Food prices are climbing fast, with the Tampa Bay area in Florida showing the highest spike in prices in the continental United States over the last year. More of us are growing gardens to to close the nutritional gap between our paychecks and the checkout lane. But if you’ve just started to garden, you may wonder what to plant in May in Florida.
The news isn’t all-good. May is the true test of a Florida gardener’s grit begins. The temperatures are climbing fast, the sun is scorching, and only the toughest plants — and gardeners — will survive to June.
To make things even more interesting, much of Florida is facing a serious drought this year. Watering wisely is going to be just as important as choosing the right crops.
It’s not too late to plant your garden, but you’ll need to focus on heat-hardy, drought-tolerant crops that can handle the summer blast. Plant smart now, and fall will see you adding lots of value to your pantry staples.
Why Planting a Garden in May in Florida is So Hard
Gardening in May comes with a few classic Florida curveballs. The soil heats up and dries out fast, making it harder for seeds to germinate and young plants to get established. Pests like aphids, stink bugs, and caterpillars show up almost overnight, and fungal diseases aren’t far behind once the rains finally start.
It’s a month that rewards quick action, smart plant choices, heavy mulch, and a willingness to water early in the morning before the sun starts boiling everything alive.
Survive May, and you’re officially a Florida gardening veteran.
The real problem with planting May in Florida is that we get the summer heat and blistering sun without the summer rain and it’s lovely cloud cover.
What You CAN Plant in May (even in Florida)
It’s not too late to look for abundance from your home garden – if you plan ahead, develop some patience, and don’t mind getting up early (or staying out late) to water.
Beans, Peas, and More
If you’re serious about growing your own food to cut grocery costs, beans and peas should be at the top of your May planting list. Not only are they some of the easiest crops to grow in Florida’s brutal summer heat, but they’re also packed with protein, fiber, iron, and key nutrients that your pantry—and your budget—will thank you for later.
Over the last year, the cost of protein ingredients — eggs, meat, and fish — saw the highest increase in the Tampa Bay area at 7.8% up from spring 2024.
Shelling peas and dried beans go a long way in delivering protein and fiber during tough financial times.
Southern Peas
Southern peas, including black-eyed peas, cowpeas, and crowder peas, are true Southern staples for a reason. These peas can thrive where other crops fail, fixing nitrogen in the soil and producing reliable harvests even in sandy or dry conditions.
They are an incredible source of affordable, homegrown protein, with one cup of cooked black-eyed peas delivering about 13 grams of protein and 11 grams of fiber. Some great heat-tolerant varieties include ‘Mississippi Silver’ (crowder type), ‘California Blackeye No. 5’ (classic black-eyed pea), and ‘Red Ripper’ (an old heirloom cowpea known for its vigorous growth). Once dried, Southern peas can last up to 2–3 years in airtight storage.
Pigeon Peas
Pigeon peas are another powerhouse plant worth your garden space if you’re growing food for resilience. Originally from Africa and India, pigeon peas are a small shrub that can live for several seasons in frost-free areas of Florida.
They’re drought-resistant and pest-resistant. Even better — they pump nitrogen back into depleted soils, making them a natural fit for Florida’s sandy soil conditions.
The fresh peas are delicious in curries, stews, and rice dishes (think Caribbean “peas and rice”). Dried pigeon peas are a survival food loaded with fiber, potassium, and protein. Plus, once established, pigeon pea plants can produce for up to 3–5 years with minimal care.
While pigeon peas might not deliver a harvest until next January, plant them now for years of delicious nutty flavored beans. You’ll also get months of blooms that produce an intoxicating frangrance and feed the bees during the flower-sparse winter.
Tropical Staples to Plant in May
When Florida’s summer heat kicks into high gear, most traditional crops wave the white flag. But tropical staples like sweet potatoes, boniato, malanga, ginger, and turmeric actually thrive when the sun gets punishing.
These plants aren’t just tough — they’re nutrient-dense, calorie-rich, and ideal for anyone serious about growing their own food to save money.
Sweet Potatoes
Sweet potatoes are a classic Florida summer crop, and May is prime time for planting slips. They’re also a dual-purpose food: you can harvest the leaves for nutritious greens all summer, and dig up the starchy roots in the fall.
A medium sweet potato packs about 26 grams of complex carbs, along with beta-carotene, potassium, and fiber. They store incredibly well, lasting up to a year in cool, dry conditions. It’s hard to find a cool, dry place anywhere in Florida, but you can always freeze them for later after blanching or boiling them.
Boniato
Boniato, sometimes called Cuban sweet potato, is a white-fleshed cousin of the common sweet potato, but with a lighter, fluffier texture and a flavor somewhere between a potato and a chestnut.
It loves the Florida heat and poor soils and needs very little water once established. Boniato is a staple in Caribbean and Latin American cooking, especially for roasting, mashing, and making hearty stews.
Malanga
Malanga (Xanthosoma spp.) is another incredible staple crop for South and Central Florida gardeners. It’s a starchy root similar to taro. Malanga is rich in fiber and potassium and highly digestible, making it an important food source for people with dietary sensitivities.
Malanga can be boiled, mashed, fried like chips, or added to soups and stews as a thickener. Once harvested, the corms can last several weeks or even months when kept dry and cool.
Ginger / Turmeric
Ginger and turmeric are tropical rhizomes that love Florida’s muggy summers. They’re slow growers but extremely rewarding: a few seed pieces planted in May can yield a surprising harvest by late fall.
Fresh ginger and turmeric are high-value crops — prices at the store can easily top $5–10 per pound. Plus experts have been lauding their health benefits and medicianl uses for decades — so there’s another way they can help you stretch your buying power.
Growing your own gives you access to anti-inflammatory, antioxidant-rich roots at a fraction of the cost. Both can be frozen, dehydrated, or turned into powders for long-term storage, making them highly useful in both cooking and natural remedies.
Vegetables and Fruits to Plant in May in Florida
May can be a good time to plant fruits like cantaloupes, honeydews, and watermelons. You can also still plant a few vegetables, like winter squashes, Armenian and Asian cucumbers, and certain tomato varieties. However, growing them in Florida’s heat takes a bit of finesse.
Melons
Cantaloupes and Honeydews thrive in Florida’s heat, but they need some shade to avoid sunburn, especially during the peak afternoon heat. Trellising can help keep them off the soil and reduce the risk of fungal disease and pest infestation. These fruits need consistent moisture, but since Florida’s soil drains quickly, mulch is your friend. It helps retain moisture and keep the roots cool.
Watermelon
Watermelons love the heat, but they’re also prone to pests and disease. Trellising can help save space, and keeping the vines off the ground also reduces pest problems. As with melons, regular, light watering is key — but avoid soaking the leaves to prevent mildew.
Watermelon plants may also need shade during the hottest part of the day to reduce stress. My favorite variety is Sugar Baby, because they’re small enough to trellis and mature quickly before disease and pests can destroy them.
Winter Squash
Winter Squashes (or storage squashes) like Calabaza, Seminole pumpkin, and butternut squash can handle the heat, but watch out for pests like aphids and squash bugs. Mulching the soil helps keep moisture in and the fruits off the soil if they’re too large to trellis. Providing some shade, either with cloth or nearby taller plants, can help reduce sunburn and heat stress.
In Florida’s sandy, well-draining soil, make sure you’re watering regularly until the rainy season kicks in. Consider using drip irrigation or soaker hoses for more efficient water delivery. Shade during midday and consistent moisture will help your plants survive and thrive throughout the summer.
Yardlong Beans
Sometimes called asparagus beans or Chinese long beans, yardlong beans thrive in Florida’s climate, even during a drought. Native to Southeast Asia, they love the heat and humidity and will start producing fast, often within just 60 days of planting.
The vines can grow 8 to 10 feet tall, so you’ll want to give them a sturdy trellis.
(Make good use of the shade they provide to protect more sun-senstive plants like peppers).
Each pod can grow over two feet long, but they’re best picked around 18 inches for tenderness. Yardlong beans have a mild, slightly nutty flavor and stay crisp even when cooked, making them perfect for quick stir-fries, light sautés, and even tempura. A few plants can keep a family in fresh beans all summer—and any extra pods can be blanched and frozen for later.
Yes, You CAN Plant Tomatoes in May in Florida
If you missed Florida’s prime tomato-growing months (usually September through April), there are still a few tried-and-true varieties that will survive our hot, humid climate.
Everglades
Everglades Tomatoes are a Florida favorite. These small, cherry-sized tomatoes are incredibly heat-tolerant and resistant to many of the common pests and diseases that can plague tomatoes in Florida.
They thrive in hot weather, making them perfect for planting in May. Their flavor is sweet and tangy, and they produce prolifically, so you can enjoy a steady harvest throughout the summer months.
So, even if you really wanted tomatoes for making sauce, a few extra Everglades tomato plants in your summer garden will provide. These intensely-flavored gems make excellent sauces. Investing in a food mill to remove all the skins and seeds makes quick work of turning out a smooth tomato paste or BBQ sauce.
Sweeties is another excellent choice for Florida gardens. These small, round, red tomatoes are known for their exceptional sweetness. They’re perfect for snacking right off the vine or tossing in salads. Sweeties are also incredibly productive, and their compact growth makes them a good choice for small spaces or container gardening.
Gardener’s Delight is a reliable heirloom cherry tomato that grows well in Florida’s heat. These tomatoes have a rich, classic tomato flavor that’s both sweet and tangy, and they hold up well against disease and heat stress. Gardener’s Delight is a true workhorse in the garden, providing a steady crop even in less-than-ideal conditions.
Large Red Cherry Tomatoes are a also great option. These tomatoes are slightly bigger than traditional cherry tomatoes but still maintain the classic sweetness and firm texture that makes them so popular. They are great for fresh eating, making sauces, or adding to dishes like bruschetta. They are also known for being resistant to cracking and pests, which is important in Florida’s sometimes unpredictable weather.
Tomato Survival Hacks for Florida Summer Tomatoes
To ensure your heirloom tomatoes thrive, be sure to water consistently. But avoid overwatering — cherry tomatoes (especially Everglades) have notoriously thin skins that can split easily.
Mulching helps retain moisture and keeps the roots cool. Trellising your tomatoes keeps them off the ground, making them easier to harvest. It also makes it easier to spray the leaf-footed bugs that love to enjoy your tomatoes before you do. If possible, some afternoon shade helps keep them thriving, especially when temperatures peak in summer.
Last, but certainly not least, challenging temperatures across the country and adjustments to climate change have inspired many gardeners to experiment with shade cloth. I tried this last summer, and while I need to improve my setup structures, I was impressed enough with results to repeat the experiment.
Why Plant Cherry Tomatoes in May?
Cherry tomatoes keep producing through Florida’s heat because their tiny flowers set fruit reliably even when daytime temps soar above 90°F. Large slicer varieties, by contrast, need cooler nights (below 75°F) to germinate pollen. More often than not, regular tomato plants drop blooms when it’s too hot, so you end up with empty trusses instead of ripe fruit.
Smaller fruits also mean cherry plants can support dozens of tomatoes without needing huge amounts of water or nutrients all at once. Their steady, spread-out flowering means you’ll get bites of ripe fruit between heat waves, rather than betting everything on a single truss that might fail in a sudden heat spike. That’s why cherry and grape types are the smart choice for a Florida summer garden.
The Secret to Summer Gardening in Florida
If there is any wisdom I can pass on about what to plant in May in Florida, it is this: The faster a vegetable or fruit produces, the less exposure to heat, sun, spores, and insects it will have to endure.
While some vegetables will happily endure the harsh elements (sweet potatoes, cowpeas, okra, etc.), others are destined to live fast and die young (small melons, cucumbers, etc). This has proven true to me during every season in a wildly changeable climate.
Find the fastest maturing varieties you can for the best results.
Embracing the Slow Burn
Now that you’ve planted your heat-hardy staples — pigeon peas, sweet potato and boniato slips, southern peas, cherry tomatoes, and more — it’s time to step back, stay cool, and let nature do its thing.
Get out of the sun, for pity’s sake!
These crops aren’t in a rush; many take the full summer to deliver a harvest. Use this hot, slow season to relax in the shade, sip cold drinks, and give your garden a light check-in now and then rather than daily toil in the blazing sun.
By the time temperatures start to dip in September, you’ll have a pantry full of nutritious pantry staples. You’ll also be rested and ready for fall — the real growing season in Florida.
April in Florida isn’t for the faint of heart—or the cool-season crops. The days heat up and spring surrenders to summer with a whimper. So, it’s time to embrace the sun-loving, heat-thriving plants that won’t wither under the pressure. Whether you’re in North, Central, or South Florida, this is the month to swap out those fading winter veggies for those that bask in the heat and humidity. So, grab your trowel, slap on some sunscreen, and let’s talk about what to plant in April in Florida—before the summer sun really starts flexing its muscles.
Plant Heat-Loving Staples in April
Even in early April, summer starts to creep into our consciousness with midday temps in the high 80s and even 90s. Ironically, this is the perfect time to think about preparing for winter food requirements.
The one thing that still amazes me about gardening in Florida is that we really can grow our own food year round. But
April in Central Florida is the perfect time to plant staple crops. These tough, drought-tolerant crops thrive in the rising heat, and most are low-maintenance. This means you won’t have to spend hours in the hot sun or pouring rain tending to your garden.
Many help enrich the soil while producing a steady supply of food through the summer. Others, help keep it loose and friable, fighting compaction.
Peanuts: Set-It-and-Forget-It
Peanuts (Arachis hypogaea) are one of the easiest crops to grow in Florida, as long as you have enough room. I don’t have enough room for peanuts, but I have to present these as a great option for those that do. They pack so much nutrition into such a delicious legume, they deserve to top the list as a staple crop for the South.
First Quality Non-GMO Peanut Seeds – Current Lab Test Data Shown on Packet
Exclusive Gold Vault Packaging – Provides 3X Longer Storage than Paper or Plastic with Triple Layer Mylar Gold Foil.
Peanuts flower above ground but produce their pods underground — a fascinating process you may have observed if your spouse has a bad squirrel-feeding habit like mine does.
Space them a few inches apart in loose, sandy soil, and they’ll take care of the rest. Peanuts need about four to five months to mature, making them a great long-term crop for Florida’s extended warm season.
Southern Peas: True Heat Warriors
When the heat starts taking a toll on other vegetables, Southern peas (Vigna unguiculata) just keep growing. Also called cowpeas, black-eyed peas, crowder peas, and cream peas, these legumes have been a Southern staple for centuries, thriving in hot, dry conditions where other crops fail.
Southern peas are easygoing and don’t ask for much—just full sun, well-drained soil, and occasional watering. They grow as bush or vining plants, producing pods packed with protein-rich peas that can be eaten fresh, shelled and dried, or even cooked whole as tender snap beans.
Seeds for Purple Hull Peas- Knuckle Purple Hull peas are named for large purple hulls filled with cowpeas that have a green color with a purple “eye” when fresh….
Beyond their value as a food crop, Southern peas are also natural soil builders. As legumes, they fix nitrogen in the soil, improving fertility for future plantings. Many gardeners use them as a cover crop to enrich the soil while producing a reliable harvest at the same time.
Plant Sweet Potato: For a Bountiful Harvest This Fall
April is the also the perfect time to plant sweet potato and boniato slips. These heat-loving root crops thrive in the rising temperatures and longer days of spring, giving them plenty of time to establish before summer’s peak growth season.
Unlike traditional seed-planted crops, sweet potatoes and boniatos are grown from slips—small rooted cuttings that quickly take off once planted in warm soil.
You can grow your own sweet potato slips but get started as soon as possible in order to give them enough time to produce a crop by December. Sweet potatoes are perennial in Florida, but if they’re still small by winter, they’ll go dormant. You can leave them till spring, but they can get woody if left too long.
One of the best things about planting sweet potatoes and boniatos is how little maintenance they require. Once they start growing, their sprawling vines act as a natural weed barrier, covering the ground and keeping moisture in the soil.
They don’t need much fertilizing, and by late summer or early fall, you’ll be digging up a generous harvest of delicious, nutrient-packed tubers.
Time to Plant Winter Squash in April in Florida
April is prime time for planting winter squash in Central Florida, especially heat-loving varieties like Calabaza and Seminole pumpkin.
While the name “winter squash” might make you think they belong in cooler weather, these varieties actually thrive when planted in spring and grown through the long, hot summer. That’s just when they’re perfect for eating.
The name “winter squash” refers to their amazing shelf life. You can keep a ripe, well-cured pumpkin for several months in a cool, dark storage room — all winter long.
Calabaza Squash: The Tropical Powerhouse
Calabaza squash (Cucurbita moschata) is a favorite in Latin American and Caribbean cuisine, known for its deep orange flesh, rich flavor, and resistance to pests and diseases. It thrives in Florida’s heat and humidity, producing sprawling vines that need plenty of space to roam.
The squash itself comes in various shapes, from round and squat to elongated, but all varieties share a sweet, nutty taste that works beautifully in soups, stews, and roasted dishes.
Seminole Pumpkin: Florida’s Native Squash
If there’s one squash perfectly suited to Florida’s climate, it’s the Seminole pumpkin. Grown by the indigenous Seminole people for centuries, this hardy squash is practically indestructible. It shrugs off heat, humidity, drought, and even pests that bother other squash varieties.
The fruits are typically round, with tan or orange skin, and have a dense, sweet flesh similar to butternut squash. Seminole pumpkins store exceptionally well, making them a great choice for gardeners who want a reliable, long-lasting harvest.
Butternut Squash: Sweet, Smooth, and Reliable
Butternut squash is another great choice for Florida gardens in April. While it may not be as pest-resistant as Seminole pumpkin or Calabaza, it makes up for it with its smooth, easy-to-peel skin and rich, creamy texture.
Butternut squash is excellent for roasting, pureeing into soups, or even using in baked goods. Just like the others, butternut squash needs plenty of space, full sun, and warm soil to thrive.
Pigeon Peas the Permaculture Paragon of Survival Gardening
April is a great time plant pigeon peas (Cajanus cajan), a hardy, drought-tolerant legume that thrives in Florida’s warm climate. These perennial bean bushes can grow 10 feet high, and their cheerful yellow blooms drive pollinators bonkers.
Since they’re perennials, you can plant them nearly any time in Florida, but April and May are the last months to plant in time for a really big crop at harvest time. That’s just my experience. There are faster maturing varieties you can find for sale online.
These peas grow well in sandy soils and are a staple in many Caribbean and South Asian dishes. Not only do you get delicious peas but also nitrogen-fixing benefits for your soil. The plants can handle the heat and are relatively low-maintenance, making them perfect for Florida gardens.
Edible Hibiscus Varieties for Florida Gardens
Another fun and flavorful addition to your garden this month is edible hibiscus. Florida’s climate is ideal for cultivating various edible hibiscus species, each offering unique culinary and ornamental benefits. Here are some noteworthy varieties:
Roselle (Hibiscus sabdariffa)
Known for its tangy, cranberry-like flavor, the flowers and calyxes of Roselle are perfect for making teas, jams, and even sauces.
This tropical plant loves Florida’s climate and adds a splash of color to the garden, with its vibrant red flowers. Plus, it’s an easy-to-grow perennial that thrives in the heat, offering both beauty and culinary delight to your garden.
Long Leaf Edible Hibiscus (Abelmoschus manihot)
Also known as the “Salad Tree,” this plant thrives in Florida’s USDA zones 9-11. It produces vibrant foliage and flowers, reaching heights of 10-12 feet. It’s very nutritious, and the leaves have a tart, rhubarb-like flavor, suitable for cooked dishes or fresh salads.
Cranberry Hibiscus (Hibiscus acetosella)
Renowned for its deep burgundy leaves and pink-red flowers, this variety is both visually striking and edible. The leaves and calyces (the cup-like structures beneath the flowers) impart a tangy flavor, ideal for teas, juices, and salads.
Hot Weather Herbs to Plant in April in Florida
April is the perfect time to plant out your herb garden here in Florida. Many of the most flavorful culinary herbs that thrive in the heat. Here are some excellent options for Florida’s hot, humid climate:
Cumin
Cumin thrives in hot, dry conditions, making Florida’s summer weather an ideal environment for this spice. Known for its earthy, warm flavor, cumin is a key ingredient in many cuisines, including Indian, Middle Eastern, and Mexican.
It’s a bit of a long-growing herb, so plant it early in April, and be patient — it typically takes several months to mature. Its seeds are harvested for use in both cooking and spice blends.
Ginger
Ginger loves the tropical Florida heat, making it a perfect addition to your garden. It requires plenty of moisture, so be sure to keep the soil consistently damp but not soggy. Harvest the rhizomes, or underground stems, to use in cooking, teas, and making .
Ginger adds a zesty, spicy kick to dishes, from stir-fries to baked goods, and is great for soothing an upset stomach.
Mexican Tarragon
Mexican tarragon (Tagetes lucida) is an herb that adds a bold, anise-like flavor to dishes. Unlike regular tarragon, Mexican tarragon is more heat-tolerant, making it ideal for Florida’s climate.
It’s often used in Mexican and Southwestern cooking, especially in sauces, salsas, and meat dishes. Plus, it has lovely yellow flowers that attract pollinators, adding both beauty and function to your garden.
Turmeric
Turmeric, with its vibrant golden-yellow rhizomes, is another tropical herb that thrives in Florida’s warm, humid conditions. It requires rich, well-draining soil and a lot of water, but the effort is well worth it for the health benefits and bold flavor it provides.
Turmeric is commonly used in curries and teas, and its active compound, curcumin, has anti-inflammatory and antioxidant properties. Harvesting your own fresh turmeric rhizomes is as satisfying as it is flavorful.
Basil
Basil loves the heat and sunshine of Florida, making it a perfect addition to your herb garden. Whether you’re growing sweet basil for pesto or Thai basil for its peppery kick, this herb will flourish in the warm temperatures of spring and summer.
Like cucumbers, basil plants will grow fast and furious and tend to bolt quickly in the heat. So either keep your basil trimmed regularly or plant out in succession.
Lemongrass
Lemongrass is a tropical herb that thrives in Florida’s hot, humid climate. It’s perfect for adding a citrusy zing to teas, curries, and even soups. With its tall, grass-like stalks, it also makes a lovely ornamental addition to the garden.
Oregano
This hardy herb is known for its ability to withstand the Florida heat. Whether you prefer the Mediterranean variety or Mexican oregano, both are well-suited to our hot summers and add bold, savory flavors to a variety of dishes.
Note that oregano can suffer from flooding, so make sure to plant in sandy, well-draining soil on a high-spot in the garden. Alternatively, you can keep it in containers — terra cotta planters provide the best conditions for Mediterranean plants.
Rosemary
Rosemary is another robust, sun-loving herb that thrives in Florida’s heat, offering both culinary and ornamental value. Its woody fragrance and needle-like leaves make it a favorite in Mediterranean cuisine, and it can withstand dry conditions once established.
Rosemary is another culinary herb that requires elevation in the garden. Summer downpours can drown them, resulting in a quick and dramatic plant death. Again, terracotta pots are a savior for any plant that needs more arid conditions.
Mint
Mint loves warmth and is less touchy about excess moisture. I know a lot of gardeners say it can spread quickly. They recommend keeping it in pots to keep it from overtaking your garden.
I’ve never had that happen in the 30+ years I’ve been gardening in Florida.
Never.
If the summer heat doesn’t kill it dead before it can spread, the spring dry season keeps it from thriving.
Honestly, the best reason for keeping it in containers is to keep the poor things alive through the worst extremes of our climate.
With the right containers, however, you can have a thriving collection of mint plants to add to use in cooking, confections, tea, and making extracts. Place in the shady spots of the garden and use pot trays to ensure adequate moisture.
Plant Heat Resistant and Fast-Cropping Vegetables in April in Florida
Now that we’ve got those reliable staple foods out of the way, let’s look at some seasonal fruits and vegetables to plant in April in Florida.
Beans
April is a great time to plant the last crop of beans of spring. If you haven’t already, now’s the time to get pole beans and bush beans in the ground.
I personally choose fast-maturing bush beans this late in the spring. They will produce prolifically in one or two easy to pick crops within 6-8 weeks — before the heat takes over.
But the real star of the show this month? Yardlong beans.
Yardlong beans are the ultimate heat-loving climber.
April marks the start of yardlong bean season. (Vigna unguiculata subsp. sesquipedalis) This is a moment worth celebrating if you love a high-yield, low-maintenance crop. Originally from Southeast Asia, these beans are built for Florida’s relentless sun and humidity.
Unlike traditional green beans, yardlong beans grow fast and furious but need hot weather to really thrive. They produce sprawling vines that need a trellis or support system to keep them off the ground.
In just a couple of months, they’ll start pumping out impressively long, slender pods — often reaching 18 inches or more — that dangle in pairs like green or red noodles swaying in the breeze.
Their flavor is a bit different from regular green beans—milder, slightly nutty, with a hint of sweetness—and they have a crisp-tender texture that holds up beautifully in cooking.
A staple in many Asian cuisines, yardlong beans are perfect for stir-fries, sautés, curries, and soups. They have a knack for soaking up flavors. Use garlic and soy sauce for Asian inspiration, or coconut milk and nutmeg for a taste of the Caribbean. A quick toss in olive oil with salt and pepper and garlic provides an Italian taste profile.
Hot Weather Fruits and Vegetables to Plant in April in Florida
April is also a good time plant melons in Florida. With rising temperatures and long sunny days, these heat-loving vines will take off. Cantaloupe, honeydew, and watermelon all thrive in Florida’s warm climate, but each has its own personality in the garden.
Cantaloupe: Sweet and Musky
Cantaloupe (Cucumis melo var. reticulatus) is a fast-growing melon that loves full sun and well-draining soil. The vines produce round, netted fruits with orange, fragrant flesh that’s packed with natural sweetness.
Give them plenty of space, regular watering, and good air circulation to keep powdery mildew at bay. I personally trellis all my melons if size allows, and you can support cantaloupes with leftover net bags used for onions and citrus.
Honeydew: Smooth, Cool, and Refreshing
Honeydew melons (Cucumis melo var. inodorus) are similar to cantaloupes but have smooth, pale green skin and firmer, subtly sweet flesh. They need the same growing conditions—full sun, warm soil, and plenty of room to spread.
Unlike cantaloupes, honeydews don’t “slip” off the vine when ripe, so you’ll need to check for a creamy yellowish hue on the skin and a slightly soft blossom end to know when they’re ready to harvest.
Watermelon: The Ultimate Summer Treat
Most watermelons (Citrullus lanatus) need even more space than cantaloupes or honeydews, but they’re worth it. These vines stretch far and wide, producing large, juicy fruits that are the ultimate Florida summer refreshment.
If you don’t have the garden space for growing big watermelons, you can plant personal-sized varieties. Again, I recommend trellising. Sugar Baby Watermelons are my favorite. They take up little space when trained on a support, and they grow and ripen quicker than full-size varieties.
Watermelons love the heat but require consistent watering, especially while the fruits are developing. To know when they’re ripe, look for a dried tendril near the fruit’s stem and a yellow spot where the melon has been resting on the ground.
Perfect for Florida Summers
All three melons do best in sandy, well-draining soil with plenty of organic matter mixed in. Give them deep, infrequent watering to encourage strong root growth, and keep an eye out for pests like aphids and cucumber beetles. By planting in April, you’ll be enjoying sweet, homegrown melons just in time for the peak of summer.
Get Cucumbers and Summer Squash in the Ground
If you want fresh, crisp cucumbers and tender summer squash, now’s the time to plant them in Central Florida. These fast-growing plants thrive in warm weather, but there’s one important step you don’t want to skip—trellising!
With Florida’s rainy season on the horizon, keeping your cucumbers and squash off the ground will help prevent disease, reduce pest problems, and make harvesting a whole lot easier.
Cucumbers: Crisp, Refreshing, and Quick to Produce
Cucumbers (Cucumis sativus) grow fast in Florida’s spring heat, producing fruit in as little as 50 days. Whether you prefer slicing cucumbers for fresh eating or pickling varieties for homemade pickles, they’ll all benefit from vertical growing.
You can get a longer cucumber harvest by sowing starts in succession. Cucumbers live fast and die young, so use generously sized cell trays (even better — use soil blocks) to sow cucumber seeds for planting out every three weeks for a continuous harvest.
You can start them as early as January and keep planting them out until May if you’re willing to cover during cold nights and provide shade cloth in May and June. This is even easier to do if you grow them in containers.
Summer Squash
Zucchini and yellow squash (Cucurbita pepo) are garden favorites, but Florida’s humidity can be tough on them. Like cucumbers, summer squash plants benefit from support—especially vining varieties.
Training them onto a trellis or staking them upright keeps the leaves dry, helps prevent fungal issues, and makes it harder for pests like squash bugs to hide.
With Florida’s rainy season approaching, ground-level vines can quickly become a soggy mess. Wet foliage leads to fungal diseases, and damp soil invites slugs, pill bugs, and other pests that love to snack on tender squash and cucumbers.
Only For the Brave: Time to Plant Sweet Corn or Dent Corn
April is the time to plant sweet corn or dent corn in Florida, but this crop isn’t for the faint of heart. Corn requires fertile, well-draining soil, which can be a challenge in Florida’s sandy ground.
It also doesn’t love being too wet, so managing moisture—especially with the state’s rainy season on the horizon — can be tricky.
In Florida’s heat, pests are another obstacle. Corn is prone to issues with aphids, corn earworms, and even wildlife like squirrels. Regular monitoring and pest control measures will be essential if you want to keep your crop safe.
While I will not be planting sweet corn this April, I wanted to mention it, since it’s the last month of spring worth the effort. Fall and winter is usually easier, but if you have the room and time to pamper them, it’s often worth it.
Keep plenty of bt (Bacillus thuringiensis) on hand and don’t get lazy about your spraying schedule if you plan to get to eat any of it.
Pepper and Tomato Plants to Get Into the Ground in April
April is the last month of spring to plant pepper and tomato plants in Florida, but it’s important to be mindful of the heat when choosing varieties.
Peppers (Chili or Sweet)
Whether you’re growing spicy chili peppers orsweet bell peppers, April is last month to put pepper plants into the garden until fall. Note that it’s a bit late to grow them outdoors from seed — although you could start them indoors from seed and plant out in August.
Peppers love heat and sunshine, making them a great choice for Florida’s warm climate. But they easily scorch in the hot summer sun. But with the right care, they’ll deliver a bountiful harvest.
Shade cloth during the hottest hours of the day can help keep them protected, while a thick layer of hay or other organic mulch can keep their roots cool and hydrated.
Tomatoes for Florida Summers
For those eager to get their tomatoes going, cherry tomato plants are your best bet. Regular slicing or saucing tomatoes will definitely start to struggle in the Florida heat come June. Even more frustratingly, they require lower temperatures at night to set fruit. So, even if you keep them healthy and pristine — free from pests or blight — they won’t set fruit as nighttime temps climb into the mid 70s.
But cherry tomatoes are smaller, more heat-tolerant, and perfect for Florida’s climate.
You might even want to consider Everglades tomatoes, a variety specifically adapted to Florida’s conditions. They’re North America’s only “native” tomatoes, having become naturalized to Florida many hundreds of years ago.
Every other tomato on the market today was developed in Europe from South American varieties. However, Everglades were brought directly to Florida from Peru, and they’re pretty much the same species that still grows in the Andes today.
In fact, Everglades tomatoes are a distinct species (Solanum pimpinellifolium) from even the heirloom varieties we grow in the U.S. (Solanum lycopersicum).
These tiny, hardy tomatoes are incredibly resilient and prolific, producing fruit through the hottest months of summer and often through winter, as well.
And while they’re too tiny to make a BLT, it won’t take long until you have several gallons of these little gems that make the world’s best barbecue sauce.
Time to Plant in April in Florida Before the Summer Heat Kicks In!
April is your last big window to get warm-season crops in the ground before Florida’s summer heat makes gardening a real challenge. The longer you wait, the tougher it gets—so grab your seeds, slips, and transplants and get growing!
With the right choices, your garden will be thriving well into the hotter months, rewarding you with fresh veggies, herbs, and fruits.
Don’t let the Florida sun catch you off guard—plant now and enjoy the harvest before the real heat sets in!
December and January were weird, am I right? How about that whole week of winter? Usually, Florida gardeners are doing the majority of their spring planting in February. I don’t know about you, but I certainly didn’t feel confident about starting anything in the greenhouse. Too often, temperatures will drop into the 30s and 40s in mid-March. So be prepared to cover tender vegetable plants or bring tiny seedlings indoors.
Here on the Gulf Coast, the two major hurricanes in the fall and the persistantly cold weather in December meant a non-starter on our spring seed sowing. My fall tomatoes went in late (in November), and managed to survive the cold spells. So, I’m just going with those. I do have some peppers ready to plant out and I did start some cucumbers that I’ll plant out soon.
It pays to follow the forecast and be prepared for anything and everything. However, for the most part, it’s definitely time to get planting in February, wherever in Florida you live.
South Florida
Gardeners in Zones 10-11 usually find that they can keep their starter trays outdoors through most of February. You’ll want to keep them under cover and move indoors in the case of a cold snap.
South Florida gardeners may find their fall vegetables are still cropping
Start Indoors in February for South Florida
In February, we’re sowing the following starter plants:
Other edible vegetables you can start indoors in February in South Florida Zones 10-11 include:
chives
cilantro
dill
fennel
luffa
marjoram
oregano
parsley
rosemary
thyme
Direct Sow in February for South Florida
I like to start almost all of my vegetable garden in cells or soil blocks and plant out in a few weeks. But I do direct sow a few things that simply perform better when planted directly.
Other edible garden plants suitable for direct sowing in February in Florida Zones 10-11 include:
arugula
beets
bush beans
cabbage
carrots
cassava
chaya
collards
comfrey
corn
daikon
ginger
green onions
Irish (white) potatoes
kohlrabi
leeks
lettuce
mustard
okra
peas
pole beans
radish
shallots
sweet potato slips
Swiss chard
turnips
Central Florida
The central strip of the state that extends from the Gulf Coast to the Atlantic covers Zone 9b and 10a. Zone 10a includes the cities of Tampa and Orlando, while some of the more inland areas remain in 9b. Ocala and Gainesville are in 9a. Jacksonville is in zone 9b.
Even though Jacksonville is technically located in the north of the state, its proximity to the coast means a warmer climate. Keep track of the different microclimates in your garden and adjust as needed to meet those conditions.
Sow Indoors in February for Central Florida
Gardeners in Central Florida in Zones 9a to 9b can sow starter plants indoors until they’re well established enough to plant out at the end of March:
basil
cantaloupe
Cape gooseberry
chives
cilantro
cucumbers
dill
eggplant
leeks
luffa
marjoram
okra
oregano
parsley
peppers, chili
peppers, sweet
rosemary
summer squash
thyme
tomatoes
winter squash
Direct Sow in February for Central Florida
Central Florida gardeners can sow many cold-hardy vegetables directly, if they prefer:
arugula
beans, bush, and pole
beets
broccoli
Brussels sprouts
cabbage
carrots
cauliflower
collards
comfrey
corn
daikon
green onions
Irish potatoes
kale
kohlrabi
lettuce
mustard
peas
pumpkins
radish
spinach
sweet potato slips
Swiss chard
turnips
watermelon
North Florida
North Florida gardeners find themselves in Zone 9a and 9b. A small few are in 8b, after the USDA zone map update of 2023.
But most of the northern span of the state is solidly placed in zone 9, which includes the city of Tallahassee and most of the panhandle.
Florida Gardeners along the Gulf Coast near Pensacola and Panama City may find that their proximity to water gives them more leeway for planting early. To pinpoint your growing zone, use the search tool on the USDA website.
Sow Indoors in February in North Florida
The last frost date for Zone 9 is in February, but it pays to be cautious considering how eratic our weather has been. North Florida gardeners may prefer to get a jump on spring by starting the following seeds indoors:
Temperatures will remain low enough for many cool-season vegetables that you can plant directly in Zone 9:
arugula
beans, bush, and pole
beets
broccoli
cabbage
carrots
cauliflower
collards
corn
garlic
green onions
Irish potatoes
kale
kohlrabi
lettuce
mustard
onion sets
peas
radish
spinach
Swiss chard
turnips
Getting Ready for Your Planting in February in Florida
It sometimes seems like the seasons change too quickly in Florida. And yes, we do actually have seasons. A few years of gardening here will teach you how to note the differences, and you’ll soon feel them in your bones.
It also sometimes seems like you have to plant everything all at once if you hope to get any kind of yield. The mildness of spring can quickly become the sweltering heat of summer. That’s if you don’t get a surprise frost in March!
But relax and take it one step at a time. If you start sowing your spring seeds in late January or in February, you’ll find you can pace yourself. You still have time for some cool-season vegetables early in the year, so take advantage of it.
Warm-season vegetables, like peppers and tomatoes, can be potted up as they grow until it’s safe to plant them into the garden. Be prepared to cover anything outdoors, if necessary, but otherwise, succession planting is your friend.
If you need a tool that will help you keep track of what to plant and when, as well as some helpful advice on the best vegetable varieties to plant in Florida, check out our Florida Gardening Planner. You’ll also find even more vegetable varieties for planting in February in Florida. You can purchase it in print from Amazon or as a digital download on Etsy to print out as needed.
I hate to say it, but Hurricanes Helene and Milton actually gave me a chance to regroup. I could sit back, think hard, and approach my winter garden more thoughtfully. They may not pay off, but it also gave me the opportunity to take some chances. But now it’s time to figure out what to plant in January.
We’re still cleaning up after the hurricanes. There’s still a lot of work to do, but my first step was to detox the garden beds. It seems that seawather inundated every square foot of my active gardening space. Plants don’t like seawater. Not a bit. This resulted in the loss of nearly everything except some very established ornamentals. So, flushing out the salt water from the storm surge from Hurricane Helene was my top gardening priority.
Some Gardening Product Recommendations
Some very nice horiticultural companies reached out and offered me their products to help restore the soil. The first was Elm Dirt, which I used to restore the potted plants that were my fall inventory. The fact that most of them survived after sitting in about a foot of saltwater overnight is a miracle.
Organic Plant Food: Elm Dirt Plant Food is a premium organic fertilizer crafted with utmost care and dedication. It harnesses the power of premium worm castings and high-quality organic nutrients, making it an ideal choice for nourishing a wide range of plants. From house plants to gardens, shrubs, roses, and even hydrangeas.
Another great company that offered their assistance was Simple Grow Solutions. They provided me a nice big bottle of their Sea Hume product to help restore the structural damage in my soil after the flood.
Some post-storm research suggested that humic acid and biochar may help remediate any long-lasting damage, so I was excited to try their product.
I’ve been making and applying my own biochar for the last couple of years, but had no ready source of humic acid. And yes, the irony that sea kelp may help sea-polluted soil didn’t fail to amuse.
Seaweed 8%: Liquid Sea Kelp Concentrate blended with Ascophyllum Nodosum Seaweed harvested in the Icy North Atlantic.
Humic Acid 1%: Sea Hume is a Highly Concentrated form of Liquefied Carbon Derived from the Highest Quality Humate Source, Leonardite. Leonardite is Considered by many to be the Highest Quality form of Humic Acid.
Last, but not least, my cuttings were not only also soaked for hours in seawater, but were late to potting up. If I was going to recover my inventory with any speed in time for spring sales, I needed to pamper them as much as possible to ensure they hadn’t been set back any further.
The folks at Smart Grower sent me a package of their SuperCharge Mycorrhizal Fungi Blend I used when potting them up. I’ll follow up with my results from them in another post, but I do recommend this stuff highly.
Save Sick Plants Fast – Revive struggling plants with a powerful blend of Mycorrhizal Fungi, Trichoderma, and Bacillus that restores root health and boosts nutrient uptake for vibrant growth
January is a Month of Transitions
January doesn’t just mark the start of a new year, it’s also the time to transition from cool-season crops to warm-season crops — at least in Central and South Florida.
Depending on the forecast, you can start planting warm-season crops in South Florida, and start warm-season crops indoors in North and Central Florida.
There’s also plenty of time to start fast-growing cool-season crops, like lettuces, spinaches, and cabbages. In North Florida, you could probably even still grow those that take a bit longer, like cauliflower and brocolli. No promises, though, as the climate has become increasingly erratic over the last decade.
I generally start all my vegetable plants in soil blocks or cell trays, anyway. (Except for those that really MUST be direct sown, like beans and peas. This allows me to make the most of succession planting and filling in the odd gaps here and there for more production.
We’re supposed to get an Arctic Blast over the next two weeks, so I’ll be sowing indoors exclusively and working to keep things toasty through the month.
What to Plant in January Indoors
The good news is that if you get the urge to garden and plant in January, it’s one of the times in Florida when you can pretty much start everything and anything. Start warm-season vegetables indoors, especially the long-season ones like tomatoes and peppers.
It’s also not too late to start some cool-season vegetables outdoors, particularly varieties that mature quickly.
Tomatoes
I always grow tomatoes. I always grow more tomatoes than I need. Sometimes, I sell the starter plants at local markets in the spring, but we’re thinking of relocating next year, and my focus has been on downsizing my inventory.
In Zone 10, you can start tomatoes from late December through January for planting out in late February. You can also start them indoors in Zones 9, though you’ may ‘ll need to be prepared to pot them up at least once if they outgrow their starter cells. It’s really one of the best arguments for using soil blocks.
You may even have tomatoes growing from fall, like I do. Despite the saltwater flood, I got a plethora of volunteers over winter. Just be prepared to cover them as necessary.
I normally rely on varieties like Gardener’s Delight for salads, and Marglobefor slicing, and San Marzano for sauce. I know a lot of people recommend Roma for Florida, but I’ve honestly found they’re too susceptible to fungal disease to produce well.
The Everglades seem to make their own arrangements.
If you’re not sure which varieties of tomatoes to look for, check out my list of the best vegetable varieties for Florida.
Peppers
Peppers don’t seem to be fazed by any kind of weather in my zone. Unless they’re hit by Whitefly or bacterial wilt, they’re nearly indestructible and certainly perennial. My tabasco peppers dropped all their leaves after the seawater flood, but are starting to leaf out and grow pretty abundantly.
You can start both sweet peppers and hot varieties indoors. Both types require a lot of time to mature and fruit, and they also produce more fruit if you prune them back at 12”. This means that it feels like forever before you get any peppers at all.
For this reason, start peppers as soon as reasonable or possible so they have a significant head start before spring. They take so long, it’s even worth setting up space indoors with a grow light if you really love peppers.
Melons
I have finally mastered watermelons – and the secret for me seems to grow small varieties, like Sugar Baby, and trellis them. I’ll try to fill up every trellis I can improvise now that I know what works best for me.
Cantaloupe and Honeydew are usually pretty reliable for me. Zones 10 and 11 can start any of them indoors in January, while Zone 9 should wait until next month.
While cucumbers are technically a type of melon, they quickly outgrow their seed tray cells and are too sensitive to cold to plant out in January. I’ll be starting these in cell trays so I can pull them indoors if necessary.
Many home gardeners find they don’t transplant well, so they prefer to direct sow. If you haven’t been successful with them to date, try experimenting with both methods to see what works for you.
Squash
Winter squash is a breeze in Zone 10a, but I haven’t mastered the knack of summer varieties. I planted out cocozelle zuchinni in November on a whim, and they look healthy and strong now. I’m just not sure how well they’ll produce.
Corn
Damage on corn from the Big Christmas Freeze 2022
Corn is another vegetable garden staple whose success seems to elude me here on the Gulf Coast. I did have it sussed a couple of years ago, and had a beautiful stand of Early Golden Bantam growing. Then the freak 3-night freeze of Christmas 2022 killed them all off.
If you have the space and the patience and enough Spinosad, January is a good time to start your corn in Central or South Florida.
When it comes to corn, Zones 10 and 11 can plant in January, while North Florida gardeners should wait until February.
Herbs
I only occasionally sow and grow herbs, and that’s because they tend to be much cheaper to buy than the time and attention they take to grow in my climate. Most culinary herbs prefer a drier climate than I can provide. I do have a few basil volunteers I’m tending.
Start both perennial and annual herbs indoors in January. Pinch back basil aggressively until planting out to increase bushiness.
Plant in January Outdoors
January is definitely not too late to plant another round of winter vegetables. I often opt for quick-growing varieties for this reason.
Brassicas
Early Jersey Wakefield cabbage is ready in 60 to 70 days. Collards and Brazilian broccoli are very heat tolerant and will continue to flourish into early summer, even though they’re technically cool-season veg.
Asian cabbages, bok choy, mustard, tatsoi, and other brassicas are also good candidates to plant in January. If you’re in Zone 9, you can even have time for cauliflower and celery. Those in Zones 10 and 11 should look for quick-maturing varieties, however.
Peas and Green Beans
January may be your last chance to plant garden peas and snow peas. It’s well worth the effort, and if if we get the long, cold winter that was predicted, take advantage of it.
You can also plant green beans in Zone 11, as well.
Root Vegetables
Consider adding some root vegetables too, like carrots and rutabaga. If you don’t think the cool weather will hold, plant radishes, most of which will be ready in 28 to 45 days. I recently sowed Daikonand French Breakfast radish, and there’s still enough winter days left to sow more.
Turnips are also quicker to harvest than other root veg, and generally more heat tolerant as well.
Onions
Alliums are nice additions to the mid-winter garden, and again, if you’re concerned the weather will get too hot too quickly, green onions grow quickly. Otherwise, it’s not too late for onion sets, leeks, or shallots.
No matter where you are in Florida, your county ag extension office can offer some reliable options for your gardening schedule.
For you floral fanatics, January also offers a lot of opportunities.
Most perennial flowering plants do best when planted in the fall. If sown from seed, it gives any cold snaps the ability to break the seed’s dormancy. When planted in the early fall, the plants have time to get established to then regrow and bloom in the spring.
But that doesn’t mean it’s too late to get them started now. You can sow starts of tropical salvia, blue salvia, purple coneflower and other perennials in January to plant out in February.
As far as annuals are concerned, you can sow or plant out cool-season flowers, like pansies, petunias, nigella, and bachelor’s buttons in January. A light frost will not set them back if they’re grown from seed. And placed with some protection from larger specimens will help starter plants weather through any cold snaps.
In North and Central Florida, you can plant Asters. For South Florida gardeners, add nasturtiums.
In North Florida, you can start lavender and snapdragons. Central Florida gardeners can plant dianthus. In balmy South Florida, calendula, nicotania, and sunflowers are three you can plant in January.
Plan Ahead or Pants It?
There’s a lot to be said for the joy of discovering a new flower or vegetable that you can start right away. Especially in the dreary days following the let-down of the holiday season. What greater joy than finding that there ARE many ways you can get started on a brand-new gardening season?
But there’s also much to advocate for when it comes to planning ahead. Knowing ahead of time what you’re going to plant and when you need to start it is one reliable way of providing food security for your family.
It’s certainly one way to narrow down those plants and varieties work best in your microclimate. Planning your garden ahead of time leaves a record of your successes and failures. In fact, I would have given up on watermelons and cucumbers years ago if I hadn’t planned for trellising two varieties and made note of a very abundant harvest.
I’ve compiled a garden planning tool for this very method. If you’d like to create a more productive garden that makes the most of Florida’s eccentric gardening calendar, check out my Florida Gardening Planner. (Those in Louisiana and Georgia will find the same), available on Amazon in digital download or print.
I’ve seen and heard many Florida gardeners complain that tomatoes just do not grow well here. It’s too hot, it’s too buggy, it’s too wet, or the alligators eat them all, or something.
That’s just not true.
Tomatoes grow wonderfully here in Florida. In fact, not a few miles away from my place is Ruskin, Florida — the home of “Ruskin Tomatoes,” which I recall were quite famous when I was a kid back in the late 70s.
I suspect they were simply the first fresh tomatoes available in U.S. grocery stores after the winter hungry gap. This was before all the imported foods from Mexico and South America flooded the market and spoiled us with year-round fresh produce in the middle of winter.
And this isn’t a digression — in fact, it’s the salient point.
The reason Ruskin Tomatoes were so early to the market was because we can grow tomatoes in the winter.
The flipside of this awesome boon is that we CAN’T grow them in the summer!
(Except for ONE single particular type of tomato — more on that below!)
Winter isn’t the gardener’s enemy in Florida — summer is. And it isn’t getting any better.
The storms and occasional hurricanes were bad enough, but now we’re dealing with heat indices in the triple digits. This is the new norm. It certainly isn’t the climate I moved into 32 years ago.
Why Gardeners Don’t Know When To Plant Tomatoes in Florida
The reason most gardeners think you can’t grow tomatoes in Florida (especially new ones and transplants from other states) is because:
They don’t understand our very weird climate cycles.
They haven’t learned our convoluted planting schedules.
They don’t really know how tomatoes evolved to grow.
Florida’s subtropical climate provides a uniquely annoying setting for gardening, particularly when it comes to growing tomatoes.
The state’s steamy temperatures, blistering sunshine, and long growing season may seem ideal for these popular plants. While summer is the usual time to grow tomatoes in most parts of the country, Florida summers are simply too much for tomatoes.
Tomatoes are a jungle creeper, evolving in cooler, dryer elevations of South America. They’re meant for mild and moist conditions under the forest canopy, not in the blistering sunlight.
If you live in Indiana or Ohio, you want to pump as much sunlight into these guys as you can during your short growing season. But, Florida is closer to the equator, with a higher UV rating. And increasing development and land clearing is turning the state into a seriously dangerous hot spot.
So, consider several factors when planning your planting schedule, especially given the recent updates to USDA hardiness zones in 2023, when most of the state moved up a growing zone.
Here’s a detailed look at these considerations:
Subtropical Climate
Florida’s subtropical climate means that it experiences mild winters and hot, humid summers. This climate allows for multiple growing seasons, making it possible to grow tomatoes both in the fall and late winter.
However, the extreme heat and humidity of summer can pose challenges, including increased pest and disease pressure, which can affect the health and productivity of tomato plants.
Updated USDA Hardiness Zones
In late 2023, the USDA updated its hardiness zones, which reflect the average annual minimum winter temperature. These updates have shifted some areas of Florida into warmer zones. For example, parts of central Florida have moved from Zone 9 to Zone 10.
Understanding these new zones is crucial for determining the best planting times and selecting appropriate tomato varieties that can thrive in the updated climate conditions.
Best Times to Plant Tomatoes in Florida
Now that you understand the backstory, here’s some actionable information you can use right now when planning your Florida garden.
Because right now is the best time to start your tomato seeds.
Fall: The Optimal Planting Season for Tomatoes in Florida
Fall is considered the best time to plant tomatoes in Florida. The weather conditions during this season are typically favorable, with cooler temperatures and lower humidity levels compared to the sweltering summer months.
This change in temperatures reduces the risk of diseases and pest infestations, which can wreak havoc on tomato plants.
There is an increased risk of hurricanes and tropical storms as the season progresses but fall and winter are usually mild enough to replant should my garden get washed out.
In fact, in Central and South Florida, you can pretty much plant out tomato starter plants any time between September and March. There can be a few chilly nights in late December and January, but if you avoid the two weeks of actual “winter,” you can just put starters in the ground at any time.
When to Start Florida Fall Tomatoes from Seed Indoors
Tomatoes will do best when planted out as well-developed seedlings of 6 or 8 weeks. For that reason, you want to start your fall tomatoes in mid-summer. You can start them out of doors, as long as they’re protected from heavy rainfall.
However — and this seems to be an increasingly annoying fact of Florida gardening life — understand that excessive heat can prevent your tomato seeds from germinating.
When I first started growing fall tomatoes in earnest — maybe 10 years ago — I didn’t have any trouble with outdoor germination in the summer as long as I could keep my seed trays covered and protected from washout by summer storms.
During the last four or five years, however, I’ve had to start them indoors in the summer to ensure good germination. Except for Everglades tomatoes (which are a distinct species), many a seedling tray has sat empty for weeks without a sprout. I’ve begun starting more seeds indoors as a result.
Zone 8: Start seeds indoors in June through July.
Zone 9: Start seeds indoors in July.
Zone 10: Start seeds indoors in July
Zone 11: Start seeds indoors in mid to late August.
When to Plant Fall Tomatoes Out into the Garden
Zone 8: Transplant seedlings in July or August
Zone 9: Transplant seedlings in August through September
Zone 10: Transplant seedlings in August through September
Zone 11: Transplant seedlings in September through November
Late Winter/ Early Spring: Another Ideal Planting Time
Winter vegetables for Florida
Most gardeners think of January and February as “late winter,” but for Florida gardeners, these are the first months for spring planting.
Late winter offers another excellent window for planting tomatoes in Florida. During this period, temperatures are gradually warming up, but they are still cool enough to prevent the rapid spread of pests and diseases.
The risk of frost is minimal, especially in southern parts of the state, allowing tomato plants to thrive as they move into spring.
Florida gardeners should prepare to cover their tomato plants from late December through the end of February. A simple frost cloth or old sheet is usually sufficient.
Honestly, this is the main reason I prefer shorter-statured determinate tomatoes to more ambitious indeterminate types. They’re just easier to cover during the occasional cold snap.
Late winter and spring are also the dry season in Florida, so you may need to water manually instead of depending on rain.
When to Start Spring Tomato Plants from Seed Indoors
Zone 8: Start seeds indoors in early January.
Zone 9: Start seeds indoors in late December through early January.
Zone 10: Start seeds indoors in late December through early January.
Zone 11: Start seeds indoors in December
When to Plant Spring Tomatoes Out into the Garden
Check temperatures before planting out and be sure to provide a cover when nights fall below 40°F.
Zone 8: Transplant seedlings in mid-February through early April.
Zone 9: Transplant seedlings in late January through February
Zone 10: Transplant seedlings in late January through February
Zone 11: Transplant seedlings in January through February
Best Varieties of Tomatoes to Grow in Florida
Floradade Tomatoes
Along with not understanding our very weird planting schedule, a lot of new Florida gardeners are choosing the wrong varieties.
Choosing the right variety of tomatoes is crucial for a successful harvest in Florida. Some of the best varieties include:
‘Sweet 100’: A prolific cherry tomato variety that produces an abundance of sweet, small fruits.
‘Floradade’: A large-fruited variety developed for Florida’s climate, resistant to cracking and splitting.
‘Marglobe’: A small, fast developing fruit that will outrun most pest and disease pressure.
‘Mortgage Lifter’: A beefsteak tomato that tops out at about 5 to 6 feet tall and stands up to heat.
‘Solar Fire’: Bred specifically for hot climates, this variety is heat-tolerant and resistant to common diseases.
‘Heatwave II’: Another heat-tolerant variety, perfect for Florida’s warm temperatures.
These are a small, currant-type tomato that thrives in Florida’s hot and humid conditions. It’s a distinct species that remains truer to its wild Peruvian roots. So, it’s a lot more resistant to pests and disease, particularly in hot weather.
You can even grow these tomatoes in the summer in Florida — they’re just that hardy.
Start Tomato Seeds Now
Now that it’s July, it’s time to start preparing for your fall Florida garden. Long-season annual vegetables like tomatoes, peppers, and eggplant like a nice head start before planting out.
IFAS recommends planting them out in August through November (depending on where in the state you live). I’m in Central Florida, on the Gulf Coast, so I tend to procrastinate due to the flexibility of my planting times.
But the time to start tomato seeds for fall planting is right now.
You’ll find seeds for Florida-friendly tomato varieties in my Etsy shop. And don’t worry — I always include enough seeds in each pack for both the fall and late winter planting seasons.
So, remember, you CAN grow tomatoes in Florida. It’s just a matter of “right plant, right place,” and particularly for Florida gardeners… right time.
In the verdant state of Florida, where the sun smiles generously, the question isn’t whether you can cultivate a thriving vegetable garden, but rather when is the best time to start a vegetable garden.
As home gardeners in this bountiful corner of the world, we’re poised to harness these cycles of nature. So, let’s look at some of the nuances of vegetable gardening in Florida to ensure your garden flourishes in harmony with the seasons.
Year-Round Growing in Florida
Florida’s unique climate allows for nearly continuous vegetable gardening. The state’s mild winters and hot summers create an environment where careful planning and selection of crops can yield a year-round harvest.
Spring Vegetables
Florida is definitely an outlier when it comes to the best time to start a vegetable garden. In temperate zones, most of the following vegetables are planted and grown over the summer.
In the muggy subtropics, however, it’s important to get a jump on long-season veggies so they can thrive before the summer storm season.
Start long-season vegetable seeds in late winter, or about 6 to 8 weeks prior, to plant out in early spring after the last frost (usually in February, depending on your exact USDA zone). Start faster-maturing varieties about four weeks before the last frost date.
Tomatoes
Tomatoes thrive in our spring’s warmer temperatures. Rich in nutrients and relatively easy to grow, they are perfect for Florida’s soil and climate.
Peppers
With a preference for warm weather, they start well in spring and can continue through summer. In fact, they can be cultivated as perennials in Florida.
Squash
Enjoys the moderate temperatures of spring. Squash plants are prolific producers, making them a rewarding choice. Summer may be too late to plant, due to disease and pest pressure.
Cucumbers
Love the increasing warmth and longer days of spring. They’re fast growers, making them ideal for this season.
Beans
Thriving in warm soil, beans are an excellent spring crop, with varieties like bush and pole beans adapting well to Florida’s climate. Direct sow beans as soon as the last frost date has passed.
Summer Vegetables
Because of our extreme summer weather, only the most heat-tolerant vegetables thrive in June through August.
Eggplant
With its preference for hot weather, eggplant grows well in our intense summer heat. You can plant earlier but know they will really flourish over the summer.
Okra
Heat-loving and drought-tolerant, okra is a staple in Southern gardens.
Sweet Potatoes
Plant anytime between spring and summer. They thrive in hot weather, making them perfect for Florida’s summers. Sweet potatoes can be grown as “perennials” in most of Florida simply by leaving smaller tubers in the ground when you harvest.
Southern Peas
Ideal for hot climates, they are a nutritious addition to the garden and a staple throughout much of the south. Look for cowpeas, black-eyed peas, or pigeon peas.
Yard Long Beans
These Southeast Asian beans taste different than regular green beans, but unlike the more traditional types, they’ll thrive in a Florida summer.
Fall Vegetables to Grow in Florida
I personally feel that fall is the best time to start a vegetable garden in Florida. The days are still long enough to provide sunlight for working in the evening once the heat dissipates.
Lettuce
Cooler fall temperatures are ideal for growing crisp, tender lettuce. You can grow lettuce in late fall until spring, over our mild winters.
Broccoli
Thrives in cooler weather, making it a perfect crop to plant in the fall. Because it’s cold hardy, you can grow it throughout the winter months.
Cauliflower
Similar to broccoli, it grows well in the cooler temperatures of fall. Some regions in Florida may still be too hot for cauliflower, so check with your county ag extension for specific advice.
Carrots
The mild, moist fall weather is ideal for growing sweet, crunchy carrots, and our sandy soil offers plenty of room for root vegetables.
Kale
Hardy and frost-tolerant, kale is a nutritious choice for a fall garden. Our random cold snaps simply sweeten the crop.
Winter Vegetables for Florida Gardens
Yes, you really can grow in the winter. My own garden is far more abundant in the winter than say, the summer.
Spinach
Cold-hardy spinach can grow well in North Florida’s milder winters. Those in Central and South Florida may want to choose a different leafy green. I’ve never had any luck with the stuff here in 10A, so grow Perpetual Chard instead.
Collard Greens
Tolerant of cold weather, they are a staple in Southern winter gardens. Best of all, they will often continue to grow until summer.
Beets
Can be grown in winter due to their frost tolerance.
Radishes
Fast-growing and frost-tolerant, perfect for a quick winter crop, or even a succession of several crops from November through April. Roasting radishes makes them sweeter and reduces any spiciness.
Herbs
As a hardy herb, it survives the cooler temperatures of winter. Cilantro also enjoys our winter weather. It’s also a good time to sow perennial herb seeds, such as sage, oregano, and thyme.
So, When is the Best Time to Start a Vegetable Garden in Florida?
The entire year offers unique opportunities for gardening in Florida., but certain times are more ideal than others.
Starting Your Florida Vegetable Garden in Winter
Prepping a spring vegetable garden for Florida starts as early as December. Our mild winters make it an ideal time for outdoor work. I do most of my major work in our drier winters, such as putting up or repairing garden supports, cleaning out the shed, cutting up wood, and shredding woody debris.
Because it doesn’t freeze often and never long enough to prevent working the soil, you can start as early as December to ensure your garden is ready for spring.
Many areas of Florida have last frost dates in February. So, don’t put off getting ready for spring.
Start Seeds Indoors
Long-season vegetables, including peppers and tomatoes, are perfect for starting indoors over the winter. This way, you’ll have large, healthy plants ready to go into the ground as soon as you pass your first frost date.
Preparing your garden bed in late winter allows you to get a head start on crops like tomatoes and peppers, ensuring a bountiful harvest before the height of summer.
It also allows you to plant out in succession, getting several harvests of those fast-maturing fruits and vegetables, like cucumbers, melons, and squash.
It’s also an excellent time to grow corn without worrying about the pest pressure that comes with hot weather.
Prepping Your Florida Vegetable Garden
Black-eyed peas for summer cover cropping
Prepping your garden bed in the winter means you can employ no-dig or no-till methods for planting in spring. No-till methods can significantly enhance the health and productivity of your garden, as well as its long-term soil health.
Why No-Till Gardening for Florida?
I adopted no-till about five years ago and found that my poor sandy soil needed less amending, fewer fertilizers, and my vegetables needed fewer waterings.
No-till gardening preserves the natural structure of the soil. It keeps the beneficial microorganisms intact, which are essential for nutrient cycling and healthy plant growth.
This method helps in retaining soil moisture, especially in the warmer, sunnier climate of Florida.
No-till beds often have fewer weeds since the soil is not disturbed, which can bring dormant weed seeds to the surface.
Over time, no-till gardening leads to richer, more fertile soil as organic matter accumulates and decomposes naturally.
By not disturbing the soil, erosion is minimized, which is especially important in areas prone to heavy rains, like Florida.
Last, but certainly not least — no-dig gardening is easier on the human body. Especially for home-scale gardening, prepping and cultivating a product garden bed can be back-breaking.
While physical exercise is good for the body, mind, and soul, our extreme climate can make it absolutely exhausting. We had heat indexes in the triple digits for days on end in 2023. Working outdoors in that kind of heat can be dangerous. Even fatal.
Choosing the Right Spot
Most vegetables need at least 6-8 hours of direct sunlight. Observe your potential garden area throughout the day to ensure it gets enough sun.
Good drainage is essential, and although most of our Florida soils are pretty sandy, we’re certainly famous for our swamps. So, avoid areas where water tends to pool after rain.
Choose a spot that is easily accessible for watering, weeding, and harvesting. As I grow older, I find that planning ahead can prevent many backaches.
Look for windbreaks or structures to protect your garden from strong winds, which can be frequent in Florida.
Once you’ve chosen the spots for your garden beds, consider starting as early as November or December to start a vegetable garden bed.
When you use no-dig garden methods, you can let Nature do most of the work. However, she does need some time to perform her magic.
Preparing Your Garden Beds for Spring Planting
As early in advance as you can, it’s time to start preparing your garden beds. You want to prep bed by layering it with organic matter and allowing it to decompose.
First Layer
The first layer is for weed suppression. Start by laying down cardboard or several layers of newspaper over your garden area. This layer suppresses existing grass and weeds.
Second Layer
Spread a thick layer of compost over the garden area. This serves as the primary growing medium for your plants.
Third Layer
Cover the compost with a layer of mulch, like straw or hay to conserve moisture and keep weeds at bay. You can also use wood chips, but I find they interfere a bit too much with any succession planting because they take so long to break down.
Settling
Once you have your layers build up, give your garden bed a few weeks to settle. The cardboard or newspaper will gradually decompose, and the compost will start feeding the soil life beneath.
This is another reason to start as early as possible on bed preparation.
Cover Crops
Another trick to managing poor Florida soils is to set the bed up in November and plant a winter cover crop on top that you can cut down to further feed the soil.
One highly suitable winter cover crop for Florida include crimson clover for its nitrogen-fixing ability. It’s also a beautiful addition to your garden that improves soil structure and feeds numerous pollinator species. So, even if you aren’t able to kill it all off before planting, it continues to add benefits to your garden.
While the bed is settling, it’s time to start your long-season vegetables. I recommend starting long-season vegetables as much as 12 weeks in advance. Tomatoes, peppers, and eggplant all benefit from a good head start before planting out.
Planting
When it’s time to plant, simply move aside the mulch where you want to plant and put your seedlings directly into the compost layer. The natural layers will provide a nutrient-rich, moisture-conserving environment for your plants to thrive.
Advantages of No-Till in the Florida Spring Garden
Spring in Florida can be dry, and the no-till method helps retain soil moisture.
And because of our variable winter weather — warm sunny days with random cold snaps — the mulch layer helps keep the soil temperature more stable.
Throughout the growing season, continue to add organic materials like compost or grass clippings to the surface of your no-till beds. This will continually improve the soil fertility and structure and suppress our abundant weed species.
The Best Time to Start a Vegetable Garden in Florida is Now
Start tomatoes indoors over winter.
While late winter and late summer are the best time to start a vegetable garden in the Sunshine State, it’s really a year-round adventure.
To learn more about the specifics of garden planting schedules in Florida (and Georgia and Louisiana), consider purchasing my state-specific gardening planners available on Amazon. These offer some tools that will help you maximize your garden’s potential in these unique climates.
As a gardener in Florida, I’ve learned that our winters provide a unique setting for growing a variety of plants. You really can grow lettuce in Florida, as long as you grow it in winter.
Lettuce loves cool weather and will bolt and go to seed quickly in the heat. Since it starts getting really hot in May, that means the window to grow lettuce in Florida remains between September to April. Even then, there are a few tricks you’ll need to know to be successful.
Understanding Winter Climate in Florida
When we talk about gardening in Florida during the winter, it’s important to first understand the unique climatic conditions of the region. The Gulf States, from Florida to Eastern Texas, sit firmly in Zones 9 through 11. They have mild winters and enjoy lower humidity than the rest of the year.
Despite the milder temperatures, winter also brings shorter daylight hours. Lettuce generally requires around 6 hours of sunlight per day. In winter, the sun is lower in the sky, and the days are shorter, so selecting a planting site with maximum light exposure is crucial.
Winters in Florida are drier and less humid than the summer months, which is beneficial for lettuce, as high humidity can encourage fungal diseases. However, this also means you need to be more vigilant about watering.
Choosing the Best Lettuce Varieties to Grow in Florida
A big part of successfully growing lettuce in Florida is choosing the right varieties. You may have heard that it’s the one time of year you can grow crispheads, but my experience in Zone 10A says, “Don’t bother.”
Lettuces can be broadly categorized into four types: crisphead, butterhead, romaine, and loose leaf. In Florida, crisphead lettuces like iceberg generally don’t perform as well due to their preference for cooler, more consistent temperatures.
Yes, it may get below freezing, and yes, it’s generally cooler in the winter. But you see, when it’s not freezing, the temperature is still likely to jump above 80°F.
Instead, focus on butterhead, romaine, and loose-leaf varieties, which are more adaptable to those surprise heatwaves.
Heading Lettuce Varieties to Grow in Florida
Jericho Romain lettuce in the garden
Some “heading” lettuce varieties to look for:
Jericho Romaine
A robust variety known for its heat tolerance. Jericho produces dense, crisp leaves and is ideal for salads and wraps. This variety, developed in Israel, is very heat-tolerant, and I’ve even been able to keep it growing through to June.
You can find Jericho Romaine lettuce seeds in my shop.
Manoa
Similar to butterhead lettuce, Manoa is a heat-tolerant variety with a soft texture and sweet flavor, perfect for delicate salads. I’ve grown this one for several years but am still mastering the optimum germination temperatures.
Red Cross
This butterhead variety has beautiful, red-tinted leaves and a tender, mild flavor. It adds a pop of color to any salad. I haven’t tried this one yet, but the San Deigo Summer Lettuce program recommends it.
Nevada
Boasting good heat resistance, Nevada has crisp, green leaves that form a loose head. It’s known for its durability in fluctuating temperatures.
Paradai
A romaine type, Paradai is prized for its crunchy texture and resistance to bolting in warmer weather.
Parris Island
A classic romaine with long, dark green leaves, this variety is valued for its crisp texture and exceptional flavor.
Little Gem
A smaller romaine type, Little Gem is ideal for limited space. It has a sweet flavor and a compact, crunchy head.
Anuenue
Another butterhead type, Anuenue is known for its heat tolerance and resistance to bolting, producing soft, tender leaves.
Loose Leaf Lettuces to Grow in Florida
Loose leaf lettuce varieties are truly the easiest when you’re trying to grow lettuce in Florida. Best of all, you can harvest individual leaves as they mature, ensuring several harvests throughout fall and winter.
Mesclun Mix
Mesclun mix is generally a dealer’s choice of tender leaf lettuces and brassicas that provide a distinct and delicious salad blend.
You can find Mesclun Mix lettuce seed mix in my shop.
Black-Seeded Simpson
One of the most popular loose-leaf varieties, it produces light green, curly leaves with a delicate flavor. It’s a fast grower and very resilient. I’ve grown this one for years, and it’s recommended by the IFAS Florida Ag page.
Red Sails
This variety features attractive, ruffled, red-tinted leaves. It’s not only heat tolerant but also rich in nutrients and flavor.
Salad Bowl
As a cut-and-come-again variety, Salad Bowl produces loose, green, crinkly leaves that are both tender and flavorful. I’ve grown several “salad bowl” varieties in containers with much success, harvesting from October through April on a “cut and come again” basis.
Bronze Oakleaf
Known for its bronze-red leaves that resemble oak leaves, this variety offers a sweet taste and a pleasing texture. Most of the “oak leaf” type leaf lettuces will grow well in Florida winters.
Starting your lettuce seeds in cell blocks or seed trays allows for better control over the growing conditions. Even heat-tolerant lettuce varieties struggle to germinate at temperatures above 80°F, and my struggles with the delicate and sweet Manoa lettuce is a testament to that.
Temperature Control
It’s easier to manage the temperature for seed germination in controlled environments. Lettuce seeds prefer cooler temperatures for germination and can struggle in the heat, making indoor starting ideal.
Longer Harvest
Starting seeds in trays can lead to an earlier and longer harvest seaon by allowing you to begin the growing process indoors while waiting for outdoor conditions to become suitable. That way, you can sow lettuce seeds indoors during the boiling heat of August or the frigid nights of December.
Flexibility
Trays allow you to strategically plan your garden layout and maximize yield by choosing where and when to transplant seedlings. I frequently dot my winter garden beds with Jericho Romaine heads whenever and wherever space becomes available.
Here’s a detailed guide on how to successfully start lettuce seeds in cell blocks or trays:
You’ll need clean cell trays or small soil blocks. Use a light seed-starting mix that won’t offer too much resistance to delicate roots.
Make soil blocks or fill cell trays with your well-moistened seed mix.
Plant three seeds per block or 4 to 5 if using older seeds.
Cover lightly with soil and press down to increase seeds’ contact with soil.
Use a mister to keep soil moist or bottom-water as required.
Maintain a soil temperature of around 60-70°F.
Seedlings will need plenty of light once they germinate. You can grow them outside in Florida if temperatures are on-point. If it gets above 80°F or below 50°F, consider moving them indoors near a window or into a greenhouse.
If necessary, you can purchase inexpensive grow lights. The new LED technologies for grow lights provide full spectrum at low initial cost, reduced electrical usage, and thankfully – no added heat load to your home.
Lettuce seeds typically germinate within 7-10 days. Monitor the moisture level and temperature regularly.
Check the water daily. If seedlings become leggy (tall and thin), they need more light.
Thin back to one seedling per cell. You can try to separate them and plant them individually, but I have found they’re really just too delicate. Best to thin the herd and let the strongest one take over.
Gradually acclimate the seedlings to outdoor conditions over a week. Start by placing them outside in a shady area for part of the day and then progressively increase their time outdoors.
Preparing the Garden
Florida soil is known for being sandy, which is nice for working but devoid of organic matter and nutrients. I try to layer some compost down on any planting bed twice a year to improve the soil.
Once weeds have been removed, you can transplant the seedlings into your prepared garden bed. Provide about 8” to 10” for each plant in order to provide enough space to grow.
Transplanting
Transplant lettuce seedlings to the garden after the last heat wave of September or anytime throughout winter until April.
Late December through late January has the highest chance of frost, so you may choose to avoid those weeks for planting out.
Ongoing Care to Grow Lettuce in Florida
Because Florida EATS compost, you may want to side-dress your lettuce with compost or composted manure. A dose of fish emulsion usually provides a boost in the middle of the growing season, as well.
The winter months also offer less rainfall. To add insult to injury, it’s also incredibly windy. That means you’ll need to stay on top of irrigation to keep your lettuce plants thriving.
Lettuce can handle light frosts, but temperatures below freezing (32°F or 0°C) for long periods can damage the plants.
In Florida, freezes are rare, but it’s good to be prepared. Use row covers or even old sheets or beach towels to cover them during a freeze warning.
That sounds like a lot of work to me, and for the most part, I only grow a little heading lettuce here and there in the garden. I may stick some Jericho seedlings in between other plants. Once my fall determinate tomatoes crop, I sometimes plant some lettuce under them.
For a regular supply of homegrown lettuce, though, I use containers instead.
I’ve found that shallow planters (pick them up cheap at the dollar store) with some drainage holes added, make excellent garden planters for cut and come again leaf lettuce.
This offers several advantages:
Temperature Control
I can start seeds in August and keep them indoors or in the shade, moving the containers easily to where they’re needed.
Likewise, as the temperatures cool, I can move the planters into a sunnier spot in the garden.
Succession Timing
After several years of planting this way, I know how many containers to plant per week for my family. I plant five large trays (or seven smaller ones) per week for four weeks.
As the first ones mature, I sow more in succession. This means that I have a regular supply of fresh, young, tender lettuce at any given time.
I don’t have to deal with lettuce growing, maturing, and becoming bitter because we can’t eat it fast enough.
Not that the chickens aren’t willing to get rid of it for me.
Cheaper, Easier, and Less Work
Since I’m growing in containers, I only have to ensure moisture and fertility for a limited amount of soil. Lettuce is a shallow-rooted planted. It’s a hungry plant, because it doesn’t have deep roots. It needs all it’s moisture and nutrition close to the surface.
It’s a heck of a lot cheaper to feed and water a bunch of shallow containers than vast swathes of garden soil. Besides, growing my quick-maturing lettuce in containers means more room in the garden for broccoli and cabbages.
Growing Lettuce in Containers
Find shallow garden planters or other containers to use. You can use transparent bins (like on Roots and Refuge Farm) or cheap garden planters from the dollar store.
Last year, I found a clearance sale on some cubby bins from Dollar General and drilled some holes in the bottom.
Planting
Fill the container with 4” to 6” of good, rich potting soil.
Add some slow-release organic fertilizer to save time and trouble. Most are good for three to four months of growing.
Lightly scatter your loose-leaf lettuce seeds on top and then sprinkle the top with a light layer of more soil.
Press down with your hands to increase seed contact with the soil.
Mist well and place in a temperate spot to germinate.
Harvesting
As plants germinate and mature, harvest individual leaves for eating by pinching them near the ground.
Allow smaller leaves to grow and harvest later.
Planting and harvesting in succession will result in a season-long harvest of fresh salad greens.
Winter isn’t just the best time to grow lettuce in Florida, it may actually be the ONLY time you can grow it with any success in our hot, humid climate.
Whether you grow in the ground or in containers, adding fresh, homegrown salads to your winter menu is sure to elevate your cooking and improve nutrition for you and your family.
Whether you’re a novice or an experienced gardener, mastering the skill of seed germination is a fundamental skill. It’s the first step to a bountiful and abundant harvest. So, let’s dive into the seed starting basics of germination and provide you with valuable insights on how to successfully kickstart your garden from the very beginning.
How Seeds Germinate
Seed germination is a remarkable process by which a dormant seed transforms into a tiny, delicate seedling. Understanding the science behind this empowers you to become a more proficient seed starter. You’ll be able to give your plants the best possible start. Let’s take a look at nature at work.
The Anatomy of a Seed
Seeds are remarkable storehouses of life. They consist of three key parts:
embryo
endosperm
seed coat
The embryo is the embryonic plant inside the seed, containing the first leaves (cotyledons), the stem (hypocotyl), and the root (radicle).
The endosperm, a nutrient-rich tissue, provides nourishment to the developing embryo.
Finally, the seed coat acts as a protective shell, shielding the delicate contents from external threats.
Image from page 372 of “Plant life and plant uses; an elementary textbook, a foundation for the study of agriculture, domestic science or college botany” (1913)
The Trigger: Absorption of Water
The germination process begins with the absorption of water through the seed coat. As the seed absorbs water, it rehydrates. The dormant embryo awakens from its slumber.
This rehydration process also activates enzymes that break down stored nutrients within the endosperm, transforming them into simple sugars and other essential substances for the seedling’s early growth.
Activation of Growth Hormones
Water absorption triggers the production of growth hormones called gibberellins, which play a pivotal role in stimulating the embryo to initiate growth.
Gibberellins activate enzymes responsible for cell division and elongation, propelling the embryo’s root (radicle) to emerge from the seed coat in search of moisture and nutrients.
Emergence of the Root
As the root (radicle) elongates, it breaks through the seed coat and emerges into the surrounding soil.
The radicle becomes the primary root of the seedling, anchoring it in the growing medium and absorbing water and essential nutrients.
Unfurling the Cotyledons
Simultaneously, the stem (hypocotyl) elongates, pushing the cotyledons (seed leaves) above the soil surface.
Cotyledons vary in number and shape depending on the plant species and can be either one or two. These early leaves are instrumental in photosynthesis and provide the young seedling with initial sustenance until true leaves develop.
Photosynthesis Commences
With the cotyledons exposed to light, the process of photosynthesis begins.
Through photosynthesis, the seedling synthesizes glucose, a vital energy source, from carbon dioxide and water using sunlight.
This metabolic activity fuels the seedling’s growth, allowing it to develop into a robust and self-sustaining plant.
The intricate processes of water absorption, hormone activation, and the emergence of roots and cotyledons collectively orchestrate a marvelous transformation.
What Seeds Need to Germinate
Seed germination is a critical stage in a plant’s life cycle, and providing the right conditions is essential for successful germination.
While individual plant species have specific germination requirements, some general factors influence seed germination across most plants.
Understanding these factors will help you create an optimal environment for seedlings to emerge and thrive.
Moisture
Water is a primary trigger for seed germination. During imbibition, the seed absorbs water, leading to the activation of enzymes that initiate metabolic processes and growth.
Sufficient moisture is vital during germination to ensure the seed swells, softens the seed coat, and facilitates the emergence of the radicle.
Warmth
Temperature plays a crucial role in germination. Each plant species has an optimal temperature range for germination.
Seeds typically require warmth to activate enzymes and metabolism. Low temperatures can slow or inhibit germination, while high temperatures can cause damage or desiccation.
Seeds respire during germination, converting stored energy into usable forms. Adequate oxygen supply is essential for these metabolic processes.
Soil structure and porosity influence the availability of oxygen to seeds in the growing medium.
Light
Light requirements for germination vary among plant species. Some seeds require light to trigger germination, while others germinate best in darkness.
Photoreceptor proteins in seeds sense light levels and influence germination responses.
Factors that Affect Seed Starting and Germination
Seed Coat Permeability
The seed coat serves as a protective layer, and its permeability affects germination.
Some seeds have hard or impermeable seed coats, requiring scarification (mechanical or chemical abrasion) to enhance water absorption and germination.
Seed Dormancy
Scarification involves breaking or weakening the seed coat, promoting germination. Stratification refers to subjecting seeds to cold treatment, mimicking winter conditions.
Both techniques are used to overcome seed dormancy and synchronize germination with favorable conditions.
Germination Inhibitors and Hormones
Some seeds contain chemicals that inhibit germination until specific conditions are met.
Others require exposure to hormones like gibberellins or cytokinins to initiate germination.
Germination Time
Different seeds have varied germination periods. Some seeds germinate quickly, while others may require several weeks or even months.
Understanding the expected germination time helps manage expectations and avoid premature intervention.
Seeds that Need Light to Germinate
Some seeds need sunlight exposure to germination. Sunlight acts as a signal to the seed that it is close to the surface of the soil and has good conditions to begin growing.
Light-sensitive seeds won’t germinate if planted too deep in the soil.
Vegetable Seeds that Require Light to Germinate
Arugula (Eruca vesicaria subsp. sativa)
Bok Choy (Brassica rapa subsp. chinensis)
Cilantro/Coriander (Coriandrum sativum)
Dill (Anethum graveolens)
Endive (Cichorium endivia)
Lettuce (Lactuca sativa)
Mizuna (Brassica rapa var. japonica)
Mustard Greens (Brassica juncea)
Spinach (Spinacia oleracea)
Swiss Chard (Beta vulgaris)
Flower Seeds that Require Light to Germinate
Alyssum (Lobularia maritima)
Amaranthus (Amaranthus spp.)
Baby’s Breath (Gypsophila paniculata)
Calendula (Calendula officinalis)
Nigella/Love-in-a-Mist (Nigella damascena)
Pansy (Viola tricolor)
Portulaca (Portulaca grandiflora)
Stock (Matthiola incana)
Sweet Alyssum (Lobularia maritima)
Verbena (Verbena spp.)
Seeds that Need Darkness to Germinate
On the other hand, some seeds require darkness to germinate.
Light-sensitive inhibitors in these seeds prevent germination in the presence of light. When these seeds are covered by soil or kept in a dark environment, the light is blocked, and germination can occur.
Vegetable Seeds that Require Darkness to Germinate
Beets (Beta vulgaris)
Carrots (Daucus carota)
Parsnips (Pastinaca sativa)
Rutabaga (Brassica napus)
Salsify (Tragopogon porrifolius)
Scorzonera (Scorzonera hispanica)
Skirret (Sium sisarum)
Taro (Colocasia esculenta)
Turnips (Brassica rapa subsp. rapa)
Yam (Dioscorea spp.)
Flower Seeds that Require Darkness to Germinate
Browallia (Browallia speciosa)
Coleus (Plectranthus scutellarioides)
Cyclamen (Cyclamen spp.)
Dusty Miller (Senecio cineraria)
Forget-Me-Nots (Myosotis sylvatica)
Foxglove (Digitalis purpurea)
Impatiens (Impatiens walleriana)
Primrose (Primula spp.)
Sweet William (Dianthus barbatus)
Viola (Viola spp.)
Seeds that Need to be Soaked to Germinate
Some seeds have hard seed coats that create a barrier to water absorption, slowing germination.
To overcome this dormancy, you can soak these seed before planting. You can also nick the hard shell before soaking. This softens the seed coat, allowing water to penetrate and trigger germination.
List of Flower Seeds that Can be Soaked before Sowing
Four O’Clock (Mirabilis jalapa)
Moonflower (Ipomoea alba)
Morning Glory (Ipomoea purpurea)
Nasturtium (Tropaeolum majus)
Scarlet Sage (Salvia coccinea)
Sweet Acacia (Vachellia farnesiana)
Sweet Alyssum (Lobularia maritima)
Sweet Peas (Lathyrus odoratus)
Sweet Sultan (Centaurea moschata)
Sweet William (Dianthus barbatus)
Some seeds may require only a few hours of soaking, while others might need an overnight soak or even longer.
Seeds that Need Cold Stratification to Germinate
Many seeds from temperate climates have built-in dormancy mechanisms that prevent immediate germination.
This can be a problem when gardening in warmer climates in Zones 8-12. We rarely get enough cold or long enough during the winter to stimulate these kinds of plant seeds.
In this case, cold stratification, a process of subjecting seeds to cold and moist conditions before seed starting, mimics winter conditions. This breaks seed dormancy, allowing them to germinate.
This treatment triggers biochemical changes within the seeds, preparing them for germination once conditions become favorable.
Flower Seeds that Benefit from Cold Stratification
Black-Eyed Susan (Rudbeckia hirta)
Columbine (Aquilegia spp.)
Delphinium (Delphinium spp.)
Foxglove (Digitalis purpurea)
Hollyhock (Alcea rosea)
Larkspur (Consolida spp.)
Purple Coneflower (Echinacea purpurea)
Seeds that Germinate at Cold Temperatures (40-50 degrees F)
Plants that have evolved to germinate best under cooler conditions may require cooler temperatures to germinate. This gives them a head start in competing in temperate climates.
These cold-tolerant seeds germinate when the soil temperature is relatively low, which is often during early spring or late fall when the weather is cooler.
Vegetable Seeds that Germinate at Cold Temperatures (40-50 degrees F)
Arugula (Eruca vesicaria subsp. sativa)
Kale (Brassica oleracea var. acephala)
Lettuce (Lactuca sativa)
Mizuna (Brassica rapa var. japonica)
Mustard Greens (Brassica juncea)
Pak Choi (Brassica rapa subsp. chinensis)
Peas (Pisum sativum)
Radishes (Raphanus sativus)
Spinach (Spinacia oleracea)
Swiss Chard (Beta vulgaris)
Flower Seeds that Germinate at Cold Temperatures (40-50 degrees F)
Black-Eyed Susan (Rudbeckia hirta)
Delphinium (Delphinium spp.)
Hollyhock (Alcea rosea)
Larkspur (Consolida spp.)
Purple Coneflower (Echinacea purpurea)
Seeds that Germinate at Cool Temperatures (50-65 degrees F)
Some seeds germinate at temperatures within the range of 50-65 degrees Fahrenheit. These cool-tolerant seeds prefer milder conditions, making them suitable for seed starting during the cooler months of spring and fall.
In warmer growing zones, such as 9-12, these seeds can normally be planted and grown over the winter.
Vegetable Seeds that Germinate at Cool Temperatures (50-65 degrees F)
Beets (Beta vulgaris)
Carrots (Daucus carota)
Kale (Brassica oleracea var. acephala)
Mesclun Mix (Lepidium sativum, Eruca vesicaria, and others)
Mizuna (Brassica rapa var. japonica)
Radicchio (Cichorium intybus)
Spinach (Spinacia oleracea)
Swiss Chard (Beta vulgaris)
Flower Seeds that Germinate at Cool Temperatures (50-65 degrees F)
Alyssum (Lobularia maritima)
Baby’s Breath (Gypsophila paniculata)
Clarkia (Clarkia spp.)
Foxglove (Digitalis purpurea)
Iceland Poppy (Papaver nudicaule)
Love-in-a-Mist (Nigella damascena)
Nasturtium (Tropaeolum majus)
Seeds that Germinate at Moderate Temperatures (65-75 degrees F)
Moderate temperature conditions ranging from 65 to 75 degrees Fahrenheit are ideal for the germination of most garden seeds.
These seeds thrive in mild, favorable temperatures. In Zones 9-12, we generally plant these seeds under cover to plant out right after the last frost date, before it becomes too hot.
We also frequently start them indoors in the summer to plant out once temperatures drop in the fall.
Vegetable Seeds that Germinate at Moderate Temperatures (65-75 degrees F)
Corn (Zea mays)
Cucumbers (Cucumis sativus)
Eggplant (Solanum melongena)
Melons (Cucumis spp.)
Peppers (Capsicum spp.)
Pumpkins (Cucurbita pepo)
Squash (Cucurbita spp.)
Tomatoes (Solanum lycopersicum)
Flower Seeds that Germinate at Moderate Temperatures (65-75 degrees F)
Four O’Clock (Mirabilis jalapa)
Gaillardia (Gaillardia spp.)
Gazania (Gazania spp.)
Marigolds (Tagetes spp.)
Petunias (Petunia spp.)
Poppies (Papaver spp.)
Sunflowers (Helianthus annuus)
Seeds that Germinate at High Temperatures (75-90 degrees F)
Plants from tropical and subtropical regions of the world often germinate best at much warmer conditions. Their optimal germination temperatures range from 75 to 90 degrees Fahrenheit.
In Zones 9-12, we can sow these seeds directly in the garden in the early summer through early fall. They can also be started outside but should be kept under cover such as an awning to protect them from being flooded out by heavy rain or scorched by the summer sun.
Many of these plants are the few we can grow successfully through the summer in Florida. So, it’s worthwhile learning about these varieties and how to use them in your garden and your menu.
Vegetable Seeds that Germinate at High Temperatures (75-90 degrees F)
Flower Seeds that Germinate at High Temperatures (75-90 degrees F)
Calendula (Calendula officinalis)
Celosia (Celosia spp.)
Cosmos (Cosmos bipinnatus)
Globe Amaranth (Gomphrena globosa)
Marigolds (Tagetes spp.)
Morning Glory (Ipomoea purpurea)
Nasturtium (Tropaeolum majus)
Sunflowers (Helianthus annuus)
Vinca (Catharanthus roseus)
Zinnia (Zinnia elegans)
How to Nick and Soak Seeds to Improve Germination
Seeds with tough outer coverings often require some help stepping out of their shells. You can nick the casing and soak them to speed up germination when seed starting these types.
Step 1: Gather Materials
Gather the seeds you wish to nick and soak. Ensure they are seeds that require scarification (nicking) or soaking for enhanced germination.
Step 2: Prepare the Nicking Tools
Use a pair of sharp scissors, a nail file, or sandpaper to nick the seed coat. Sterilize the tools with rubbing alcohol before use to prevent the spread of pathogens.
Step 3: Nicking the Seeds
Hold the seed firmly but gently with your fingers or tweezers to avoid damaging the embryo.
Locate the seed’s opposite end from the hilum (scar) where it was attached to the parent plant.
Make a small, shallow cut or nick on the opposite end of the seed coat using the prepared tools.
The goal is to break through the hard outer layer without damaging the delicate inner part of the seed.
Step 4: Soaking the Seeds
After nicking the seeds, place them in a container suitable for soaking. Glass or plastic containers work well.
Fill the container with warm water, about 100 degrees F or so. It should feel slightly warmer than your skin temperature. Cover the seeds completely. Don’t use water that’s too cold or too hot, as extreme temperatures may harm the seeds.
Let the seeds soak for the specified duration, which varies depending on the type of seeds. Some seeds may require only a few hours, while others may need overnight soaking.
Step 5: Monitor the Soaking Process
Keep a close eye on the seeds while soaking to prevent over-soaking. Different seeds have different soaking times, and excessive soaking can lead to seed damage or rot.
Step 6: Drain and Plant
Once the soaking time is up, remove any seeds that are floating in the water. They will likely not germinate
Drain the water from the container. Place the nicked and soaked seeds on a damp paper towel to remove excess moisture.
Plant the seeds immediately after nicking and soaking, following the recommended planting depth and spacing for each seed type.
Remember that not all seeds require nicking and soaking for successful germination. Generally, those with hard shells can be soaked prior to planting
However, make sure you research the specific germination requirements of each seed type before proceeding.
How to Cold Stratify Seeds
Seeds from plants native to cold climates or those with natural dormancy mechanisms may require cold stratification before planting.
Find a sealable plastic bag or airtight container. To this, add a small amount of moistened coconut coir, perlite, or vermiculite to the container.
Then, place the seeds on top of the damp medium.
Seal the container and label it with the seed type and the date of stratification.
Place the sealed container in the refrigerator, where it should remain at a consistent temperature between 32 to 45 degrees Fahrenheit.
The duration of cold treatment varies depending on the seed type, so you’ll need to do some research on your specific seeds. Some require a few weeks while others require several months.
Check the container periodically to ensure the medium remains consistently moist. Add a few drops of filtered water if the medium seems too dry.
After the required cold stratification period, remove the seeds from the refrigerator and allow them to warm up gradually at room temperature for a few days.
You can then sow your cold-stratified seeds following the recommended planting depth and spacing for each seed type.
Cold stratification is a valuable technique for enhancing the germination of certain seeds. It mimics natural winter conditions and prepares seeds to sprout when the warmer temperatures of spring arrive.
Planting Depth and Its Impact on Successful Growing
Planting depth is a critical factor in seed germination and seedling establishment, as it directly influences various physiological processes in plants.
Understanding the scientific aspects of why planting depth matters can help gardeners make informed decisions to achieve optimal growth in their gardens.
Here’s a scientific perspective on the importance of planting depth and its impact on successful growing:
1. Soil Temperature and Moisture
Planting depth affects the soil temperature experienced by the seed. Seeds planted closer to the surface experience higher soil temperatures, promoting faster germination.
Deeper planting can result in cooler soil conditions, which may delay germination.
Additionally, proper planting depth allows seeds to access adequate soil moisture levels, which are essential for initiating metabolic activities and cellular processes during germination.
2. Seed Respiration and Oxygen Availability
During germination, seeds undergo respiration, a process that provides energy for growth.
Adequate oxygen availability is crucial for efficient respiration.
Shallow planting ensures better oxygen diffusion to the embryo, promoting healthier seedling development.
Deeper planting may reduce oxygen diffusion, leading to suboptimal respiration and potentially weak seedlings.
3. Photomorphogenesis and Light Perception
Photomorphogenesis is the process by which light influences plant growth and development. Some seeds exhibit photoblastic behavior, responding to light for germination.
Seeds that require light for germination (positive photoblastic) should be surface-sown to ensure they receive sufficient light.
On the other hand, seeds with negative photoblastic behavior, which require darkness for germination, should be planted at the appropriate depth to shield them from light.
4. Hypogeal and Epigeal Seedlings
Hypogeal and epigeal seedlings are terms used to describe two distinct types of seed germination and the initial stages of seedling development.
These terms highlight the differences in how seeds sprout and the subsequent growth patterns of emerging seedlings.
Understanding these concepts is crucial for successful gardening and plant propagation.
Hypogeal Seedlings
Hypogeal germination is characterized by the emergence of seedlings where the cotyledons, or embryonic seed leaves, remain below the soil surface.
In this type of germination, the cotyledons do not emerge above the ground but stay within the protective shell of the seed coat.
Instead, the epicotyl (the embryonic shoot) elongates and pushes the cotyledons and growing point above the soil.
Key Features of Hypogeal Germination
Cotyledons remain below ground.
Epicotyl elongates and emerges above the soil.
Cotyledons remain enclosed in the seed coat.
Typically observed in plants like beans, peas, and sunflowers.
Examples of Hypogeal Seedlings
Beans (Phaseolus vulgaris): Beans are a classic example of hypogeal germination. When a bean seed germinates, the cotyledons remain underground while the shoot (epicotyl) elongates and emerges above the soil. The cotyledons stay enclosed within the seed coat until the shoot reaches the surface.
Peas (Pisum sativum): Peas also exhibit hypogeal germination. As the pea seed germinates, the shoot pushes upward, bringing the growing point and cotyledons above the soil. However, the cotyledons themselves remain below ground, protected by the seed coat until the shoot emerges.
Sunflowers (Helianthus annuus): Sunflowers demonstrate hypogeal germination. The shoot of the germinating sunflower seed elongates and emerges above the soil, while the cotyledons remain within the seed coat below ground.
Epigeal Seedlings
Epigeal germination, on the other hand, involves the emergence of seedlings where the cotyledons are lifted above the soil surface.
As the embryonic shoot elongates, it pushes the cotyledons and growing point upward, breaking through the soil.
Once exposed to light, the cotyledons expand and begin to perform photosynthesis.
Key Features of Epigeal Germination
Cotyledons emerge above ground.
Cotyledons expand and perform photosynthesis.
Hypocotyl (stem below cotyledons) remains short.
Common in plants like lettuce, cucumber, and sunflower.
Examples of Epigeal Seedlings
Lettuce (Lactuca sativa): Lettuce is an example of epigeal germination. In lettuce seeds, the cotyledons emerge above the soil surface as the shoot elongates. Once exposed to light, the cotyledons expand and start performing photosynthesis.
Cucumber (Cucumis sativus): Cucumber seeds undergo epigeal germination. The cotyledons of cucumber seedlings emerge above ground, and as they unfurl, they begin capturing light energy for photosynthesis.
Melons (Cucumis melo): Melons, such as watermelon and cantaloupe, also exhibit epigeal germination. The cotyledons break through the soil surface and become exposed to light, where they start their photosynthetic activity.
For hypogeal seedlings, it’s crucial to plant seeds at the right depth to ensure that the epicotyl can push through the soil.
For epigeal seedlings, proper exposure to light is essential for the development of healthy cotyledons.
Understanding these examples of hypogeal and epigeal germination provides insight into how different plants handle the initial stages of growth. This knowledge can guide gardeners in providing the appropriate care and conditions for various types of seedlings.
5. Root Elongation and Establishment
The depth at which seeds are planted affects root growth and establishment.
Shallow planting encourages early root elongation near the soil surface, allowing seedlings to access surface nutrients effectively.
Deeper planting promotes downward root growth and establishment in search of deeper water and nutrient resources.
6. Seed Coat Integrity and Imbibition
Planting depth can impact seed coat integrity and imbibition (absorption of water by seeds).
Shallow planting minimizes the risk of seed coat damage during germination, enabling optimal water uptake by the seed.
7. Seedling Competition and Spacing
Proper planting depth helps maintain adequate spacing between seedlings. Appropriate spacing reduces competition for resources such as light, water, and nutrients, ensuring healthier individual plant growth.
8. How to Determine How Deep to Plant Seeds
Planting seeds at the appropriate depth is crucial for successful germination and seedling establishment.
The ideal planting depth varies depending on the size of the seed and its germination requirements.
Here are a few ways to determine the proper planting depth for different seeds:
Research the Seed: It often helps to read the seed packet, but additional research is a good idea.
Consider Seed Size: As a general rule, smaller seeds are typically planted at shallower depths, while larger seeds can be sown deeper.
Small seeds, like lettuce or petunias, may require only a light covering of soil or none at all.
Larger seeds, such as beans or squash, may need to be planted at a deeper depth.
Observe the Seed Shape: Some seeds have distinct shapes that influence planting depth. For example, flat seeds, like sunflower seeds, should be sown horizontally at a depth equal to their width.
Rounded seeds, like peas, are often sown at a depth two to three times their diameter.
Follow Recommendations: Pay attention to any specific recommendations provided for the seed variety you’re planting.
Some seeds, particularly those that require light for germination, should not be buried and should be surface-sown instead.
Soil Type Considerations: In heavy or clayey soils, it’s essential not to plant seeds too deep, as this can hinder seedling emergence.
In loose or sandy soils, consider planting slightly deeper to ensure adequate moisture retention.
Watering Considerations: Keep in mind that seeds planted too deep may struggle to reach the surface, and their access to moisture may be limited.
Planting at the correct depth ensures that seedlings can emerge and access essential water and nutrients after germination.
When to Start Seeds
Understanding the ideal timing for seed starting is crucial for successful gardening. Properly aligning seed sowing with the distinct growth preferences of warm-season and cool-season crops is essential to achieve robust and thriving plants.
What Are Warm Season Crops?
Warm-season crops flourish in the warmth of the spring through fall growing season. These crops, including tomatoes, peppers, cucumbers, and squash, exhibit specific characteristics that make them well-suited for the elevated temperatures of these seasons.
Characteristics of Warm Season Crops
Warm season crops require temperatures between 70-85°F (21-29°C) for optimal germination and growth. They thrive when exposed to abundant sunlight and have a longer growing cycle.
Requirements of Warm Season Crops
These crops need well-draining soil, ample sunlight (8-10 hours daily), and regular moisture. They are sensitive to frost, requiring careful timing for both indoor and direct sowing.
Seed Starting Times for Warm Season Crops
Indoors: Around 6-8 weeks before the anticipated planting months, aligning with the end of winter or early spring.
In Zones 9-12, we frequently start warm-season crops indoors in late December through January for planting out after the last frost date in February or March.
We also start seeds indoors or undercover in the late summer for planting out during the milder months of September and October after the heat of summer has worn down.
Outdoors: When the danger of frost has passed and temperatures consistently stay within the preferred range.
Examples of Warm Season Crops
Tomatoes
Peppers
Cucumbers
Squash (zucchini, butternut, etc.)
Eggplant
Okra
Watermelon
Cantaloupe
Pumpkin
Sweet potatoes
Corn
Beans (pole beans, lima beans, etc.)
Peanuts
Sunflowers
What Are Cool Season Crops?
Cool-season crops thrive in the moderate temperatures of fall and early spring.
These crops, including lettuce, spinach, carrots, and peas, possess unique attributes that enable them to flourish during the cooler months.
Characteristics of Cool Season Crops
Cool season crops tolerate temperatures within the range of 40-70°F (4-21°C) and often have a shorter growth cycle. They can endure light frosts and have rapid growth.
Requirements of Cool Season Crops
These crops thrive with well-drained soil, moderate sunlight (6-8 hours daily), and regular moisture. They can withstand cooler temperatures and even benefit from them.
Sowing Times for Cool Season Crops
Indoors: Begin around 6-10 weeks before the desired planting months, aligning with the end of summer or early fall.
In Zones 8-12, we can start many of these indoors or undercover during the late summer or early fall. Because of our mild winters, we can generally plant cool-season crops throughout the fall and winter, ending only in spring around late March.
Outdoors: Plan for direct sowing during the milder months of fall through early spring, avoiding extreme heat.
Examples of Cool Season Crops
Lettuce
Spinach
Kale
Broccoli
Cauliflower
Brussels sprouts
Cabbage
Carrots
Radishes
Peas
Swiss chard
Beets
Turnips
Onions
Garlic
What are Long-Season Crops?
Long-season crops encompass plant varieties that require an extended period to reach maturity and produce a harvest.
These crops demand a substantial growing season to develop fully, making them a strategic choice for gardeners in Zones 8-12 who have the luxury of extended warm weather.
Characteristics of Long-Season Crops
Long-season crops are marked by their slower growth rate and longer time to maturity. They often necessitate consistent warmth and a lengthy frost-free period to thrive.
Requirements of Long-Season Crops
These crops typically require well-draining soil, abundant sunlight, and regular moisture. The extended growing period allows them to develop deep root systems and produce bountiful yields.
Sowing Times for Long-Season Crops
Indoors: Start sowing seeds around 8-10 weeks before the projected planting months, aligning with the onset of the growing season.
You may need to pot these up after 6 to 8 weeks to provide adequate growing space.
Outdoors: Plan for direct sowing when the danger of frost has passed, and temperatures remain consistently warm.
Examples of Long-Season Crops
Tomatoes
Eggplant
Peppers
Melons (muskmelon, cantaloupe)
Winter squash (acorn, butternut)
Pumpkins
Sweet potatoes
Corn
Beans (pole beans)
Okra
What are Short-Season Crops?
Short-season crops are characterized by their ability to mature and yield within a shorter timeframe.
This often makes them quite suitable for the challenging subtropical conditions of Zones 8-12. Their fast growth rate allows you to get a harvest before it gets too hot or the pest pressure becomes overwhelming.
Characteristics of Short-Season Crops
Short-season crops have a quicker growth cycle, allowing them to complete their lifecycle before extreme weather conditions set in. They are often adaptable and can be grown as a reliable source of fresh produce.
Requirements of Short-Season Crops
These crops necessitate well-drained soil, moderate sunlight, and regular moisture. Their accelerated growth allows them to efficiently utilize available resources.
Seed Starting Times for Short-Season Crops
Indoors: Commence seed sowing approximately 4-6 weeks before the targeted planting months.
Because of their fast growth rate, it’s a good idea to sow seeds in succession. Planting another cell pack of seeds every two or three weeks allows you to plug in your small starters as space opens up in the garden.
You can use them for underplanting or filling in empty spaces. Or you can simply replace exhausted annuals in the garden.
Outdoors: Direct sow seeds when outdoor temperatures provide favorable conditions for germination and growth.
Again, succession seed starting is your friend. For many of these crops, you can direct sow in any empty spots in the garden for a quick harvest.
Examples of Short-Season Crops
Lettuce (leaf and butterhead varieties)
Spinach
Radishes
Carrots (early varieties)
Beets
Green onions
Peas
Bush beans
Turnips
Swiss chard
Planning for Big Harvests and Garden Abundance.
Understanding the distinct characteristics and growth requirements of warm season, cool season, long-season, and short-season crops equips gardeners with invaluable insights for effective garden planning.
This knowledge empowers gardeners to make informed decisions on when to start your seeds, optimizing their gardening efforts for successful yields and a thriving garden ecosystem.
By applying this understanding, gardeners can:
Optimize Seed Starting Times
Gardeners can confidently initiate seed starting activities at the appropriate times, aligning with the unique temperature preferences of each crop.
This ensures that seedlings develop robustly and are ready for transplanting when outdoor conditions are favorable.
Maximize Space Utilization
Armed with knowledge of crop growth duration, gardeners can strategically allocate garden space to accommodate the varying needs of long-season and short-season crops. This efficient space utilization enhances overall garden productivity.
Extend Growing Seasons
Gardeners can take advantage of the subtropical climate in Zones 8-12 by two growing seasons by selecting a combination of warm season and cool season crops.
This enables continuous harvests throughout the year, capitalizing on both spring and fall gardening opportunities.
Plan Crop Successions
Understanding the distinct timelines for different crop types empowers gardeners to plan successive plantings. As one crop nears maturity, gardeners can prepare to replace it with a different crop, ensuring a constant supply of fresh produce.
Mitigate Climate Challenges
Knowledge of the climate-appropriate crops allows gardeners to navigate challenges posed by subtropical conditions. By choosing short-season crops during periods of extreme heat, gardeners can ensure a successful harvest without being adversely affected by temperature fluctuations.
Enhance Biodiversity
Gardeners can foster biodiversity by incorporating a mix of warm season and cool season crops, as well as long-season and short-season varieties. This diversity attracts beneficial insects, improves soil health, and promotes a balanced garden ecosystem.
Promote Soil Health
By strategically rotating warm season and cool season crops, gardeners can prevent soil depletion and maintain optimal soil health. Different crop types have varied nutrient demands, reducing the risk of nutrient imbalances.
Seed Starting Basics: How to Start Every Type of Seed
Starting seeds in seed tray cells, soil blocks, or individual pots is a practical and efficient way to kickstart your garden.
By starting them in a controlled environment, you can ensure that only healthy plant starts end up in your garden.
If you have little space to work with, seed starting in small containers is the most efficient way to use your limited garden space.
Starting Small Seeds
Small seeds, such as those of herbs and flowers, require special care during germination due to their delicate nature.
Follow these step-by-step instructions to ensure successful germination and healthy growth of small seeds in seed tray cells:
Step 1: Select the Right Seed Tray
Choose a seed tray with small individual cells. These cells provide ample space for each seed to germinate without crowding.
Step 2: Fill Seed Tray with Growing Medium
Fill the seed tray cells with a high-quality, sterile seed-starting mix. The mix should be light, well-draining, and rich in nutrients to support early seedling growth.
Step 3: Moisten the Growing Medium
Gently water the seed-starting mix until it is uniformly moist. Avoid overwatering, as excessive moisture can lead to seed rot.
Step 4: Sow the Small Seeds
Carefully sow one to two small seeds per cell, following the recommended planting depth for each seed type. Use a toothpick or tweezers to handle small seeds delicately.
If using old seeds or multi-sowing, you can drop two or three or four seeds per compartment.
Step 5: Cover the Seeds (Optional)
Some small seeds require darkness for germination, while others benefit from exposure to light.
Refer to seed packets or reliable gardening references to determine whether covering the seeds with a thin layer of vermiculite or seed-starting mix is necessary.
Step 6: Label the Seed Tray
Use plant labels to identify the seeds sown in each cell. Proper labeling ensures easy identification as seeds germinate and grow.
Step 7: Provide Bottom Heat (Optional)
To encourage germination, consider placing the seed tray on a heating mat or a warm surface. Bottom heat can improve germination rates for some small seeds.
This may be unnecessary in Zones 9-12, although you may want to start seeds indoors during the winter months to ensure consistent temperatures provided by your home heating system.
Step 8: Provide Adequate Moisture
Place the seed tray in a shallow tray filled with water to allow for bottom watering. Ensure that the seed-starting mix remains consistently moist, but not waterlogged.
Step 9: Cover the Seed Tray (Optional)
Cover the seed tray with a clear plastic dome or plastic wrap to create a mini greenhouse effect. This helps retain moisture and humidity for optimal germination.
Step 10: Place the Seed Tray in a Warm Location
Position the seed tray in a warm location with consistent temperatures suitable for germination.
A bright windowsill or indirect light on a covered porch can provide enough light for those that require light to germinate.
Step 11: Monitor Germination and Remove Cover
Keep a close eye on the seed tray for signs of germination. Once the seeds start sprouting, remove the cover to prevent mold growth and provide better air circulation.
For most plants, you’ll need to ensure that the new sprouts receive some light. Even seeds that require darkness to germinate will require sunlight once they’ve broken the surface.
Step 12: Thin Seedlings (If Needed)
If more than one seed germinates in a cell, gently thin the seedlings to leave only the healthiest one to grow.
You won’t want to do this if you’re multi-sowing, however.
Seed Starting for Large Seeds
Starting large seeds in soil blocks or pots provides ample space and nutrients for robust seedling development.
Large seeds, such as those of melons, cucumbers, and beans, benefit from a more substantial growing medium during germination. They grow so quickly that they’ll outgrow a smaller container before they’re ready to plant out.
Some plants benefit from up to three months of supervised cultivation before planting out, including tomatoes, peppers, and eggplant.
These long-season annuals are best planted once they’re well developed. To avoid stressing them with constant transplanting into larger containers, start with large soil blocks or small pots for germination.
Step 1: Choose the Right Containers
Select suitable containers for starting large seeds. Opt for individual pots or soil blocks with sufficient space to accommodate the size of the seeds and allow for root growth.
Step 2: Prepare the Growing Medium
Use a well-draining, nutrient-rich potting mix suitable for seed starting. Fill the containers with the growing medium, leaving about 1/2 inch (1.25 cm) space from the rim for easy watering.
Step 3: Water the Growing Medium
Moisten the potting mix thoroughly to ensure even moisture distribution. Avoid overwatering, as large seeds may rot in excessively wet conditions.
Step 4: Sow Seeds
Plant one large seed per pot or soil block. You can plant two per block when using old seeds.
Place the seed on top of the growing medium at the recommended planting depth for each specific seed type.
Step 5: Cover the Seeds
Cover the seeds with the recommended depth of soil mix.
Step 6: Label the Containers
Label each container or tray of soil blocks with the name of the plant variety to avoid confusion as the seedlings grow.
It’s also useful to add the date to your tags. This allows you to plan for succession crops based on the time to germinate.
Step 7: Provide Bottom Heat (Optional)
If starting in an unheated room during winter, using a heating mat or placing the containers on a warm surface encourages germination.
Step 8: Maintain Adequate Moisture
Keep the potting mix consistently moist by bottom watering the containers. Avoid overhead watering, which may dislodge the large seeds or create uneven moisture levels.
Step 9: Monitor Germination and Adjust Light
Keep a close eye on the containers for signs of germination. Once seedlings emerge, provide adequate light to ensure healthy growth.
Adjust the position of the containers to prevent leggy seedlings.
Step 10: Transplant Seedlings (If Needed)
As the seedlings grow, they’ll develop true leaves and become crowded in their pots. If the conditions in the garden aren’t optimal yet, consider transplanting them to larger containers or individual pots for further growth.
Step 11: Harden Off Seedlings
Before transplanting the seedlings outdoors, gradually expose them to outdoor conditions over several days. This process, called hardening off, prepares the seedlings for the change in environment.
How to Direct Sow Small Seeds in the Garden
Direct sowing small seeds in the garden allows for a natural and straightforward approach to gardening.
Whether you’re growing vegetables, herbs, or delicate flowers, direct sowing is the easiest method for many plant species.
I personally prefer seed starting in blocks or cells first, but if you’re establishing a wildflower meadow or looking to create large swathes of bedding annuals, direct sowing really is the most straightforward method.
Direct Sowing Small Seeds
Follow these step-by-step instructions to ensure successful germination and growth when direct seed starting small seeds in the garden:
Step 1: Choose the Right Location
Select a garden location that receives the appropriate amount of sunlight for the specific plant species you’re sowing. Consider factors like soil drainage and exposure to wind when choosing the site.
Step 2: Prepare the Soil
Clear the area of any weeds, rocks, or debris. Loosen the soil to a depth of about 2-3 inches (5-8 cm) using a garden fork or trowel. Rake the soil surface to create a smooth, level bed for sowing.
Adding a layer of compost or mixing some composted manure into the first inch or two of soil will help provide a good environment for your seeds to grow.
Alternatively, many wildflower seeds prefer poor soil condition, so don’t provide any garden amendments for these hardy troopers.
Step 3: Sow the Small Seeds
Gently sprinkle the small seeds evenly over the prepared soil surface. Follow the recommended planting depth and spacing for each seed type.
For very tiny seeds, mix them with fine sand or vermiculite to help distribute them more evenly.
Step 4: Cover the Seeds
Depending on the seed type, consider covering the seeds with a thin layer of fine soil, vermiculite, or compost. Some small seeds benefit from being exposed to light for germination, so do not cover them if indicated.
Step 5: Water the Seeded Area
After sowing, water the area gently to settle the soil and ensure good seed-to-soil contact. Avoid heavy watering, as it may dislodge the small seeds or cause them to clump together.
Step 6: Monitor Moisture Levels
Keep the seeded area consistently moist until germination occurs. Use a fine mist or a gentle watering can to avoid disturbing the seeds.
Step 7: Thin Seedlings (If Needed)
Once seedlings emerge and grow their first true leaves, thin them out if they appear crowded. This step ensures each seedling has sufficient space to develop properly. Consult the instructions on your seed packet for plant spacing.
Step 8: Mulch the Area (Optional)
Once seeds have germinated, been thinned, and have developed several sets of true leaves, consider applying a thin layer of organic mulch around the seedlings. This will conserve moisture, suppress weeds, and help to maintain an even soil temperature.
How to Direct Sow Large Seeds in the Garden
Direct sowing large seeds in the garden is a simple and efficient way to grow a variety of plants.
Although I generally recommend seed starting in blocks or cell trays and then planting out, species with deep tap roots, hypersensitive roots, or those that grow extremely quickly can be direct sown.
Whether you’re planting beans, squash, or sunflowers, follow these step-by-step instructions to ensure successful direct sowing of large seeds in your garden:
Step 1: Choose the Right Location
Select a sunny location in your garden with well-draining soil. Ensure that the chosen spot provides ample space for the large plants to grow.
If seed starting for climbers or vines, it’s a good idea to install your trellis or support structure before sowing your seeds.
This 1) prevents any damage done to delicate seedlings by trying to install the support after it has started growing. And 2) Allows you to better eyeball plant spacing by using the trellis or support as a measure.
Step 2: Prepare the Soil
Clear the area of any weeds, rocks, or debris. Decide where you’ll be planting each seed and cover each location with several inches of compost
If your soil is highly compacted, you can loosen the soil to a depth of about 4-6 inches in each location. We generally recommend no-dig methods and try to avoid disturbing the structure and living organisms below the soil surface.
Step 3: Sow the Large Seeds
Poke a hole to the depth recommended for the seeds and sow them directly into the prepared space.
Step 4: Cover and Firm the Soil
After sowing, cover over with the loose compost you provided. Firm the soil or compost over the seeds gently with your hands.
Step 5: Water the Seeded Area
Water the seeded area thoroughly after planting to help settle the soil around the seeds. Adequate watering is essential for proper germination.
Step 6: Monitor Moisture Levels
Keep the seeded area consistently moist until germination occurs. Regularly check the soil moisture and water as needed, especially during dry spells.
Step 7: Thin Seedlings (If Needed)
Once the large seedlings emerge and grow their first true leaves, thin them out if they are too close together. Thinning allows each seedling to have enough space to develop and access sunlight and nutrients.
Step 8: Feed and Mulch Your Plants
Once plants are a few inches high and have developed several sets of true leaves, you can apply vegetable fertilizer and mulch around the seedlings.
Consider applying a slow-release organic vegetable fertilizer or organic compost to support the growth of your plants. These once-a-month or once-a-season amendments can really save you many hours of hard work in the garden.
Water fertilizer or compost in well after application and then proceed to mulching.
Mulch can help retain moisture and keep the soil cool enough to support the beneficial microbiological organisms that plants need for healthy growth.
Consider straw or hay for mulching vegetable beds.
Wood chips are an excellent mulch for perennial plants, but don’t break down quickly enough for annual plantings and may interfere with your plants in future seasons.
Common Problems in Seed Starting, Prevention, and Remedies
Starting seeds can be a rewarding endeavor, but it is not without its challenges. Gardeners may encounter various problems during the seed starting process, leading to germination failure or stunted seedling growth.
Here is a list of common problems that may occur when starting seeds, along with their symptoms and remedies:
1. Problem: Poor Germination
Symptoms: Low percentage of seeds germinating or seeds failing to sprout.
Remedies: Ensure seeds are fresh and not expired. If you decide to use old seed up, double up on the number you plant.
Make sure the temperature is right for your seed type. You can find a chart of optimal temperatures on our website here.
You may have over-covered seeds that require light to germinate. Sometimes, seed packets lie and I’ve seen many that say to plant seeds ½ deep that won’t germinate without sunlight. Do some additional research on your seeds to be sure.
Avoid overwatering. This can cause seeds to rot before they can sprout.
2. Problem: Damping Off
Symptoms: Seedlings appearing weak, wilting, and collapsing at the soil level due to fungal infection.
Remedies: Use sterile potting mix and clean containers.
Improve air circulation around seedlings to reduce humidity.
Avoid overwatering and allow the soil surface to dry between watering.
3. Problem: Leggy Seedlings
Symptoms: Seedlings with elongated and weak stems reaching for light, often resulting from insufficient light or crowded conditions.
Remedies: Provide adequate light to seedlings, either with grow lights or by placing them in a sunny location. Thin out seedlings to allow ample space for each to grow.
In some cases, particularly tomatoes and peppers, you can salvage leggy seedlings by replanting them deeply into a larger container.
4. Problem: Seedlings Turning Yellow
Symptoms: Seedlings showing yellowing of leaves, usually due to nutrient deficiencies or overwatering.
Remedies: Although most seeds contain enough nutrients to support the initial growth of the seedlings, you may run into a nutrient deficiency if the seedling is in the cell too long.
You can use some dilute balanced liquid fertilizer when bottom watering.
To prevent this from happening, pot up your seedlings into larger containers sooner than later.
Yellowing may also be caused by overwatering. Bottom water with a very diluted fertilizer and allow the cells or pots surface to dry out before watering again.
5. Problem: Seedlings Growing Slowly
Symptoms: Seedlings not showing significant growth over time, possibly due to poor soil quality or low temperatures.
Remedies: Ensure the growing environment is warm enough to support seedling growth. Add a heat mat or move trays to a warmer location.
6. Problem: Fungal or Bacterial Diseases
Symptoms: Seedlings displaying discoloration, wilting, or lesions caused by fungal or bacterial infections.
Remedies: Remove affected seedlings promptly and destroy them.
Improve air circulation and avoid overcrowding to reduce disease spread. Use sterilized containers and tools.
Often, seed trays can show signs of algae growth on the tops. This is usually caused by exposure to sunlight when damp and is relatively harmless. The green sheen on top of your seed trays is annoying and unsightly, but it’s usually no detriment to the plant.
7. Problem: Insect Pests
Symptoms: Seedlings showing signs of pest infestations, such as chewed leaves or visible insects.
Remedies: Monitor seedlings regularly for pests and take appropriate measures, such as handpicking or using organic insecticides, to manage infestations.
If starting seeds outside, you may even find rodents digging into your seed trays to collect species like sunflowers, melons, or squash seeds. Cover seed trays with sturdy covers at night. You can also move them to a protected spot (like indoors) until they have sprouted to prevent this problem.
8. Problem: Lack of Hardening Off
Symptoms: Seedlings showing shock when transplanted outdoors due to insufficient acclimatization.
Remedies: Gradually expose seedlings to outdoor conditions for a few hours each day over several days before transplanting, a process known as hardening off.
If possible, transplant your young seedling during a cloudy day, especially if there’s rain in the forecast. I find this helps them transition to outdoor garden life much better.
9. Problem: Overcrowding
Symptoms: Seedlings growing closely together, leading to competition for resources and weak growth.
Remedies: It’s tough, but it has to be done. Thin out seedlings to provide adequate space for each plant to grow and develop.
10. Problem: Insufficient Watering
Symptoms: Seedlings showing signs of wilting or dry soil due to inadequate watering.
Remedies: Water seedlings consistently and ensure the soil remains evenly moist without becoming waterlogged.
FAQ
When is the best time to start seeds?
For successful seed starting in gardening Zones 8-12, there are generally two good times to start seeds. The first is four to six weeks before the last frost date in the spring for planting out in February and March. The second is in late summer in July and for planting out in September and October. This will vary depending on whether you’re planting warm season or short season crops.
Why should you start seeds indoors?
Starting seeds indoors in Zones 8-12 offers several benefits. It extends the growing season, giving delicate crops like tomatoes and peppers a head start before planting out. It also provides a controlled environment for germination, out of excessive heat and heavy rainfall.
Where is the best place to start seeds indoors?
In Zones 8-12, where warm and humid conditions prevail, the best location to start seeds indoors is a well-ventilated area with consistent warmth and ample sunlight. Choose a spot that receives abundant natural light or use grow lights. Be cautious not to overheat the seedlings. Adequate airflow is essential to prevent fungal issues, so ensure good ventilation while keeping the humidity in check.
How many seeds per starter pot should you sow?
When seed starting, it’s essential to strike a balance between providing adequate space for each seedling’s growth and maximizing your planting efficiency. Generally, aim to sow 2-3 seeds per starter pot, ensuring a higher likelihood of successful germination. If using old seeds from earlier seasons, consider sowing 3 to 4 seeds. This approach accounts for potential variations in seed viability and helps ensure at least one healthy seedling per pot. Once seedlings develop their first true leaves, you can carefully thin out the weaker seedlings, leaving the strongest ones to continue growing.
How many lumens for seed starting should a grow light have?
When using grow lights for seed starting, it’s important to provide your seedlings with the optimal amount of light to promote healthy growth. For most vegetable and flower seedlings, aim for a grow light that provides around 1000 to 1500 lumens per square foot. This light intensity mimics the brightness of natural sunlight and encourages sturdy stem development and vibrant leaf growth.
When do you begin starting fall seeds in Zones 8-12?
In Zones 8-12, the timing for starting fall seeds varies based on the type of seed you’re growing. In general, you’ll sow warm-season crops in late summer to plant out in the fall. You’ll sow warm-season crops again from late December through January to plant out after your last frost date.
For cool season crops, you can start seeds indoors in late summer and plant out from October through March as the weather allows. Most cool season crops can be planted in Zones 8-12 throughout the winter.
How many hours of light do seeds need to germinate?
Seeds require varying amounts of light for germination, depending on the plant species and its specific light preferences. In general, many seeds benefit from around 12-16 hours of light per day during the germination process. Remember that some seeds require darkness to germinate and should be covered or placed in a dark environment during this phase.
What are the 4 requirements for seed germination?
The four primary requirements for seed germination are water, proper temperature, oxygen, and suitable soil or growing medium. These factors work in conjunction to trigger the biochemical processes necessary for a seed to break dormancy, swell, and initiate growth.
Which seeds need light to germinate?
Seeds that require light for germination include lettuce, spinach, arugula, kale, radish, cilantro, dill, nasturtium, calendula, zinnia, sweet alyssum, and pansy. Providing these seeds with exposure to light during germination is essential for their successful sprouting and subsequent growth.
What not to do when germinating seeds?
When seed starting, it’s important to avoid overwatering, as excessive moisture can lead to fungal growth and rot. Additionally, refrain from planting seeds too deeply, as they may struggle to reach the surface. Avoid using contaminated soil, as it can hinder germination. Finally, placing seeds in an area with insufficient light or incorrect temperature can delay or prevent germination.
How do you know when a seed is germinating?
You can identify germination by observing the emergence of the seedling from the growing medium. As the seed absorbs water and swells, the outer shell cracks, and a tiny shoot, called the radicle, emerges. This initial growth is followed by the emergence of the seedling’s first leaves, called cotyledons.
How do you know if seeds are too old?
Seeds that are too old may exhibit reduced germination rates or fail to germinate altogether. You can assess seed viability by performing a simple germination test. Place a specific number of seeds on a damp paper towel, seal it in a plastic bag, and keep it in a warm location for the recommended time period. Afterward, count the number of seeds that have sprouted. If a significant percentage fails to germinate, it indicates reduced viability.
Which is the best seed starting mix?
We recommend a blend of coconut coir, perlite, compost, and a slow-release fertilizer that contains beneficial mycorrhizal fungi and beneficial bacteria. You can purchase a commercial blend like ProMix, or make your own. Avoid heavy garden soil or potting mixes, as they can impede seedling development.
How do I make my own seed starting mix?
A basic recipe includes mixing together coconut coir and perlite in equal parts. To make a larger batch, use a bucket or large container and thoroughly blend the ingredients until well combined. Optionally, you can add a small amount of finely screened compost or vermicompost for added nutrients. we also recommend adding a slow-release fertilizer for seed starting in small pots or soil blocks where the plants will remain for many weeks before planting out. This DIY mix offers a cost-effective and customizable solution for starting seeds, ensuring a suitable medium for germination and early growth.
What is a good recipe for soil block mix?
Mix the following components thoroughly to create a peat-free soil block mix. Coconut coir serves as an environmentally friendly alternative to peat moss, providing adequate moisture retention and aeration. It also adds structure to the soil block mix to ensure they hold together. Compost adds nutrients to support seedling growth, while vermiculite and perlite contribute to proper drainage and texture. This peat-free mix offers a sustainable option for starting seeds in soil blocks, promoting healthy germination and early development.
If you’ve been paying attention to the weather forecast, it’s likely that the last thing on your mind is what to plant in July in Florida. The heat indexes have easily been in the triple digits, and the rainfall reports are way down.
The good news is that if you’re just as addicted to gardening as I am, there are a few things you can do to feed that urge, even in all this heat.
That’s right, Florida gardeners — it’s July! It’s not time to get back into the garden quite yet, but it IS time to start collecting supplies and sowing seeds indoors and under cover.
It’s time to get ready for the fall garden. Start stocking up on your favorite seeds and get cracking. It’s go time.
It’s Time to Get Seeding!
We had a ridiculously cold winter and a frighteningly dry spring. It’s even been a dry summer.
While you may have given up on your tomatoes months ago, you can certainly try again now.
While you can grow nearly anything between September and December in Florida (at least Central and South Florida), the time to start long-season crops is right now.
Tomato Time
Start tomato seeds in mid-July through Mid August in order to plant out into the garden or containers in September.
You’ll want to be sure that the temperatures have dropped low enough that tomatoes can flower and form fruit, so keep an eye on the weather.
The best way to be ready to have well-developed plants to add to the garden as early as feasible is to start them indoors in July.
You can grow your seedlings under cover and pot them up as they grow for up to three months if necessary. In containers, you can better control their exposure to scalding sun and downpouring rains.
We’ll be selling a new line of vegetable starters suited for Florida gardens in our nursery. If you’re not nearby, we invite you to check out our seeds for sale. We’ve curated the best varieties for the hot & humid Southeastern states, Gulf Coast region, and blistering hot Southwest garden.
And all of our tomato seeds come with a free pack of companion French Marigolds, because we know the tragedy that is root knot nematodes.
Peppers
Everyone loves peppers because they’re easy to grow, come in a wide variety of colors, and have different flavor profiles for a range worldwide cusines.
But boy, can they be lazy.
Peppers can take forever to take off. I don’t know how many times I’ve stared pointedly at cell trays of peppers wondering whether to even bother misting them after two weeks.
Because they do take some time to get going, start them now so you’ll have time to plant them out as early as possible.
They don’t like the cold at all, so if we get another chilly December, it will be nice to get some sweet bells before then.
Check out our California Wonder pepper seeds to plant in July in soil blocks or cells.
Protecting Your Seedlings
Sowing under cover in Florida isn’t an issue of protecting delicate seedlings from the cold. Here, it’s a matter of preventing them from getting washed out by heavy rainstorms.
Starting seeds out of the elements can help keep them from burning up when the heat index is in the triple digits and even your hot peppers are getting scalded.
Whether you start them on a patio, lanai, or indoors, make sure they get plenty of light once the seeds germinate.
Since the long-season peppers and tomatoes like to germinate in warm temperatures, keep your seed starting trays somewhere where they’ll stay at a minimum of 75°F.
They’ll also need some airflow, which not only reduces the chance of dampening off but also stimulates the growth of strong, sturdy stems.
What Else to Plant in July in Florida?
Along with starting your Fall crops by seed, there are also a few heat-loving veggies you can direct sow. Summer is great for planting Okra and Southern Peas. If you’re not a big fan of black-eyed peas or cowpeas, you can also sow them as cover crops to improve your soil for fall planting out.
If you’ve already sown or purchased starts of tropical vegetables or Mediterranean herbs, you can add them to your garden. You’ll find exotic veggies like Okinawa spinach or Longevity spinach at many Florida nurseries. We sell Okinawa spinach starts too.
Make sure your Mediterranean herbs have plenty of drainage, as they can get root rot from our persistent (and seemingly unending) rainfall.
And don’t forget to plant flowers! Many annual flowers you can add to the garden will attract pollinators and beneficial insects that help nurture and protect your crops. Some will grow and bloom in just 60 to 75 days. Quick-growing annual flowers add beauty and diversity to your garden, and many provide critical root exudates for your soil.
Start your broccoli and tomato plants in late July in Central and South Florida.
Here’s what you can start sowing in July in Florida, as well as other Gulf Coast states in the U.S>
South Florida (Zones 10 to 11)
If you’re in South Florida, and some parts of coastal Central Florida, the weather is steaming, even dangerous.
However, it changes fast, so it’s a good idea to be ready with healthy vegetable plants starts so you’re ready to plant out in September.
Scarlet Sage loves the heat and will draw in bees and hummingbirds to your garden.
Pace Yourself When Gardening in Florida in July
Don’t try to start everything at once. Remember, it’s still very hot out there, and it looks like it will stay dry. So, no regular summer storms to cool things off a bit. There’s still a risk of heat exhaustion and skin damage from UV rays.
The wonderful thing about gardening in Florida is our mild autumn and the length of our growing season. Start with vegetables that take the longest time to mature, such as tomatoes and peppers. In Central and South Florida, you can usually plant these out as late as October and overwinter them by covering them on cold nights.
I’m never happy to see the days get shorter, but I’m always excited for the Fall gardening season. To make the most of it, you can get many of your vegetables and flowers started in July.
It’s been a cold winter and a dry spring, but now it’s June and the summer garden in Central Florida is … well … hot, wet, full of bugs, and still struggling.
But that’s okay. Zone 10 and Zone 9 Florida gardening is usually filled with challenges. Who else still has debris from Hurricane Ian or Hurricane Nicole? I know I do!
The rains have finally started, although it may be too little, too late. We need the rain badly, and for anyone growing perennials or trying to establish a food forest, the rains are always welcome.
Vegetable Gardening – What Can I Plant in June in Florida?
What are you planting in June this year in Florida? Are you ready for the challenge? There are a few vegetable varieties, specifically tropical edibles, that love our summer heat and humidity.
Very few of the traditional vegetables will make it if planted between now and August. It really isn’t the heat – it’s the humidity. In fact, the temperature often settles to a relatively comfortable level in the summer, thanks to the overcast skies and the regular rains.
But anything with any susceptibility to fungal disease won’t make it.
So long, tomatoes!
It’s been fun, cukes!
Sayonara, squash!
A few vegetables you can plant in June in all Florida gardening zones include:
Note that basil, oregano, and rosemary love the heat but hate the humidity. If you can keep them under some cover to keep them from drowning, they will love you for it.
What I’m planting in June 2023
Vegetable gardening is taking a bit of a backseat in my backyard this year. I still have peppers and watermelons that I’m hoping to keep harvesting for a while.
The yard-long beans are producing faster than I can prep them for storage.
But the big project this summer is nursery expansion.
We’ll be adding more covered space with a new greenhouse (or two) to increase the growing area. And the gardening focus is on building inventory.
I’ll be air-layering star jasmine and propagating cuttings of plumbago, fire bush, bougainvillea, and golden dew drop.
And of course more mulberry trees.
Summer is also a good time to start perennial flowers from seed. I’m hoping to have more salvias and blue butterfly pea vine plants to ship soon.
I’ll also be stocking up the inventory for more annual seeds for the shop.
Fruit Trees Love the Summer Garden in Central Florida
My family loves bananas, and it’s a good thing, because we have dozens of banana “trees,” with at least 10 in flower or fruiting.
The rainy season is a good time to get your own banana circle started. Bananas need a lot of moisture, especially to get established.
I’m hoping to start carrying banana plants in the nursery next spring, but for now, I’ll just enjoy being a home grower.
Flower Gardening — What can I plant in June in Florida?
If you’re uninspired by the small range of edibles to grow in the summer garden in Central Florida, you’ll be happy to know that adding flowers for pollinators is always in season.
You’ll find a wide range of heat-tolerant and even heat-loving flowers that attract bees and butterflies to your yard. Getting a good pollinator garden established now will come in handy in September and October when your cucumbers need pollinating.
Some great varieties for Florida gardening zone 9 and 10 are:
If you’ve ever wept over pounds of scabby-looking tomatoes, pocked with yellow spots, and covered by horrible little orange insects, then you know the pain of dealing with leaf-footed bugs (squash bugs) is real.
I tried this.
It works.
You really need to soak the little buggers down, but it works.
Go forth and claim back your garden from the leaf-footed menace.
Southern Garden is a participant in the Amazon Services LLC Associates Program, an affiliate advertising program designed to provide a means for sites to earn advertising fees by advertising and linking to Amazon.com.
We may earn a small commission from some of products or educational resources discussed on this site.

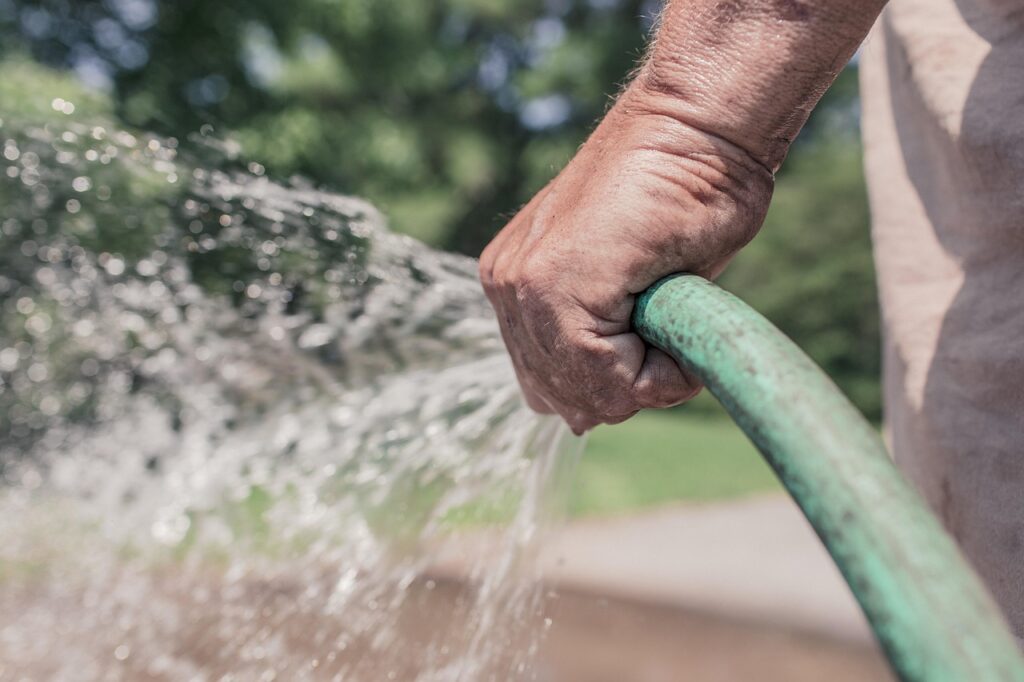
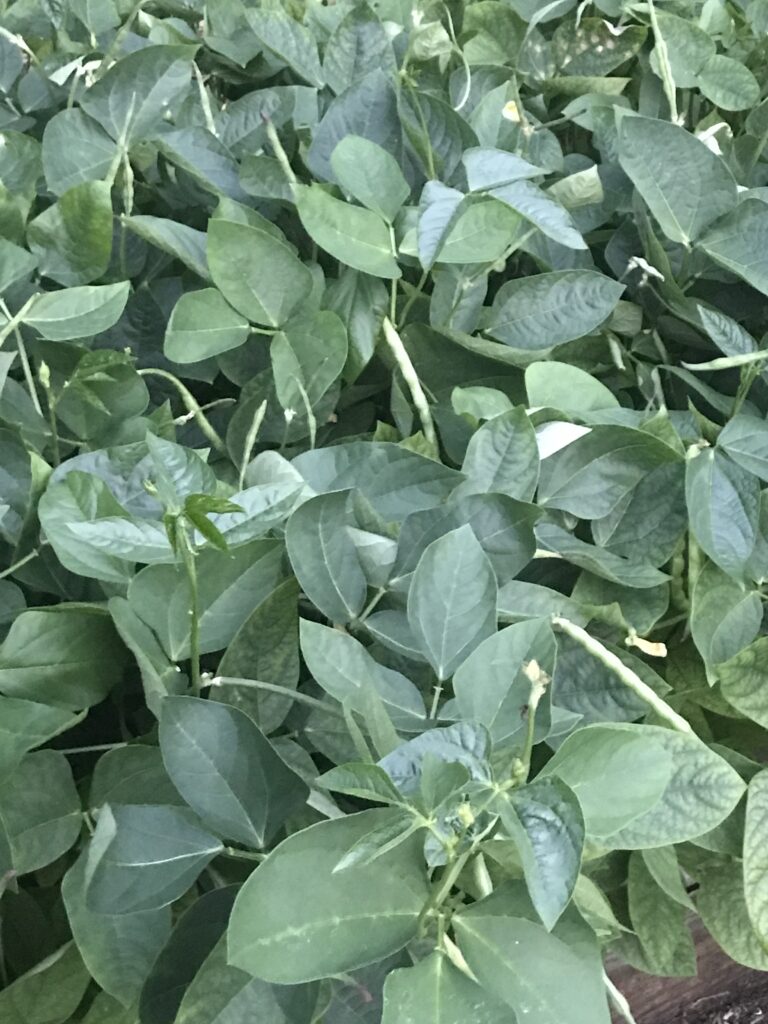
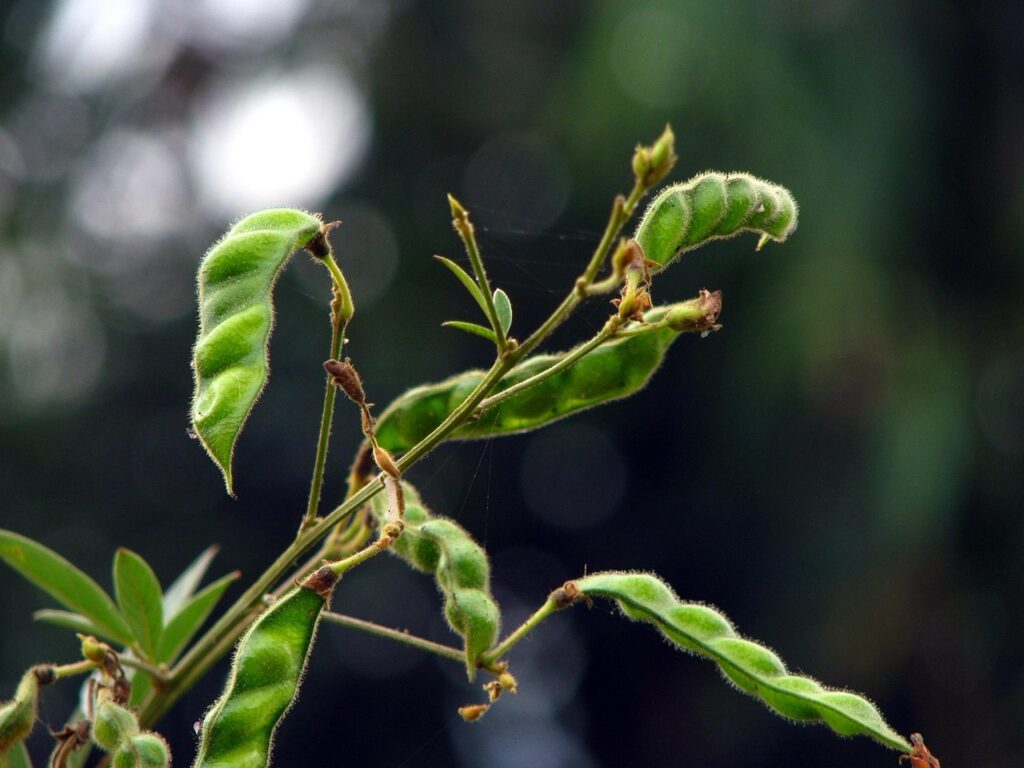
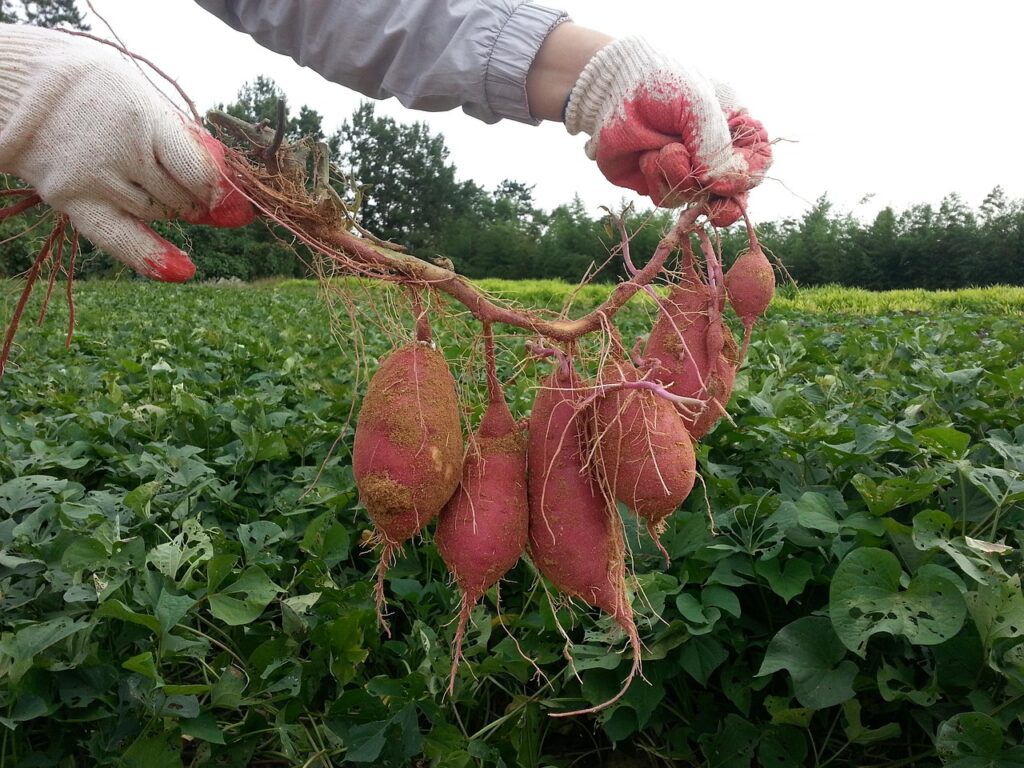
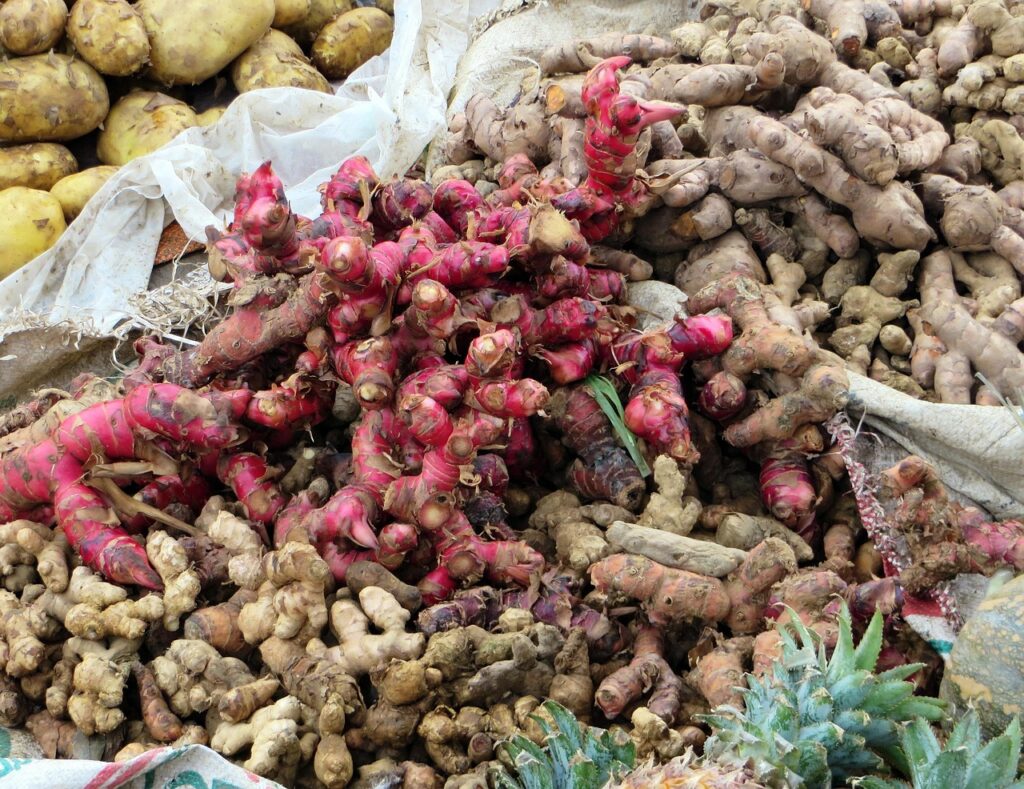

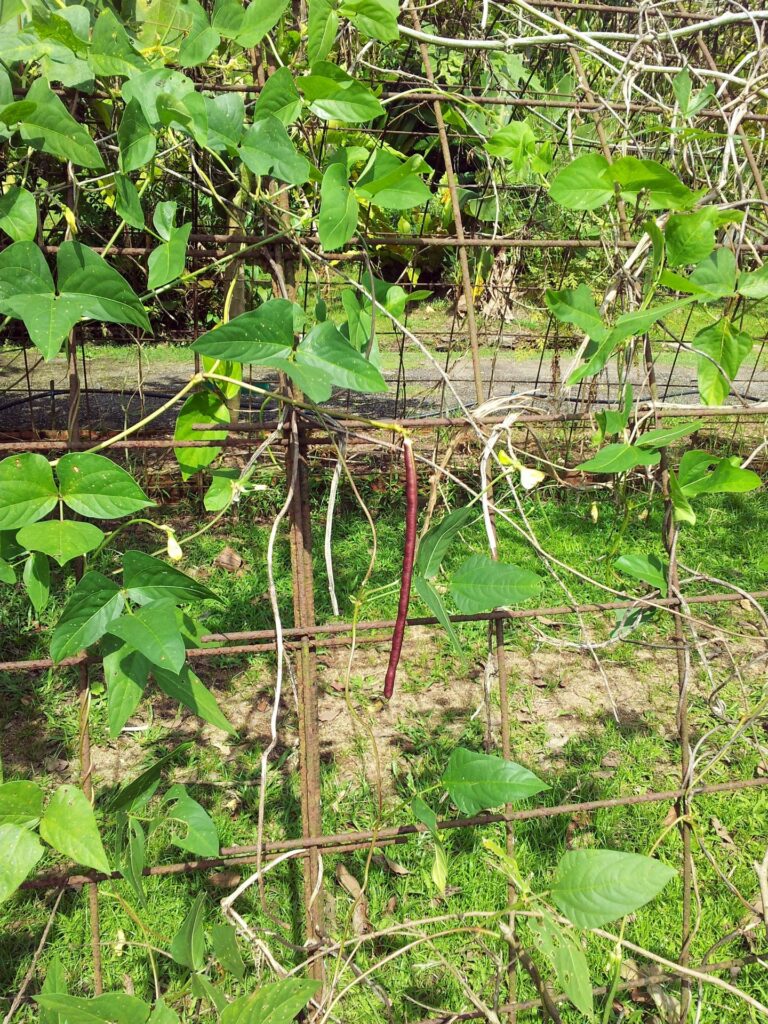
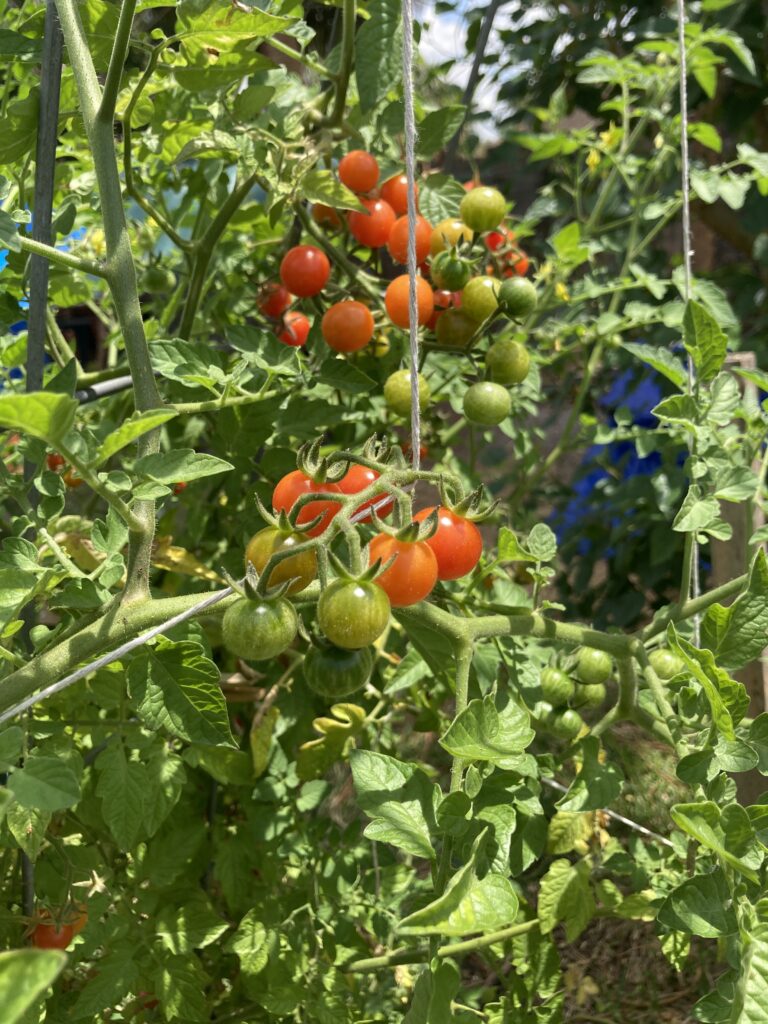
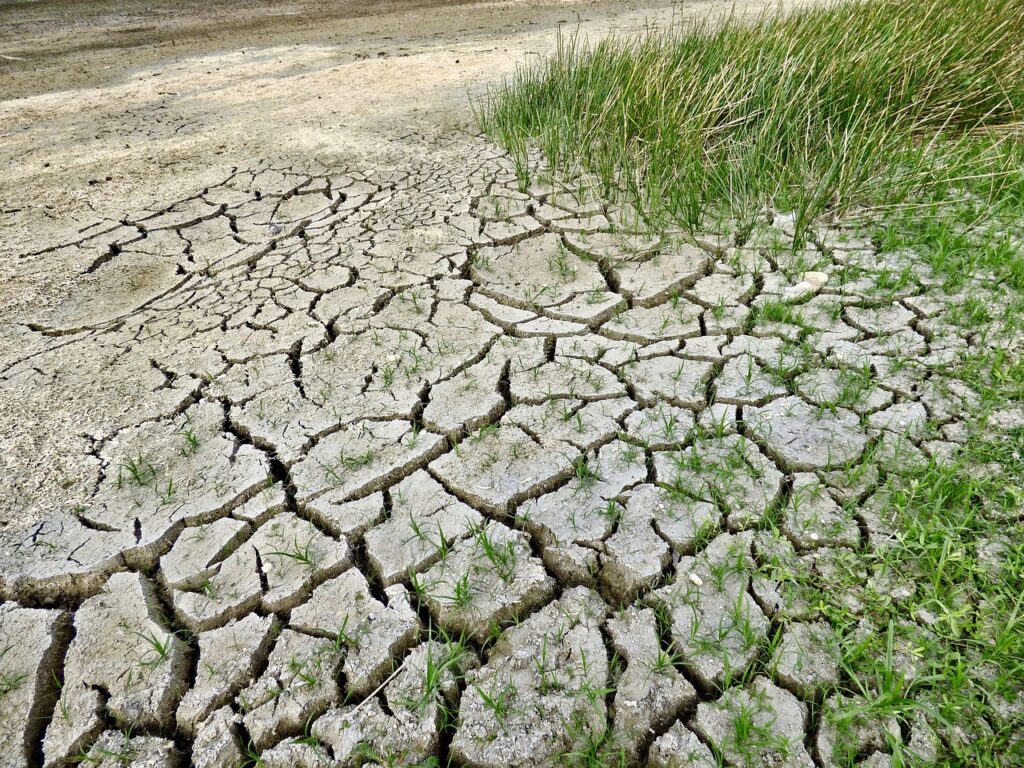
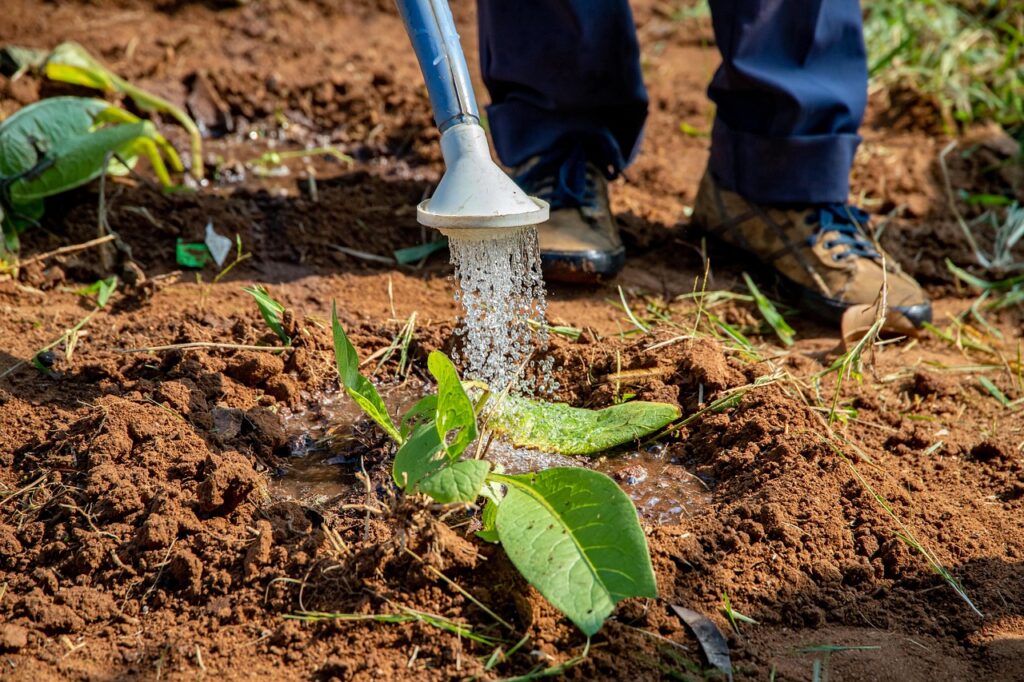
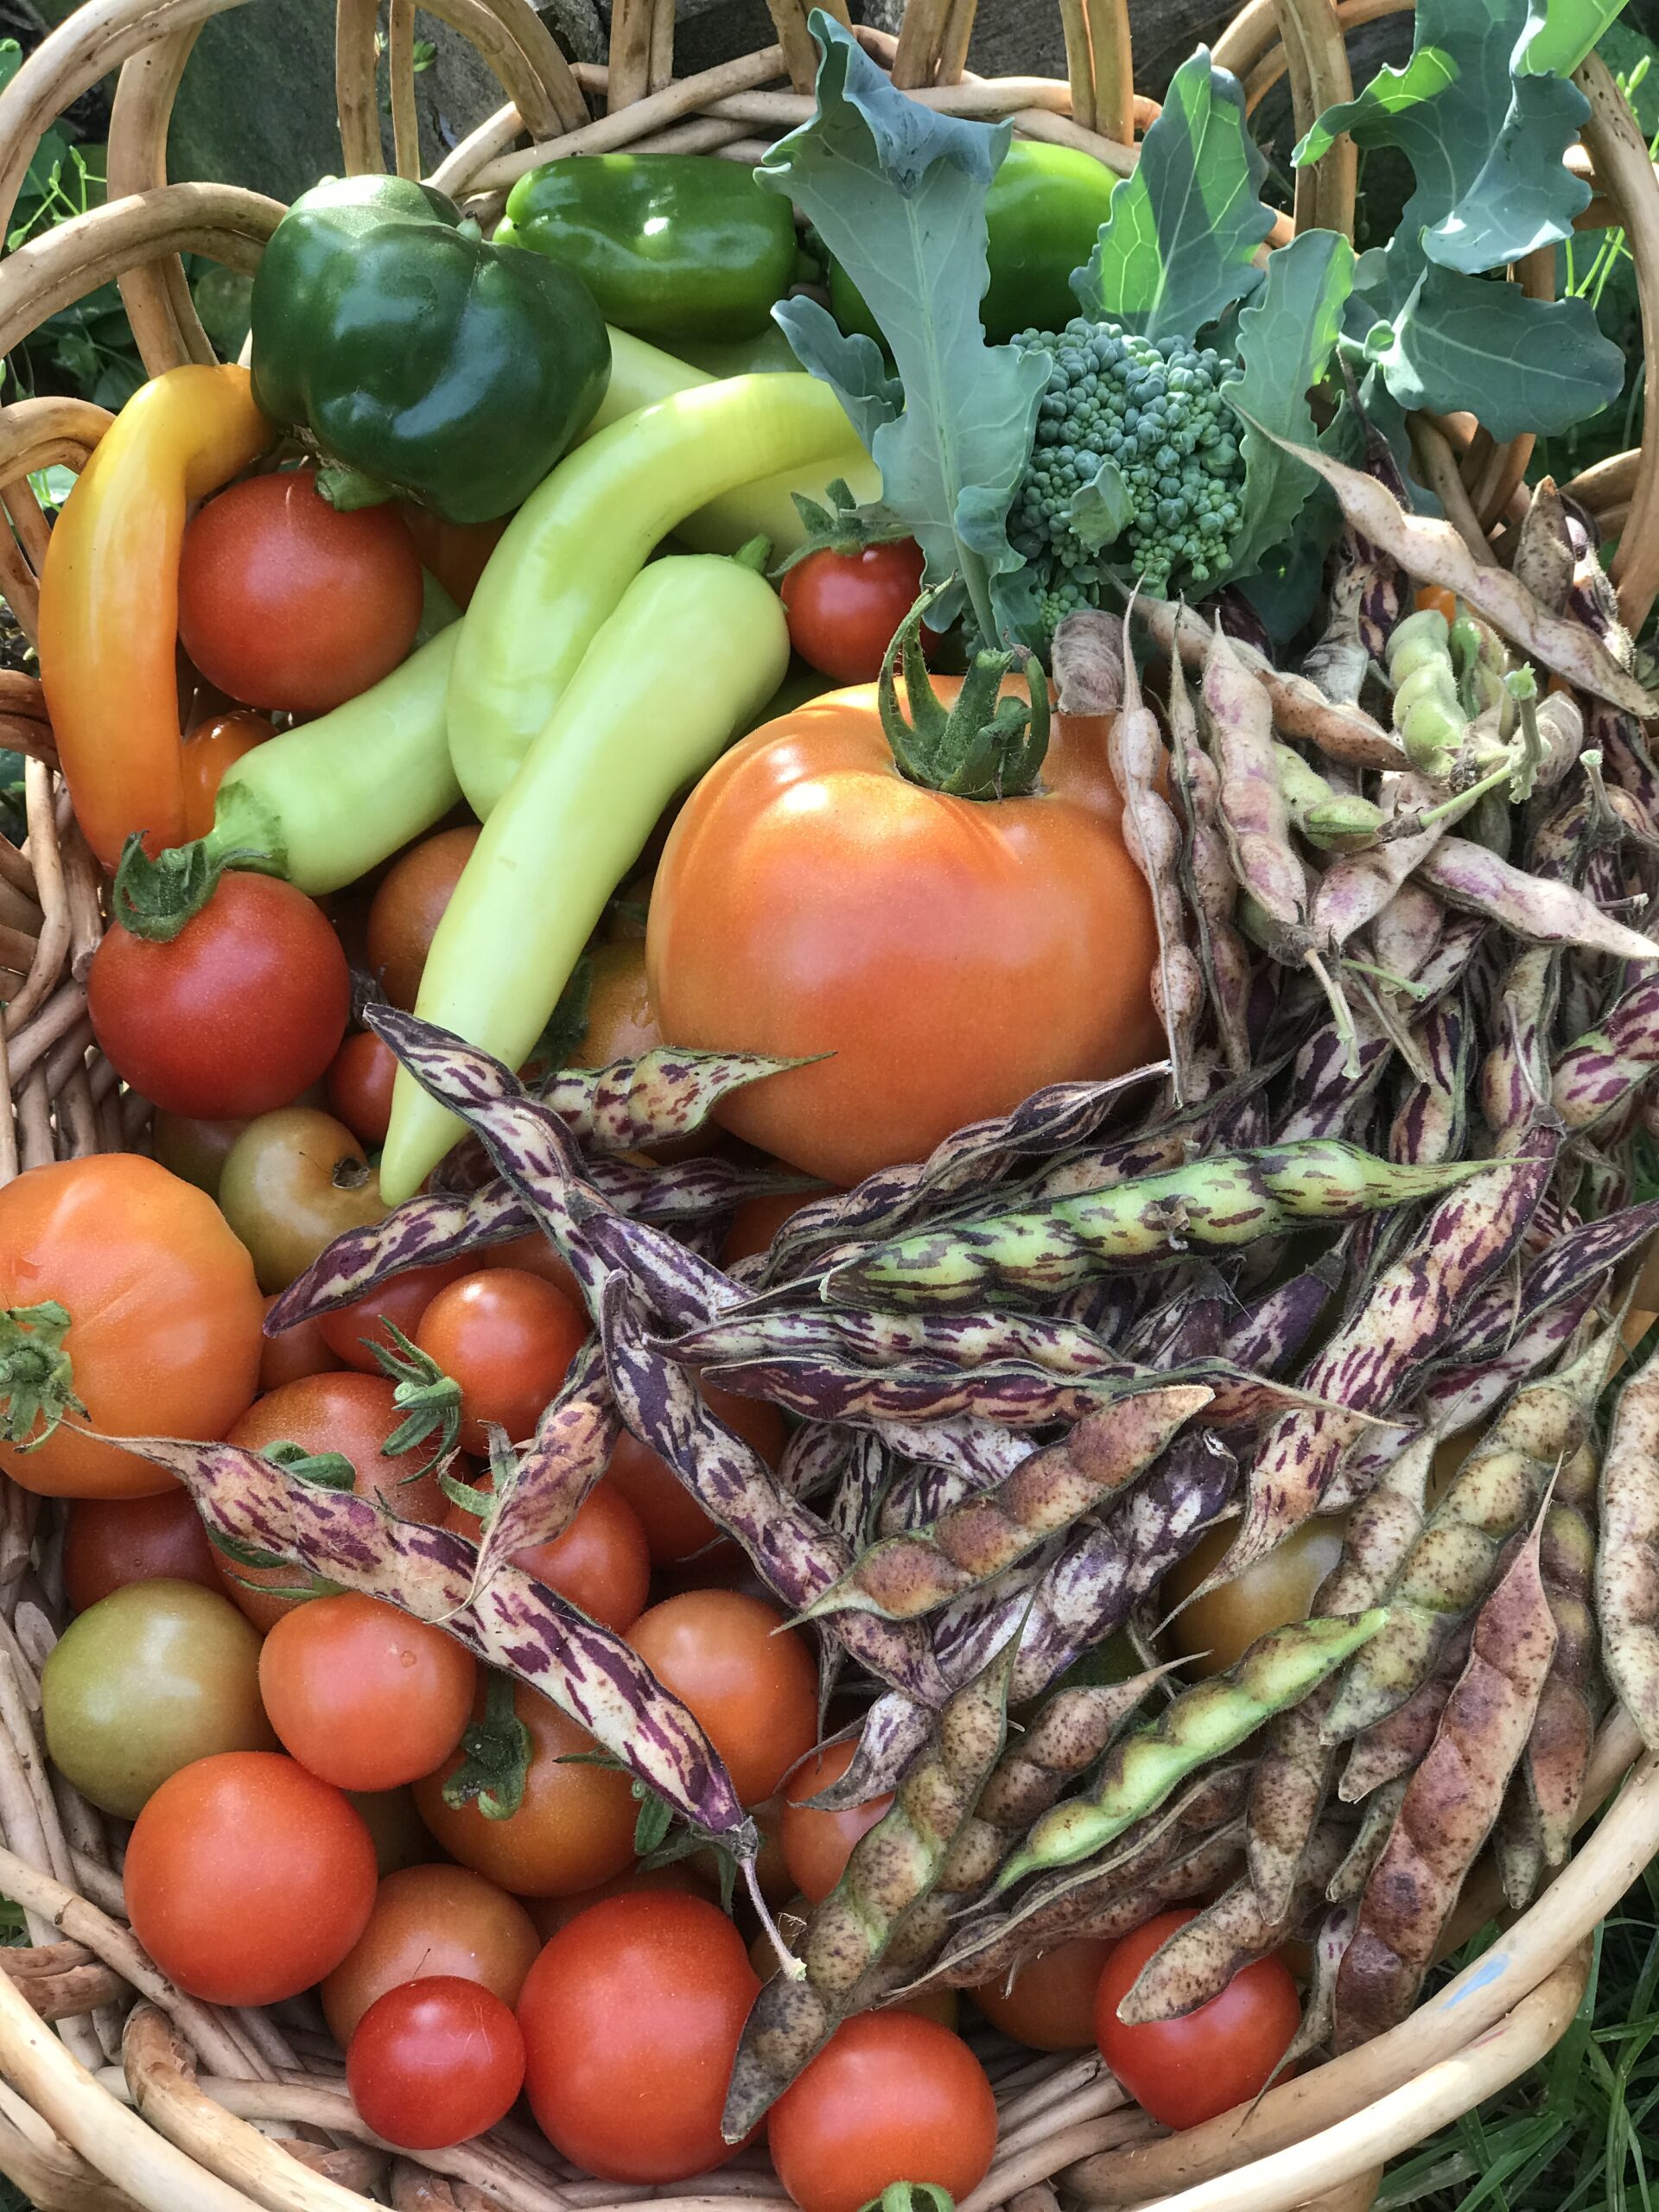
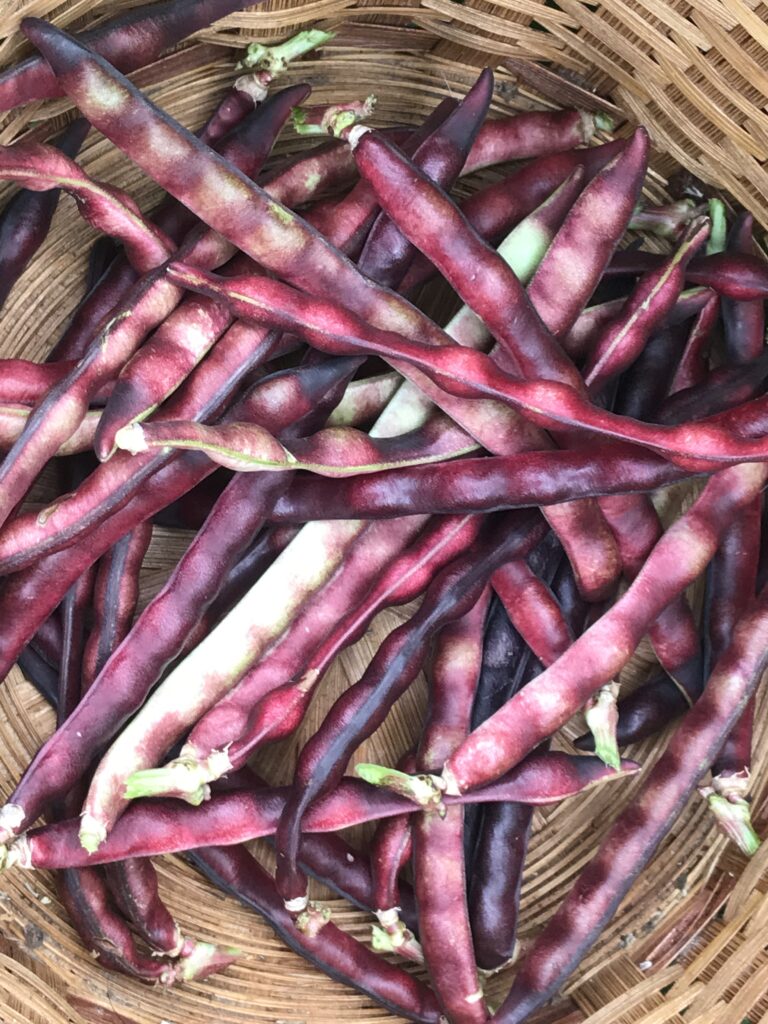


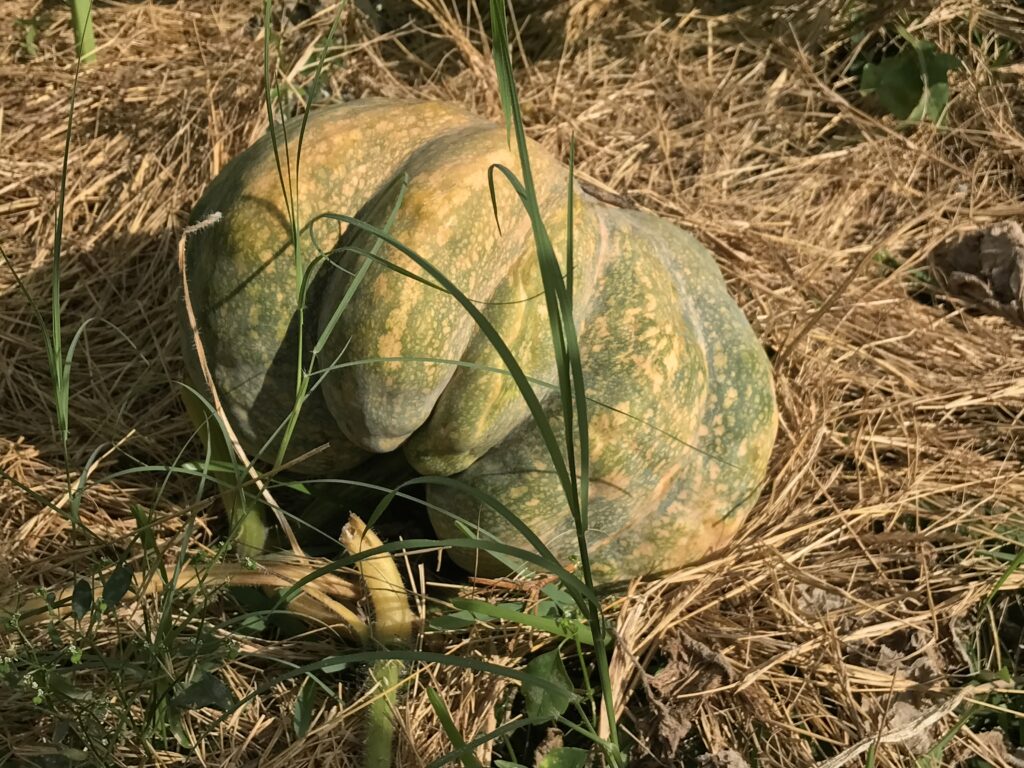

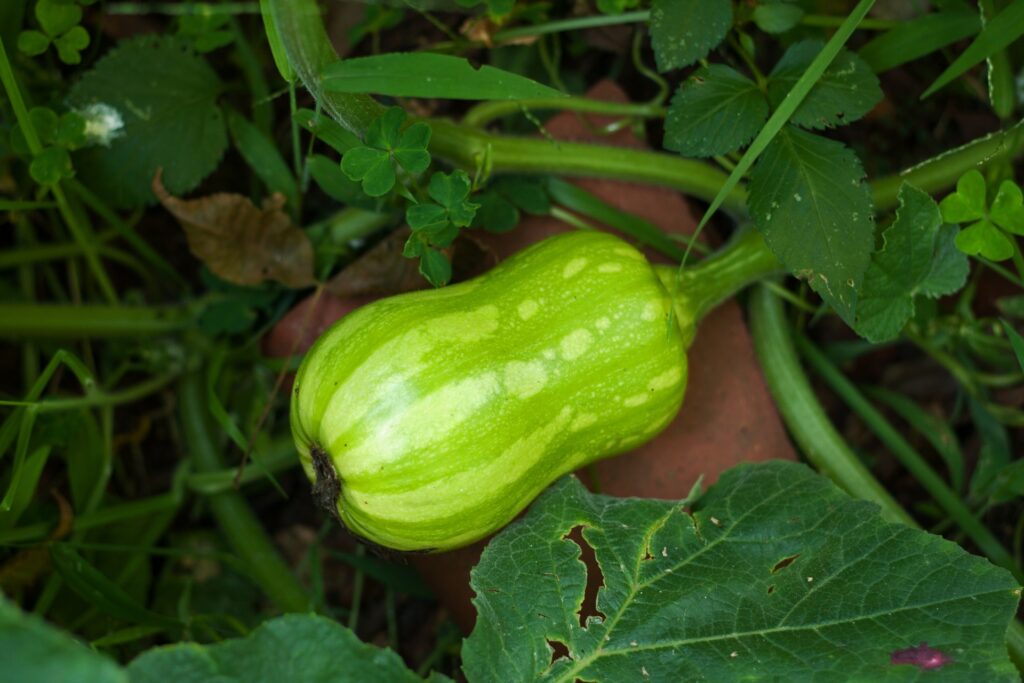
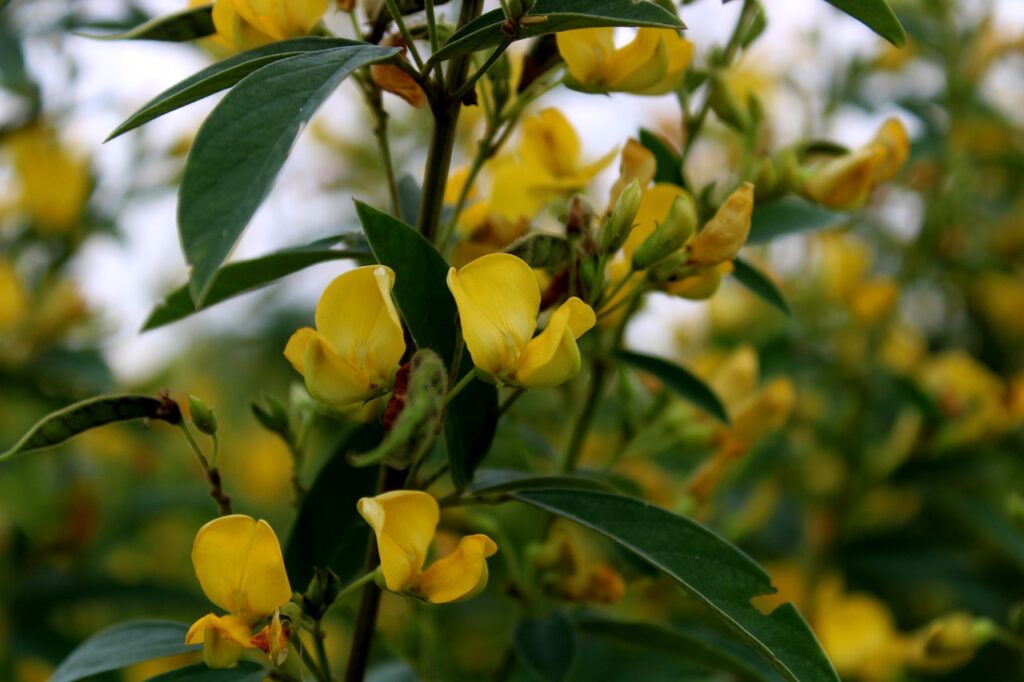
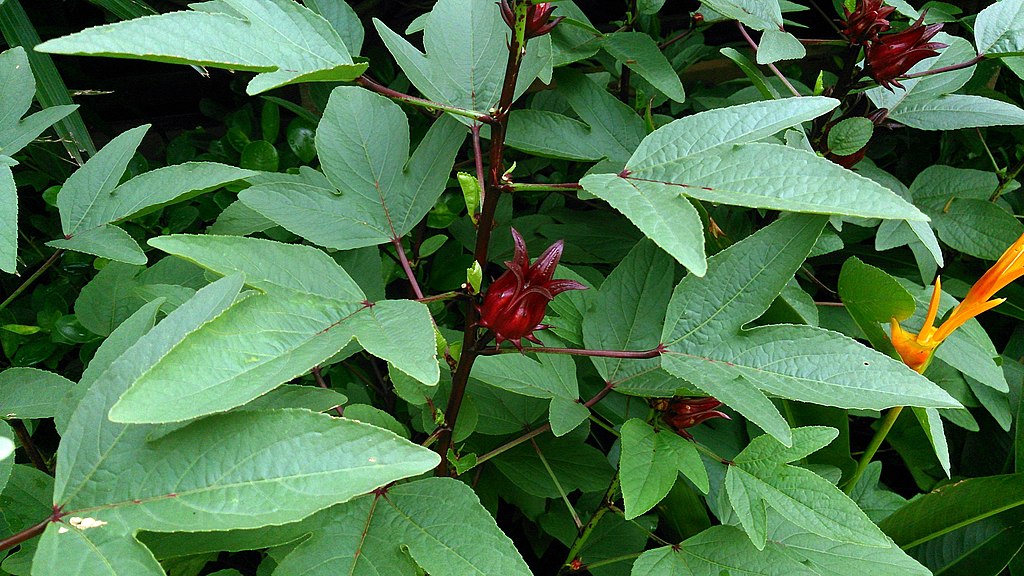
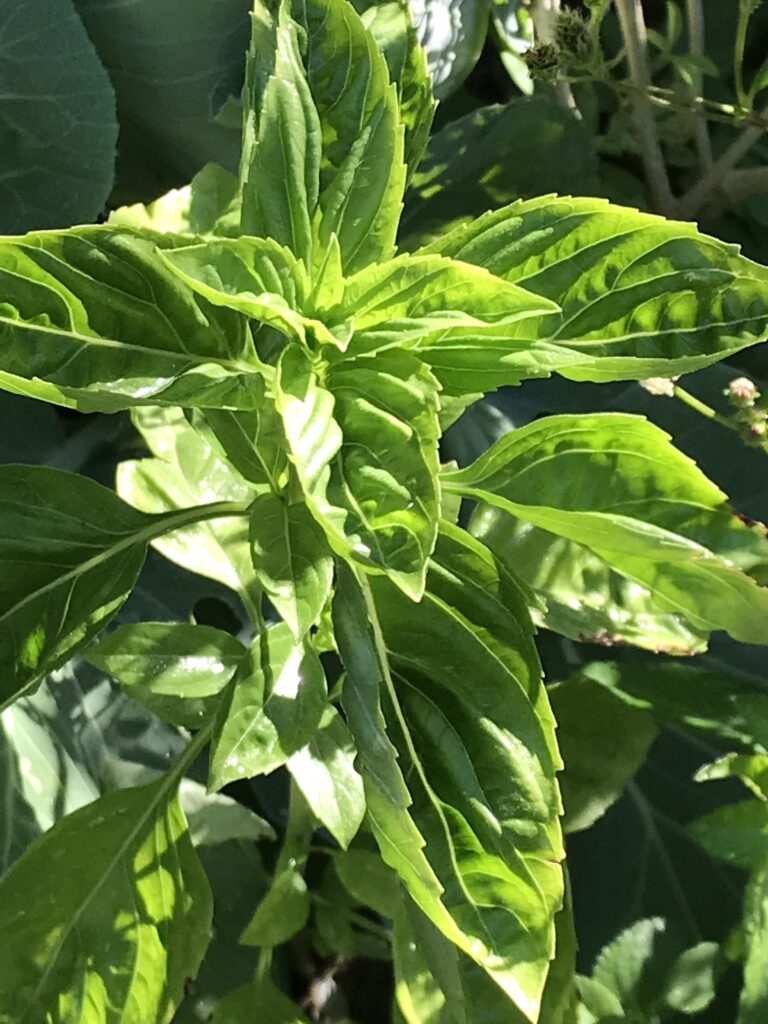
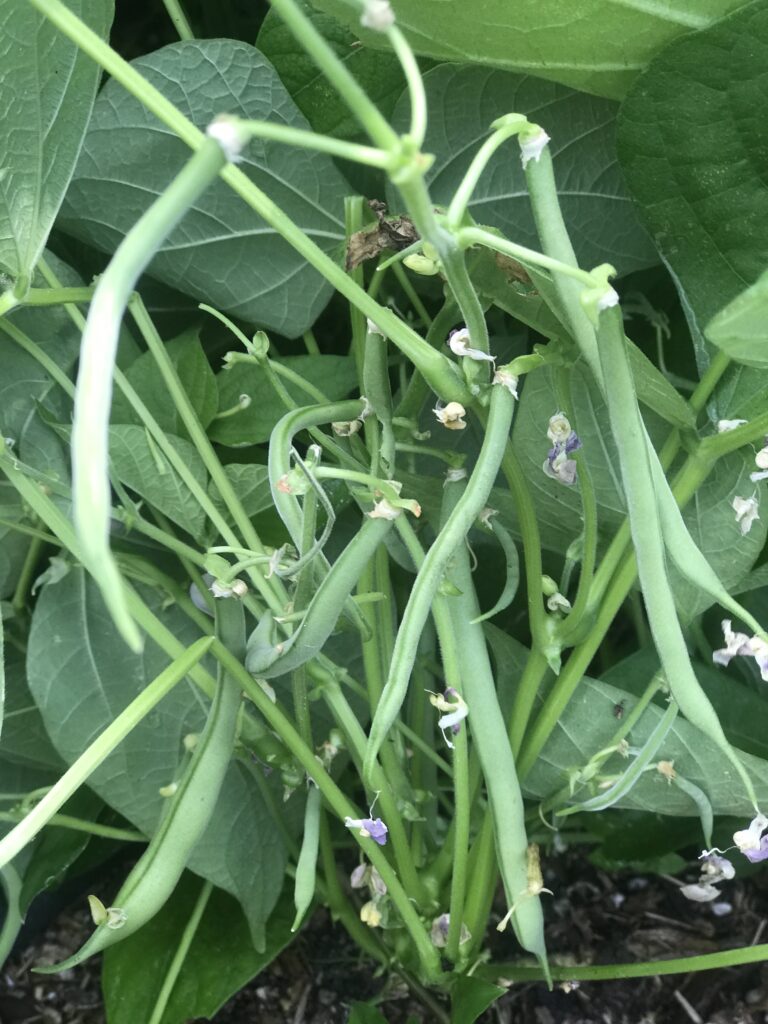

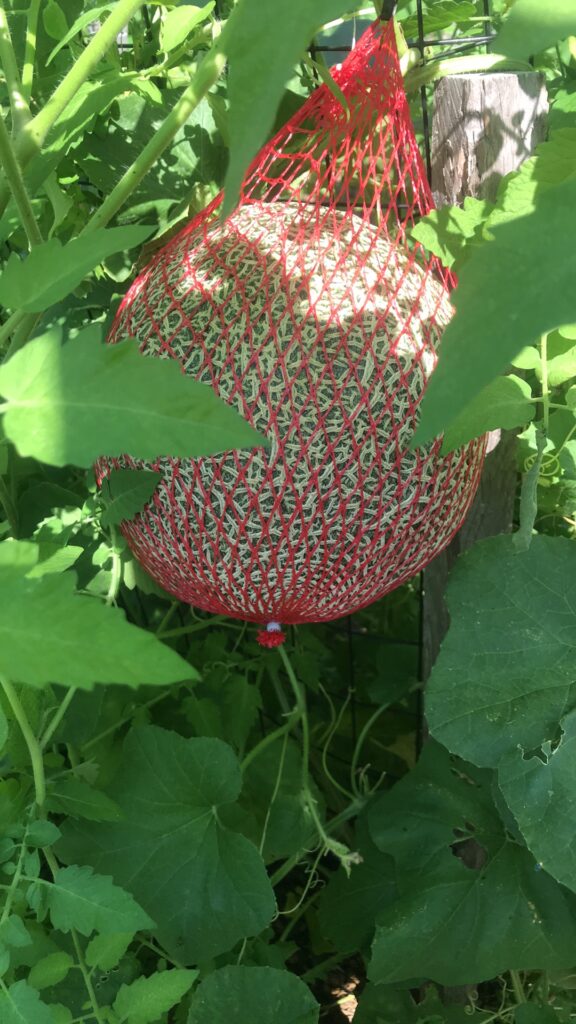
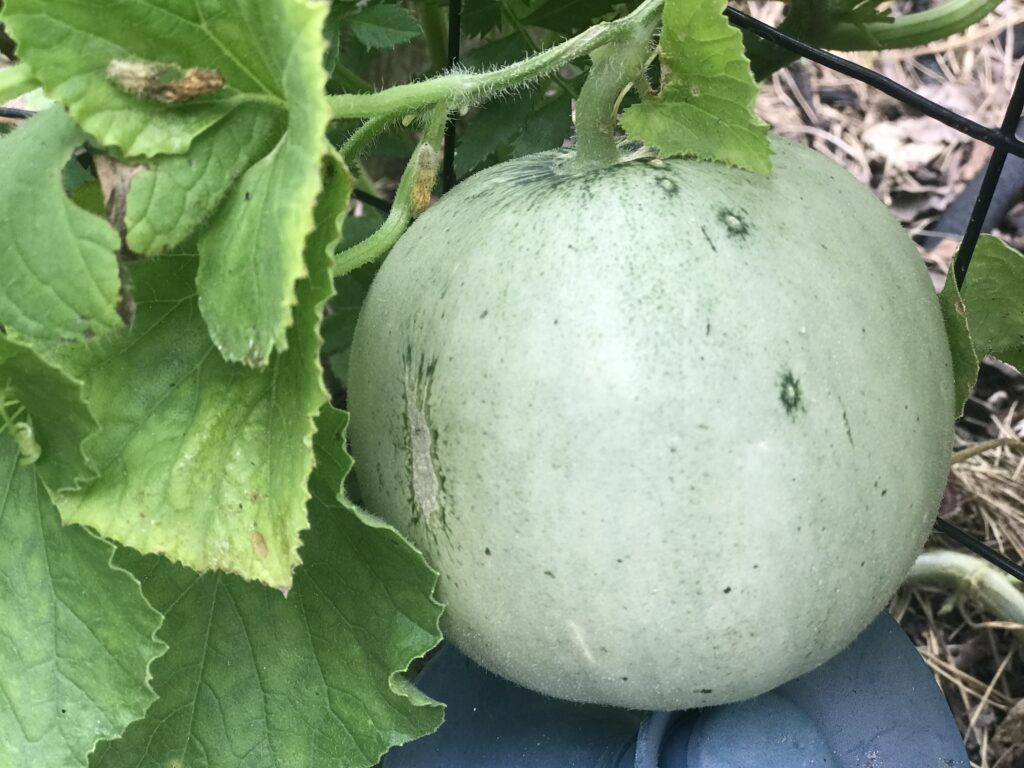

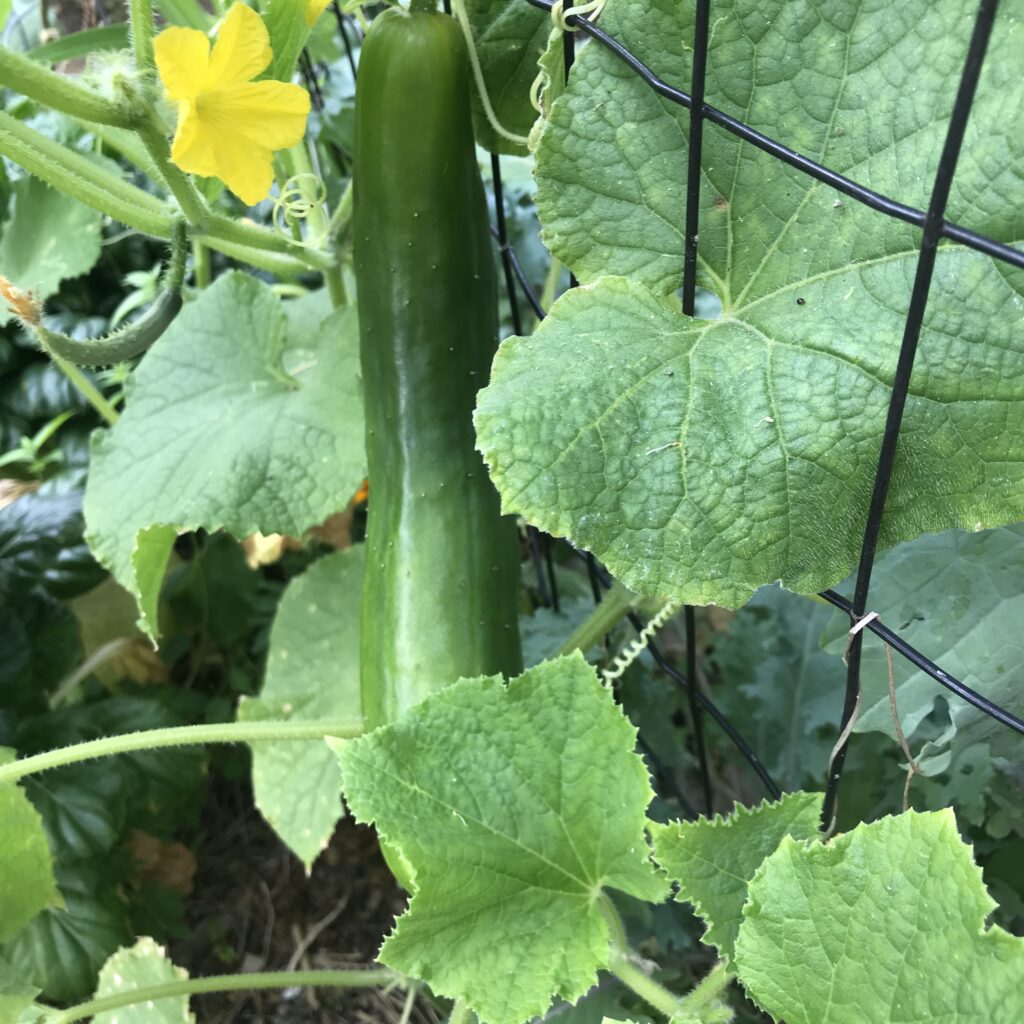
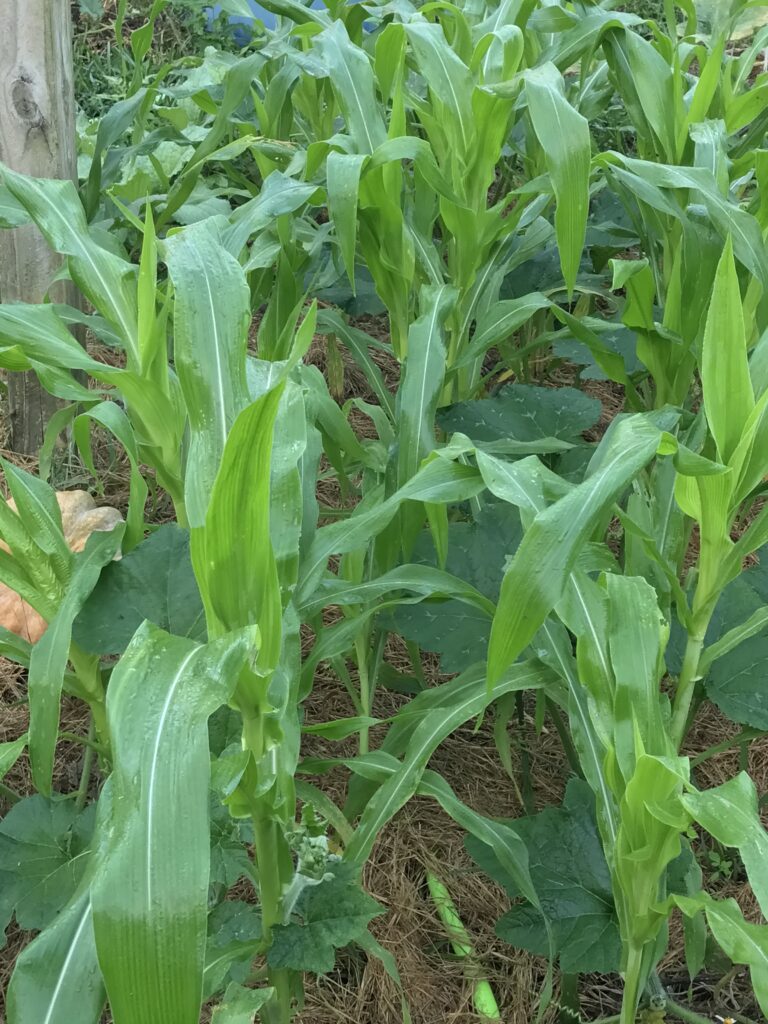
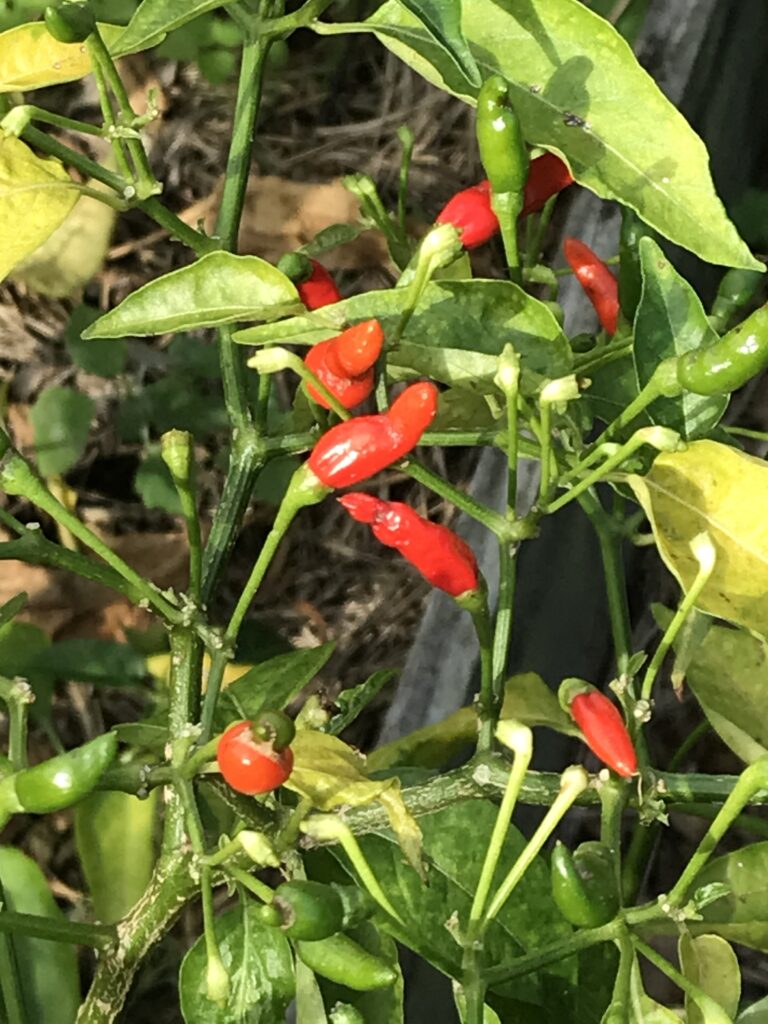
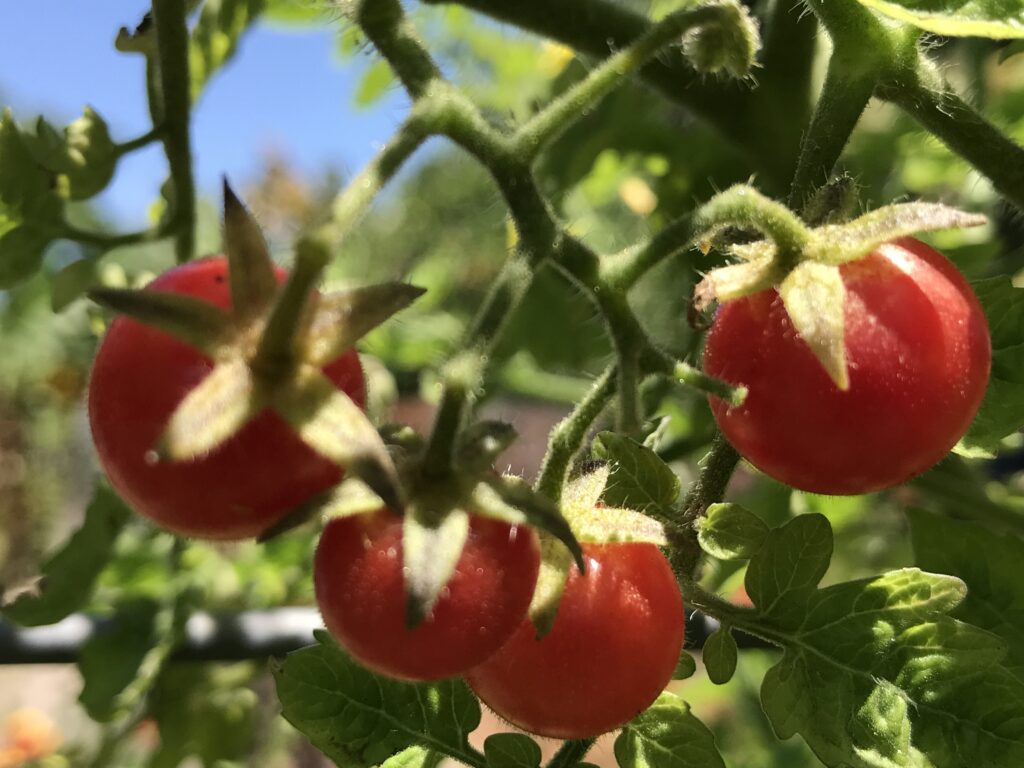
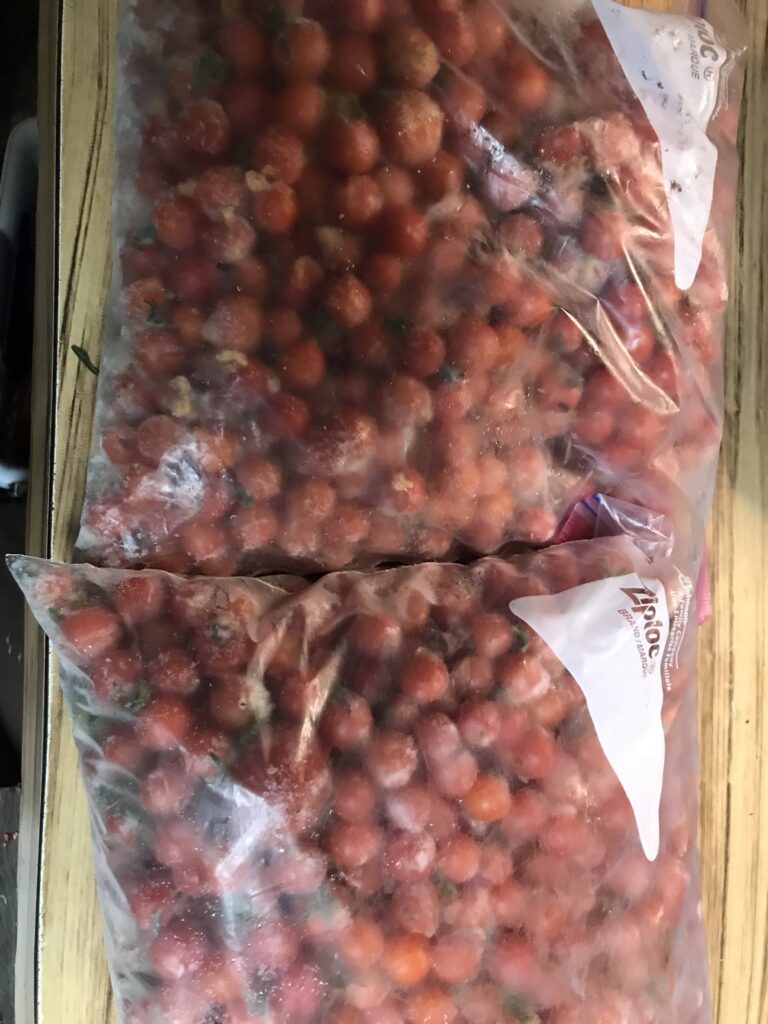


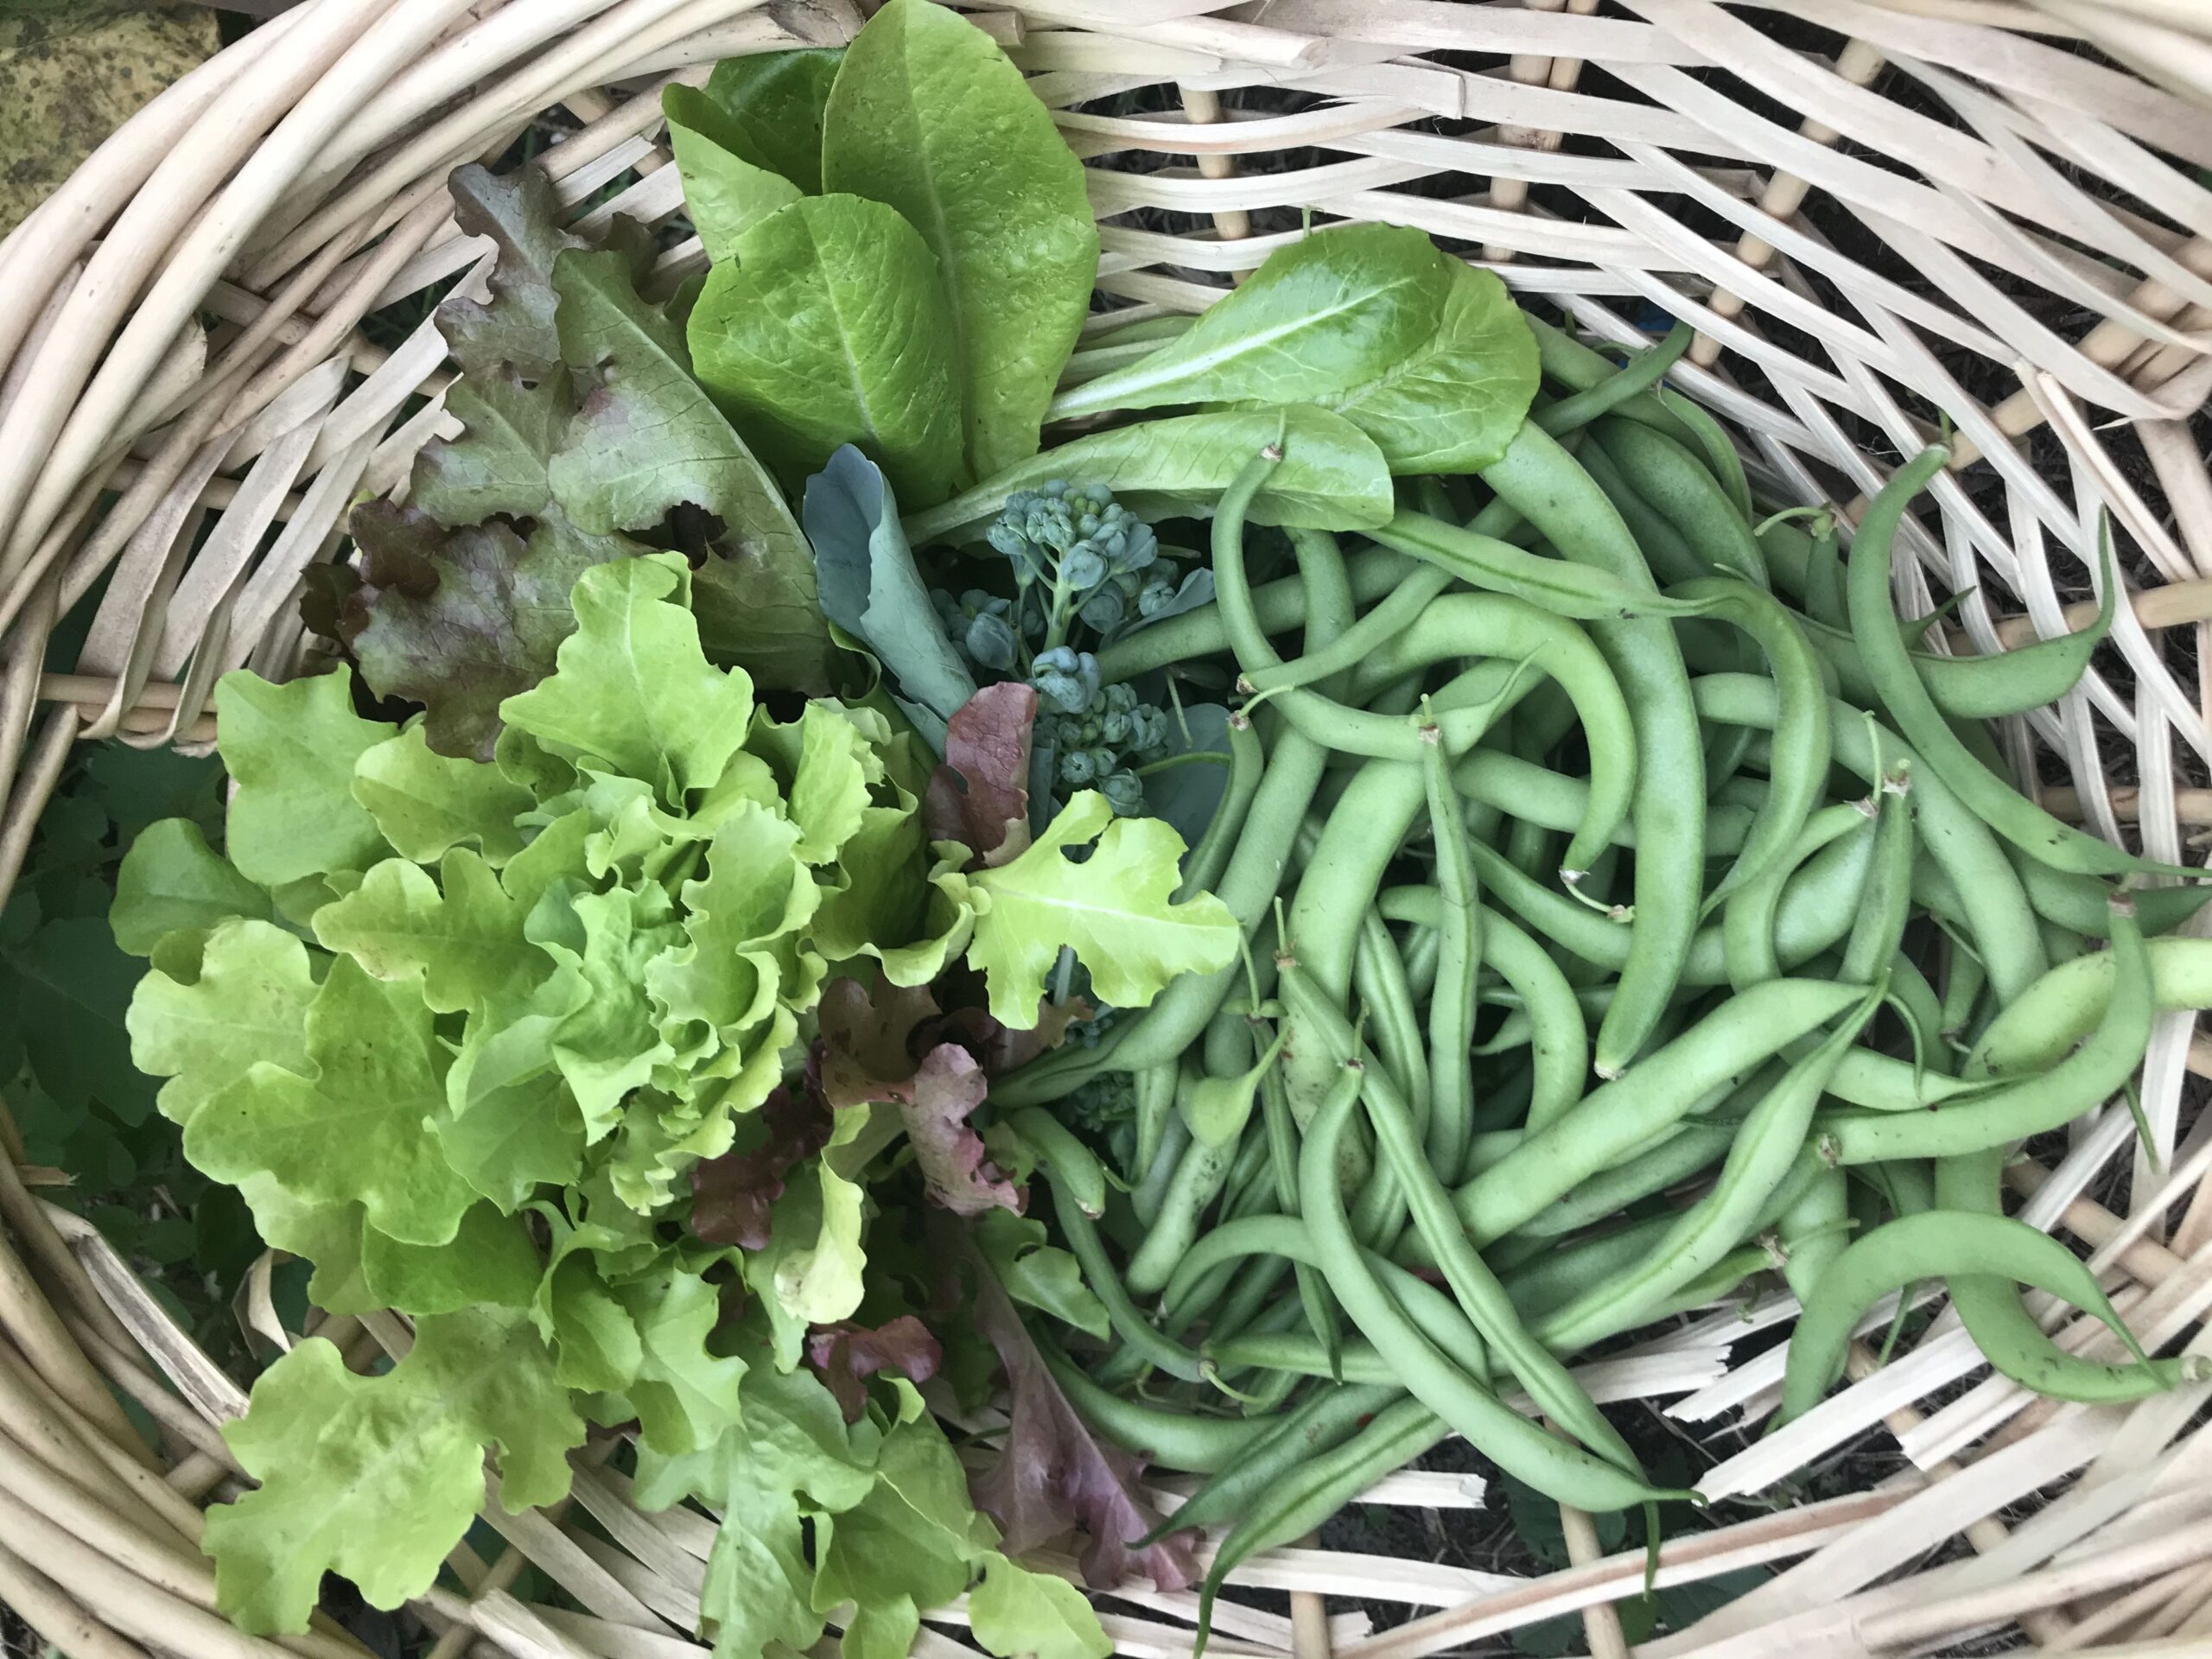
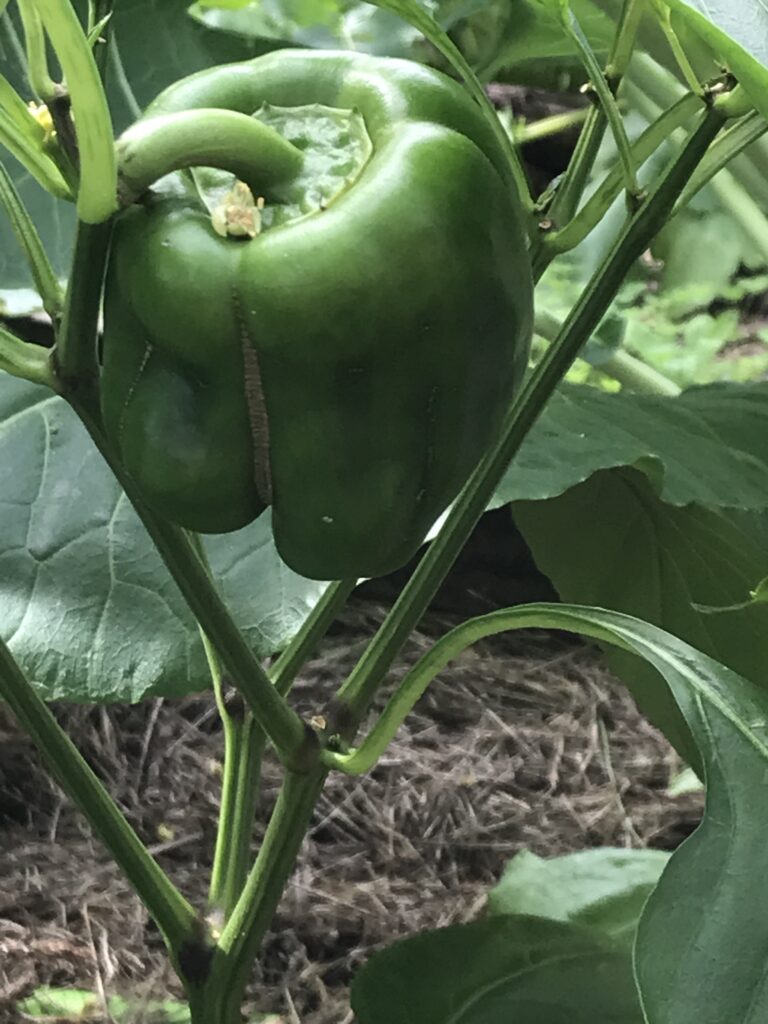


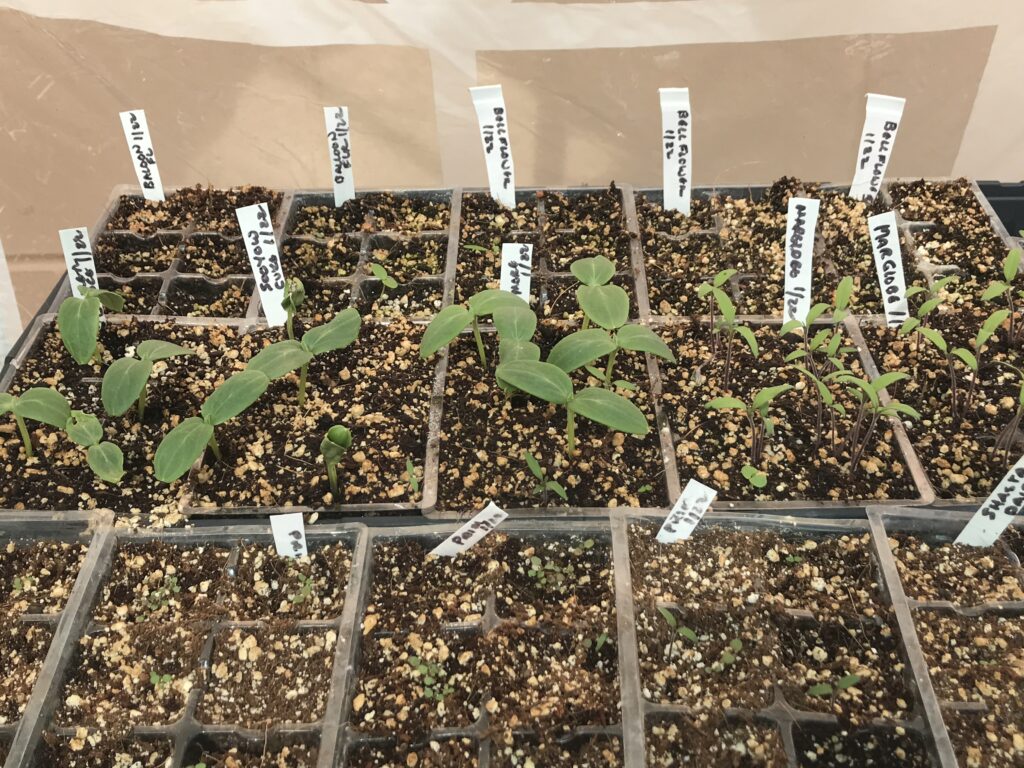
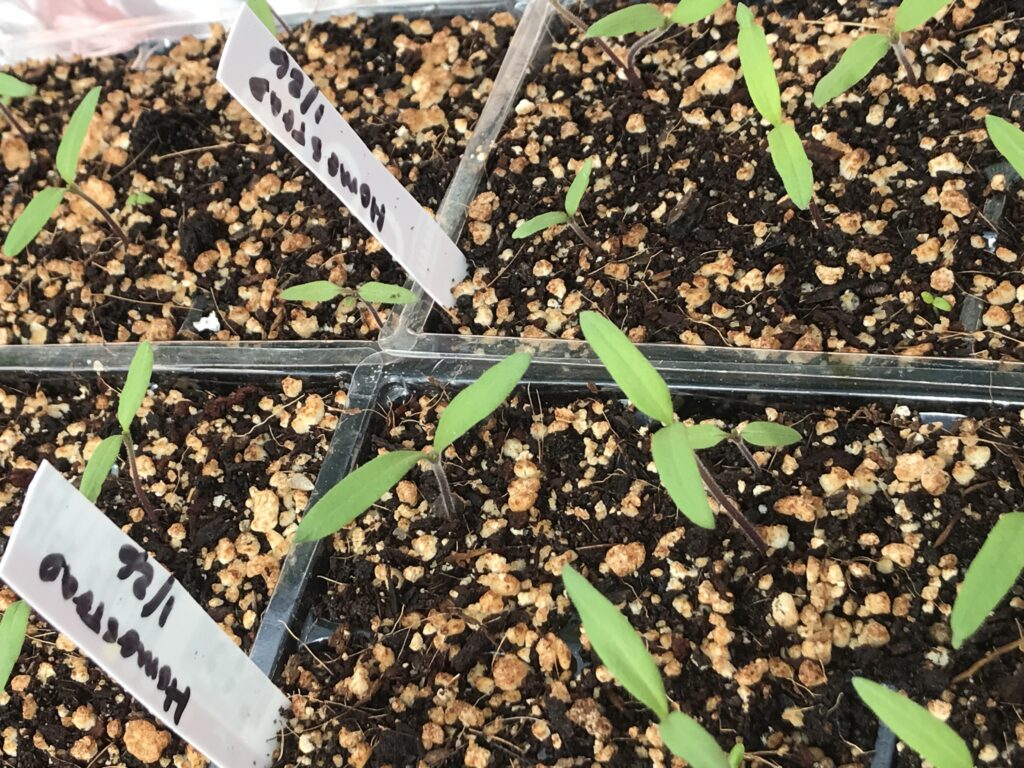
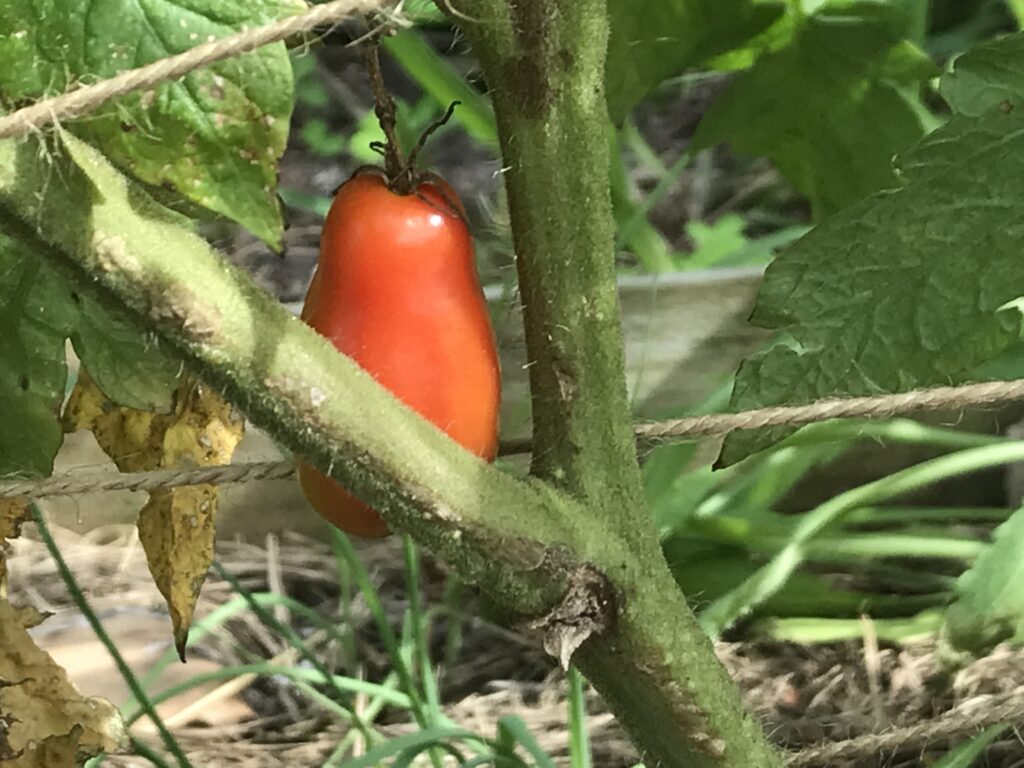


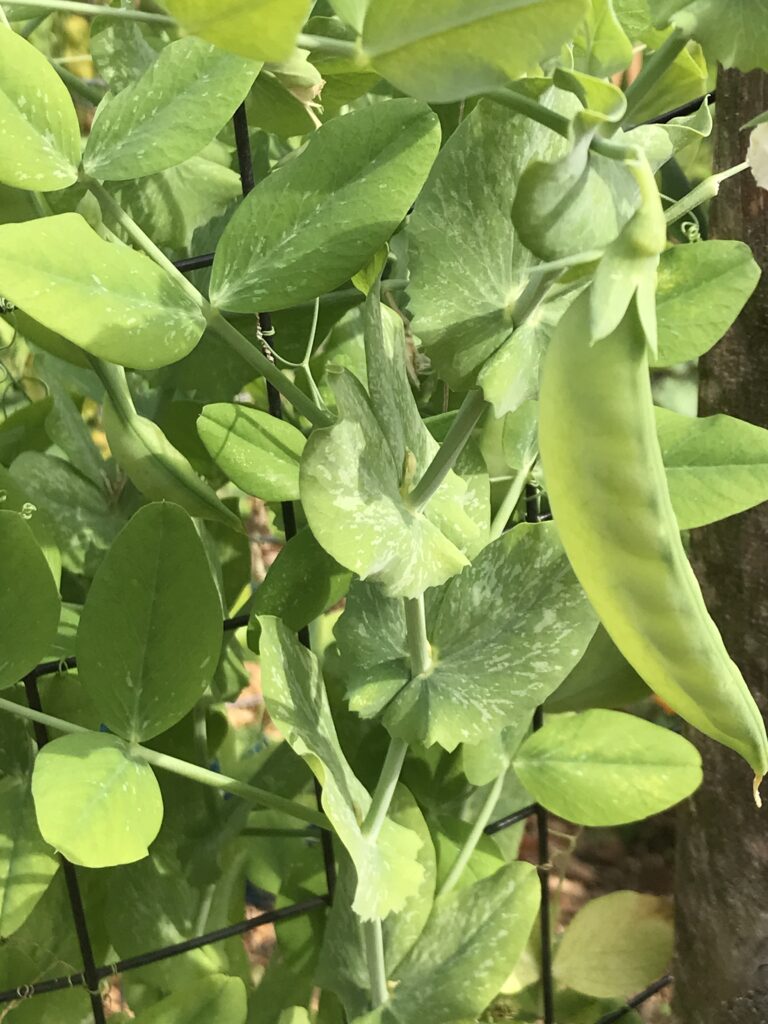
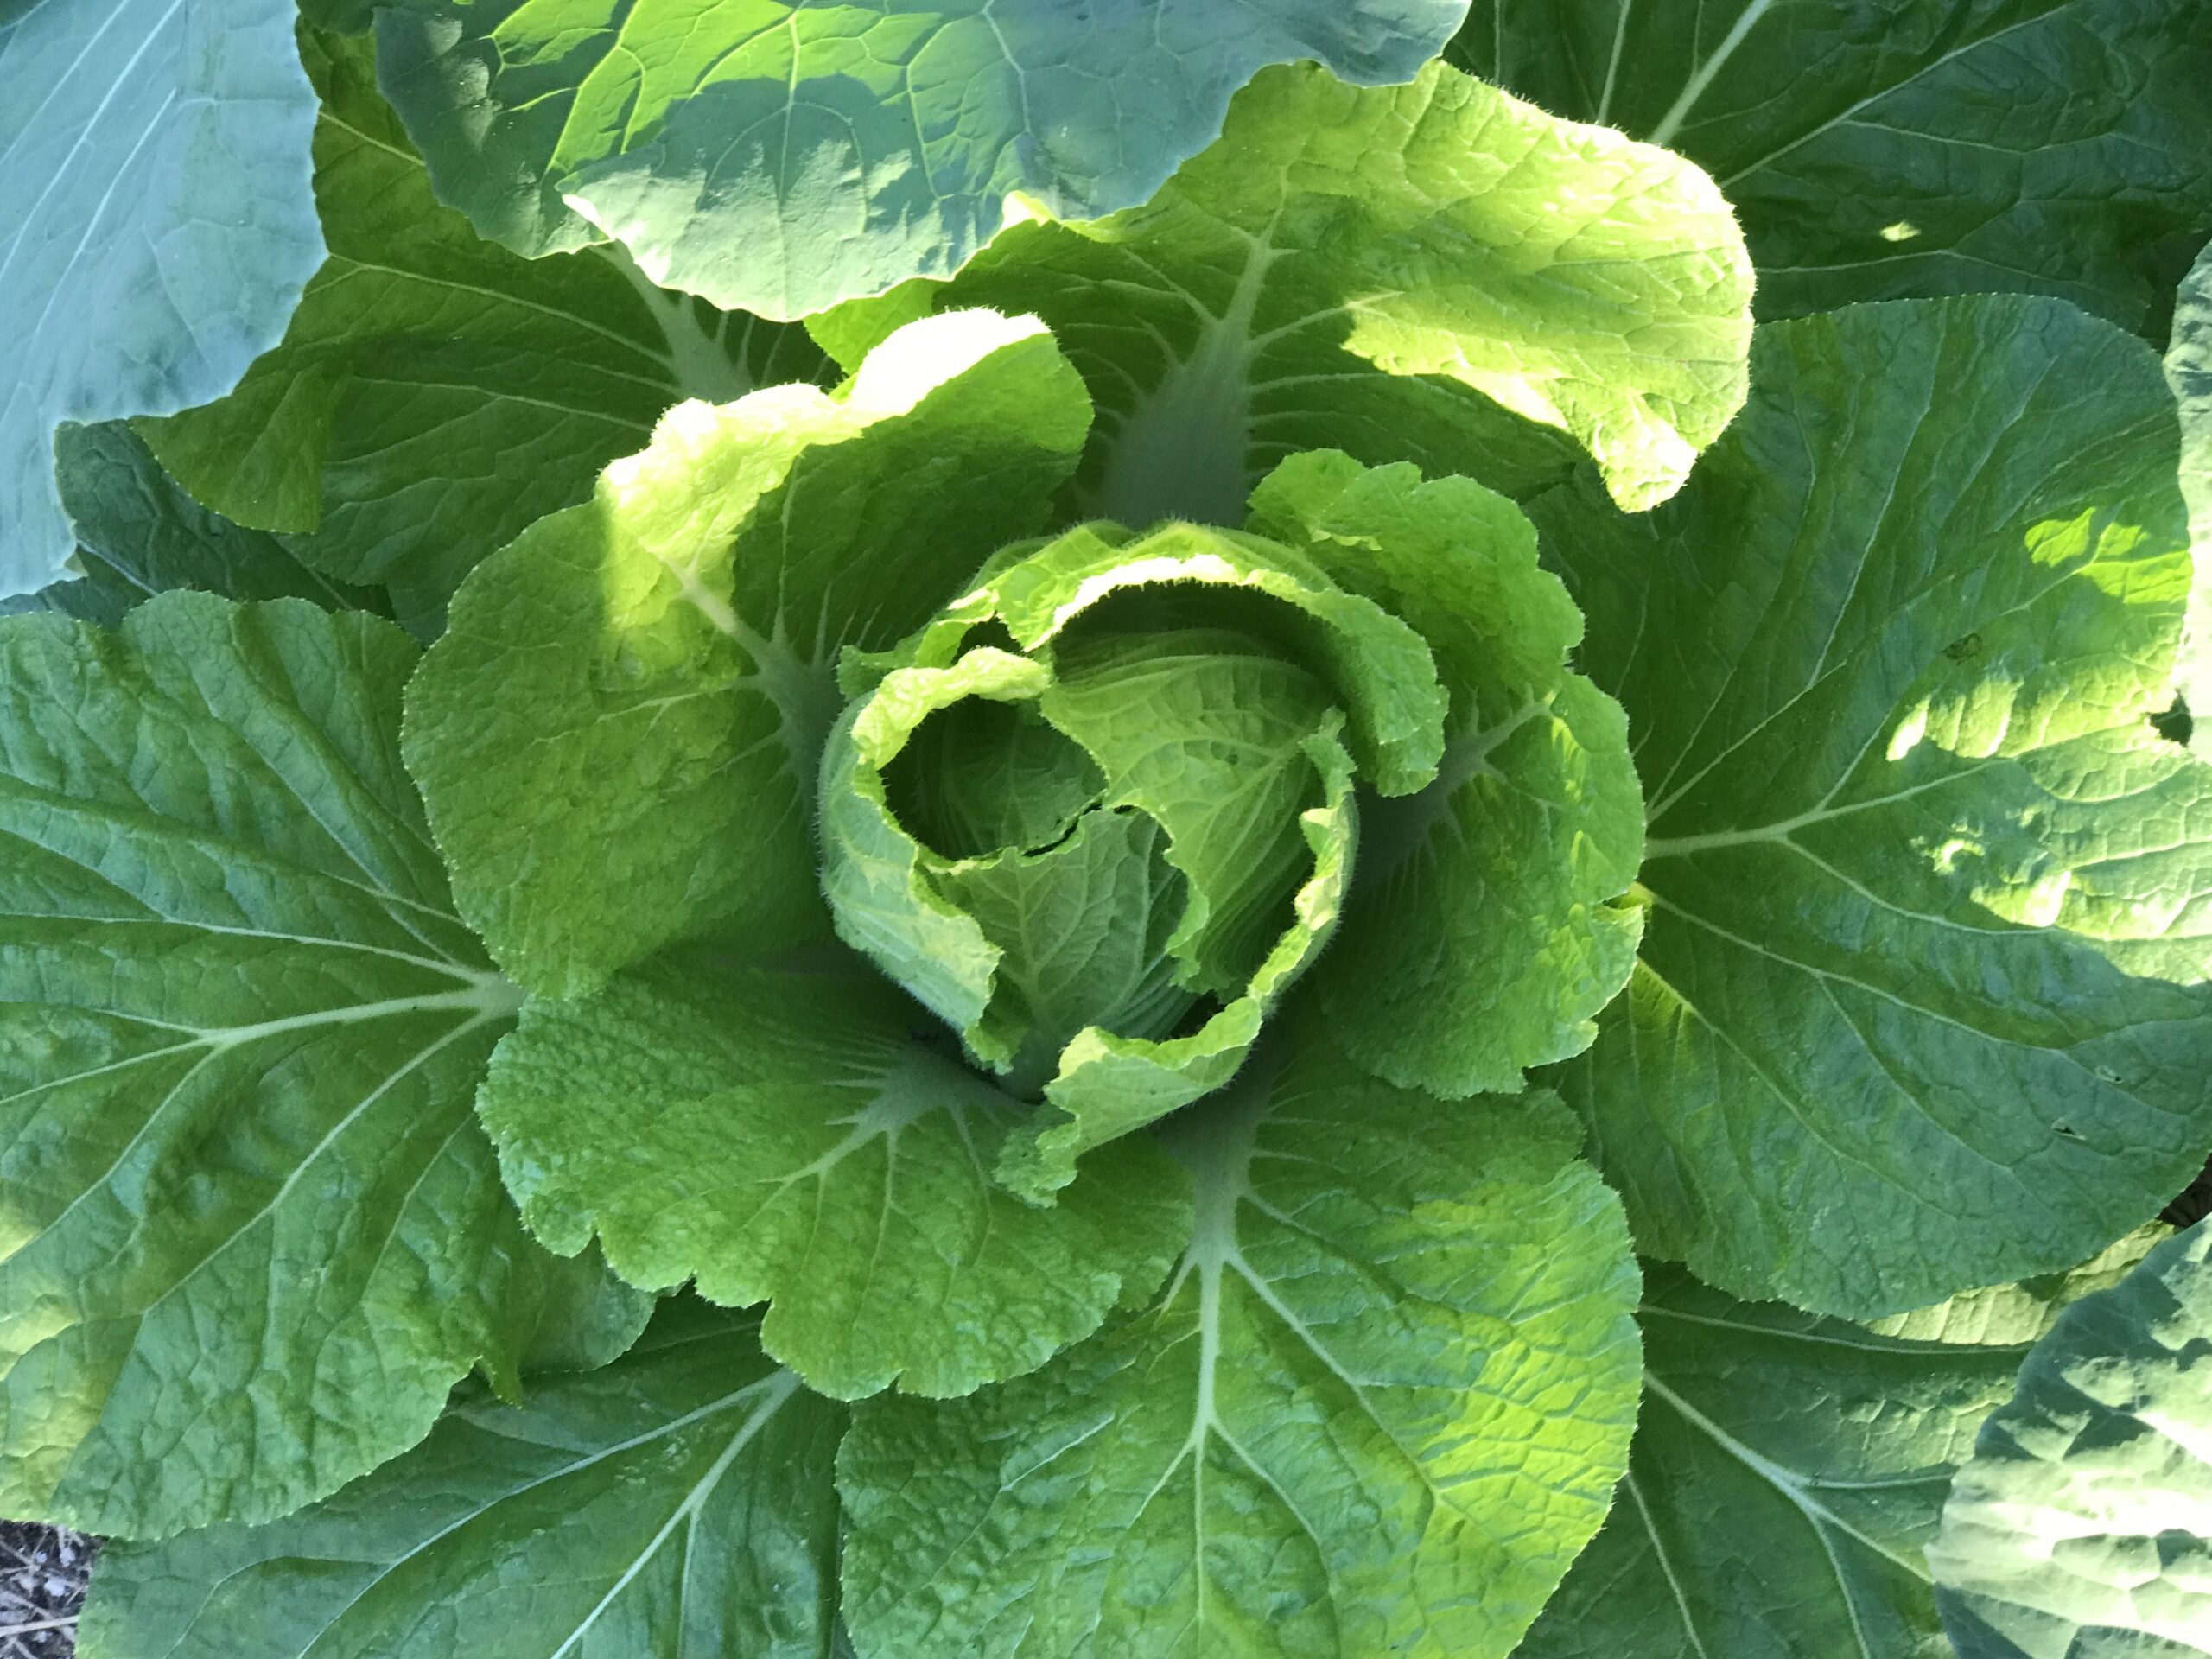


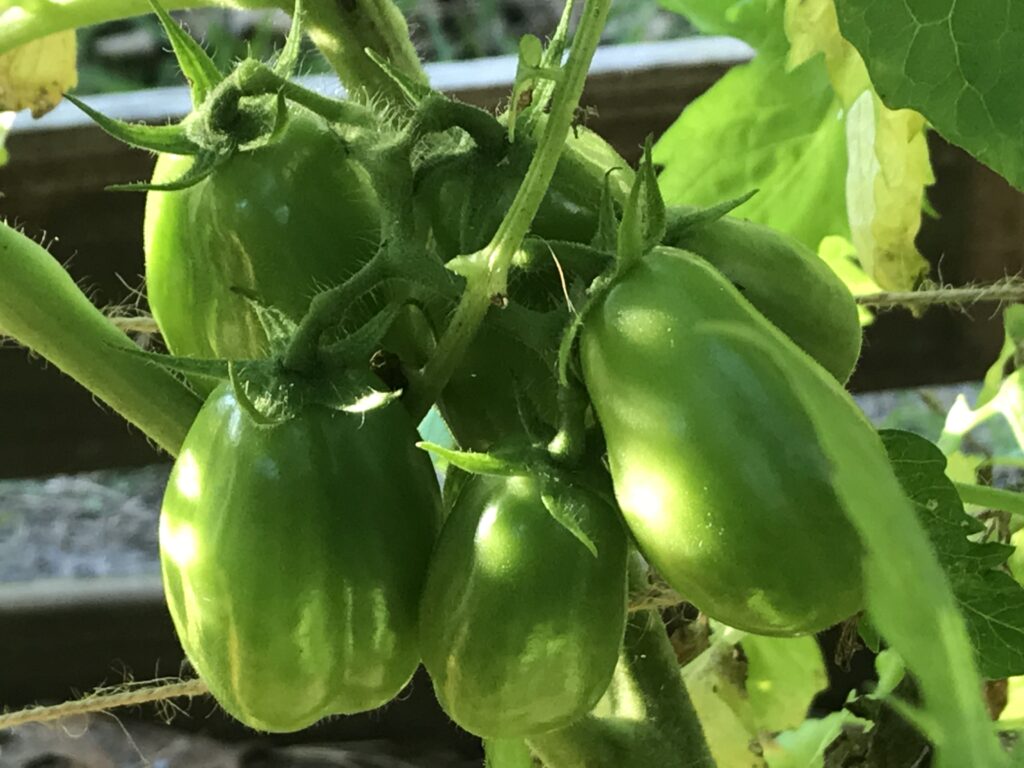
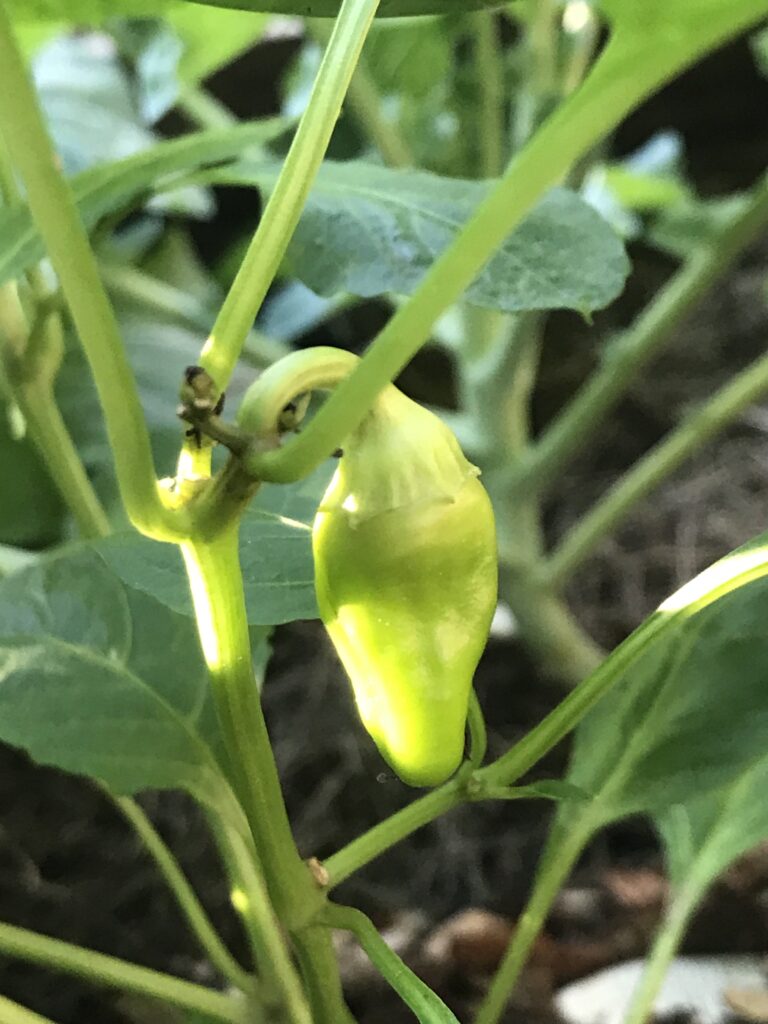
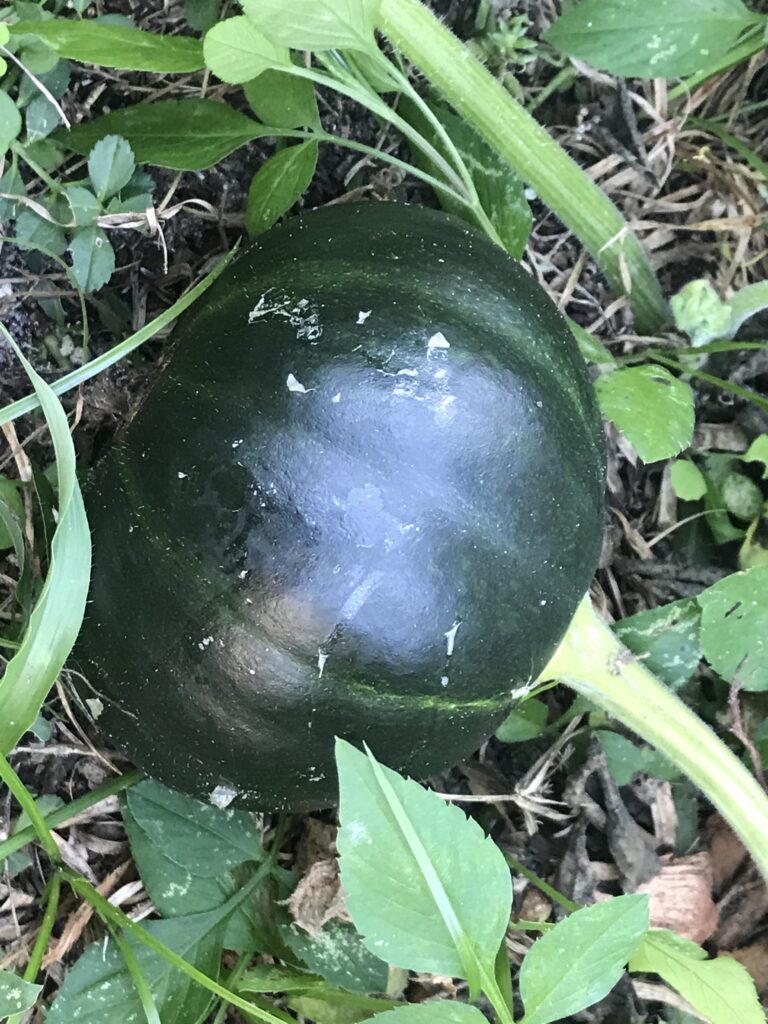
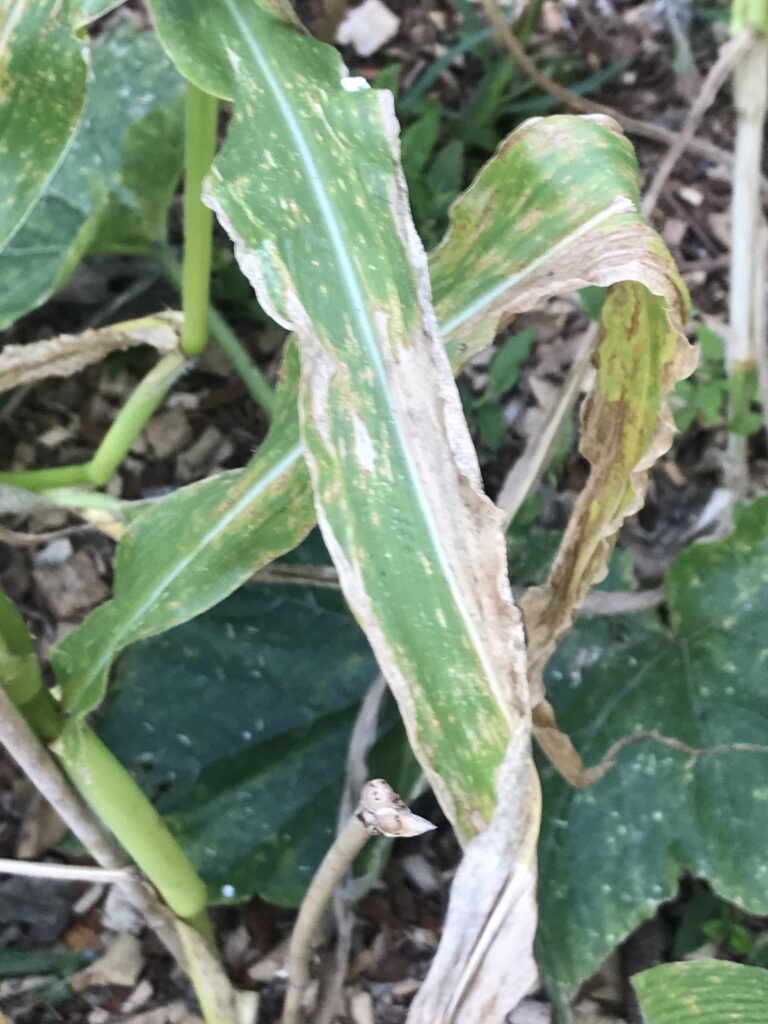
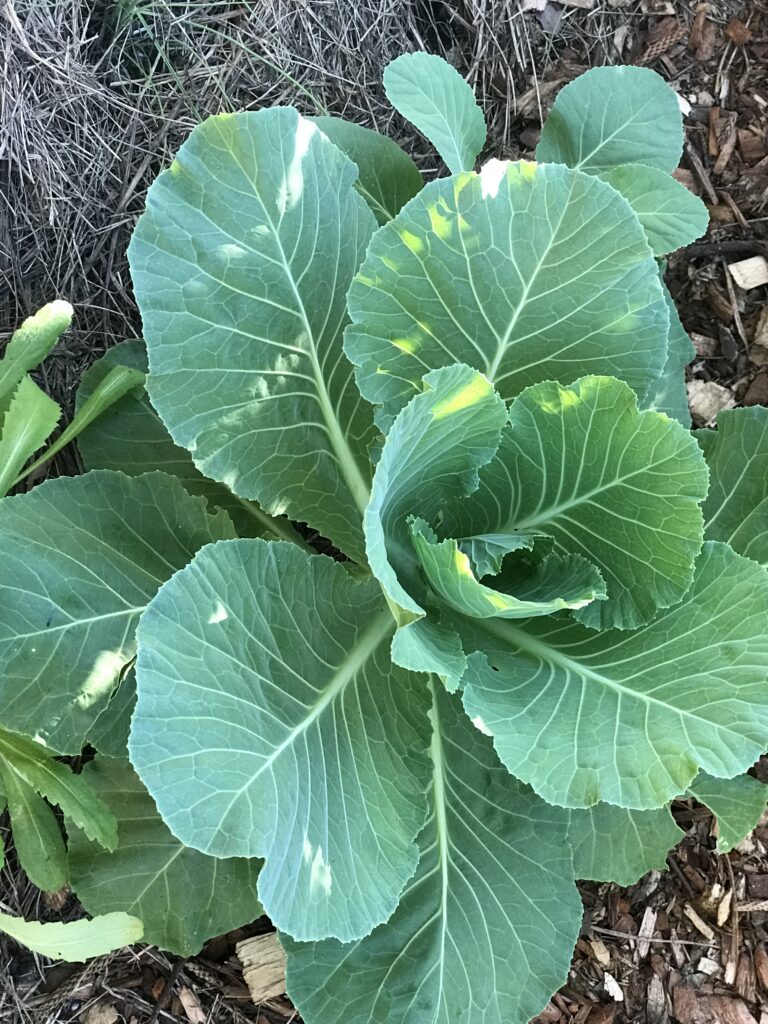
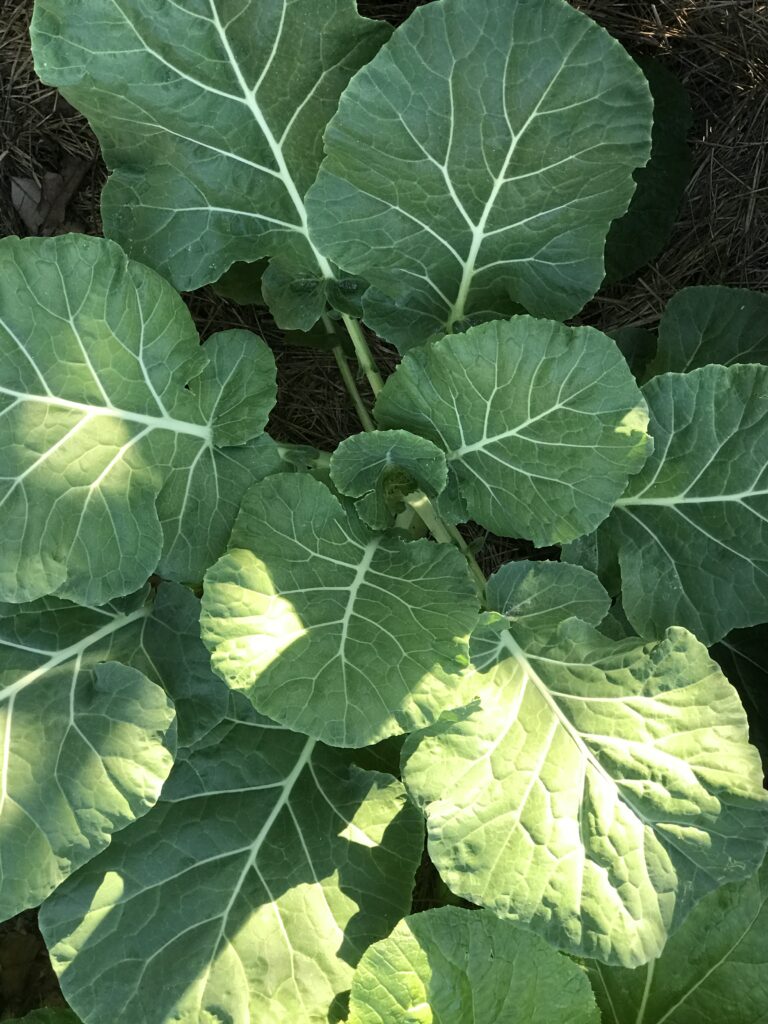
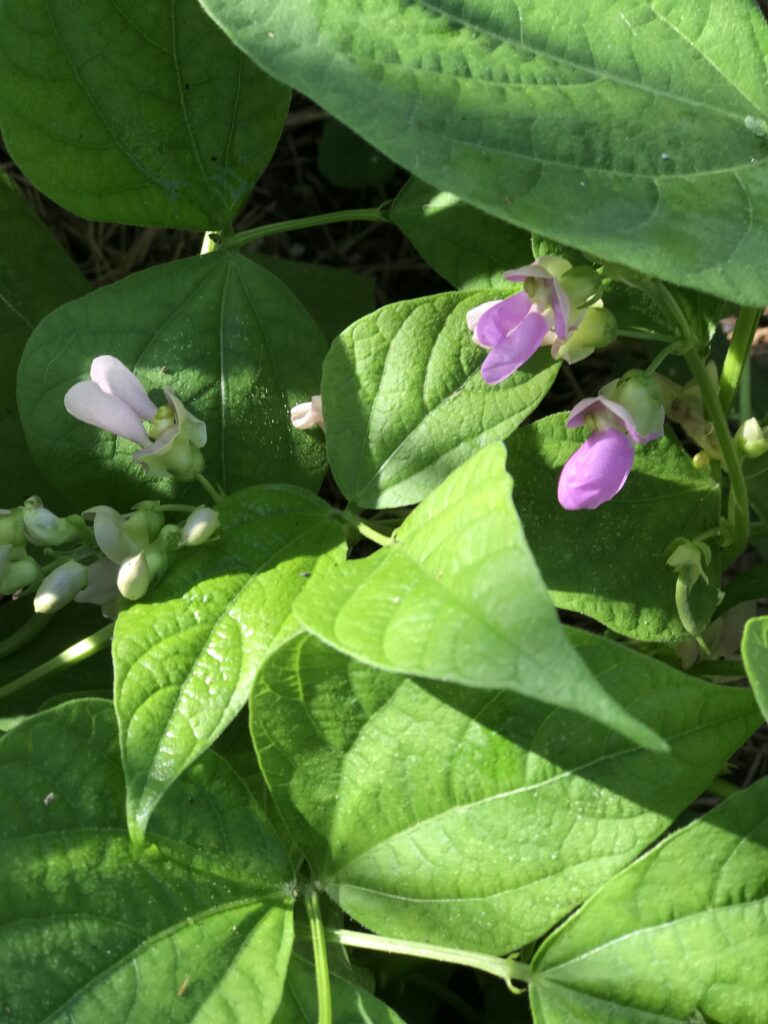
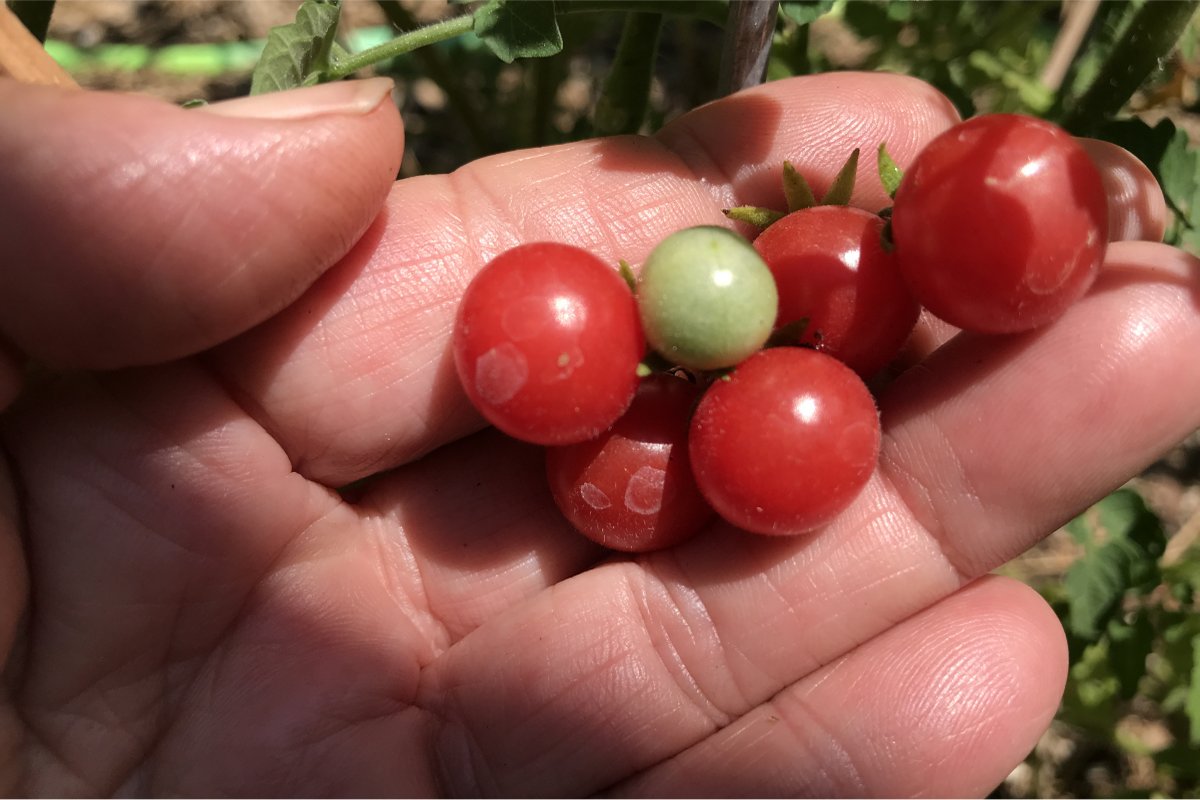
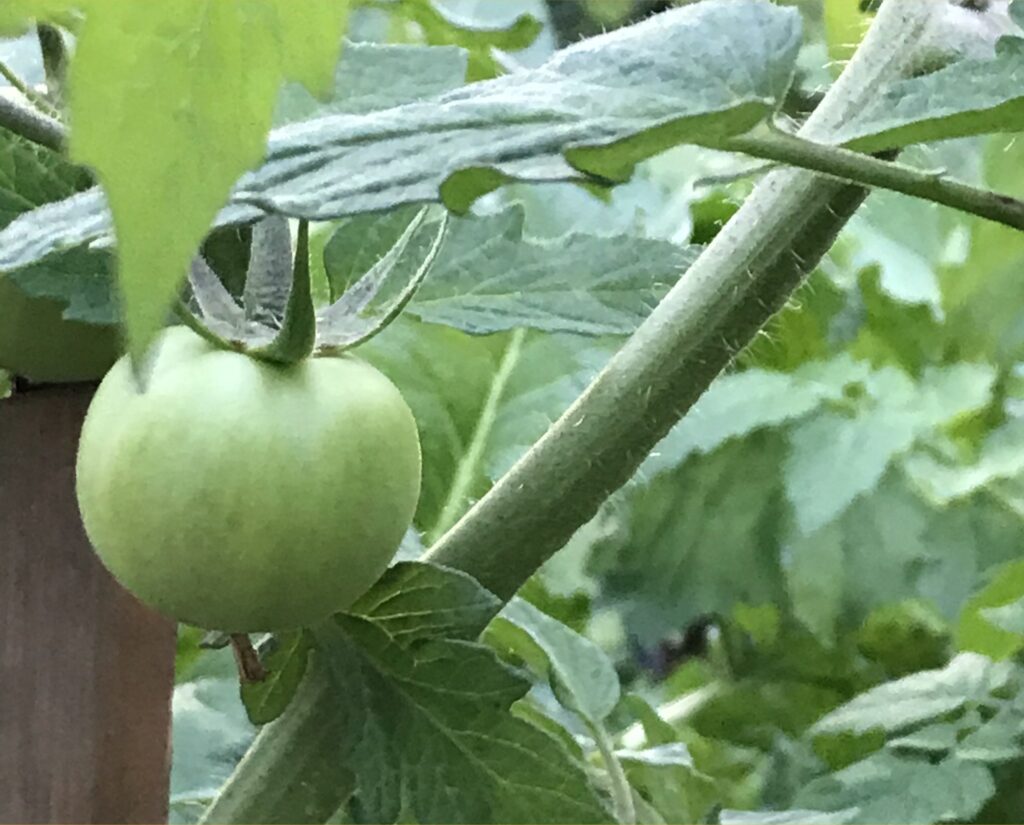
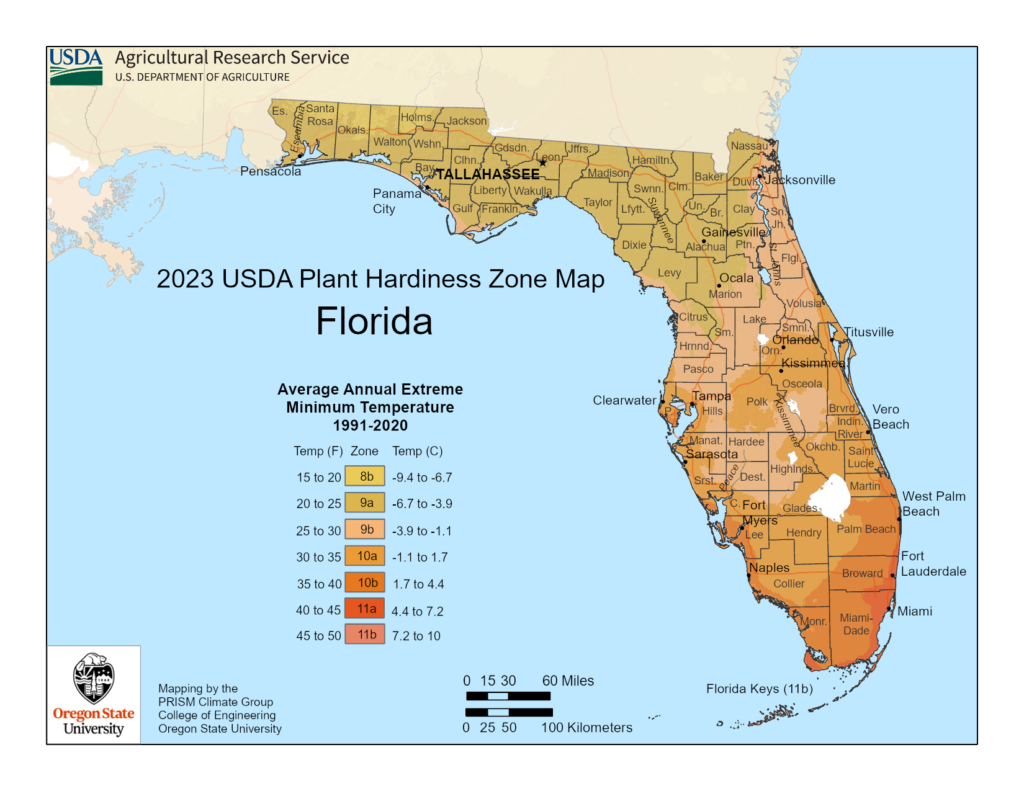
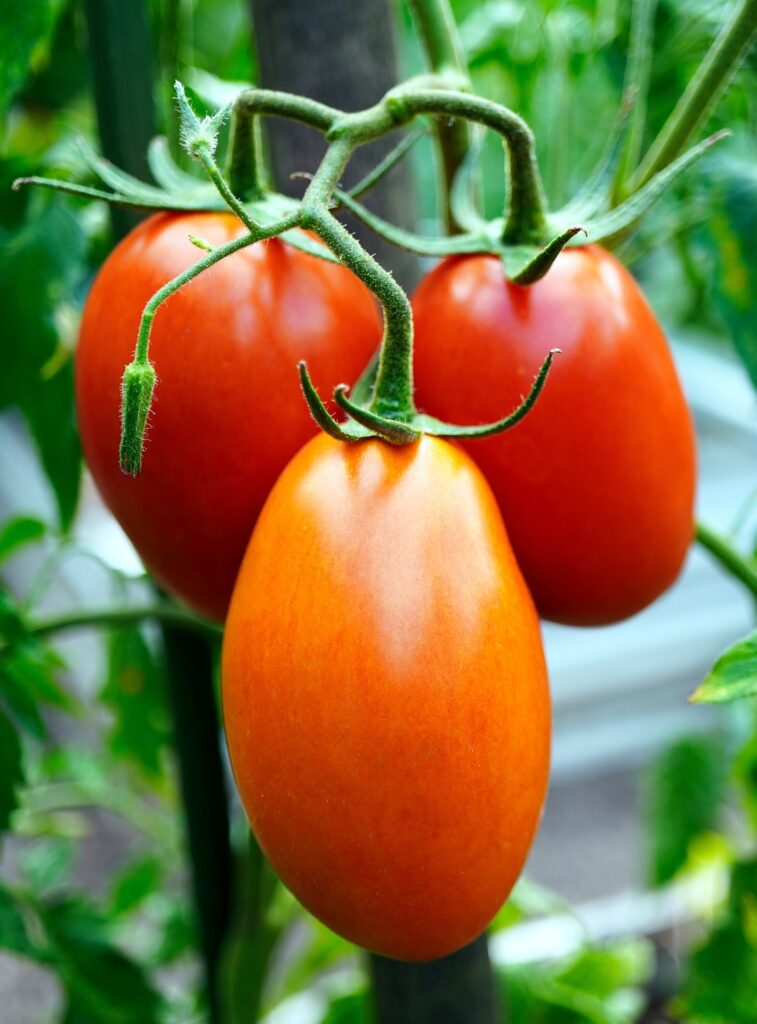
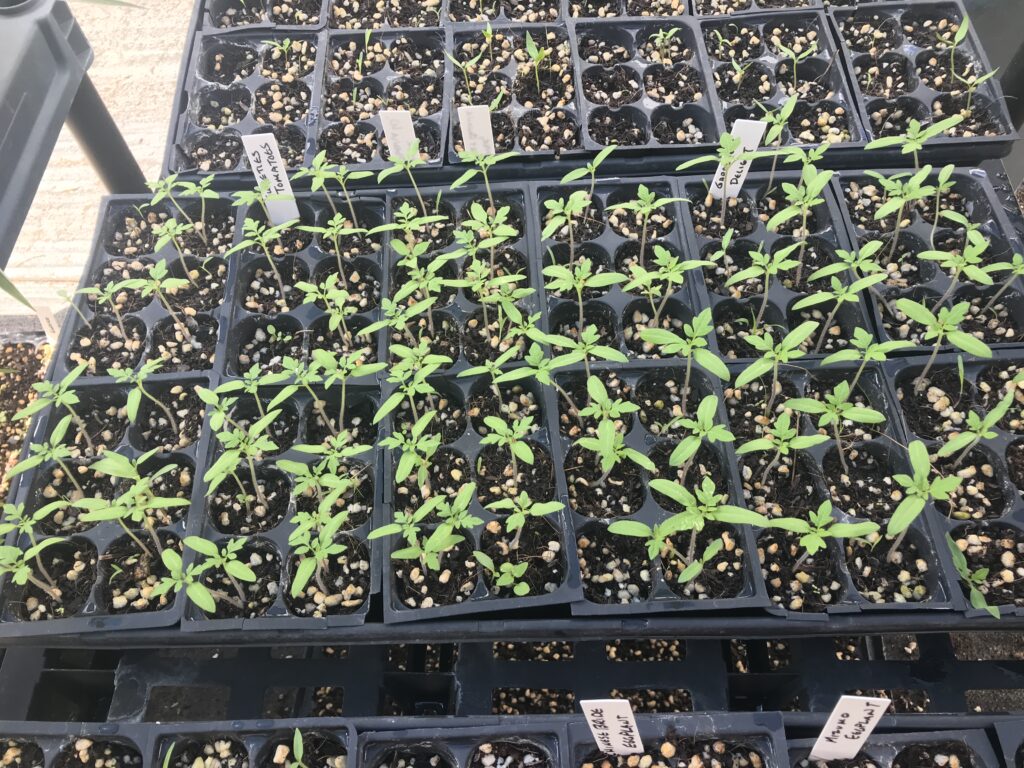
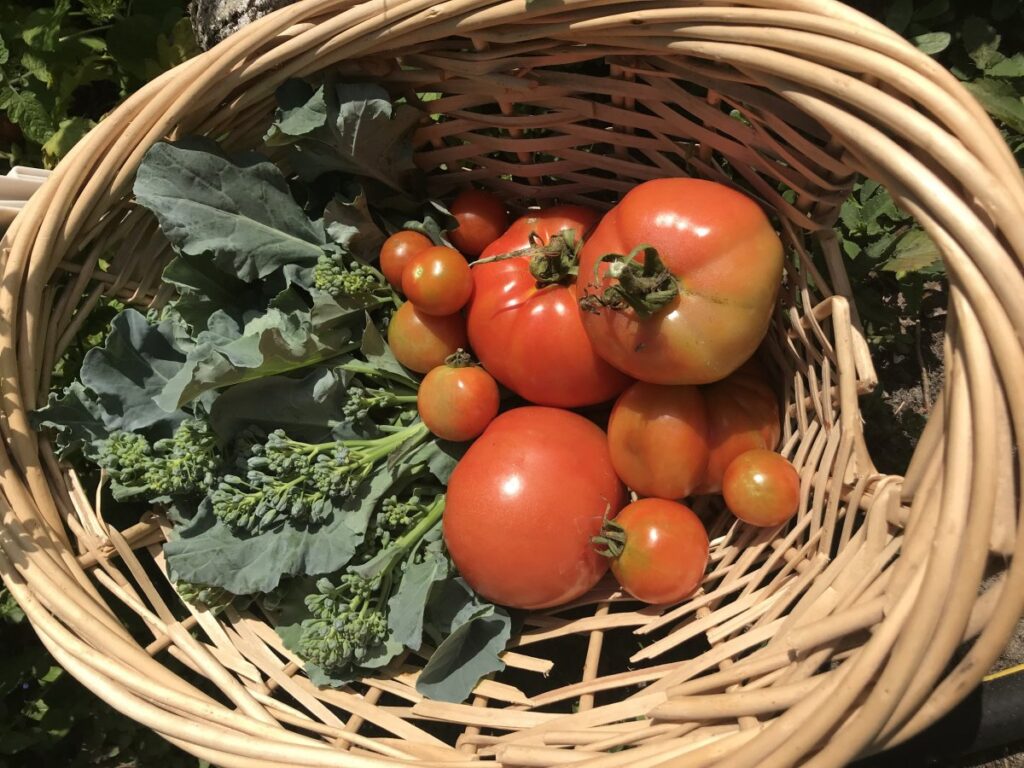
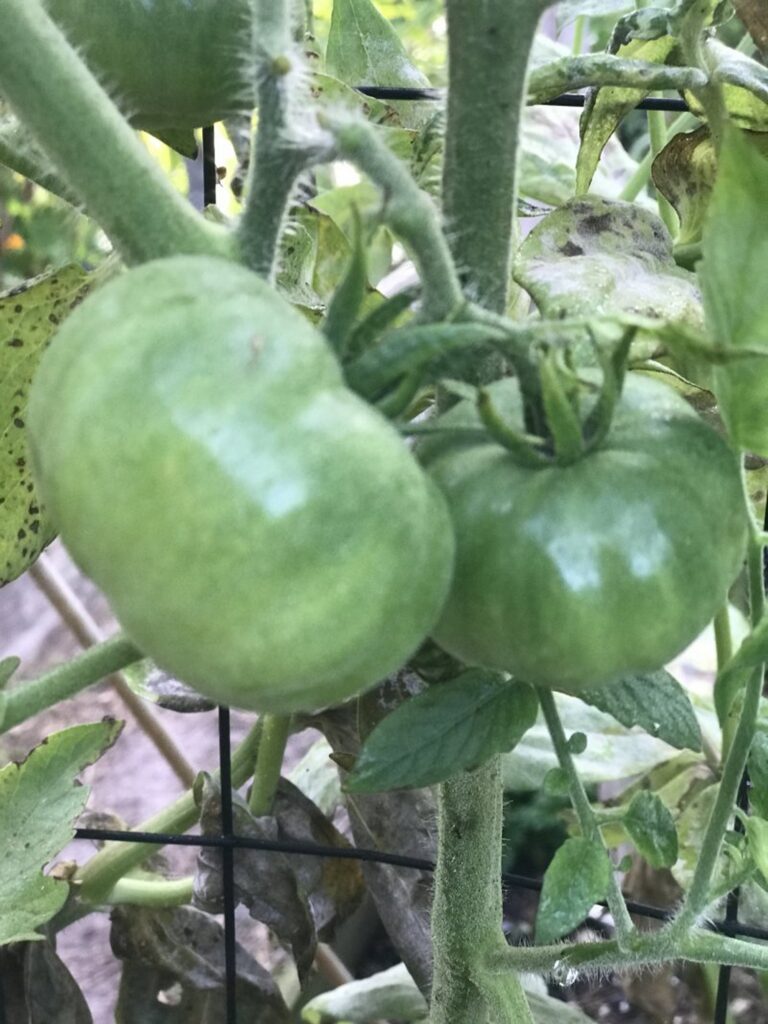
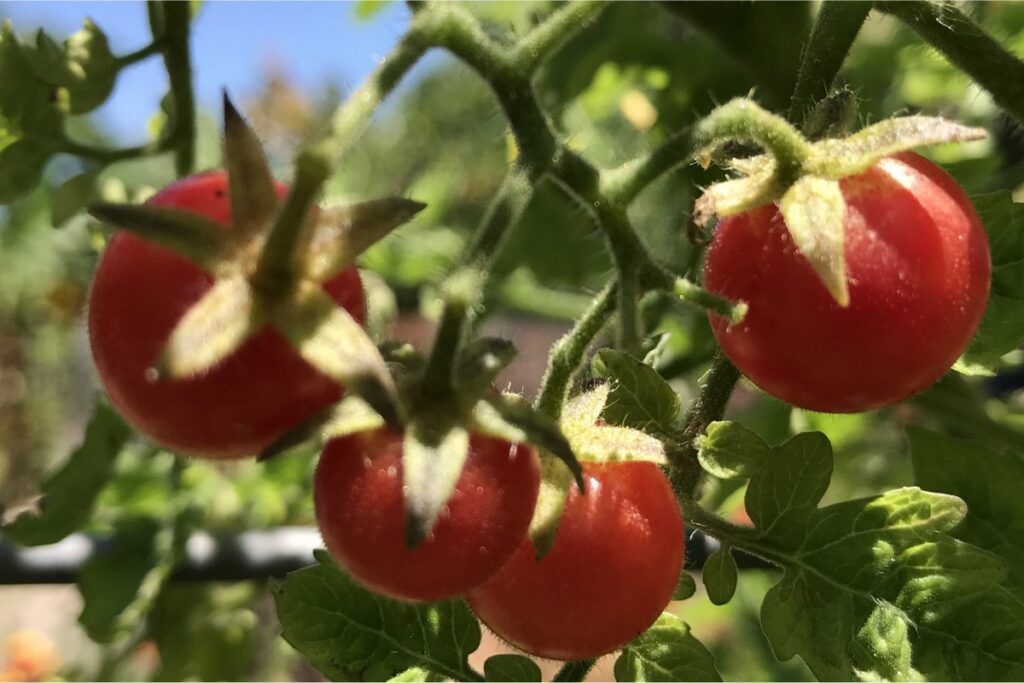
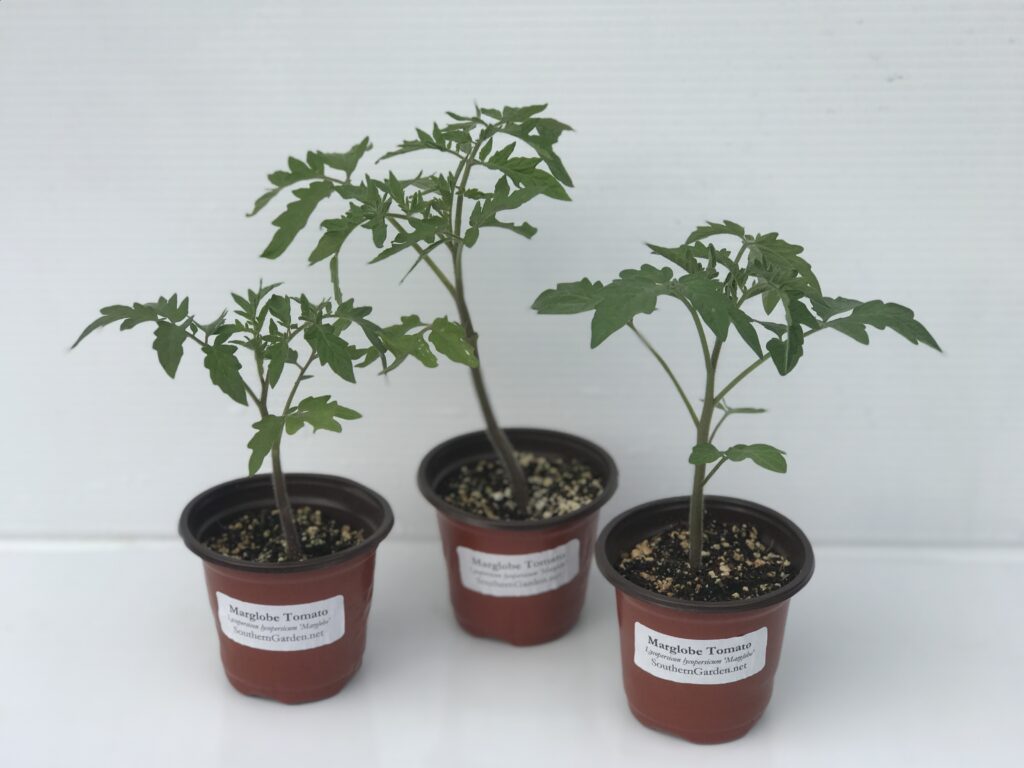
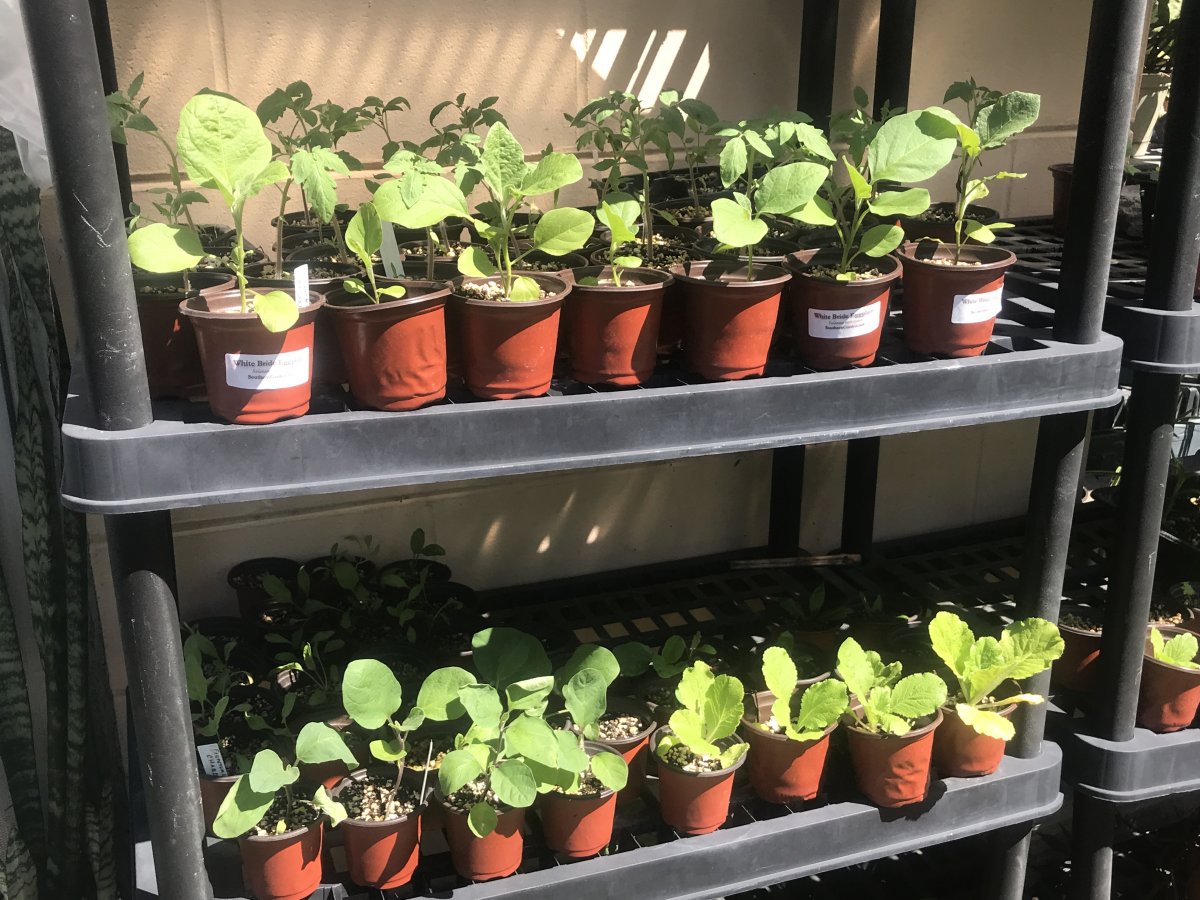
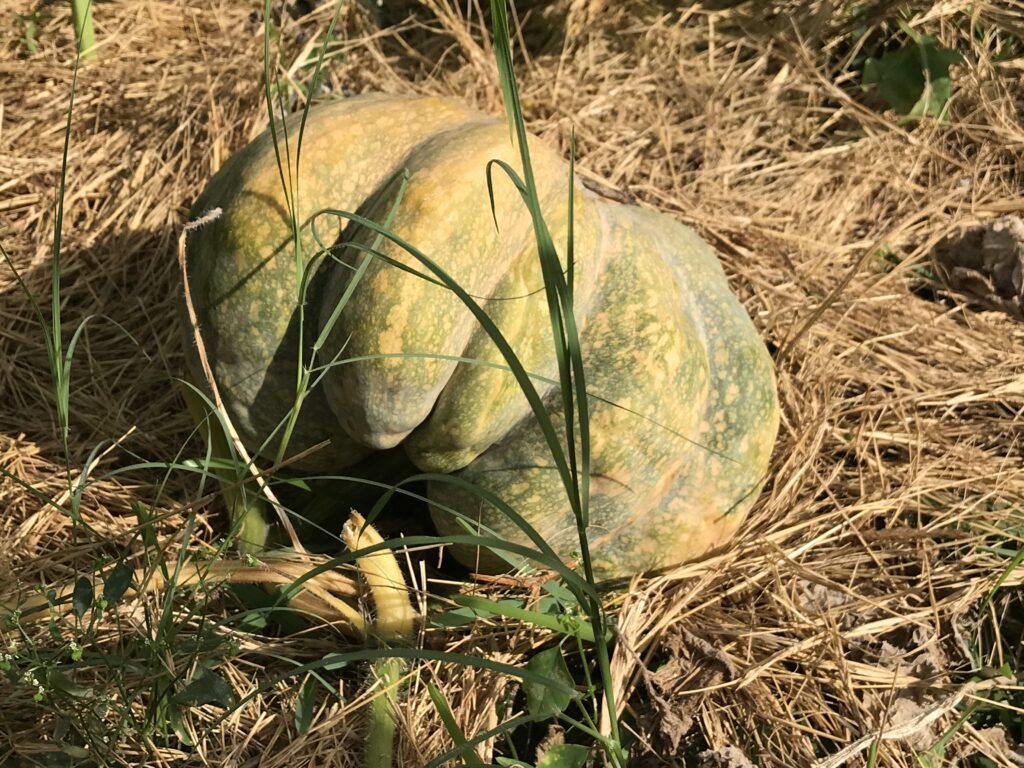
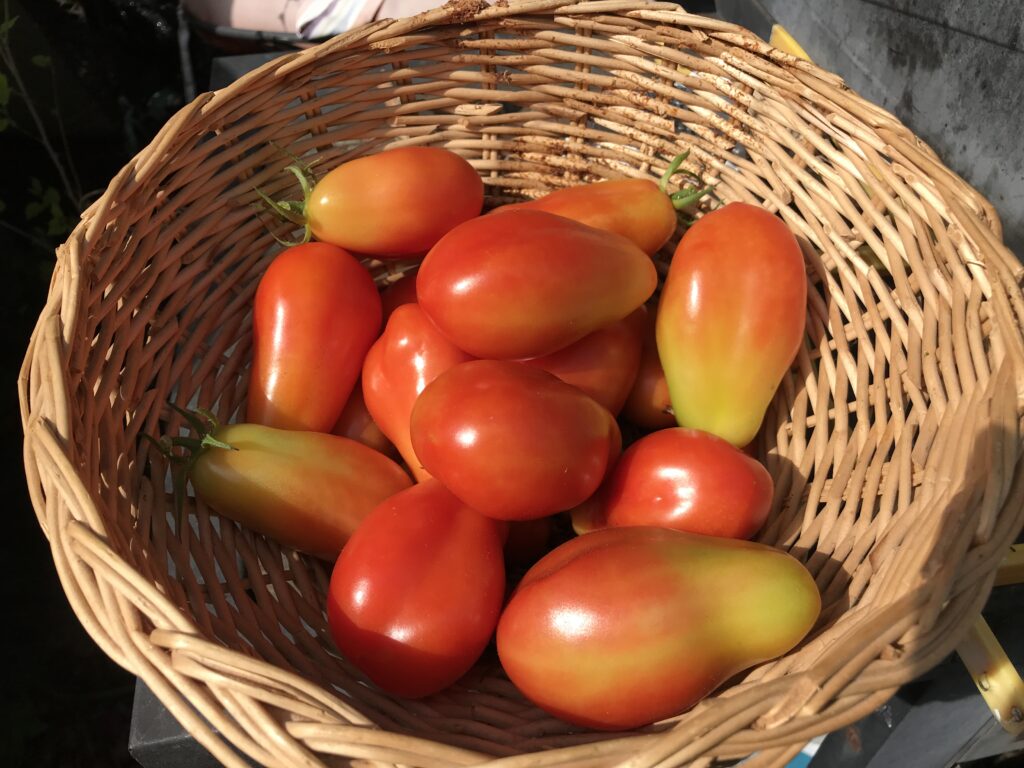
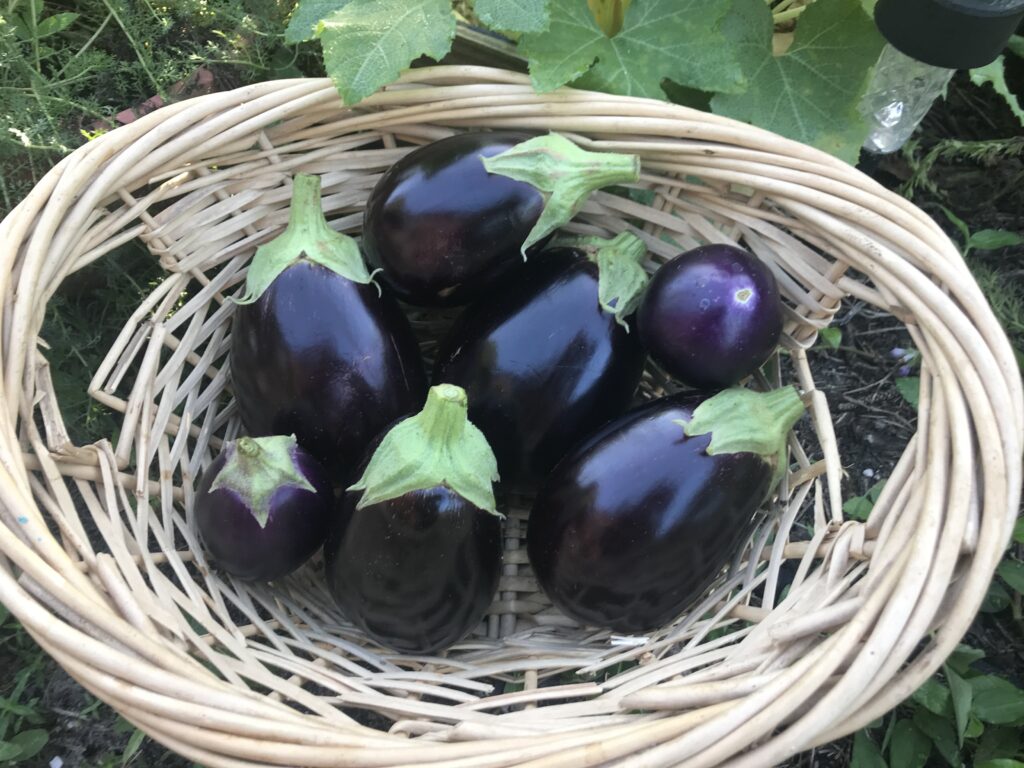
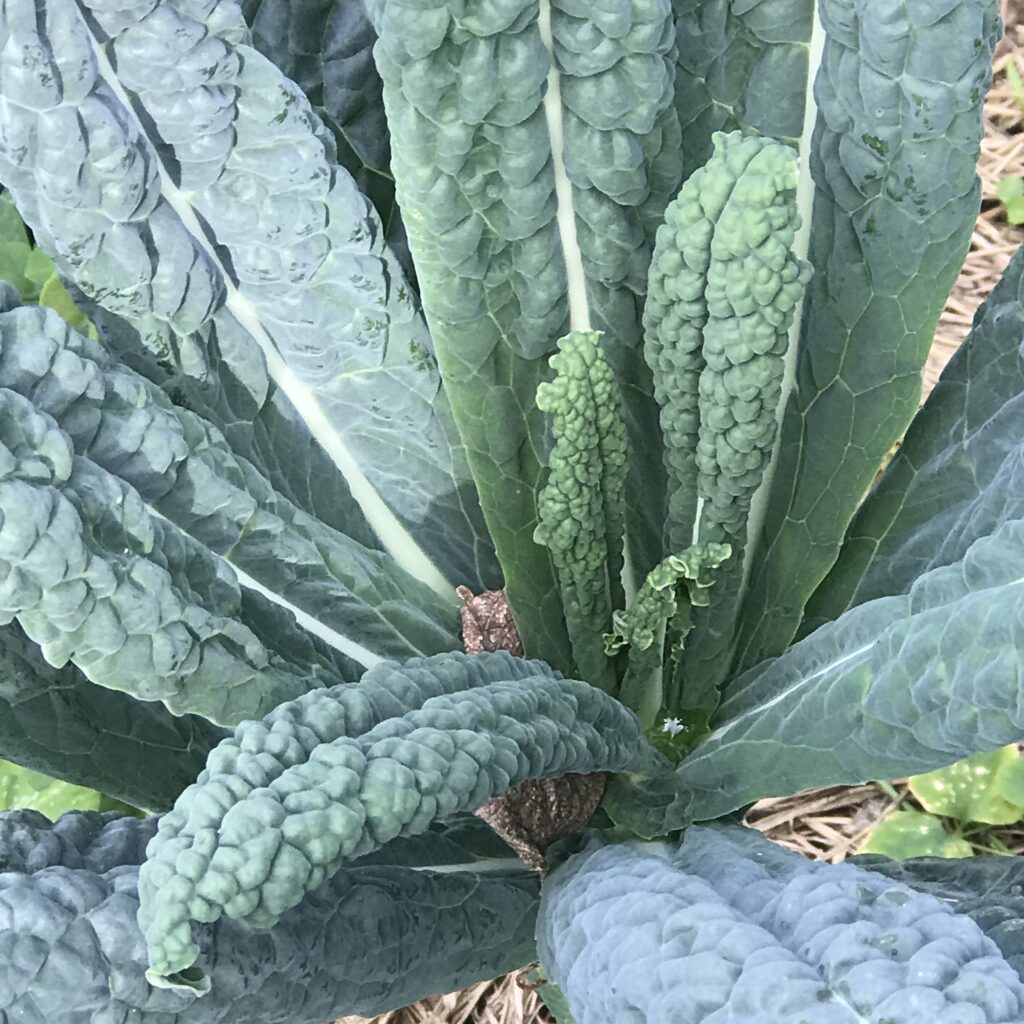
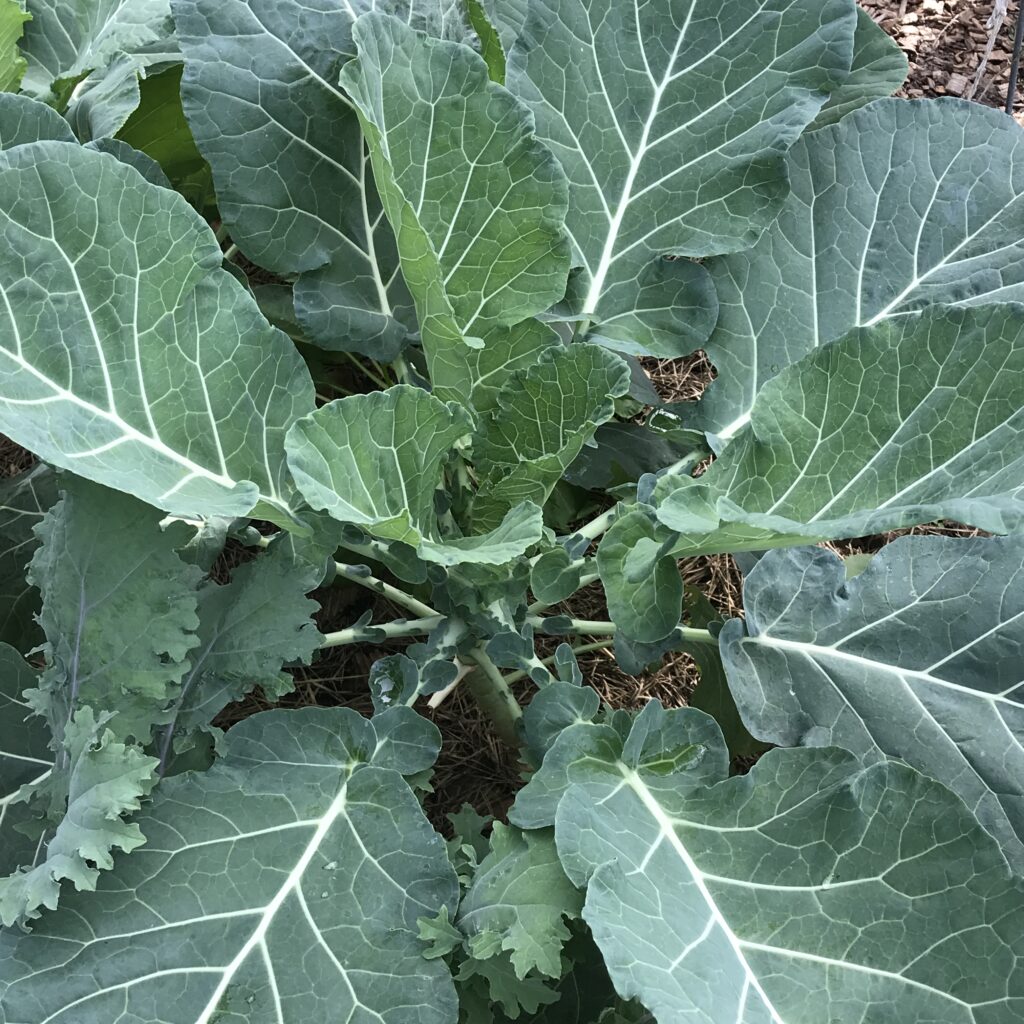

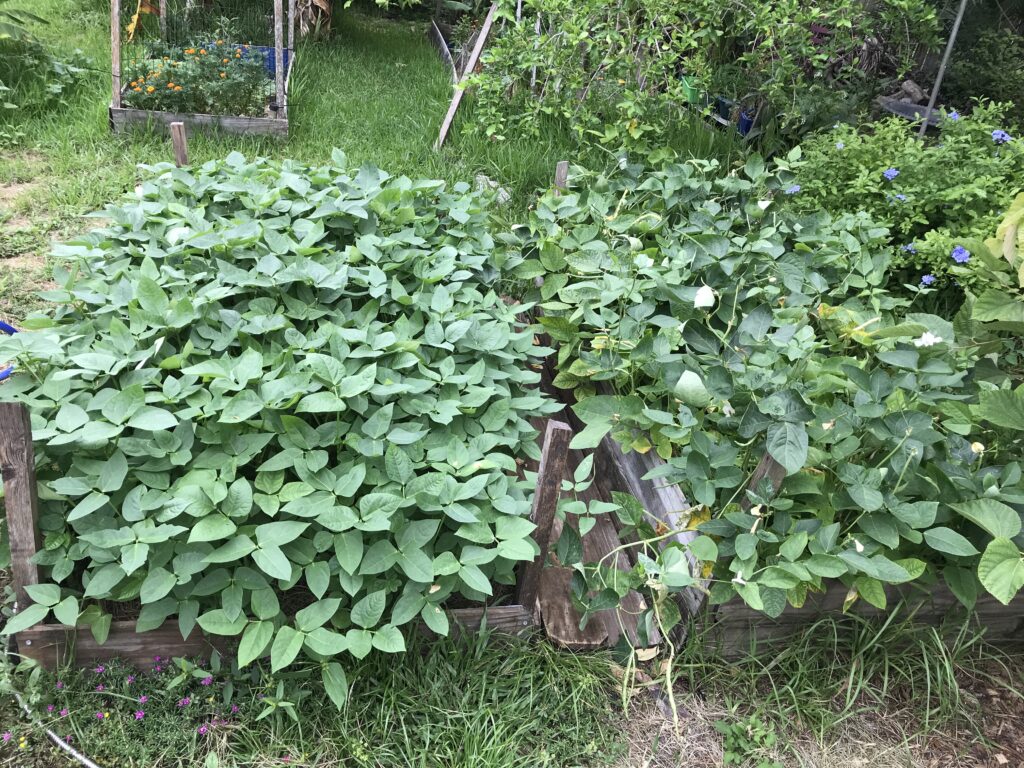

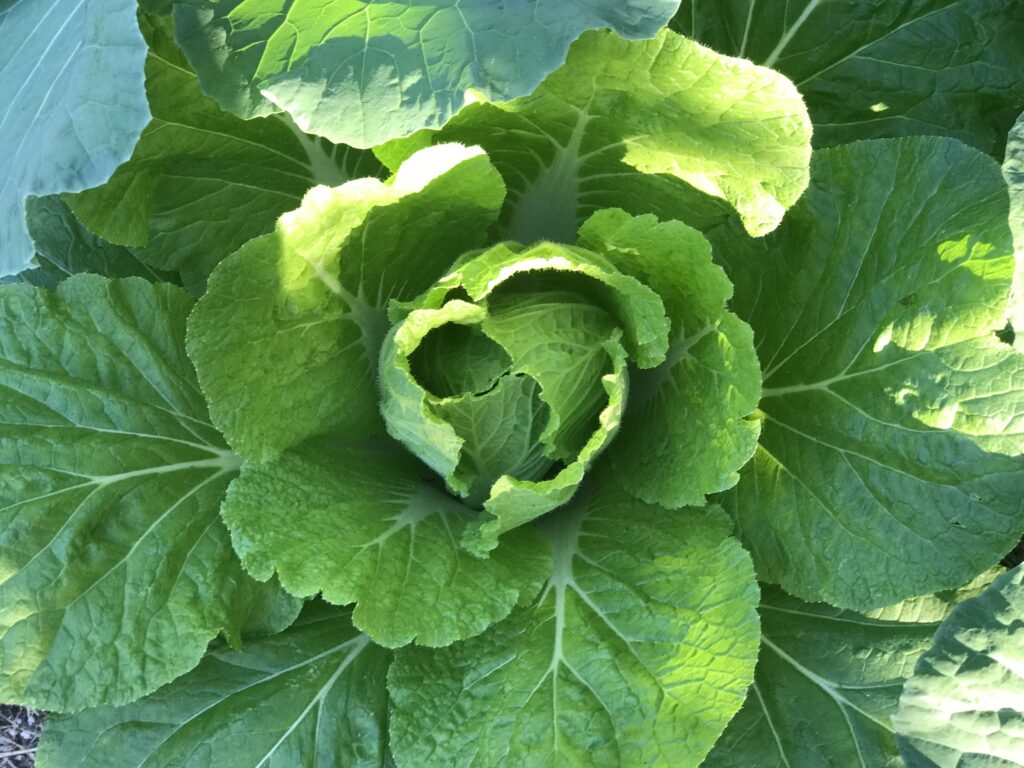
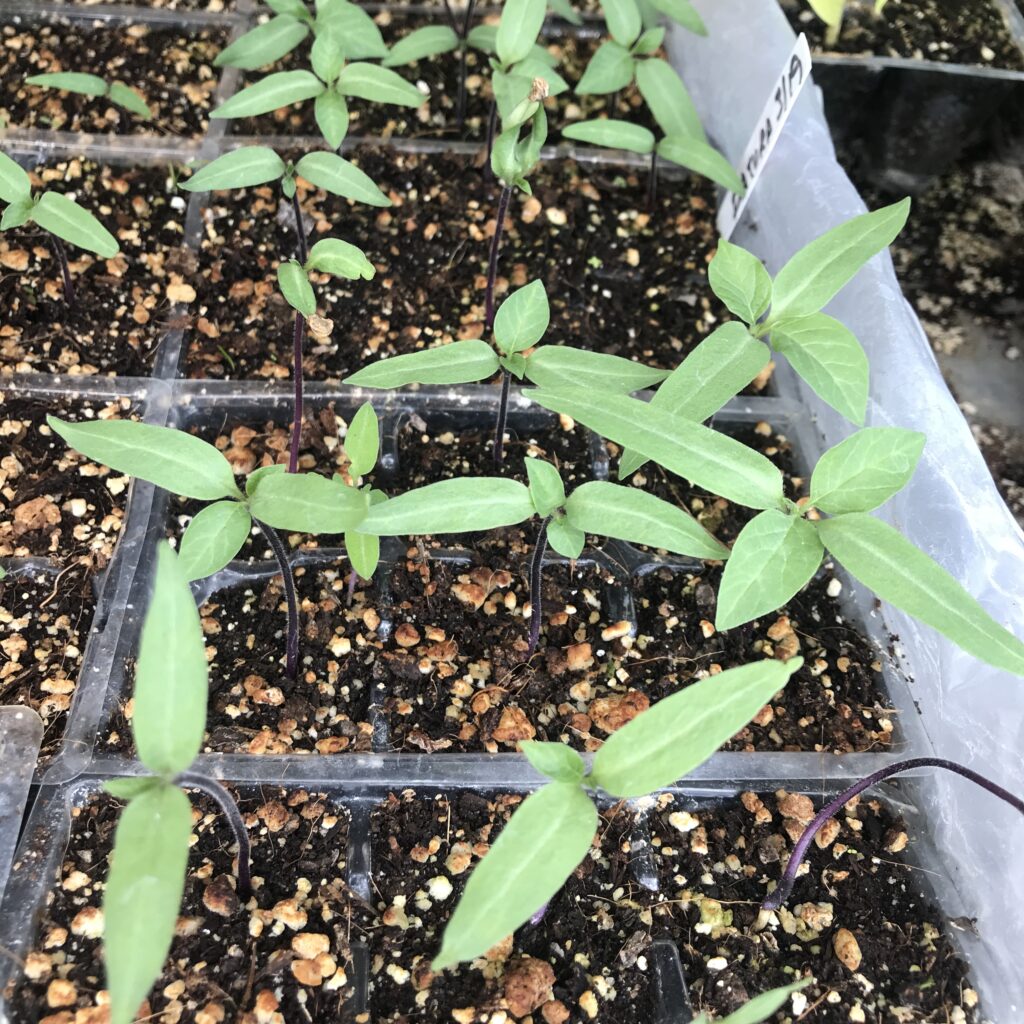
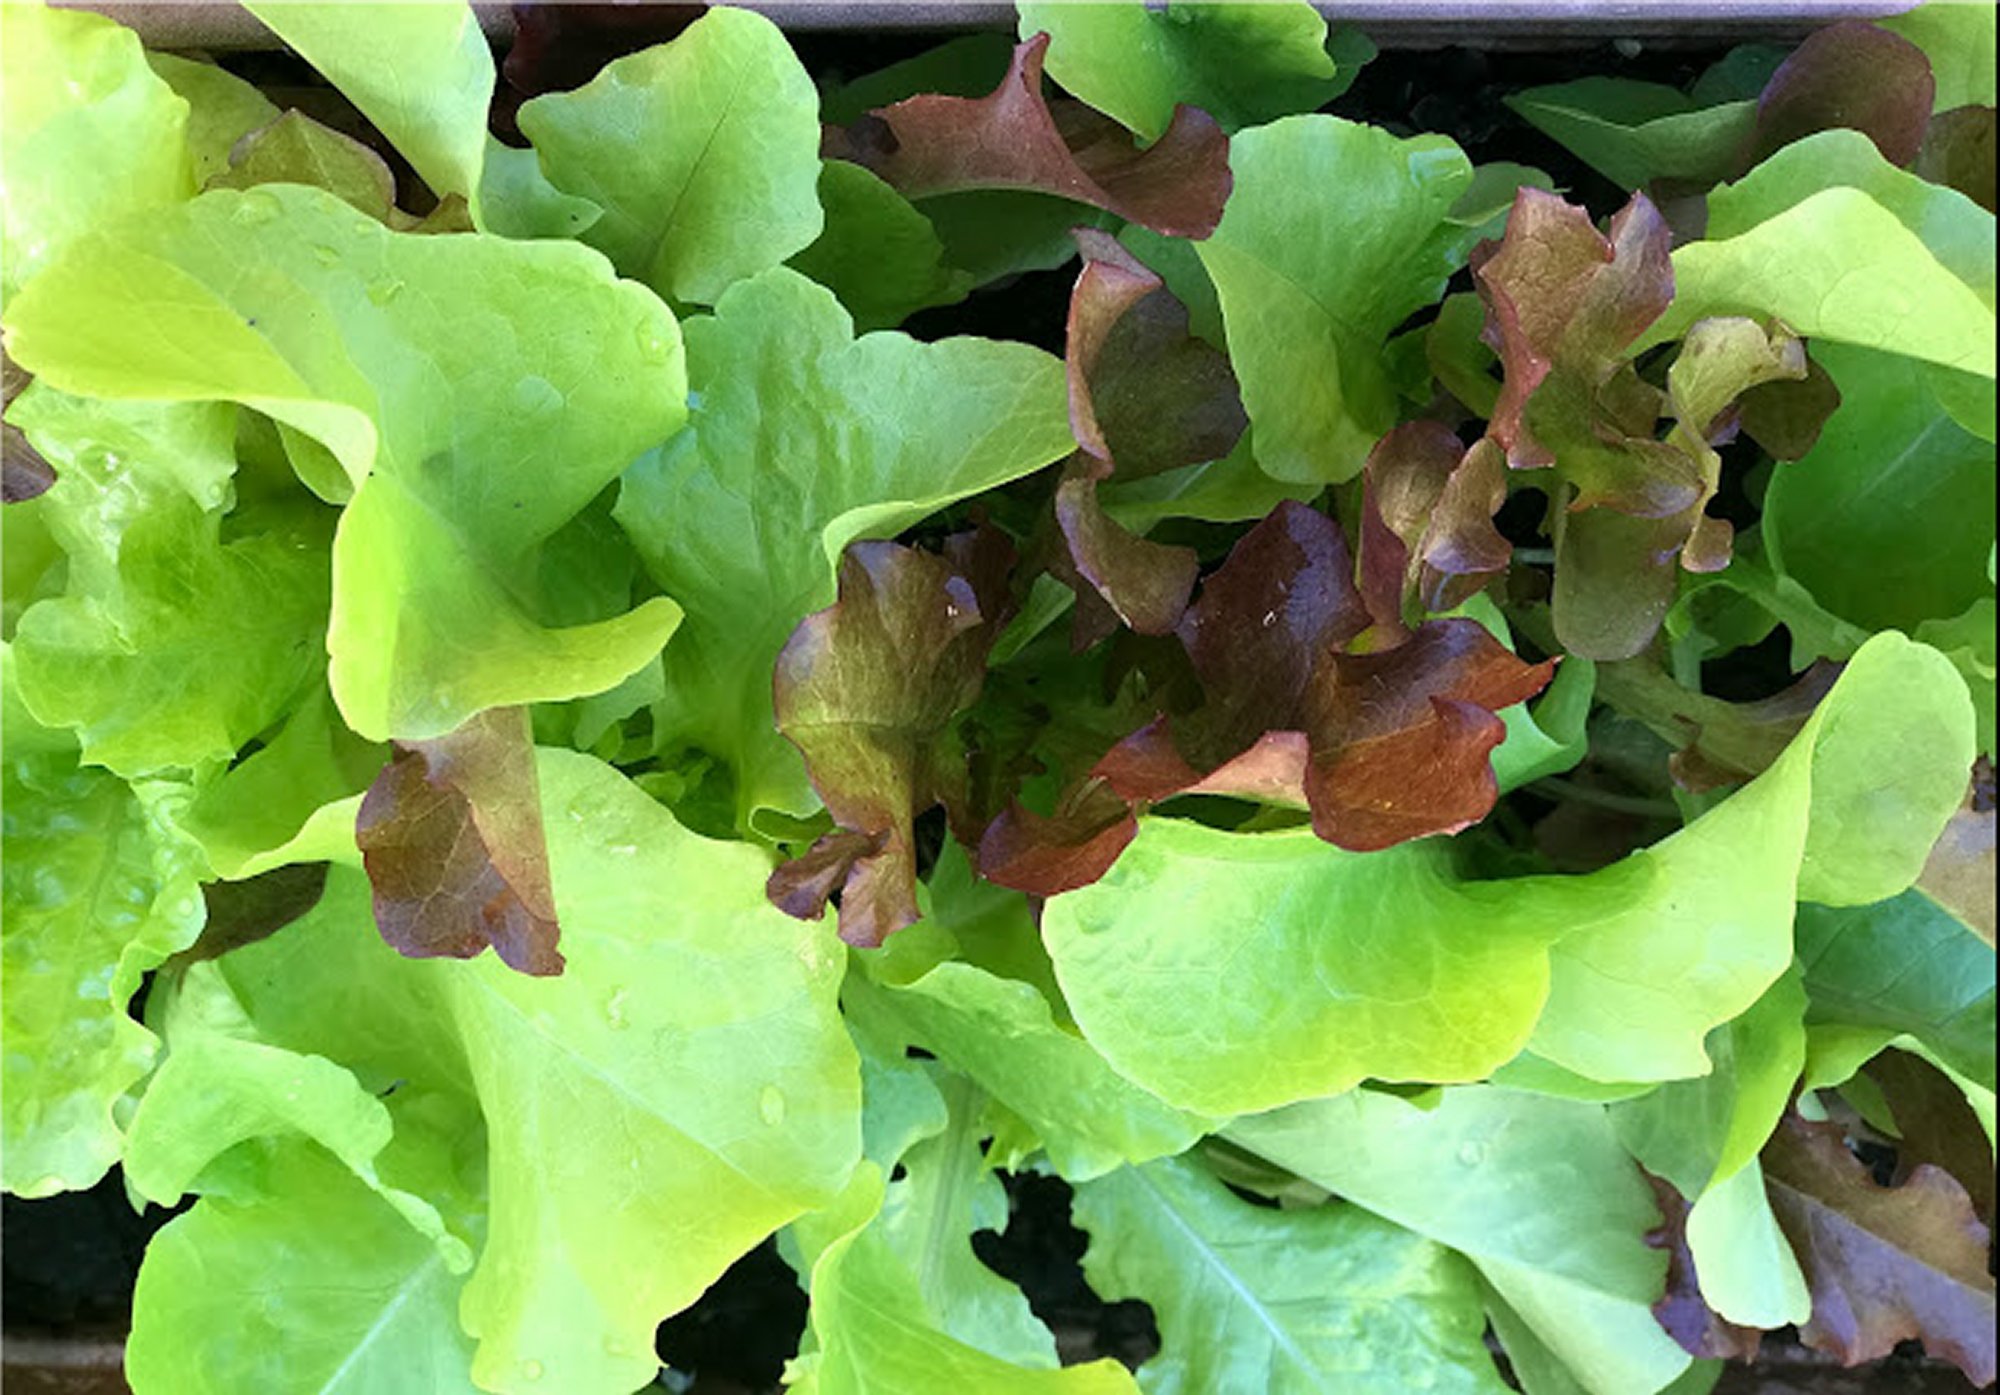

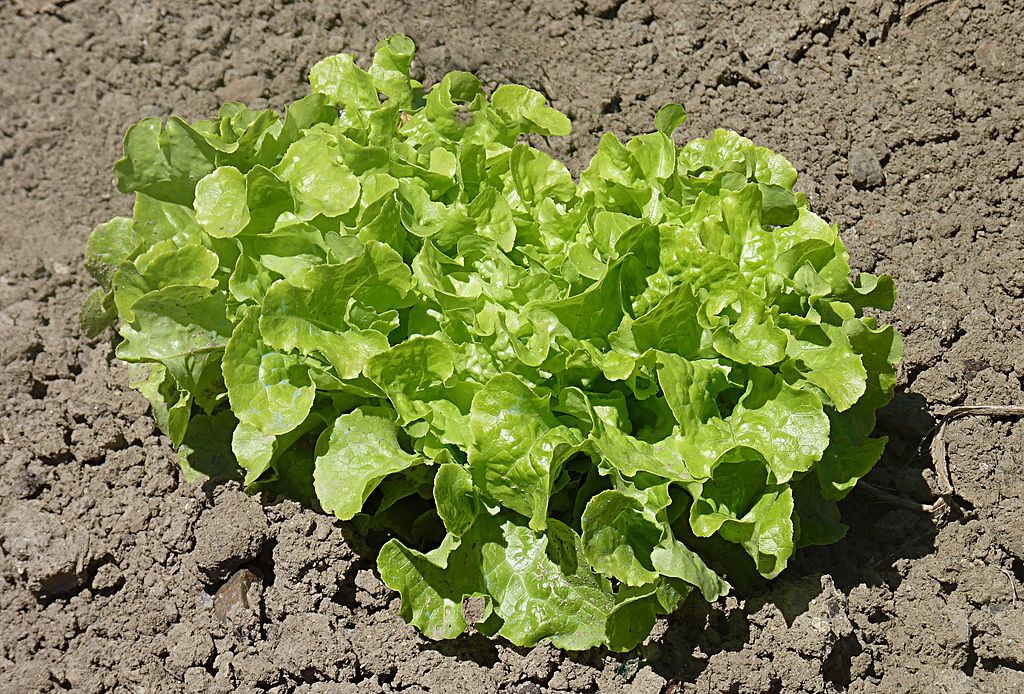


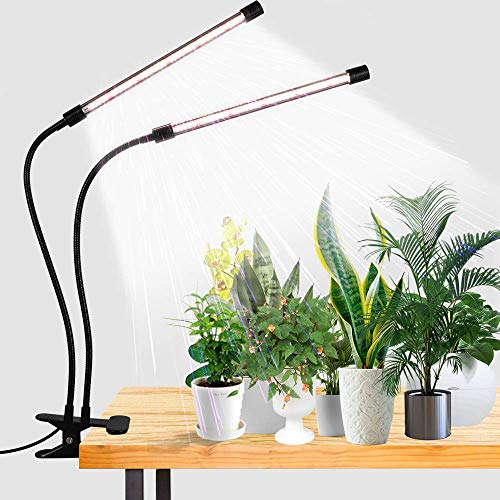
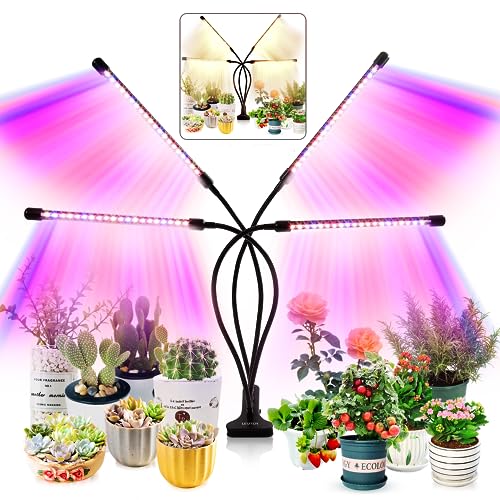


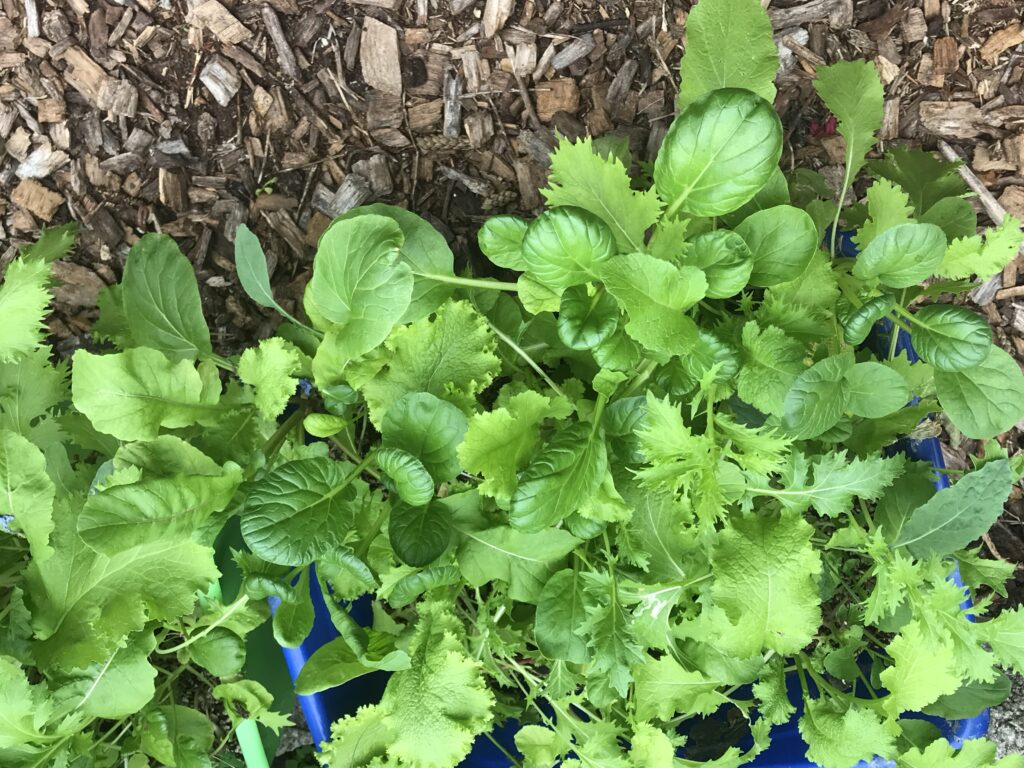


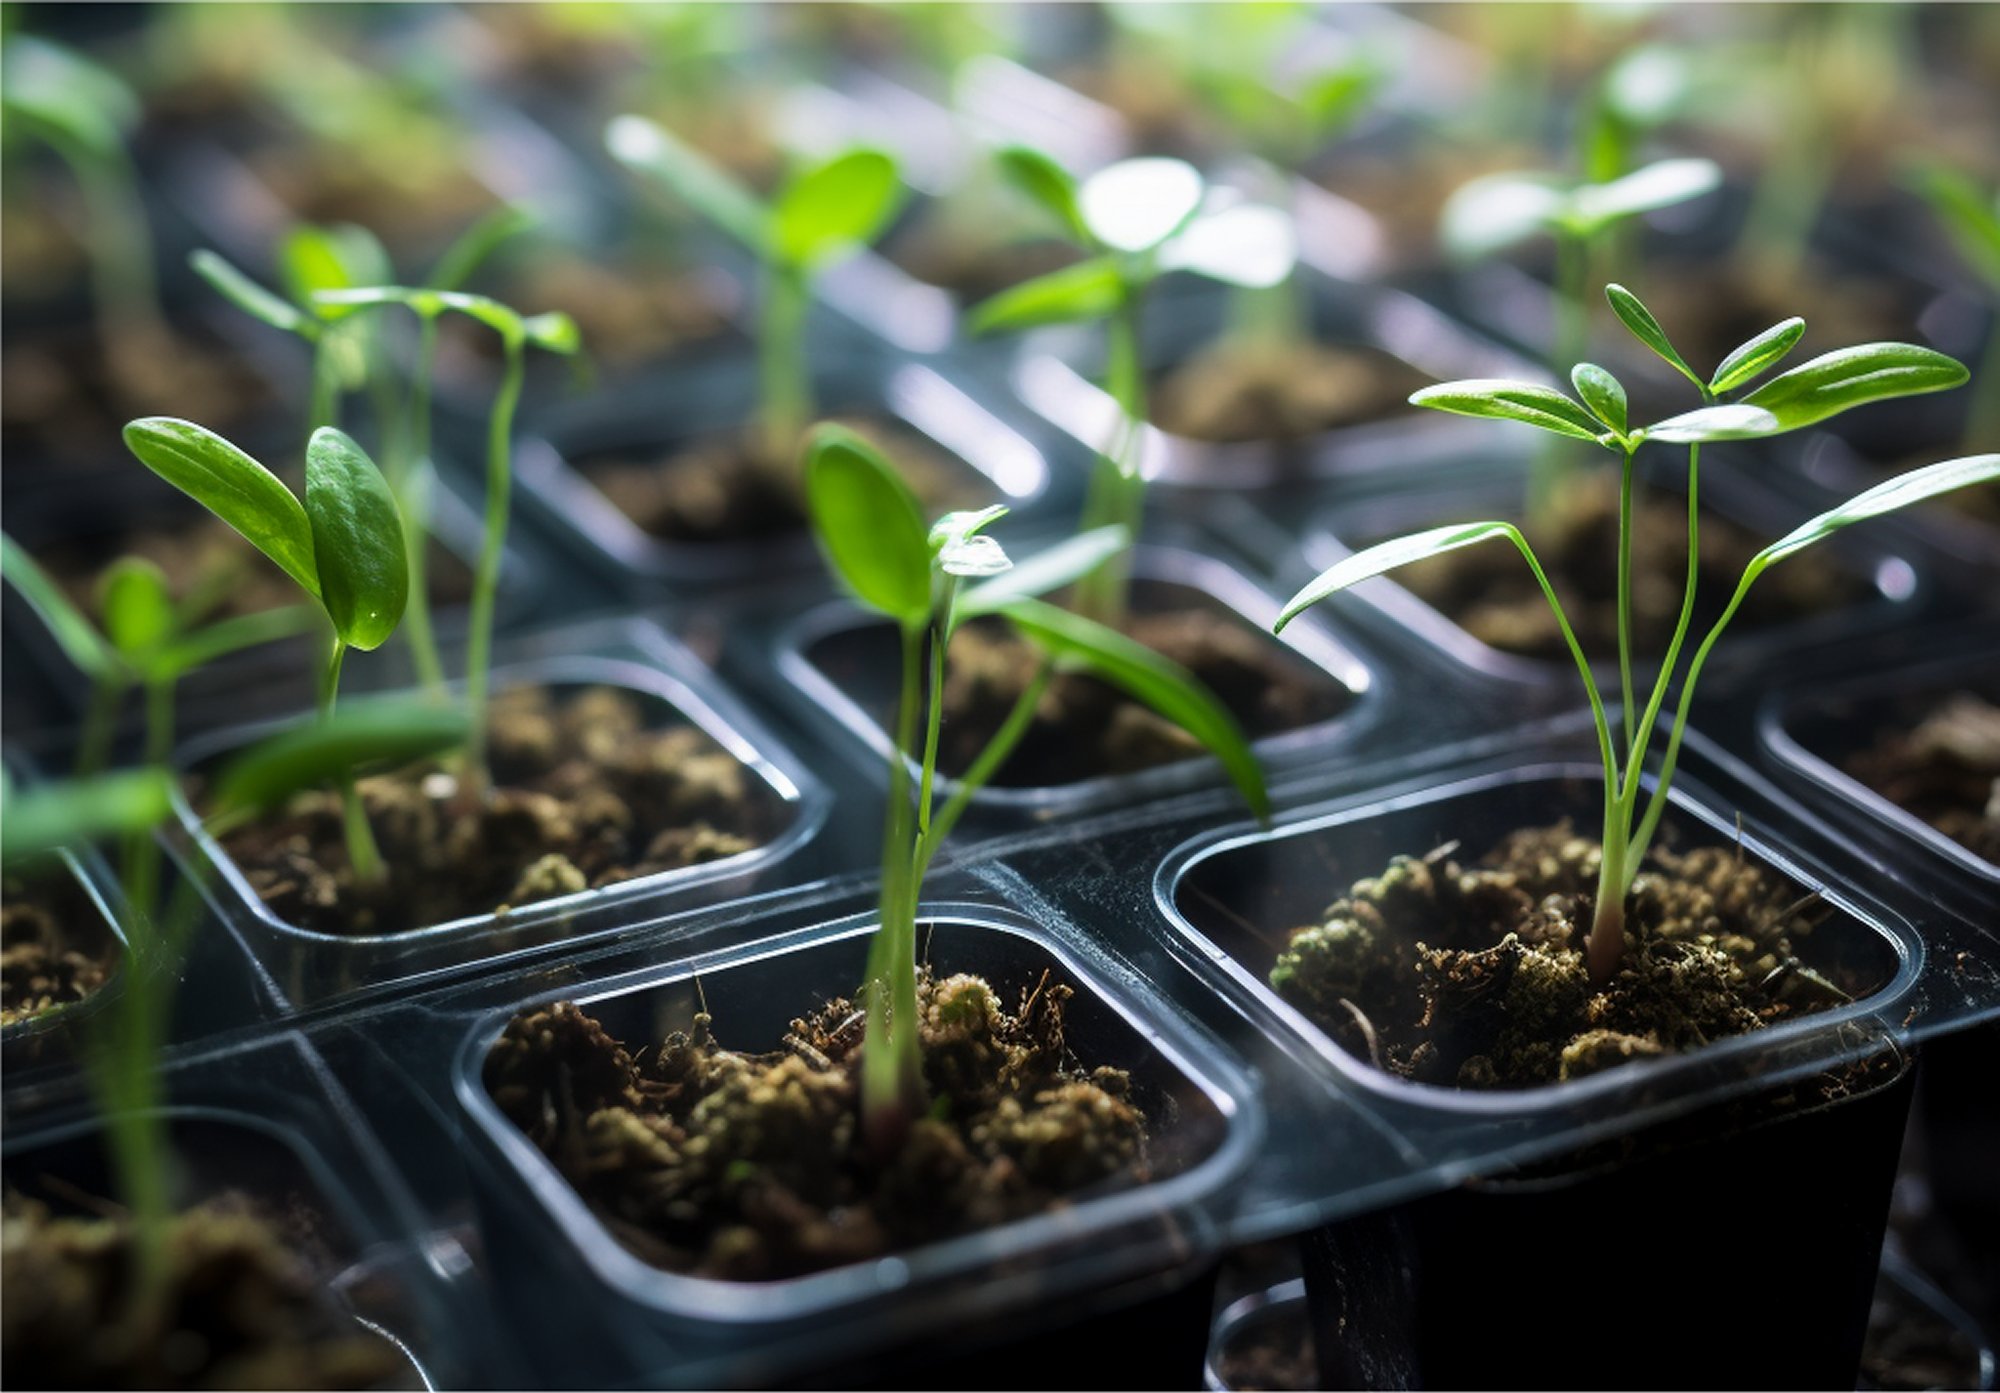
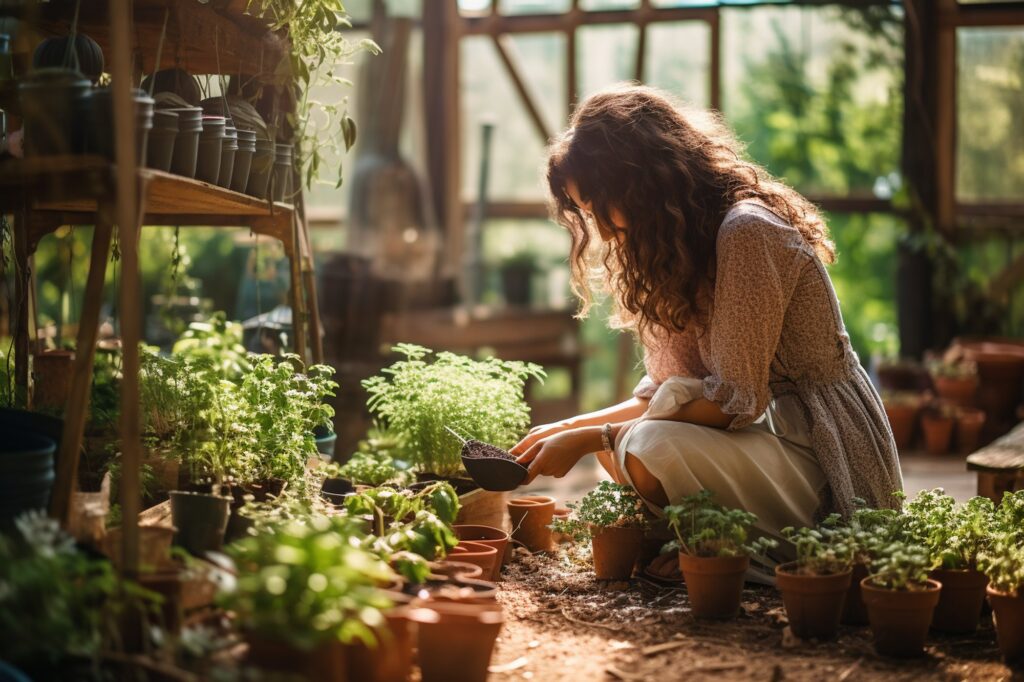
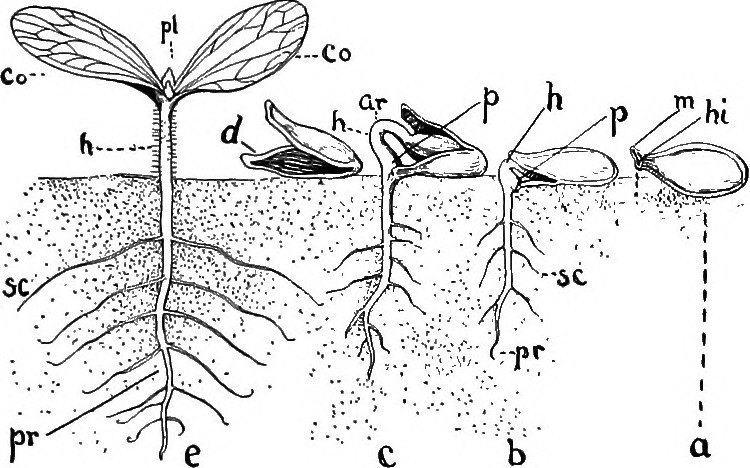
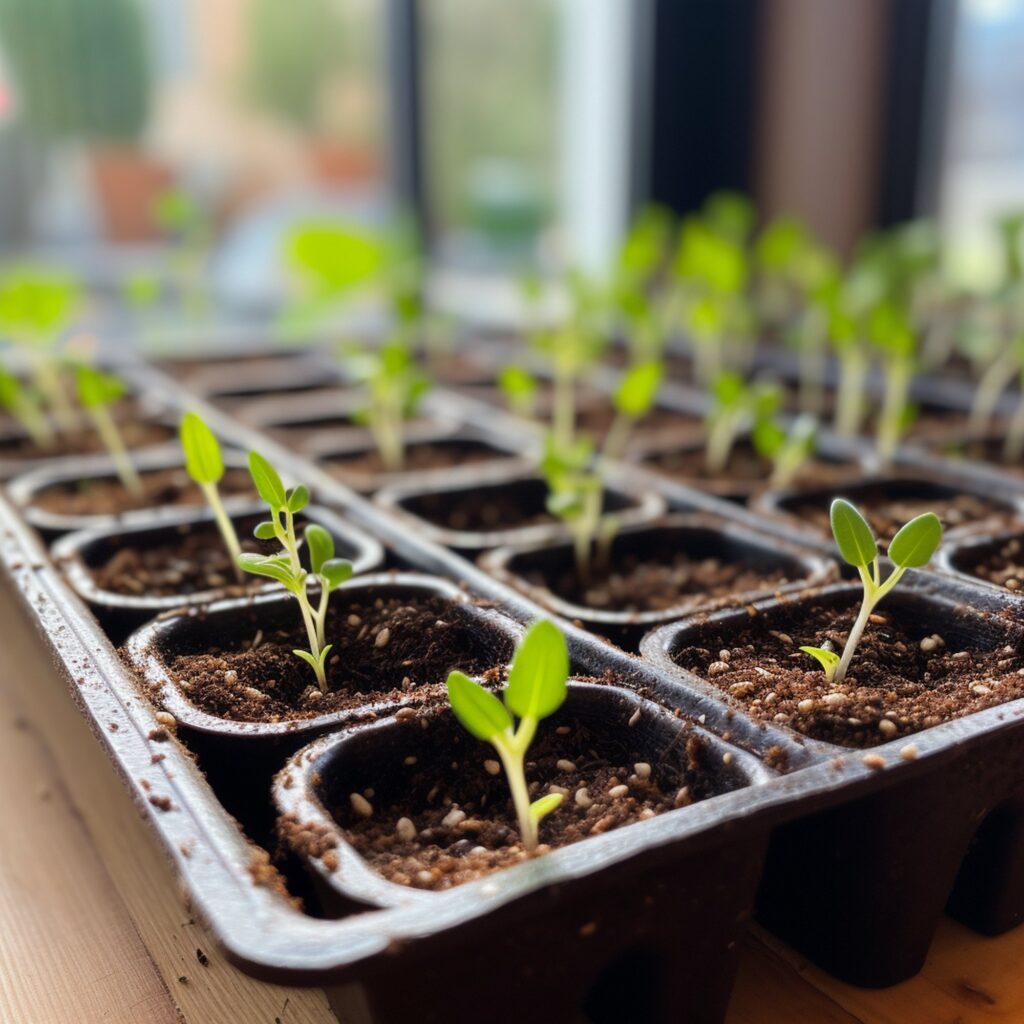
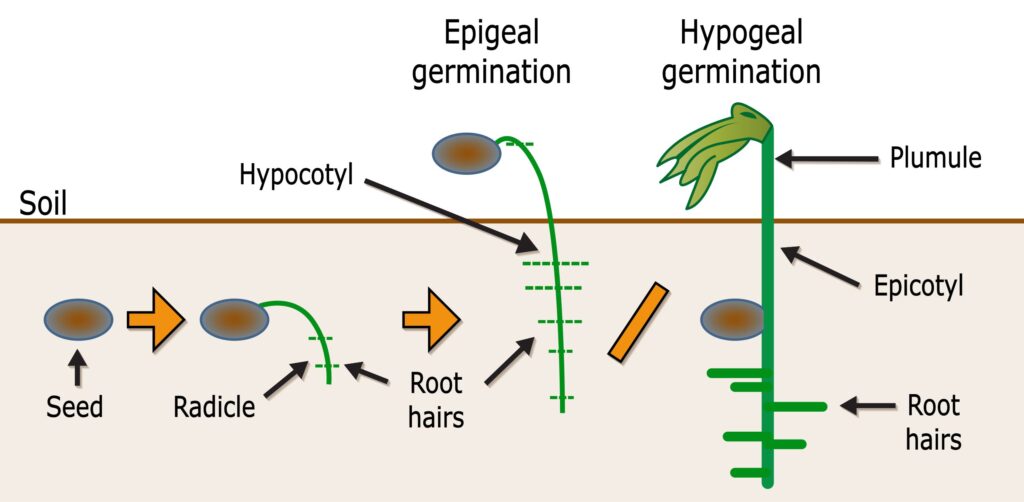
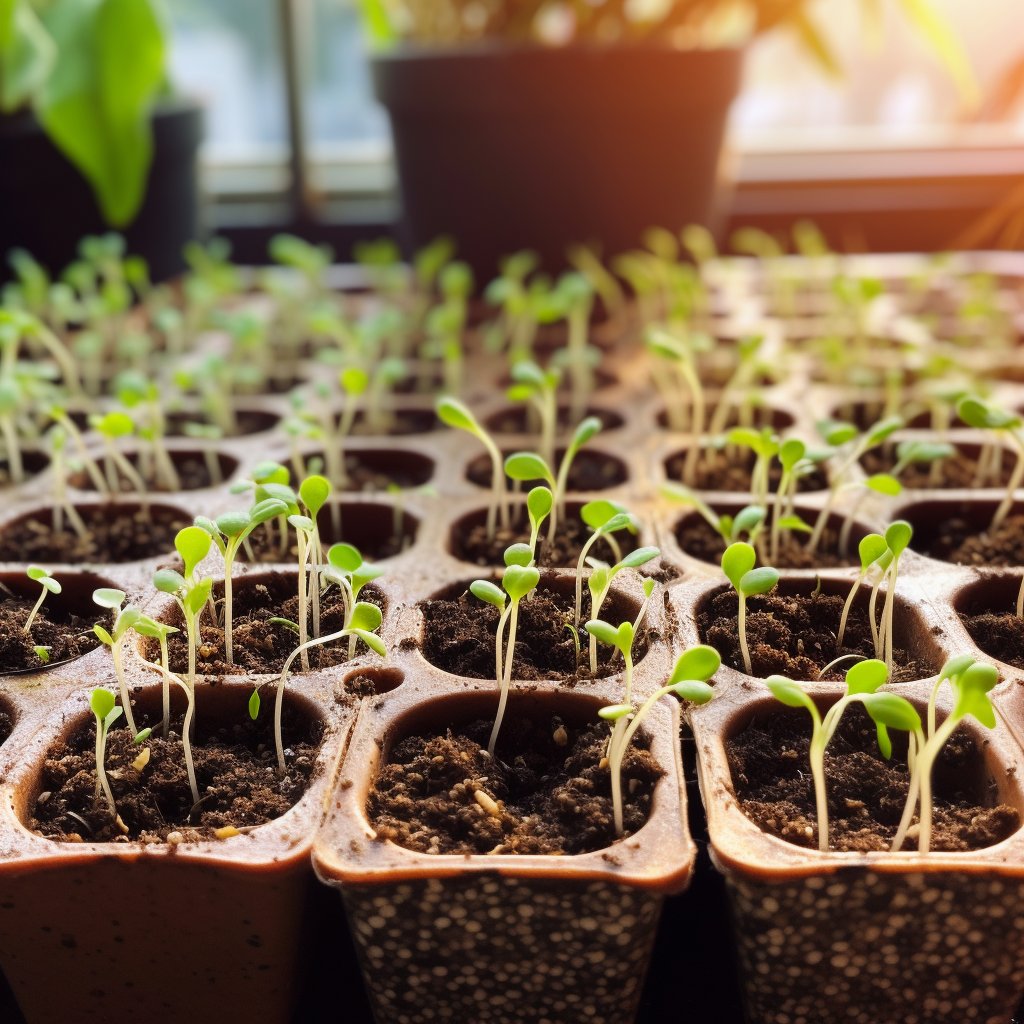
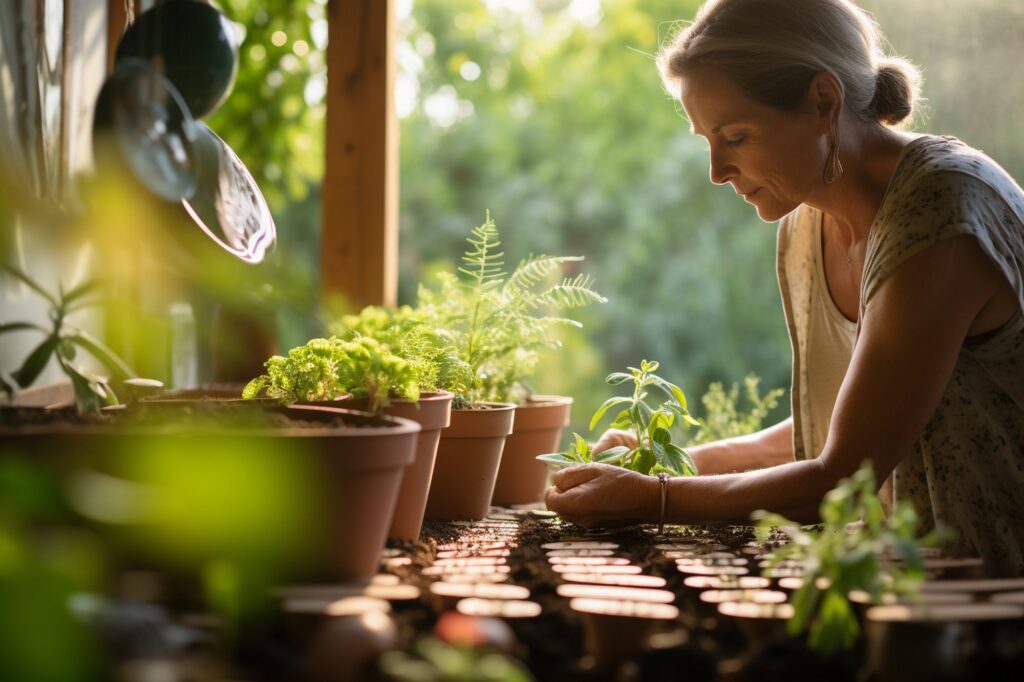
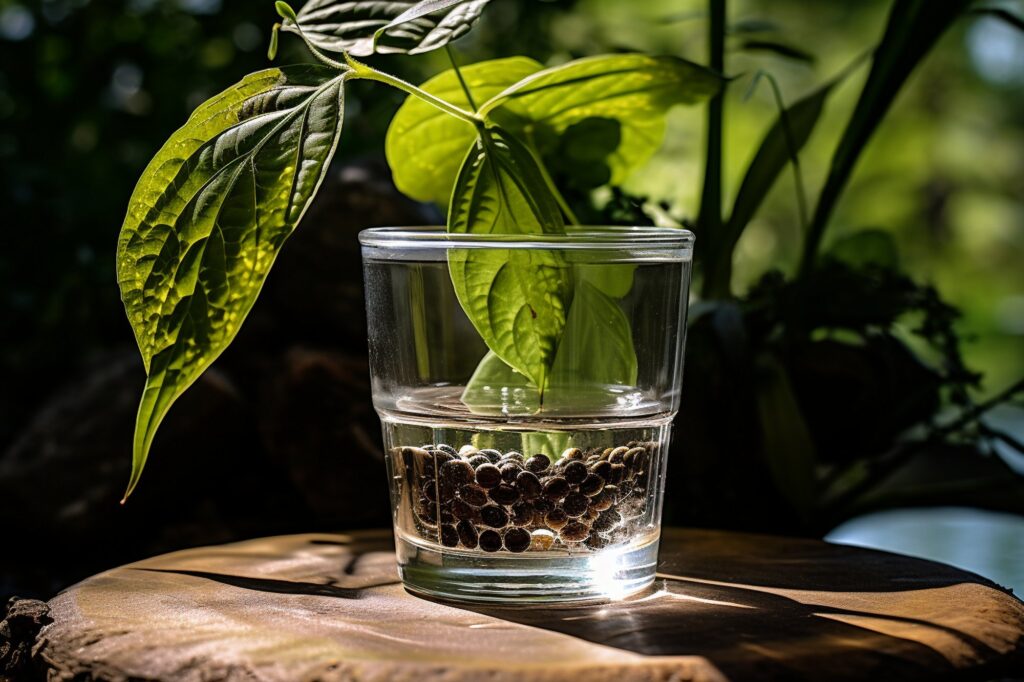
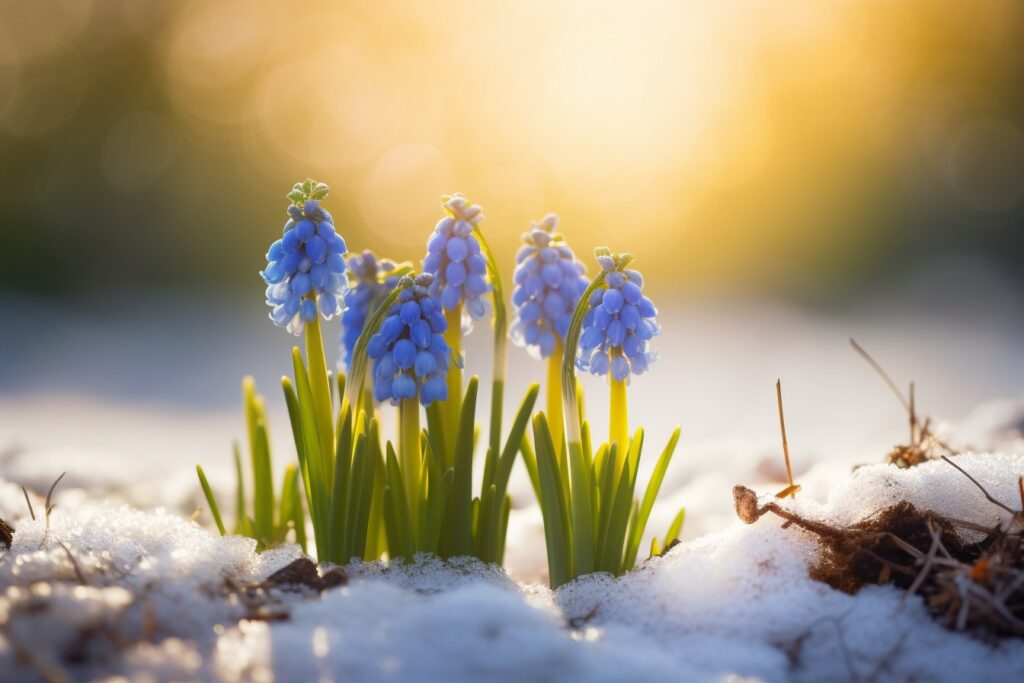
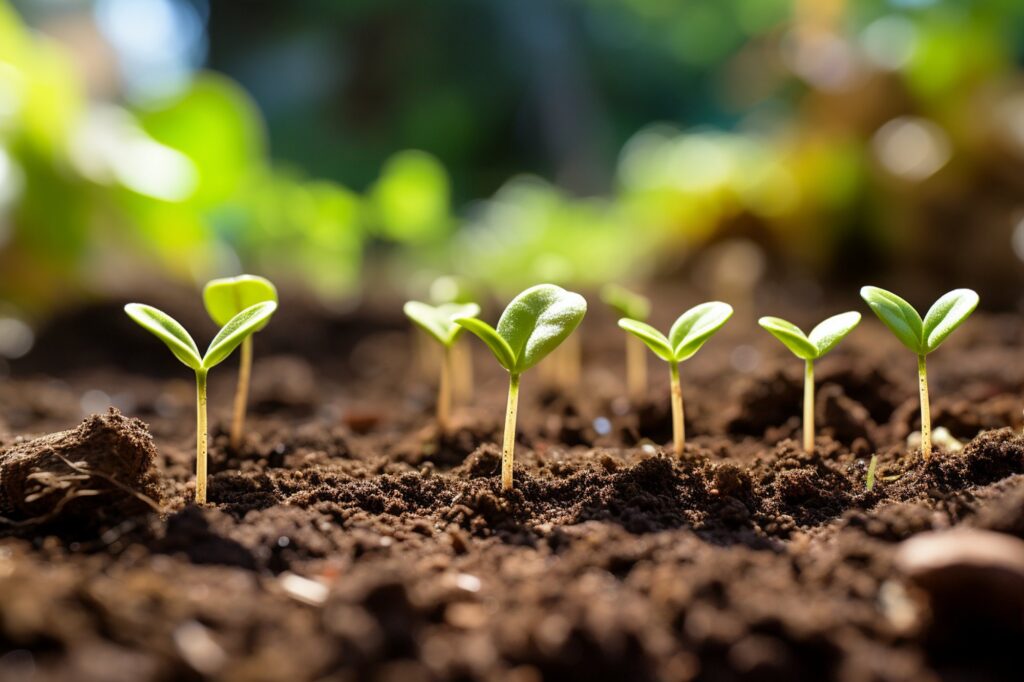
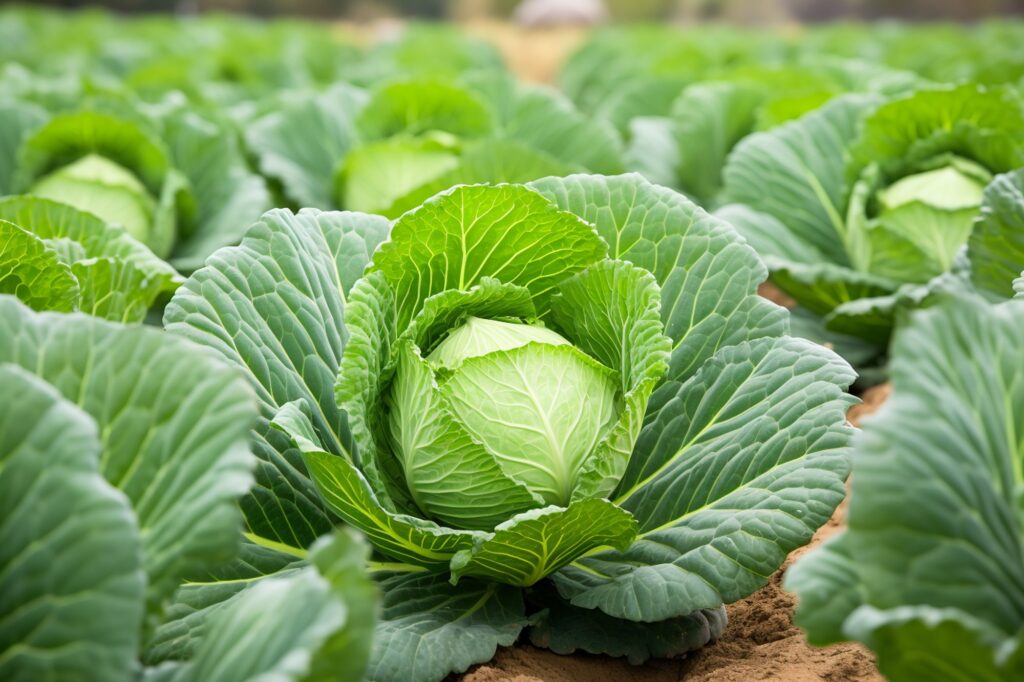
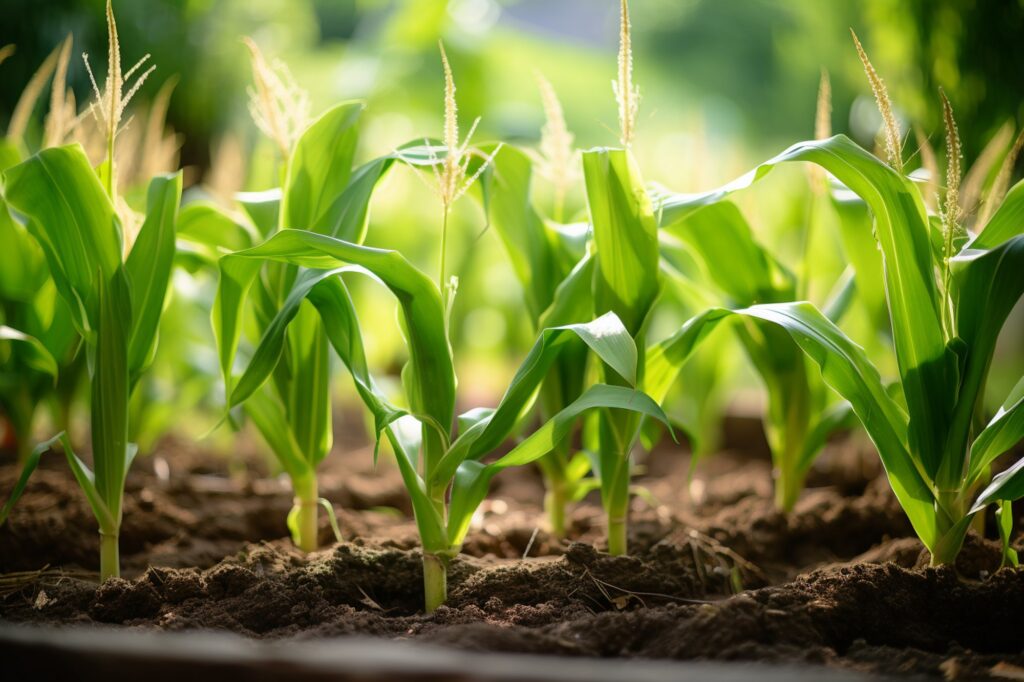
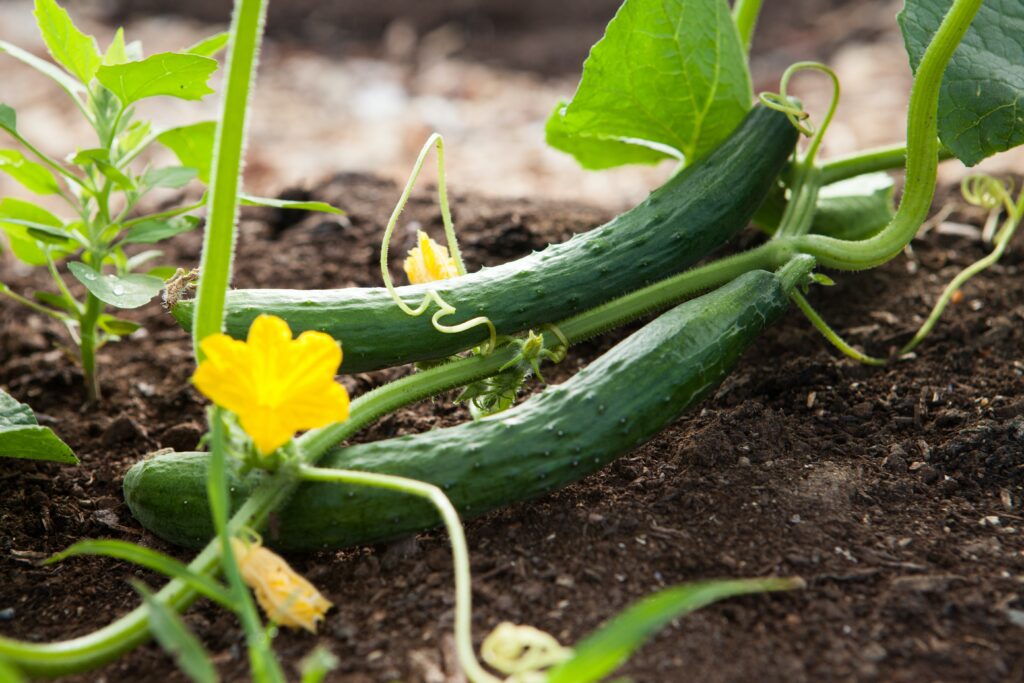
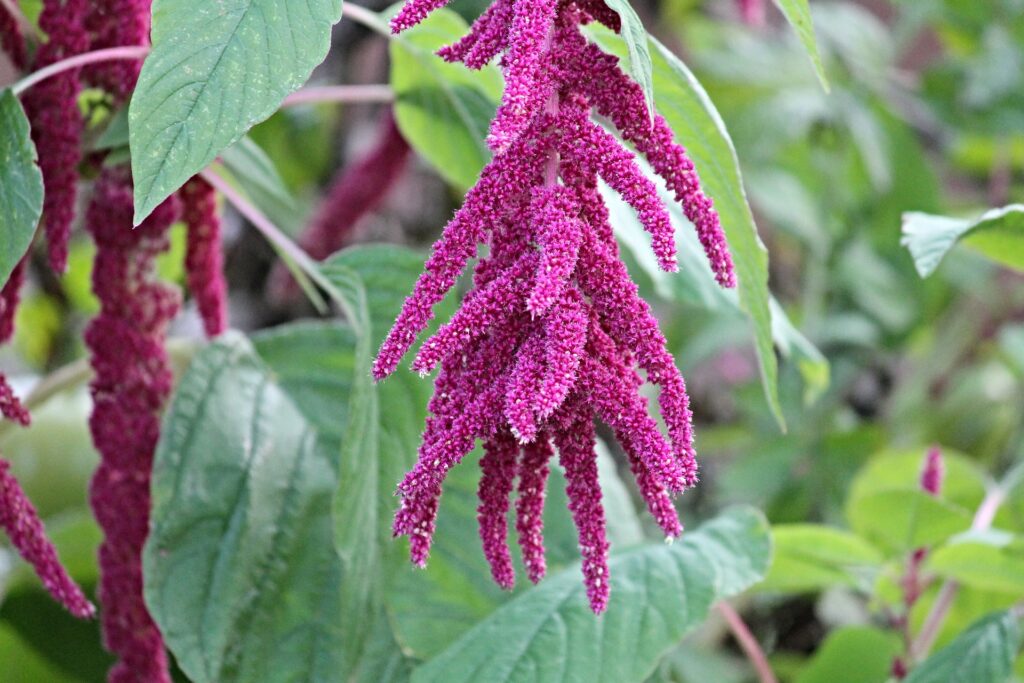
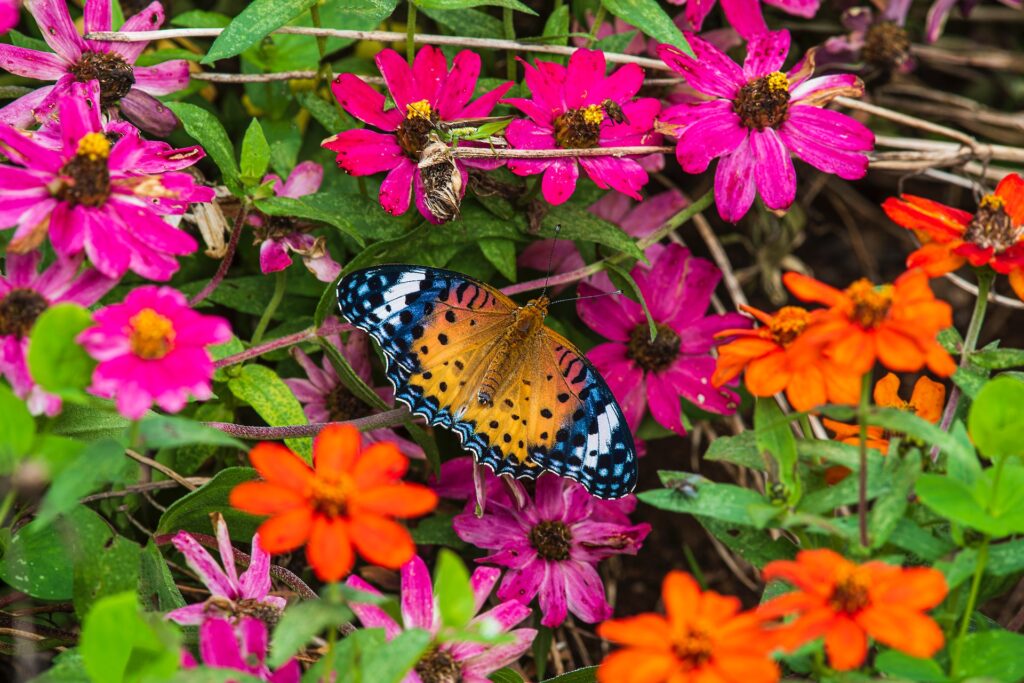
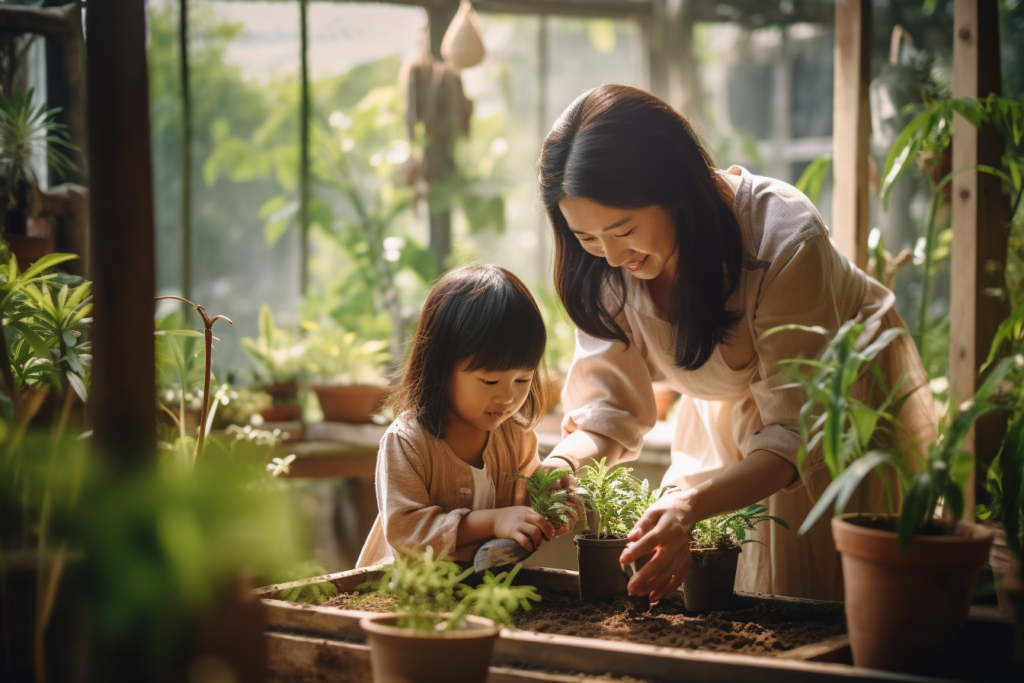
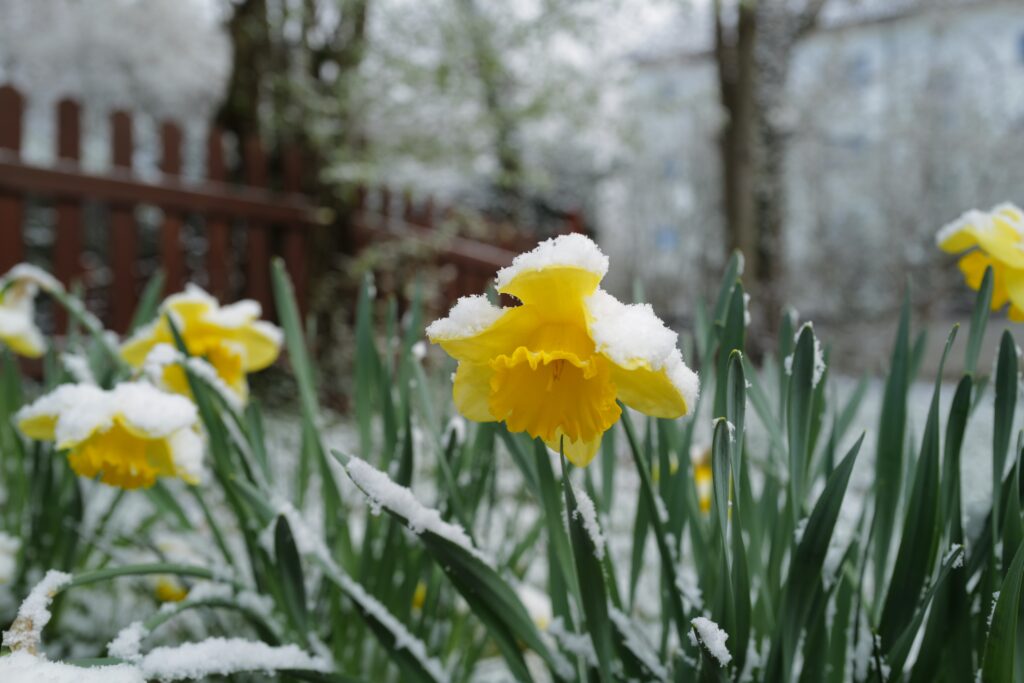
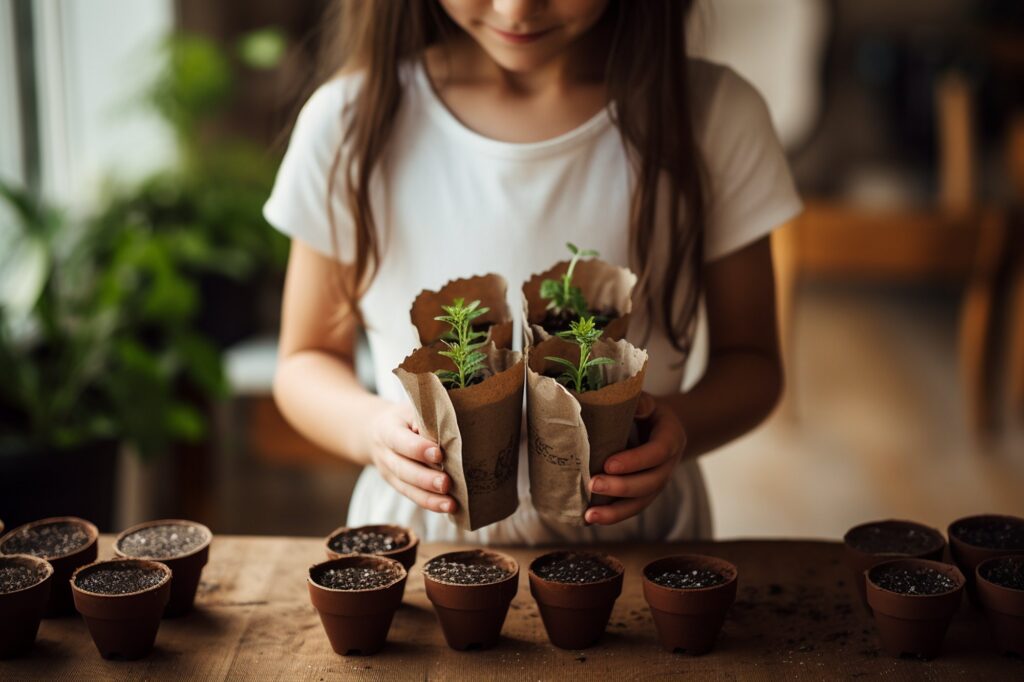
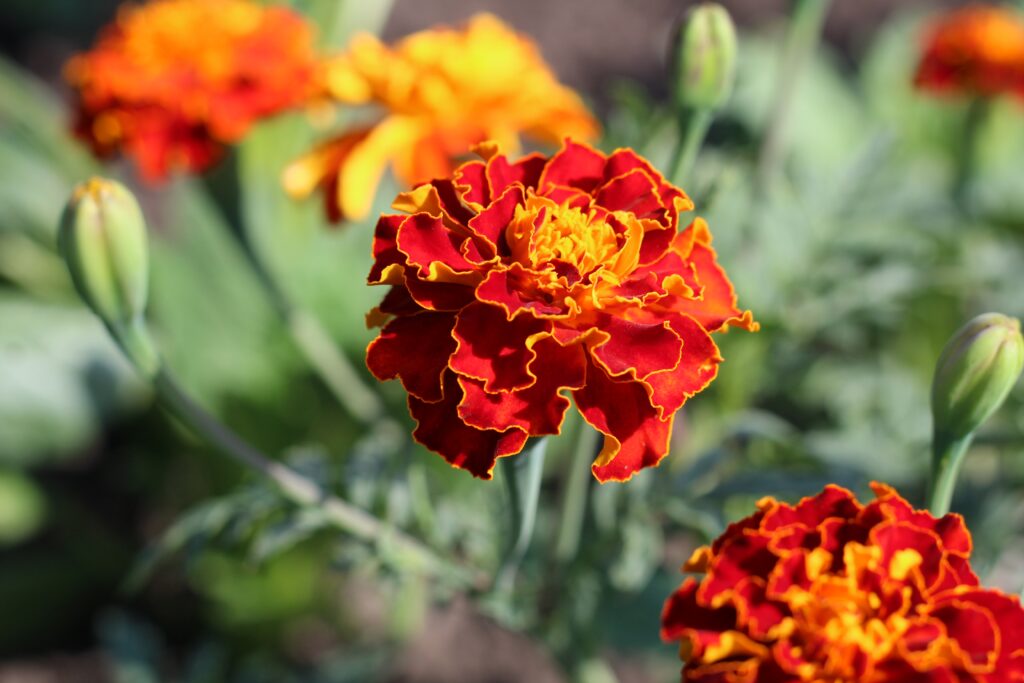
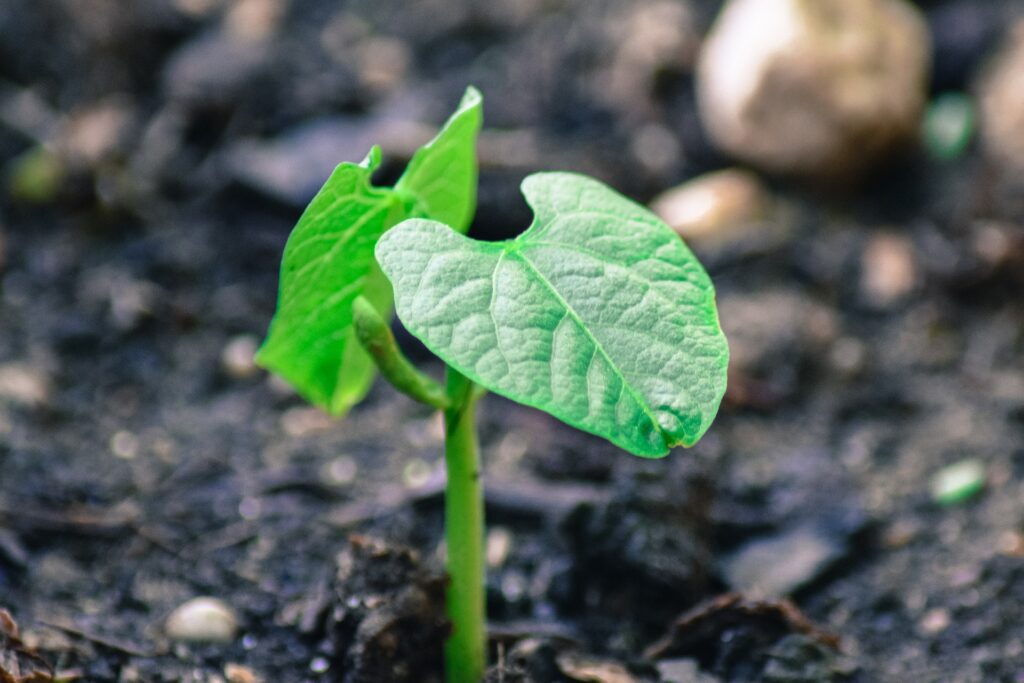
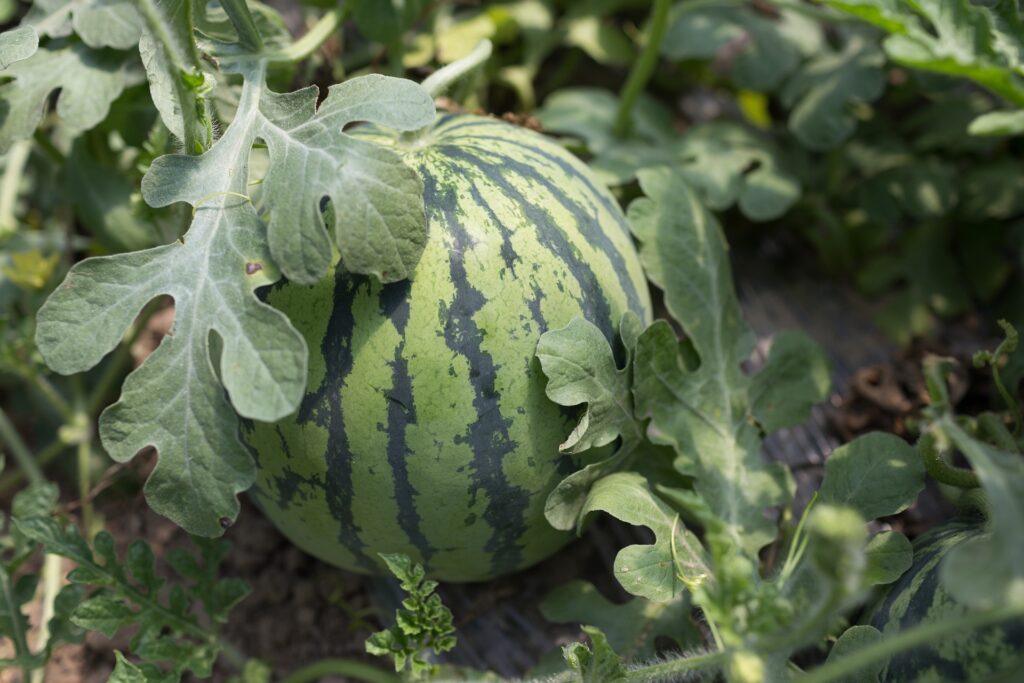
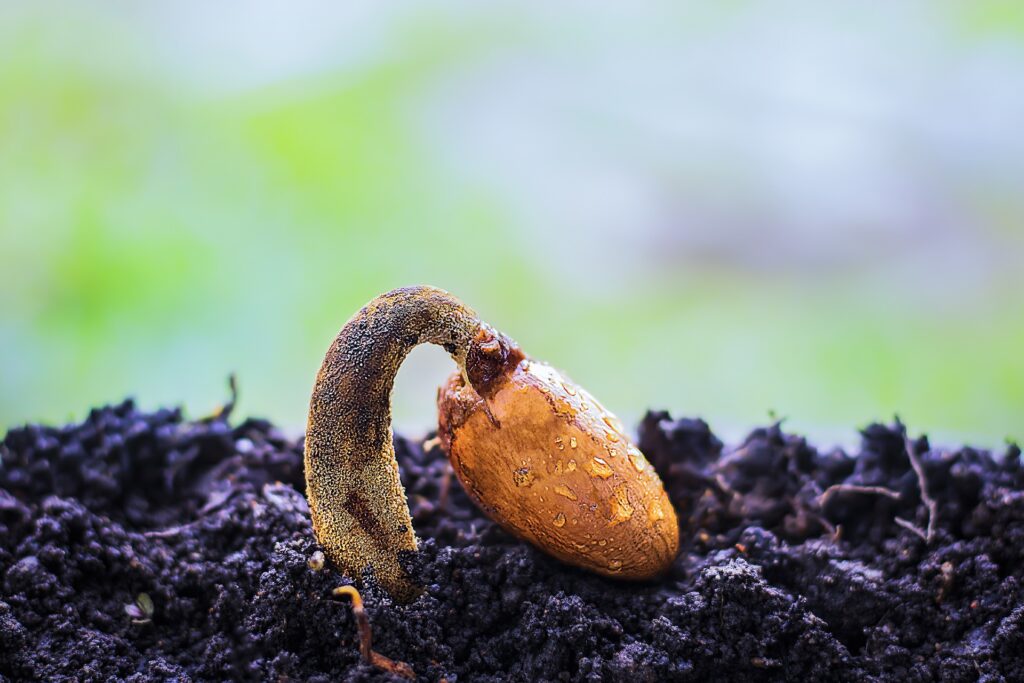
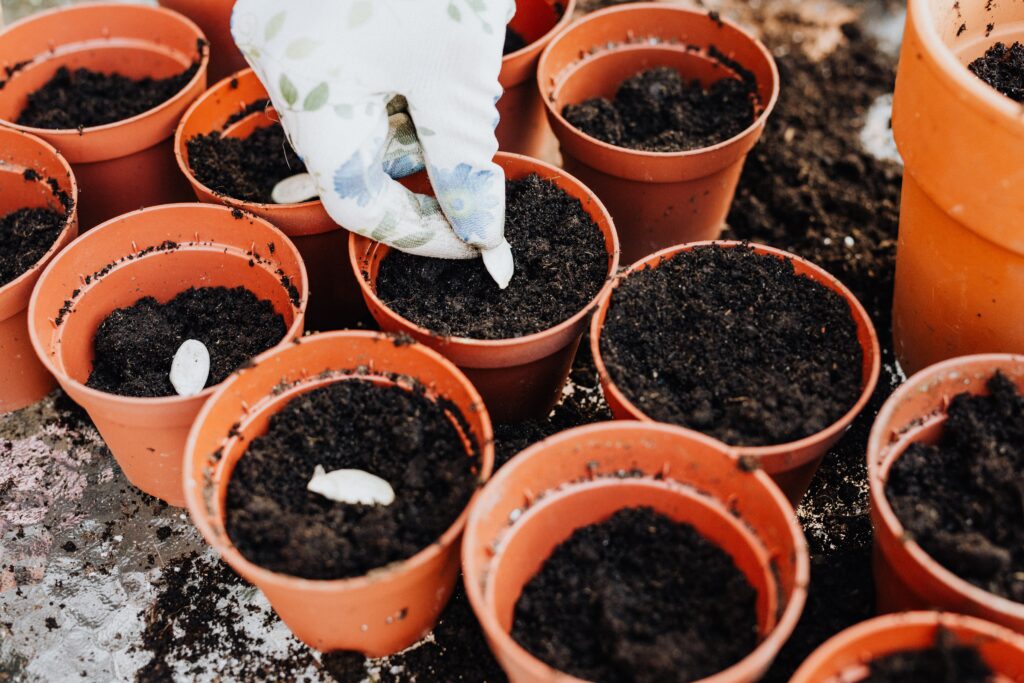
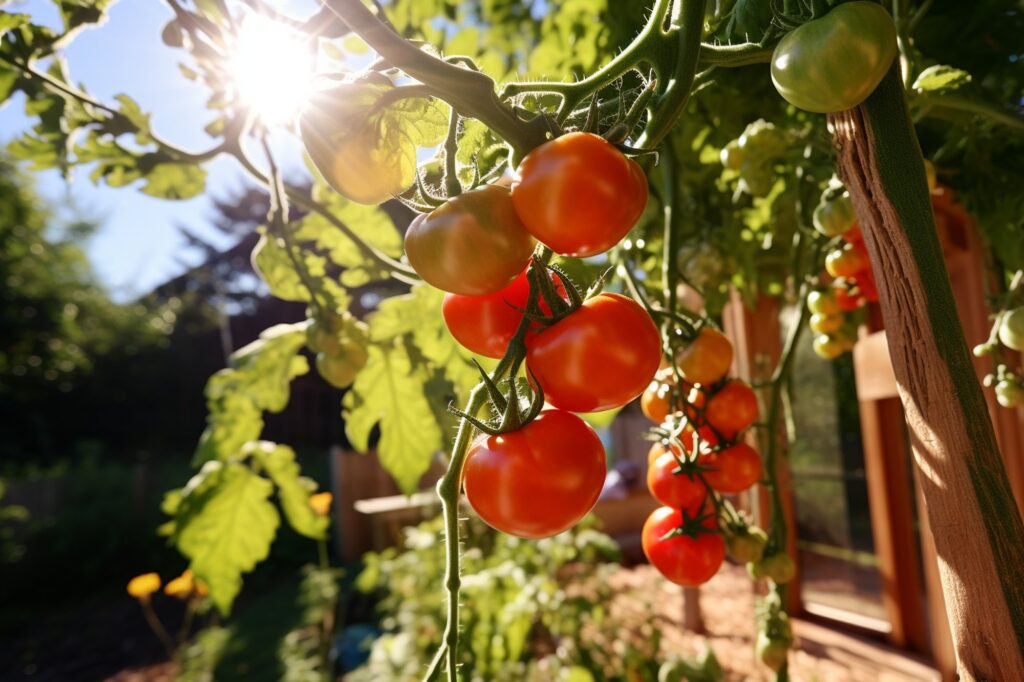
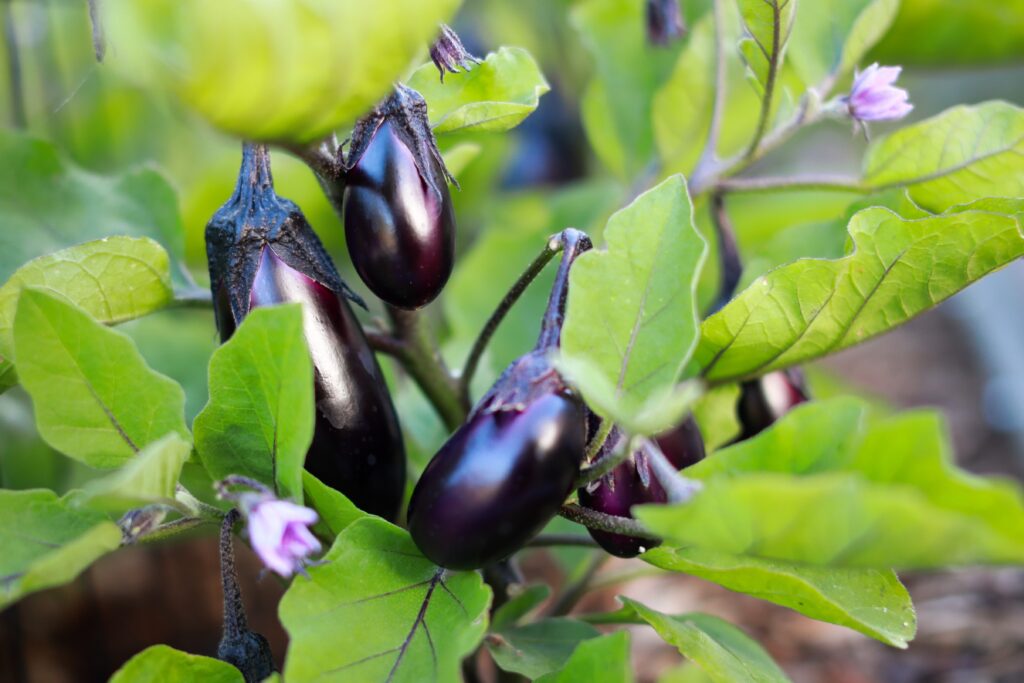
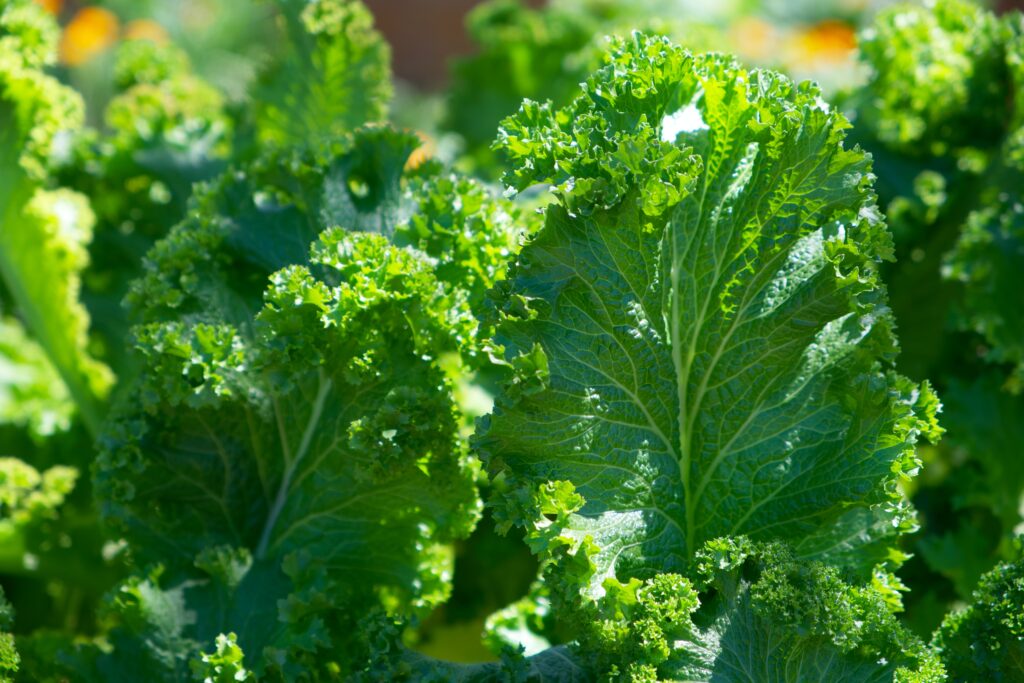

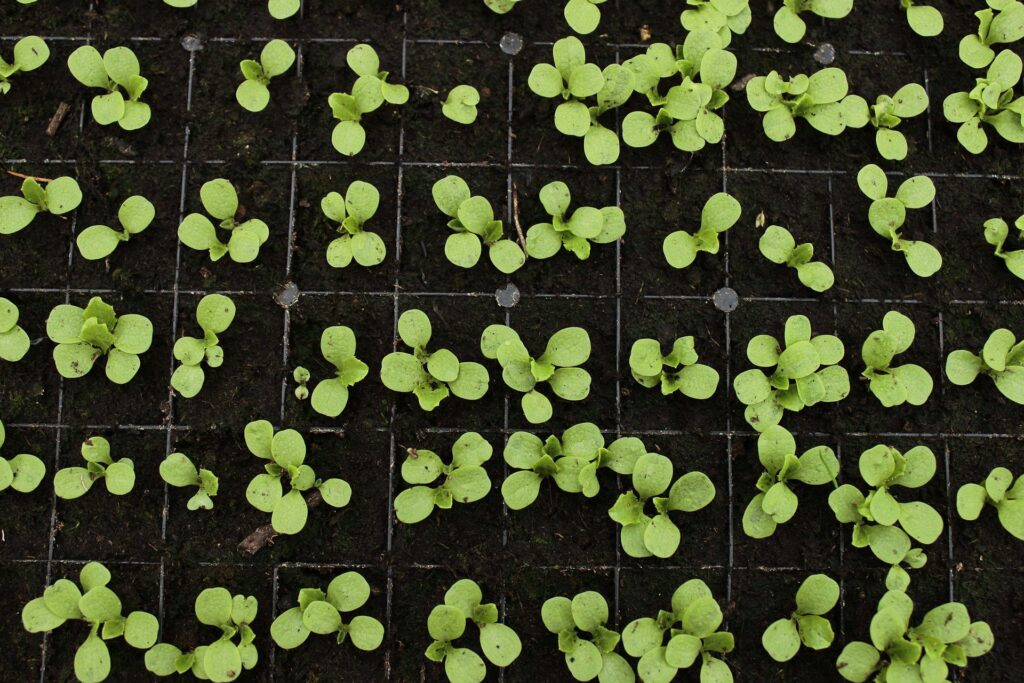

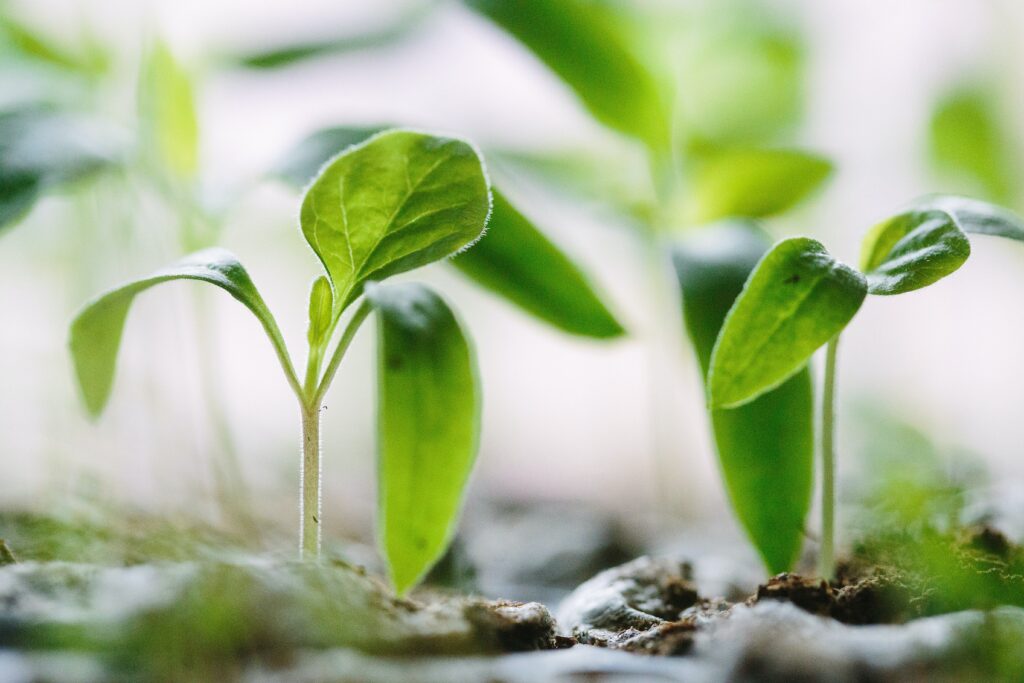
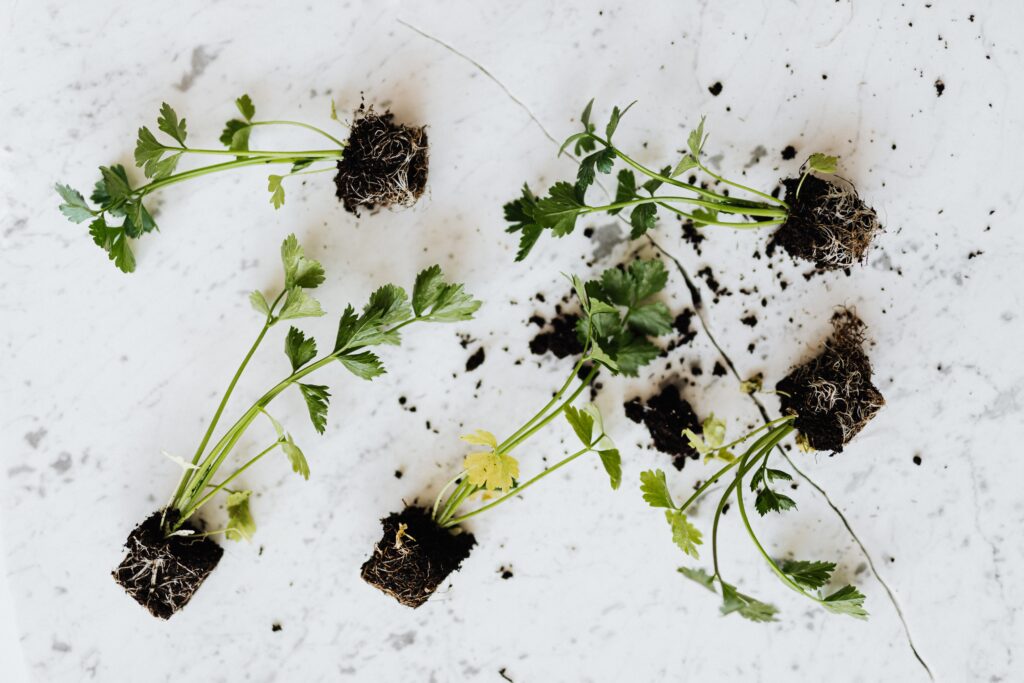
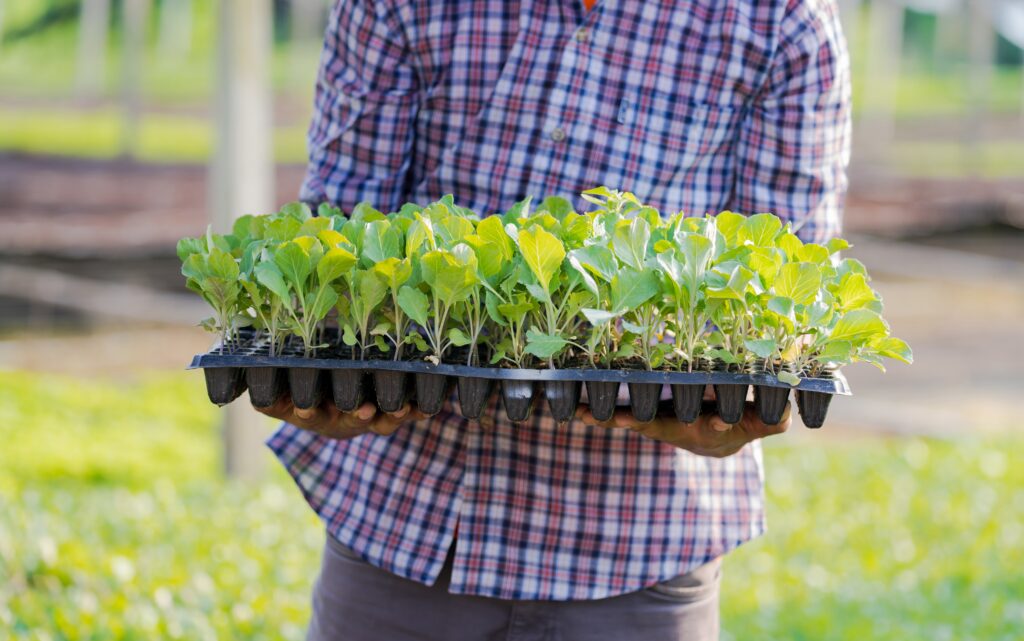
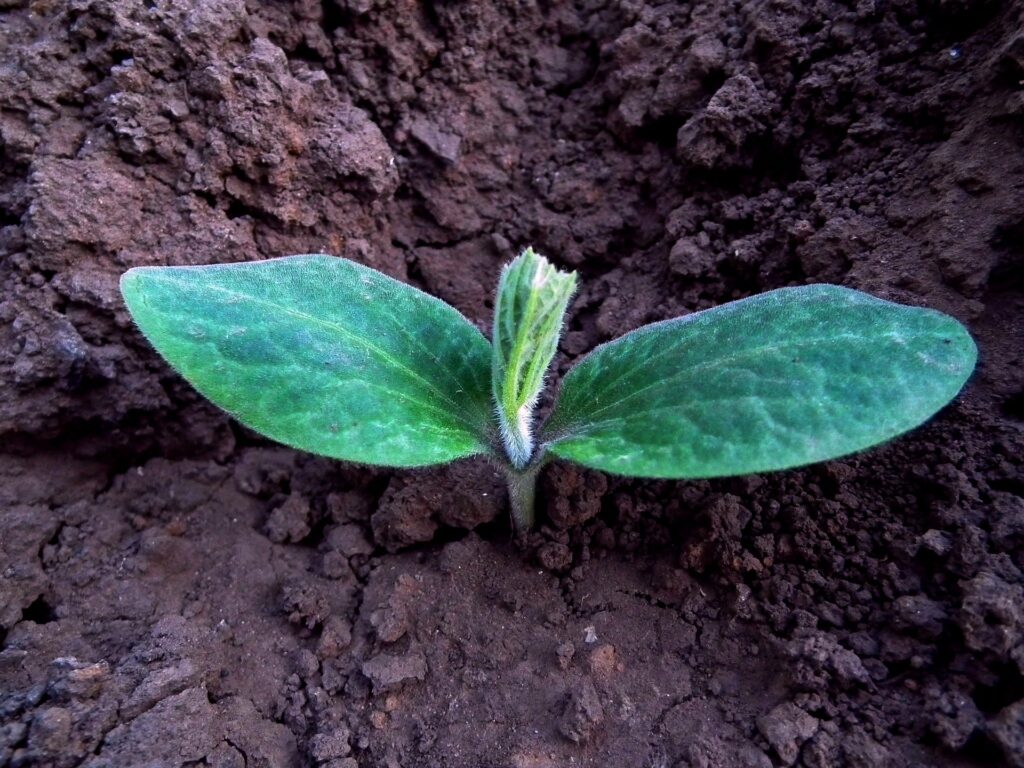
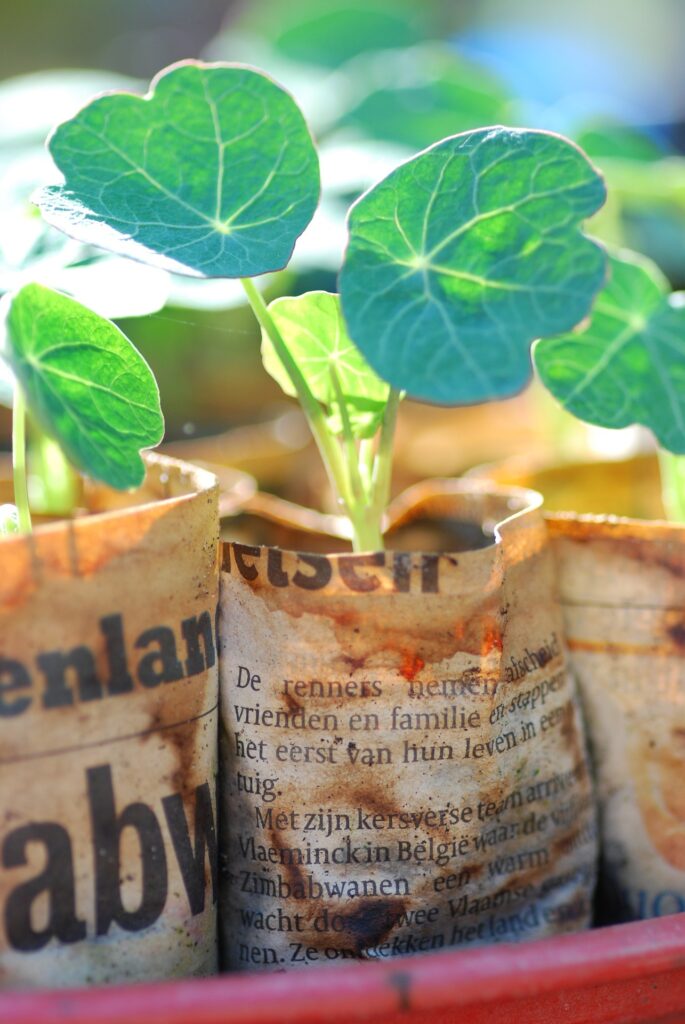
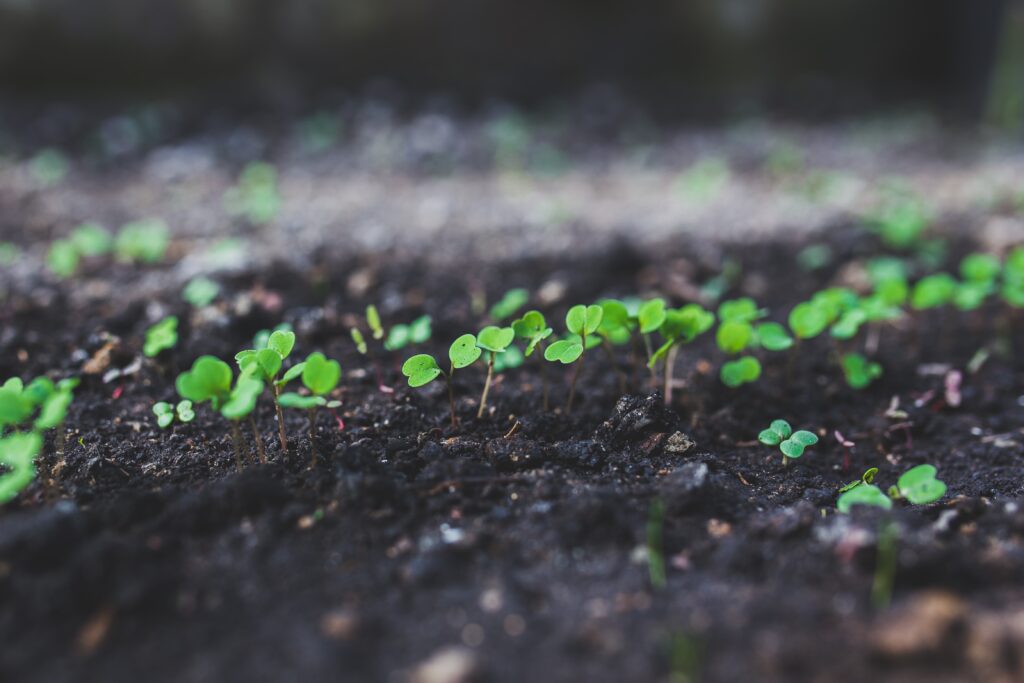
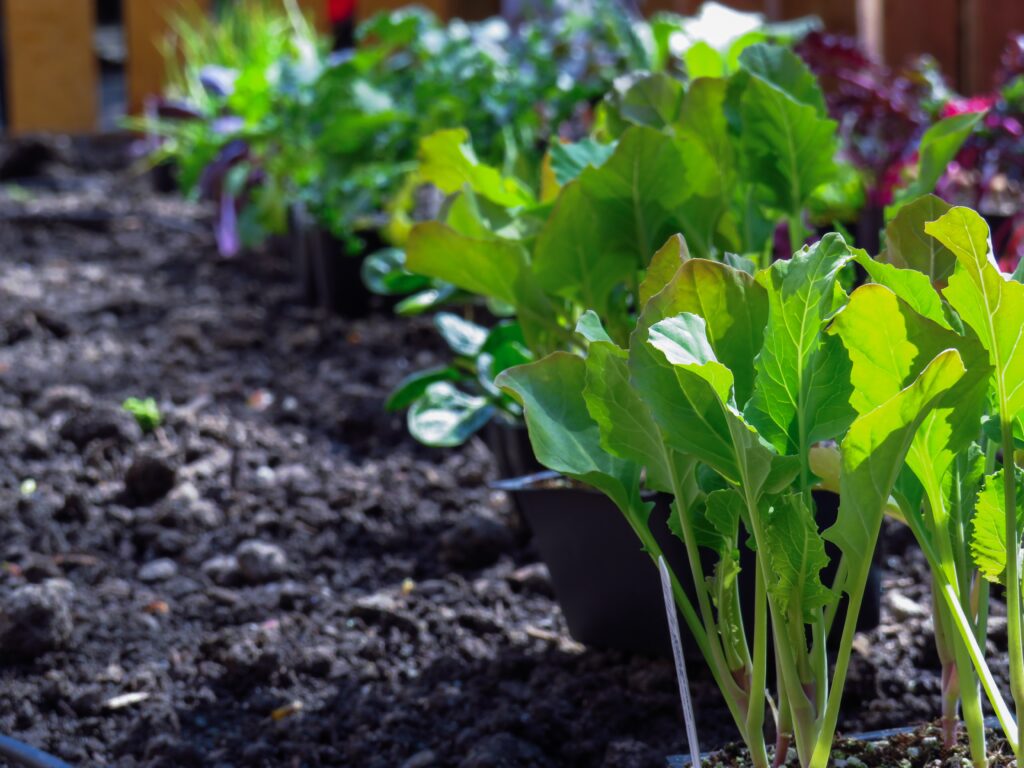
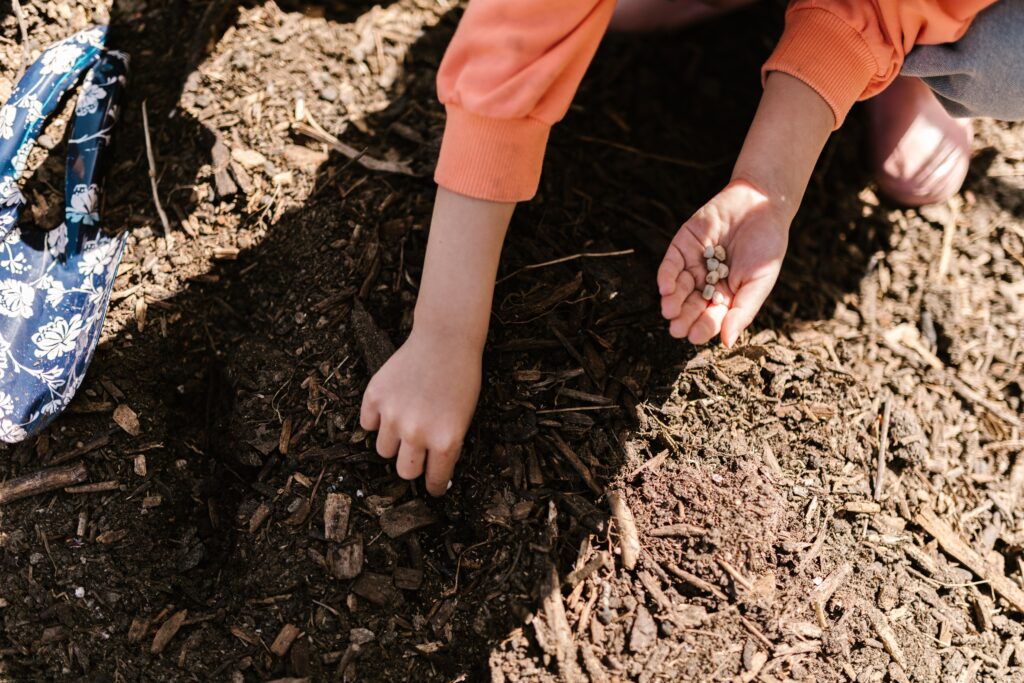
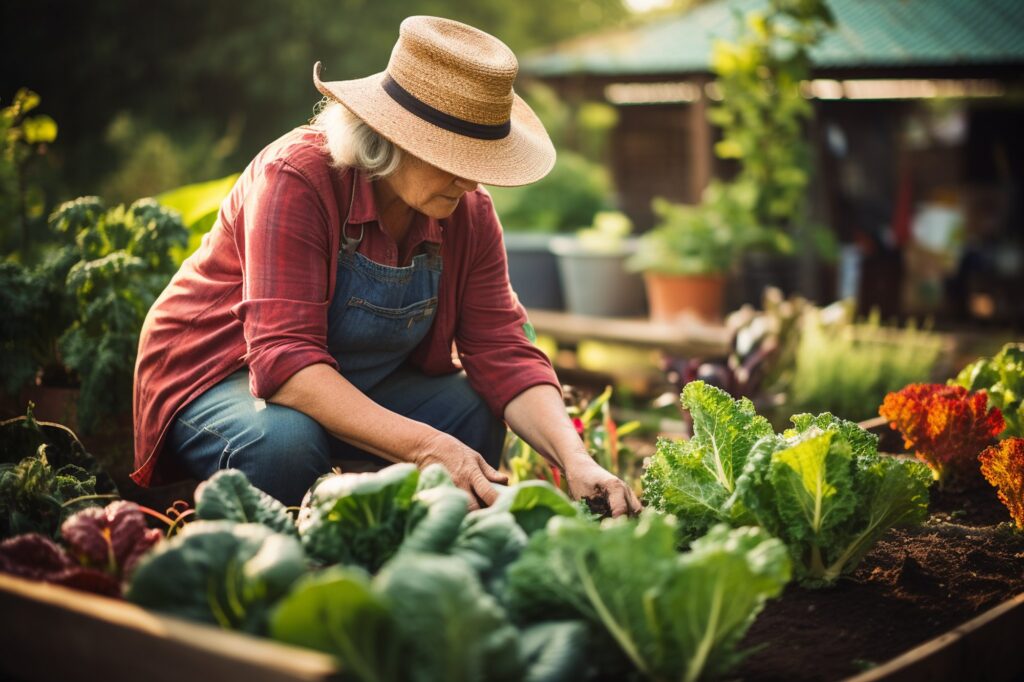
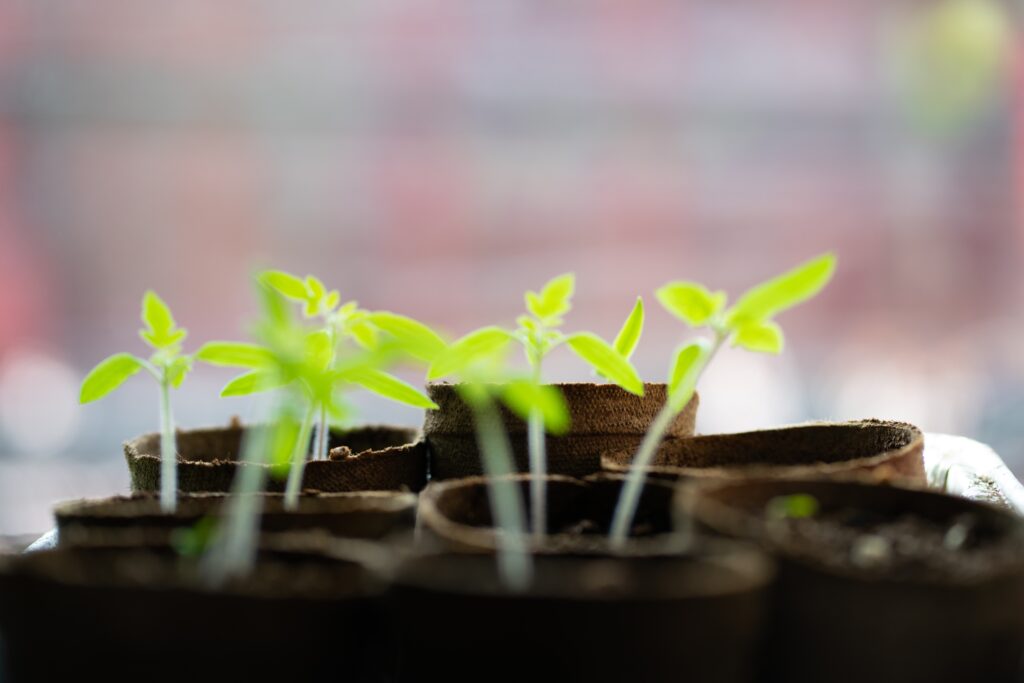

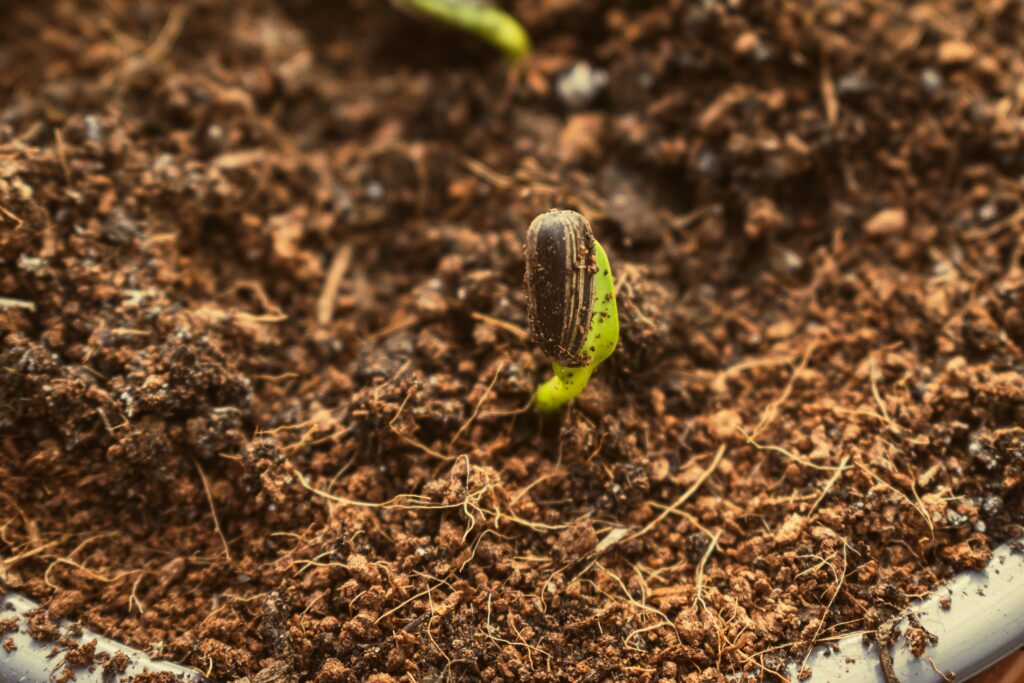
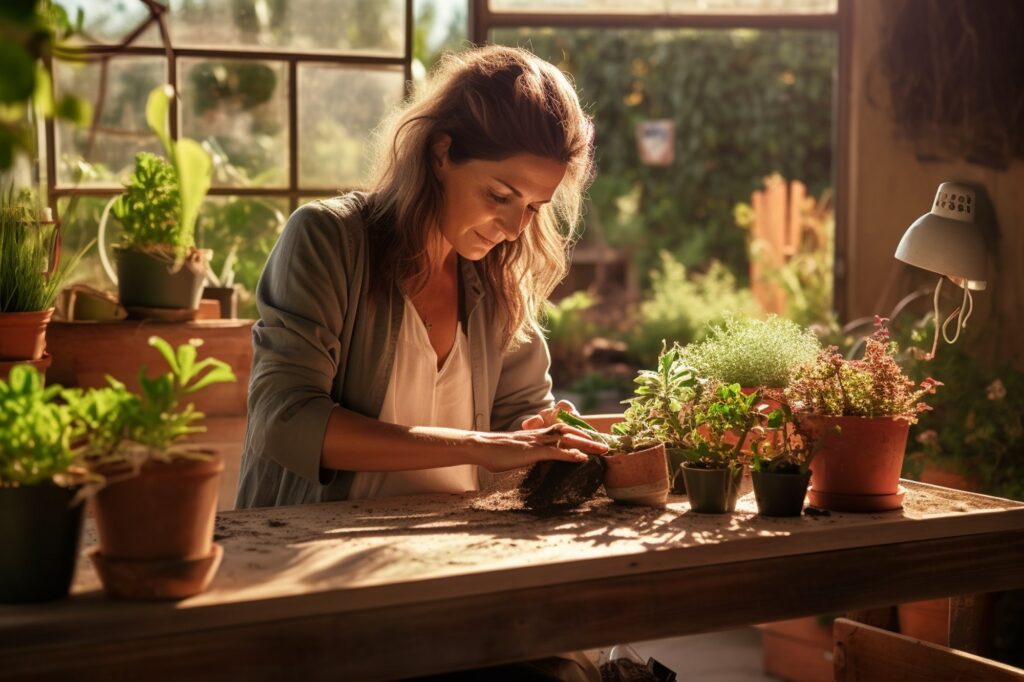
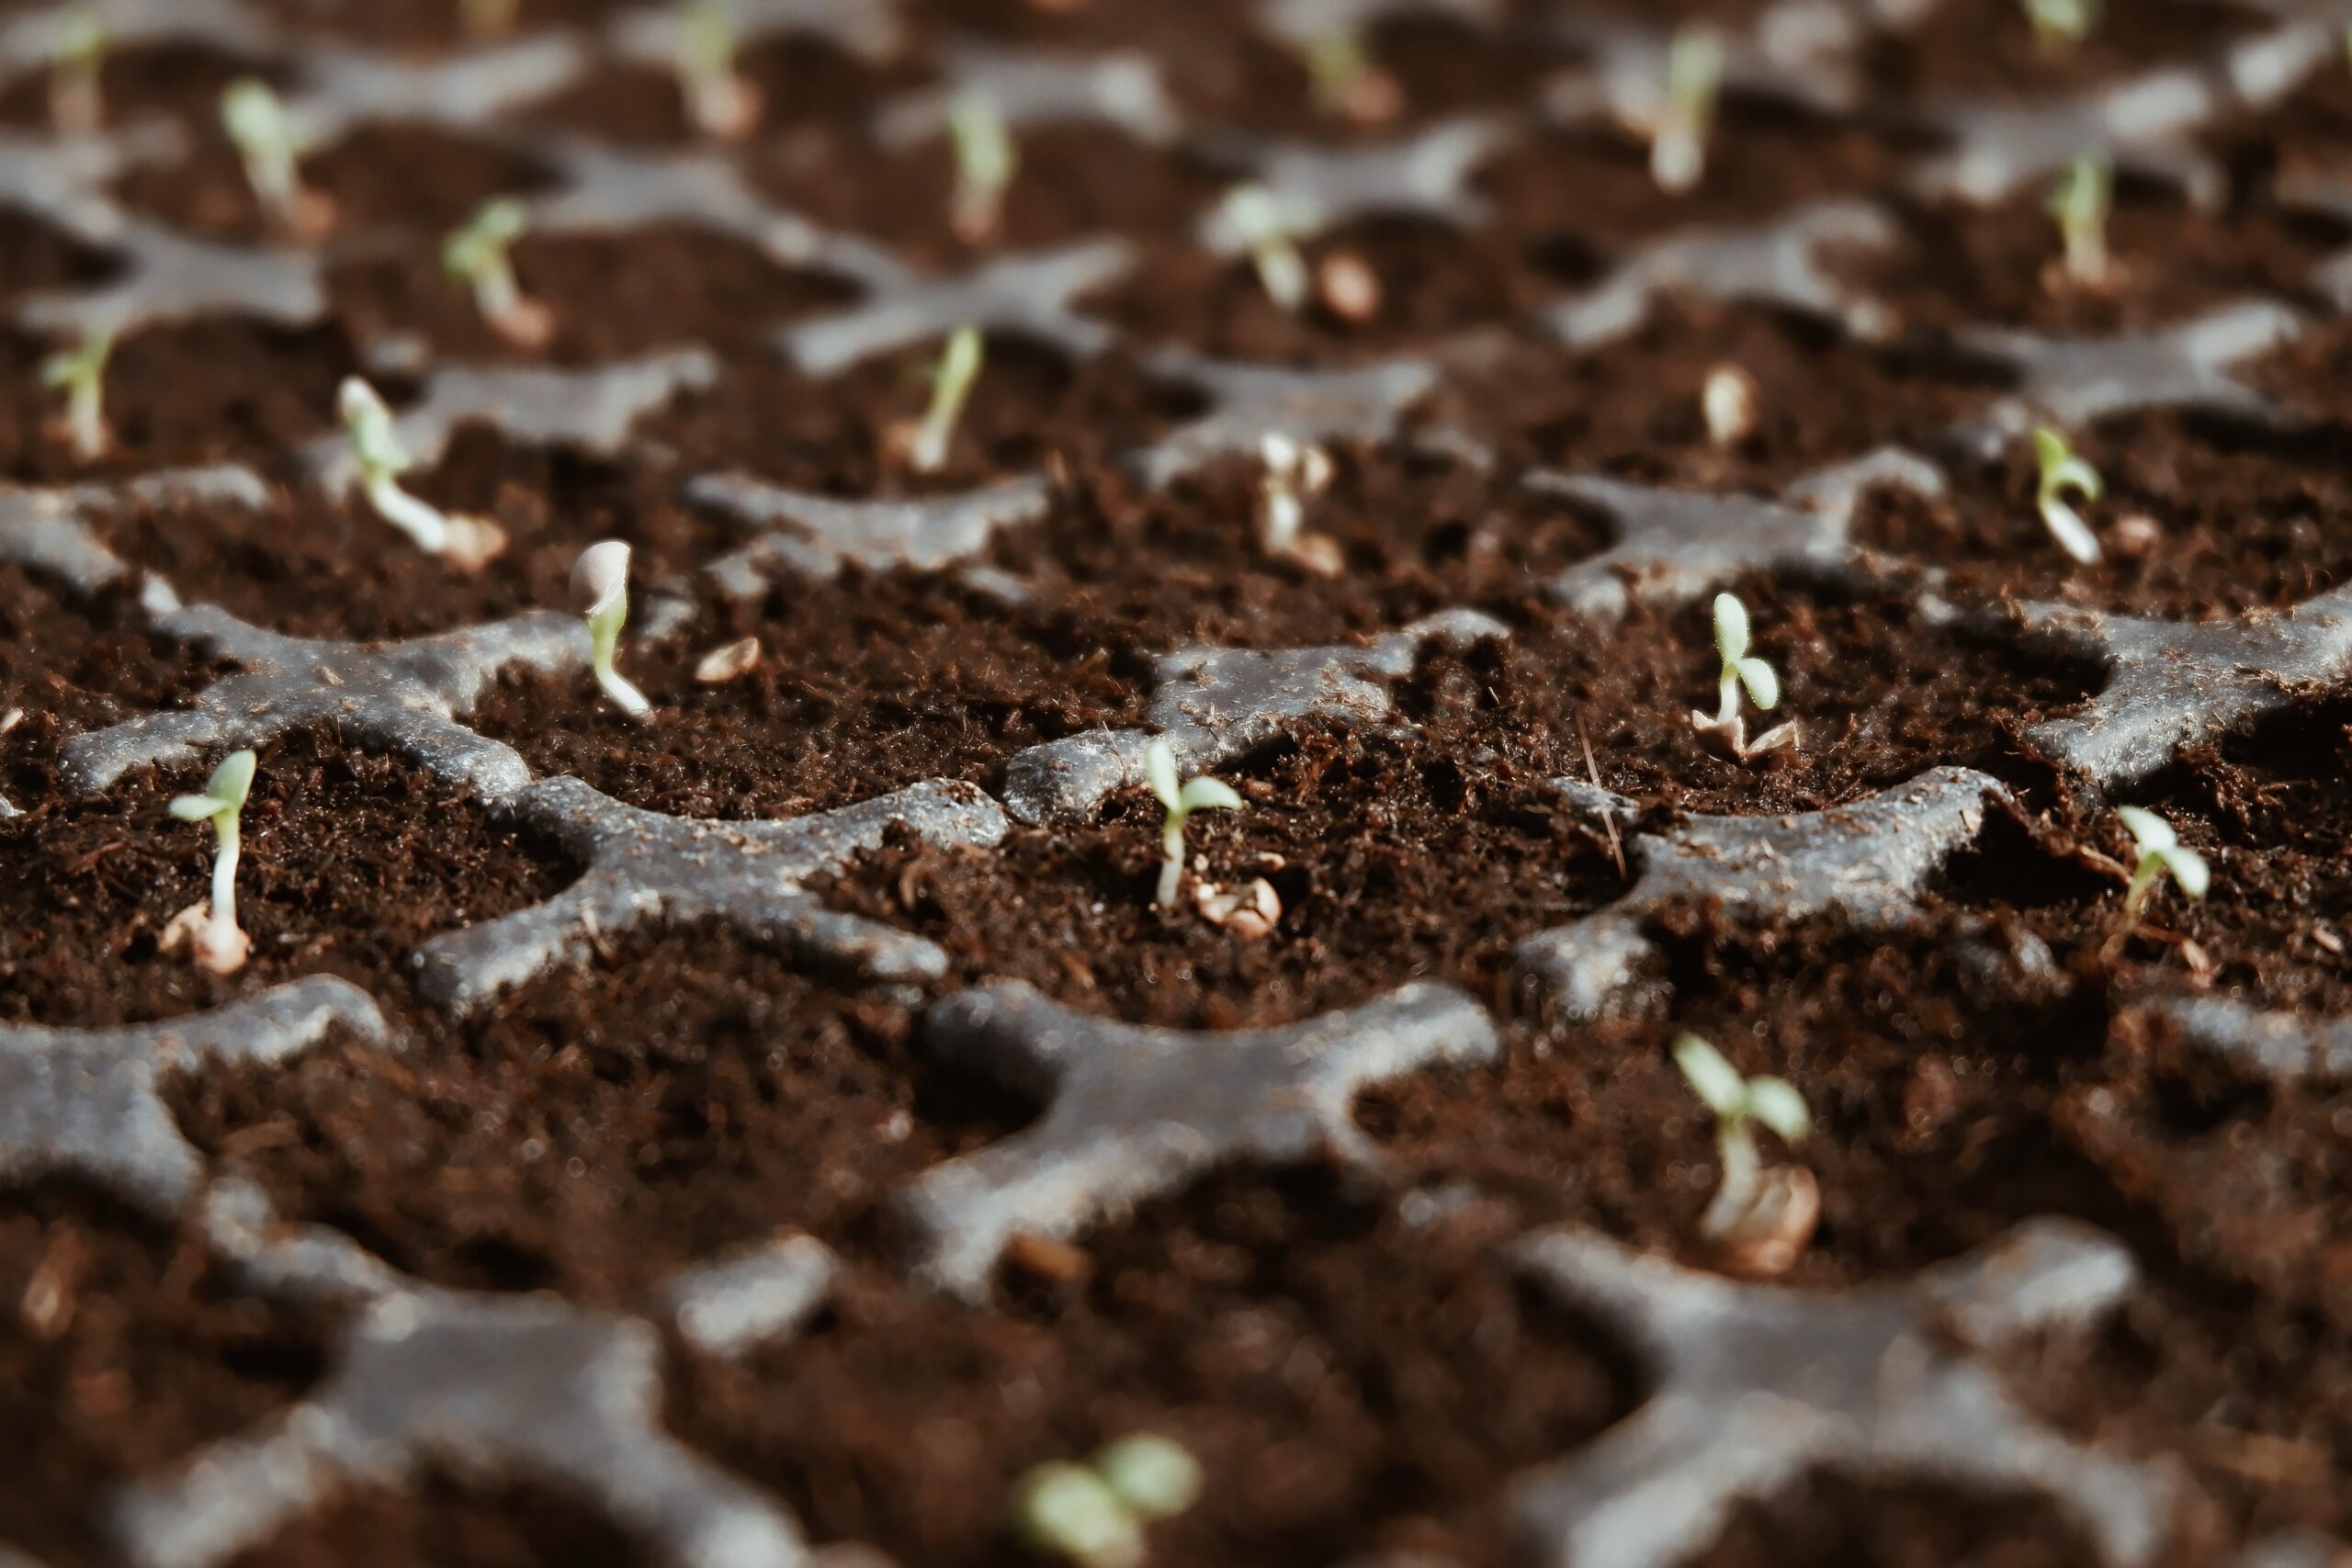

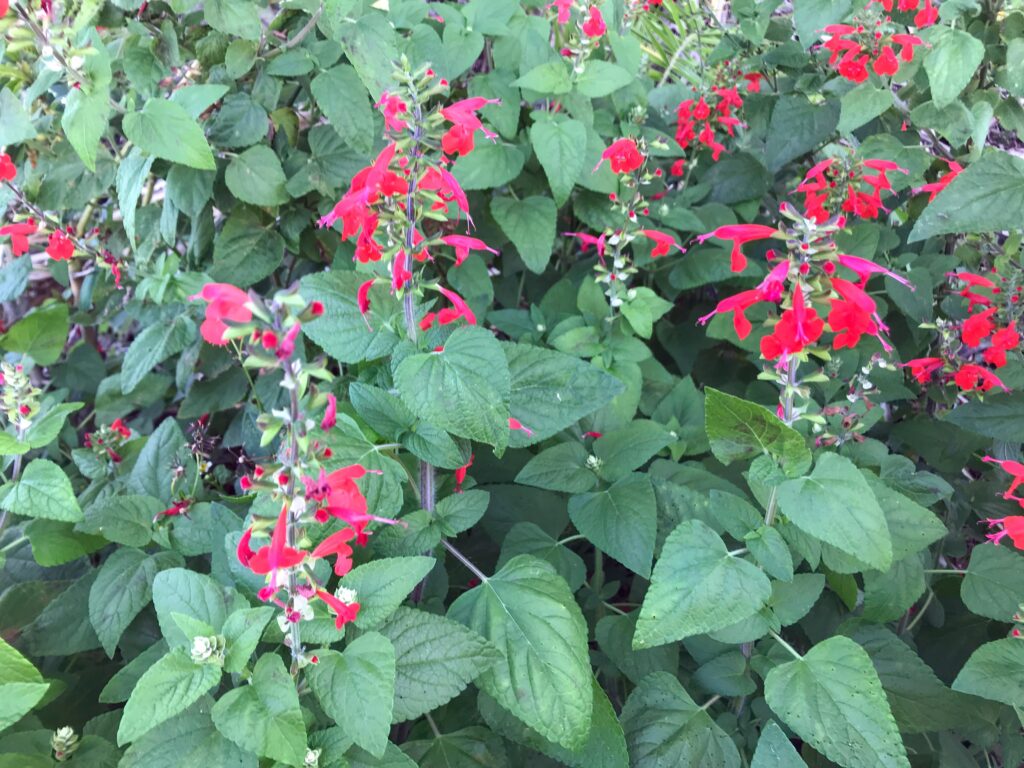
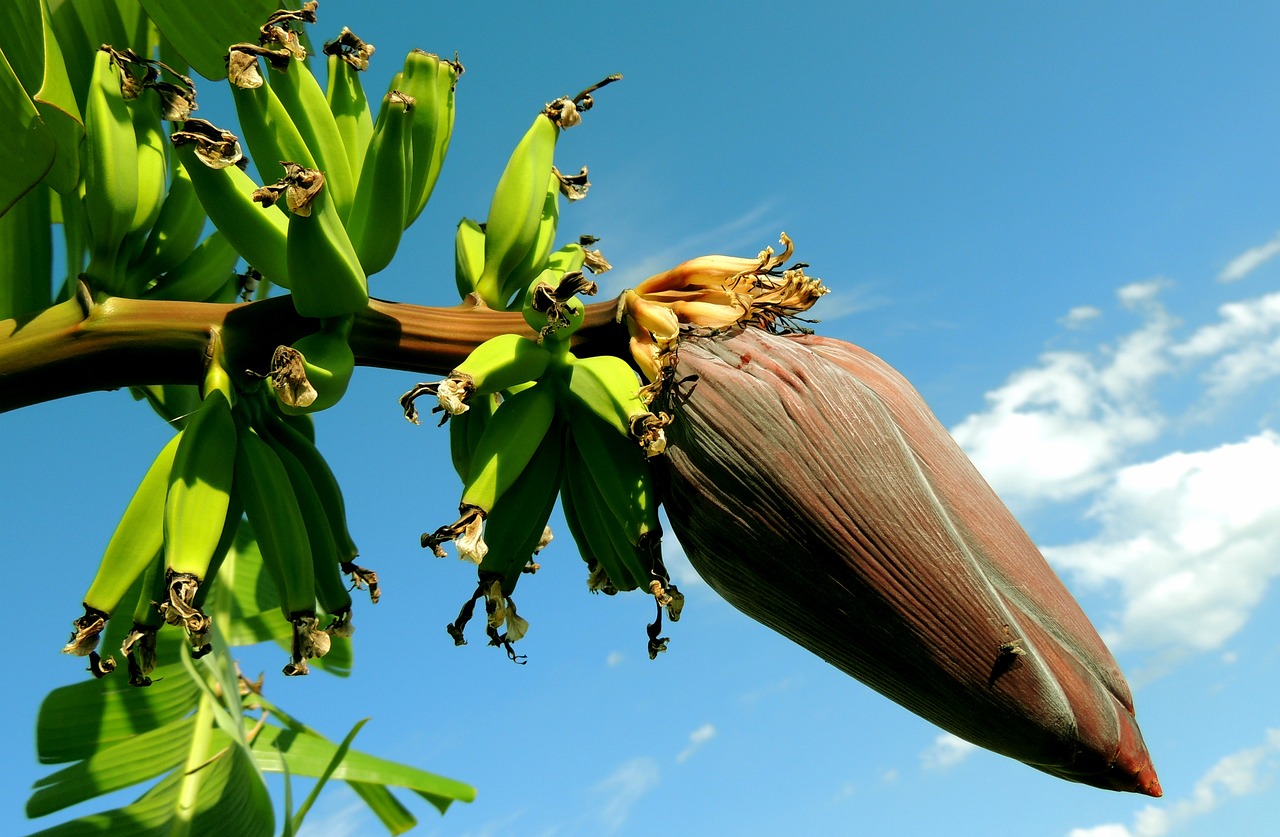
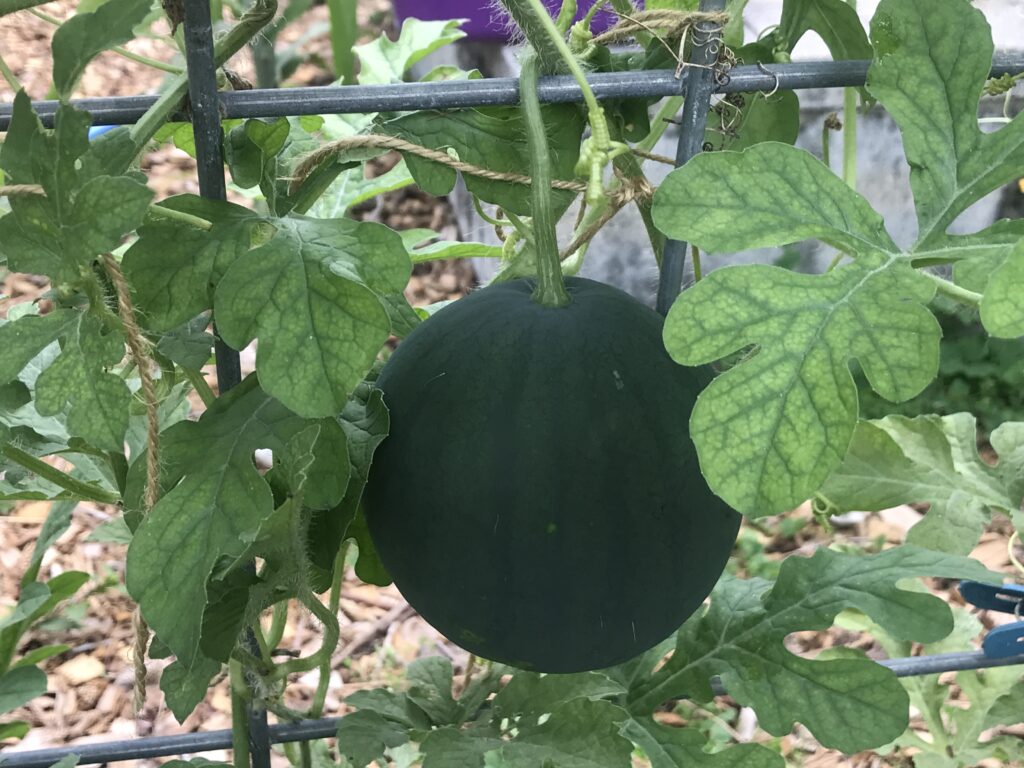


