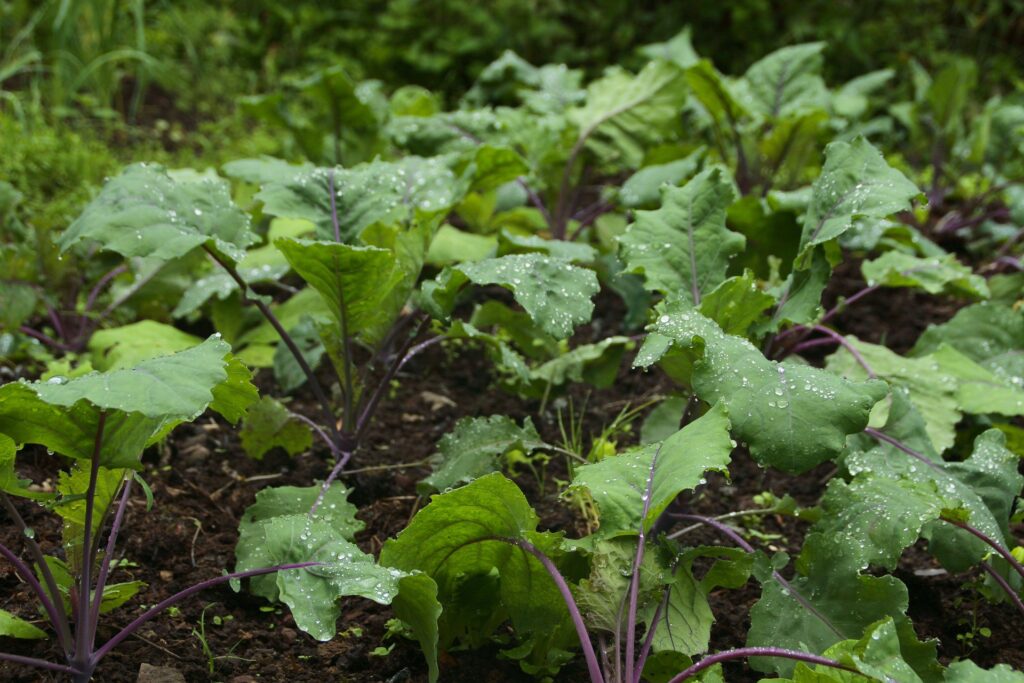
Red Russian Kale, scientifically known as Brassica napus var. pabularia, is a hardy leafy green belonging to the Brassicaceae family. Learning to grow Red Russian Kale is one of the easiest steps you’ll take starting your winter garden journey.
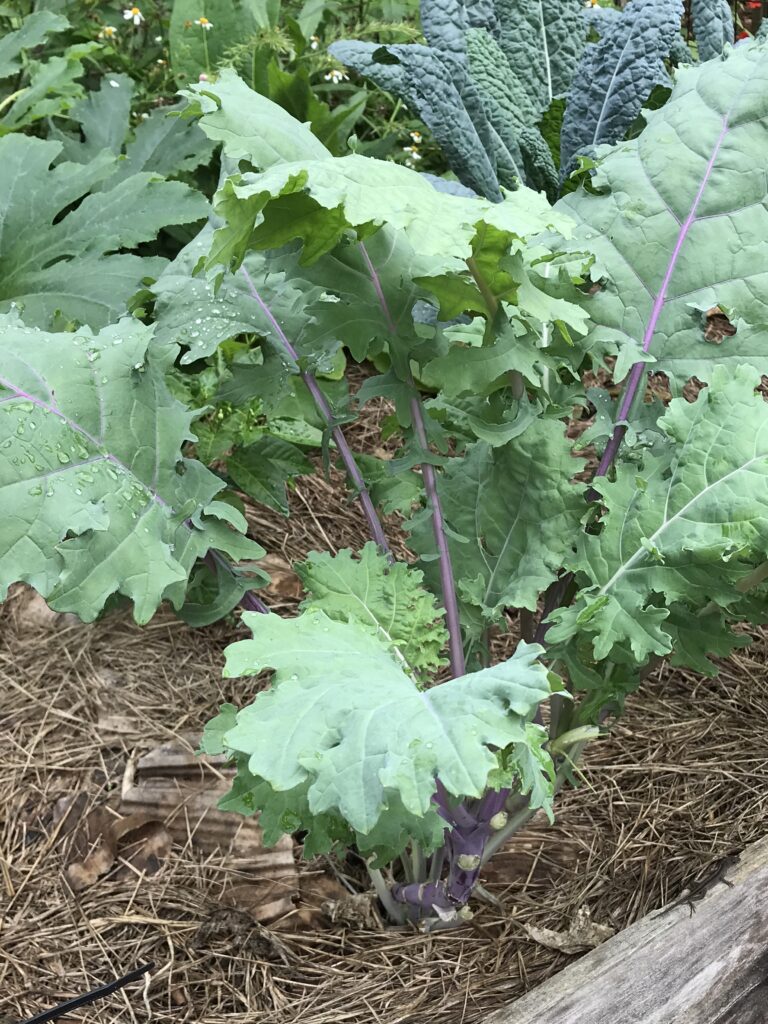
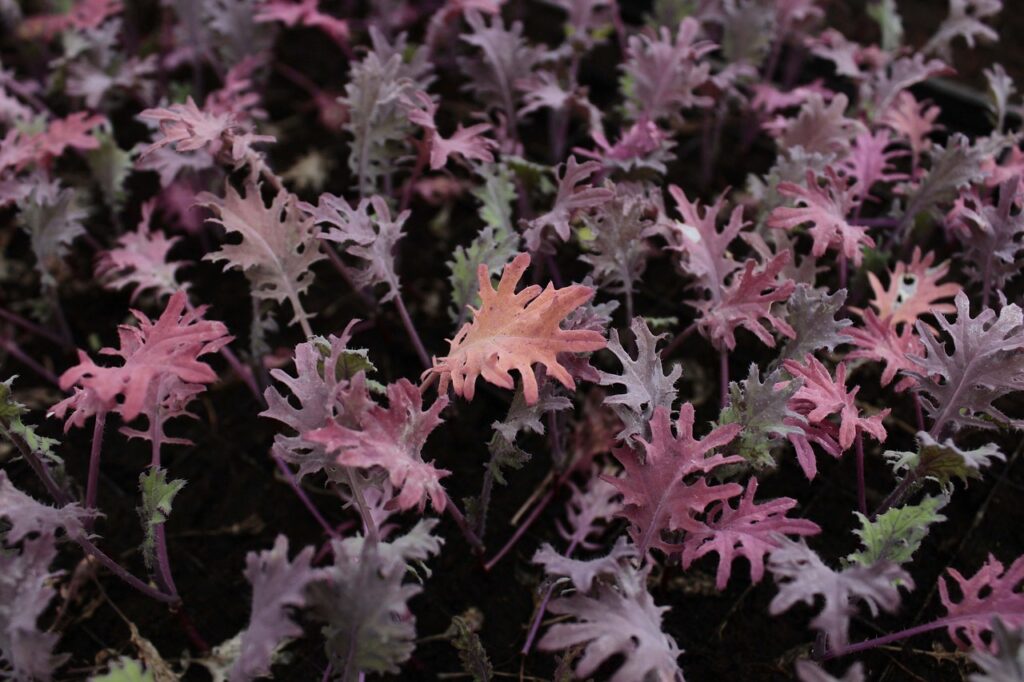
Originating from Russia, this kale variety is distinguished by its flat, fringed leaves which are a deep green with purple veins, and have a sweeter and more delicate taste compared to other kale types.

This plant is well-suited for cool climates and grows optimally in temperatures between 35°F and 75°F, making it a perfect vegetable for fall and winter gardens in the Southeast, Southwest, and on the West Coast.
It can withstand frost, with cold temperatures often enhancing its sweetness. Red Russian Kale is versatile in its growth zones, thriving in USDA zones 3-12. This wide range demonstrates its adaptability to various climatic conditions, though it prefers cooler weather.
In temperate climates, it’s planted in early spring or late summer for fall harvests, and in Zones 8-12, it can be grown throughout the winter.
The plant’s nutritional profile is impressive, being rich in vitamins A, C, and K, as well as containing ample amounts of calcium, iron, and antioxidants. Its health benefits, combined with its culinary versatility, make it a popular choice among gardeners and chefs alike.

When to Start Red Russian Kale Seeds
The timing for starting Red Russian Kale seeds varies across different USDA zones.
In Zones 3-5
Start Red Russian Kale seeds indoors about 8-10 weeks before the last expected spring frost. This early start allows the seedlings to develop sufficiently to withstand the cooler outdoor temperatures upon transplanting.
For a fall crop, begin the seeds indoors in mid to late summer, around 8 weeks before the first expected fall frost.
In Zones 6-8
Start seeds indoors approximately 6-8 weeks before the last spring frost. For a fall crop, seed starting should be timed around 8 weeks before the first expected fall frost, typically in late summer.
In these zones, starting seeds in late summer to early fall can also yield a successful winter harvest, especially in zones 7 and 8.
In Zones 9-12
Gardeners in Zones 9-12 can grow Red Russian Kale throughout the winter.
Start seeds indoors or under cover about 6-8 weeks before you plan to transplant them outside. While you can direct-sow them any time between September and March, starting them in cell trays or soil blocks allows you to tuck them into empty corners of the garden as more cold-sensitive plants die off or are harvested.
How to Start Red Russian Kale Seeds

Starting Red Russian Kale seeds in cell trays or soil blocks is an excellent approach, particularly for no-till gardens. This method allows for better control of the growing conditions and minimizes transplant shock. Here’s a detailed guide on how to successfully start these seeds indoors:
Seed Starting Mix
Choose a high-quality seed starting mix that is light and well-draining. The mix should ideally be rich in organic matter to provide the necessary nutrients. Consider using a peat-free mix to support sustainable practices.

Selecting Containers
Cell trays or soil blocks are ideal for starting Red Russian Kale seeds. Soil blocks, in particular, offer the advantage of air-pruning the roots, encouraging a stronger root system.
Choose containers that are deep enough to accommodate the root growth, usually at least 2 inches deep.
Sowing Seeds
Sow Red Russian Kale seeds at a depth of ¼ to ½ inch in the soil. This depth is optimal for ensuring good seed-to-soil contact while allowing for easy emergence of seedlings.
Moisture Requirements
Water the seeds gently to avoid disturbing them. The soil should be kept consistently moist but not waterlogged. Mist or bottom-water to prevent displacing the seeds.
Temperature for Germination
The ideal temperature range for germinating Red Russian Kale seeds is between 65-75°F (18-24°C).
Light Requirements
Once seeds have germinated, provide them with plenty of light to prevent leggy growth. If natural light is insufficient, especially in winter months, use grow lights placed a few inches above the seedlings.
Time to Germination
Red Russian Kale seeds typically germinate within 5-10 days under optimal conditions. Once the seedlings emerge, keep them under consistent light and temperature conditions to ensure steady growth.
Monitoring Growth
As the seedlings grow, monitor for any signs of overcrowding or disease. Thin out any overcrowded seedlings to ensure healthy development.
When to Plant Out Red Russian Kale
Here’s how to assess whether your kale plants are ready for this important transition:
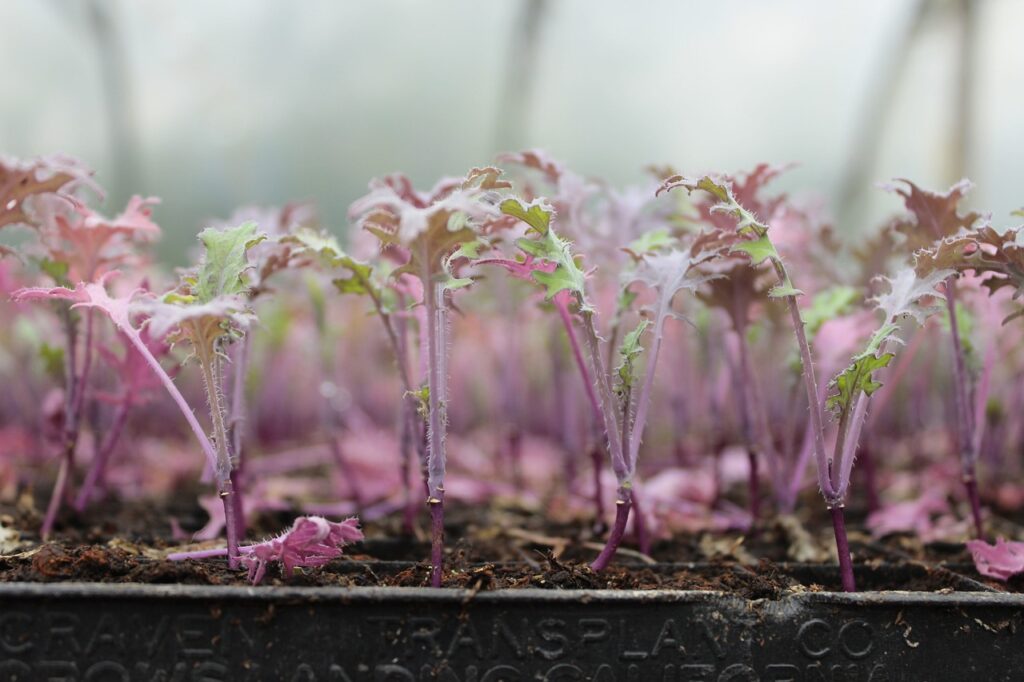
True Leaf Development
The most reliable indicator that seedlings are ready for transplanting is the development of true leaves. Initially, seedlings sprout with a set of cotyledons, or seed leaves, which are the first leaves to appear. After these, true leaves develop, which are more characteristic of the mature plant.
Red Russian Kale seedlings are typically ready to transplant when they have 3-4 true leaves, which usually takes about 3-4 weeks after germination.
Root System Check
Gently check the root system of your seedlings. A healthy, ready-to-transplant seedling will have a well-developed but not overcrowded root system. In soil blocks or cell trays, the roots should be visible but not circling extensively or pushing out of the block or cell.
Plant Height and Strength
Seedlings ready for transplant are usually about 2-3 inches tall and have sturdy stems. If they appear leggy or weak, they may need more light or time to develop before being transplanted.
Environmental Conditions
Besides the seedlings’ readiness, ensure that outdoor conditions are suitable for transplanting. The threat of heavy frost should have passed, and soil temperatures should be warming up. In most regions, this typically aligns with late spring. However, Red Russian Kale is frost-tolerant, so a light frost should not be a concern.
In warm climate zones, wait until high temps start dropping and staying below 90°F in the fall before planting out your kale.
Prepare Your Garden Bed to Grow Red Russian Kale
Preparing the garden bed for Red Russian Kale is a critical step for ensuring a healthy and productive crop. Here’s how to do it effectively:
Choosing a Location
Select a spot in your garden that gets ample sunlight, as kale thrives best in full sun to partial shade. The area should also be well-ventilated to discourage disease. Consider companion planting; herbs or flowers that deter pests can be beneficial neighbors for kale.
Light Requirements
Red Russian Kale needs 4-6 hours of sunlight daily, ideally with some afternoon shade in hotter climates. Observe the location throughout the day to gauge sunlight exposure, adjusting if needed to meet these requirements.
Moisture
Good drainage is essential to prevent waterlogging, as kale prefers consistently moist soil. Improve the soil’s drainage and moisture retention by incorporating organic matter. Ensure your watering system can keep the soil evenly moist without making it soggy.
Soil Type Preferred
Loamy, nutrient-rich soil is ideal for Red Russian Kale. Test the soil pH; a slightly acidic to neutral range (6.0-7.5) is optimal. Enrich the soil with organic matter like compost or well-rotted manure. This improves the soil structure and adds nutrients, aligning with no-till gardening practices. Adjust the soil with additional organic matter if it’s too sandy or clay-heavy.
No-Dig Bed Preparation
If you don’t have an established garden bed to plant your kale, creating a no-dig bed for Red Russian Kale involves layering materials to form a rich, fertile bed without the need for tilling. This method is beneficial for soil health and plant growth.
Here’s how to do it:
Choose the Right Location
Select a spot in your garden that gets full sun to partial shade. Kale grows best with ample sunlight. Make sure the area has good air circulation and is easily accessible for maintenance.
Lay a Weed Barrier
Start by laying down a layer of cardboard or newspaper over your chosen area. This layer will suppress any existing weeds or grass. Make sure the pieces overlap to prevent weeds from poking through.
Add Compost and Organic Matter
Spread a generous layer of well-rotted compost or manure over the cardboard. This layer will be the main growing medium for your kale. The compost not only enriches the soil with nutrients but also helps retain moisture.
Optional Topsoil Layer
If you have access to good-quality topsoil, you can add a layer on top of the compost. This step is optional but can help to create a more traditional garden bed.
Incorporate Soil Amendments
If your compost isn’t particularly nutrient-rich, consider adding amendments like bone meal or blood meal. These additions can provide essential nutrients for your kale.
Mulch the Surface
Cover the bed with organic mulch such as straw, leaves, or wood chips. Mulching helps to retain soil moisture, regulate temperature, and further suppress any emerging weeds. Over time, the mulch will break down and add to the soil’s fertility.
Water the Bed
After setting up your layers, thoroughly water the bed. This step is important to help settle the materials and start the composting process of the cardboard or newspaper.
Let the Bed Settle
Ideally, give the bed a few weeks to settle and integrate before planting. This waiting period allows the materials to start breaking down and the soil life to activate, creating a more cohesive bed. However, if you’re pressed for time, you can plant directly into the bed.
Planting Your Kale
When you’re ready to plant, simply move aside the mulch where you want to place your seedlings and plant them directly into the compost layer. Ensure you water the seedlings well after planting.
By following these steps, you’ll create a nutrient-rich, sustainable bed for your Red Russian Kale, promoting a healthy and productive garden.
Hardening Off Red Russian Kale Starter Plants
Hardening off is a crucial process that helps Red Russian Kale seedlings acclimate to outdoor conditions. This gradual transition reduces the risk of transplant shock and prepares the plants for a successful move to the garden. Here’s how to harden off your Red Russian Kale seedlings:
Begin the Process
Start hardening off about 7-10 days before you plan to transplant the seedlings. This timing allows the plants to adjust gradually to the changes in temperature, sunlight, and wind.
Initial Exposure
On the first day, place the seedlings outside in a sheltered, shaded spot for about 2-3 hours. Avoid direct sunlight and harsh conditions like strong wind or extreme temperatures.
Gradually Increase Exposure
Each day, gradually increase the time the seedlings spend outside by 1-2 hours. Also, start introducing them to more sunlight and less protected areas.
Monitor the Weather
Keep an eye on the weather forecast. If there are predictions of hot weather, severe storms, or frost, bring the seedlings back indoors or provide protection.
Watch for Stress Signs
Observe the seedlings for any signs of stress, such as wilting, leaf burn, or discoloration. If you notice any issues, adjust the hardening-off process by reducing exposure time or providing more shade.
Watering During Hardening Off
Continue to water the seedlings as needed during the hardening-off process. The goal is to maintain consistent moisture without overwatering, which can be adjusted based on the outdoor conditions.
Final Days of Hardening Off
By the end of the hardening-off period, the seedlings should be spending most of the day outside, including direct sunlight and typical outdoor temperatures for your area.
Ready for Transplant
Once the seedlings have been gradually exposed to a full day outside and have adjusted to the natural sunlight and temperature variations, they are ready to be transplanted into your garden.
Hardening off is a critical step in the transition from seedling tray to garden bed. It ensures your Red Russian Kale plants are robust and ready to thrive in their new outdoor environment.
Planting Red Russian Kale Plants into the Garden

Begin by ensuring that your garden bed is ready. The soil should be loose and enriched with organic matter. This preparation is crucial for the healthy growth of the kale.
Planting Depth and Process
When planting each kale seedling, make a hole in the soil just deep enough for the root ball. The top of the root ball should be level with the soil surface.
Gently remove the seedling from its container, being careful with the roots, and place it in the hole. Fill the hole with soil, gently patting it down around the roots to secure the plant and eliminate air pockets.
Spacing the Plants
Space the kale seedlings about 12-18 inches apart. This spacing allows each plant enough room to grow and ensures good air circulation, reducing the risk of disease.
Mulching
After planting, apply a layer of organic mulch around the plants. Use materials like straw or shredded leaves, spreading it evenly but avoiding direct contact with the plant stems. This layer helps maintain soil moisture and suppresses weed growth.
Watering In After Planting
Water the kale plants thoroughly after planting. This initial watering settles the soil around the roots and provides essential moisture for the plants to start establishing themselves in their new environment.
Ongoing Care Immediately After Planting
Monitor the plants closely for the first few days, especially if the weather is hot or windy. The soil should be kept consistently moist but not waterlogged to support the plants’ initial growth phase.
Caring for Red Russian Kale involves a few key practices that ensure healthy growth and a bountiful harvest. These include proper watering, feeding, and weeding. Consistent and attentive care will help your kale thrive throughout its growing season.
Watering
Watering is crucial for kale’s growth. Red Russian Kale prefers consistent moisture in the soil. The goal is to keep the soil evenly moist but not waterlogged.
During dry spells or in particularly hot climates, you may need to water the plants more frequently. It’s best to water early in the morning or late in the afternoon to reduce evaporation and allow the water to soak deep into the soil.
Utilize drip irrigation or soaker hoses for efficient watering. This method also helps prevent diseases that can occur with overhead watering.
Adjust your watering schedule based on rainfall and temperature, and always check the soil moisture at about an inch below the surface; if it feels dry, it’s time to water.
Feeding
Red Russian Kale benefits from regular feeding. Incorporate a balanced, all-purpose organic fertilizer into the soil at the time of planting.
You can also side-dress the plants with compost or a nitrogen-rich fertilizer a few weeks after planting, which will give them a boost as they grow. Avoid over-fertilizing, as this can lead to rapid growth at the expense of flavor and texture.
Weeding
Keeping the area around your kale plants weed-free is important for their growth. Weeds compete with kale for nutrients, water, and light.
Mulching around your plants not only helps retain soil moisture but also suppresses weed growth.
Regularly check for and remove weeds, being careful not to disturb the kale plant’s roots. Snipping weeds off at ground level and re-mulching is the best long-term strategy, as these roots will become organic matter in your soil.
Organic Ways for Addressing Pests
Dealing with pests in an organic garden requires a blend of prevention, observation, and intervention. For Red Russian Kale, common pests include aphids, cabbage worms, and flea beetles.
Encouraging beneficial insects such as ladybugs, lacewings, and predatory wasps can naturally reduce pest populations.
Physical barriers like floating row covers are effective in preventing pests from reaching the plants.
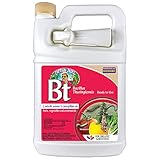
Handpicking larger pests and using organic insecticidal soaps, bt, or spinosad can help control outbreaks.


Regularly inspecting your plants for signs of pests and taking immediate action can prevent larger infestations.
Organic Ways for Avoiding and Treating Disease
Preventing disease starts with good cultural practices. Ensure adequate spacing between plants for air circulation and avoid overhead watering to keep the leaves dry.
Organic fungicides like copper sprays can be used for certain fungal diseases. However, the best approach is often to remove and destroy affected plants to prevent the spread of the disease.
Additional Tips to Grow Red Russian Kale
Consistency is key. Regular watering, feeding, and weeding will go a long way in ensuring the health of your kale.
If growing in a particularly hot climate, providing some afternoon shade can help prevent the leaves from becoming tough and bitter.
Harvest leaves regularly to encourage new growth.
Maturity and Harvest Expectations
Red Russian Kale typically matures and is ready for harvest 50 to 65 days after planting. The leaves can be harvested once they reach a desirable size, usually when they are about the size of your hand.
Younger leaves will be more tender and are ideal for salads, while older leaves can be cooked.
How to Harvest Red Russian Kale
To harvest, gently remove the outer leaves from the plant, leaving the central bud intact to continue producing new leaves.
Use a sharp knife or scissors to cut the leaves to avoid tearing the plant.
Regular harvesting encourages the plant to produce more leaves, extending your harvest period.
Remember to harvest only a few leaves from each plant at a time to avoid stressing the plant.
How to Use Red Russian Kale in Cooking
Red Russian Kale is a versatile and nutritious leafy green that can be used in a variety of dishes. Its slightly sweet and peppery flavor makes it a delightful ingredient in a wide range of dishes. Here are some examples of how to use Red Russian Kale in cooking.
Raw in Salads
Young, tender leaves of Red Russian Kale are perfect in salads. They can be mixed with other salad greens and dressed with a vinaigrette. A great recipe to try is “Kale Salad With Apples and Cheddar.”
Sautéed or Stir-Fried
Kale can be sautéed with garlic, olive oil, and a pinch of salt for a simple yet delicious side dish. It can also be stir-fried with other vegetables. Try A suitable recipe suggestion is “Sautéed Kale with Garlic and Olive Oil.”
In Soups and Stews
Kale adds nutrition and texture to soups and stews. It pairs well with legumes and root vegetables. Try this hearty recipe: “Tuscan White Bean and Kale Soup.”
Baked Kale Chips
Baking kale leaves with a bit of oil and seasoning creates a crispy, healthy snack. A great recipe to try is “Crispy Red Kale Chips.”
In Pasta and Grain Dishes
Chopped kale can be incorporated into pasta dishes, risottos, or grain bowls for added color and nutrients.
As a Pizza Topping
Add kale to pizzas either before or after baking for a unique twist.
Steamed or Boiled
Simply steamed or boiled kale can be a great addition to any meal. Serve it as a side or mix it into other dishes.
Grow Red Russian Kale This Year
Growing Red Russian Kale in your garden is more than just cultivating a plant — it’s about nurturing health, flavor, and versatility right in your backyard.
This robust and nutritious leafy green not only enriches your meals but also brings a sense of accomplishment as you watch it thrive from seed to harvest.
Learning to grow Red Russian Kale offers a delightful experience, from the crisp, tender leaves of a fresh salad to the heartwarming comfort of a kale-infused soup on a chilly evening.
It’s even pretty to look at, if you ask me.
If you have a tip, a recipe, or a story to share about growing Red Russian Kale, we’d love to hear it! Feel free to leave your comments below.
Last update on 2026-07-09 / Affiliate links / Images from Amazon Product Advertising API
This product presentation was made with AAWP plugin.