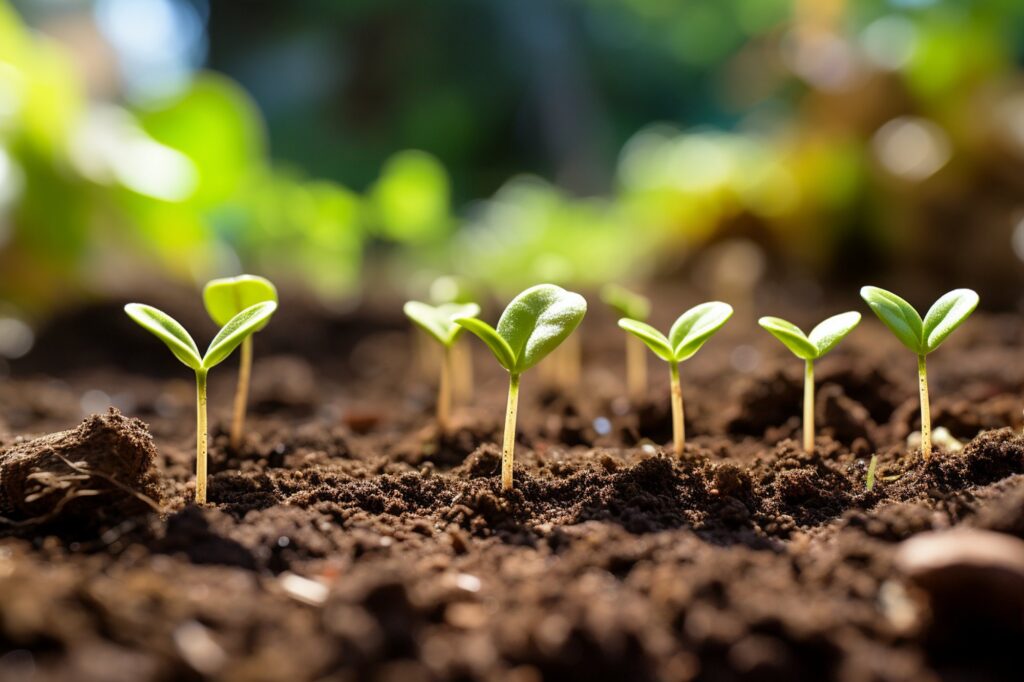
Whether you’re a novice or an experienced gardener, mastering the skill of seed germination is a fundamental skill. It’s the first step to a bountiful and abundant harvest. So, let’s dive into the seed starting basics of germination and provide you with valuable insights on how to successfully kickstart your garden from the very beginning.
How Seeds Germinate
Seed germination is a remarkable process by which a dormant seed transforms into a tiny, delicate seedling. Understanding the science behind this empowers you to become a more proficient seed starter. You’ll be able to give your plants the best possible start. Let’s take a look at nature at work.

The Anatomy of a Seed
Seeds are remarkable storehouses of life. They consist of three key parts:
- embryo
- endosperm
- seed coat
The embryo is the embryonic plant inside the seed, containing the first leaves (cotyledons), the stem (hypocotyl), and the root (radicle).
The endosperm, a nutrient-rich tissue, provides nourishment to the developing embryo.
Finally, the seed coat acts as a protective shell, shielding the delicate contents from external threats.
The Trigger: Absorption of Water
The germination process begins with the absorption of water through the seed coat. As the seed absorbs water, it rehydrates. The dormant embryo awakens from its slumber.
This rehydration process also activates enzymes that break down stored nutrients within the endosperm, transforming them into simple sugars and other essential substances for the seedling’s early growth.
Activation of Growth Hormones
Water absorption triggers the production of growth hormones called gibberellins, which play a pivotal role in stimulating the embryo to initiate growth.
Gibberellins activate enzymes responsible for cell division and elongation, propelling the embryo’s root (radicle) to emerge from the seed coat in search of moisture and nutrients.
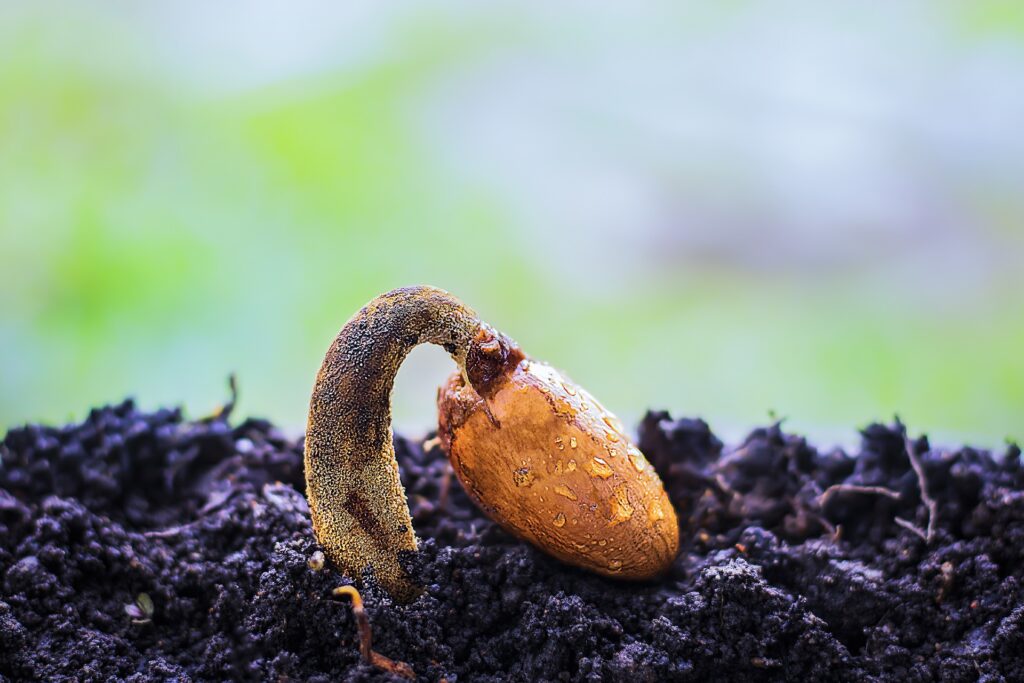
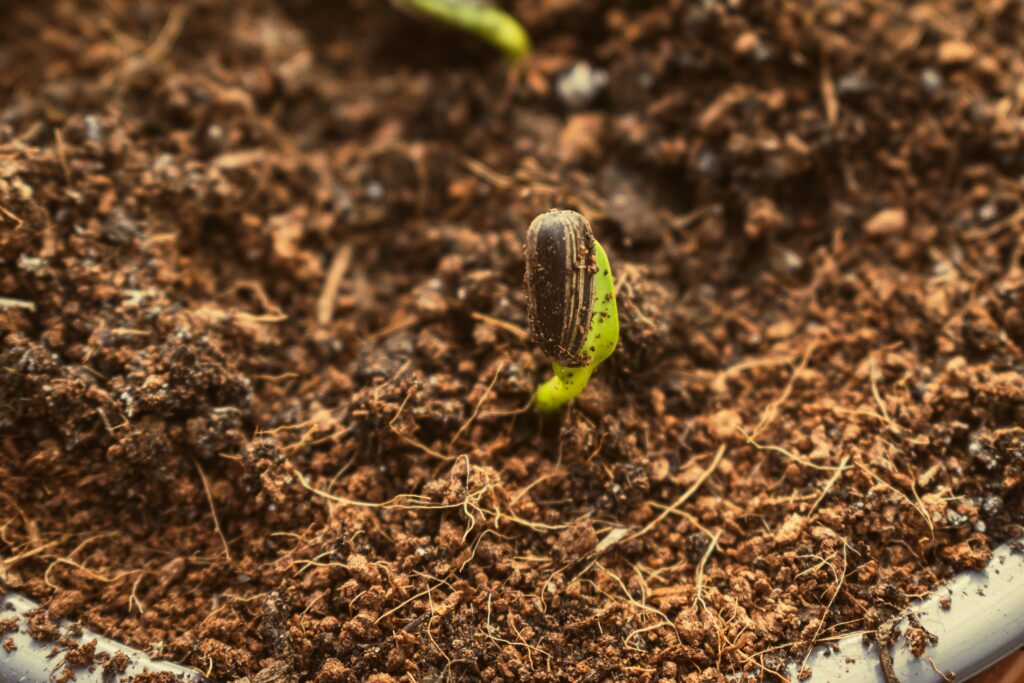
Emergence of the Root
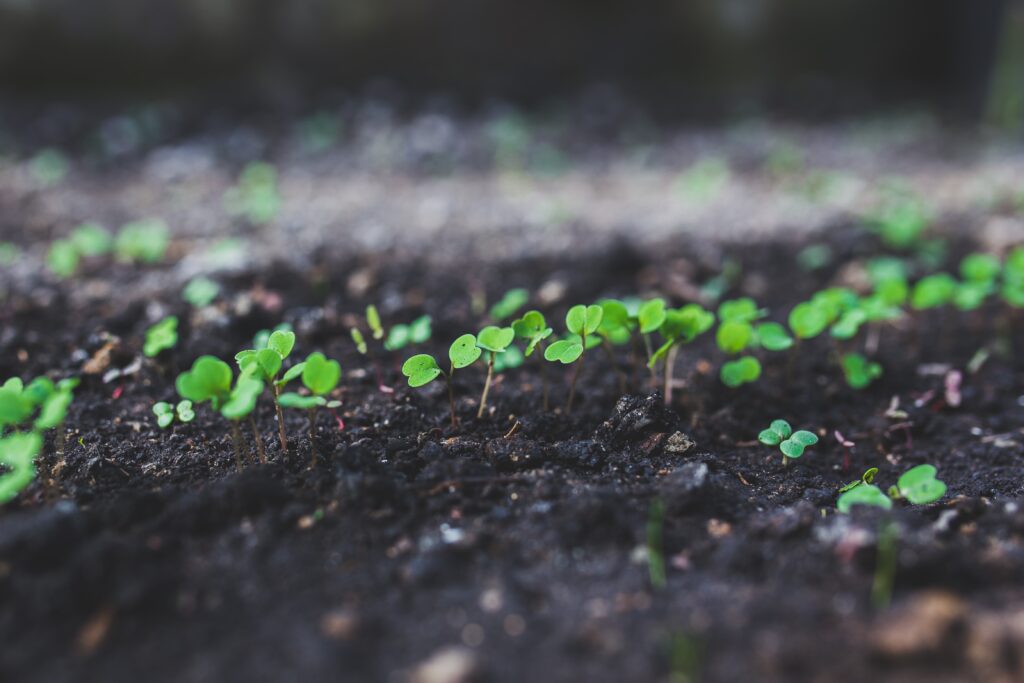
As the root (radicle) elongates, it breaks through the seed coat and emerges into the surrounding soil.
The radicle becomes the primary root of the seedling, anchoring it in the growing medium and absorbing water and essential nutrients.
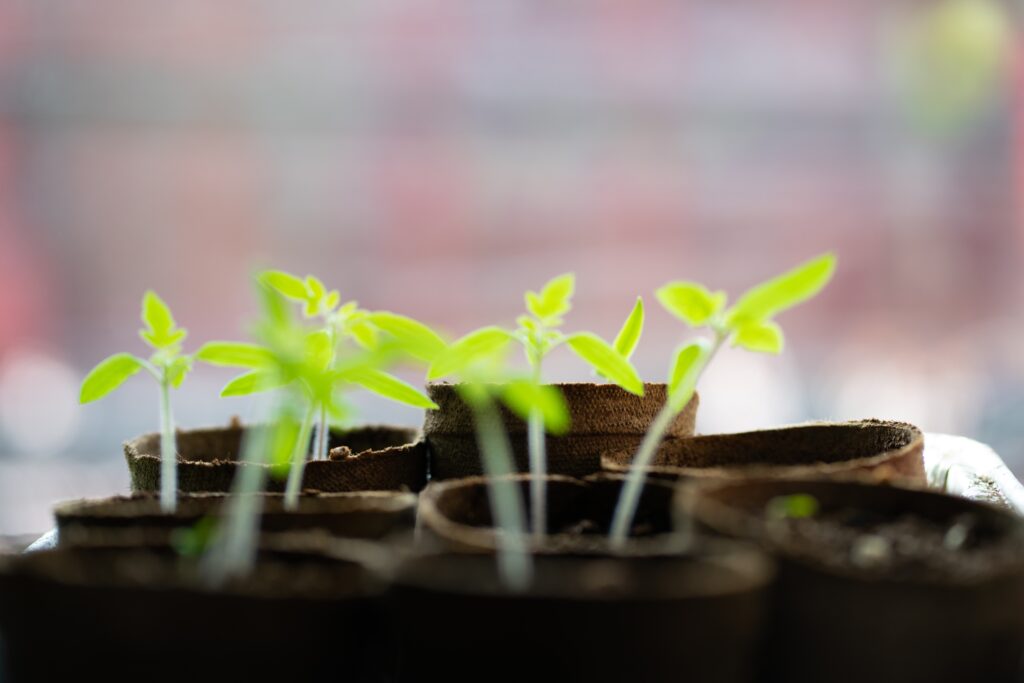
Unfurling the Cotyledons
Simultaneously, the stem (hypocotyl) elongates, pushing the cotyledons (seed leaves) above the soil surface.
Cotyledons vary in number and shape depending on the plant species and can be either one or two. These early leaves are instrumental in photosynthesis and provide the young seedling with initial sustenance until true leaves develop.
Photosynthesis Commences
With the cotyledons exposed to light, the process of photosynthesis begins.
Through photosynthesis, the seedling synthesizes glucose, a vital energy source, from carbon dioxide and water using sunlight.
This metabolic activity fuels the seedling’s growth, allowing it to develop into a robust and self-sustaining plant.
The intricate processes of water absorption, hormone activation, and the emergence of roots and cotyledons collectively orchestrate a marvelous transformation.
What Seeds Need to Germinate
Seed germination is a critical stage in a plant’s life cycle, and providing the right conditions is essential for successful germination.
While individual plant species have specific germination requirements, some general factors influence seed germination across most plants.
Understanding these factors will help you create an optimal environment for seedlings to emerge and thrive.
Moisture
Water is a primary trigger for seed germination. During imbibition, the seed absorbs water, leading to the activation of enzymes that initiate metabolic processes and growth.
Sufficient moisture is vital during germination to ensure the seed swells, softens the seed coat, and facilitates the emergence of the radicle.
Warmth
Temperature plays a crucial role in germination. Each plant species has an optimal temperature range for germination.
Seeds typically require warmth to activate enzymes and metabolism. Low temperatures can slow or inhibit germination, while high temperatures can cause damage or desiccation.
Oxygen
Seeds respire during germination, converting stored energy into usable forms. Adequate oxygen supply is essential for these metabolic processes.
Soil structure and porosity influence the availability of oxygen to seeds in the growing medium.
Light
Light requirements for germination vary among plant species. Some seeds require light to trigger germination, while others germinate best in darkness.
Photoreceptor proteins in seeds sense light levels and influence germination responses.
Factors that Affect Seed Starting and Germination
Seed Coat Permeability
The seed coat serves as a protective layer, and its permeability affects germination.
Some seeds have hard or impermeable seed coats, requiring scarification (mechanical or chemical abrasion) to enhance water absorption and germination.
Seed Dormancy
Scarification involves breaking or weakening the seed coat, promoting germination. Stratification refers to subjecting seeds to cold treatment, mimicking winter conditions.
Both techniques are used to overcome seed dormancy and synchronize germination with favorable conditions.
Germination Inhibitors and Hormones
Some seeds contain chemicals that inhibit germination until specific conditions are met.
Others require exposure to hormones like gibberellins or cytokinins to initiate germination.
Germination Time
Different seeds have varied germination periods. Some seeds germinate quickly, while others may require several weeks or even months.
Understanding the expected germination time helps manage expectations and avoid premature intervention.
Seeds that Need Light to Germinate
Some seeds need sunlight exposure to germination. Sunlight acts as a signal to the seed that it is close to the surface of the soil and has good conditions to begin growing.
Light-sensitive seeds won’t germinate if planted too deep in the soil.
Vegetable Seeds that Require Light to Germinate
- Arugula (Eruca vesicaria subsp. sativa)
- Bok Choy (Brassica rapa subsp. chinensis)
- Cilantro/Coriander (Coriandrum sativum)
- Dill (Anethum graveolens)
- Endive (Cichorium endivia)
- Lettuce (Lactuca sativa)
- Mizuna (Brassica rapa var. japonica)
- Mustard Greens (Brassica juncea)
- Spinach (Spinacia oleracea)
- Swiss Chard (Beta vulgaris)
Flower Seeds that Require Light to Germinate
- Alyssum (Lobularia maritima)
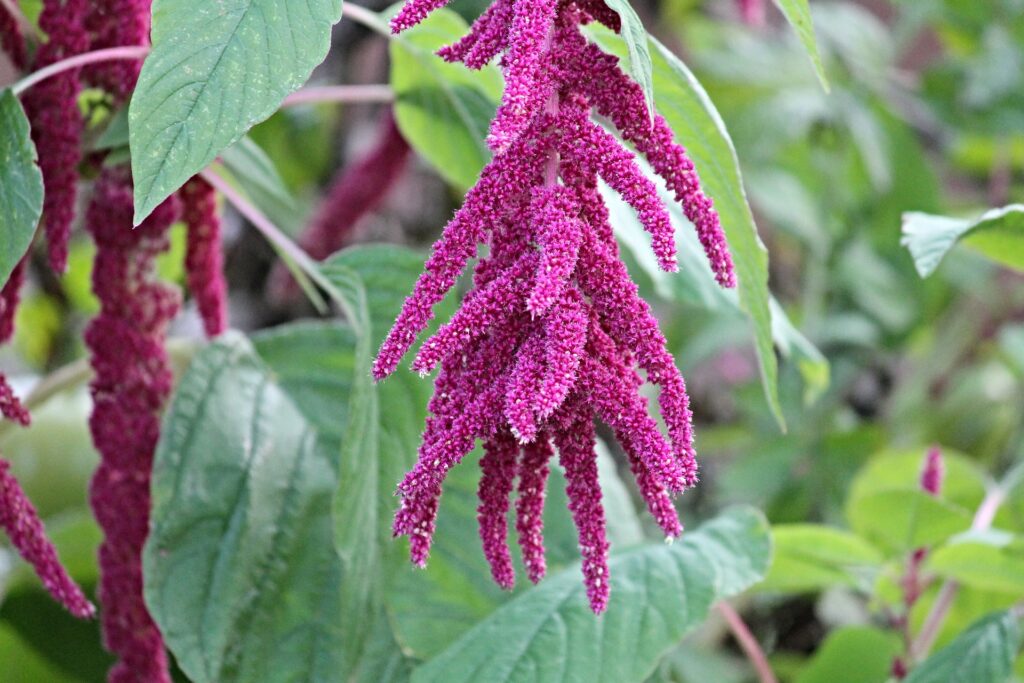
- Amaranthus (Amaranthus spp.)
- Baby’s Breath (Gypsophila paniculata)
- Calendula (Calendula officinalis)
- Nigella/Love-in-a-Mist (Nigella damascena)
- Pansy (Viola tricolor)
- Portulaca (Portulaca grandiflora)
- Stock (Matthiola incana)
- Sweet Alyssum (Lobularia maritima)
- Verbena (Verbena spp.)
Seeds that Need Darkness to Germinate
On the other hand, some seeds require darkness to germinate.
Light-sensitive inhibitors in these seeds prevent germination in the presence of light. When these seeds are covered by soil or kept in a dark environment, the light is blocked, and germination can occur.
Vegetable Seeds that Require Darkness to Germinate
- Beets (Beta vulgaris)
- Carrots (Daucus carota)
- Parsnips (Pastinaca sativa)
- Rutabaga (Brassica napus)
- Salsify (Tragopogon porrifolius)
- Scorzonera (Scorzonera hispanica)
- Skirret (Sium sisarum)
- Taro (Colocasia esculenta)
- Turnips (Brassica rapa subsp. rapa)
- Yam (Dioscorea spp.)
Flower Seeds that Require Darkness to Germinate
- Browallia (Browallia speciosa)
- Coleus (Plectranthus scutellarioides)
- Cyclamen (Cyclamen spp.)
- Dusty Miller (Senecio cineraria)
- Forget-Me-Nots (Myosotis sylvatica)
- Foxglove (Digitalis purpurea)
- Impatiens (Impatiens walleriana)
- Primrose (Primula spp.)
- Sweet William (Dianthus barbatus)
- Viola (Viola spp.)
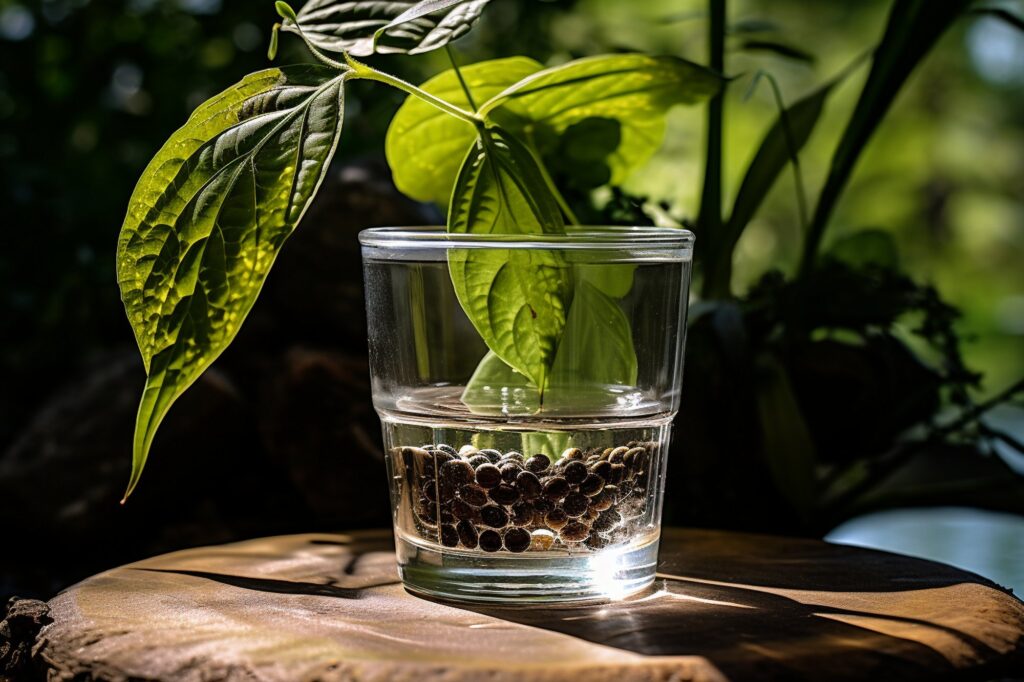
Seeds that Need to be Soaked to Germinate
Some seeds have hard seed coats that create a barrier to water absorption, slowing germination.
To overcome this dormancy, you can soak these seed before planting. You can also nick the hard shell before soaking. This softens the seed coat, allowing water to penetrate and trigger germination.
Vegetable Seeds that Can be Soaked before Sowing
- Artichoke (Cynara cardunculus var. scolymus)
- Beans (Phaseolus vulgaris)
- Chard (Beta vulgaris subsp. cicla)
- Cowpeas (Vigna unguiculata)
- Lima Beans (Phaseolus lunatus)
- Okra (Abelmoschus esculentus)
- Peas (Pisum sativum)
- Runner Beans (Phaseolus coccineus)
- Scarlet Runner Beans (Phaseolus coccineus ‘Scarlet Emperor’)
List of Flower Seeds that Can be Soaked before Sowing
- Four O’Clock (Mirabilis jalapa)
- Moonflower (Ipomoea alba)
- Morning Glory (Ipomoea purpurea)
- Nasturtium (Tropaeolum majus)
- Scarlet Sage (Salvia coccinea)
- Sweet Acacia (Vachellia farnesiana)
- Sweet Alyssum (Lobularia maritima)
- Sweet Peas (Lathyrus odoratus)
- Sweet Sultan (Centaurea moschata)
- Sweet William (Dianthus barbatus)
Some seeds may require only a few hours of soaking, while others might need an overnight soak or even longer.
Seeds that Need Cold Stratification to Germinate
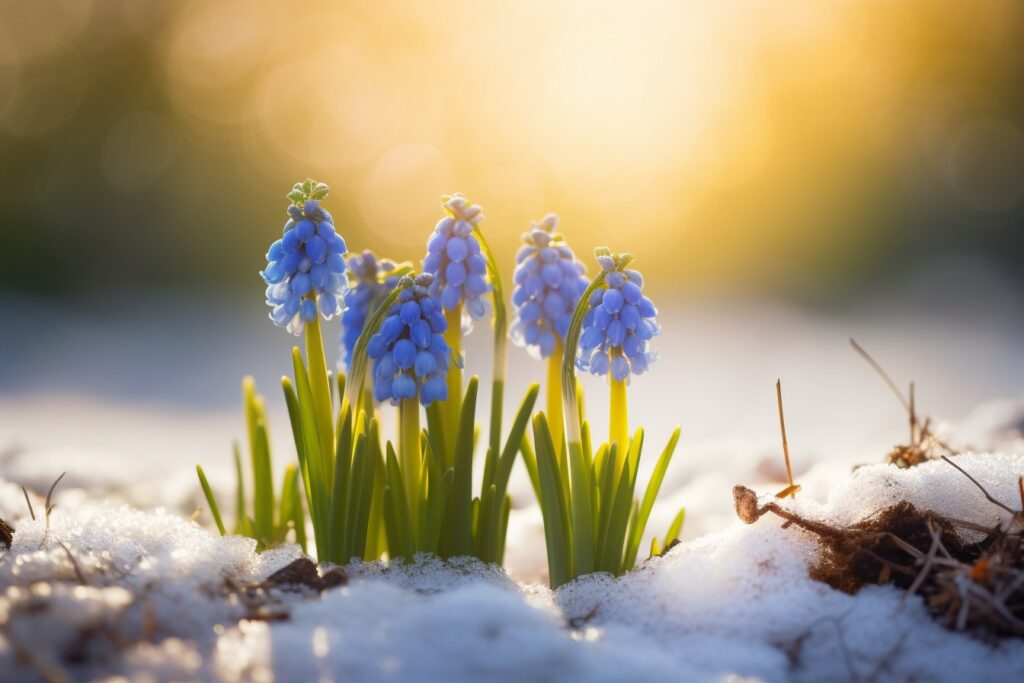
Many seeds from temperate climates have built-in dormancy mechanisms that prevent immediate germination.
This can be a problem when gardening in warmer climates in Zones 8-12. We rarely get enough cold or long enough during the winter to stimulate these kinds of plant seeds.
In this case, cold stratification, a process of subjecting seeds to cold and moist conditions before seed starting, mimics winter conditions. This breaks seed dormancy, allowing them to germinate.
This treatment triggers biochemical changes within the seeds, preparing them for germination once conditions become favorable.
Flower Seeds that Benefit from Cold Stratification
- Black-Eyed Susan (Rudbeckia hirta)
- Columbine (Aquilegia spp.)
- Delphinium (Delphinium spp.)
- Foxglove (Digitalis purpurea)
- Hollyhock (Alcea rosea)
- Larkspur (Consolida spp.)
- Purple Coneflower (Echinacea purpurea)
Seeds that Germinate at Cold Temperatures (40-50 degrees F)
Plants that have evolved to germinate best under cooler conditions may require cooler temperatures to germinate. This gives them a head start in competing in temperate climates.
These cold-tolerant seeds germinate when the soil temperature is relatively low, which is often during early spring or late fall when the weather is cooler.
Vegetable Seeds that Germinate at Cold Temperatures (40-50 degrees F)
- Arugula (Eruca vesicaria subsp. sativa)
- Kale (Brassica oleracea var. acephala)
- Lettuce (Lactuca sativa)
- Mizuna (Brassica rapa var. japonica)
- Mustard Greens (Brassica juncea)
- Pak Choi (Brassica rapa subsp. chinensis)
- Peas (Pisum sativum)
- Radishes (Raphanus sativus)
- Spinach (Spinacia oleracea)
- Swiss Chard (Beta vulgaris)
Flower Seeds that Germinate at Cold Temperatures (40-50 degrees F)
- Black-Eyed Susan (Rudbeckia hirta)
- Delphinium (Delphinium spp.)
- Hollyhock (Alcea rosea)
- Larkspur (Consolida spp.)
- Purple Coneflower (Echinacea purpurea)
Seeds that Germinate at Cool Temperatures (50-65 degrees F)
Some seeds germinate at temperatures within the range of 50-65 degrees Fahrenheit. These cool-tolerant seeds prefer milder conditions, making them suitable for seed starting during the cooler months of spring and fall.
In warmer growing zones, such as 9-12, these seeds can normally be planted and grown over the winter.
Vegetable Seeds that Germinate at Cool Temperatures (50-65 degrees F)
- Beets (Beta vulgaris)
- Carrots (Daucus carota)
- Kale (Brassica oleracea var. acephala)
- Mesclun Mix (Lepidium sativum, Eruca vesicaria, and others)
- Mizuna (Brassica rapa var. japonica)
- Radicchio (Cichorium intybus)
- Spinach (Spinacia oleracea)
- Swiss Chard (Beta vulgaris)
Flower Seeds that Germinate at Cool Temperatures (50-65 degrees F)
- Alyssum (Lobularia maritima)
- Baby’s Breath (Gypsophila paniculata)
- Clarkia (Clarkia spp.)
- Foxglove (Digitalis purpurea)
- Iceland Poppy (Papaver nudicaule)
- Love-in-a-Mist (Nigella damascena)
- Nasturtium (Tropaeolum majus)
Seeds that Germinate at Moderate Temperatures (65-75 degrees F)
Moderate temperature conditions ranging from 65 to 75 degrees Fahrenheit are ideal for the germination of most garden seeds.
These seeds thrive in mild, favorable temperatures. In Zones 9-12, we generally plant these seeds under cover to plant out right after the last frost date, before it becomes too hot.
We also frequently start them indoors in the summer to plant out once temperatures drop in the fall.
Vegetable Seeds that Germinate at Moderate Temperatures (65-75 degrees F)
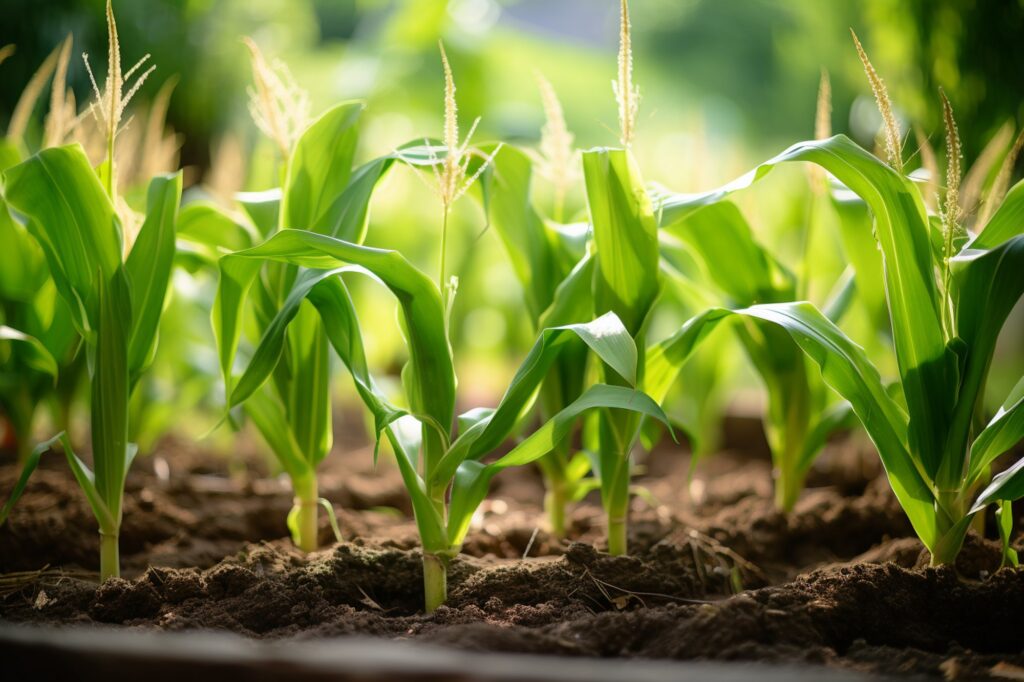
- Corn (Zea mays)
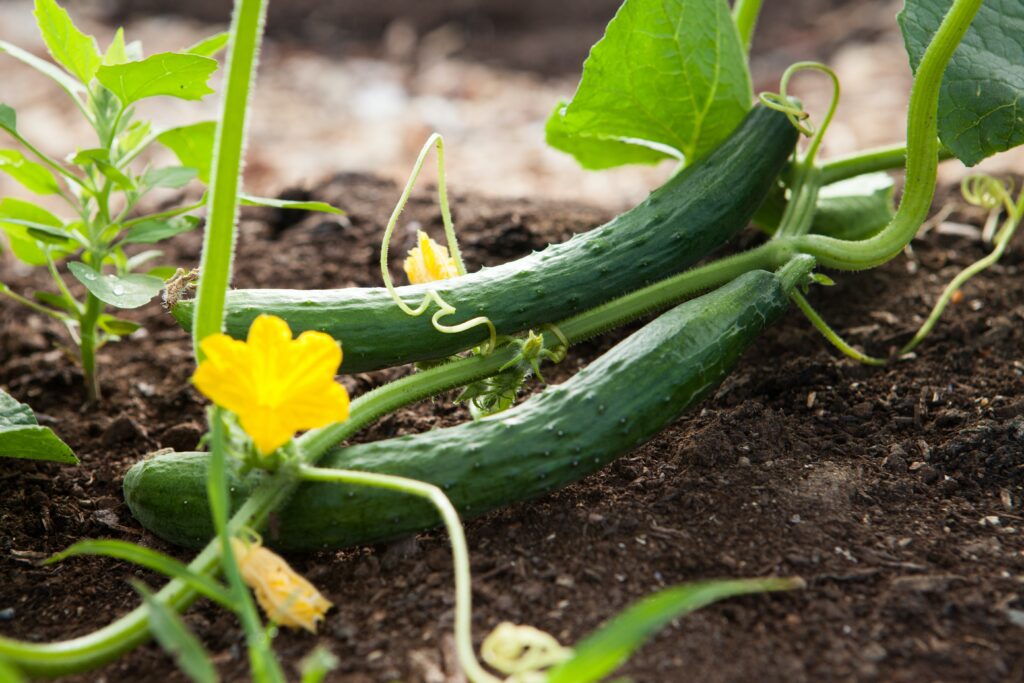
- Cucumbers (Cucumis sativus)
- Eggplant (Solanum melongena)
- Melons (Cucumis spp.)
- Peppers (Capsicum spp.)
- Pumpkins (Cucurbita pepo)
- Squash (Cucurbita spp.)
- Tomatoes (Solanum lycopersicum)
Flower Seeds that Germinate at Moderate Temperatures (65-75 degrees F)
- Four O’Clock (Mirabilis jalapa)
- Gaillardia (Gaillardia spp.)
- Gazania (Gazania spp.)
- Marigolds (Tagetes spp.)
- Petunias (Petunia spp.)
- Poppies (Papaver spp.)
- Sunflowers (Helianthus annuus)
Seeds that Germinate at High Temperatures (75-90 degrees F)
Plants from tropical and subtropical regions of the world often germinate best at much warmer conditions. Their optimal germination temperatures range from 75 to 90 degrees Fahrenheit.
In Zones 9-12, we can sow these seeds directly in the garden in the early summer through early fall. They can also be started outside but should be kept under cover such as an awning to protect them from being flooded out by heavy rain or scorched by the summer sun.
Many of these plants are the few we can grow successfully through the summer in Florida. So, it’s worthwhile learning about these varieties and how to use them in your garden and your menu.

Vegetable Seeds that Germinate at High Temperatures (75-90 degrees F)
- Amaranth (Amaranthus spp.)
- Basil (Ocimum basilicum)
- Cantaloupe (Cucumis melo)
- Cowpeas (Vigna unguiculata)
- Cucuzzi Squash (Lagenaria siceraria)
- Malabar Spinach (Basella alba)
- Okra (Abelmoschus esculentus)
- Southern Peas (Vigna unguiculata)
- Watermelon (Citrullus lanatus)
- Yardlong Beans (Vigna unguiculata subsp. sesquipedalis)
Flower Seeds that Germinate at High Temperatures (75-90 degrees F)
- Calendula (Calendula officinalis)
- Celosia (Celosia spp.)
- Cosmos (Cosmos bipinnatus)
- Globe Amaranth (Gomphrena globosa)
- Marigolds (Tagetes spp.)
- Morning Glory (Ipomoea purpurea)
- Nasturtium (Tropaeolum majus)
- Sunflowers (Helianthus annuus)
- Vinca (Catharanthus roseus)
- Zinnia (Zinnia elegans)

How to Nick and Soak Seeds to Improve Germination
Seeds with tough outer coverings often require some help stepping out of their shells. You can nick the casing and soak them to speed up germination when seed starting these types.
Step 1: Gather Materials
Gather the seeds you wish to nick and soak. Ensure they are seeds that require scarification (nicking) or soaking for enhanced germination.
Step 2: Prepare the Nicking Tools
Use a pair of sharp scissors, a nail file, or sandpaper to nick the seed coat. Sterilize the tools with rubbing alcohol before use to prevent the spread of pathogens.
Step 3: Nicking the Seeds
Hold the seed firmly but gently with your fingers or tweezers to avoid damaging the embryo.
Locate the seed’s opposite end from the hilum (scar) where it was attached to the parent plant.
Make a small, shallow cut or nick on the opposite end of the seed coat using the prepared tools.
The goal is to break through the hard outer layer without damaging the delicate inner part of the seed.
Step 4: Soaking the Seeds
After nicking the seeds, place them in a container suitable for soaking. Glass or plastic containers work well.
Fill the container with warm water, about 100 degrees F or so. It should feel slightly warmer than your skin temperature. Cover the seeds completely. Don’t use water that’s too cold or too hot, as extreme temperatures may harm the seeds.
Let the seeds soak for the specified duration, which varies depending on the type of seeds. Some seeds may require only a few hours, while others may need overnight soaking.
Step 5: Monitor the Soaking Process
Keep a close eye on the seeds while soaking to prevent over-soaking. Different seeds have different soaking times, and excessive soaking can lead to seed damage or rot.
Step 6: Drain and Plant
Once the soaking time is up, remove any seeds that are floating in the water. They will likely not germinate
Drain the water from the container. Place the nicked and soaked seeds on a damp paper towel to remove excess moisture.
Plant the seeds immediately after nicking and soaking, following the recommended planting depth and spacing for each seed type.
Remember that not all seeds require nicking and soaking for successful germination. Generally, those with hard shells can be soaked prior to planting
However, make sure you research the specific germination requirements of each seed type before proceeding.
How to Cold Stratify Seeds
Seeds from plants native to cold climates or those with natural dormancy mechanisms may require cold stratification before planting.
- Find a sealable plastic bag or airtight container. To this, add a small amount of moistened coconut coir, perlite, or vermiculite to the container.
- Then, place the seeds on top of the damp medium.
- Seal the container and label it with the seed type and the date of stratification.
- Place the sealed container in the refrigerator, where it should remain at a consistent temperature between 32 to 45 degrees Fahrenheit.
- The duration of cold treatment varies depending on the seed type, so you’ll need to do some research on your specific seeds. Some require a few weeks while others require several months.
- Check the container periodically to ensure the medium remains consistently moist. Add a few drops of filtered water if the medium seems too dry.
After the required cold stratification period, remove the seeds from the refrigerator and allow them to warm up gradually at room temperature for a few days.
You can then sow your cold-stratified seeds following the recommended planting depth and spacing for each seed type.
Cold stratification is a valuable technique for enhancing the germination of certain seeds. It mimics natural winter conditions and prepares seeds to sprout when the warmer temperatures of spring arrive.
Planting Depth and Its Impact on Successful Growing
Planting depth is a critical factor in seed germination and seedling establishment, as it directly influences various physiological processes in plants.
Understanding the scientific aspects of why planting depth matters can help gardeners make informed decisions to achieve optimal growth in their gardens.
Here’s a scientific perspective on the importance of planting depth and its impact on successful growing:
1. Soil Temperature and Moisture
Planting depth affects the soil temperature experienced by the seed. Seeds planted closer to the surface experience higher soil temperatures, promoting faster germination.
Deeper planting can result in cooler soil conditions, which may delay germination.
Additionally, proper planting depth allows seeds to access adequate soil moisture levels, which are essential for initiating metabolic activities and cellular processes during germination.
2. Seed Respiration and Oxygen Availability
During germination, seeds undergo respiration, a process that provides energy for growth.
Adequate oxygen availability is crucial for efficient respiration.
Shallow planting ensures better oxygen diffusion to the embryo, promoting healthier seedling development.
Deeper planting may reduce oxygen diffusion, leading to suboptimal respiration and potentially weak seedlings.
3. Photomorphogenesis and Light Perception
Photomorphogenesis is the process by which light influences plant growth and development. Some seeds exhibit photoblastic behavior, responding to light for germination.
Seeds that require light for germination (positive photoblastic) should be surface-sown to ensure they receive sufficient light.
On the other hand, seeds with negative photoblastic behavior, which require darkness for germination, should be planted at the appropriate depth to shield them from light.
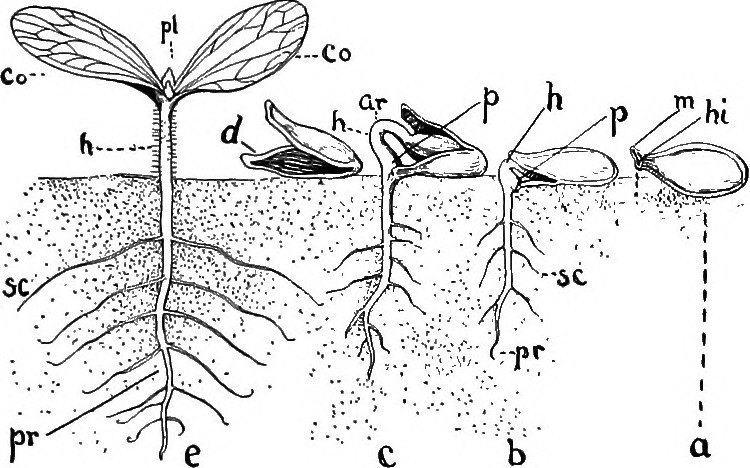
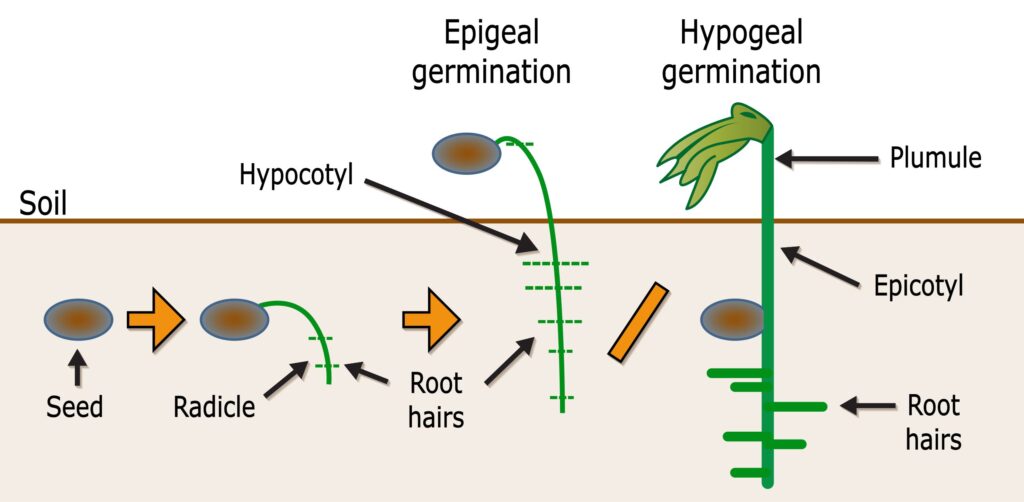
4. Hypogeal and Epigeal Seedlings
Hypogeal and epigeal seedlings are terms used to describe two distinct types of seed germination and the initial stages of seedling development.
These terms highlight the differences in how seeds sprout and the subsequent growth patterns of emerging seedlings.
Understanding these concepts is crucial for successful gardening and plant propagation.
Hypogeal Seedlings
Hypogeal germination is characterized by the emergence of seedlings where the cotyledons, or embryonic seed leaves, remain below the soil surface.
In this type of germination, the cotyledons do not emerge above the ground but stay within the protective shell of the seed coat.
Instead, the epicotyl (the embryonic shoot) elongates and pushes the cotyledons and growing point above the soil.
Key Features of Hypogeal Germination
- Cotyledons remain below ground.
- Epicotyl elongates and emerges above the soil.
- Cotyledons remain enclosed in the seed coat.
- Typically observed in plants like beans, peas, and sunflowers.
Examples of Hypogeal Seedlings
Beans (Phaseolus vulgaris): Beans are a classic example of hypogeal germination. When a bean seed germinates, the cotyledons remain underground while the shoot (epicotyl) elongates and emerges above the soil. The cotyledons stay enclosed within the seed coat until the shoot reaches the surface.
Peas (Pisum sativum): Peas also exhibit hypogeal germination. As the pea seed germinates, the shoot pushes upward, bringing the growing point and cotyledons above the soil. However, the cotyledons themselves remain below ground, protected by the seed coat until the shoot emerges.
Sunflowers (Helianthus annuus): Sunflowers demonstrate hypogeal germination. The shoot of the germinating sunflower seed elongates and emerges above the soil, while the cotyledons remain within the seed coat below ground.
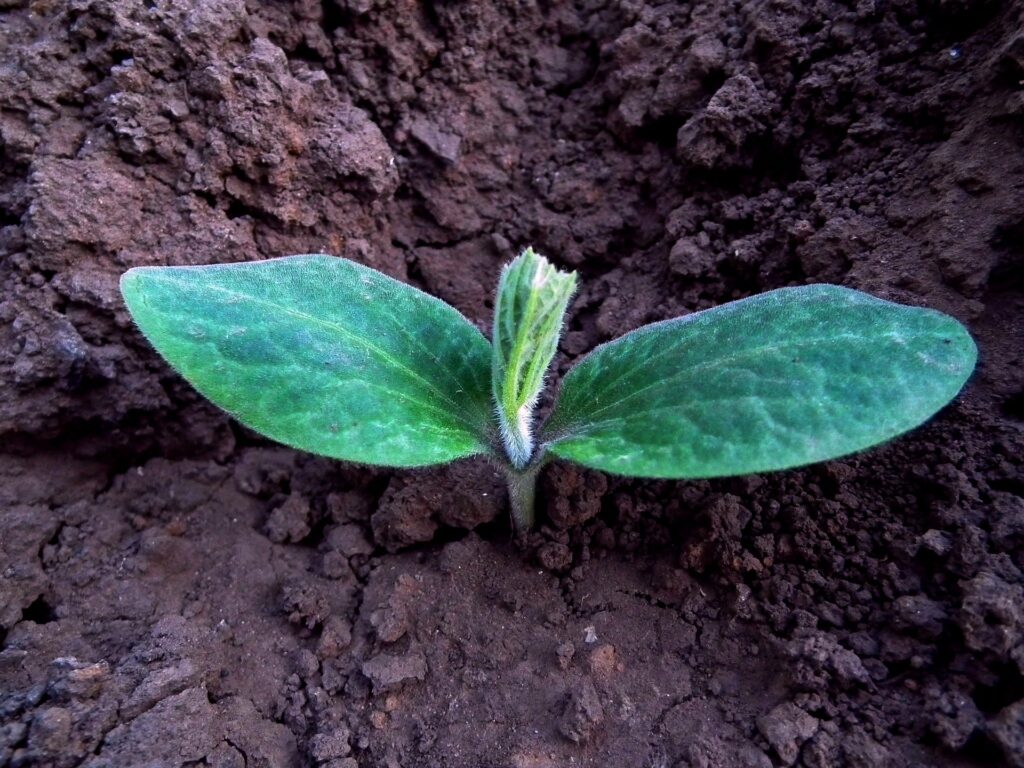
Epigeal Seedlings
Epigeal germination, on the other hand, involves the emergence of seedlings where the cotyledons are lifted above the soil surface.
As the embryonic shoot elongates, it pushes the cotyledons and growing point upward, breaking through the soil.
Once exposed to light, the cotyledons expand and begin to perform photosynthesis.
Key Features of Epigeal Germination
- Cotyledons emerge above ground.
- Cotyledons expand and perform photosynthesis.
- Hypocotyl (stem below cotyledons) remains short.
- Common in plants like lettuce, cucumber, and sunflower.
Examples of Epigeal Seedlings
Lettuce (Lactuca sativa): Lettuce is an example of epigeal germination. In lettuce seeds, the cotyledons emerge above the soil surface as the shoot elongates. Once exposed to light, the cotyledons expand and start performing photosynthesis.
Cucumber (Cucumis sativus): Cucumber seeds undergo epigeal germination. The cotyledons of cucumber seedlings emerge above ground, and as they unfurl, they begin capturing light energy for photosynthesis.
Melons (Cucumis melo): Melons, such as watermelon and cantaloupe, also exhibit epigeal germination. The cotyledons break through the soil surface and become exposed to light, where they start their photosynthetic activity.
For hypogeal seedlings, it’s crucial to plant seeds at the right depth to ensure that the epicotyl can push through the soil.
For epigeal seedlings, proper exposure to light is essential for the development of healthy cotyledons.
Understanding these examples of hypogeal and epigeal germination provides insight into how different plants handle the initial stages of growth. This knowledge can guide gardeners in providing the appropriate care and conditions for various types of seedlings.
5. Root Elongation and Establishment
The depth at which seeds are planted affects root growth and establishment.
Shallow planting encourages early root elongation near the soil surface, allowing seedlings to access surface nutrients effectively.
Deeper planting promotes downward root growth and establishment in search of deeper water and nutrient resources.
6. Seed Coat Integrity and Imbibition
Planting depth can impact seed coat integrity and imbibition (absorption of water by seeds).
Shallow planting minimizes the risk of seed coat damage during germination, enabling optimal water uptake by the seed.
7. Seedling Competition and Spacing
Proper planting depth helps maintain adequate spacing between seedlings. Appropriate spacing reduces competition for resources such as light, water, and nutrients, ensuring healthier individual plant growth.
8. How to Determine How Deep to Plant Seeds
Planting seeds at the appropriate depth is crucial for successful germination and seedling establishment.
The ideal planting depth varies depending on the size of the seed and its germination requirements.
Here are a few ways to determine the proper planting depth for different seeds:
Research the Seed: It often helps to read the seed packet, but additional research is a good idea.
Consider Seed Size: As a general rule, smaller seeds are typically planted at shallower depths, while larger seeds can be sown deeper.
Small seeds, like lettuce or petunias, may require only a light covering of soil or none at all.
Larger seeds, such as beans or squash, may need to be planted at a deeper depth.
Observe the Seed Shape: Some seeds have distinct shapes that influence planting depth. For example, flat seeds, like sunflower seeds, should be sown horizontally at a depth equal to their width.
Rounded seeds, like peas, are often sown at a depth two to three times their diameter.
Follow Recommendations: Pay attention to any specific recommendations provided for the seed variety you’re planting.
Some seeds, particularly those that require light for germination, should not be buried and should be surface-sown instead.
Soil Type Considerations: In heavy or clayey soils, it’s essential not to plant seeds too deep, as this can hinder seedling emergence.
In loose or sandy soils, consider planting slightly deeper to ensure adequate moisture retention.
Watering Considerations: Keep in mind that seeds planted too deep may struggle to reach the surface, and their access to moisture may be limited.
Planting at the correct depth ensures that seedlings can emerge and access essential water and nutrients after germination.
When to Start Seeds
Understanding the ideal timing for seed starting is crucial for successful gardening. Properly aligning seed sowing with the distinct growth preferences of warm-season and cool-season crops is essential to achieve robust and thriving plants.
What Are Warm Season Crops?
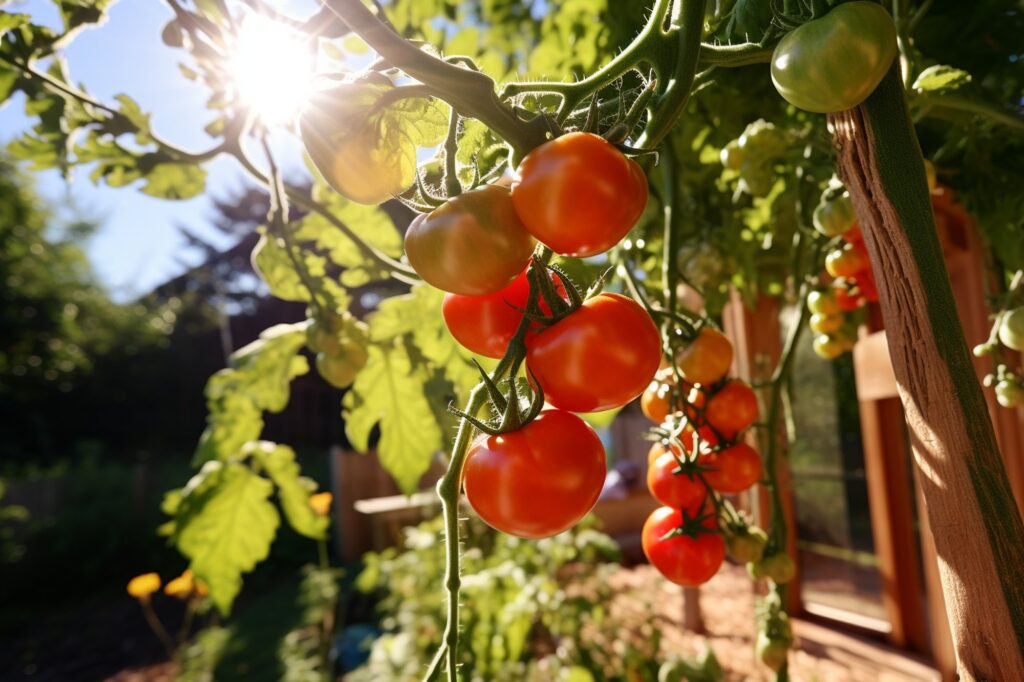
Warm-season crops flourish in the warmth of the spring through fall growing season. These crops, including tomatoes, peppers, cucumbers, and squash, exhibit specific characteristics that make them well-suited for the elevated temperatures of these seasons.
Characteristics of Warm Season Crops
Warm season crops require temperatures between 70-85°F (21-29°C) for optimal germination and growth. They thrive when exposed to abundant sunlight and have a longer growing cycle.
Requirements of Warm Season Crops
These crops need well-draining soil, ample sunlight (8-10 hours daily), and regular moisture. They are sensitive to frost, requiring careful timing for both indoor and direct sowing.
Seed Starting Times for Warm Season Crops
Indoors: Around 6-8 weeks before the anticipated planting months, aligning with the end of winter or early spring.
In Zones 9-12, we frequently start warm-season crops indoors in late December through January for planting out after the last frost date in February or March.
We also start seeds indoors or undercover in the late summer for planting out during the milder months of September and October after the heat of summer has worn down.
Outdoors: When the danger of frost has passed and temperatures consistently stay within the preferred range.
Examples of Warm Season Crops
- Tomatoes
- Peppers
- Cucumbers
- Squash (zucchini, butternut, etc.)
- Eggplant
- Okra
- Watermelon
- Cantaloupe
- Pumpkin
- Sweet potatoes
- Corn
- Beans (pole beans, lima beans, etc.)
- Peanuts
- Sunflowers
What Are Cool Season Crops?
Cool-season crops thrive in the moderate temperatures of fall and early spring.
These crops, including lettuce, spinach, carrots, and peas, possess unique attributes that enable them to flourish during the cooler months.
Characteristics of Cool Season Crops
Cool season crops tolerate temperatures within the range of 40-70°F (4-21°C) and often have a shorter growth cycle. They can endure light frosts and have rapid growth.
Requirements of Cool Season Crops
These crops thrive with well-drained soil, moderate sunlight (6-8 hours daily), and regular moisture. They can withstand cooler temperatures and even benefit from them.
Sowing Times for Cool Season Crops
Indoors: Begin around 6-10 weeks before the desired planting months, aligning with the end of summer or early fall.
In Zones 8-12, we can start many of these indoors or undercover during the late summer or early fall. Because of our mild winters, we can generally plant cool-season crops throughout the fall and winter, ending only in spring around late March.
Outdoors: Plan for direct sowing during the milder months of fall through early spring, avoiding extreme heat.
Examples of Cool Season Crops
- Lettuce
- Spinach
- Kale
- Broccoli
- Cauliflower
- Brussels sprouts
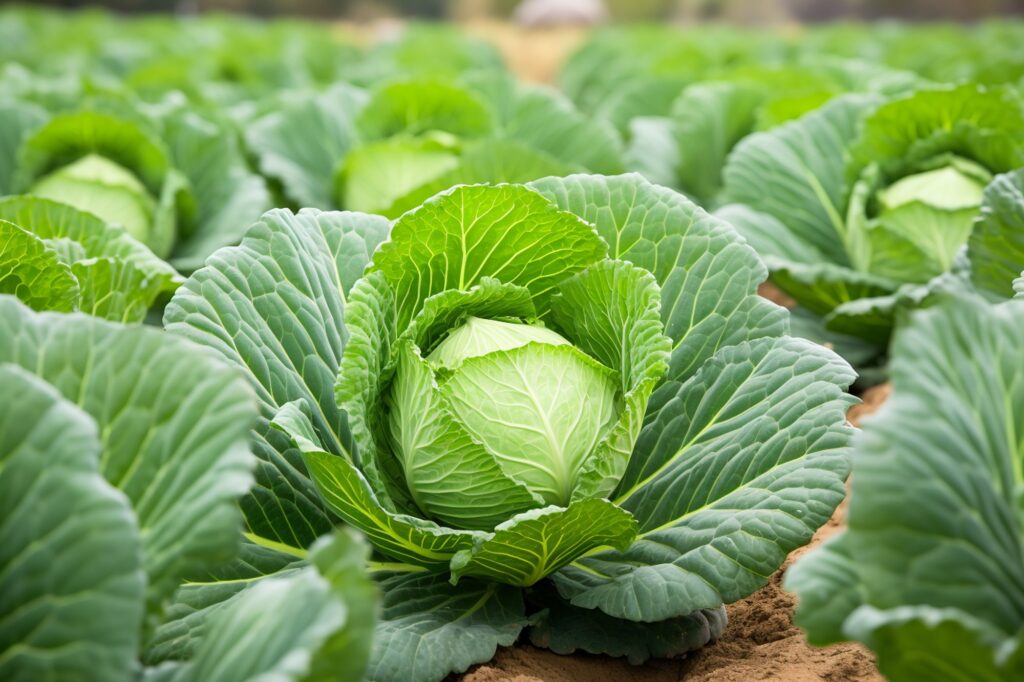
- Cabbage
- Carrots
- Radishes
- Peas
- Swiss chard
- Beets
- Turnips
- Onions
- Garlic
What are Long-Season Crops?
Long-season crops encompass plant varieties that require an extended period to reach maturity and produce a harvest.
These crops demand a substantial growing season to develop fully, making them a strategic choice for gardeners in Zones 8-12 who have the luxury of extended warm weather.
Characteristics of Long-Season Crops
Long-season crops are marked by their slower growth rate and longer time to maturity. They often necessitate consistent warmth and a lengthy frost-free period to thrive.
Requirements of Long-Season Crops
These crops typically require well-draining soil, abundant sunlight, and regular moisture. The extended growing period allows them to develop deep root systems and produce bountiful yields.
Sowing Times for Long-Season Crops
Indoors: Start sowing seeds around 8-10 weeks before the projected planting months, aligning with the onset of the growing season.
You may need to pot these up after 6 to 8 weeks to provide adequate growing space.
Outdoors: Plan for direct sowing when the danger of frost has passed, and temperatures remain consistently warm.

Examples of Long-Season Crops
- Tomatoes
- Eggplant
- Peppers
- Melons (muskmelon, cantaloupe)
- Winter squash (acorn, butternut)
- Pumpkins
- Sweet potatoes
- Corn
- Beans (pole beans)
- Okra
What are Short-Season Crops?
Short-season crops are characterized by their ability to mature and yield within a shorter timeframe.
This often makes them quite suitable for the challenging subtropical conditions of Zones 8-12. Their fast growth rate allows you to get a harvest before it gets too hot or the pest pressure becomes overwhelming.
Characteristics of Short-Season Crops
Short-season crops have a quicker growth cycle, allowing them to complete their lifecycle before extreme weather conditions set in. They are often adaptable and can be grown as a reliable source of fresh produce.
Requirements of Short-Season Crops
These crops necessitate well-drained soil, moderate sunlight, and regular moisture. Their accelerated growth allows them to efficiently utilize available resources.
Seed Starting Times for Short-Season Crops
Indoors: Commence seed sowing approximately 4-6 weeks before the targeted planting months.
Because of their fast growth rate, it’s a good idea to sow seeds in succession. Planting another cell pack of seeds every two or three weeks allows you to plug in your small starters as space opens up in the garden.
You can use them for underplanting or filling in empty spaces. Or you can simply replace exhausted annuals in the garden.
Outdoors: Direct sow seeds when outdoor temperatures provide favorable conditions for germination and growth.
Again, succession seed starting is your friend. For many of these crops, you can direct sow in any empty spots in the garden for a quick harvest.
Examples of Short-Season Crops
- Lettuce (leaf and butterhead varieties)
- Spinach
- Radishes
- Carrots (early varieties)
- Beets
- Green onions
- Peas
- Bush beans
- Turnips
- Swiss chard
Planning for Big Harvests and Garden Abundance.
Understanding the distinct characteristics and growth requirements of warm season, cool season, long-season, and short-season crops equips gardeners with invaluable insights for effective garden planning.
This knowledge empowers gardeners to make informed decisions on when to start your seeds, optimizing their gardening efforts for successful yields and a thriving garden ecosystem.
By applying this understanding, gardeners can:
Optimize Seed Starting Times
Gardeners can confidently initiate seed starting activities at the appropriate times, aligning with the unique temperature preferences of each crop.
This ensures that seedlings develop robustly and are ready for transplanting when outdoor conditions are favorable.
Maximize Space Utilization
Armed with knowledge of crop growth duration, gardeners can strategically allocate garden space to accommodate the varying needs of long-season and short-season crops. This efficient space utilization enhances overall garden productivity.

Extend Growing Seasons
Gardeners can take advantage of the subtropical climate in Zones 8-12 by two growing seasons by selecting a combination of warm season and cool season crops.
This enables continuous harvests throughout the year, capitalizing on both spring and fall gardening opportunities.
Plan Crop Successions
Understanding the distinct timelines for different crop types empowers gardeners to plan successive plantings. As one crop nears maturity, gardeners can prepare to replace it with a different crop, ensuring a constant supply of fresh produce.
Mitigate Climate Challenges
Knowledge of the climate-appropriate crops allows gardeners to navigate challenges posed by subtropical conditions. By choosing short-season crops during periods of extreme heat, gardeners can ensure a successful harvest without being adversely affected by temperature fluctuations.
Enhance Biodiversity
Gardeners can foster biodiversity by incorporating a mix of warm season and cool season crops, as well as long-season and short-season varieties. This diversity attracts beneficial insects, improves soil health, and promotes a balanced garden ecosystem.
Promote Soil Health
By strategically rotating warm season and cool season crops, gardeners can prevent soil depletion and maintain optimal soil health. Different crop types have varied nutrient demands, reducing the risk of nutrient imbalances.
Seed Starting Basics: How to Start Every Type of Seed
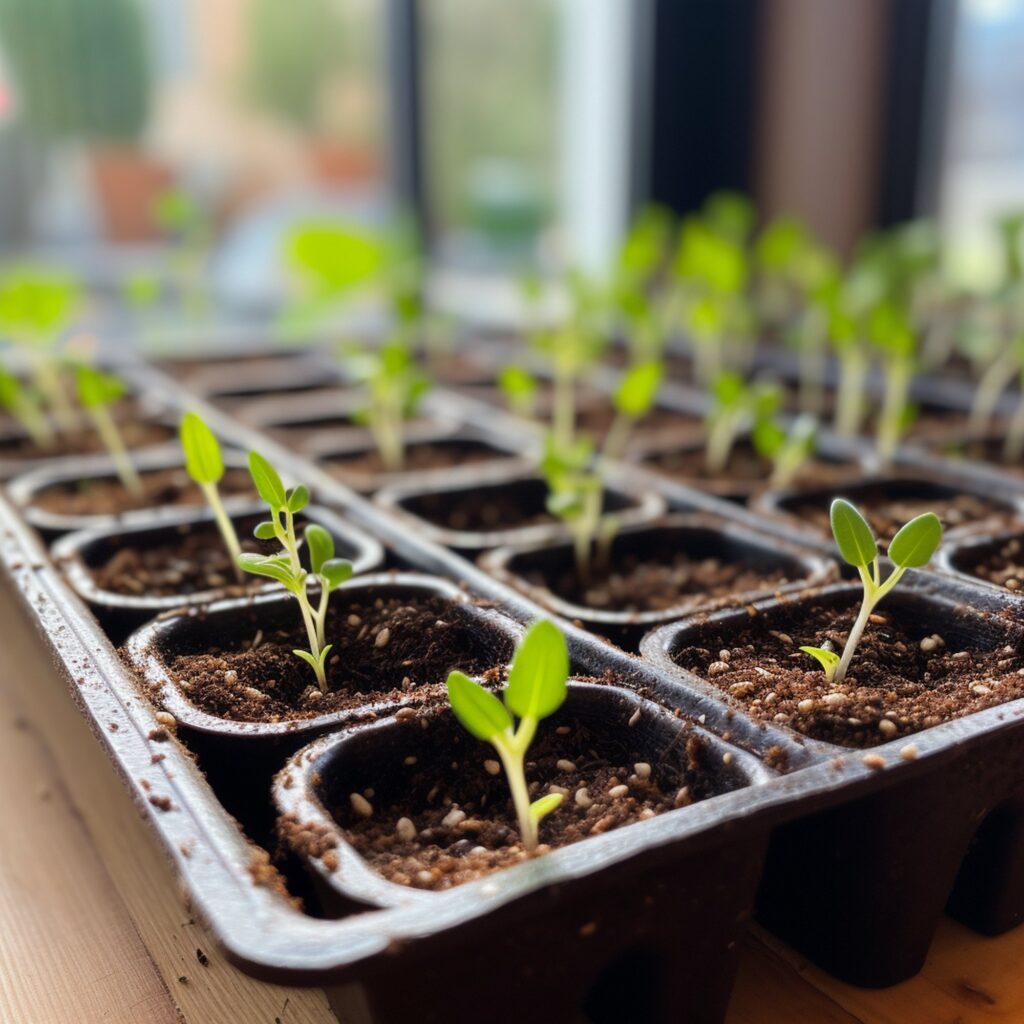
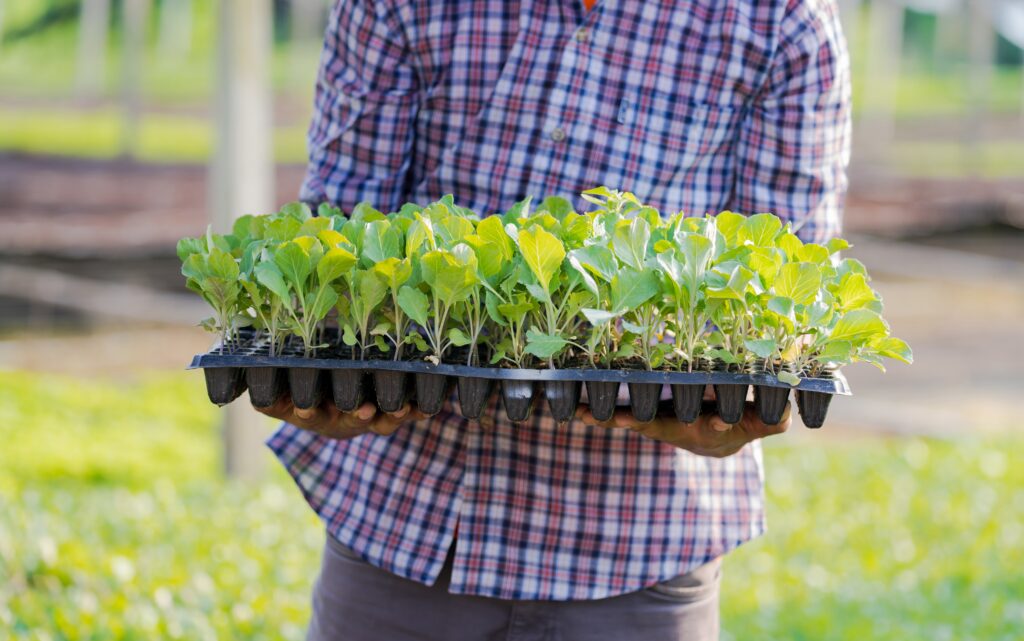
Starting seeds in seed tray cells, soil blocks, or individual pots is a practical and efficient way to kickstart your garden.
By starting them in a controlled environment, you can ensure that only healthy plant starts end up in your garden.
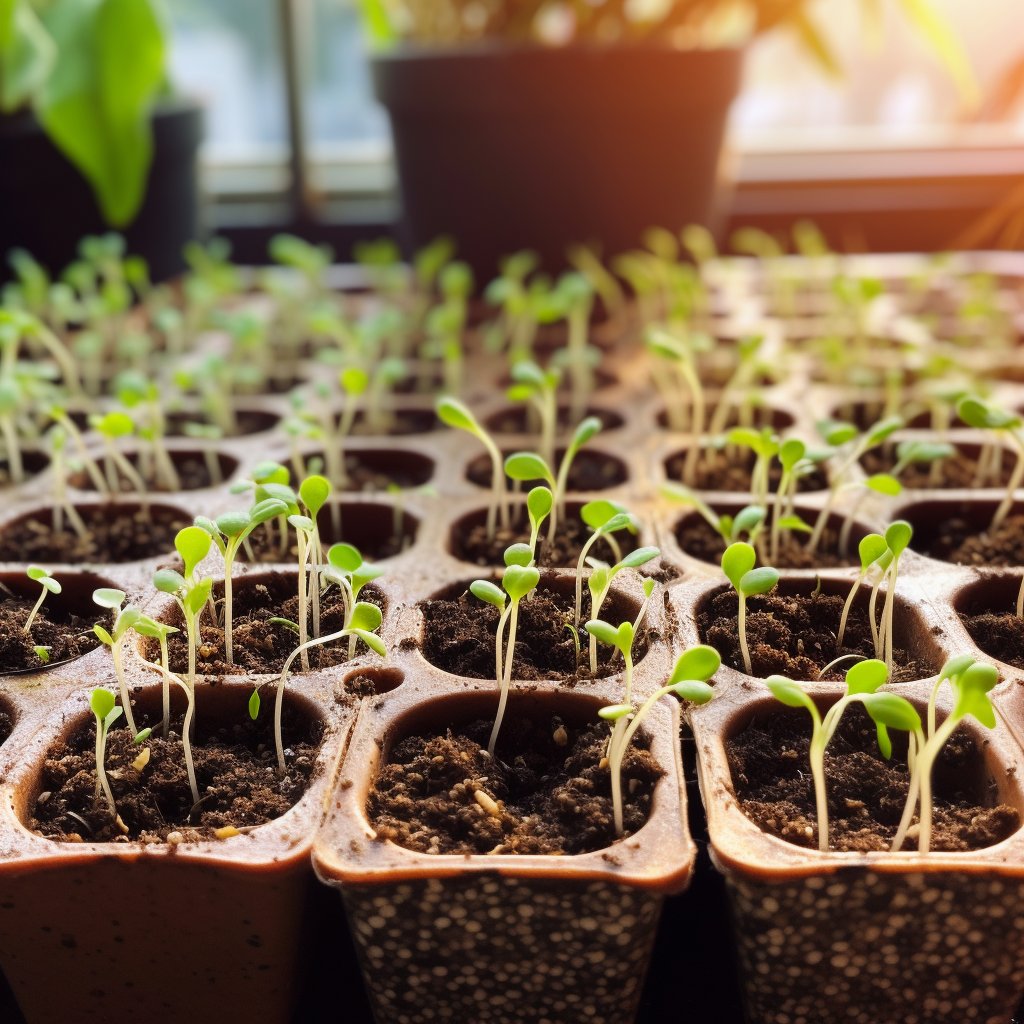
If you have little space to work with, seed starting in small containers is the most efficient way to use your limited garden space.
Starting Small Seeds
Small seeds, such as those of herbs and flowers, require special care during germination due to their delicate nature.
Follow these step-by-step instructions to ensure successful germination and healthy growth of small seeds in seed tray cells:
Step 1: Select the Right Seed Tray
Choose a seed tray with small individual cells. These cells provide ample space for each seed to germinate without crowding.
Step 2: Fill Seed Tray with Growing Medium
Fill the seed tray cells with a high-quality, sterile seed-starting mix. The mix should be light, well-draining, and rich in nutrients to support early seedling growth.
Step 3: Moisten the Growing Medium
Gently water the seed-starting mix until it is uniformly moist. Avoid overwatering, as excessive moisture can lead to seed rot.
Step 4: Sow the Small Seeds
Carefully sow one to two small seeds per cell, following the recommended planting depth for each seed type. Use a toothpick or tweezers to handle small seeds delicately.
If using old seeds or multi-sowing, you can drop two or three or four seeds per compartment.
Step 5: Cover the Seeds (Optional)
Some small seeds require darkness for germination, while others benefit from exposure to light.
Refer to seed packets or reliable gardening references to determine whether covering the seeds with a thin layer of vermiculite or seed-starting mix is necessary.
Step 6: Label the Seed Tray
Use plant labels to identify the seeds sown in each cell. Proper labeling ensures easy identification as seeds germinate and grow.
Step 7: Provide Bottom Heat (Optional)
To encourage germination, consider placing the seed tray on a heating mat or a warm surface. Bottom heat can improve germination rates for some small seeds.
This may be unnecessary in Zones 9-12, although you may want to start seeds indoors during the winter months to ensure consistent temperatures provided by your home heating system.
Step 8: Provide Adequate Moisture
Place the seed tray in a shallow tray filled with water to allow for bottom watering. Ensure that the seed-starting mix remains consistently moist, but not waterlogged.
Step 9: Cover the Seed Tray (Optional)
Cover the seed tray with a clear plastic dome or plastic wrap to create a mini greenhouse effect. This helps retain moisture and humidity for optimal germination.
Step 10: Place the Seed Tray in a Warm Location
Position the seed tray in a warm location with consistent temperatures suitable for germination.
A bright windowsill or indirect light on a covered porch can provide enough light for those that require light to germinate.
Step 11: Monitor Germination and Remove Cover
Keep a close eye on the seed tray for signs of germination. Once the seeds start sprouting, remove the cover to prevent mold growth and provide better air circulation.
For most plants, you’ll need to ensure that the new sprouts receive some light. Even seeds that require darkness to germinate will require sunlight once they’ve broken the surface.
Step 12: Thin Seedlings (If Needed)
If more than one seed germinates in a cell, gently thin the seedlings to leave only the healthiest one to grow.
You won’t want to do this if you’re multi-sowing, however.
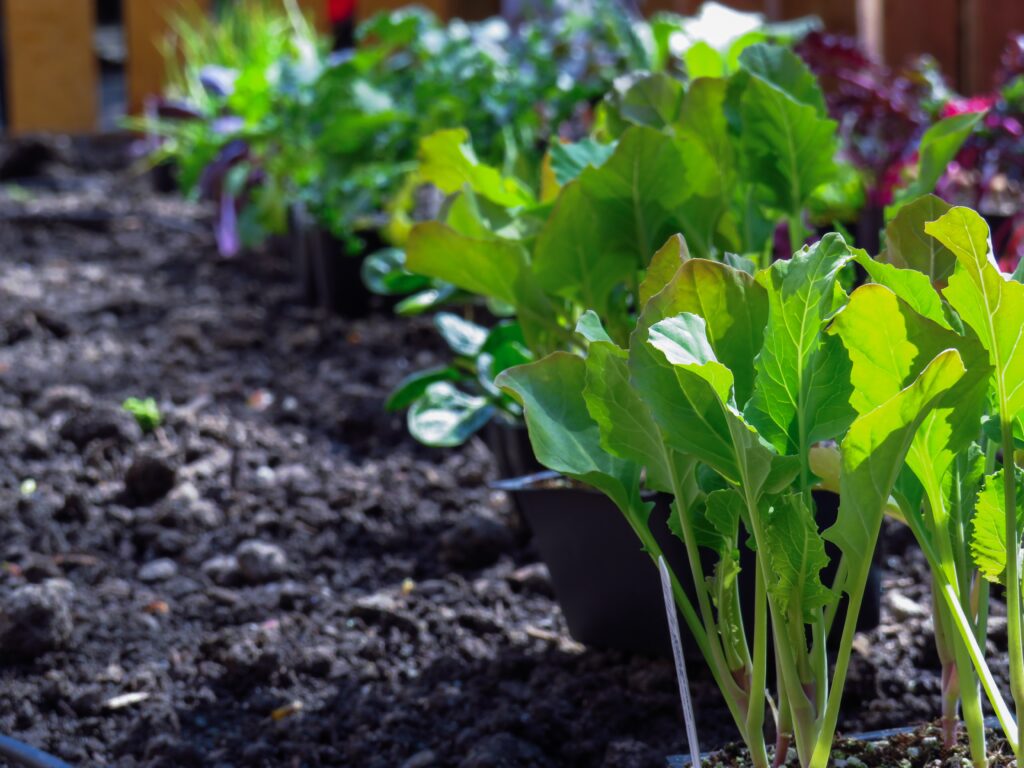
Seed Starting for Large Seeds
Starting large seeds in soil blocks or pots provides ample space and nutrients for robust seedling development.
Large seeds, such as those of melons, cucumbers, and beans, benefit from a more substantial growing medium during germination. They grow so quickly that they’ll outgrow a smaller container before they’re ready to plant out.
Some plants benefit from up to three months of supervised cultivation before planting out, including tomatoes, peppers, and eggplant.
These long-season annuals are best planted once they’re well developed. To avoid stressing them with constant transplanting into larger containers, start with large soil blocks or small pots for germination.
Step 1: Choose the Right Containers
Select suitable containers for starting large seeds. Opt for individual pots or soil blocks with sufficient space to accommodate the size of the seeds and allow for root growth.
Step 2: Prepare the Growing Medium
Use a well-draining, nutrient-rich potting mix suitable for seed starting. Fill the containers with the growing medium, leaving about 1/2 inch (1.25 cm) space from the rim for easy watering.
Step 3: Water the Growing Medium
Moisten the potting mix thoroughly to ensure even moisture distribution. Avoid overwatering, as large seeds may rot in excessively wet conditions.
Step 4: Sow Seeds
Plant one large seed per pot or soil block. You can plant two per block when using old seeds.
Place the seed on top of the growing medium at the recommended planting depth for each specific seed type.
Step 5: Cover the Seeds
Cover the seeds with the recommended depth of soil mix.
Step 6: Label the Containers
Label each container or tray of soil blocks with the name of the plant variety to avoid confusion as the seedlings grow.
It’s also useful to add the date to your tags. This allows you to plan for succession crops based on the time to germinate.
Step 7: Provide Bottom Heat (Optional)
If starting in an unheated room during winter, using a heating mat or placing the containers on a warm surface encourages germination.
Step 8: Maintain Adequate Moisture
Keep the potting mix consistently moist by bottom watering the containers. Avoid overhead watering, which may dislodge the large seeds or create uneven moisture levels.
Step 9: Monitor Germination and Adjust Light
Keep a close eye on the containers for signs of germination. Once seedlings emerge, provide adequate light to ensure healthy growth.
Adjust the position of the containers to prevent leggy seedlings.
Step 10: Transplant Seedlings (If Needed)
As the seedlings grow, they’ll develop true leaves and become crowded in their pots. If the conditions in the garden aren’t optimal yet, consider transplanting them to larger containers or individual pots for further growth.
Step 11: Harden Off Seedlings
Before transplanting the seedlings outdoors, gradually expose them to outdoor conditions over several days. This process, called hardening off, prepares the seedlings for the change in environment.
How to Direct Sow Small Seeds in the Garden
Direct sowing small seeds in the garden allows for a natural and straightforward approach to gardening.
Whether you’re growing vegetables, herbs, or delicate flowers, direct sowing is the easiest method for many plant species.
I personally prefer seed starting in blocks or cells first, but if you’re establishing a wildflower meadow or looking to create large swathes of bedding annuals, direct sowing really is the most straightforward method.
Direct Sowing Small Seeds
Follow these step-by-step instructions to ensure successful germination and growth when direct seed starting small seeds in the garden:
Step 1: Choose the Right Location
Select a garden location that receives the appropriate amount of sunlight for the specific plant species you’re sowing. Consider factors like soil drainage and exposure to wind when choosing the site.
Step 2: Prepare the Soil
Clear the area of any weeds, rocks, or debris. Loosen the soil to a depth of about 2-3 inches (5-8 cm) using a garden fork or trowel. Rake the soil surface to create a smooth, level bed for sowing.
Adding a layer of compost or mixing some composted manure into the first inch or two of soil will help provide a good environment for your seeds to grow.
Alternatively, many wildflower seeds prefer poor soil condition, so don’t provide any garden amendments for these hardy troopers.
Step 3: Sow the Small Seeds
Gently sprinkle the small seeds evenly over the prepared soil surface. Follow the recommended planting depth and spacing for each seed type.
For very tiny seeds, mix them with fine sand or vermiculite to help distribute them more evenly.
Step 4: Cover the Seeds
Depending on the seed type, consider covering the seeds with a thin layer of fine soil, vermiculite, or compost. Some small seeds benefit from being exposed to light for germination, so do not cover them if indicated.
Step 5: Water the Seeded Area
After sowing, water the area gently to settle the soil and ensure good seed-to-soil contact. Avoid heavy watering, as it may dislodge the small seeds or cause them to clump together.
Step 6: Monitor Moisture Levels
Keep the seeded area consistently moist until germination occurs. Use a fine mist or a gentle watering can to avoid disturbing the seeds.
Step 7: Thin Seedlings (If Needed)
Once seedlings emerge and grow their first true leaves, thin them out if they appear crowded. This step ensures each seedling has sufficient space to develop properly. Consult the instructions on your seed packet for plant spacing.
Step 8: Mulch the Area (Optional)
Once seeds have germinated, been thinned, and have developed several sets of true leaves, consider applying a thin layer of organic mulch around the seedlings. This will conserve moisture, suppress weeds, and help to maintain an even soil temperature.
How to Direct Sow Large Seeds in the Garden
Direct sowing large seeds in the garden is a simple and efficient way to grow a variety of plants.
Although I generally recommend seed starting in blocks or cell trays and then planting out, species with deep tap roots, hypersensitive roots, or those that grow extremely quickly can be direct sown.
Whether you’re planting beans, squash, or sunflowers, follow these step-by-step instructions to ensure successful direct sowing of large seeds in your garden:
Step 1: Choose the Right Location
Select a sunny location in your garden with well-draining soil. Ensure that the chosen spot provides ample space for the large plants to grow.
If seed starting for climbers or vines, it’s a good idea to install your trellis or support structure before sowing your seeds.
This 1) prevents any damage done to delicate seedlings by trying to install the support after it has started growing. And 2) Allows you to better eyeball plant spacing by using the trellis or support as a measure.
Step 2: Prepare the Soil
Clear the area of any weeds, rocks, or debris. Decide where you’ll be planting each seed and cover each location with several inches of compost
If your soil is highly compacted, you can loosen the soil to a depth of about 4-6 inches in each location. We generally recommend no-dig methods and try to avoid disturbing the structure and living organisms below the soil surface.
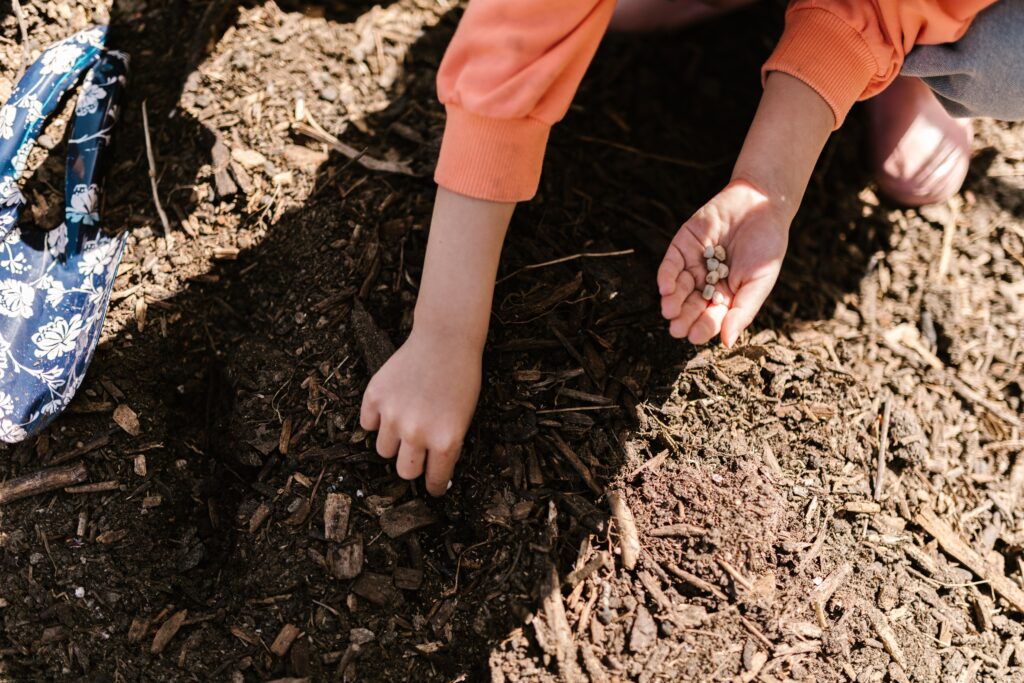
Step 3: Sow the Large Seeds
Poke a hole to the depth recommended for the seeds and sow them directly into the prepared space.
Step 4: Cover and Firm the Soil
After sowing, cover over with the loose compost you provided. Firm the soil or compost over the seeds gently with your hands.
Step 5: Water the Seeded Area
Water the seeded area thoroughly after planting to help settle the soil around the seeds. Adequate watering is essential for proper germination.
Step 6: Monitor Moisture Levels
Keep the seeded area consistently moist until germination occurs. Regularly check the soil moisture and water as needed, especially during dry spells.
Step 7: Thin Seedlings (If Needed)
Once the large seedlings emerge and grow their first true leaves, thin them out if they are too close together. Thinning allows each seedling to have enough space to develop and access sunlight and nutrients.
Step 8: Feed and Mulch Your Plants
Once plants are a few inches high and have developed several sets of true leaves, you can apply vegetable fertilizer and mulch around the seedlings.
Consider applying a slow-release organic vegetable fertilizer or organic compost to support the growth of your plants. These once-a-month or once-a-season amendments can really save you many hours of hard work in the garden.
Water fertilizer or compost in well after application and then proceed to mulching.
Mulch can help retain moisture and keep the soil cool enough to support the beneficial microbiological organisms that plants need for healthy growth.
Consider straw or hay for mulching vegetable beds.
Wood chips are an excellent mulch for perennial plants, but don’t break down quickly enough for annual plantings and may interfere with your plants in future seasons.
Common Problems in Seed Starting, Prevention, and Remedies
Starting seeds can be a rewarding endeavor, but it is not without its challenges. Gardeners may encounter various problems during the seed starting process, leading to germination failure or stunted seedling growth.
Here is a list of common problems that may occur when starting seeds, along with their symptoms and remedies:
1. Problem: Poor Germination
Symptoms: Low percentage of seeds germinating or seeds failing to sprout.
Remedies: Ensure seeds are fresh and not expired. If you decide to use old seed up, double up on the number you plant.
Make sure the temperature is right for your seed type. You can find a chart of optimal temperatures on our website here.
You may have over-covered seeds that require light to germinate. Sometimes, seed packets lie and I’ve seen many that say to plant seeds ½ deep that won’t germinate without sunlight. Do some additional research on your seeds to be sure.
Avoid overwatering. This can cause seeds to rot before they can sprout.
2. Problem: Damping Off
Symptoms: Seedlings appearing weak, wilting, and collapsing at the soil level due to fungal infection.
Remedies: Use sterile potting mix and clean containers.
Improve air circulation around seedlings to reduce humidity.
Avoid overwatering and allow the soil surface to dry between watering.
3. Problem: Leggy Seedlings
Symptoms: Seedlings with elongated and weak stems reaching for light, often resulting from insufficient light or crowded conditions.
Remedies: Provide adequate light to seedlings, either with grow lights or by placing them in a sunny location. Thin out seedlings to allow ample space for each to grow.
In some cases, particularly tomatoes and peppers, you can salvage leggy seedlings by replanting them deeply into a larger container.

4. Problem: Seedlings Turning Yellow
Symptoms: Seedlings showing yellowing of leaves, usually due to nutrient deficiencies or overwatering.
Remedies: Although most seeds contain enough nutrients to support the initial growth of the seedlings, you may run into a nutrient deficiency if the seedling is in the cell too long.
You can use some dilute balanced liquid fertilizer when bottom watering.
To prevent this from happening, pot up your seedlings into larger containers sooner than later.
Yellowing may also be caused by overwatering. Bottom water with a very diluted fertilizer and allow the cells or pots surface to dry out before watering again.
5. Problem: Seedlings Growing Slowly
Symptoms: Seedlings not showing significant growth over time, possibly due to poor soil quality or low temperatures.
Remedies: Ensure the growing environment is warm enough to support seedling growth. Add a heat mat or move trays to a warmer location.
6. Problem: Fungal or Bacterial Diseases
Symptoms: Seedlings displaying discoloration, wilting, or lesions caused by fungal or bacterial infections.
Remedies: Remove affected seedlings promptly and destroy them.
Improve air circulation and avoid overcrowding to reduce disease spread. Use sterilized containers and tools.
Often, seed trays can show signs of algae growth on the tops. This is usually caused by exposure to sunlight when damp and is relatively harmless. The green sheen on top of your seed trays is annoying and unsightly, but it’s usually no detriment to the plant.
7. Problem: Insect Pests
Symptoms: Seedlings showing signs of pest infestations, such as chewed leaves or visible insects.
Remedies: Monitor seedlings regularly for pests and take appropriate measures, such as handpicking or using organic insecticides, to manage infestations.
If starting seeds outside, you may even find rodents digging into your seed trays to collect species like sunflowers, melons, or squash seeds. Cover seed trays with sturdy covers at night. You can also move them to a protected spot (like indoors) until they have sprouted to prevent this problem.
8. Problem: Lack of Hardening Off
Symptoms: Seedlings showing shock when transplanted outdoors due to insufficient acclimatization.
Remedies: Gradually expose seedlings to outdoor conditions for a few hours each day over several days before transplanting, a process known as hardening off.
If possible, transplant your young seedling during a cloudy day, especially if there’s rain in the forecast. I find this helps them transition to outdoor garden life much better.
9. Problem: Overcrowding
Symptoms: Seedlings growing closely together, leading to competition for resources and weak growth.
Remedies: It’s tough, but it has to be done. Thin out seedlings to provide adequate space for each plant to grow and develop.
10. Problem: Insufficient Watering
Symptoms: Seedlings showing signs of wilting or dry soil due to inadequate watering.
Remedies: Water seedlings consistently and ensure the soil remains evenly moist without becoming waterlogged.

FAQ
When is the best time to start seeds?
For successful seed starting in gardening Zones 8-12, there are generally two good times to start seeds. The first is four to six weeks before the last frost date in the spring for planting out in February and March. The second is in late summer in July and for planting out in September and October. This will vary depending on whether you’re planting warm season or short season crops.
Why should you start seeds indoors?
Starting seeds indoors in Zones 8-12 offers several benefits. It extends the growing season, giving delicate crops like tomatoes and peppers a head start before planting out. It also provides a controlled environment for germination, out of excessive heat and heavy rainfall.
Where is the best place to start seeds indoors?
In Zones 8-12, where warm and humid conditions prevail, the best location to start seeds indoors is a well-ventilated area with consistent warmth and ample sunlight. Choose a spot that receives abundant natural light or use grow lights. Be cautious not to overheat the seedlings. Adequate airflow is essential to prevent fungal issues, so ensure good ventilation while keeping the humidity in check.
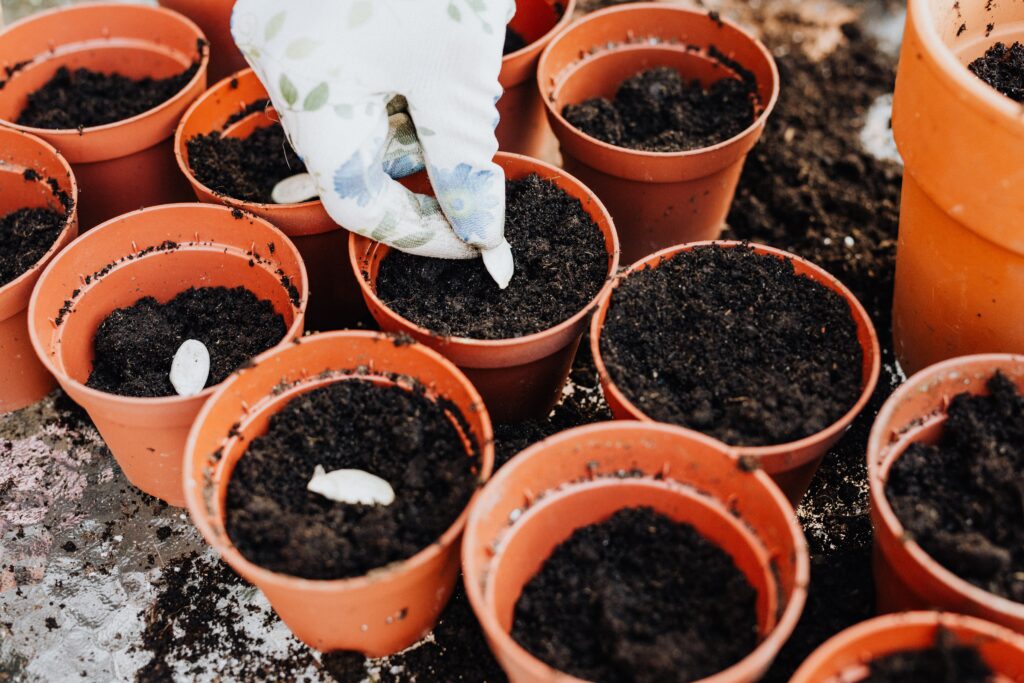
How many seeds per starter pot should you sow?
When seed starting, it’s essential to strike a balance between providing adequate space for each seedling’s growth and maximizing your planting efficiency. Generally, aim to sow 2-3 seeds per starter pot, ensuring a higher likelihood of successful germination. If using old seeds from earlier seasons, consider sowing 3 to 4 seeds. This approach accounts for potential variations in seed viability and helps ensure at least one healthy seedling per pot. Once seedlings develop their first true leaves, you can carefully thin out the weaker seedlings, leaving the strongest ones to continue growing.
How many lumens for seed starting should a grow light have?
When using grow lights for seed starting, it’s important to provide your seedlings with the optimal amount of light to promote healthy growth. For most vegetable and flower seedlings, aim for a grow light that provides around 1000 to 1500 lumens per square foot. This light intensity mimics the brightness of natural sunlight and encourages sturdy stem development and vibrant leaf growth.
When do you begin starting fall seeds in Zones 8-12?
In Zones 8-12, the timing for starting fall seeds varies based on the type of seed you’re growing. In general, you’ll sow warm-season crops in late summer to plant out in the fall. You’ll sow warm-season crops again from late December through January to plant out after your last frost date.
For cool season crops, you can start seeds indoors in late summer and plant out from October through March as the weather allows. Most cool season crops can be planted in Zones 8-12 throughout the winter.
How many hours of light do seeds need to germinate?
Seeds require varying amounts of light for germination, depending on the plant species and its specific light preferences. In general, many seeds benefit from around 12-16 hours of light per day during the germination process. Remember that some seeds require darkness to germinate and should be covered or placed in a dark environment during this phase.
What are the 4 requirements for seed germination?
The four primary requirements for seed germination are water, proper temperature, oxygen, and suitable soil or growing medium. These factors work in conjunction to trigger the biochemical processes necessary for a seed to break dormancy, swell, and initiate growth.
Which seeds need light to germinate?
Seeds that require light for germination include lettuce, spinach, arugula, kale, radish, cilantro, dill, nasturtium, calendula, zinnia, sweet alyssum, and pansy. Providing these seeds with exposure to light during germination is essential for their successful sprouting and subsequent growth.
What not to do when germinating seeds?
When seed starting, it’s important to avoid overwatering, as excessive moisture can lead to fungal growth and rot. Additionally, refrain from planting seeds too deeply, as they may struggle to reach the surface. Avoid using contaminated soil, as it can hinder germination. Finally, placing seeds in an area with insufficient light or incorrect temperature can delay or prevent germination.
How do you know when a seed is germinating?
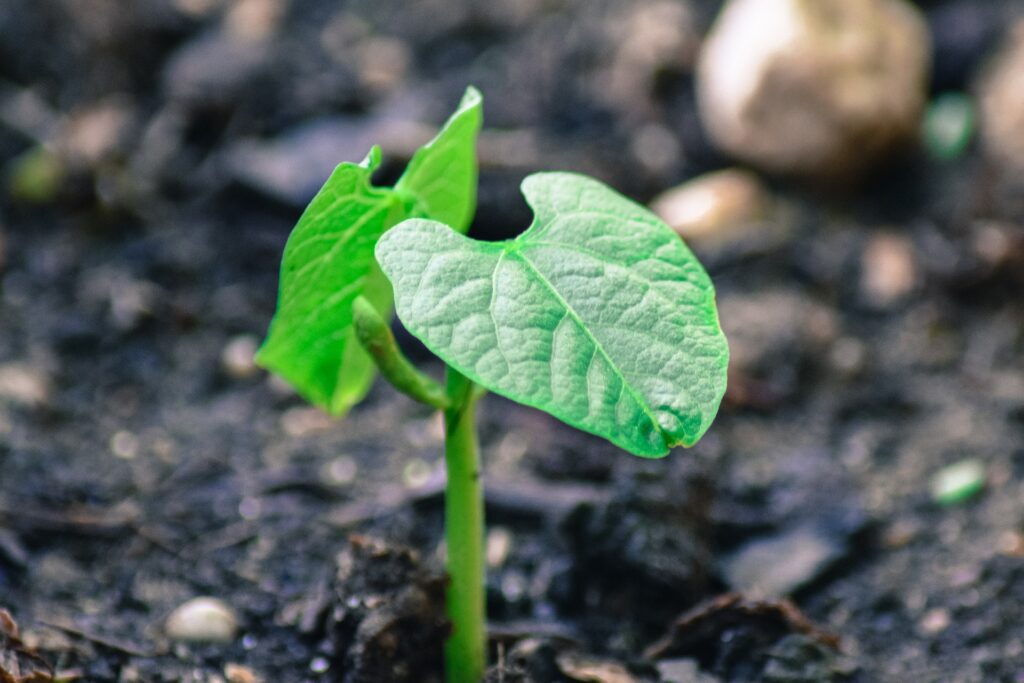
You can identify germination by observing the emergence of the seedling from the growing medium. As the seed absorbs water and swells, the outer shell cracks, and a tiny shoot, called the radicle, emerges. This initial growth is followed by the emergence of the seedling’s first leaves, called cotyledons.
How do you know if seeds are too old?
Seeds that are too old may exhibit reduced germination rates or fail to germinate altogether. You can assess seed viability by performing a simple germination test. Place a specific number of seeds on a damp paper towel, seal it in a plastic bag, and keep it in a warm location for the recommended time period. Afterward, count the number of seeds that have sprouted. If a significant percentage fails to germinate, it indicates reduced viability.
Which is the best seed starting mix?
We recommend a blend of coconut coir, perlite, compost, and a slow-release fertilizer that contains beneficial mycorrhizal fungi and beneficial bacteria. You can purchase a commercial blend like ProMix, or make your own. Avoid heavy garden soil or potting mixes, as they can impede seedling development.
How do I make my own seed starting mix?
A basic recipe includes mixing together coconut coir and perlite in equal parts. To make a larger batch, use a bucket or large container and thoroughly blend the ingredients until well combined. Optionally, you can add a small amount of finely screened compost or vermicompost for added nutrients. we also recommend adding a slow-release fertilizer for seed starting in small pots or soil blocks where the plants will remain for many weeks before planting out. This DIY mix offers a cost-effective and customizable solution for starting seeds, ensuring a suitable medium for germination and early growth.
What is a good recipe for soil block mix?
Mix the following components thoroughly to create a peat-free soil block mix. Coconut coir serves as an environmentally friendly alternative to peat moss, providing adequate moisture retention and aeration. It also adds structure to the soil block mix to ensure they hold together. Compost adds nutrients to support seedling growth, while vermiculite and perlite contribute to proper drainage and texture. This peat-free mix offers a sustainable option for starting seeds in soil blocks, promoting healthy germination and early development.
- Coconut Coir: 4 parts
- Compost: 2 parts
- Vermiculite or Perlite: 2 part