Posted on

What Every Southern Gardener Needs to Know About Tropical Hibiscus

tropical hibiscus care for Florida gardens

Tropical Hibiscus has to be the Hail Mary throw for any Florida gardener. These beautiful flowering shrubs are so easy to grow in our climate that cultivating a variety is a no-brainer. Tropical hibiscus care is simple and straightforward, and the amount of bloom you get for your buck (and effort) is simply incredible.

There seem to be an endless number of tropical hibiscus varieties, including some extravagantly flamboyant hybrids. Unfortunately, there are also a lot of scams floating around. If you seed tropical hibiscus for sale promising impossible-in-nature colors, it may be a complete scam.

If you live in the Southeastern U.S., specifically around the hot and humid Gulf Coast, you may have seen tropical hibiscus for sale and been tempted to purchase plants. Perhaps you thought they were fussy. They’re so pretty, they must be a pain to care for, right? Turns out, they’re not. They’re dead easy, and these showy exotics turn even the most mundane suburban spread into a tropical paradise.

Tropical Origins

Tropical hibiscus with single red flowers

Tropical hibiscus, or Hibiscus rosa-sinensis, is believed to have originated in China, particularly in the southern regions. It’s also native to India, Malaysia, Indonesia, Thailand, and the Philippines, along with the Pacific Islands, like Fiji, Samoa, Tonga, and Hawai’i.

Over the years, these beautiful plants have spread to other tropical climates in Africa, Australia, Central and South America, and the Caribbean. In these tropical regions, the hibiscus thrives in rainforests and coastal areas.

In Hawai’i, tropical hibiscus is part of native culture, making up the iconic lei garlands worn on special occasions. These blooms are worn in the hair, are used in floral displays, and signify beauty. Tropical hibiscus is also used medicinally and as offerings in spiritual ceremonies.

The tropical hibiscus embodies the spirit of “aloha’ – love, compassion, and hospitality.

How can you fail to fall in love with that?

I always like to joke that I don’t live in the Southern U.S., I live in the North Caribbean, so tropical hibiscus is one of the first ornamentals I added to our landscape.

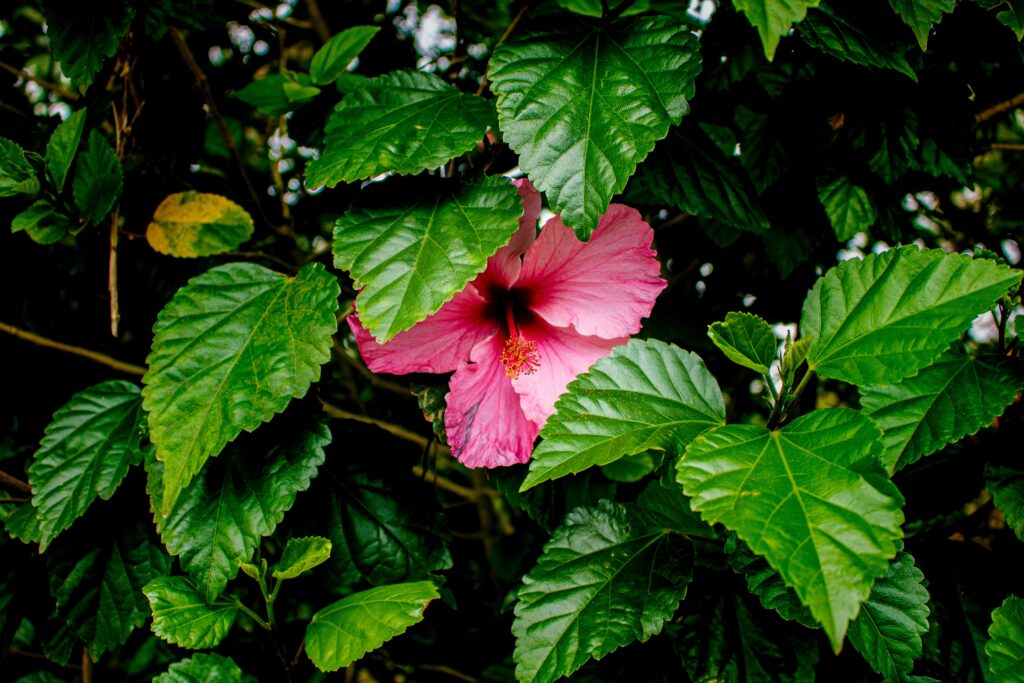
Tropical hibiscus is a woody shrub that can reach a height of 6 to 10 feet tall, with a spread of 4 to 6 feet. The foliage is glossy and dark green, creating an attractive backdrop for its stunning flowers.

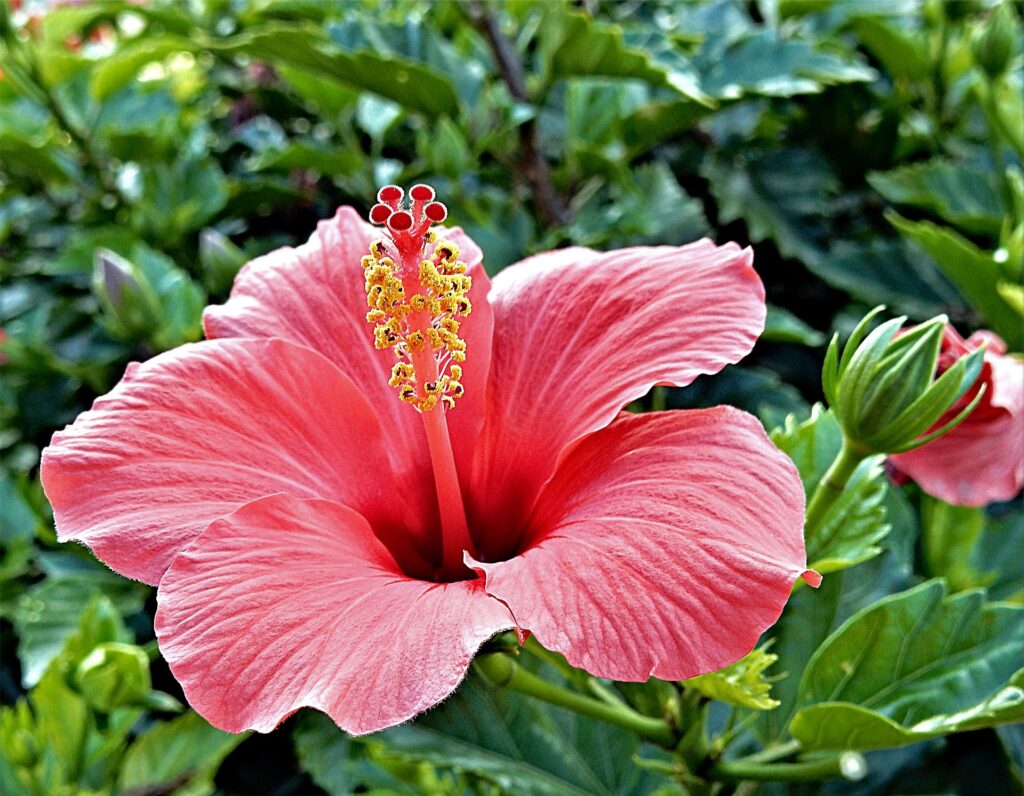
Tropical Hibiscus Flowers

Pink Tropical hibiscus flower

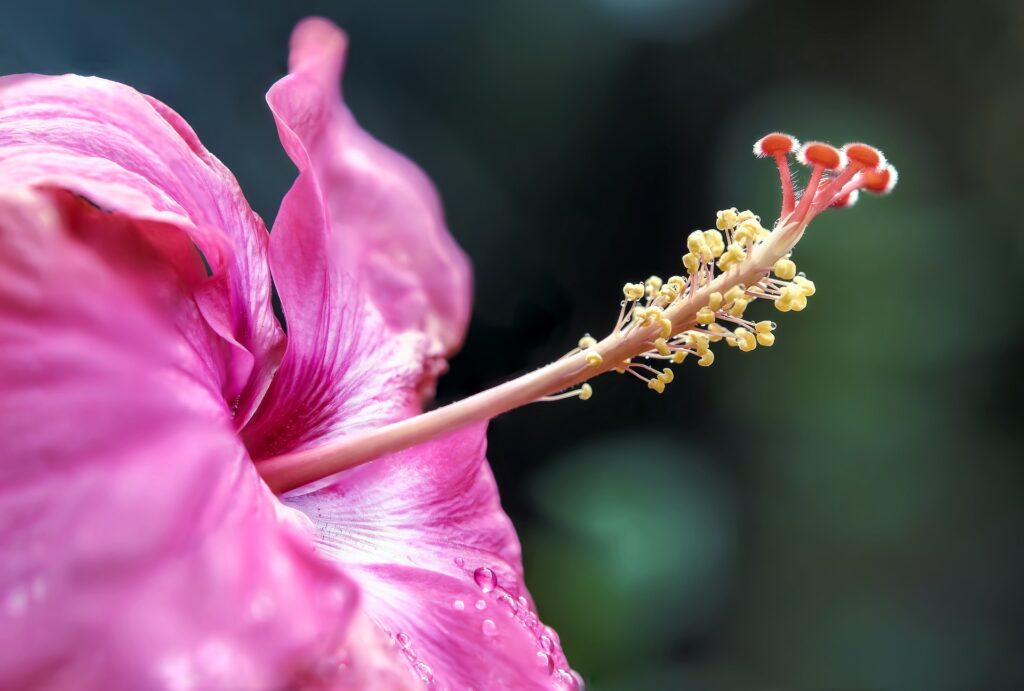
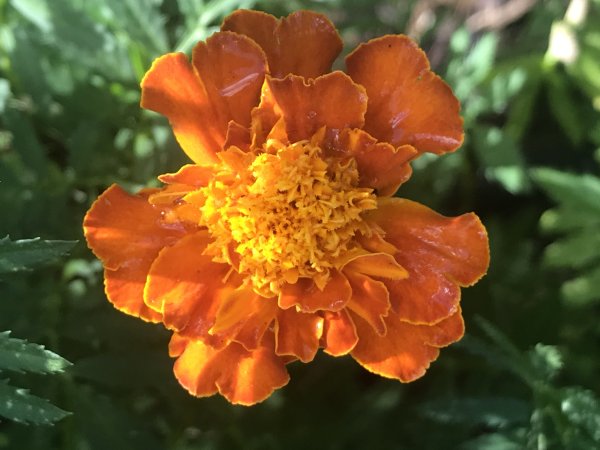
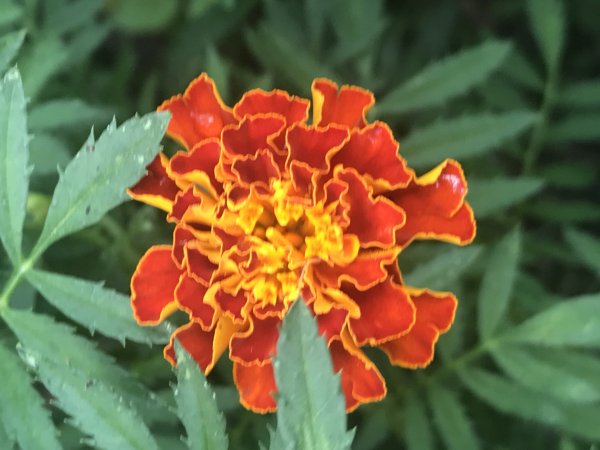
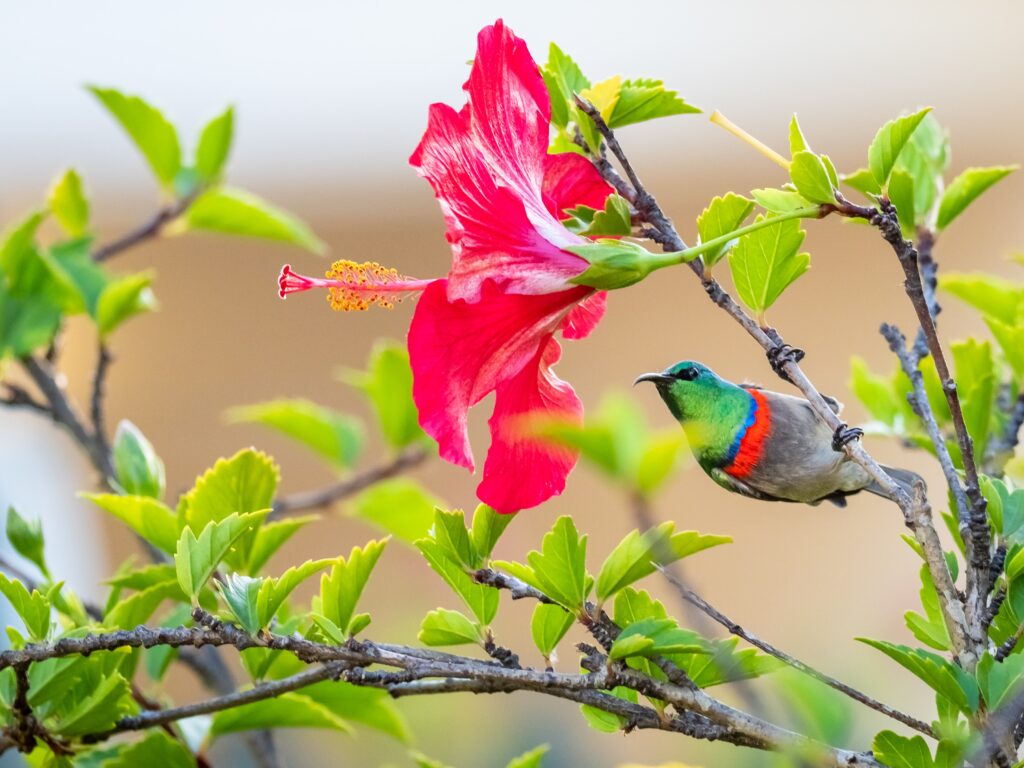
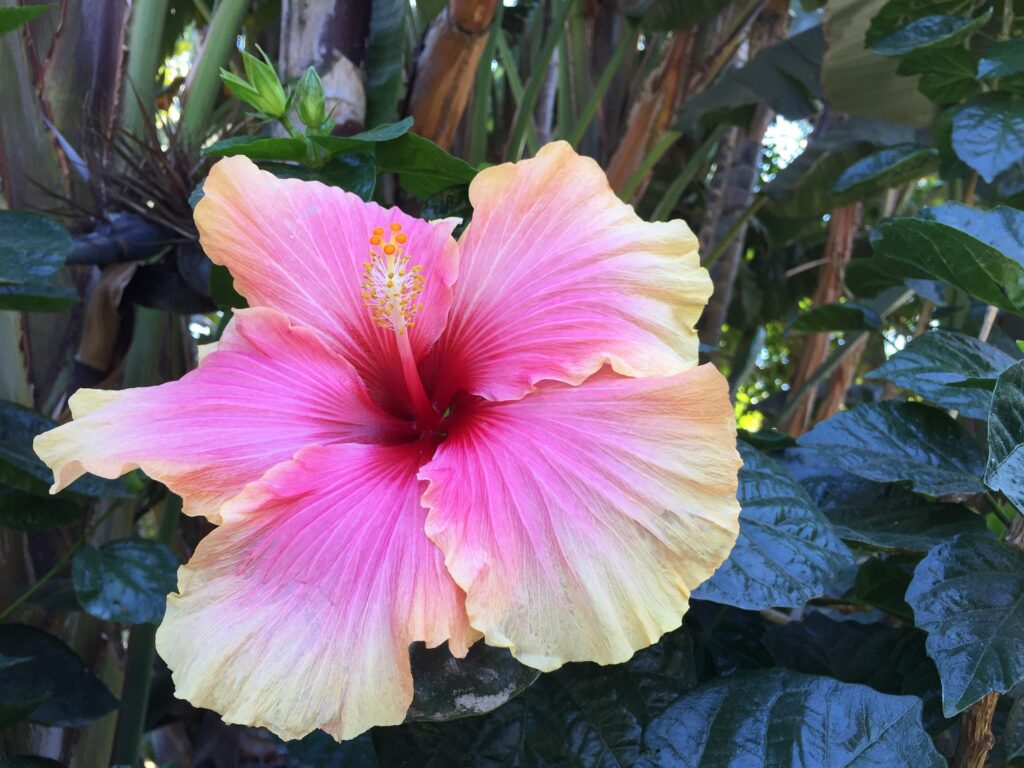
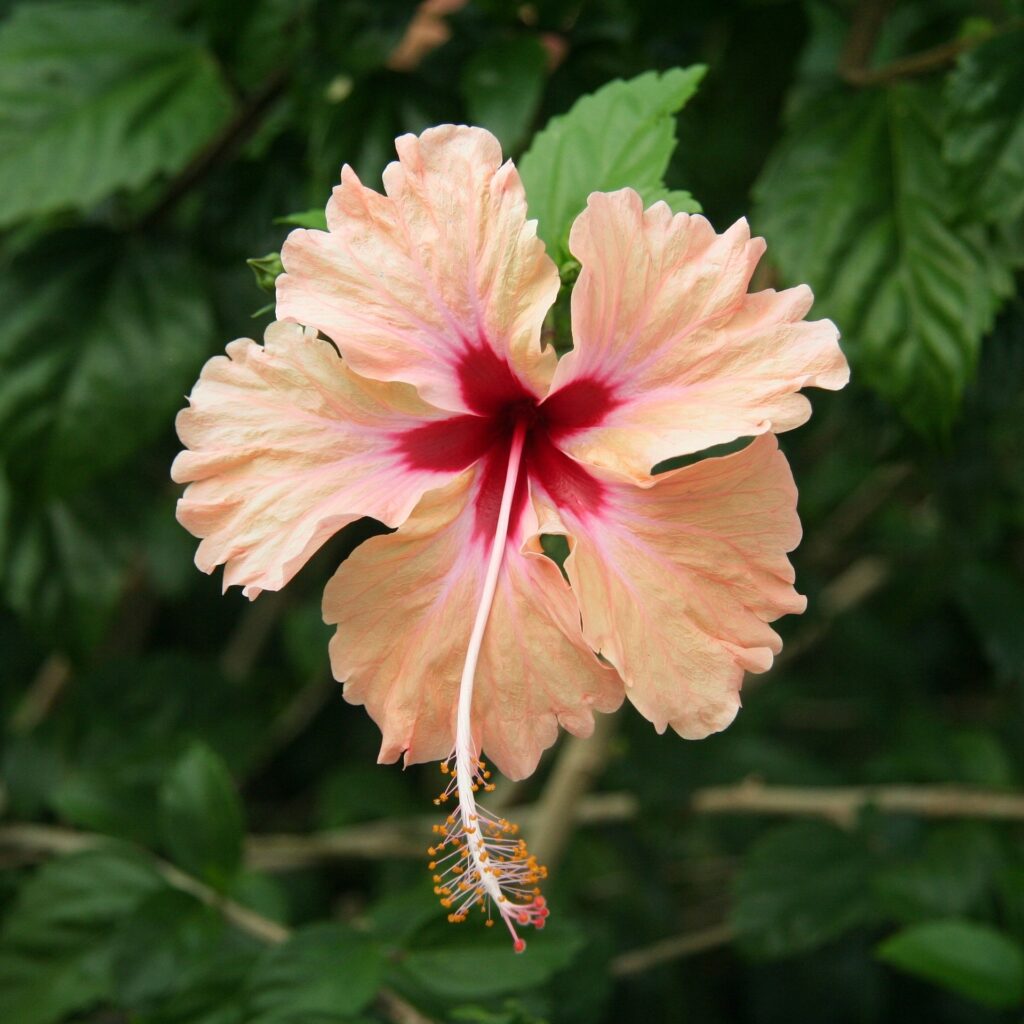
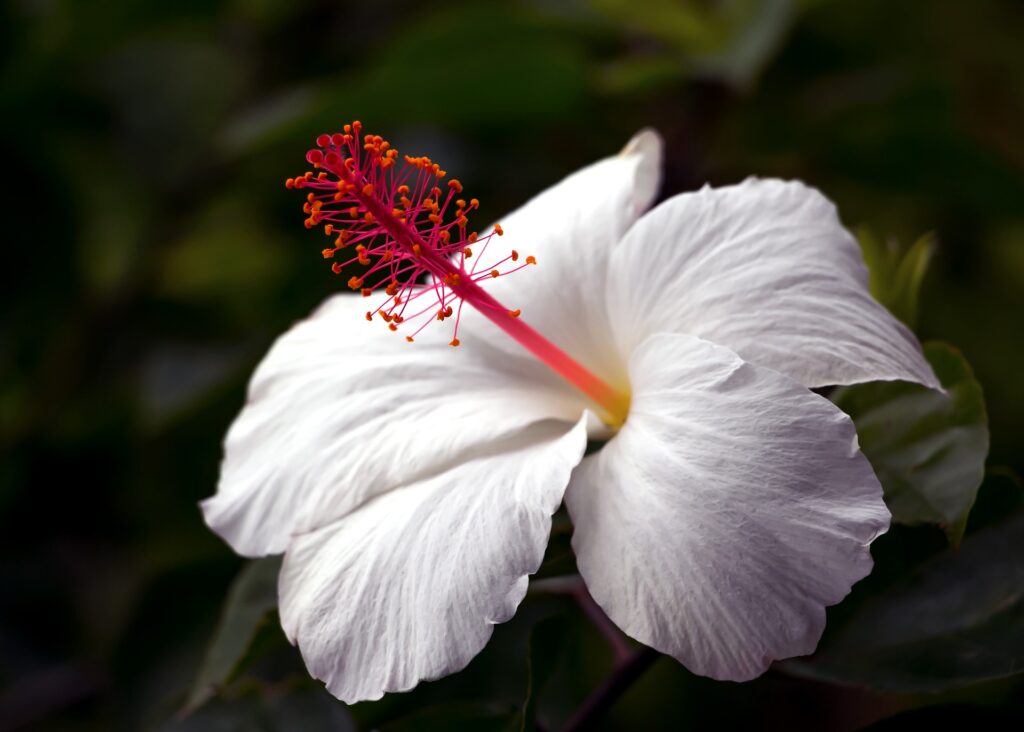
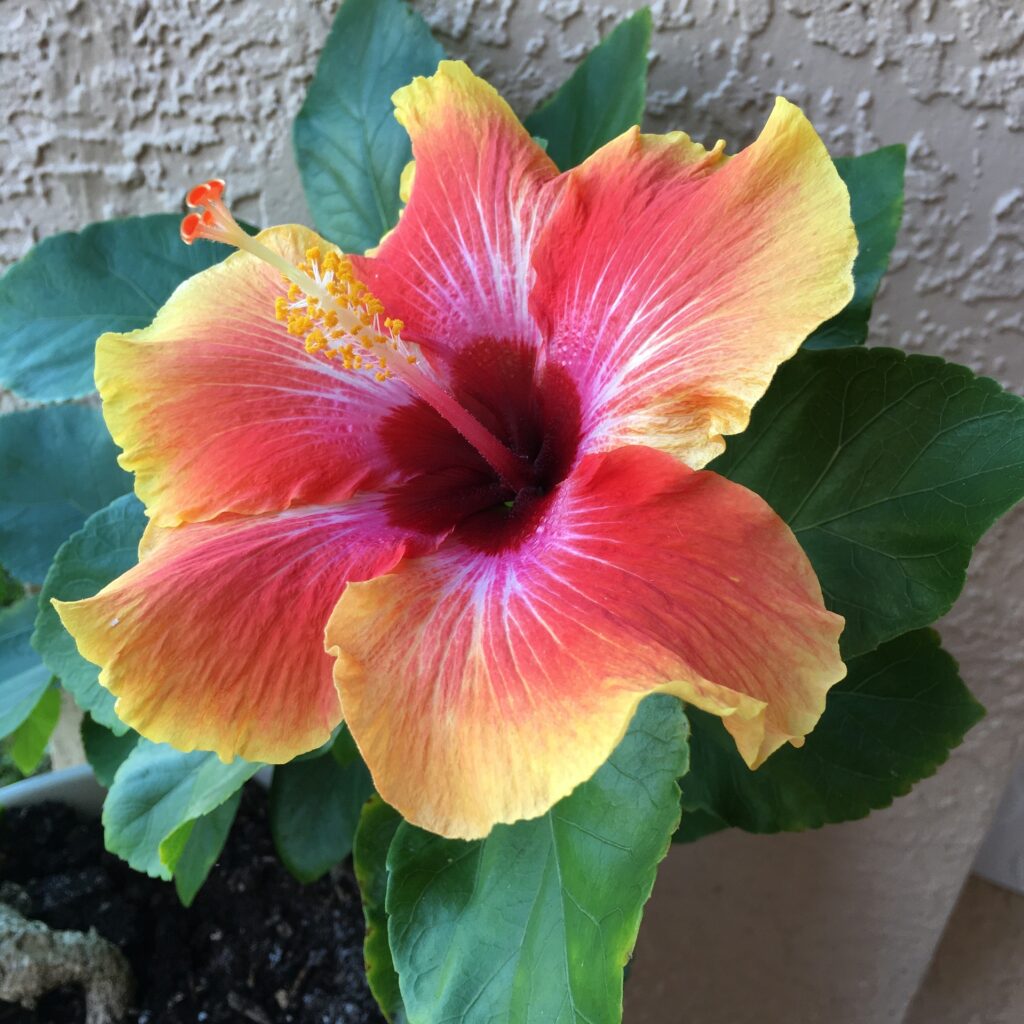
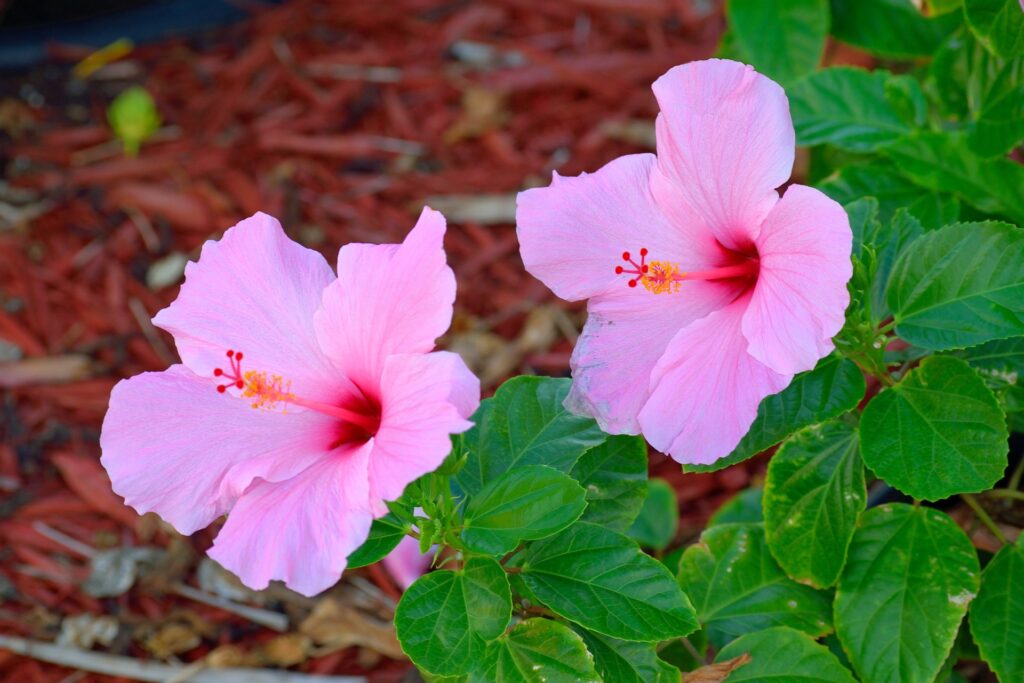
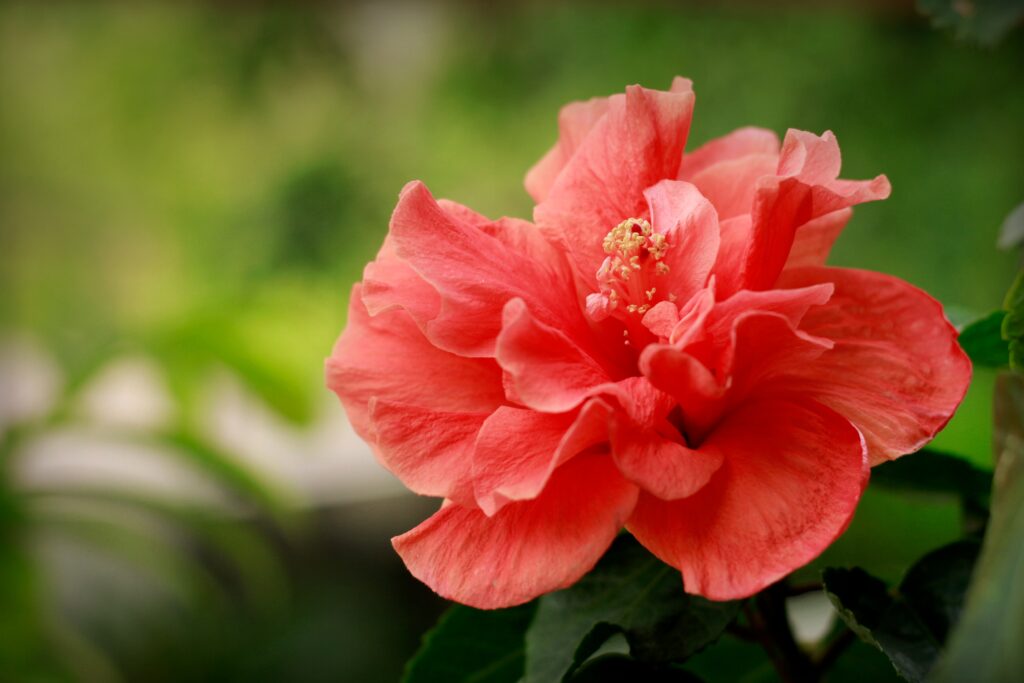
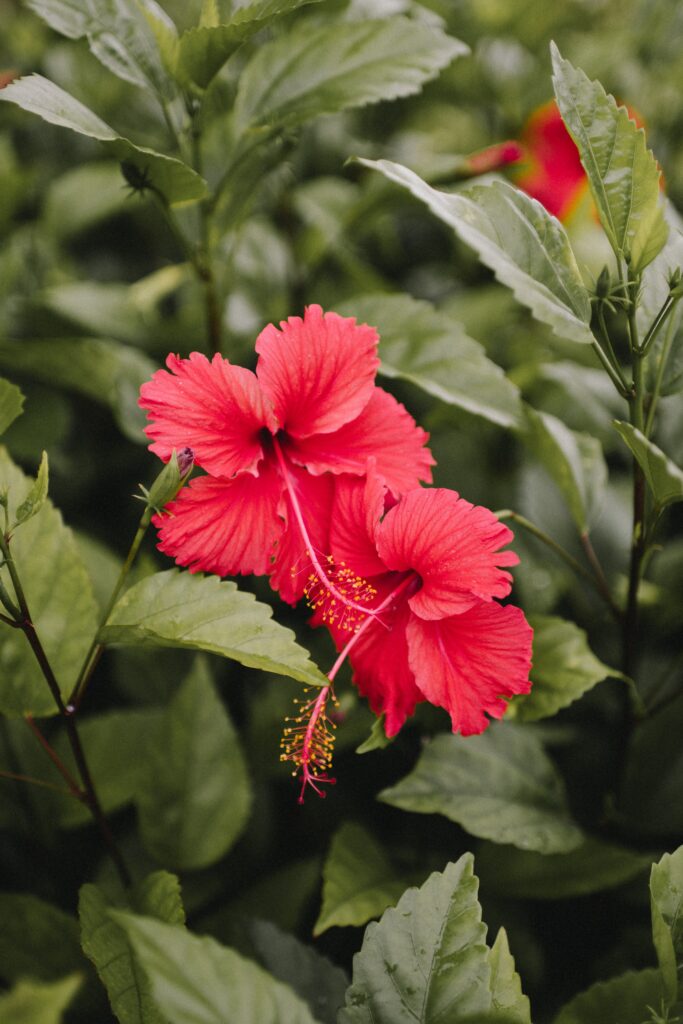
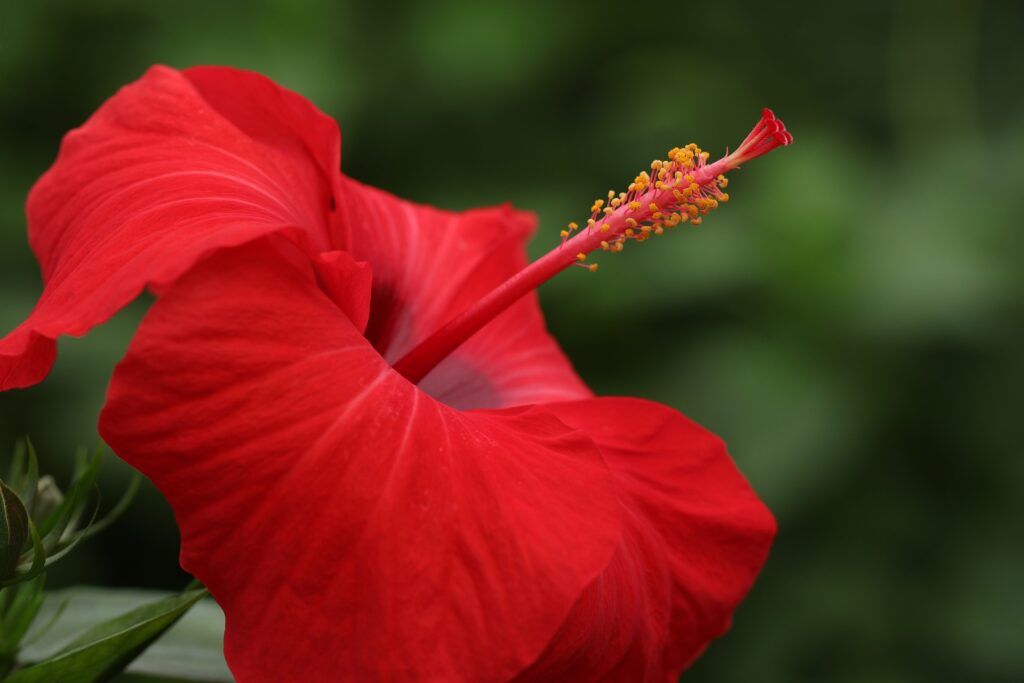
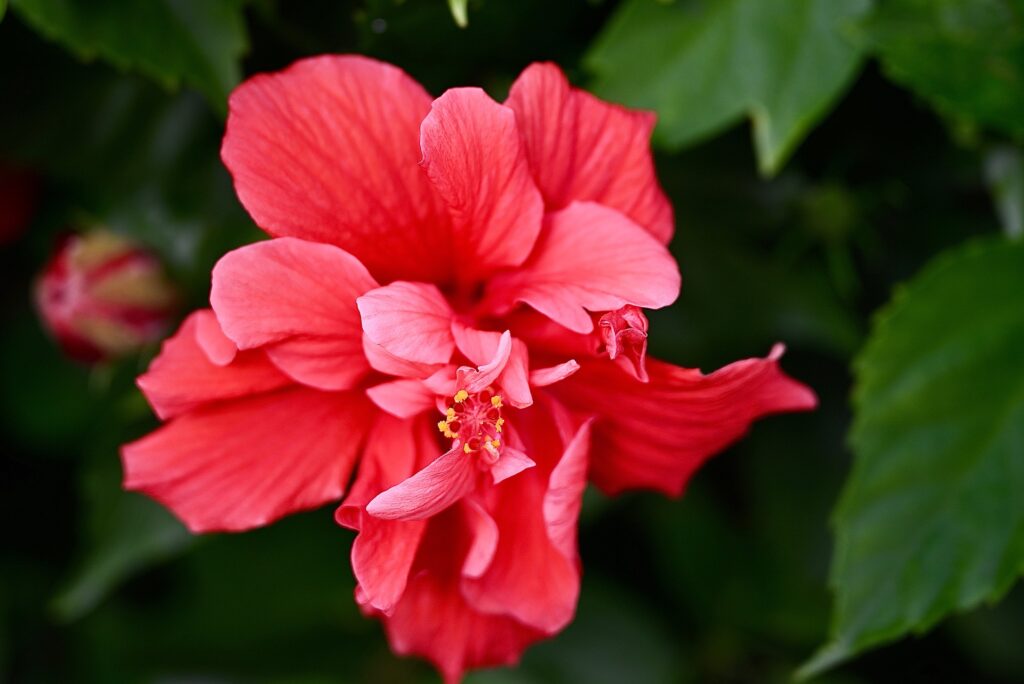
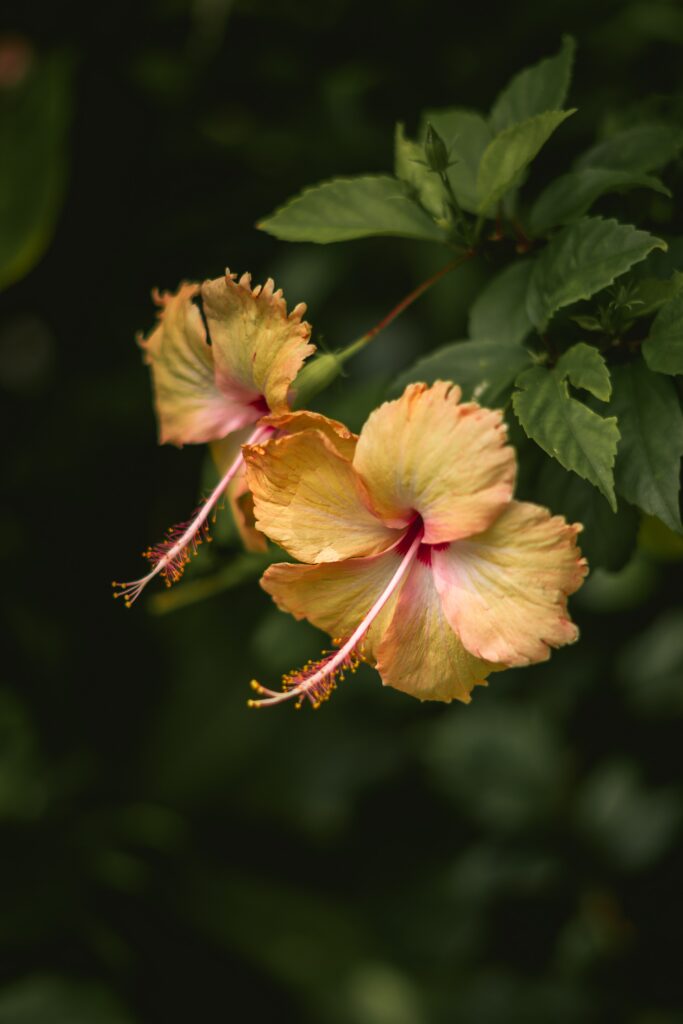
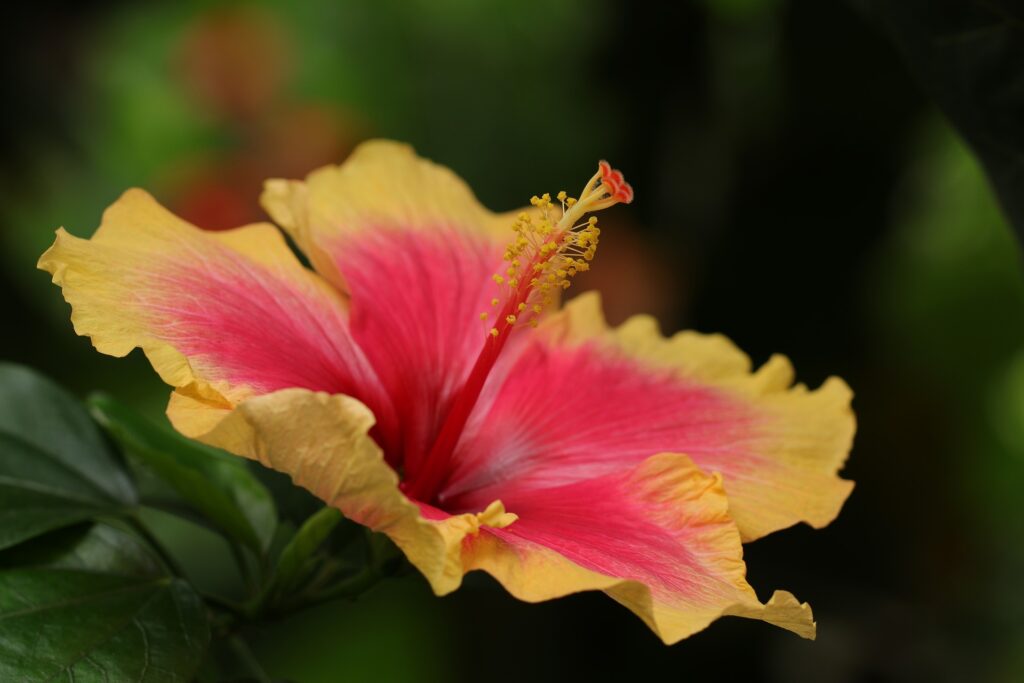
These evergreen plants produce large, showy blooms in a wide range of tropical hibiscus colors, including red, orange, pink, yellow, and white. These flowers can reach diameters of 4 to 8 inches and exhibit a striking trumpet-like shape. The nectar-rich flowers of tropical hibiscus attract hummingbirds and butterflies, enhancing the beauty and biodiversity of any garden.

Tropical hibiscus can be classified into two main types: singles and doubles.

Singles

Single tropical hibiscus flowers have a single row of petals, creating a striking focal point. They often feature a prominent stamen in the center. Some popular tropical hibiscus varieties feature vivid colors of red, yellow, pink, orange, and even white.

Doubles

Double tropical hibiscus flowers have multiple rows of petals, creating a fuller and more ruffled appearance. These varieties are known for their lush and showy blooms. Many of your favorite tropical hibiscus colors have a double version, as well.

In addition to these main color categories, tropical hibiscus cultivars can exhibit variations and combinations of colors, including blends, streaks, and bicolor patterns. This diverse range of tropical hibiscus colors and petal forms allows for endless possibilities in creating captivating displays and adding vibrant beauty to tropical gardens and landscapes.

Some hybrid “fancy” cultivars are even more exotic-looking, include maroon and purple and even blue. You’ll find electric pink and purple blooms, like ‘Voodoo Queen.’ Some don’t even look real, and I suspect a bit of photoshopping is going on.

Wildlife Magnets

Hummingbird visiting a red tropical hibiscus flower

Tropical hibiscus attracts various pollinators and other wildlife:

Bees

Various species of bees are attracted to the nectar-rich flowers of tropical hibiscus. This includes honeybees, bumblebees, and native solitary bees such as carpenter bees, mason bees, metallic green sweat, and mining bees.

Butterflies

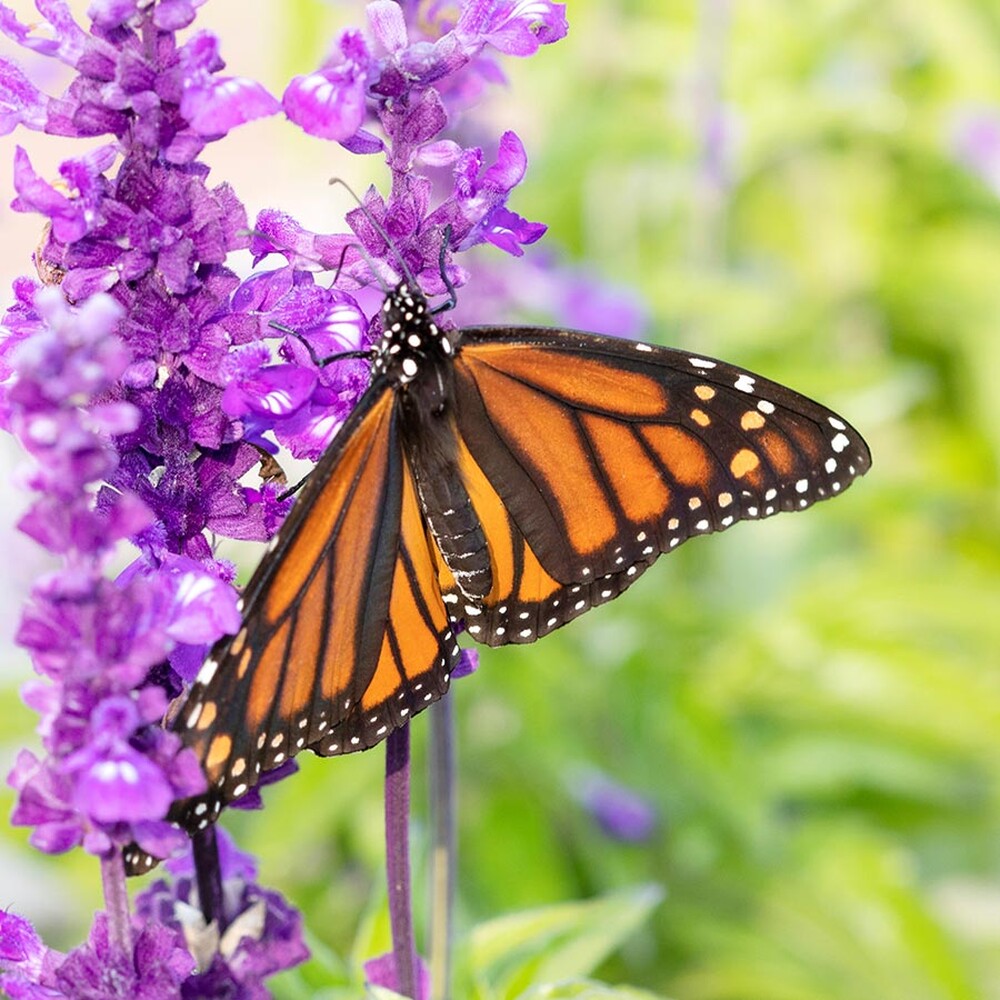
Several butterfly species are drawn to the vibrant colors and nectar of hibiscus flowers. This includes swallowtails, admirals, painted ladies, and hairstreaks.

Our Florida state butterfly, the Zebra Longwing, also seems to love dive-bombing the tropical hibiscus blooms.

Florida White Butterflies with their distinctive black markings are commonly found visiting hibiscus flowers for nectar.
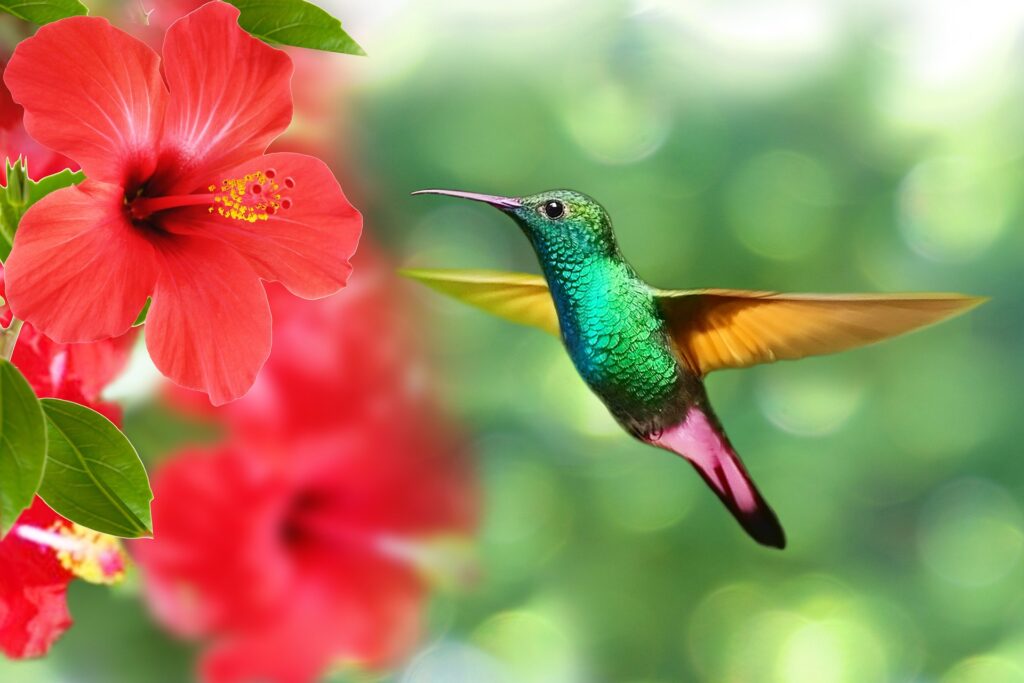
Hummingbirds

These small, agile birds are highly attracted to the tubular-shaped flowers of tropical hibiscus. Their long, slender beaks are perfectly adapted for sipping nectar from deep within the flower.

Ruby-throated Hummingbirds are known to visit hibiscus flowers for their nectar, especially during their migration and breeding season in Florida.

Other Wildlife

While not directly interacting with the flowers, anole lizards are often seen snoozing in hibiscus plants at night.

The flowers can also make a meal for iguanas and turtles enjoy munching on the foliage. I’ve also seen squirrels enjoying a blossom or two.

Creating a wildlife-friendly garden with tropical hibiscus can help support and attract a diverse range of critters, contributing to the overall health of the ecosystem.

Optimal Growing Conditions for Tropical Hibiscus

Pink and yellow tropical hibiscus flower

Tropical hibiscus thrives in warm and humid climates and is commonly found in tropical rainforests and coastal areas, where it enjoys the protection of tree canopies and the moist, well-drained soils prevalent in these habitats.

Light Requirements

Tropical hibiscus thrives in full sun to partial shade. It requires at least 6 hours of direct sunlight daily to promote robust growth and abundant flowering.

Soil Type

Well-draining soil is essential for tropical hibiscus. A rich, loamy soil mixed with organic matter provides the ideal growing medium. Avoid heavy clay soils that can lead to waterlogged conditions.

Tropical hibiscus (Hibiscus rosa-sinensis) generally prefers slightly acidic to neutral soil conditions. While they are not considered strict acid-loving plants like azaleas or blueberries, they can benefit from a slightly acidic soil pH in the range of 6.0 to 6.8.

Climate

Tropical hibiscus thrives in warm and humid climates. It requires consistently warm temperatures above 60°F, preferably over 80°F during the growing season for optimal growth and flowering.

Elevation

Elevation is generally not a significant concern for tropical hibiscus unless you are growing it in high-altitude regions where temperatures can drop significantly.

Tropical Hibiscus Cold Tolerance

Tropical hibiscus temperature tolerance can be a factor in USDA Zones 8 and above. Growth may slow or cease below 50°F, and temperatures near or below freezing can cause severe damage or even death to the plant.

Tropical hibiscus is not frost-tolerant and is typically grown as a container plant in regions with colder climates.

Here on the Gulf Coast, they’re a garden staple in the landscape. They’re best suited for USDA hardiness zones 9 to 11. You can probably even baby them in Zone 8 with adequate frost blankets.

Protecting from Cold: During colder months, it is crucial to protect tropical hibiscus from freezing temperatures. Move container-grown plants indoors or provide adequate insulation for in-ground specimens. Use frost cloth or blankets to cover plants and provide additional heat sources like Christmas lights for added protection.

Planting Tropical Hibiscus in the Ground

Select a suitable location. Choose a spot in your garden that receives full sun for at least six hours a day. Tropical hibiscus thrives in warm, sunny conditions.

Prepare the soil

Ensure the soil is well-draining and enriched with organic matter. Hibiscus prefers slightly acidic to neutral soil with a pH between 6.0 and 7.0. Amend the soil with compost or well-rotted manure to improve its fertility and drainage.

Dig the planting hole

Dig a hole that is slightly wider and deeper than the root ball of the hibiscus shrub. The hole should be large enough to accommodate the roots comfortably.

Remove the hibiscus from its container

Gently tap or squeeze the sides of the container to loosen the root ball. Carefully slide the hibiscus out of the container, taking care not to damage the roots.

Place the hibiscus in the hole

Position the hibiscus in the center of the hole, ensuring that it sits at the same depth as it was in the container. The top of the root ball should be level with the soil surface.
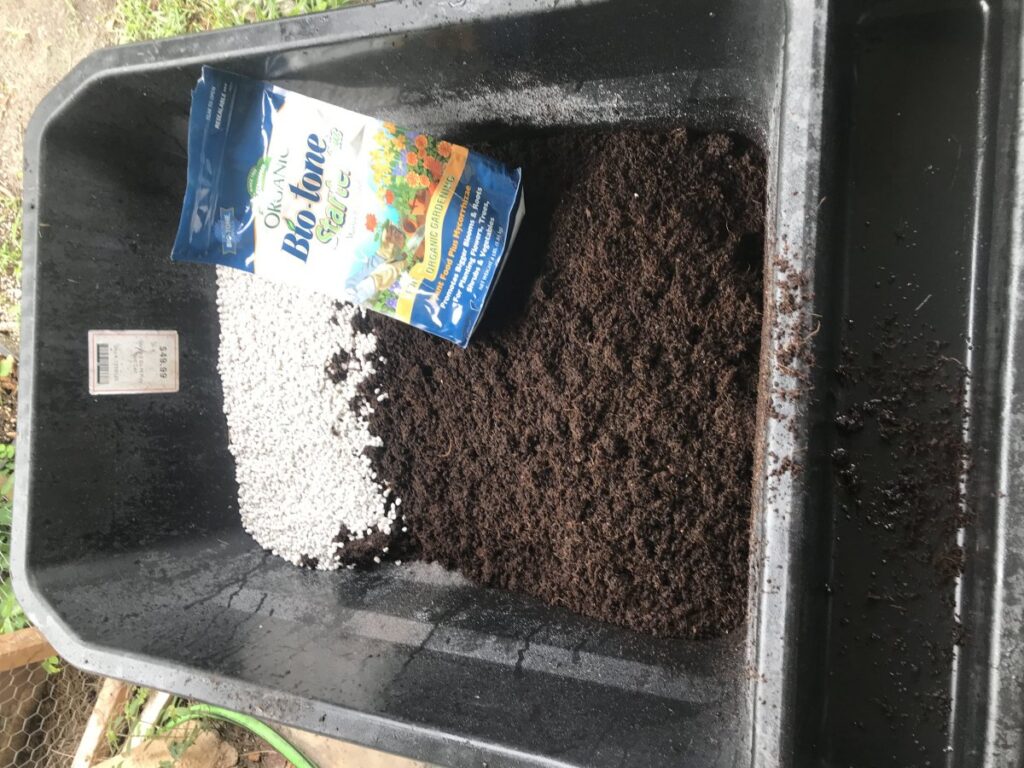
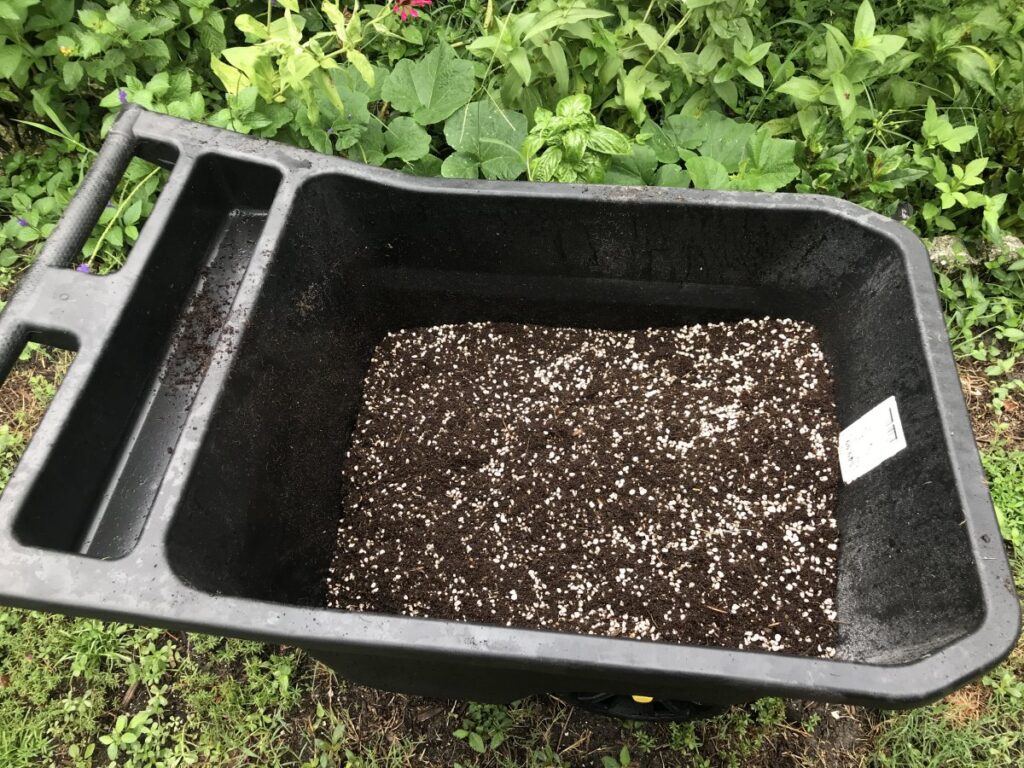
Add Amendments

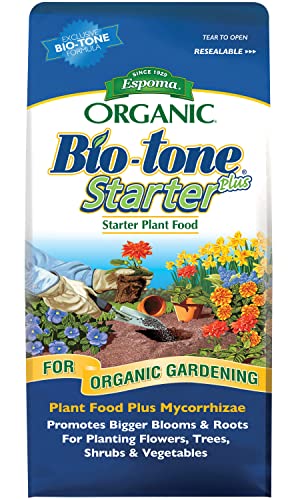
For the best start, add an organic fertilizer in the planting hole that contains mycorrhizal fungi to improve nutrient uptake and root health. Compost is also another great soil amendment that adds richness to mediocre soils.

Backfill the hole

Fill the hole with the excavated soil, gently firming it around the roots as you go. Ensure there are no air pockets around the roots.
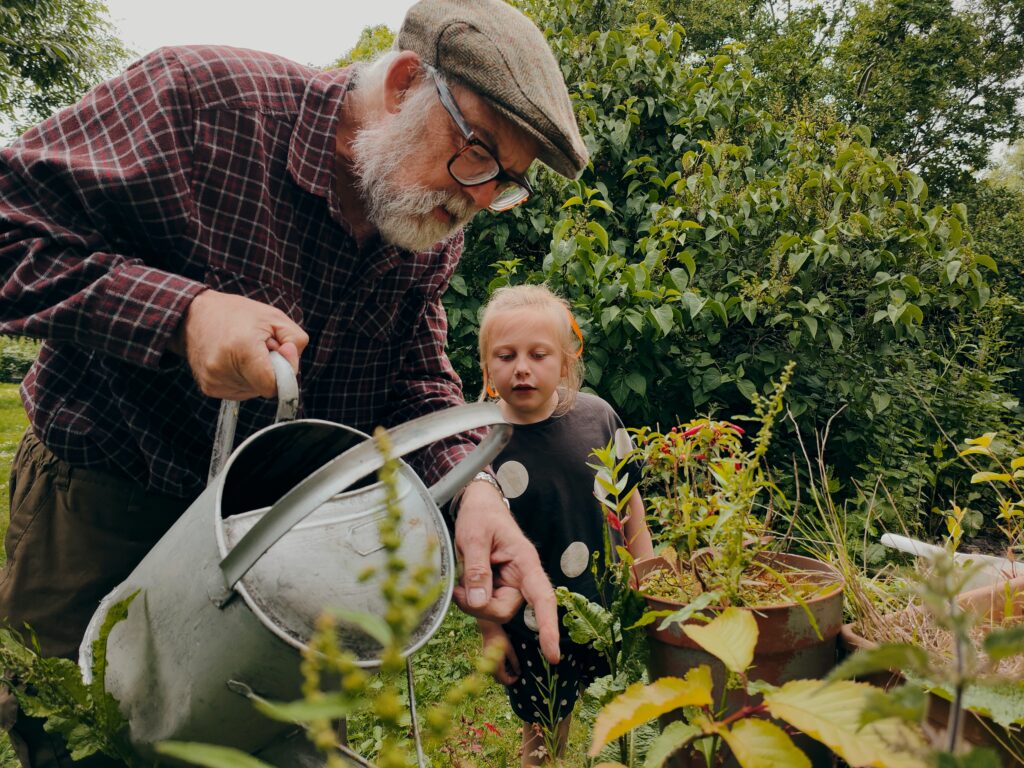
Water thoroughly

After planting, water the hibiscus thoroughly to settle the soil and hydrate the plant. Provide enough water to moisten the entire root ball as well as the soil around it.

Mulch around the plant

Apply a layer of organic mulch, such as wood chips, around the base of the hibiscus. This will help conserve moisture, suppress weeds, and regulate soil temperature.

First year care

Regularly water the hibiscus, keeping the soil evenly moist but not waterlogged. Water deeply whenever the top inch of soil feels dry.

Care of Tropical Hibiscus

White tropical hibiscus flower

Following these steps will help ensure a successful planting of your tropical hibiscus shrub. Remember to provide regular care, including watering, fertilizing, and proper maintenance, to keep your hibiscus healthy and thriving.

Watering Schedule

Tropical hibiscus prefers regular watering to keep the soil consistently moist but not waterlogged. Water deeply when the top inch of soil feels dry and adjust watering frequency based on environmental conditions.

Fertilizer Composition

Provide tropical hibiscus with a balanced fertilizer, such as a slow-release granular formula with an N-P-K ratio of 10-10-10 or 14-14-14. Feed every four to six weeks during the growing season, reducing or stopping fertilization during winter dormancy.

Horticulturists often recommend specific macronutrients and micronutrients for the optimal production of tropical hibiscus. Here are the essential nutrients that are typically recommended.

Macronutrients

Nitrogen (N) is essential for promoting leafy growth and overall plant vigor. It is particularly important during the active growth stages of tropical hibiscus.

Phosphorus (P) plays a crucial role in root development, flowering, and fruit production. It helps promote strong root systems and enhances flower and fruit formation.

Potassium (K) is vital for overall plant health, disease resistance, and flower quality. It aids in the regulation of water movement within the plant and supports the development of strong stems and roots.

Micronutrients

Iron (Fe) is necessary for chlorophyll synthesis and plays a key role in photosynthesis. It is important for maintaining healthy foliage and preventing yellowing of leaves (chlorosis).

Magnesium (Mg) is an essential component of chlorophyll and is critical for photosynthesis. It supports energy production and enzyme activation within the plant.

Zinc (Zn) is involved in various enzymatic processes and plays a role in hormone regulation, protein synthesis, and carbohydrate metabolism. It is essential for overall plant growth and development.

Manganese (Mn) is necessary for chlorophyll production and is involved in enzyme activation. It contributes to photosynthesis, nitrogen metabolism, and carbohydrate synthesis.

Copper (Cu) is required for various enzymatic reactions and is involved in plant respiration, photosynthesis, and lignin synthesis. It aids in overall plant growth and development.

It’s important to note that the specific nutrient requirements may vary depending on factors such as soil composition, growing conditions, and plant health. Conducting a soil test and consulting with your ag extension service can provide more precise nutrient recommendations tailored to your specific growing environment and goals.

Specialized Tropical Hibiscus Fertilizer

Fertilizers formulated specifically for tropical hibiscus, often labeled as “Hibiscus Fertilizer” or “Tropical Plant Fertilizer,” are available in the market and are formulated to meet the specific nutrient needs of these plants.

Fertilizing tropical hibiscus with acid-loving plant fertilizers can be beneficial if the soil pH is alkaline or if you are aiming to lower the pH slightly. Acid-loving fertilizers typically contain higher amounts of sulfur, which helps lower soil pH.

These fertilizers may also include additional nutrients that are beneficial for acid-loving plants, such as iron and manganese.

If you notice signs of nutrient deficiency or if your soil pH is consistently high, using an acid-loving plant fertilizer can help provide the necessary nutrients while also slightly adjusting the soil pH.

However, it’s important to note that tropical hibiscus can also thrive in slightly alkaline soils as long as the necessary nutrients are available.

Before applying any fertilizer, it’s recommended to conduct a soil test to determine the pH and nutrient levels of your soil.

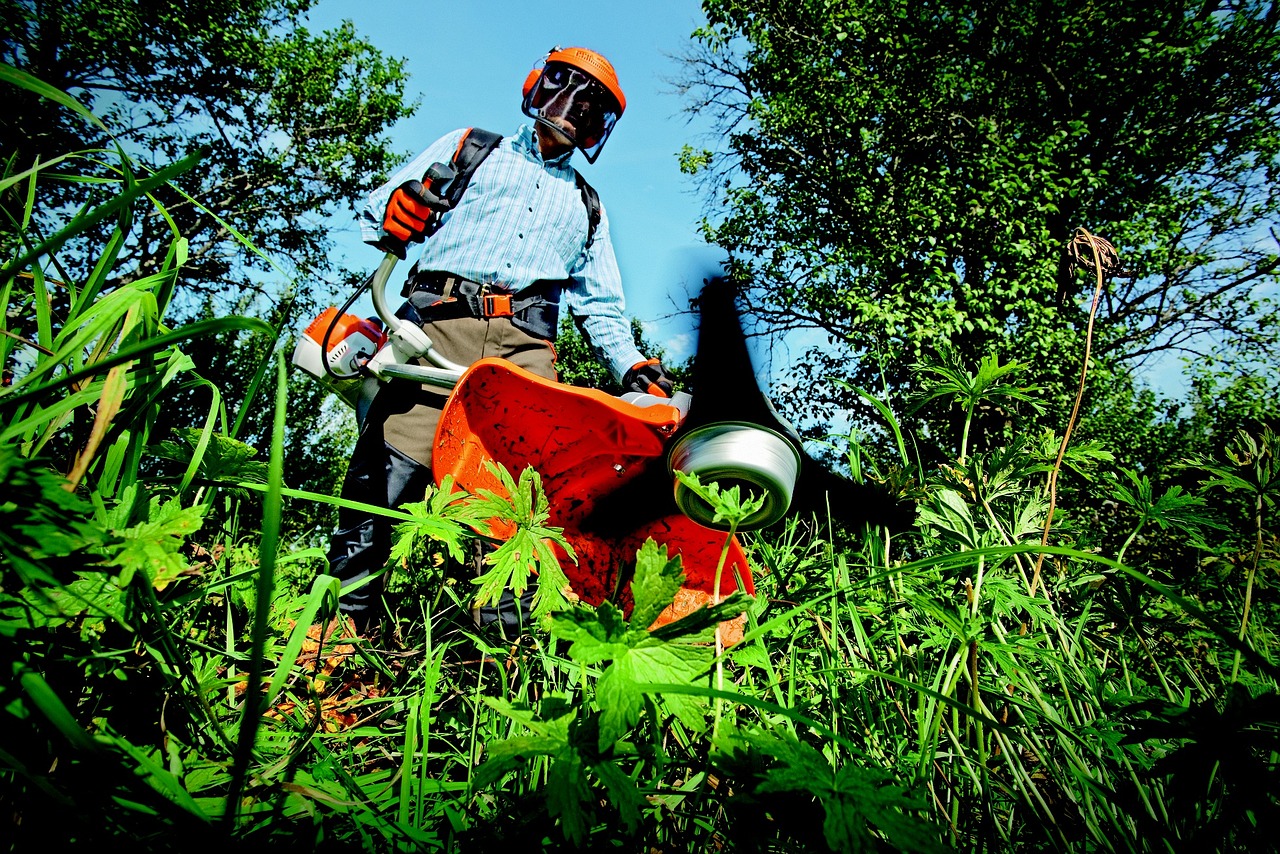
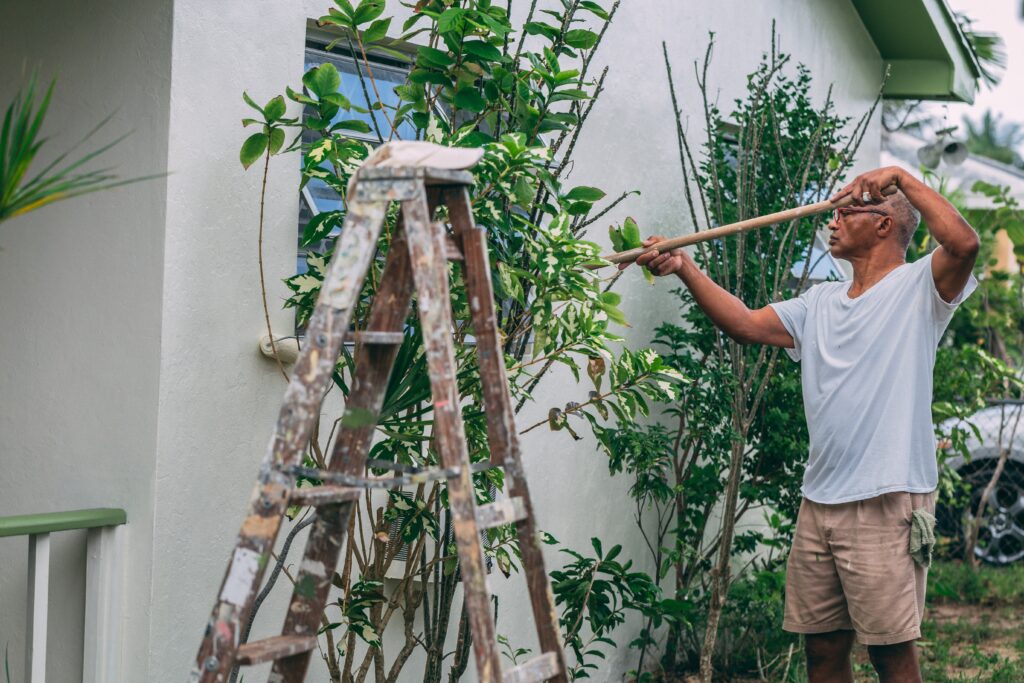
Pruning Your Tropical Hibiscus

While tropical hibiscus is a low-care plant, it does require some pruning to make it look its best. You’ll want to prune in late winter or early spring before new growth emerges. You may also want to prune during the growing season to prevent it from becoming overgrown and leggy.

Pruning During the Growing Season.

You can prune your hibiscus back any time during the growing season as required to maintain its shape.

Timing

During the growing season, you can prune your tropical hibiscus every 4-6 weeks to maintain its size and shape. Start pruning when new growth is about 6 inches long.

Tools

Gather a pair of clean, sharp pruning shears or scissors. Ensure the tools are sanitized to prevent the spread of diseases.

Assess the Plant

Examine the hibiscus plant and identify branches that are growing too vigorously or extending beyond the desired size or shape.

Determine the Pruning Length

Decide on the amount you want to prune to control the size of the plant. Aim to remove around one-third of the branch’s length.

Prune Vigorous Branches

Locate the node or leaf joint where you want to make the cut. Position the pruning shears just above the node and make a clean, angled cut. Cutting above a node encourages new growth from that point.

Control Branch Length

To prevent the hibiscus from becoming too leggy, prune the branches to a desirable length. Identify branches that have grown excessively long or are crowding other parts of the plant, and trim them back to a suitable length, just above a node.

Remove Suckers

Suckers are new shoots that emerge from the base of the plant. They can divert energy from the main growth. Remove these suckers by pruning them at the base.

Regular Maintenance

Throughout the growing season, continue to monitor the growth of your hibiscus. As new growth appears, repeat the pruning process, removing any excessive or unwanted branches to maintain the desired size and shape.

Clean Up

After pruning, remove any fallen leaves or debris from the base of the plant to maintain a tidy and healthy growing environment.

Aftercare

Following pruning, provide your tropical hibiscus with water and fertilizer to support healthy regrowth.

By following these step-by-step instructions and regularly pruning your tropical hibiscus during the growing season, you can effectively manage its size, prevent excessive growth, and maintain the desired shape of the plant.

Remember to adjust the frequency and intensity of pruning based on the growth rate and specific needs of your hibiscus variety.

Annual Winter Pruning for Tropical Hibiscus

Double tropical hibiscus flower

Late winter or early spring is the perfect time to prune your hibiscus to remove any dead or diseased branches. This step is critical for maintaining the health of your plant.

Timing

Prune your tropical hibiscus just before it breaks dormancy, typically in late winter or early spring. This allows new growth to emerge on a well-shaped plant.

Assessment

Examine the plant for dead, damaged, or diseased branches. Look for crossing or rubbing branches that can impede airflow and create wounds.

Sterilization

Clean and sterilize your pruning tools before use. Dip the blades in disinfectant spray or wipe them down with rubbing alcohol to prevent the spread of diseases.

Thinning

Thin out overcrowded branches by selectively removing some of the older or weaker stems. Aim for an open and balanced growth habit.

Size control

If necessary, trim back the overall size of the plant to maintain a desirable shape or control its height. Cut back the branches to the desired length, just above a set of healthy leaves.

Pruning cuts

Make clean, angled cuts above leaf nodes or buds, ensuring the remaining branches face outward to encourage outward growth.

Clean-up

Remove all the pruned branches and debris from the area around the plant. This helps prevent the spread of pests and diseases.

Aftercare

After pruning, provide regular care to support new growth. Water the plant appropriately, ensure it receives adequate sunlight, and follow up with a spring feeding once new growth emerges.

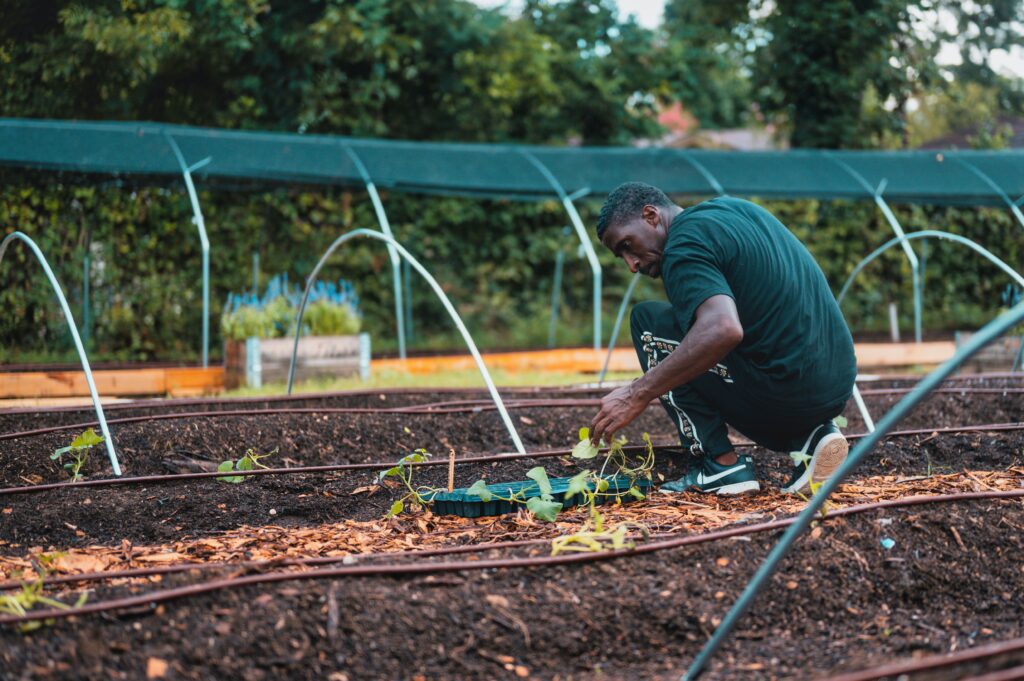
Tropical Hibiscus Propagation

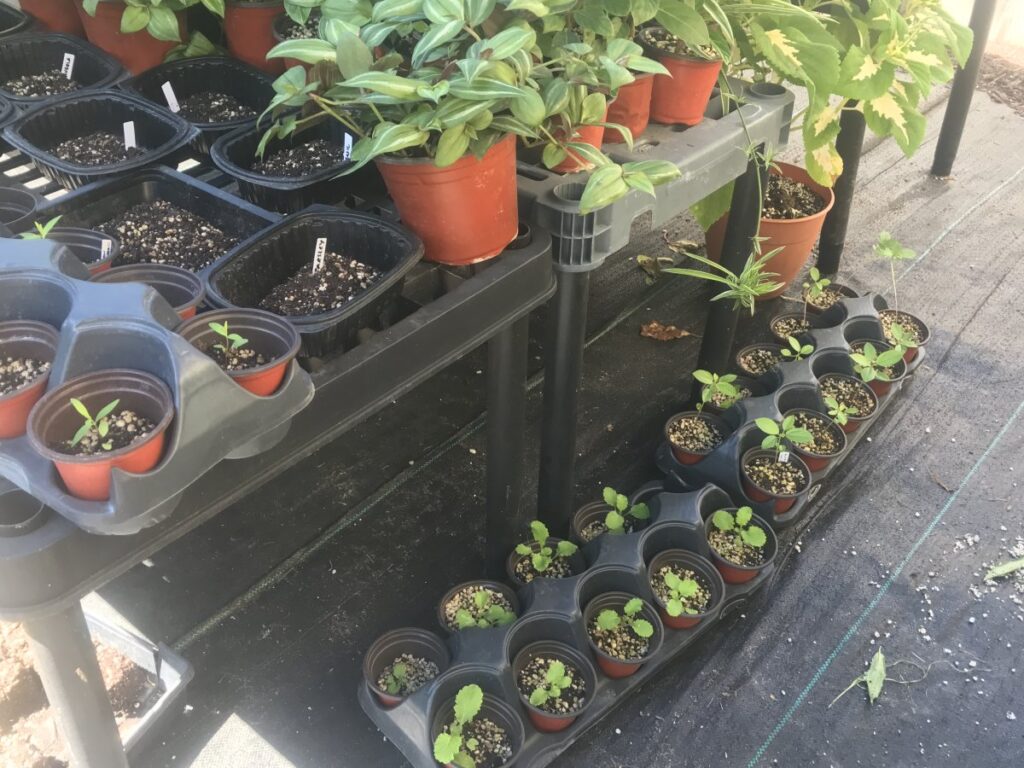
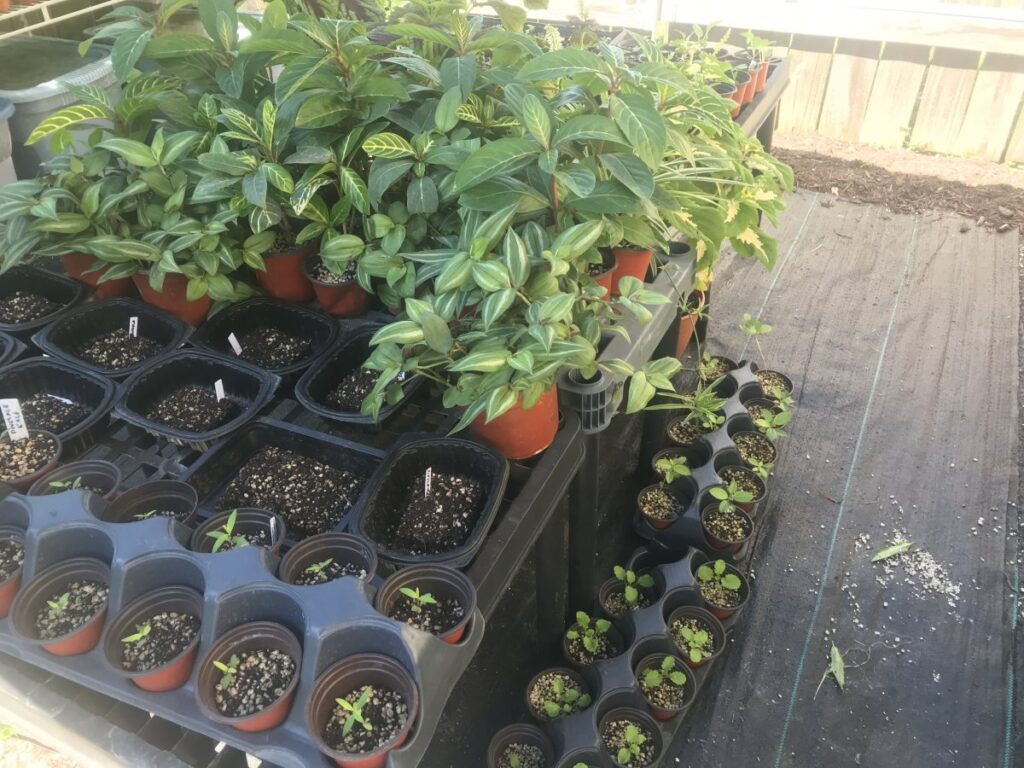
There are a few different methods you can use for tropical hibiscus propagation: stem cuttings, air layering, or seed propagation. Stem cuttings are the most common and easiest method.

Prepare the Cuttings

Select a healthy and mature branch of the tropical hibiscus plant. Using clean and sharp pruning shears, cut a 4-6 inch section of the stem just below a leaf node (where leaves emerge). Remove any leaves from the lower half of the cutting.

Hormone Application (Optional)

To enhance root development during tropical hibiscus propagation, you can apply a rooting hormone to the base of the cutting according to the manufacturer’s instructions. This step is optional but can increase the success rate.

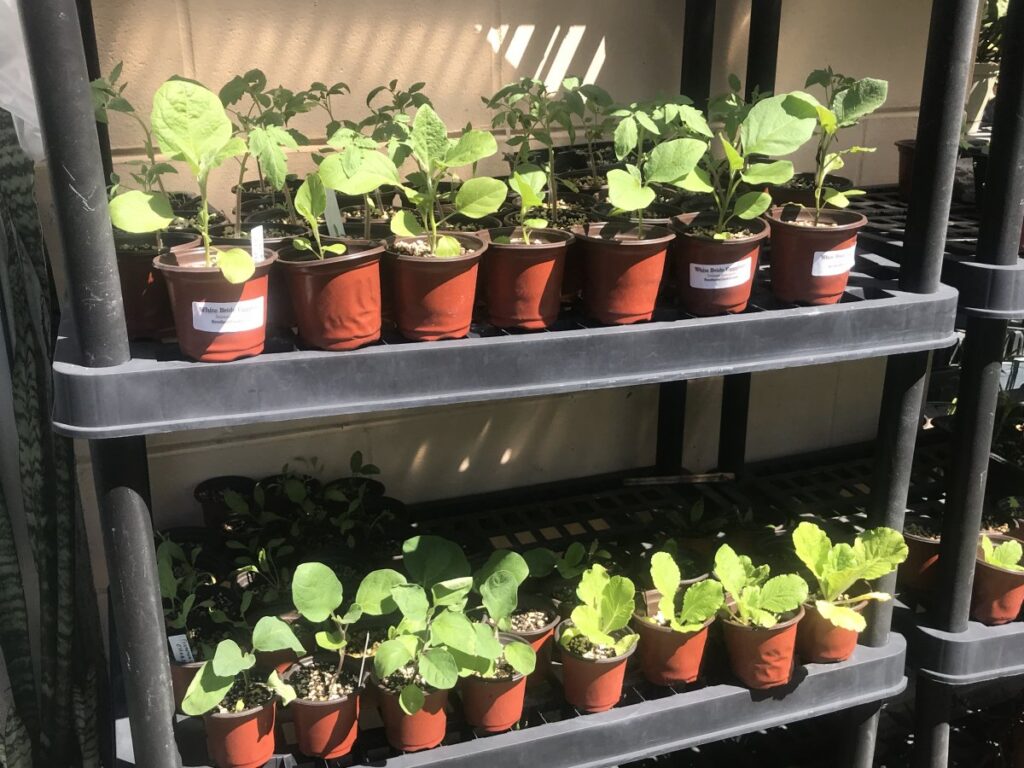
Planting the Cutting

Prepare a small pot with a well-draining potting mix. Make a hole in the soil using a pencil or your finger and insert the cutting about 1-2 inches deep into the soil. Firmly press the soil around the cutting to secure it.

Provide Ideal Conditions

Place the pot in a warm and bright location with indirect sunlight. Maintain a consistent temperature between 70-80°F (21-27°C). Keep the soil moist but not waterlogged. You can cover the pot with a plastic bag or place it in a propagation tray to create a humid environment.
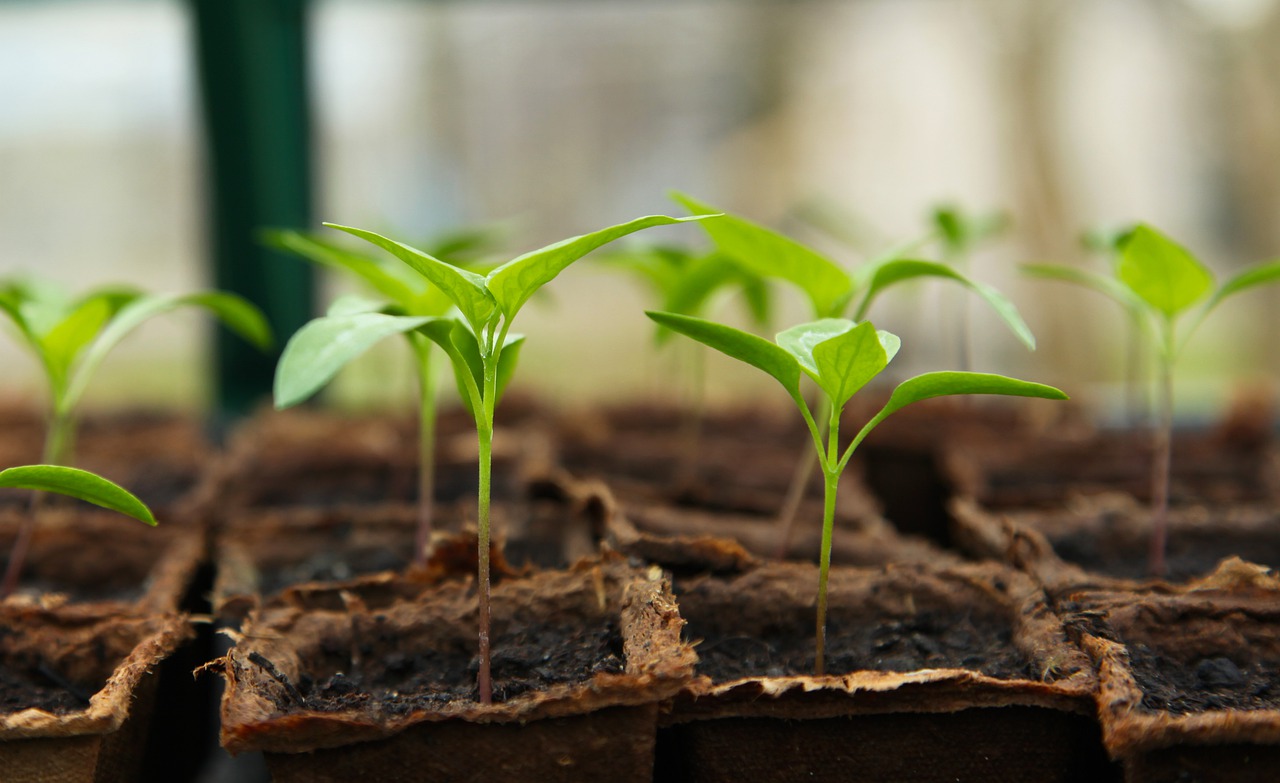
Root Development

Over the next several weeks, the cutting will develop roots. Check the soil moisture regularly and mist the leaves if necessary to maintain humidity. Avoid direct sunlight, as it can scorch the cutting.

Transplanting

Once the cutting has developed a healthy root system, usually after 6-8 weeks, you can transplant it into a larger pot or into the garden if the conditions are suitable. Ensure the soil is well-draining and provide adequate watering and care as the plant establishes itself.

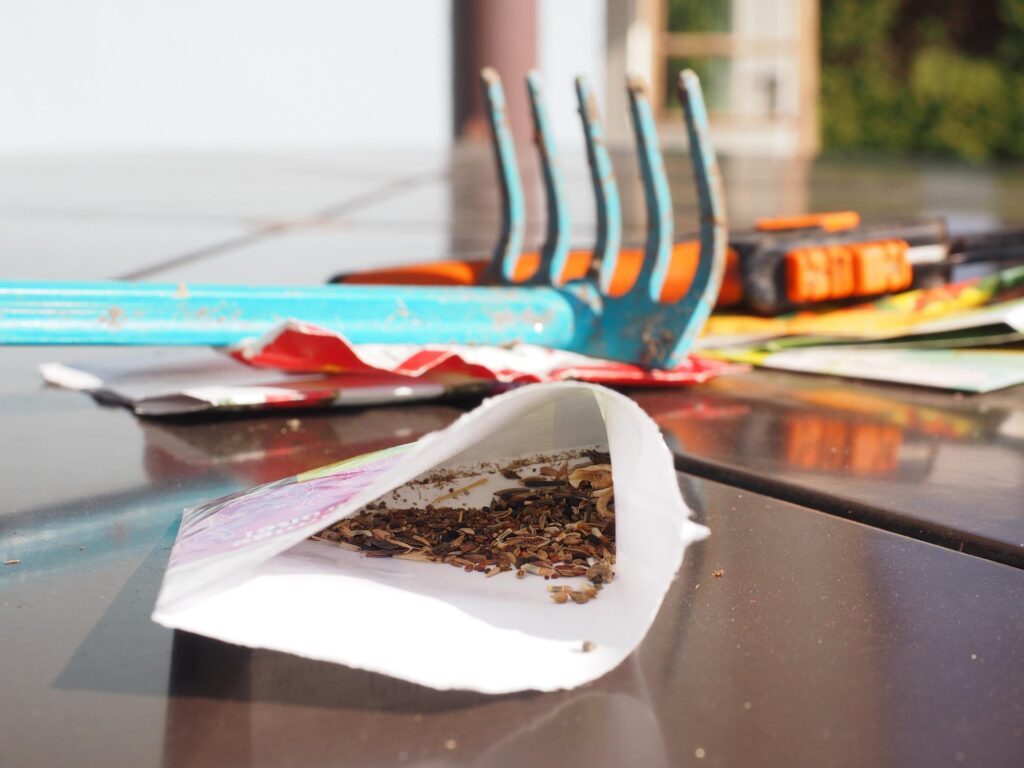
Note: Tropical hibiscus propagation from seed is also possible but requires more time and effort. It’s an approach for expert gardeners. It involves harvesting and germinating the seeds, followed by nurturing the seedlings until they are ready for transplanting.

Winter Care for Tropical Hibiscus

Protecting tropical hibiscus during the winter is crucial in regions where temperatures drop below their cold tolerance. Here are some steps to help safeguard your plants:

Timing

Begin winter protection measures when temperatures consistently fall below 50°F (10°C) or when frost is expected.

Pruning

Before the first frost, consider pruning your tropical hibiscus to a manageable size. Remove any dead or diseased branches and aim for a compact shape.

Mulching

Apply a layer of organic mulch around the base of the plant, such as straw or wood chips. This helps insulate the roots and retain moisture.

Covering

Use frost blankets, burlap, or old bedsheets to cover the entire plant during extremely cold nights. Secure the cover loosely to allow for airflow and prevent moisture buildup.

Remove the cover as soon as possible after sunrise. If temperatures are expected to drop for several nights in a row, you can leave the covers on.

Container plants

If your hibiscus is in a container, move it to a protected area like a garage or basement. Ensure the plant receives adequate light and water sparingly to prevent root rot.

Watering

During winter, reduce watering frequency to avoid waterlogged soil. Only water when the top inch of soil feels dry to the touch.

If the cold snap will be brief, water the day before the overnight temperatures drop. Water early enough to allow the day’s sunlight to heat the root zone. This will help keep the soil around the plant warmer overnight.

However, this technique is not suitable for longer cold spells. If you are expecting several nights of cold weather, don’t water until the weather warms enough to remove the coverings.

Temperature monitoring

Keep an eye on weather forecasts and be prepared to provide additional protection if unexpected cold snaps occur.

By implementing these measures, you can help protect your tropical hibiscus from winter damage and promote its health for the following growing season.

Tropical Hibiscus Pests and Diseases

Keep an eye out for common pests like aphids, spider mites, and whiteflies. Treat any infestations promptly using appropriate organic or chemical controls. Monitor for signs of diseases like leaf spot or powdery mildew and take necessary steps to address them.

Common Pests

Common pests affecting tropical hibiscus include aphids, whiteflies, spider mites, and mealybugs. Regularly inspect the plant for signs of infestation.

Here’s some guidance on identifying common insect pests that can infest tropical hibiscus:

Aphids

Look for clusters of small, soft-bodied insects on the undersides of leaves, flower buds, or stems.

Aphids can be green, black, brown, or other colors, depending on the species.

They often leave behind a sticky residue called honeydew, which can attract ants and promote the growth of sooty mold.

Whiteflies

Whiteflies are tiny, white or pale yellow insects that resemble small moths. They can be found on the undersides of leaves, typically in large numbers. When disturbed, whiteflies will fly up in a cloud of tiny insects.

Spider Mites

Spider mites are very small and may appear as tiny dots on the leaves. Look for fine webbing on the undersides of leaves, especially in cases of severe infestation. Spider mites can cause stippling or yellowing of the foliage.

Mealybugs

Mealybugs are soft-bodied insects covered in a white, cottony, waxy substance. They tend to congregate in protected areas, such as leaf axils, leaf undersides, and stem joints. Look for cottony masses and sticky residue on the plant surface.

Oleander caterpillars

Oleander caterpillars are vibrant and distinctive in appearance. They have a black body with bright orange or red stripes running along their length. The caterpillars have a slightly hairy or spiky texture.

When inspecting your hibiscus for pests, be sure to examine the undersides of leaves, as many pests prefer to hide in those areas. Additionally, closely monitor the overall health of your plant for signs of wilting, yellowing leaves, or stunted growth, as these can be indicators of a pest infestation.

Pest Remedy

Control pests by spraying the plant with an appropriate insecticide, focusing on the undersides of leaves where pests often congregate. Follow the product instructions and repeat applications as necessary.

Common Diseases

Tropical hibiscus can be susceptible to diseases such as leaf spot, root rot, and powdery mildew. Ensure proper watering practices, good air circulation, and avoid overhead watering to minimize disease incidence.

Leaf Spot

Leaf spot is a common fungal disease that affects tropical hibiscus. Look for circular or irregularly shaped spots on the leaves, usually with defined margins. The spots can vary in color, ranging from brown, black, or yellow to dark purple.

As the disease progresses, the spots may enlarge and merge, leading to the yellowing and defoliation of affected leaves.

Root Rot

Root rot is a fungal disease caused by overwatering, poor drainage, or soilborne pathogens. Observe the plant for signs of wilting or yellowing leaves that don’t respond to watering.

Gently remove the plant from the pot or dig around the root zone to inspect the roots. Healthy roots should appear white or off-white, while rotting roots may appear brown, mushy, or have a foul odor.

Severely affected plants may exhibit stunted growth and eventually die.

Powdery Mildew

Powdery mildew is a fungal disease characterized by a white or grayish powdery growth on the foliage. Look for a fine, talcum-like coating on the upper surfaces of leaves, stems, and even flowers.

Affected leaves may become distorted, curl, or drop prematurely. In severe cases, the powdery growth can cover a significant portion of the plant, inhibiting photosynthesis and weakening its overall health.

When identifying these diseases, careful observation of the plant’s symptoms and characteristics is essential. If you suspect any of these diseases, it is recommended to take appropriate measures for prevention, treatment, and control to minimize their impact on your tropical hibiscus.

Disease Remedy

To combat diseases, remove and dispose of affected plant material, improve air circulation, and apply appropriate fungicides as recommended by a local garden center or professional.

Special Needs or Care

Tropical hibiscus benefits from regular grooming to remove spent flowers and encourage continuous blooming. Additionally, the plant may require occasional staking or support as it grows taller to maintain an upright habit.

Yellow Leaves Troubleshooting

Several factors can contribute to yellowing leaves in tropical hibiscus. Here are some common causes:

Overwatering

Excessive watering can lead to waterlogged soil and root rot, resulting in yellowing leaves. Ensure proper drainage and avoid overwatering the plant.

Underwatering

On the other hand, if the plant is not receiving enough water, the leaves may turn yellow and wilt. Check the soil moisture regularly and water the plant when the top inch of soil feels dry.

Nutrient Deficiencies

Yellowing leaves can be a sign of nutrient deficiencies, such as iron or nitrogen. A lack of essential nutrients can affect the plant’s ability to photosynthesize and maintain healthy foliage. Fertilize the plant with a balanced fertilizer formulated for tropical plants to ensure it receives adequate nutrients.

Environmental Stress

Tropical hibiscus is sensitive to environmental changes. Exposure to cold temperatures, drafts, or sudden temperature fluctuations can cause leaves to yellow and drop. Ensure the plant is placed in an appropriate location with stable temperatures.

Pests and Diseases

Infestations of pests like aphids, whiteflies, or spider mites, as well as diseases like leaf spot or powdery mildew, can cause yellowing leaves. Inspect the plant regularly for any signs of pests or diseases and take appropriate measures for control.

Natural Leaf Shedding

It is normal for tropical hibiscus to shed older leaves as part of their natural growth cycle. If the yellowing is limited to older leaves at the bottom of the plant, it may be a natural process.

By identifying the specific cause of yellowing leaves, you can take appropriate steps to address the issue and promote healthy foliage growth in your tropical hibiscus.

Landscaping Design Ideas for Tropical Hibiscus

Tropical hibiscus adds a vibrant and tropical touch to any landscape. Plant it as a focal point in garden beds, mix it with other tropical plants for a lush oasis, or grow it in containers to add color to patios and balconies.

Create tropical-themed gardens by combining tropical hibiscus with companion plants such as palms, bird of paradise, or ginger lilies for a stunning display of foliage and flowers.

Companion Plants for Tropical Hibiscus

The following plants have similar water, sunlight, and soil requirements as tropical hibiscus, so should be suitable for companion planting in your landscape.

Flowering Plants

  • Bird of Paradise (Strelitzia reginae)
  • Ixora (Ixora spp.)
  • Plumeria (Plumeria spp.)
  • Ti Plant (Cordyline fruticosa)
  • Firebush (Hamelia patens)

Flowering Bulbs:

  • Canna Lily (Canna spp.)
  • Ginger Lily (Hedychium spp.)
  • Blood Lily (Haemanthus spp.)
  • Amazon Lily (Eucharis spp.)
  • Spider Lily (Hymenocallis spp.)

Perennial Flowering Shrubs

  • Bougainvillea (Bougainvillea spp.)
  • Mandevilla (Mandevilla spp.)
  • Plumbago (Plumbago auriculata)
  • Mexican Petunia (Ruellia brittoniana)
  • Shrimp Plant (Justicia brandegeana)

Creating a Tropical Paradise with Hibiscus

Tropical hibiscus (Hibiscus rosa-sinensis) is a captivating and vibrant plant native to warm tropical regions. Its glossy foliage and large, showy flowers make it a delightful addition to gardens and landscapes.

By providing the right growing conditions, including adequate sunlight, well-drained soil, and protection from cold temperatures, you can enjoy the beauty of tropical hibiscus throughout the year.

Remember to care for your plant by regular watering, appropriate fertilization, and addressing any pests or diseases promptly. With proper care, tropical hibiscus will reward you with its stunning blooms and bring a touch of the tropics to your garden.

FAQ – Frequently Asked Questions About Growing Tropical Hibiscus

How tall do tropical hibiscus get?

Tropical hibiscus can grow anywhere from 3 to 10 feet tall, depending on the specific variety and growing conditions. Compact varieties are more suitable for containers or smaller spaces and may stay around 3 to 4 feet tall, while larger varieties can reach heights of 6 to 10 feet.

What is the lowest temperature for tropical hibiscus?

Tropical hibiscus is generally not tolerant of freezing temperatures. Prolonged exposure to temperatures below 28°F for several hours or more is likely to cause severe damage or kill the plant.

What is the tropical hibiscus growth rate?

The growth rate of tropical hibiscus can range from 6 to 12 inches in height per year during the peak growing season.

Is tropical hibiscus annual or perennial?

Tropical hibiscus is a perennial plant in its native tropical and subtropical regions where it can thrive year-round. However, in areas with cold winters, tropical hibiscus is often grown as an annual or treated as a tender perennial.

What are the signs of tropical hibiscus frost damage?

Frost damage on a tropical hibiscus plant typically manifests as wilting, browning, or blackening of the foliage and stems. The leaves may become limp and appear water-soaked. In severe cases, the plant may exhibit leaf drop or defoliation.

Do tropical hibiscus come back every year?

No, tropical hibiscus will not grow back after a cold winter in temperate climates. However, in frost-free regions or with proper protection, it may survive and continue to grow year-round.

What is the cause if my tropical hibiscus lost all leaves?

There can be several possible causes for a tropical hibiscus plant losing all its leaves. It could be due to environmental stressors such as cold temperatures, frost damage, or excessive exposure to direct sunlight. Overwatering or underwatering can also lead to leaf drop.

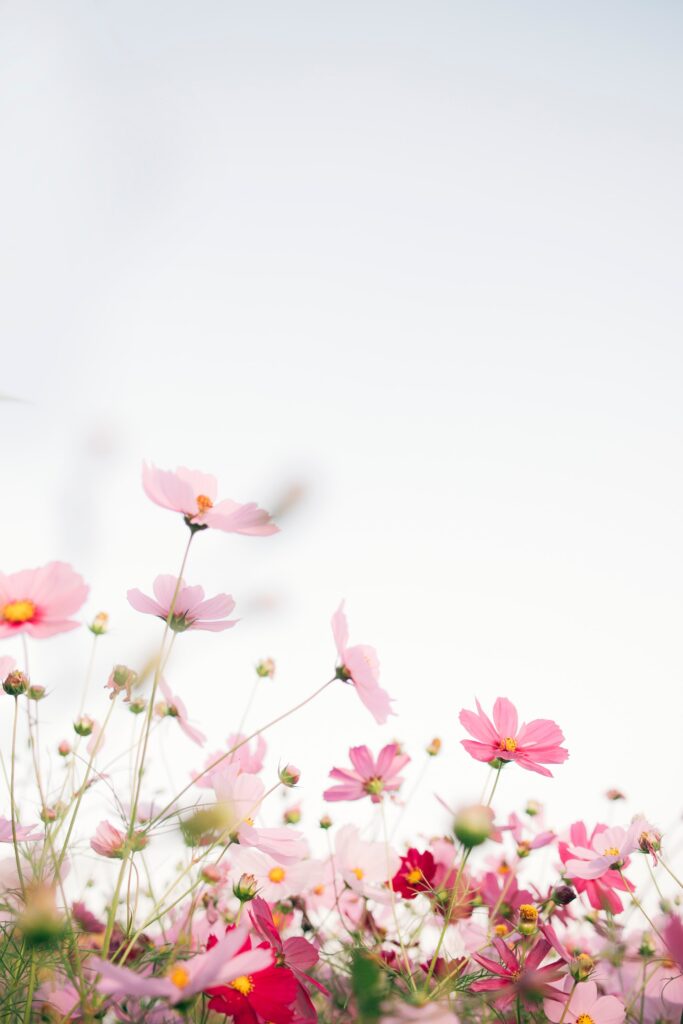
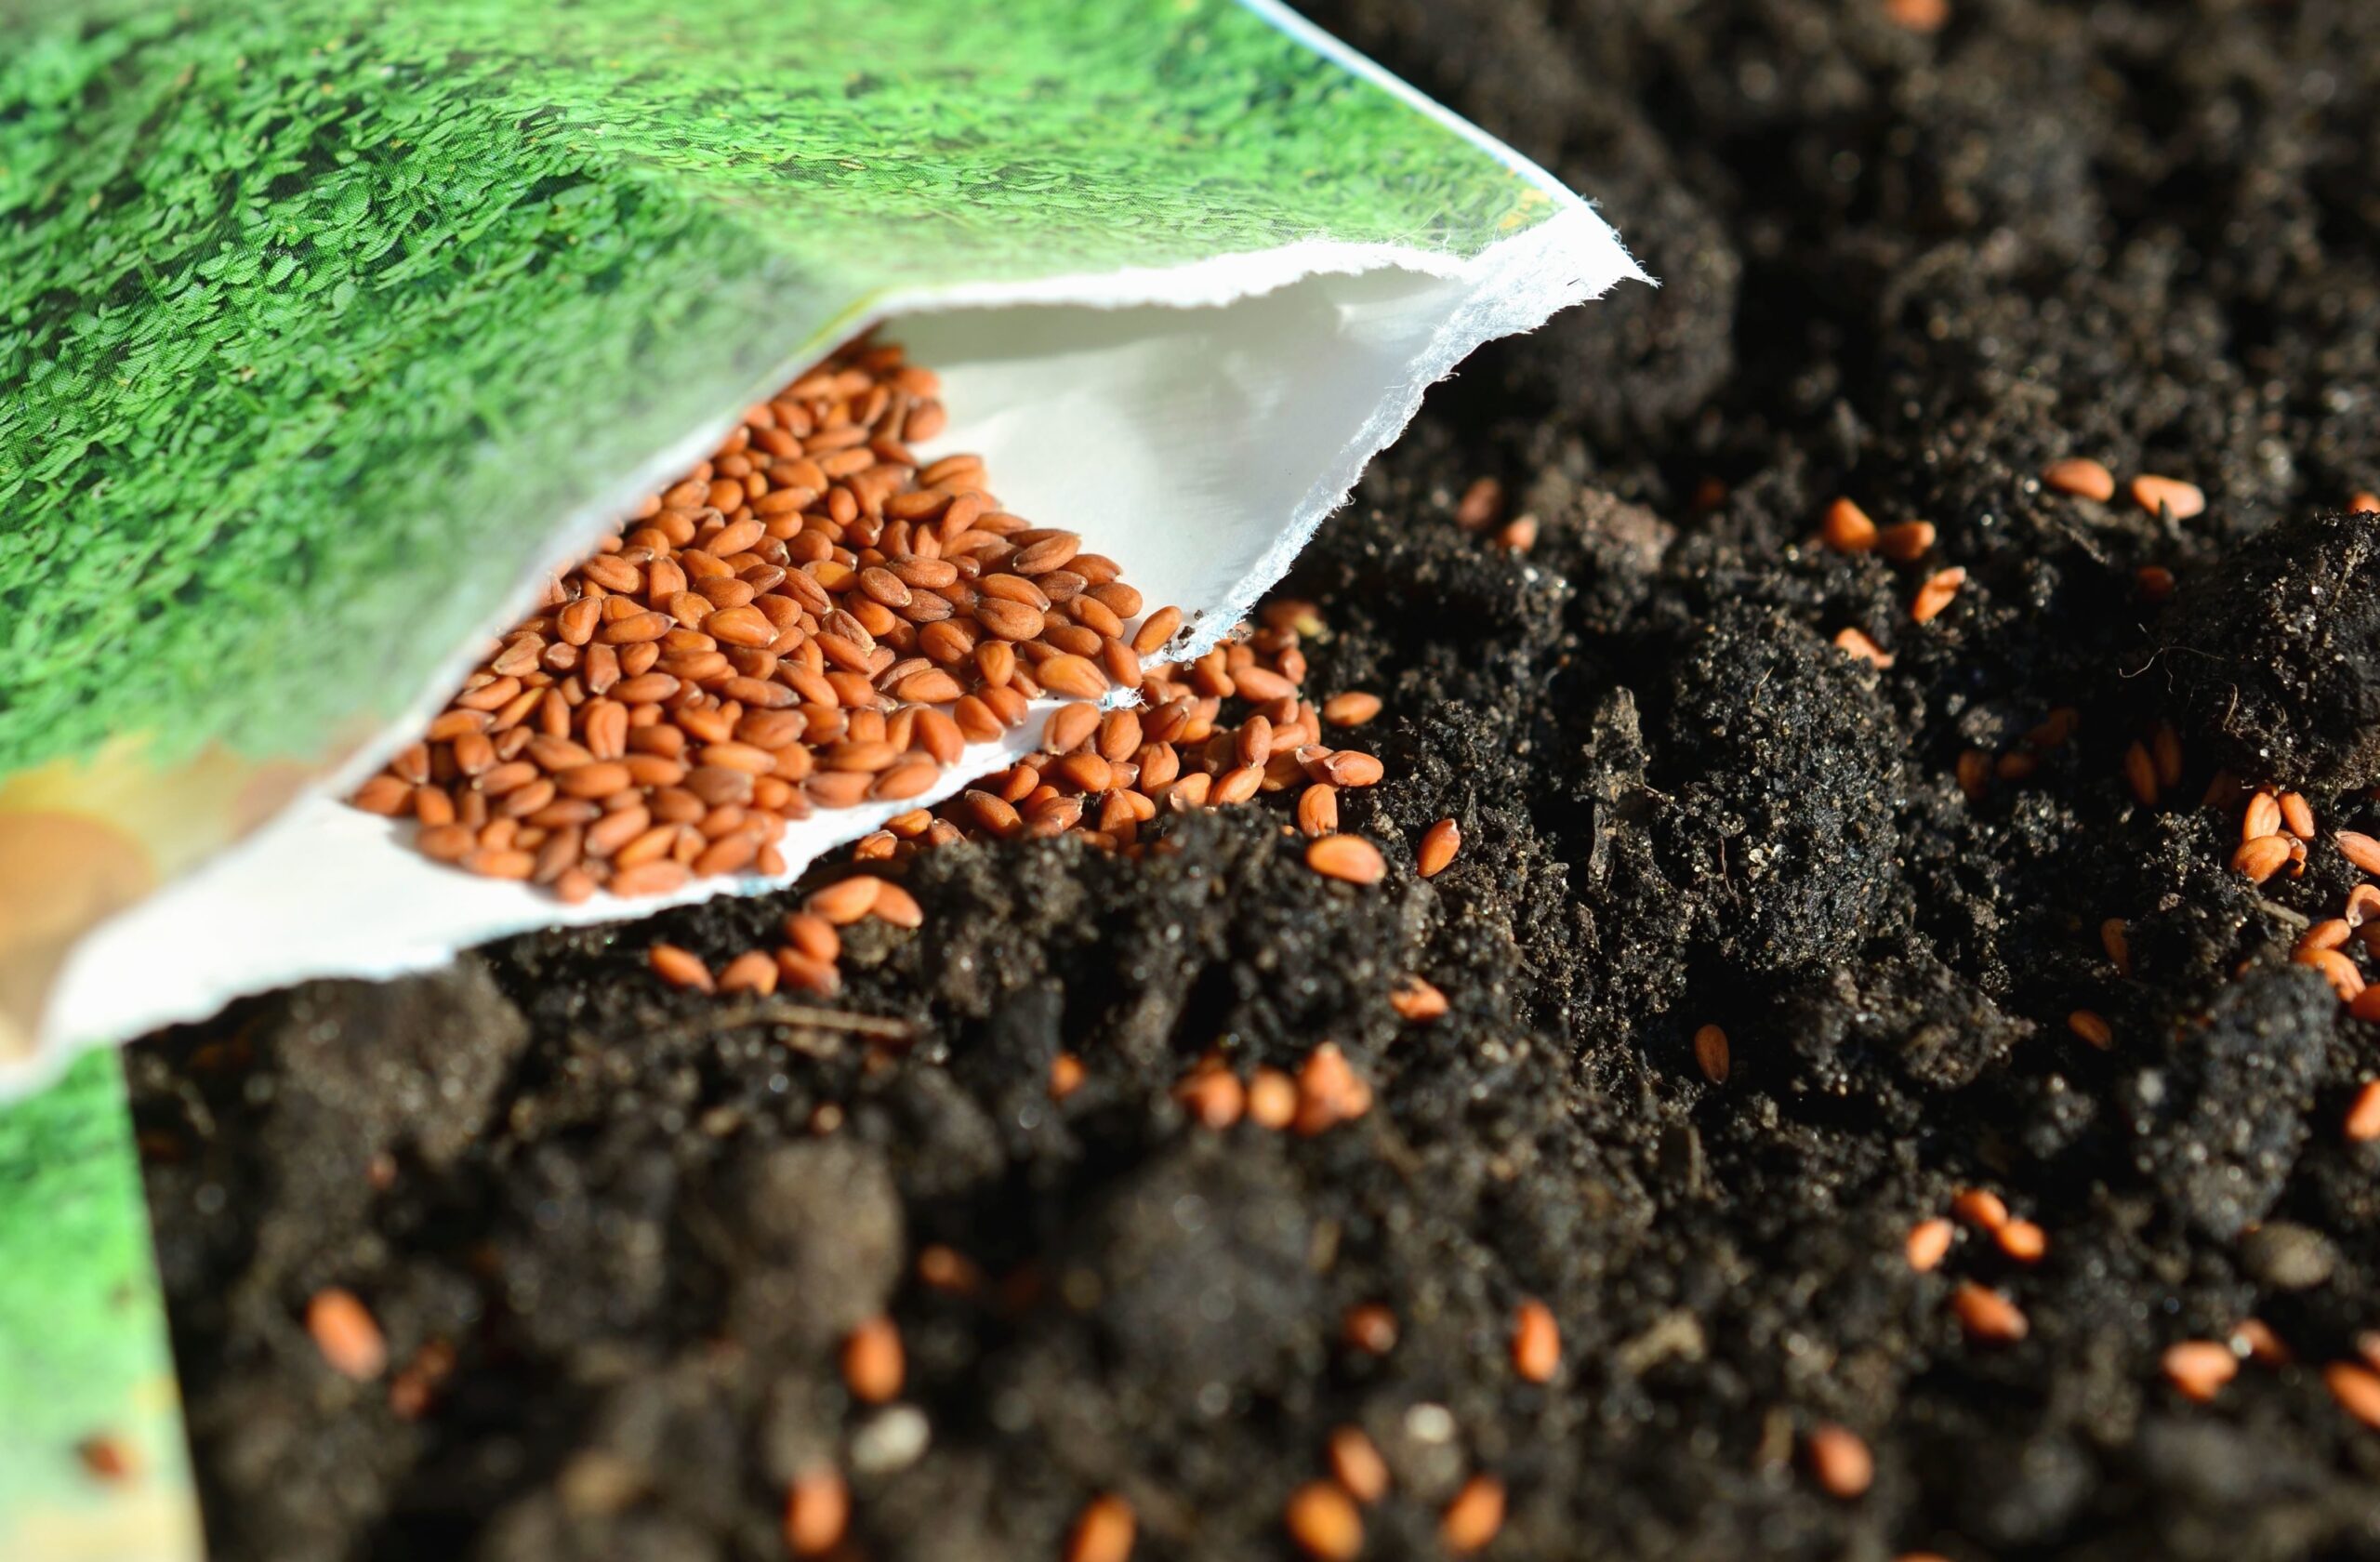
Can you grow tropical hibiscus from seed?

Yes, you can grow a tropical hibiscus from seed. However, it’s important to note that tropical hibiscus seeds can be a bit challenging to germinate and require specific conditions for successful growth.

What is the difference between tropical hibiscus vs hardy hibiscus?

Tropical hibiscus thrives in warm, tropical or subtropical climates and cannot tolerate freezing temperatures, while hardy hibiscus is adapted to colder regions and can withstand freezing temperatures.

Is tropical hibiscus tea safe to drink? Is tropical hibiscus what they use to make tea?

Yes, tropical hibiscus, specifically Hibiscus sabdariffa, is the variety commonly used to make herbal tea known as hibiscus tea or roselle tea. The calyces (the fleshy covering around the seed pod) of the Hibiscus sabdariffa plant are harvested and used to make the tea.

Do hibiscus grow better in pots or ground?

Hibiscus can thrive both in pots and in the ground, but each option has its considerations. When grown in pots, hibiscus plants offer the advantage of portability, allowing you to move them indoors during colder months or place them in optimal locations for sunlight. Potted hibiscus may require more frequent watering and fertilization due to limited soil volume.

How hot is too hot for hibiscus?

The optimal temperature range for hibiscus is typically between 60°F (15°C) and 90°F (32°C). When temperatures consistently exceed 90°F (32°C), hibiscus may experience reduced growth, wilting, leaf drop, and flower damage. High heat combined with intense sunlight can also lead to sunburn on the leaves.

How do you keep hibiscus blooming?

Ensure your tropical hibiscus receives consistent moisture. Feed your tropical hibiscus plant with a water-soluble bloom booster for acid-loving plants. Then work in some slow-release fertilizer formulated for flowering plants around the root zone and apply a layer of organic mulch to help retain moisture. Deadheading regularly will encourage the development of new buds.

Where can I find tropical hibiscus plants for sale?

Our nursery carries tropical hibiscus for sale and can ship them conveniently to your home. Visit our shop at: https://southerngarden.net/shop/

Posted on

Great Last-Minute Gardening Gifts for Dad

Not all gardening gifts for dad have to be power tools!

There’s something about dads who work outside even after they’ve worked at a job all day. My dad was like that. With Father’s Day coming up, gardening gifts for Dad or Grandpa seem like an easy choice for guys like that.

They work all day in some stuffy office and spend hours commuting in their cars, but the minute they get home, that’s when the real work begins. They go into a trance, putting the crazy world behind them and focusing on one plant, one plot of dirt, one crop at a time.

Are you looking for some great last-minute gardening gifts for Dad? Or maybe you’re looking for gardening gifts for Grandpa because he was the one that shared his love of backyard growing with you when you were growing up.

Find gardening gifts for dad or gardening gifts for grandpa

I’ve got some great recommendations to make. I’ve spent a lot of time (and too much money) trying to make my gardening life more efficient, and even less painful. And some of these deserve a slot on any grower’s wishlist.

Here are some of my favorite gardening gifts for dads and grandpas, or any gardener on your list. You may even want to treat yourself!

1. Tuzoc Metal Garden Hose, 100FT

A garden hose may seem like a lame gift, but if Dad is getting up in years, I can tell you that garden hoses get heavier as you age. He may have been wanting one of these stainless steel garden hoses for ages, but they’re a little on the pricey side for someone on a fixed income.

It doesn’t take much to wrench a shoulder or pull a back muscle when you’re constantly watering in the summer heat. He’s going to LOVE this garden hose. It’s tough and durable while still being light enough to water everything without much exertion at all.

I recently picked one of these up, and I recommend it highly.

Buy on Amazon.

2. Black Iron Hori Hori Garden Knife

A hori hori knife is an indispensable tool for any gardening enthusiast. This Japanese-inspired wonder is a combination of a knife and a trowel, making it the ultimate gardening companion for any Garden Ninja.

Its sharp, serrated edge effortlessly cuts through soil, weeds, and tough roots, while the flat side can be used for digging, transplanting, and scooping. The sturdy blade is perfect for precision cutting and dividing plants, and the pointed tip aids in creating seed furrows or removing stones.

With measurement markings along the blade, the hori hori knife ensures accurate planting depths.

From planting to weeding and everything in between, the hori hori knife is a true multitasker and is my No. 1 go-to gardening tool.

Buy it on Amazon.

3. Rechargeable Battery Powered Garden Sprayer

You don’t have to be professional or spend professional kind of money to get a powered garden sprayer. Dad deserves a break from tedious priming and hand-pumping while tending the garden.

This rechargeable battery-powered garden sprayer makes plant care a breeze, and who doesn’t need a little extra help battling squash bugs and powdery mildew in the summer heat and humidity?

With a convenient and portable design, this innovative tool eliminates the need for manual pumping or carrying heavy containers. The battery-powered mechanism provides consistent and even spraying, ensuring uniform coverage. Best of all, it’s rechargeable.

I purchased a rechargeable powered sprayer in 2021 and it’s been a game changer.

You can buy it on Amazon.

4. Genuine Ladbrooke 6-Pc. “Master Grower” Soil Blocker Set 

On the other hand, if Dad is serious about self-sufficient vegetable gardening, he’s going to fall in love with the Ladbrooke soil-blocking system. No more fragile cell packs, no more weird, desiccated pellets in netting that never decomposes.

The right gardening gifts for dad make it easier for him to share his love of nature with his children

While you’ll find a number of knock-off soil blockers on the market, don’t be fooled by cheap imitations. Ladbrookes is the genuine article, made in England, where gardening truly is an elevated art form.

And if the big kit is too spendy, they do have smaller sets to fit your budget. I recommend starting out with the Mini 4, which makes 1-3/8″ dirt brownies in which tomatoes and peppers just thrive.

You can buy both on Amazon and avoid the international shipping fees.

5. AcuRite Iris (5-in-1) Wireless Indoor/Outdoor Weather Station

Because there’s nothing worse than spraying fungicides or fertilizer only to see all your hard work and money get washed away in the rain. Your favorite Garden Guru will love this weather station so he can stay on top of climatic conditions in the garden.

For gardening dads with a greenhouse or grow house, check out this Acurite package with three sensors for monitoring the temperature and humidity from the comfort of your home.

Acurite has been around for 80 years, and its reputation is stellar. I’ve been using a three-sensor black-and-white system from them for the last four years to keep tabs on the greenhouse, chicken coop, and bunny run. Well, at least that was until the bunnies buried their sensor while digging a new burrow.

So, we’re down to two sensors, but they’re both critical for monitoring conditions during those rare overnight freezes and in the heat of the day when plants (and chickens) can get dangerously stressed.

A wireless indoor/outdoor weather station is an essential tool for gardening dads. He’ll have access to accurate and up-to-date weather information, so he can make informed decisions about his gardening activities.

This information helps to determine the ideal planting times, adjust irrigation schedules, and take necessary precautions during extreme weather.

Buy AcuRite weather monitors from Amazon.

6. VIVOSUN Portable Garden Kneeler Seat

Garden Kneelers aren’t just for seniors. My son got me one of these about five years ago, and it’s still incredibly handy. Even if you don’t need a pad for kneeling or a handy seat, it’s an awesome portable caddy for your tools. I use mine as a small table to hold my coffee cup, phone, and Bluetooth speaker while I putter in the backyard and listen to the No-Till Growers Podcast while I work.

A portable garden kneeler/seat is a game-changer for dads and grandpas who appreciate a more leisurely garden experience. Kneel in comfort or just sit and relax while you enjoy the peaceful satisfaction of all your hard work.

The best gardening gifts for dads make it easier for him to enjoy his garden without pain.

The soft cushioning of the kneeler relieving the strain on your knees while the sturdy frame ensures enough stability and support to kneeling and rising so much easier. This kneeler/seat features handy storage pockets that detach and function as a tool belt.

You can buy it on Amazon and have it delivered wherever your dad gardens.

7. Gardenfather Tee Shirt

It’s hard to find gardening gifts for Dad when it seems he already has every tool, gadget, or going thing for his outdoor passion.

If Dad also has a sense of humor, maybe a Father’s Day gift on the lighter side is in order.

Dad Jokes deserve full retaliation, and what better way to show Pops that you inherited his lame sense of humor than a gag gardening gift?

It's hard to find gardening gifts for dad when it seem he has everything.

Although, it doesn’t have to be completely useless. There are plenty of funny gardening gifts for Dad that he’ll appreciate just as much for their practical use as the laugh factor.

Tee shirts are great gardening gifts for Bad because he’ll always have something comfortable he can wear while he’s working outside.

Hats are even more useful for keeping the sun off his face and out of his eyes.

Find more funny gardening gear for Dad on Amazon.

8. LANNIU Garden Tool Set

Now, if you can’t find the right gardening gifts for Dad because he’s a total noob and has nothing, then this handy set has everything and somewhere to put it, too.

There have been a lot of newbie gardeners in the last few years. Between the boredom of pandemic lockdowns to rising food prices to just the desire for a healthier lifestyle.

If he’s never gardened before, he may not have any tools at all.

This handy set has a full array of great starter tools for the newly-hatched gardener. It also works as a seat when you need a break or need to juggle seed packets.

Find great gardening tool sets for Father’s Day on Amazon.

9. Garden Grafting Tool Kit

Serious gardening dads deserve serious gardening gifts for dads. Help Pops take his self-sufficiency to the next level with this well-appointed tree grafting kit.

This choice is easy on the wallet but offers hours of gardening fun. Dad will be creating his own Frankentrees in no time!

For gardeners with small spaces or poor decision-making skills (like me), adding fruit trees can prove overwhelming. Which fruits to grow? Which varieties?

Why not try them all?

Learning how to graft fruit trees opens up a whole new world for avid gardeners and homesteaders. You can combine the desirable traits of different fruit tree varieties into a single tree.

By mastering this skill, he’ll gain the ability to create custom fruit trees with improved disease resistance, superior fruit quality, and increased productivity.

Find grafting kits for Pops on Amazon.

10. Greenhouse

I’ve talked about my love of greenhouse growing before. Sure, it’s Florida and there’s not much need for supplemental heat – but there IS plenty of need for extra shade and protection from driving rainstorms.

I’m adding this gift idea here because it’s on sale right now. It’s a pop-up, so even grandpas can set this one up by themselves. It’s just the right size for protecting seed trays from both cold weather and excessive sun.

Some of the larger greenhouses for the consumer market even offer watering kits, which is super nice when it’s too hot to stand outside with a hose.

Find greenhouses for every budget on Amazon.

11. The Day Off

Maybe the best gardening gifts for Dad are a few hours to relax — or at least a chance to snooze in the shade outside.

Everyone loves a hammock, but not everyone has two trees spaced exactly the perfect distance apart.

A freestanding hammock with a frame can go anywhere Dad wants it — full sun, deep shade, or even behind the shed where no one can find him all day.

When it comes down to it, your dad will probably love anything you get for him. Even if he already has six of them in the garage. (Even if you’re the one that got those other six.) He’ll really just be happy that you understand his need to weed.

Posted on

Flowers for Florida – What We’re Planting in February

Blanket flowers are one of the best choices in flowers for Florida

It’s Valentine’s Day, and that means flowers. Lots and lots of flowers. If you’d prefer to grow your own, the good news is that this month sees Florida warming up and drawing closer to our last frost dates. Flowers for Florida for gardeners means it’s time to start sowing and planting.

Purchasing Flowering Plants and Bedding Plants

If you plan to purchase plants at your local nursery or home improvement center, you can begin planting them out now in South Florida. Be aware that some of these plants have been treated with systemic pesticides. While these make it easier for the grower to present you with beautiful, undamaged plants, it can also mean they could harm your pollinators.

Be especially diligent by avoiding plants that have been treated with Neonicotinoid insecticides. These are particularly harmful to bees.

Sowing Flower Seeds

You can avoid all synthetic pesticides when you sow your own flower seeds. Florida flower gardeners are particularly lucky, as our growing season is long enough to allow some scheduling leeway for sowing from seed.

South Florida, Zones 10 and 11

Flowers for Florida -- coreopsis is Florida's official state wildflower
Coreopsis is Florida’s State Wildflower

The USDA and Farmer’s Almanac say that South Florida doesn’t have a last frost date. But that doesn’t mean we shouldn’t be careful with tender seedlings.

In February, it’s still a good idea to nurture small seedlings under cover in case of a late frost or cold snap. This winter, it seems more important than ever. We seem to be heading toward a trend of cooler winters. Last year, we had a cold snap in mid-March.

Some varieties you can plant out or start in seed trays include:

  • asters
  • bachelor’s buttons
  • bee balm
  • bulbine
  • calendula
  • cosmos
  • dianthus
  • gaillardia
  • impatiens
  • lobelia
  • marigolds
  • nasturtiums
  • nigella
  • salvias
  • snapdragons
  • sunflowers
  • tithonia
  • verbena
  • vinca
  • zinnias

Central Florida, Zone 9

Tithonia delivers in Florida’s hot summers

The last frost date for Zones 9a and 9b fall in mid-to-late February. While you can still plant out fully developed plants from the nursery, starting fast-growing annuals from seed right now is a great way to reduce your landscaping costs.

For flowers in February, plant out starter plants of the following varieties. You can still start seeds as well, and plant out in 4 to 6 weeks. This will ensure that none of your plants are damaged by a late cold snap.

  • asters
  • bachelor’s buttons
  • bee balm
  • calendula
  • dianthus
  • lobelia
  • nasturtiums
  • nicotiana
  • nigella
  • pansies
  • petunias
  • snapdragons
  • sunflowers
  • tithonia
  • verbena

North Florida, Zone 8

Love-in-a-Mist, or Nigella

The last frost for Zone 8 falls in mid-March. So, it may be too early to plant out most flowers for Florida. However, it’s a great time to sow annual flowers for your butterfly garden indoors or under cover where you can keep them warm.

Consider the following varieties for planting out or sowing now:

  • agapanthus
  • asters
  • bee balm
  • crinum lily bulbs
  • dahlia bulbs
  • dianthus
  • lavender
  • nigella
  • pansies
  • snapdragons
  • viola

Flowers for Florida in February Guaranteed

One of the best ways to ensure you’ll have flowers in February is to plant out perennial flower bushes in the previous fall. Our mild temperatures and regular fall rainfall create the perfect conditions to establish flowering bushes and trees like plumbago, duranta, and hibiscus.

It seems there is far too much to do in February for the Florida gardener, but we’re lucky. You can plant annual flower seeds nearly year-round for a regular succession of colorful blooms.

Posted on

Soil Temperature Matters: Why Your Seeds Didn’t Germinate

soil temperature and seed germination

New and experienced gardeners often find themselves frustrated by seeds that don’t pop. After spending hours deliberating over your garden plan and then money on starting mix, it’s a huge disappointment when your little cell trays remain empty. But one of the primary reasons your seeds didn’t germinate is soil temperature.

If you’re new to gardening, you may think that growing plants from seeds is simple – toss them in some dirt, and boom – a few weeks later, you have a yard full of flowers. Or vegetables. And yes, while nature uses this method, more or less, nature also uses hundreds if not thousands of seeds to produce one viable plant. Survival of the fittest, and all that.

I get it. You’re excited for spring and keen to get growing. You’ve had a miserable cold winter and need some green in your life. However, jumping the gun will lead to disappointment. If you want an abundant garden, you’ll need to learn about the importance of soil temperature.

What Seeds Need to Grow

Last week, I touched lightly on the importance of proper seed storage. To keep your seed stash viable as long as possible, you need to deny them the very things they need to germinate:

  • Light
  • Moisture
  • Heat
  • Oxygen

There is a pretty wide range of optimal germination temperatures depending on where the plant evolved and the climate of its origins. Some plants prefer cooler temperatures and will germinate very early in the spring. Others prefer higher temperatures and will do wonderfully in the summer heat.

Nature abhors a vacuum and will work to ensure a steady supply of flowering plants throughout the growing season. So, some flowers have evolved to germinate at 45 or 50 degrees, while others will take over when temperatures hit 85.

For a long-lasting and beautiful garden throughout the growing season, it’s critical to understand what you can grow and at which temperature to start them.

Container gardening lets you control moisture and soil temperature for a variety of plant species
Container gardening lets you control moisture and soil temperature for a variety of plant species.

Soil Temperature vs. Ambient Temperature

One mistake I have commonly seen made by new gardeners is not understanding the difference between soil temperature and air temperature. While soil temperatures are relatively stable 10 feet below the surface, it’s much more variable at root level for your new seedlings.

Even at root level, soil temperatures are very different than the air temperature. For good germination, you need to be sure the soil temperature is right.

In cooler regions, the soil temperature may stay much cooler, even though the sun feels hot on your skin on a clear spring day. Worst of all, they may plummet in the night when the sun goes down. The soil — and your little seeds — could even freeze.

In warmer regions, however, the soil can remain much warmer than the air temperature, which isn’t always a good thing.

Last January, for example, our nearby IFAS weather station recorded lows of 26 degrees Fahrenheit, but the soil temperature barely dropped below 60. Now that it’s summer, the soil can reach up to 86 degrees F, even as the air cools towards evening into the 70s. Many flower seeds just won’t germinate above 85.

Optimal Soil Temperature Varies

The best temperature for germinating flower seeds will vary by plant species, plant origins, and even moisture levels.

Seeds too cold

Seeds in conditions that are too cold will not germinate. If those conditions are also moist, it’s likely the seed will rot before it sprouts. Heavy spring rains can also keep your garden soil from warming up, further slowing the process. And that’s if you don’t have a sudden late frost!

Seeds too hot

Seeds in conditions that are too hot may also not germinate. There’s a reason gardening experts recommend getting your compost pile above 100 degrees. That’s to kill whatever weed seeds may lie dormant in the pile. Too much heat kills.

Seeds just right

Seeds have been programmed by millions of years of evolution, along with careful cultivation by humans, to germinate when the ongoing conditions will be optimal for the plants to grow and thrive.

This is reinforced by the fact that the microbiology in the soil that will help your plants thrive also needs optimal temperatures to thrive.

Germination Temperature vs. Growing Temperature

More annoyingly, many plants prefer lower growing temperatures once they’ve germinated. So, that beautiful new packet of petunia seeds may need 75 degrees to germinate, but will perhaps grow better under cooler conditions around 60 to 65.

Other plants may be stimulated by a freakish warm spell or even the odd late freeze that cracks the shell.

Plants are weird.

This need for a particular sequential set of conditions is one of the reasons why so many gardeners turn to native plants. Rather than spending money on heaters and lights and misting systems, many gardeners prefer to take their cues from the natural conditions where they live and let nature sort it out.

Group plants by their preferred soil temperature when direct sowing a variety of plants.

Control Freak Gardening

Over the years, I’ve evolved from the hopeful and random scattering of seeds into a complete control freak, where nearly everything I grow is started in cell trays or soil blocks.

Aside from beans and Ipomoea spp. (and sometimes even those), I’m all about controlled conditions. While I do enjoy an extended growing season in Coastal Central Florida, I also have very little room. I take Charles Dowding to heart when he suggests starting as many plants as possible in trays so you’ll always have something to plug into the garden beds. I’m a big fan of soil blockers.

With flowers, I’m a little less controlling, but then, I’ve got more experience with vegetable gardening and I’m really just starting to experiment with growing ornamentals and wildflowers from seeds. I’ve had equal success with easy flowers with direct sowing as with using starter trays.

But as I talk to more gardeners across the country, both new and experienced, I learn more about how important soil temperature is for germination. I admit it — I’m spoiled by an excellent climate. We almost always have reasonable soil temperatures where I live. If anything, it’s managing moisture we struggle with most here in Florida.

As I learn more about optimal soil temperatures for germinating flower seeds, the more I become fascinated and keen to experiment. We’re in the hottest part of the summer, with daily UV alerts and heat indexes in the 100s. I’m excited to see if I can start some more heat-sensitive flowers indoors in my “farm office” for planting out as the weather cools toward autumn.

In temperate zones, many gardeners get a start on spring by starting seeds indoors in the winter.

Here in the subtropics, we can do the same thing to get a jump on fall gardening.

Starting plants indoors lets you provide optimal soil temperature for a variety of plants.

Optimal Soil Temperature for Flower Seeds

Most internet resources will tell you that anything between 68 and 75 degrees Fahrenheit is fine. But since I deal with a lot of flowers that are native to tropical and subtropical regions, I wanted to dive deeper than “just fine.”

I was also able to find some other critical information on the Iowa State University website that may prove useful — the common flower seeds that require light to germinate.

Some seeds require surface sowing, as they need exposure to sunlight to sprout. Others should be covered with soil, generally with 2 times the depth of the size of the seed.

For seeds that require light to germinate, barely cover with a sprinkling of soil. Or sprinkle lightly onto moist starting mix and press gently into the soil. Use a mister to keep seeds moist without disturbing them or displacing them.

With seeds that require darkness, remember that as soon as they sprout, they will need sunlight. Don’t leave them in the dark too long without checking them.

Flower Germination Temperature and Light Conditions

Flower SeedOptimal Temperature for GerminationLight Requirements for Germination
Alyssum 55° to 70°Light
Angelonia 70° to 75°Light
Aster65° to 70°Light or Dark
Bachelor’s Buttons (Centaurea cyanus)65° to 70°Light or Dark
Begonia 70° to 75°Light
Blanket Flower (Gaillardia aristate) 70° to 75°Light
Blue Sage (Salvia farinacea)70° to 75°Light
Borage65° to 85°Dark
California Poppy (Eschscholzia californica)55°Light
Canna70° to 85°Dark
Celosia 70° to 75°Dark
Cleome70° to 75°Light
Coleus70° to 75°Light
Columbine (Aquilegia spp.)65° to 75°Light
Coneflower (Echinacea spp.) 65° to 70°Light
Coreopsis55° to 75°Light
Dahlia70° to 80°Light or Dark
Daisy (Bellis perennis)65° to 70°Light
Delphinium60° to 68°Dark
Dianthus60° to 68°Dark
False Queen Anne’s Lace (Ammi majus)55° to 65°Light
Four O’ Clocks (Mirabilis) 65° to 75°Dark
Foxgloves (Digitalis)60° to 65°Light
French Marigold (Tagetes spp.)70° to 75°Light
Geranium (Pelargonium) 70° to 75°Dark
Gomphrena70° Light or Dark
Hollyhocks (Alcea rosea)60° to 70°Light
Impatiens70° to 75°Light
Lavender70° to 80°Light
Liatris55° to 72°Dark
Lisianthus 75°Light
Lobelia65° to 75°Light
Lupine55° to 65°Dark
Mexican Sunflower (Tithonia rotundafolia)70° to 75°Light
Milkweed (Asclepias)70° to 75°Light or Dark
Monarda60° to 70°Light
Moonflower (Ipomea alba)85° to 95°Dark
Morning Glory (Ipomea spp.)70° to 85°Dark
Nasturtium65° to 70°Dark
Nicotiana 70° to 75°Light
Nigella65° to 70°Light
Pansy (Viola tricolor)65° to 70°Dark
Petunia70° to 80°Light
Phlox60° to 65°Dark
Portulaca75° to 85°Light
Red Poppy (Papaver rhoeas)65° to 70°Light
Roselle75° to 85°Dark
Rudbeckia70° to 75°Light or Dark
Scarlet Sage (Salvia coccinea)70° to 75°Light
Snapdragon (Antirrhinum) 60° to 70°Light
Statice (Limonium)68° to 75°Light
Stocks (Matthiola incana)60° to 65°Light or Dark
Strawflower (Xerochrysum bracteatum)70° to 75°Light or Dark
Sunflower (Helianthus) 70° to 85°Dark
Verbena70° to 75°Dark
Vinca (Catharanthus roseus)70° to 75°Light or Dark
Yarrow (Achillea millefolium )65° to 75°Light
Zinnia70° to 80°Dark

How to Make Optimal Soil Temperature Work for You

Now that you know the best soil temperatures for common garden flowers, you can use this information for better germination. Consult your local extension office to find the best source of soil temperature data for your area. I use, appropriately, the Florida Automated Weather Network, or “FAWN.”

If you’re starting early in the spring, you can use black plastic sheets several weeks before direct sowing to warm the soil.

The most popular option is to start your seeds indoors where it’s warmer. Many gardeners swear by heat mats for starting seeds and cuttings at any time of year. Heat mats will ensure a steady perfect temperature, regardless of the weather or the blasting AC in August.

If you’ve already hit high summer temperatures, you can choose to start seeds indoors or under cover where they’ll receive some shade. The summer sun on a bare garden bed can play havoc on seeds and other soil life. Growing them under cover until they’re mature enough to handle the heat is one technique to add to your gardening toolbox.

For my part, I know I’ll never try to start alyssum or nigella after April ever again.

Time to Grow

Adding flowers to your garden plan is always a good idea. They’re not just beautiful – they also add critical forage for those pollinator friends that help us with our squashes and cucumbers. Many also bring in necessary predatory insects that can help protect our work.

They add diversity to the garden with their own root exudates, enriching the soil and in some cases, purifying it as well.

Flowers bring all good things to the garden.

Posted on 1 Comment

How Long Will Flower Seeds Last?

open packet of flower seeds

It’s only June, but you’ve already filled your garden to the brim with summer vegetables and herbs. The flower borders are chock full, and you’ve even tucked a few spare cosmos and zinnias into the squash patch. The problem is, you still have packets and packets of flower seeds left to plant. Can you save them for next year? How long will flower seeds last in storage?

Maybe you just got swept away with gardening enthusiasm and bought too many seeds. Or maybe you ran into a great sale. We all do it – buy too many seeds. They’re relatively inexpensive, and it’s easy to fall in love with the picture on the packet. But too many seeds can also mean a few broken dreams.

How long can you keep these extra seeds without having to throw them away? Do flower seeds expire?

How Long Can Flower Seeds Be Stored

Depending on the variety, flower seeds will last in storage for 1 to 5 years.

How long flower seeds will last will depend on a few key factors. Are they annuals or perennials? What kind of seed coating or shell does the seed have? Where are you storing your flower seeds?

And finally – how important are these seeds to your gardening plans?

That seems like a harsh question, but it’s a valid one when it comes to deciding whether to simply toss them or to use critical storage space to keep them in the right conditions.

Seed Saving Priorities

If your garden is already full of zinnias, whose seeds are extremely easy to save, should you really bother to save that damp, torn, half-packet you found at the bottom of your seed stash?

Perhaps you have a small garden and very limited space for seed starting. Should you bother to save seeds when you know you won’t have room to plant them next spring?

Where Does Your Garden Grow?

For those of us who garden in the South and the subtropics, in particular, saving seeds after spring planting means saving them for fall planting. If you live on the Gulf Coast, for example, you may want to plant those zinnias in February, May, and September.

If you live in Iowa or Nebraska, however, when the season is short, you want to be ready right out of the spring gate. Perhaps you have a large property, with room to experiment? If your spring priority is getting food in the ground, perhaps you don’t want to spend time or money on flower seeds. You may want to save the ones you have to help bring in pollinators, but it’s not your top priority. In that case, you may want to save your flower seeds even if the germination rate is low.

If you’re anything like me, you save everything – obsessively — even seeds that are likely to fail. Even seeds for flowers that you hate and vegetables you won’t eat.

Because seed saving sometimes becomes a bit of a lifestyle.

So, how do you determine what’s worth keeping?

How Long Do Packaged Flower Seeds Last?

When you purchase seeds from a big box store, you’ll often find the package labeled with the “best-by” date and date of expiration. This date isn’t when the seeds expire, but it is the date that stores will remove them from their inventory.

Companies that handle a lot of seed packets will purchase and package all the seed they sell in one year and mark it for sale for the following year. For example, they’ll buy mass quantities of those same zinnia seeds harvested by farmers in 2022 to sell at your local garden center starting in January of 2023.

You may also see markings on the packets that include lot numbers and germination rates. While there are federal standards for vegetable seed germination rates, flower seeds are regulated at the state level. And to be honest, they’re pretty low standards. In many cases, germination rates as low as 40 or 50 percent are considered acceptable.

Seed Germination Rates Vs. Vigor

Many new gardeners are surprised to learn that good germination doesn’t always result in a strong healthy crop. Even though I’ve been gardening for many years, I made this mistake with an overlarge package of bush bean seeds. The first four crops were amazing, but planting number 5, about three years later, produced dismal-looking specimens.

So, while your flower seeds might sprout beautifully under the best conditions, the seeds may be too old to produce tall, strong, vigorous plants.

Oregon State University has proposed several methods of testing seed vigor, but they may be considered excessive by the average home gardener.

However, the difference between germination rates vs. vigor is another reason you need to determine your gardening priorities when saving flower seeds. Unless you’re a professional grower or garden designer, you may be willing to take more chances on old seed.

How long do perennial flower seeds last?

When stored properly, perennial flower seeds may last up to 5 years.

How long do annual flower seeds last?

Annual flower seeds, except for a few exceptions, will normally last up to 3 years.

Flower Seed Viability Chart

When properly stored, your flower seeds may last as long as shown on the following flower seed viability chart. The years listed are the maximum to expect under optimal conditions.

Flower Seed Viability Chart

How long to store seeds.
Ageratum4Echinacea4Petunia3
Alyssum5Euphorbia4Phlox2
Amaranthus5Forget Me Not2Poppy4
Ammi majus2Four O'Clocks2Portulaca2
Artemisia5Gaillardia3Rudbeckia2
Asclepias1Gomphrena5Salvia3
Aster2Helianthus3Saponaria5
Bachelor's Buttons5Heliotrope2Scabiosa3
Borage5Hollyhocks3Stocks3
Calendula6Impatiens2Snapdragon5
Campanula3Larkspur3Strawflower2
Carnation5Lavender3Sunflowers5
Celosia4Linaria3Sweet Pea5
Clarkia3Lisianthus3Tithonia2
Columbine2Lobelia4Verbena5
Coreopsis2Lupine5Vinca1
Cosmos4Marigold5Viola1
Chrysanthemum5Monarda4Wallflower5
Dahlia5Morning Glory4Yarrow5
Daisy3Nasturtium7Zinnia6
Delphinium3Nicotiana5
Dianthus5Nigella2
Digitalis2Pansy2

So What Are Optimal Conditions to Keep Flower Seeds Viable

There are several elements that can hasten the demise of your stored flower seeds – and they’re the same elements that make them sprout: heat, light, moisture.

Experts recommend ensuring the following to provide optimal conditions to extend the life of your saved seeds:

Home Gathered Seed

If you’re collecting your own seed from the garden:

  • Remove any chaff, leaves, or stems
  • Air dry for one to three days
  • Freeze seeds for a few days to kill any insects
  • Package in a paper bag or paper packet for short-term storage
  • Refrigerate in a sealed container with desiccant packets

Long Term Storage

If you’re storing seed over the winter or for the long term, you’ll need to take better note of conditions. Once processed and whether home-gathered or purchased:

Ensure seeds are dry – 7 to 8 percent is optimal. You can dry your seeds on screens with a fan or out of the sun on a warm day.

  • Keep at temperatures below 50 degrees Farrenheit
  • Store below 50 percent humidity
  • Store in paper packets
  • Label thoroughly
  • Place paper bags or packets
  • Keep packets in a closed container such as a canning jar or baby food jar
  • Add a desiccant packet to reduce moisture damaging seeds

Store in the refrigerator or freezer. Note that your freezer provides a more consistent temperature since it is opened less frequently than the average refrigerator.

Wildflower seed, dandelion. Free public domain CC0 photo.

Saving Flower Seeds to Last

Now that you have a good idea of how long your flower seeds will last, it’s time to start winnowing. If you’re done planting for the year – or even just for the summer – assess your inventory.

If you have seeds that are years old, with no hope of germination, it’s time to toss them and make room for others.

If you have seeds you’ll plant soon, dry them completely and put them in a cool, dark place until fall sowing.

For next year, make sure you tuck them away into the freezer. You don’t want them exposed to heat, moisture, and light before you’ve had a chance to plant them.

Posted on 1 Comment

The Best Heat-Tolerant Annual Flowers for Southern Gardens

In the South, it’s just too hot and humid for gardening much. We’re reduced to an hour or two of tolerable temperatures in the morning and maybe at dusk. But the good news is that we don’t have to forgo all gardening completely. There are many heat-tolerant annual flowers that thrive in the scorching sun, and many of them reach maturity pretty quickly.

Summer is when vegetable gardens in the South seem to perish in front of our very eyes. (If you’ve seen bacterial blight, then you know what I’m talking about.) Forget about summer tomatoes, much less lettuce. Our peppers will survive the summer, but don’t expect much in the way of a harvest.

So, it’s time to turn to sturdier, less fussy garden plants, and you may wonder what flowers tolerate full sun and heat?

Heat-Tolerant Annual Flowers You Can Plant Now

June 1st is when I turn my attention to ornamentals. I used to stick to perennial flowering bushes because of the low-care factor. June is a fine time to take cuttings, too.

However, once I discovered what annuals are heat tolerant and can thrive in our damp summers, I’ve found that annuals can flourish with summer neglect as well.

Best of all, most grow quickly and require little care. So, once they’ve germinated and put out true leaves, you won’t even need to stand in the blazing sun to water them.

Indian Blanket Flower, Gaillardia pulchella

heat tolerant indian blanket flower

Indian Blanket Flower is a quick-growing annual that just loves the heat. It’s native to the eastern and southeastern U.S., and while it’s drought-resistant, it can handle more moisture than its Western cousin, the Common Blanket Flower.

So, if you have hot, wet summers, like we do in Florida, Indian Blanket will add color to sunny areas in your garden. It will also tolerate partial shade. It reaches 1 to 2 feet high, with bright, cheerful yellow and red flowers.

It’s considered of special value to native bee populations as well. If you’re gardening for wildlife and don’t have room in your beds for flowers, it’s also one of the best heat tolerant annuals for containers.

Indian Blanket is one of the heat-tolerant annual flowers that are perennial in subtropical coastal regains. And in many areas, it will reseed prolifically.

Best of all, you’ll get flowers in only about 8 weeks!

You can purchase Indian Blanket Flower seeds here.
Buy seeds

Coreopsis, Coreopsis tinctoria

heat tolerant southern wildflowers

Sometimes called tickseed and plains Coreopsis, the Florida state wildflower produces masses of happy yellow and red flowers that bees simply adore. It puts up with a lot – even a hot Southern summer. You’ll find coreopsis available in other shades, as well, with deep red being the most common.  

If you have poor, sandy soil, coreopsis will love you and produce flowers in about 60 to 70 days. This Southern U.S. native wildflower requires no feeding but do like some moisture.

This wildflower ranges from 1 to 3 feet tall and flowers in about 80 to 90 days.

Purchase Coreopsis tinctoria seeds here, or Tall Red Coreopsis tinctoria seeds here.
Buy seeds

Salvias

Salvias are often perennial in the South, which makes them a particularly good choice for summer color. When the temperatures start to rise, it’s nice to know that your future holds flowers, even if it’s too hot for gardening.

Scarlet Sage

Salvias come in a range of colors, but Scarlet Salvia is native to the southeast and provides food for hummingbirds and butterflies. Its natural range is coastal areas, from South Carolina, around Florida, and up the Gulf Coast to Texas. Best of all, it blooms nearly all year long in subtropical climates and self-seeds like a champ.

You can purchase Scarlet Sage seeds here.
Buy seeds

Blue Salvia

heat tolerant blue salvia

Even though it’s native to the Southwest, Blue Salvia (Salvia farinacea), or Blue Sage, also does well in the Southeast. Hummingbirds love it and in frost-free areas, it will bloom year-round.

Because it’s so drought-tolerant, it makes a fantastic water-wise flower to add to your landscaping or butterfly garden.

You can purchase Blue Salvia seeds here.
Buy seeds

Zinnias

zinnias are heat and sun tolerant for southern summer gardens

Zinnias are native to Mexico and Central America, and have become naturalized to the Southwest U.S. But they grow anywhere that offers heat and sunshine. They come in a wide range of colors and heights, and they’re easy to grow.

Zinnias are a no-brainer for summer color, particularly for beginning gardeners, lazy gardeners, and kids. These heat-tolerant annual flowers germinate in as little as three days in the right conditions, but no more than 7 to 10. Best of all, they flower in about 50 days, which means you can add them now and add beauty to your garden well before fall.

You can buy Zinnia seeds here.
Buy seeds

Celosia, Celosia

flame shaped celosia

Celosia looks like we feel on the beach in July – like we’ve burst into flames. In fact, the name is derived from the Greek word for “burning.” It’s a dramatic addition to any garden because of the vivid colors and unique flame shape.

It likes some moisture but loves full sun. You’ll find it in a range of bright, jewel-toned colors.

There are a variety of flower shapes, however, including Celosia cristata, which is also called cockscomb. Celosia spicata resembles wheat.

They offer plenty of nectar for bees and butterflies, but also make excellent dried flowers.

Buy Celosia seeds here.
Buy seeds

Cosmos, Cosmos bipinnatus

heat tolerant cosmos flowers

Cosmos looks so delicate, but it’s tough as nails in the summer garden. This Mexican native plant loves the heat and will thrive under the sun.

Cosmos feature frothy, fernlike leaves reaching from 2 to 4 feet tall. They have small, dainty blossoms in a wide range of colors. Most are in the pink and white shades, but you’ll also find them in rich maroons and deep lavender.

They’ll grow anytime the weather is warm and bloom in only two months. So, it’s not too late to grow a cottage-garden style annual flower, even in June.

You can purchase cosmos seeds here.
Buy seeds
And a dwarf variety here that only reaches about 1 foot tall.
Buy seeds

French Marigolds

French marigold

These sunny, yellow flowers just seem built for hot summer gardens. French marigolds are usually just called “marigolds” in the U.S., but it distinguishes them from Calendula, which are commonly called “marigolds” in the UK and EU.

French marigolds are members of the Tagetes genus and native to Mexico and Central America.

French marigolds are long-lived annuals with a wide range of colors, heights, and growth habits. Some reach as tall as 3 feet, while other works as a compact ground cover. Because of their compact growth, they’re one of the best heat tolerant annuals for containers.

As well as being easy to grow, they’re also easy to propagate. You can take cuttings at nearly any time during the active season, so if you can preserve your favorite bloom color indefinitely.

They grow quickly and mature in about 45 to 50 days, tolerating heat and drought once established.

You can purchase French Marigolds here.
Buy seeds

Mexican Sunflower, Tithonia rotundafolia

Mexican sunflower, Tithonia bloom

If you like height and drama during the hot summer days, consider adding Tithonia to your flower garden. It isn’t a fast-growing annual, like others on this list, but in areas of the country with mild or late winters, it will bloom beautifully throughout the fall until the first frost of winter

Tithonia delivers heights up to 6 feet tall and can grow up to 3 feet wide. It features soft, spade-shaped foliage and vivid orange flowers with red centers.

It prefers poor, well-draining soil and can be sown directly or into large cells for transplanting.

Purchase Mexican Sunflower seeds here.
Buy seeds

Heat Tolerant Annual Flowers Add Sunshine During the Rainy Season

Depending on where you live in the South, summer can really be the gloomiest time of the year. Much of the Gulf Coast and Atlantic Coast enjoy a rainy season, with regular storm watches. Some years, it seems that most of the color is in the cocktails we concoct for Hurricane Parties.

But I’m here to tell you that it doesn’t have to be that way.

Sure, your spring tomatoes are all dead. The squash has been quashed by pests. The latest storm blew over your pole beans.

Even the bananas, who should be able to stand up to all this, seem sad and beaten.

It’s not too late to add a little color to your Southern garden with some fast-growing annuals.

Posted on

Flowers Aren’t Frivolous: French Marigold Benefits for the Garden

French marigold

Southern gardens are plagued by insect pests and harsh growing conditions. And even in other parts of the country, gardeners are looking for more natural and sustainable ways to deter pests and disease without the use of synthetic and dangerous chemicals. Enter companion planting, and enter one of the more famous flowers used for this technique: French Marigold benefits the garden in numerous ways.

Companion Planting

If you’ve been gardening in the 21st century for more than a couple of weeks, you’ve heard of companion planting. In short, this is the practice of planting mutually beneficial plants together in one space to support each other. It can also be the planting of herbs and flowers near vegetable plants that will support those vegetables in some way.

Complicated Combinations

One of my chief complaints about the practice of companion planting is that it can involve complicated combinations of herbs, flowers, and edibles. While I would love to go into a deep dive on the science of each, that will have to wait for next summer during the down season.

The subject of what to plant together and what not to plant can become mind-boggling. Add in a rotation schedule and you’ve got all the makings of a migraine.

I’m lazy and I like my gardening simplified. I plant diversely and densely and let nature sort it out. I like to think that if I have the basic makings of biodiversity and support my soil microbiology, it will all come out the way nature intends in the long run — even if I don’t’ get what I want in the short run.

This drives my family crazy because the ones that like to cook (or feed the rabbits from the garden) end up wandering around the whole yard trying for find what they’re looking for. No, I don’t have endless patience for labels. And no, I don’t plant all the same plants in one area so they’re easy to find and harvest.

That’s intentional. I figure that if my stepson can’t find the Pak Choy, then the slugs will also have some trouble finding it. The same goes with beans and aphids and cabbage and cabbage loopers.

We’re supposed to be the species with the big brains and the ability to generalize, after all.

French marigold
French marigold, Tagetes patula

Steady Go-To Companions

However, one thing I definitely do is to plant flowers (and sometimes herbs — I have trouble with herbs) within ALL of my vegetable garden beds. Flowers attract pollinators and predator insects that hunt down those cabbage loopers and aphids.

If I was to offer any recommendations to new gardeners in any zone, the first would be to plant seasonal annual flowers within EVERY single fruit and vegetable planting.

French Marigold Benefits

French marigold (Tagetes patula) has a reputation as the wunderkind of companion plants. Most of that reputation is well deserved and well documented.

Along with being available in a number of varieties for various applications, they’re also very attractive, with bushy foliage and bright, cheerful blooms. Best of all, they’re incredibly easy to grow and maintain.

I’ve grown French marigolds in both Central Ohio and Central Florida, and both times I’ve been impressed by their dogged resilience.

Pest Repellants

In short, French Marigold benefits include deterring root-knot nematodes, the bane of the Florida gardener’s existence. They’re also said to deter slugs and hornworms.

I can tell you from experience that they do NOT deter snails. Snails LOVE French marigolds. In fact, they make serve as an excellent trap crop for snails. I regularly find snails clinging to my French marigolds. I break the stem and carry it, snail and all, to my chicken yard.

Chickens LOVE snails. And they also like marigolds.

Tagetes patula
Tagetes patula from my garden

Methods to the Madness

It seems that French marigolds repel pests using different mechanisms, depending on the pest. Volatile chemicals in the foliage and flowers that give them their distinctive odor can sometimes confuse insects that seek their target plants through smell. Other insects may simply find the odor repulsive and unpleasant.

Another mechanism is through root exudates. Plants emit various elements through their roots in order to attract beneficial bacteria to trade nutrients. These elements include sugars, which the bacteria adore, and offer micronutrients and macronutrients in exchange with the plants.

And by no means the last method, some French marigold benefits include using the flower as a trap crop, as I mentioned above regarding snails. In fact, in the case of root-knot nematodes, there is some debate as to whether marigolds repel them through root exudates or simply attract them to themselves, thereby “trapping” them in their own roots.

White Fly Results

A 2019 study examined the theory that French marigolds will reduce whitefly populations in tomatoes. I’ve never found them on tomatoes, but my peppers always seem to attract a crowd.

A few experiments found that planting French marigolds alongside tomatoes reduced the whitefly population in the greenhouse. In this case, it was the volatile compound, limonene, these flowers produce that repelled the pests.

Root Knot Nematodes

Root-knot nematodes can completely destroy a once-thriving garden. And it seems that Southern gardens are particularly rife with this soil pest. I remember moving to Florida as an experienced temperate zone gardener in 1993 and being warned that they were public enemy number one.

The UF/IFAS website recommends French marigolds as a cover crop before planting. It posits that the action of alpha-terthienyl, a root exudate, inhibits the hatching of many nematode eggs. It also suggests planting them at least two months prior to your crop, and disking or hoeing them in is the most effective method. The site says interplanting isn’t particularly effective.

In my case, I grow year-round and successively. I don’t do cover crops on beds in production, so using marigolds this way wouldn’t work for me. Especially since I do no-till.

So, I simply interplant several marigold “crops” throughout the year and then crop and drop them on top of the soil at the beginning of each season. At the same time, I plant more marigolds throughout the beds.

I harvest seeds and plant them again later. I even sell them in my Etsy shop for very little profit so other gardeners can be sure they have the right type of marigolds.

As I vaguely recall, the action of nematode suppression in marigolds extends to about a meter, or three feet in diameter, so I make sure that I have at least one planted every yard or so, staggered throughout the beds.

Tagetes patula, French marigold
French marigold in my garden

Medicinal Uses

Because of its rich components of chemical constituents, French marigolds have a number of traditional medicinal and cosmetic uses, many of which could translate well today.

A 2016 paper suggests that the blossoms, containing the flavonoids patuletin, quercetagetin, and quercetin, help protect against oxidative stress and offer anticancer properties when used in an infusion (i.e., tea).

I’m not a doctor and don’t intend to play one on the internet, so make sure you do all your due diligence before compounding your own herbal medicinals. Some are harmless, some are effective, and some can prove quite dangerous.  

It’s important to remember that there are two different species of flowers we call “marigold,” with French marigold being “Tagetes” variety. There is also Calendula officinalis, also known as “Pot marigold,” which is used extensively in cosmetics.

Fortunately, while the common name is very similar, the two plants don’t resemble each other and have very different appearances.

Pot marigold, Calendula officinalis
Calendula officinalis , or “Pot Marigold”

Beauty and Function

Tagetes patula, French marigolds, offer a host of garden benefits. However, perhaps their most important quality is the beauty they add to the garden. Even if you’re immune to the superficial beauty of flowers, any dedicated gardener has to admit that the practical beauty of an increase in bee visitors is a spectacle to behold.

Posted on

Florida Gardening: What to Plant in October

what to plant in october

The rest of the country seems to be getting ready for winter. They’re unpacking their woolies and scarves and swooning over pumpkin spice lattes. But here in Florida, we’re still sweltering in the high 80s. And with Florida’s upside-down gardening schedule, you may be wondering what to plant in October.

Other Southern garden regions have the same dilemma. If you garden in New Orleans, Biloxi, or along coastal Texas, you know the gardening season has just really gotten underway.

That doesn’t mean it won’t get cold along the Gulf. It definitely will. But it usually doesn’t get cold enough to matter until late December or early January.

Last year threw us some curveballs. Temperatures dropped in Central Florida in late November, and it got REALLY cold in early December. Cold enough to matter. Cold enough to cover.

So, right now, in early October, the race is on to get roots in the ground and vegetables well established enough to survive any surprise cold snaps.

Knowing What to Plant in October

I’ve drawn data from several sources, especially the University of UF/IFAS website. But I’ve also been collecting data from other sources, including experienced gardeners and nurseries that include expanded selections far outside the limited one provided by UF.

There exists a plethora of exotic edibles from far-flung regions with the same climate and similar conditions. Why not take advantage of those resources?

Other regions that seem to mirror our unique gardening environment include parts of Southeast Asia, Central America, South America, and coastal areas in Australia.

I’ve drawn planting suggestions from gardeners and farmers in these regions as well, for those like me who like to experiment with new and interesting vegetable varieties.

North Florida

October begins the limits on planting out in North Florida, unless you have a greenhouse or a nurturing microclimate on the coast and a south-facing wall.

Cold-weather vegetables should do well, but be prepared to cover anything tender you planted out last month:

  • arugula
  • Asian cabbages
  • beets
  • broad beans
  • broccoli
  • cabbage
  • carrots
  • cauliflower
  • celery
  • chicory
  • chives
  • collards
  • English peas
  • fennel
  • French tarragon
  • green onions
  • kale
  • kohlrabi
  • lettuce
  • mizuna
  • mustard onion
  • sets
  • parsley
  • radish
  • rapini
  • rutabaga
  • salsify
  • shallots
  • spinach
  • strawberry crowns
  • turnips

Central Florida

The weather is still fine in Central Florida, and still warm enough to sneak in a few warm-season crops like tomatoes, summer squash, and melons.

Thankfully, it also gets cool enough for those plants to begin fruiting, as well. It’s also cool enough to consider planting herbs, peas, and lettuces.

  • arugula
  • Asian cabbages
  • beans, bush
  • beans, climbing
  • beets
  • broad beans
  • broccoli
  • cabbage
  • carrots
  • cauliflower
  • celery
  • chives
  • collards
  • cucumbers
  • daikon
  • English peas
  • fennel
  • French tarragon
  • green onions
  • horseradish crowns
  • kale
  • kohlrabi
  • lettuce
  • mizuna
  • mustard
  • onion sets
  • parsley
  • potatoes
  • pumpkins
  • radish
  • rapini
  • rosemary
  • salsify
  • shallots
  • snap peas
  • snow peas
  • spinach
  • strawberry crowns
  • summer squash
  • thyme
  • tomatoes
  • turnips
  • watermelons

South Florida

Summer vegetables are still a go-to for October gardening in South Florida. With few, if any, frosts, risk-taking gardeners can continue to plant out nearly anything their heart desires.

It’s still too warm for cold-loving plants like snap peas and some brassicas, but you can start these undercover to plant out next month if you like.

  • Asian cabbages
  • beans, climbing
  • beets
  • broccoli
  • Brussels sprouts
  • cabbage
  • carrots
  • cauliflower
  • celery
  • chili peppers
  • chives
  • collards
  • corn
  • cucumbers
  • eggplant
  • English peas
  • fennel
  • green onions
  • kale
  • kohlrabi
  • leeks
  • lettuce
  • mizuna
  • mustard
  • onion sets
  • parsley
  • peppers
  • potatoes
  • radish
  • rapini
  • rosemary
  • sage
  • shallots
  • southern peas
  • spinach
  • strawberry crowns
  • summer squash
  • thyme
  • tomatoes
  • tropical spinach
  • turnips

What to Plant in Florida Month-by-Month

For planning ahead for the Florida growing schedule, please check out my Florida Gardening Planner on Amazon. It provides a month-by-month list of edibles to plant out for every month of the year for the three regions of Florida (Zones 8, 9, 10), plus handy planning and garden design tools to help you move step by step for a productive gardening year.

Posted on 1 Comment

Adventures in Soil Blocking

soil blocking

You’ve seen them on YouTube, right? All those market gardeners when their beaucoup cool soil blockers? You may have even done some online shopping to see if soil blocking is right for you.

But boy, are those soil blockers expensive! Those farmer dudes must be raking it in!

(Of course, they’re not!)

But in all seriousness, a heavy-duty, reliable tool for production is going to cost you. I’ve been eying the complete Ladbrooke soil blocking system for a few years now.

Ladbrooke Authentic Soil Block Maker 5-Pc. Essentials Nesting System Includes Mini 4, Micro 20,…
  • The Genuine Ladbrooke Essentials 5-pc soil blocking set provides the starting blocks of the…

Looks amazing, right?

You get the mini cubes, micro cubes, and the dibbler all in one handy kit.

Or maybe the “Master Grower” set, with the 4-inch blocker, for, you know, pumpkins and stuff.

Ladbrooke Authentic Soil Block Maker – 6-Pc. Master Grower Nesting System Includes Maxi, Mini 4,…
  • Look for the Ladbrooke logo on the handles of the Mini 4 and Micro 20. The Master Grower is our full set that includes all the pieces for the well known “nesting” system of soil blocking. The Micro 20 has a new stronger, smoother design.

Truth is, I couldn’t really justify the cost.

Yes, it’s the premium brand for soil blockers, and they’re used across the world by professionals.

But I couldn’t bring myself to pay for them.

So, I did the next best thing (sort of) and got a cheap plastic one from Fiskars.

After all, Fiskers is a good brand, right? They’re my go-to for scissors and secateurs. Surely, they can produce an awesome soil blocker, right?

First, I mixed up some soil blocking mix. Soil blocks rely on a high fiber content to keep them together, so they require a large amount of coconut coir (or peat moss, if you use it).

Some of the classic recipes for soil block mix include four parts coir to two parts perlite to one part compost. Plus, a whole host of amendments.

This is kind of long, but you can watch my personal hero, Jim Kovaleski, mix up some beauties:

My own attempts gave me some trouble. Was it wet enough? Would it stick? Would they crumble?

My awkward attempts started with me shoving the soil mix INTO the blocker. Nothing like that smooth, super-efficient ka-chunk that I see on the You-Tubes.

And this is what I got.

The Downside of Soil Blocking

Yeah, they worked. They held together. Sort of.

But do you see that I get only 40 modules in a tray with the Fiskars, instead of the 72 I would have gotten with modules?

I’ll try this thing a few more times, probably for pumpkins this fall.

But I have to admit, I’m not in love with the inefficient waste of space with this “spherical” design. I could have just used Jesse Frost’s hand-made soil balls and saved myself the money.

The soil doesn’t eject from the device very smoothly, particularly with the mini-block insert.

And honestly, the finished soil blocks will not stand up if your dog stomps through them in the middle of the night.

YMMV

Fiskars Soil Block Maker for Garden Seeds with Natural Air Pruning, Eco Friendly Soil Blocking…
  • Fiskars Soil Block Maker helps you grow healthier seedlings by encouraging stronger root systems through natural air pruning

You can find the Fiskars soil block maker on Amazon if you’re interested in giving it a shot. If you don’t seed like a maniac, as I do, it may work for you.

Posted on

Freedom From the Big Box: Making Your Own Potting Soil

making your own potting soil

Have you ever thought about making your own potting soil? That stuff at the big box stores is expensive, and you may not even know what’s in it.

Lately, there is a lot of controversy surrounding the use of peat in soil mixes. This is especially true in the UK, where there are so many gardeners and so little peatland. They’ll even be outlawing it by 2024.

Peat isn’t sustainable — not really. It takes thousands of years to replace. Here in the U.S., we get most of our peat from Canada, where we can assume that there is much more to be had. But it doesn’t grow back any faster in Canada.

While it seems disasterous that gardeners might someday run out of peatmoss, the really concern is that peat bogs sequester more of the earth’s carbon than any other type of vegetation. Every time a peat bog is drained and backhoe rips up a layer of peat, tonnes of carbon are released into the atmosphere.

And it’s not a trivial amount. According to the International Union for Conservation of Nature (IUCN), peat bog harvesting results in the release of about 1.3 gigatonnes of CO2 every year. This equals approximately 5.6 percent of global CO2 emissions overall. That’s just flabbergasting.

Save Money AND the Planet by Making Your Own Potting Soil

With the UK banning peat in potting soil, manufacturers are rushing to create replacement mixes. You’ll find many brands overseas, but here in the U.S., they’re few and far between. They’re also expensive.

It may seem overwhelming to make your own potting soil, but it’s so worthwhile once you get a system in place. I can blame soil-blocking and a busted air conditioner for my foray into homemade potting soil.

I like the idea of using soil blocks. Mainly, because my seed trays were falling apart. I literally was using duct tape to hold them together. Soil blocking requires a special seed starting mix, so I was already armed with most of the ingredients for potting soil.

One of the key ingredients for potting soil is compost. That’s one that isn’t so quick to come up with — not homemade compost, anyway. I’ve been focusing a lot on soil health more than production this last year. So, I have finally managed to produce a somewhat adequate supply of homemade compost. (I also had a fresh bag of Black Kow to fall back on, just in case.)

Spare Covid masks make mixing potting soil safer too!

Soil Blocking Mix

For soil blocking (more on that another time), I started with a basic mix of:

4 parts coconut coir

2 parts perlite

1 part compost

1 cup Epsoma Bio-Tone Starter Plus organic plant food per cubic yard of mix

Soil blocking relies heavily on the fibrous nature of the coir (or peat) to maintain integrity, hence the high percentage in this mix. I went with the Epsoma Bio-Tone because I didn’t want to invest heavily in bags and bags of blood meal, green sand, kelp meal, etc., that most soil block mixes prescribe.

I don’t really have room to store them, and I didn’t want to carry them all, either.

Seed Starting Mix

In seed trays, you don’t need such a heavy hand with the coconut coir. I modified the soil blocking mix to use as a seed starter:

4 parts coconut coir

3 parts perlite

2 parts compost

1 cup Epsoma Bio-Tone Starter Plus organic plant food per cubic yard of mix

Upgrade to Potting Soil

The best part of making your own potting soil is that once you have your seed-starter mix, you don’t have to start from scratch. Just take your seed starting mix and add more compost and Epsoma.

4 parts seed starting mix

1 part compost

1 cup Epsoma per cubic yard of potting soil mix

These formulas all work for Making Your Own Potting Soil for vegetable plants, flowers, foliage houseplants, and landscaping plants. The mix provides an excellent structure, microbiology, and some nutrition.

You can add liquid food for specific stages of growth without worrying about burning your plants.

making your own potting soil delivers great results
Beautiful Homemade Potting Soil

Making Your Own Potting Soil is a Form of Freedom

One of my biggest gardening goals in the last two years is being able to break ties with the big box stores for most of my garden needs. While we have lived in Florida for several decades, the idea of “buying dirt” strikes something in my Midwestern (and frugal) soul.

I like to source as much of my garden inputs as I possibly can. (Just wait, I’ll be re-learning how to fish sometime this year, because when you live within walking distance of the Gulf, you have no excuse for buying fish emulsion).

Making my own potting soil feels like I’m that much closer to self-sufficiency.