The end of summer often means we get a lot more than we bargained for, which isn’t a bad thing unless you don’t know what to do with it all. Learning how to preserve a summer glut is one of the key homesteading skills you learn early. Dehydrated eggplant is an excellent pantry staple and easy to use.
For me, the summer glut turned out to be eggplant last year. We were buried in the stuff. Now, I like eggplant, but it wasn’t long before we got a bit sick of eating the stuff.
Time to pull out the dehydrator!
We’ve got a Nesco American Harvester that has to be 30 years old if it’s a day. Works fabulous. I got bags and bags of dried eggplant that still remain good on the shelf whenever I need them.
Low Carb Eggplant Lasagna
Best of all, I’ve been able to integrate them into a keto / low carb menu all year. My favorite way to use eggplant is as a substitute for pasta in lasagna. Best of all, it’s so easy, you barely need a recipe.
Ingredients
Dehydrated eggplant slices
1 lb ground beef or pork
1 egg
1 quart marinara / spaghetti sauce
1 8-ounce carton of ricotta cheese
1 16-ounce bag of mozzarella cheese
1/4 cup parmesean cheese
salt, pepper, oregano, basil, marjoram
Take your dehydrated eggplant planks and soak them in boiling water for 20 to 30 minutes. If you prefer more tender eggplant, you can boil them for 5 to 8 minutes.
Drain completely and allow to cool.
Filling
While your eggplant is soaking or cooling, brown 1 lb of lean ground beef. You can also use ground Italian sausage or a combination of the two.
Once cooked, drain the beef well, and add to 1 quart of your favorite marinara sauce. This is one of my favorites, as it’s incredibly simple and delicious.
Mix one 8-ounce carton of ricotta cheese with 1/4-cup parmesan cheese and one egg. Season with salt, pepper, basil, oregano, and marjoram to taste. Mix well.
Layering
Spoon a layer of the sauce into a 9×13 baking pan, then add a layer of eggplant. Top with a layer of the cheese mixture, then a layer of shredded mozzarella.
Alternate the layers, finishing with a layer of shredded mozzereall.
Bake at 350°F for 45 minutes, until the top cheese layer is nicely browned.
No Dehydrator?
If you don’t have a dehydrator and aren’t ready to invest in one, check out this video on how to dry vegetables without one — using no electricity at all.
The Dirtpatchheaven YouTube channel has some great content on homesteading and gardening, and it’s one of my go-to channels. Check it and and subscribe if you’re interested in practical, creative, old-school homesteading skills.
Make-Ahead Lasagna
This is also an easy recipe for making ahead and meal planning. If you use a Pyrex dish, you can just wrap it after baking once it has cooled. Then, freeze the entire pan.
Defrost in the fridge or microwave and then reheat whenever you like.
Dehydrated eggplant is a super pantry staple for keto / low carb diets and it’s a great way to store and use a summer glut.
September heralds the beginning of the main gardening season in the South — at least for Florida. The temperature finally tapers off enough that cool-weather plants can survive the heat of midday. And bonus points: it’s still fine enough for warm-season crops. Fall gardening is the prime reason Floridians can garden at all.
What to Plant in September in the Southern Garden
If you’re wondering what to plant this September, don’t tarry when it comes to sowing summer vegetables. It’s still not too late to start tomatoes, eggplant, summer squashes, and tropical spinaches, like Okinawa spinach.
Depending on your zone, if you can get these warm-season vegetables well established before your first cold snap, you can usually overwinter them by covering them whenever nights drop below 35°F.
With night temperatures in the 70s, you can also start planting those brassicas, which is a relief. Some, like broccoli and cauliflower, take quite a long time to grow, so the earlier you start them, the better.
I’ve found a lot of success with the Piracicaba broccoli, which is a heat-tolerant, non-heading variety. I’ve grown it as late as May, here in 10a, and unless you really feel the need for big broccoli heads, the flavor and quality are superb. Best of all, these guys really deliver! They can take some time to start producing, but once they do, you’ll get tiny little broccoli heads for months and months and months.
Speaking of Strawberries
Halfway through September is when you should decide whether or not to grow strawberries this year. Summer has not been kind to last spring’s plants, and I only have myself to blame.
I’m normally a lot more attendant on helping my strawberry plants get through the Florida summer. I use organic fungicides and relocate them to keep them from scorching. But this year, with the addition of the nursery and the chickens, they fell to the bottom of the priority list.
Many nurseries will have bare roots on sale, and some will even have starter plants as well. Check back later in October, as I’m sure I’ll have some on offer this year. And if I don’t, there are many local nurseries near you that can assist.
Grow ALL the Veg!
A quick list of veggies you can start in September includes cabbages, both the Asian cabbages like bok choi and Napa, and the boring old round-head types.
You can also start some of the sturdier leafy greens, like mustards, arugula, kale, and chard. Depending on your zone and microclimate, it may still be a tad too hot for lettuces, except for those bred specifically for hot climates, like the Hawai’ian Manoa and Israeli Jericho Romaine.
It may be worth the risk if your family eats a lot of lettuce, as mine does. Especially if you do loose-leaf types with a cut-and-come-again approach, including succession sowing.
Fall Gardening in Florida Offers So Much
Along with both cool and warm-season vegetables, the fall gardening season is also an amazing time to plant flowers.
Why flowers?
They’re pretty, they add color, they offer charm and beauty.
They’re also a critical boost to local wildlife, likes bees and butterflies, wasps and other beneficial insects.
You would think that August would be the worst month of the year to do any gardening, especially in Florida.
It’s hot, it’s humid, the daily rains pound baby plants, and the heat index regularly hits the three digits.
Weirdly, ironically, and in a typical Floridian manner, August is one of the best months of the year to get started on your fall garden.
For the most part, I defer to the UF/IFAS Gardening Calendar, but I also find it kind of lacking. While the conservative approach would be to use this as my gardening bible, they sometimes miss a few opportunities for some of the more unusual varieties.
But you know, that’s why they’re there – to provide a slow, safe approach that any gardening newbie will find useful and accessible. It’s a fabulous resource and they go far out of their way to make Florida gardening rewarding.
bell peppers and sweet peppers
Rebel Without a Pause
I don’t have a lot of land to experiment with – it’s just a 1/10th acre suburban plot. But I do have a lot of curiosity to satisfy. And a pack of seeds is only $4 at the most. So, why not push the zone and play with the calendar?
I also have to say that I live in a somewhat nebulous space, zone-wise. Clearly, around Tampa Bay, I’m in Central Florida. However, because I live on the Gulf Coast (within walking distance), I’m in a South Florida USDA zone.
Combined with microclimates, south-facing walls, shade cloth, overhead canopy trees, and the usual independent Floridian spirit, I’ll admit that I occasionally thumb my nose at institutional planting calendars.
And let’s not even talk about the planting maps on the back of seed packets.
Seed packets lie.
August is Time to Sow Seeds
Regardless of my personal desire to buck the system, even the IFAS admits that August is a good time to start sowing seeds for the fall garden. Depending on where you live in the state and the conditions in your garden, it’s time to start everything from tomatoes and calabaza squash to broccoli and cabbages.
I’ve been looking for the most heat-tolerant and disease-resistant varieties in the last couple of years and have found a few winners. In fact, even though I’m in 10A, I’ve started my broccoli already this year using the Piracicaba seed from Whitwam Organics.
I even had some sprouting in June, until my chickens decided to escape their coop and grab some lunch!
These producers really stand up to the heat. They do need some time to get going, however, so I went ahead and started seed cells undercover to give them a head start. Once these plants start producing loose brocolette heads, it’s amazing how much they deliver.
Heat-resistant Everglades tomatoes are already growing big and strong, and now that I have my official Florida nursery registration, I’m hoping to share these with others in my Etsy shop or sell locally at farmer’s markets or Facebook marketplace. I’ve planted several out already, but I want to save room for other varieties.
Other tomato varieties in the pipeline include vining cherry types like Sweeties and Gardener’s Delight. Larger varieties started include Floradade and Marglobes. Both are determinant varieties recommended for Florida growing.
I tend to prefer determinants because they don’t need a trellis. Plus, I’m short. Most of all, I often get a more satisfying yield when they produce all their fruit in a few weeks. Indeterminants seem to struggle on forever, giving me false hope when I need to just face the facts, pull the plants, and compost the remains.
On the eggplant front, I’ve got Black Beauty, white Chinese Bride, and Japan Mizuno types in seed trays. I’ve had a lot of luck with eggplant in my location and got a serious glut of Black Beauty last year.
What to Plant Where
In North Florida, you can start cool-season crops, like broccoli, Brussels sprouts, cauliflower, and both traditional and Asian cabbages. You can also still start warm-season vegetables, like tomatoes, eggplant, and squashes.
In Central Florida, it’s time to sow warm-season vegetables only, like tomatoes, eggplant, peppers, and summer and winter squash. You can sow cool-season veg in starter trays in September.
South Floridians can start and plant out heat-loving edibles like tomatoes, tomatillos, eggplant, okra, pineapples, and sweet potatoes. September is better for cool-season starts.
Or, if you’re like me, you do you and start what you think will thrive. But hold back some seed just in case.
Weather to Direct Sow
Because August seems to be the worst for me when it comes to summer storms, I use module trays and start my vegetables undercover rather than direct sowing. Coastal living comes with some destructive weather, so I error on the side of caution. Using seed trays lets me keep seeds and seedlings protected until the weather calms down or the plants are big enough to handle the downfall.
It does mean that I spend a lot of time carrying seed trays back and forth, but I’ve seen so many early starts drowned out that it’s worth it. About two weeks ago, we got 5 inches of rain in just a few hours, and that’s just too much for my little seedlings to take.
Aside from bush and climbing beans, I prefer using starter trays. YMMV.
Gardening Goals for Fall 2021
When the weather cools down, I’ll be experimenting with Charles Dowding’s multi-sow technique for root veg. The technique advocates planting three or four turnips, rutabagas, or radishes in one cell. According to the no-dig guru, they will transplant easily and grow just fine. The goal is to twist out the largest of the clump, leaving room for the remaining roots to develop further. I’m looking forward to seeing if it really works.
August always leaves me feeling conflicted. It’s just still too stinking hot for that back-to-school, autumnal mood required. Why do they start kids in school in August? Why should we start sowing vegetables in August? The heat index of 107°F yesterday does not put me in the mood for school uniforms and cauliflower soup. So, sometimes it’s a struggle to stay on track.
But like most gardeners, I’ve got plants… I mean plans… BIG plans. Gardening plans.
What are you growing this fall in your southern garden?
Recent decades have seen an explosion in new discoveries about soil health and its impact on agriculture. On a smaller scale, home gardeners are learning how to better nurture the microbiology in their gardens for better yields. In most North American gardens, that means keeping the soil covered during fallow times. But here in the South, when gardening is a year-round affair, your best bet is to take advantage of summer cover crops.
Along the Gulf Coast, in areas like Houston, New Orleans, and all throughout Florida, winter is an excellent time for farming and gardening. Although the rainfall may be a bit scant, the pest and disease pressure drops so dramatically that it’s worth it to irrigate.
This means that many Southern gardeners may miss a chance to sow important cover crops to restore organic matter to the soil. In other areas of the country, winter is the time for keeping plots fallow or sowing cover crops like hairy vetch, sudan grass, or clover. No one wants to leave a perfectly good garden bed fallow during its most productive season. That’s where summer cover crops come in.
Summer Cover Crops Are Effortless
In the South, summer is a great time to set your garden beds to fallow mode. While you may not be able to plant cool-season cover crops like winter rye, there are great alternatives for our warmer, wetter climates. As well as restoring structure to your soil and feeding the microbiology, it’s a good time to get out of the sun and avoid heatstroke. Summer cover crops don’t need weeding or watering.
Grab a mojito or a sweet iced tea, and let the bees and bugs have their time in the sun.
Finally Got That Round Tuit
In a previous post, I wrote that I would show you how I put a garden bed to rest for the summer. Although I am running pretty late this year, I did finally start to put the beds to, well, bed.
The first step was to put The Girls to work, digging up the weeds, aerating the soil, eating some bugs, and perhaps even leaving a few nitrogen bombs behind.
Adding Amendments
After letting the chickens loose a few times on the target bed, I add a few soil conditioners and some organic matter to the bed. The first bed is particularly deficient, because it’s a new area on top of what can only be called sand, rather than soil.
Because it will be sitting fallow for about two months, I won’t be digging it in. I’m going full Lasagna mode on this one. I normally prefer a no-dig approach to vegetable gardening for several reasons.
The first is because our barren, sandy Florida soil is already sparse with worms and other organisms that I don’t want to risk them by cutting through the turf and topsoil.
The second is that our heat index is usually around 110°F and our humidity around 90%, so the less I have to do outdoors, the better.
Alfalfa Meal
I have recently discovered the many benefits of adding alfalfa to the soil. It makes a wonderful fertilizing tea. A few scoops in both potting soil or garden beds provides slow-release nutrients.
Studies have found it to be just as effective as fish emulsion and other organic fertilizers. The advantage is that alfalfa meal is a whole lot cheaper and smells a great deal better.
Alfalfa also contains a chemical called triacontanol, which acts as a growth stimulant in other plants. Studies testing triacontanol on plants found that it shortened plant dormancy and increased trunk size and bud development by 100%, and leaf and foliage production by over 200%.
This is one of my fallow beds with the alfalfa pellets.
I use pelleted alfalfa, sold for cattle and horses, at my local feed store. I like the Standlee brand in either organic or non-organic. The upside is that we can also feed it to our rabbits. For smaller areas and container plants, Down to Earth and Espomo both deliver quality organic products.
Do check around and find a feed store near you to source alfalfa meal or pellets for gardening. You’ll spend half as much and most likely you’ll be supporting a small business in your community.
Kitty Litter
Yes, kitty litter — basically, clay.
If you live in an area with heavy, cloying, clay soil, you definitely don’t want to add more. However, I live about a mile off Tampa Bay, and our sandy soil drains quickly. Many thirsty plants can’t drink deep enough before it filters through.
I started adding plain, scentless kitty litter to the soil last spring and the results were truly remarkable. I found that I didn’t have to water every single day just to keep things from wilting.
I also added a small dose of Epsoma Bio-Tone Starter. While there is plenty of organic matter going into this bed, Bio-Tone contains beneficial fungi and bacteria to assist in plant growth.
Because it’s the rainy season, and because bacteria and fungi grow pretty prolifically on their own in this climate, I just added a small bit to innoculate the soil and get it started.
Compost
Over the last three years, composting has become something of a sacred mission in our house. Family members come to me with food scraps and ask me where to place their offerings.
Then, we got a paper shredder! Saturday nights are a blast now!
Composting is the single most effective way to feed your garden and reduce your carbon footprint.
My Summer Cover Crops
Yep, a cheap bag of black-eyed peas from Publix!
Last year, I planted Cowpeas that I got from the garden center in a Ferry Morris or Burpee package. They cost me about $5 and I only had enough for a small area of my garden. They grew well. The aphids LOVED them. I did not.
So, this year, I spent $1.50 on a bag of black-eyed peas from the grocery store. That way, I won’t have to feel guilty if don’t eat any of them.
More Compost, Plus Biochar
There is no such thing as too much compost.
This layer of compost also includes some biochar I made that has been charging for about two months.
Hay There!
I watered everything in well and dropped a light covering of hay to keep the soil cool, retain moisture, and try to fool the squirrels.
There has been a lot of controversy about the use of hay and straw in the garden. More specifically, gardeners are finding that some of the hay they’re sourcing has been sprayed with the herbicide Grazon or aminopyralid.
Apparently, there is no killing this stuff! If you put it on your garden as a mulch, it will kill everything you grow there for years.
If you buy manure from horses or cows that have eaten hay sprayed with aminopyralid, it too will kill everything you use it on for years.
I’ve been lucky so far. But, I’ve also been careful.
According to No-Dig Guru, Charles Dowding, you can test for this contaminant in any hay, straw, manure, or compost you buy before destroying your garden:
Time to Chill
From now until I plant out starts in September, I don’t have to think about that garden bed. No watering, no weeding, no cares, no worries. I’ve finally learned to stop worrying and love the summer.
According to experts at the University of Florida, Institute of Food and Agricultural Sciences, other good summer cover crops for Florida and other Gulf Coast areas include legumes like Indian jointvetch, cowpeas, hairy indigo, sun hemp, and velvet beans. You can also use grain plants like sorghum and sudangrass, if you’re also looking for a huge amount of biomass at the end.
Whichever way you choose to chill this summer, feel free to give your garden a summer vacation without guilt. After all, unlike most of the U.S., we can garden all the way through the other months of the year.
Nature has such a sense of humor! In my last post, I said (confidently) not to bother with a vegetable garden in June in any part of Florida. It’s too hot, too humid… too buggy! So, I had no idea what I could advise to plant in June in Florida, since I’ve found it to be a futile endeavor.
So, what else should happen than to be blessed with a surprise crop of oncoming cucumbers — a vegetable, I must add, that I have rarely grown successfully.
This variety is a complete beast! They’re called Sweet Success, and as long as you can trellis them, they will certainly perform.
With that admission, it’s also important to note that I didn’t plant them in June. I planted this in late March and this is their second cropping after suffering a dry spell.
You may have quite a few fruits and vegetables to harvest in June if you’ve taken care of your garden or simply been lucky. But there are still very few things to plant out.
It may be that you’re finally reaping the rewards of planting three months ago — or even three years. Our bananas are getting fat, and our Barbados cherry tree is dripping with fruit.
But if you don’t have a harvest, is there anything you can plant in June in Florida?
Some Unfamiliar Names
In almost all zones in Florida, you can plant a few exotic varieties of fruits and vegetables, even in the high heat of summer. Look for Southeast Asian and Central American edible plants to expand the variety you grow and eat.
I’ve tried quite a few of them, and if I’m completely honest, there are many I don’t like. There are also quite a few that I don’t like enough to fuss over during days when the heat index is 105°F and the humidity is 98%.
Fruits and Vegetables to Plant in June in Florida
One of the reasons I don’t think about planting some of the unfamiliar vegetables I do like in the summer is because I often plant them in late spring. However, there are a few you can start in June, and even July.
And the advantage is that our summer rainy season should help get them started. So, you won’t have to stand outside in our dry April, coaxing them to life with a garden hose.
Yard Long Beans
These are one of my favorites to grow in the summer heat. They start out a bit slow, which is why I plant them in April. However, you can pretty much plant them any time of year in Central or South Florida.
Note that you WILL need a trellis and you will need one a lot taller than you could possibly imagine. You’ll be rewarded with a constant flow of delicious meaty-textured beans until December for your trouble.
Sweet Potatoes
This is another one that I generally plant long before June, so I never think of it as a “summer vegetable.” Especially considering that it takes four to five months to harvest. I usually grow my own slips from store-bought organic varieties. It takes about two to three months to get healthy slips.
I usually plant to get slips started in late winter so I can start planting in March. This way, I can plant out the slips in succession, which gives me a harvest of sweet potatoes starting in July thorugh December.
However, if you can get your hands on some slips, you still have time to plant them out for harvest in November or December. The summer heat won’t faze them if you get regular rainfall.
This Caribbean veggie is remiscient of pumpkin, but can take the heat. This is the first summer I’m growing it, so the jury is still out. I planted mine out in May, but my sources tell me you can still plant it in June. It looks delicious, and I sure hope mine proves to be.
Alternatives to Plant in June in Florida
June might also be a great time to plant something other than edibles. Add some important companion plants to your garden, or draw in pollinators and other beneficial insects with herbs and flowers.
Marigolds
Tagetes patula, or French marigolds (which are actually Mexican marigolds) work in several ways to improve your garden. They’re not just cheerful and easy to grow.
Marigolds have been known to help deter root knot nematodes — something most Florida gardeners battle regularly. Planting a swath of French marigolds in your future fall tomato bed is a smart idea for summer.
They also attract bees, which is usually a good enough reason for me.
The skies over the gardens of Florida are filled with happy, frisky Monarch butterflies, looking to make more happy, frisky Monarch butterflies. What they’re looking for are milkweed plants, the singular host of their caterpillar.
There’s a lot of controversy about the use of Tropical Milkweed, since it isn’t native to the U.S., but is to Mexico and Central America. One of the key issues is that it tends to increase the chance of them getting a parasite called “OE” (Ophryocystis elektroscirrha).
This parasite is not a good thing and can result in deformed wings in adult butterflies that is nothing less the fatal. Tropical milkweed, because it doesn’t die back here in Florida, can increase the chance of them contracting this condition.
The problem is compounded by the fact that much of Central Florida and all of South Florida enjoys a year-round population of Monarchs that do not migrate to Mexico with their fellow butterflies. It’s warm enough for them to winter over here.
The advantage to Tropical Milkweed (Asclepias Curassavica) is that it germinates well and grows quickly in our subtropical climate. This means you’ll have plenty of monarch food in time for hungry catepillars. Other milkweed species — even Florida native milkweed — can be difficult to germinate and grow too slow for the current year’s brood.
The solution is very simple — cut back your Tropical milkweed to about 2 inches tall in October or November. This will cause the die-off of the parasites and reduce the infection. Also, make sure you have other nectar flowers on hand for them over winter.
But Tropical Milkweed is certainly a beneficial flower to plant in June in Florida and will bring color to your garden.
The Florida Garden Summer Lull
The gardening bug can often turn into an obsession. If you’re relatively new to gardening, you may feel compelled to keep planting through the summer. The COVID-19 lockdowns and subsequent panic over food supplies has meant a lot of new backyard growers in Florida, the U.S., and world-wide.
If you’re a long-time gardener but new to the state, you may find it weird that hardly anyone is planting corn and tomatoes and taking advantage of all this sunshine. That’s because we’ve learned to avoid heat exhaustion and sun stroke.
You may feel like you’re missing an opportunity if you don’t find something you can plant in June in Florida. There are a few things to keep you busy, but preparing for the main even in fall may be more productive.
See all the grass you’re cutting? Compost it! Rest the soil under some cooling mulch. Sharpen your tools, order your vegetable seeds, order your flower seeds, and plan your next season. If it helps, you can even start sowing starter tomatoes next month.
It seems like everyone is using raised beds these days, and they’re more popular with gardeners than ever. Experts from all styles of gardening recommend them — from old-school horticulturists to chop and drop sustainability advocates. One place you’ll notice a big difference in opinion, however, is when it comes on which is the best soil for raised beds.
You’ll find big bags of garden soil at your
local home center or big box store. And if you’re willing to spend a small
fortune, you could definitely blow the budget filling up those raised beds. But
depending on the type of raised bed you’re using and what you’re planning to
grow, you may want to do a little planning first. Right?
So, what types of raised beds do gardeners
use?
Raised Beds Types
A “raised bed” basically means lifting your
soil above ground level. It’s one way of prepping your garden for planting. But
it’s not until you decide which kind you’re going to use before you even need
to work about which is the best soil for raised beds.
Some critical factors to consider before
deciding on what type are your budget, your physical endurance, and any time constraints.
Double-dug Raised Garden Bed
The most basic type of raised bed isn’t
raised very high at all. A double-dug raised bed only results in a few inches
of height above the normal ground level of your garden.
In double-digging, you dig the soil twice over, while loosening the deeper layers with a garden fork. While digging, you can work in extra organic matter, like compost or manure. With enough aeration and organic matter, you’ll increase the volume of soil in the garden bed, raising it slightly.
You want to loosen the soil up to 2 feet deep, so that fast-growing vegetables and fruit plants aren’t hindered by packed earth. Double-digging is hard work, but it will give you lighter and better-aerated soil for your plants. It also helps raise the planting area for better drainage.
This is the form of raised bed I used most
often, mainly because it’s so economical. First of all, you don’t need to
purchase lumber to surround the bed when it’s only 6 or so inches high.
Secondly, if you make your own compost and other soil amendments, you won’t
have to purchase the best soil for raised beds. You’ll be making it – right at
the site you need it. \
The best part of double-digging is that you only
need to do it once. In fact, I recommend that after you’ve initially prepared
your garden bed, you go no-till.
Framed Raised Garden Bed
You created framed raised garden beds directly
onto the ground with no barrier between the planting area and the ground soil.
This allows for complete drainage and offers access to microbes and worms.
More gardening experts are focusing on soil
quality these days, which means creating a healthy ecosystem with the right
fungi and bacteria for plant health. And the ones that do the best work for you
are those found in your own backyard.
Most gardeners build a framed raised bed with
wood, cement block, or even sheet steel from 10 to 12 inches or so above ground
level.
While this can be expensive, it does offer
some protection for your plants. For one thing, they’re less likely to get
stomped on by careless children and enthusiastic dogs.
Before building your raised bed, make sure
you loosen the ground soil beneath it with that handy garden fork. This helps
improve drainage and breaks up the soil to allow plants to really dig in. For
extra protection from weeds, you can also line the bottom with many sheets of
newspaper or a sheet of cardboard. Don’t worry – the worms love it and it will
soon break down and improve your soil.
Once you build your frame, you’ll want to
find a good growing medium to fill it with. You can either buy the best soil
for raised beds or mix your own. The best type really depends on what you’re
planting in it.
Raised Container Bed
While not technically a “raised bed,” a lot
of gardeners like to use large containers and planters for their fruit and
vegetable plants. And you may see them listed as “raised beds” by the
manufacturer.
But note that the real difference between a
raised bed and a container is whether it has a bottom that isolates the plants
from the native soil.
Some gardeners like to use container raised
beds to lift the entire garden off the ground. This makes it easier to tend if
you have physical challenges. If you decide to go with a “planter” or any kind
of enclosed container, whether off the ground or on, make sure the bottom has
been punctured for plenty of drainage.
One caveat, however, with this type of garden
planter — you should fill it with the best soil for raised beds that you can
afford. Container soil needs to last several seasons, with very few amendments.
When they’re isolated in a container and can’t reach the soil below, your
plants receive very limited moisture and nutrients. So, make sure that you choose
a soil that isn’t too heavy, provides good drainage, and still holds moisture
and nutrients.
So, invest in a good mix and then add some
compost or slow-release fertilizer at the beginning of each season.
Specialty Raised Beds
If you do a bit more research, you’ll also
find a few specialty type raised garden beds you may want to try. Some of them
feature explicit instructions for the best type of soil for raised beds using these
designs. And in one interesting case, the design is part of what creates the
garden soil.
Square-Foot Gardening Raised Beds
Square-foot gardening has been around since
the early 1980s and has a lot of advocates. This method uses a simple raised
bed laid out in a grid. When you do a little research into this type of bed,
you’ll find that it calls for a very specific type of soil mix, and many
gardeners say it’s definitely the best soil for raised beds.
Hugelmound
“Hugelkultur” has gained popularity recently as
many home gardeners look for ways to work more sustainably. A hugelmound is a unique
way of creating optimal conditions for growing a wide range of plants in a
small space. Form a big, mounded garden plot, starting with logs and yard debris
in a shallow pit. Then add compost and soil.
You’ll get extra room to grow, and the best
part is that a hugelmound creates a variety of microclimates. So you can add
Meditterenan herbs to the top, where the drainage is best. For plants that like
their feet a bit damp, plant around the bottom of the mount.
Depending on how you orient your hugelmount,
you can add your sun-lovers on the south-facing side, or give them a little relief
in some shade by planting on the north side.
The logs help retain moisture in the soil,
and the yard debris will break down slowly, adding nutrients to your raised bed.
Don’t be surprised if your hugelmound starts to shrink after a year or two as
the organic matter is broken down by happy soil microbes.
Lasagna Raised Bed
Often called the “lazy gardener” method, “Lasagna”
raised beds are great for no-till, no-weeding maintenance. It’s also called sheet
mulching, and it’s simple and effective if you have the materials.
Start your lasagna raised bed directly on the
ground by adding a thick layer of cardboard. Then, add layers of yard waste,
fallen leaves, scraps from the kitchen, and compost. Lasagna fans say to layer
it up to a foot high.
Lasagna gardening is said to turn even desiccated,
exhausted soil into a rich planting area wit the best soil for raised beds.
The Best Soil for
Double-Dug Raised Garden Beds
If you decide to go with the double-dug
raised bed, you may want to have your soil tested first at your local county extension office. It can help you identify if you need
to make specific amendments to your soil, such as lime or pine mulch.
Your local extension office can offer an in-depth
test to see if you need to add particular macronutrients to your soil and if it
has any deficiencies.
Soil Amendments for Macros
Now that you know what you need to add before
getting your garden going, take a look at some excellent organic
amendments that you can mix
in to improve your harvest.
To improve the structure as well as the nutrient levels, add compost, composted manure, or worm castings to your raised beds. It will also help feed those vital microbes in the soil that work to keep your garden veggies healthy.
The Best Soil for Raised
Beds
For larger raised beds or containers, you’ll
need to buy or mix garden soil to fill them. As I mentioned before, there’s a
lot of disagreement about what makes the best soil. It really comes down to
what you’re trying to grow and where and when you’re trying to grow it.
That said, here are some excellent recommendations
from gardening gurus worth looking at:
The inventor of Square Foot Gardening, Mel
Bartholomew, has a special mix he recommends. It’s called “Mel’s Mix,” and the
formula is easy to remember.
Mel’s Mix
1 part vermiculite
1 part peat moss
1 part compost
If you don’t like using peat moss — and many
gardeners don’t — you can also use coconut coir.
Which Is Really the Best
Soil for Raised Beds?
There’s never a simple answer when it comes to gardening, since there are so many external factors that affect your results. If you’re double-digging, you may not need to buy or mix any soil at all. I never have – although I do garden in containers a lot.
The mix you choose may change depending on
what you grow. Do your vegetables need rich, fertile soil? Or do they need a
lighter mix with better drainage??
Root vegetables, on the other hand, prefer
something easier to spread out in, like Mel’s Mix.
Fast-growing and hungry vegetables like tomatoes, eggplant, and squash prefer a soil that holds moisture and is rich in nutrients. They may do better in the Joe Gardener or the Farmer’s Almanac mixes.
Leafy greens need plenty of nitrogen as soon as they’re planted. So, the best soil for raised beds for growing salad greens would include composted manure. Organic matter might take too long to break down to do them much good. So, the mix from Gardeners.com might be best.
Get Growing
Once you know what plants you’ll be growing, let their needs guide you to the best soil for raised beds. Make sure you understand their optimal conditions, and then choosing will be much simpler.
Light, loose, even sandy soil is great for carrots, rutabagas, turnips, and potatoes. Leafy greens like a soil that’s high in nitrogen. Fruiting vegetables like tomatoes, eggplant, and peppers like lots of nutrients and steady moisture.
Grow tomatoes, they said. It’ll be fun, they said. Growing tomatoes in Florida seems like it’d be a natural, right? After all, it’s sunny nearly all the time and rains quite a bit. Tomatoes love sunshine and water.
Florida is also the home of “Ruskin” tomatoes, named for a small rural town not far from where I live. They’re world-famous, yet somehow, I struggle at growing tomatoes in Florida.
It’s Not the Yield, It’s the Mileage
When I say that I struggle with tomatoes, what I mean is that they’re crazy-making. I get tomatoes. Boy, do I get tomatoes. In fact, last year I got so many tomatoes that my freezer is still filled with ones I failed to find some way to consume.
Here’s the thing: When you’re growing tomatoes in Florida, you can’t count on anything going to plan.
It’s a constant juggling act, filled with an exhausting spraying schedule and fertilizing plan. If you’re not standing in the blistering sun to cover them with shade cloth, you’re standing outside in the cold night air to cover them with fleece.
Between tying and pruning and feeding and spraying, it’s a
wonder that I find time to care for my family much less myself. It’s probably a
good thing that I waited until my children were grown before I seriously took
on growing tomatoes in Florida.
Best Time to Plant Tomatoes
One of the trickiest parts of growing tomatoes in Florida is getting the timing right. Experts say to plant them between August and September for a fall crop – but I’ve found that the heat destroys them when you plant that early. I’ve always ended up nursing them through fungal diseases and plagues of leaf-footed nymphs until a decent drop in the temperature finally saves the day.
At that point, even with the cooler nights that November
brings, they’re so ravaged that they don’t recover until well into January
before finally producing some tomatoes.
Starting seedlings for another round in November and December means you can plant them out in February – which is another time frame recommended by experts. Many say you should never plant them after February.
The problem is, even in Zone 10a, we still get the occasional cold snap in January and February. Even December can pose a risk. So, be prepared to cover your plants with fleece or some other cloth for those three months.
Growing Tomatoes in Containers
Until recently, I’ve always grown my tomatoes in containers. The nematode problem in Florida is near legendary. So, rather than risk it, I’ve purchased loads of rich potting soil and stuck to pots.
Last year, however, I risked planting Everglades tomatoes in the ground. These tiny berry tomatoes are well-known here in the South for producing in even the worst heat and humidity. They conquered a sunny spot in the backyard and took over until the leaf-footed nymphs invaded and sucked the juice out of each and every tiny tomato.
In a fit of pique, I pulled out every single plant to stop
the slaughter once and for all.
The Obvious Contempt of Tomatoes
But this is also where my love-hate relationship with tomatoes
truly becomes epic.
This fall, I dutifully planted several varieties into pots with fresh (and expensive) potting soil. I nurtured and fed them. I pruned them weekly. I watered them daily. I kept their little leaves dry and aired.
I planted four separate varieties in pots: Homestead, Beefsteak,
San Marzano, and Boomer Cherry.
The damn things became sick from the get-go. Some horrible
disease that twisted leaf and stem. Some plague that shriveled their meager
fruits. Some microbial bug that stunted their growth.
My pampered but sickly tomatoes
Meanwhile, thirty feet away, volunteers that escaped from
our compost tumblers grew lush, wild, tall, strong, and healthy. Without a hint
of fusarium wilt. Without a blemish.
Happy volunteers
And then to add insult to injury, the three “spare” Homestead seedlings I plunked into a bare spot in a neglected vegetable bed did the same.
The Everglades I planted out in my most productive beds also took off without a hitch and began producing first.
Not, of course, ANY of the ones I carefully planted in pots, exactly per extension office recommendations, and fussed over daily.
Volunteer cherry tomatoes
Renewed Dedication
Even with the wet winter we’ve been having, I became complacent. In the interest of keeping organic, I neglected my spraying schedule. After all, my plants were covered in predators like assassin bugs and ladybugs. Wasps buzzed, patrolling for caterpillars.
But no more. A recent declaration of war has put me back on
alert.
This means war!
Best Varieties for Growing Tomatoes in Florida
Every year, I look for lists of resistant varieties for planting. What is the best tomato to grow in Florida? But the problem is, I’m pretty cheap. I grow from seeds. I dropped a significant amount of money on seed starting trays and cell cubes. I enjoy planting from seed, and I’m generally pretty good at it. After all, my tomato seedlings grow lush and healthy — at least until I plant them out.
Most of the resistant varieties seem to be hybrids produced by local nurseries, and I’m too cheap to drop $6 on a plant that will surely die within weeks. Especially when I usually grow about 25 to 30 tomato plants.
And most of the stores I frequent don’t carry a wide range of seed types. It’s almost as though growing tomatoes in Florida doesn’t really happen. We get seeds for locations like Ohio or Missouri, and that’s what I’ve been buying. And probably the reason for my love-hate relationship with tomatoes.
I took a risk on some Patio tomato starters and gave two to my mom and kept two for myself. Guess who has gorgeous, healthy, robust Patio tomatoes? It ain’t me.
Many Southern gardeners in Florida are plagued by nematodes, and a lot of research has gone into preventing nematode damage.
My French marigold program seems to have prevented nematode damage, so fungal infections – blight, mosaic virus, and yellow leaf curl seem to be my bane.
In the future, I may simply have to adjust which cultivars I choose when growing tomatoes in Florida. While the Beefsteak tomatoes look delicious in the picture on the seed packet, I may simply have to invest in Cherokee Purple and Brandywine seeds. I’m not sure how well strange-colored tomatoes will go over with the family, but I do know that what I’m doing now isn’t working – at least not when it’s supposed to work.
The state ag offers a list of recommended varieties. They’re the best tomato to grow in Florida, according to experts. But I can’t verify how well they’ll do in a Florida vegetable garden.
Top Cherry Tomatoes
Luckily, cherry tomatoes are pretty heat-tolerant and will grow well through the hot southern summers. A few good disease-resistant varieties to try are:
Also called “grape tomatoes,” depending on the size, berry tomatoes do quite well in Florida with good disease resistance and a better tolerance for higher temps. My experience says they’re the best tomato to grow in Florida. If you can find them, try:
Amai
Jolly Girls
Sweet Hearts
And of course, there are Everglades. Everglades grow beautifully with very little effort. Of course, you can’t cut them up and put them on a sandwich — a fact that the spouse points out repeatedly. These tiny tomatoes are cute and full of flavor, but they’re the size of your pinky fingernail.
It’s also difficult to find the seeds commercially. Most Florida gardeners give them away or swap them. The tomatoes themselves are commercially unviable. They burst easily and have no shelf life to speak of. The best way to use Everglades tomatoes is to pick just before adding them to a salad.
Everglades tomatoes ready to pick
Good Round Tomatoes for a Southern Garden
If you prefer slicing tomatoes, like the spouse does, look for heirloom varieties like:
Another factor in selecting the right variety when growing
tomatoes in Florida is deciding whether to grow determinate or indeterminate
tomatoes.
Every gardener on the planet must have seen the picture of the guy standing on a ladder next to his ginormous tomato plant.
And maybe we were a bit envious, and maybe we also felt a
bit sorry for him, too. After all, we’re simply slaves to our tomatoes. Cutting,
pruning, feeding, tending, worrying. It’s worse than having teenagers.
That’s what you can get with indeterminate tomatoes, though.
Those suckers will grow as tall as they can, sprawling and climbing over
everything until the first frost puts them down.
So, while the idea of a season of endless tomatoes sounds great in theory, they can eventually exhaust you and themselves. I’ve always struggled with providing a tall enough support for them, and I’ve literally had the spouse tie them to the sides of the house (I’m too short to reach) so they could wind themselves around makeshift supports.
If it gets cold relatively early, you can count on Mother Nature to put them out of your misery eventually. Here in my Southern garden, I’ve found that the heat of summer finally does the job. I plant in the fall, and by the following May or June, the heat and blistering sun have given me enough excuse to top them.
Topping is when you cut off the tops of your indeterminate
tomato plant. This forces any existing tomatoes on the plant to rush to ripen
and stops any future growth.
But until frost or topping, indeterminate tomatoes will bloom
and fruit continuously, giving you a whole season of oncoming tomatoes.
In contrast, determinate tomatoes feature a bushy structure with less top growth. Don’t let this fool you though, because even if the seed packet promises no more than four feet of height, they still need plenty of support. Especially once they start producing tomatoes.
The downside is that they only produce once before dying off. You’ll only get tomatoes once from your determinate varieties before you’ll need to pull them.
Choose Your Go-To Tomatoes
One of the reasons I decided to grow Homestead tomatoes this
year was because they’re determinate. I’ve tried several trellis methods for
indeterminate tomatoes, and they’re kind of exhausting to keep up with.
The larger the tomato, the more time and effort they need to grow. Large indeterminate tomatoes can mean a lot of work in the garden. So, I decided to try a determinate variety for my large tomatoes. So far, so good, with the Homesteads. I think they’re a keeper — a “go-to” tomato — for me.
Choosing successful cultivars and staying loyal is one way
to manage growing tomatoes in Florida. Although the weather can vary somewhat throughout
the year, finding a proven winner that works in your climate is gardening gold.
Everglades, although indeterminate, are another go-to tomato
for me. Although their size limits their usefulness somewhat, they grow and
fruit in the chillier days of winter and the jungle heat of summer equally
well.
So, do some experimenting to find the perfect go-to tomatoes
for your Southern garden. Once you find those true-blue winners, you can experiment
with other varieties without risking your whole food supply.
Homestead tomatoes doing well in the ground
Prepared for the Glut
It’s January now. This means that I’ll spend the next two months catering to tomato plants. I’ll get tons of fruit that I will then need to rush to harvest green in the face of every threatened cold snap.
We’ll have piles of half-green tomatoes all over the kitchen counter. Then, after my good intentions to puree, cook, strain, and freeze them become broken promises, I’ll chuck them into the freezer in plastic bags to deal with later.
But I’m ready. After all, there has to be some reward after all these months. Perhaps instead of saying I have a “love-hate” relationship with tomatoes, I should turn that around. I have a hate-love relationship with tomatoes. Because the hate really comes first.
I hate standing in the hot sun through September and October to prune them. I hate the constant and seemingly futile spraying of fungal preventatives only to be met by a plague of insects instead. I hate standing out in the bitter wind at midnight after a last-minute frost warning, trying to save them with old sheets. Especially when, comes the hour, the temperature turns out to be 10 degrees warmer than predicted.
With our erratic weather and poor soil, some gardeners in the South have all but given up on growing their own vegetables. But whether you live where the soil is red clay or soft sand, you can always focus on container gardening.
In fact, for years after moving to Florida I refused to try to grow anything outside of container gardening. Between poor soil and nematodes, I just couldn’t take the heartbreak of watching as my tomato plants fell one by one, stricken by fusarium wilt or malnutrition.
And even though I have now cultivated some nutrient-rich
garden beds over the last couple of years, I still turn to containers every
growing season.
If you’re one of the many that have resigned in disgust because of heat,
humidity, bugs, or crummy soil, container gardening with vegetables may just be
what you need to get your gardening mojo back.
Advantages to Container Gardening
Vegetables can be some of the most challenging plants to grow. Unlike flowers or decorative foliage, gardeners need to stay alert through every stage of a vegetable plant’s development. It would be so much easier if we just needed to get them to grow beautiful leaves or pretty flowers.
Most vegetables require a bit more. Many of them are pretty picky when it comes to the soil quality or moisture levels. Others are magnets for voracious insects that will strip month\’s worth of growth overnight.
Luckily, some of these challenges because so much easier to overcome when you’re growing vegetables in pots on a balcony or back porch.
Improved Soil Quality
The most significant advantage to container gardening is improved soil quality. Many gardeners have struggled for years trying to create the perfect loam in their garden beds. They add compost, manure, and mulch. They encourage earthworms and assemble massive irrigation systems.
But containers are easy. You can buy the perfect soil for any vegetable plant and control what goes in your planters. And best of all, you can grow a wide variety of edible plants that require diverse types of soil when you’re using containers.
Sunlight and Temperature Control
While some vegetable plants need plenty of sun to thrive, others need a bit of shade to do well. With container gardening, you can move your vegetable plants around to take advantage of changing light patterns in your yard.
It’s a terrific way to keep cool-weather plants – like lettuce and spinach – protected from the hot sun and extend your growing season. I grow my lettuce in containers so I can start them early in the fall while it\’s still ab it hot and grow them into May just by moving them into the shade.
Longer Harvest
If you live in an area of the South that gets the occasional frost or even freeze, you can bring your container vegetables indoors to protect them. There’s no reason to let your tomatoes freeze when you can place them in a garage or enclosed porch overnight.
Gardening in a Small Space
Last, and certainly not least, if you have
very little room, container gardening lets you grow more. Small yards aren’t a problem
when you can stack planters vertically to add space for herbs, greens, and
strawberries.
Even if all you have is a balcony or tiny patio, container gardening allows you
to grow a wide range of vegetables and fruits.
Planning Your Container Garden
If you’re ready to get started growing your own fruits and vegetables in planters and pots, the first thing you need to do is devise a plan.
Container vegetable gardening 101 requires that you start
keeping track of the conditions around your gardening space. Once you know how
much rain and sunlight you have available in your outdoor space, you’ll want to
create a container vegetable garden layout.
Container Vegetable Garden Layout.
Pick out the space you want to place your containers and spend a day off seeing where the light falls in the space. You’ll need at least six hours of sunlight a day to grow most vegetables. You may even want to sketch out your space the sunniest spots highlighted so you can position your plants for optimal production.
Also, get an idea of what kind of rainfall you can expect. Are there lots of trees blocking your container gardening space? What above overhangs? Make sure you have easy access to an outdoor hose bibb, in any case.
You’ll also need some outdoor storage space
for your gardening supplies. Whatever your good intentions, it’s far easy to
leave tools and products laying around. Unfortunately, this leaves them vulnerable
to rust and degradation.
Make sure you have a watertight shed or cabinet for storing your tools and supplies.
DIMENSIONS: 44. 9 in. W x 19. 4 in. D x 29. 8 in. H
Best Vegetables for Container Gardening
Once you have your space picked out, you’ll
want to decide what kinds of plants you want to grow. Make sure the plants you
choose are suitable for container gardening. But don’t be too surprised by the
variety you can still grow in a pot.
For example, it never occurred to me to start growing snap peas in pots until I watched a little-known gardening show from Ireland that proved that they can do better in containers than in the ground.
Container gardening lettuce is also an easy-peasy solution for fresh salad greens. I grow my lettuce in shallow containers, planting a fresh one every week until I have about 12 growing at any given time. I use the cut and come again method, starting at the most mature. By the time I get through the last one, the first one has grown back enough to harvest again.
Container gardening herbs is one of the easiest steps for new gardeners, and many choose a large container to grow a number of different herbs together. However, make sure that you don’t mix herbs with different growing needs. Mediterranean herbs, like oregano, rosemary, and thyme, all need drier conditions than fast-growing herbs with high demands like basil, tarragon, and mints.
One excellent method to approach container gardening is to choose compact varieties of your favorite plants. For example, if you want to grow tomatoes, consider patio tomatoes or even Tiny Tim or Tumbling Tom varieties.
If you’re keen on beans, then consider bush beans instead of pole varieties, which need 6 feet of trellis and can run amok.
If you’re brand new to gardening, pick a
handful of basic vegetable plants that you know you’ll enjoy eating. Check with
your local extension office to find out what’s growing best this season.
Simple Container Garden Ideas
And
if you just want to dip your toe into container gardening, consider the
following themes for one or two planters to get started:
Salad in a Planter
In a large planter, add Tiny Tim tomatoes, Mesclun mix lettuce, a few radishes, and maybe a fast-maturing bush variety of cucumber. EarthBoxes and other self-watering containers are perfect for “Salad in a Planter” setup
Mixed Herb Container Gardens
Another great container gardening idea for beginners is mixed herb container gardens. Depending on the varieties you want to grow, you may need two or three large containers. For most culinary herbs like oregano, rosemary, thyme, and marjoram, you’ll need one large container with low-nutrient soil with good drainage. For lusher herbs, like basil, tarragon, parsley, and cilantro, add another container with richer potting soil and even a self-watering reservoir.
Best Soil for Container Vegetables
The best soil for container gardens really depends on what you’re planning to grow. Most vegetables have optimal conditions depending on their origins. Most do well with potting soil mixes that contain organic material and soil lighteners, for loose potting soil.
Check the label on your potting soil and look for things like peat moss, coconut coir, tree bark, vermiculite, and perlite.
It’s possible to use plain garden soil from your yard, but you’ll need to amend it drastically if you have poor soil, like I do. However, British horticultural hero, Monty Don, recommends putting a shovelful of garden soil in containers to add natural bacteria and micro-organisms. So, don’t worry if you accidentally used garden soil in pots for container gardening.
Tips for Choosing Containers for Gardening
Now that you know how much space you have and
what you’ll be growing, it’s time to choose containers. For safe container gardening,
make sure you use natural materials or at least food-safe plastics.
That said, you can find many cheap containers to grow vegetables by using a little
imagination and by recycling and upcycling old materials. Some gardeners – like
myself – have been reusing the same free landscape pots from other plants for
years and years.
Safe materials
While you want your container garden to look
attractive, you also want to be sure you use materials that work well for your
vegetable plants. For example, terra cotta is a classic beauty, but here in Florida,
they dry out far too quickly to sustain demanding veggies like tomatoes and
eggplant. I only use them for culinary herbs and arid-loving ornamentals.
If you’re planning to move your vegetable plants
often, you may want to stick to plastic containers. Some are quite decorative
and best of all, easy to move.
The color of your containers can also impact your vegetable plants. Here in the South, dark containers can kill delicate vegetable plants in a single summer day. They\’ll absorb heat from the sun and send the temps in the soil skyrocketing. I only use these in the winter or in partial shade. The rest of the time and in very sunny spaces, I stick to light-colored pots.
Size counts
While many gardeners start seeds in small starter trays and move them to larger pots later, you don’t want to have to transplant your vegetable plants too often.
Transplanting is sure to cause a little
shock, and since vegetables need to grow and flower and fruit so quickly, you
don’t want to set them back any more than you must.
So, make sure you have large enough pots for
your container gardening, depending on the mature size of your plants.
Some common container sizes and the plants they accommodate are:
Half Gallon Pots
Bush Beans
Herbs
Salad greens
One Gallon Pots
Cabbages
Cucumber
Green beans
Leaf lettuce
Spinach
Chard
Cherry tomatoes
Patio Tomatoes
Three Gallon Pots
Eggplant
Sweet and hot pepper
Determinate tomatoes
Broccoli
Five Gallon Pots
Indeterminate tomatoes
Squash
Zucchini
Seven- or Ten-Gallon Pots
Potatoes
Sweet Potatoes
Blueberries
You can also grow a number of different
vegetables in larger pots and planters, such as planting 12 to 14 peas in a three-gallon
pot, etc.
DIY Garden Containers
You can even try your hand at getting
creative by making your own garden containers. Many gardeners swear by
five-gallon buckets from their favorite home improvement stores or local
bakeries.
One year, I was enthralled by the idea of
grow bags, but I didn’t want to spend the money to buy the 40 or more I needed.
So, I just purchased some landscape fabric from the fall clearance section and
sewed my own.
You can aim for practical or whimsical, but either
way, before you take out the recycle bin, do some shopping around inside to see
if you can convert anything to a growing container.
Container Gardening Tips
Now that you’re ready to start growing your healthy veg the easy and convenient way, here are a few pro tips to ensure a good crop.
You may wonder how often water container plants. The bad news is that containers can dry out very quickly, especially in the summer months. You may need to water up to twice a day. Consider self-watering containers or adding trays for a water reservoir under your containers.
Fertilize often and early. You can add organic matter or slow-release fertilizers, but since the resources your container plants have available is pretty limited, you may want to use liquid fertilizer. You can choose fish emulsion for an organic option or simple Miracle-Gro tomato food.
For the most bang for your buck, plant your vegetables sequentially. If your bush beans mature fully in 60 days, make sure you have something ready to go in starter trays to replace them for the rest of the season. Mix in a little composted manure after harvesting your beans and then add seeds you’ve already started for squash or cucumbers.
Get Growing
As winters grow increasingly mild in the South, the time to
start container gardening with vegetables can be all year round. Here in Zone
10a, we’re enjoying 76 to 80-degree sunny days with mild nights that are perfect
for fall and winter vegetables.
The best part is that if we get a cold snap, I can move my container gardening onto a warm, covered porch or even indoors. They’re also easier to cover with fleece when they’re in containers because I can huddle them together for warmth and cover more than one at a time. When the temps rise the next day, they can go back into their sunny slots in the yard.
Ready to grow your own? What are your favorite vegetables for container gardening?
“It is a truth universally acknowledged that a Florida gardener in possession of a good fortune in October, must be in want of bare strawberry plant roots. ” ~ Plants and Prejudice
Fall and winter are the strawberry growing seasons here in Florida. But Florida gardeners do it differently than they do up North.
Despite the fact that I’ve lived in the South for over 26 years, I’m still a bit confused about it. Apparently, in Florida, strawberries are annuals.
That’s right. Come May (or June, or whenever), Florida growers and home gardeners pull and compost millions of strawberry plants.
Back in the summer of 2018, I preordered a big batch of strawberry plant roots — Radiance variety. In October, I planted my bare root crowns and watered and fertilized them diligently.
Like many home gardeners,
I potted them in shallow containers in rich potting soil rather than in the
ground. (I’m partial to Jungle Growth brand.)
I got just a few fruits in December, but then they went kind
of dormant, despite the mild winter.
I stuffed them with a high potassium tomato food and got some flowers in late January. Strawberries duly appeared in February and March and continued until May.
At that point, all of my gardening mentors suggest that I
remove and compost them.
They’re no good anymore, they told me. They won’t produce again, they advised sagely. Burn ‘em.
But, rebel that I am, I refused to pull and dispose of perfectly good strawberry plants.
I continued to water them and feed them throughout the hot, wet
summer. Then in September, I pretended I still lived in Ohio and repotted them
in fresh potting soil.
Just in case, I also picked up some beautiful strawberry starts from a local feed store. I chose Sweet Charlies this year – mainly because that’s what they had. Sweet Charlies are early-season “June-bearing strawberries,” that, in Florida, produce from November to March.
That just shows you how messed up growing strawberries in Florida
can be.
Growing Strawberry Plants Can Be Confusing
If you starting planning to grow them, you’ll see that there are three different types, all depending on their fruiting habit. There are four, if you include wild strawberries.
Frankly, I’m still in denial that I will likely never taste a wild strawberry again in my life. Growing up in northern Ohio, we used to pick and eat them covered in milk. It was heaven, really.
But as to varieties you can buy, you can choose from June-bearing, ever-bearing, or day-neutral types.
June-bearing strawberries seem to be the favorites in most of the country. They produce fat, bright-red berries that are simply irresistible to home gardeners.
Ever-bearing types give you two solid harvests during the growing season — one in spring and another in fall.
Day-neutral varieties produce continuously as long as the temperatures
stay between 35 and 85 degrees Fahrenheit.
Growing Strawberries in a Southern Garden
While I can only speak of growing strawberries in Florida -– and argue against the “annual” approach — there are plenty of excellent resources for growing them in other regions of the South.
Can you grow strawberries year round in Florida? Experts say no. While your strawberry plants may not die off in the summer, they won’t produce either. It’s just too hot!
StrawberryPlants.com has an excellent resource for finding the right variety of strawberries for your region.
My Strawberry Experiment
As I said, I couldn’t bear the idea of just tossing a bunch
of strawberry plants.
I simply watered them and took care of them like any outdoor potted plant. I fed them once a month or so with a balanced fertilizer.
When the rainy season came, I applied my usual organic, copper-based anti-fungal. The bugs left them alone since they had no fruit. (My spring tomatoes were too much of a distraction.)
In the fall, I refreshed the soil, added a fat layer of hay
on top, and began watering and feeding for production.
Low and behold, my 2018 Festivals started to deliver.
December 13, 2019
I’m not an expert in growing anything, but I’m a passionate gardener who loves to experiment. I can’t guarantee that every gardener in Florida (especially in the southern zones) will be able to “over-summer” strawberries.
I can’t even guarantee that I’ll be able to do it again.
What I can say is that I’ve heard of one other gardener in
my area that tried it successfully. And I can say that it’s worth trying.
Do you grow strawberries in your home garden? What zone are you in, and what varieties do you plant? I’d love to hear how other gardeners in the South approach strawberry growing.
Did you remember to stock up on seeds back in
the spring when everyone was selling them? If you did, you may be wondering how
long do seeds last. And if you didn’t, do you know if the ones you purchased
last year will still germinate?
How long do seeds last after you’ve purchased them? Depending on how they’re stored, vegetable and flower seeds can last from two to five years and still be viable. Some of the longest-lasting seeds include cucumbers and lettuce. Seeds with a shorter life span include sweet corn and peppers.
So, if you’ve discovered some seed packets
you purchased last year or even a couple of years ago, you may be in luck. You
can also test them out and see if they’ll germinate before you start
double-digging your garden beds.
How Long Do Seed Last: Seed Viability Chart
One of the most frustrating parts of
gardening in the South is that by the time our fall and winter planting season comes
around, no one is selling seeds locally anymore. It seems that every garden
center has been turned into Santa’s Workshop.
So, you’ll need to buy them early in the year
if you want fresh seeds to plant in the fall and winter.
But what if you didn’t get all the seeds you
wanted back in March? Will the ones you purchased a year ago – or even two
years – still grow?
Let’s take a look at how long do vegetable seeds last in packets in the seed viability chart:
Seed Viability Chart
How long to store seeds.
Arugula
3
Asparagus
3
Beans
3
Beets
4
Brocolli
3
Cabbage
4
Carrots
3
Cauliflower
4
Celery
5
Collard greens
5
Cucumbers
5
Eggplant
4
Endive
5
Kale
4
Lettuce
5
Okra
2
Peas
3
Peppers
2
Pumpkins
4
Radish
5
Rutabagas
4
Spinach
3
Squash
4
Tomatoes
4
Turnips
4
Watercress
5
Watermelon
4
How Long Do Seeds Last: Seed Packet Dates
When you buy seeds, you’ll see that the company has printed the expiration date on the packed somewhere. However, this is the date that retailers need to remove them from the shelves.
And you don’t want to spend time preparing your vegetable beds only to find out that your seeds aren’t viable. Having an expiration date on the packet gives you an idea of the likelihood of germination.
ASSORTMENT – 35 easy to grow vegetable varieties and over 16,000 seeds. All non-GMO and heirloom varieties. Our survival pack includes lettuce, beets, carrots, onions, squash, zucchini, tomatoes, peppers, broccoli, peas, beans, and more. Complete gardening kit for growing your home garden.
Extensive Seed Starter Kit: This heirloom seeds pack offers 32 different heirloom vegetable varieties, providing a comprehensive assortment to diversify your garden and ensure a bountiful harvest
How long your seeds stay viable in storage depends on a couple of factors. The first consideration is what type of seed it is. Some seeds simply have a longer shelf life.
Another factor is how you’ve stored them. Conditions
like temperature and humidity play ab big role. Dry, dark, and cold conditions
will help you keep your seeds viable for a longer period.
How Long Do Flower Seeds Last in Packets
Annual flower seeds are some of the most
delicate of all the seeds. So, it’s important that you store your flower seeds
properly. However, most will only be good for a year. You can also try the germination
test on them, just in case.
Perennial flower seeds last from two to four
years.
How Long Do Herb Seeds Last
Herb Seed Viability Chart
How long to store herb seeds.
Basil
5
Chives
2
Cilantro
2
Fennel
3
Oregano
4
Parsley
2
Sage
4
Assorted vegetable seed-mix of snap bean, garden pea, pinto dry bean, winter squash, sweet corn, broccoli. Image CC by 2.0 SA by Lynn Ketchum via Oregon State University
How To Store Seeds
To make the most of your seed purchases, store them correctly. Remember: Cool, dry, and dark conditions will keep them alive the longest.
So, whether you collect seeds from your
garden or like to stock up on sales, you should:
Make sure the seeds are completely dry.
Place your seeds inside a paper envelope with
the name and date marked
Place the paper envelope inside an air-tight
container
Put the container somewhere where they’ll stay
cool and dark.
Some additional tips for seed saving
techniques:
Adding a desiccant to your air-tight container can help keep the moisture level below 10 percent.
You can refrigerate your seed container, but
don’t freeze your seeds.
How to Save Seeds
Saving seeds from your garden can help you save money. And it’s especially useful when you find a vegetable or flower that does particularly well for you. But first, you should know which seeds you can save.
Heirloom Seeds
Seeds from heirloom flowers and vegetables are your best bet if you want to save seeds. That’s because they’ll be the most like the parent plant.
You’ll need to let your plants go to seed –
which means vegetables will go past their best-to-pick stage. For flowers, you’ll
get seed pods that begin to dry up and turn brown.
Because they may drop before you can harvest
them, put a small paper bag or net bag over the seed pods to catch them.
Seeds from Hybrids
Hybrid plants have been bred to alter them
from their original form. That’s not the same as GMO, though, so you don’t have
to be concerned.
Some have been bred to improve their flavor –
such as varieties of sweet corn.
Others have been bred to improve their
resistance to diseases or pests.
Unfortunately, seeds from hybrid plants are
rarely viable. They won’t grow to form or may not grow at all.
When you first purchase your seeds, check the
packet label to see if they’re a hybrid or not.
While you now know that seeds can last for
many years, you may want to test them out before dedicating a portion of your
precious garden space.
It’s pretty easy to check them following the
method below:
Choose 10 seeds and lay them in a row on a paper towel that you’ve damped with water
Carefully fold the paper towel over them and then roll them up so that they don’t touch.
Place the paper towel in a plastic zip bag and close it.
Put the bag in a warm, well-lighted place like a windowsill
Carefully unroll the paper towel after five days to check for germination.
Dampen the towel by spraying it with water and reroll.
Roll the paper towel back up and put it back in the bag
Keep checking the seeds every couple of days
After two weeks, count how many of your seeds have germination.
The final number is the percentage of the germination rate, times 10. So if six out of 10 seeds began to sprout, your germination rate is 60 percent.
You can still use the seeds, but you may want to compensate for the low germination rate. So, if you normally put one seed in a starter tray cell, use two for extra insurance.
You may want to purchase new seeds, however, if the germination rate is very low. Keep in mind that the germination rate for some plants (particularly wildflowers or exotics) can be lower than more commonly used and commercial seeds.
Seed Float Test
Some people swear by the “float test,”
although I’ve only used it with morning glories and moonflowers.
When you’re ready to plant your saved seeds,
first put them into a small cup of water. Put them in one at a time and then
let them sit overnight.
After 24 hours, check the seeds – the viable
seeds will sink to the bottom of the bowl. The “bad” ones will float.
Remove the floaters and then plant the seeds
that sank immediately. You can put them in peat pods or starter cells if you’re
not ready to sow outdoors.
Starting Old Seeds
It pays to remember that even when an old seed germinates, you may not get a healthy plant from it. So, if your seeds are beyond the storage dates in the seed viability test, you should probably just get new seeds. Even if they did germination when you tested them.
If you start your seedlings two or three
months before planting them out, you should have plenty of time to weed out any
that may not produce well.
So, How Long Do Seeds Last?
Saving your seeds is a good way to save money while identifying those sure-fire winners that thrive in your particular climate and soil.
If you’re like most gardeners in the South,
you know that sometimes you have to stock up in early spring on seeds you won’t
be planting until December. So, make sure you know how to save seeds by keeping
them in an air-tight container in a cool, dry, place.
While expiration dates on your seed packets are generally helpful, they’re not the end of the story. If you’re not sure whether your seeds are viable, just give them the germination test.
Southern Garden is a participant in the Amazon Services LLC Associates Program, an affiliate advertising program designed to provide a means for sites to earn advertising fees by advertising and linking to Amazon.com.
We may earn a small commission from some of products or educational resources discussed on this site.
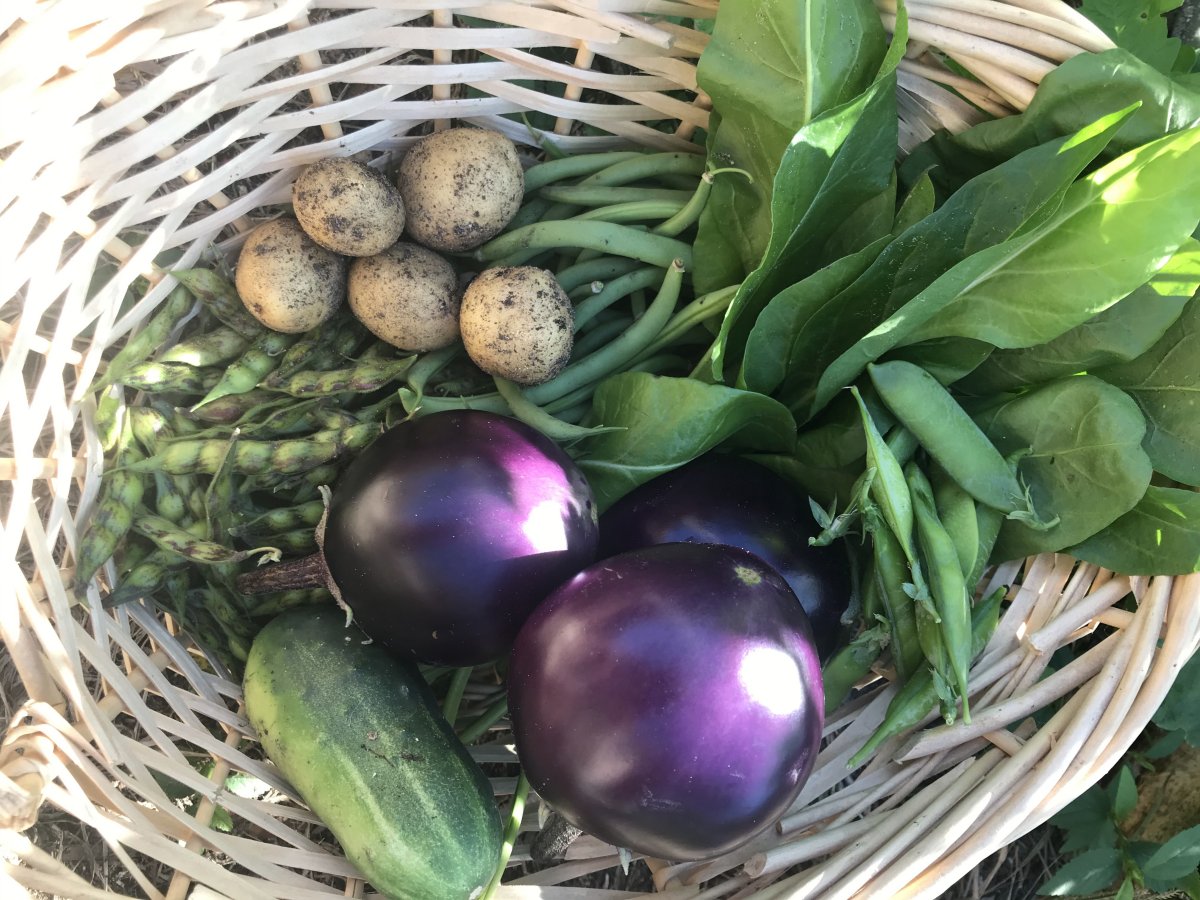
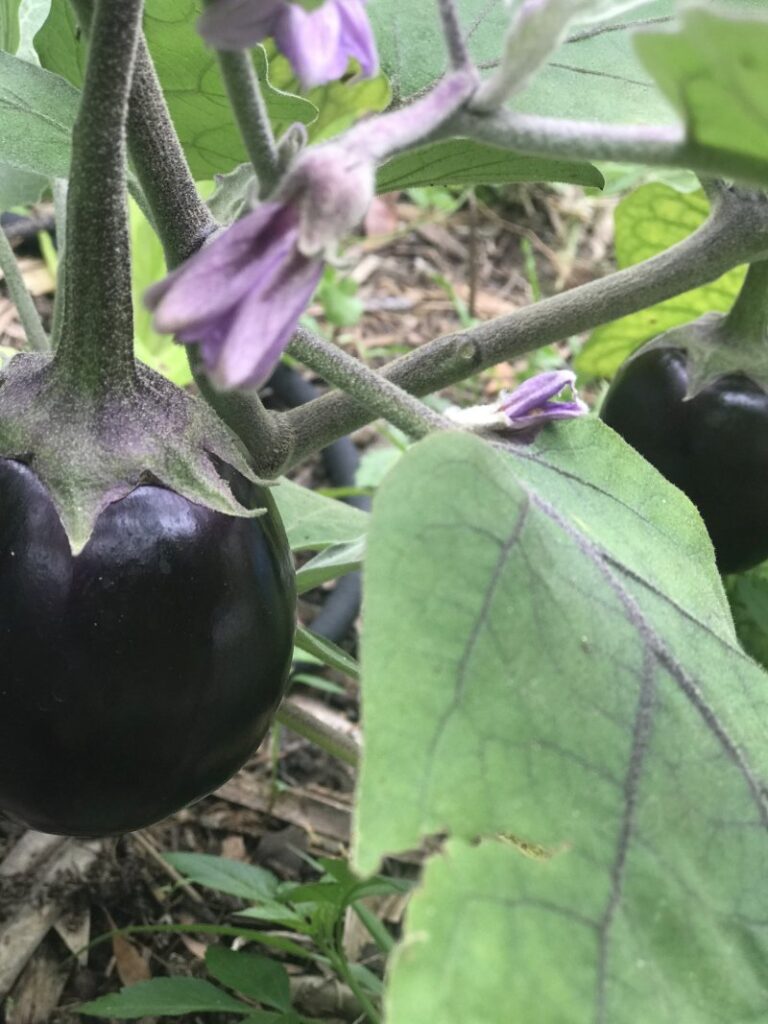
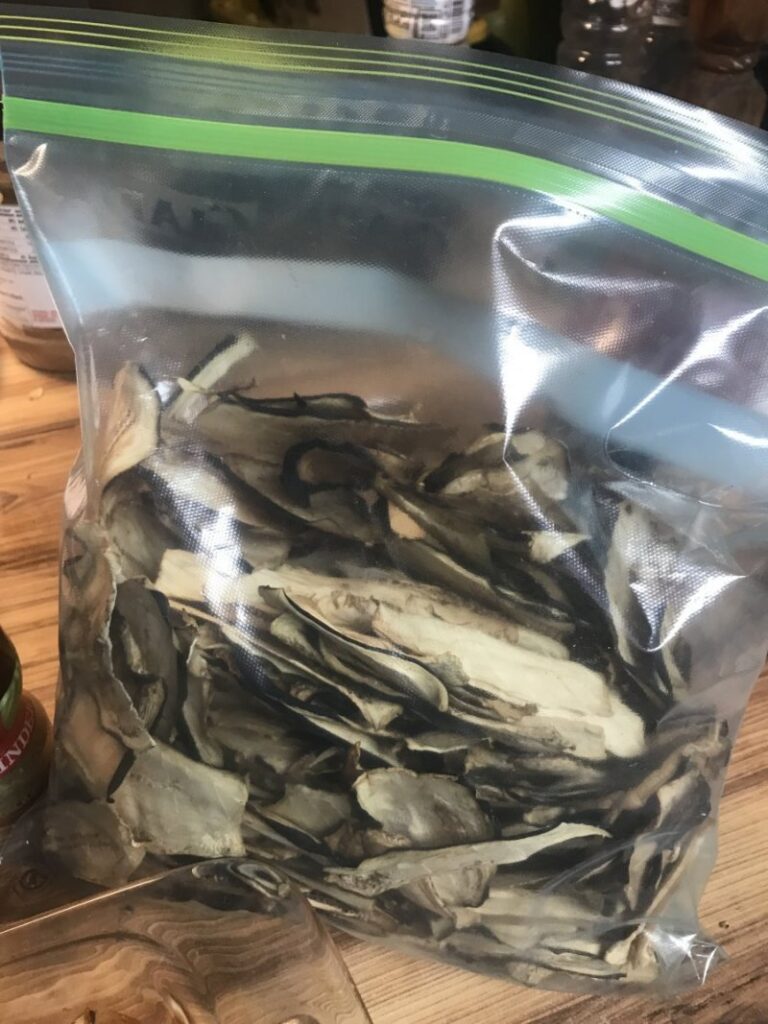
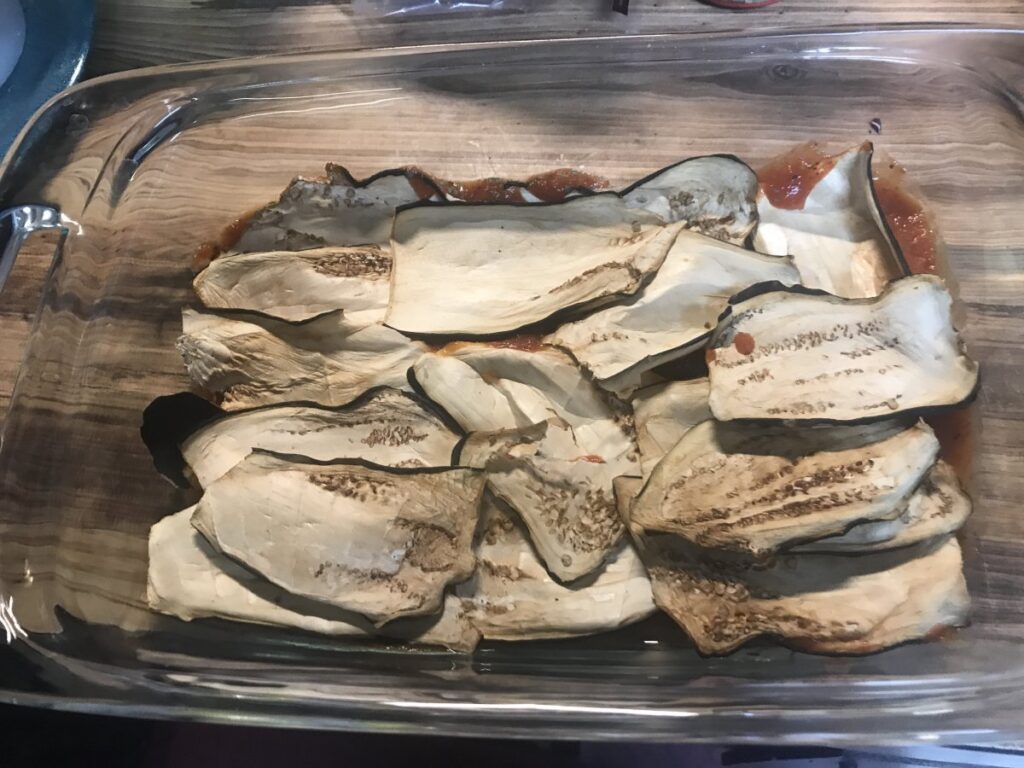
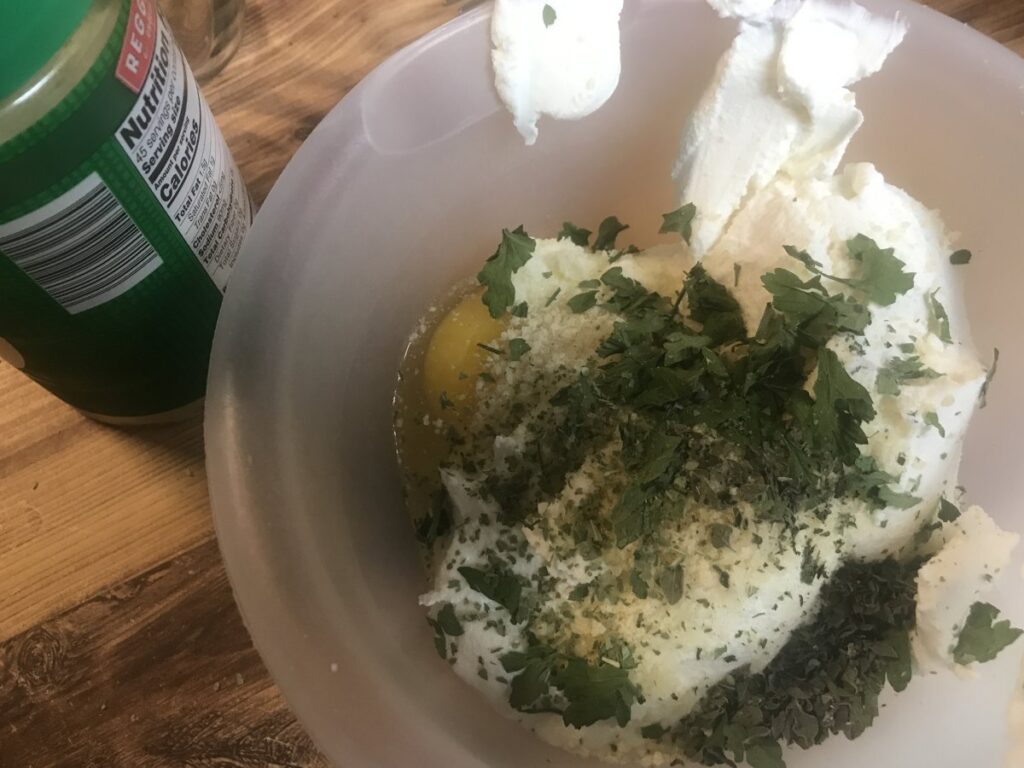
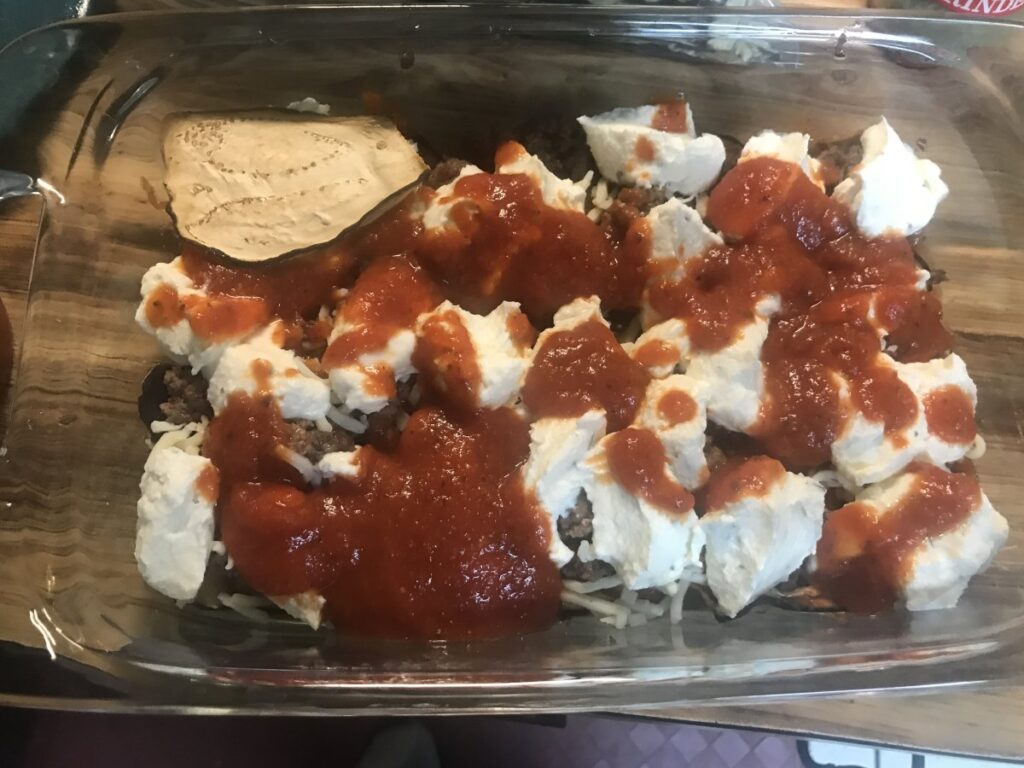
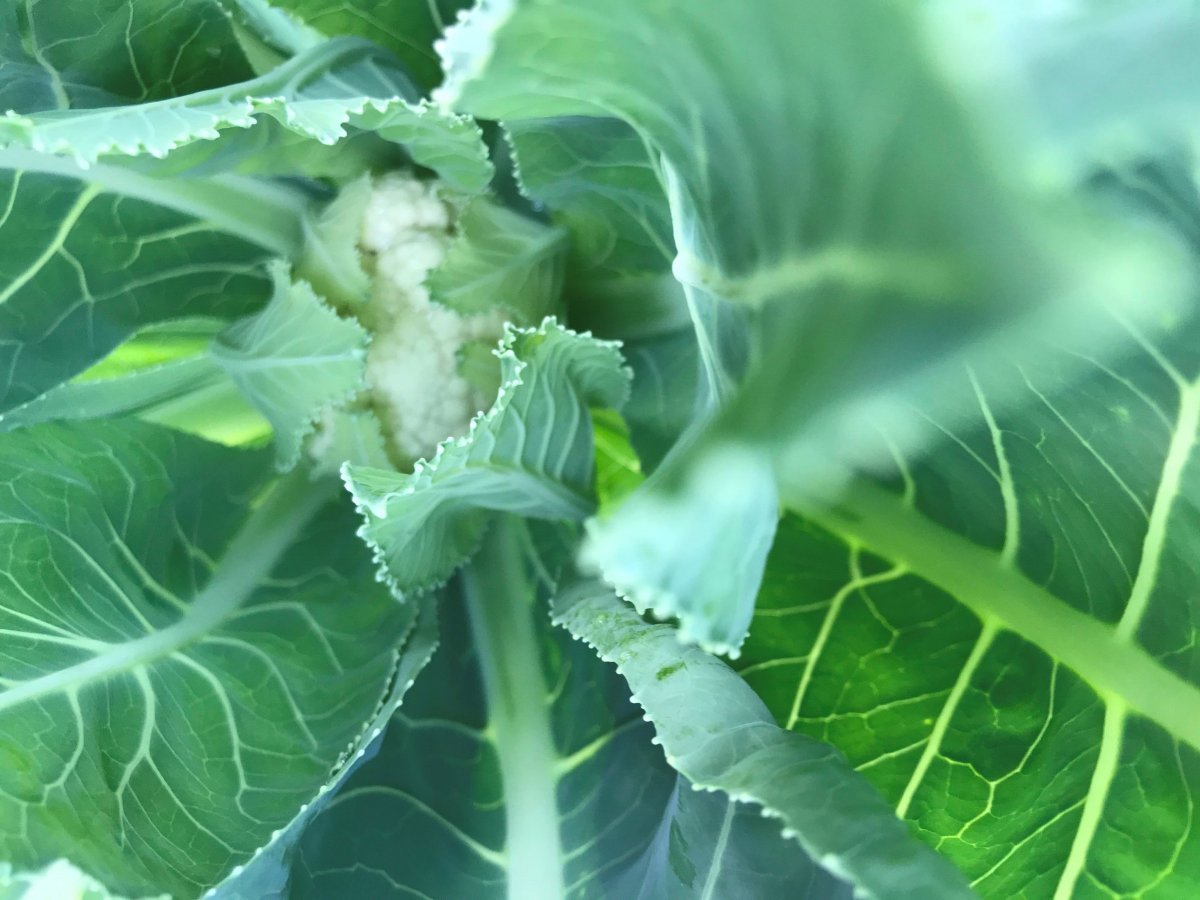
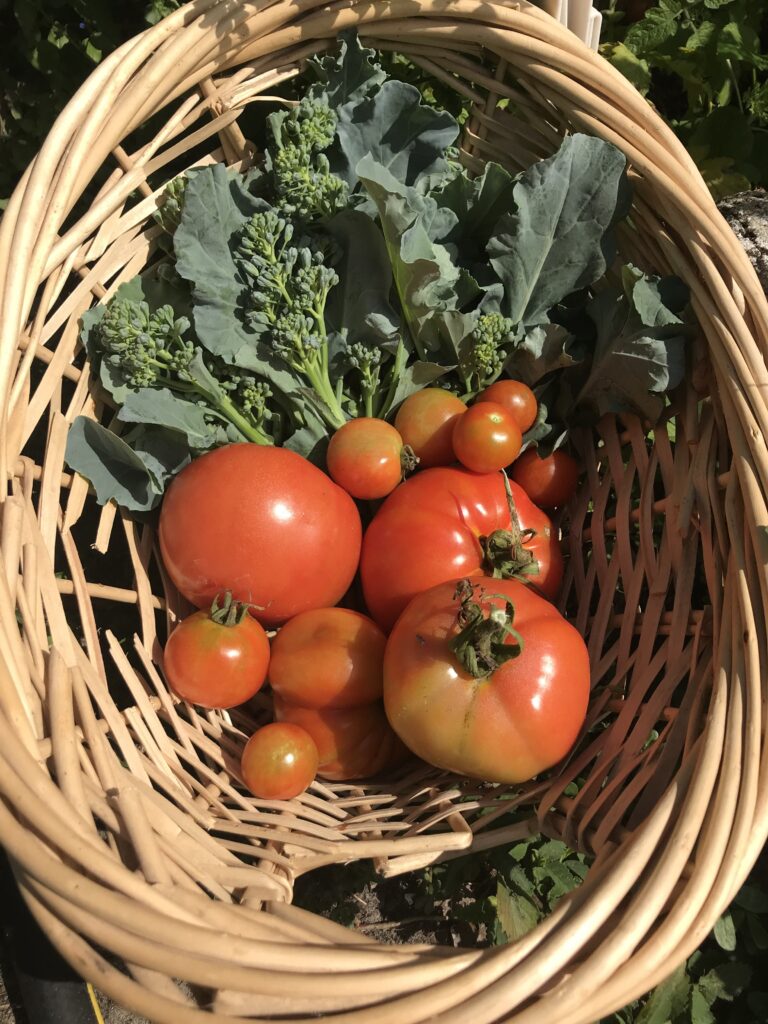
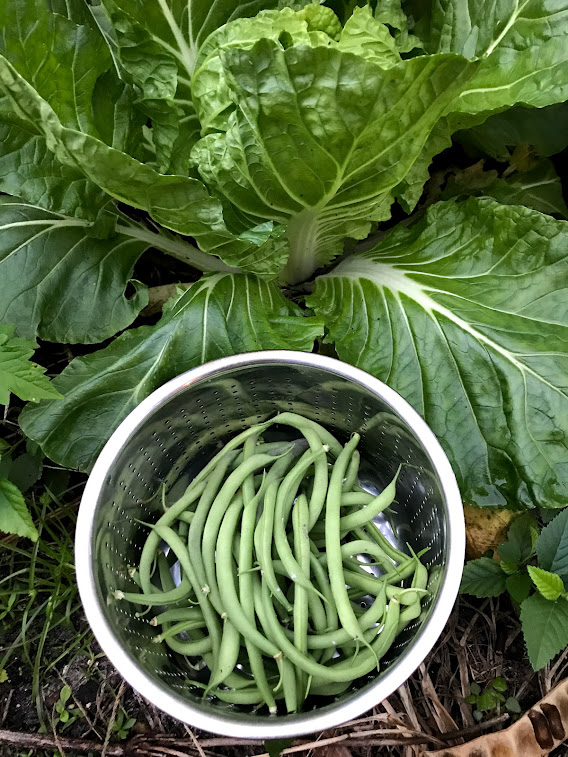
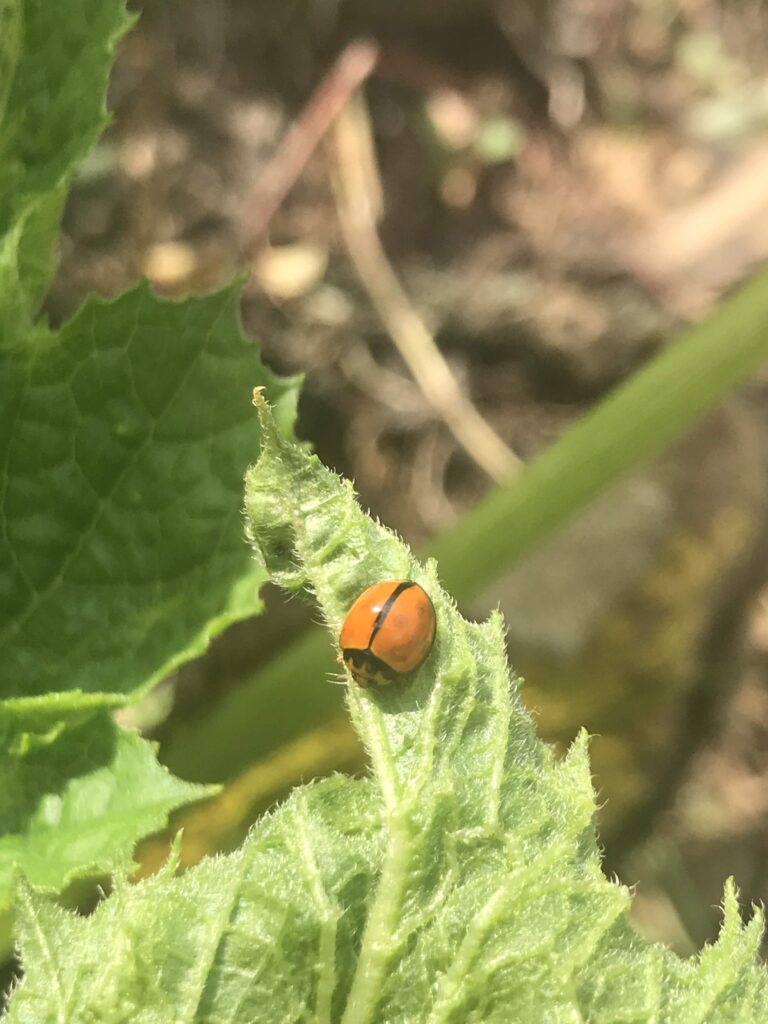
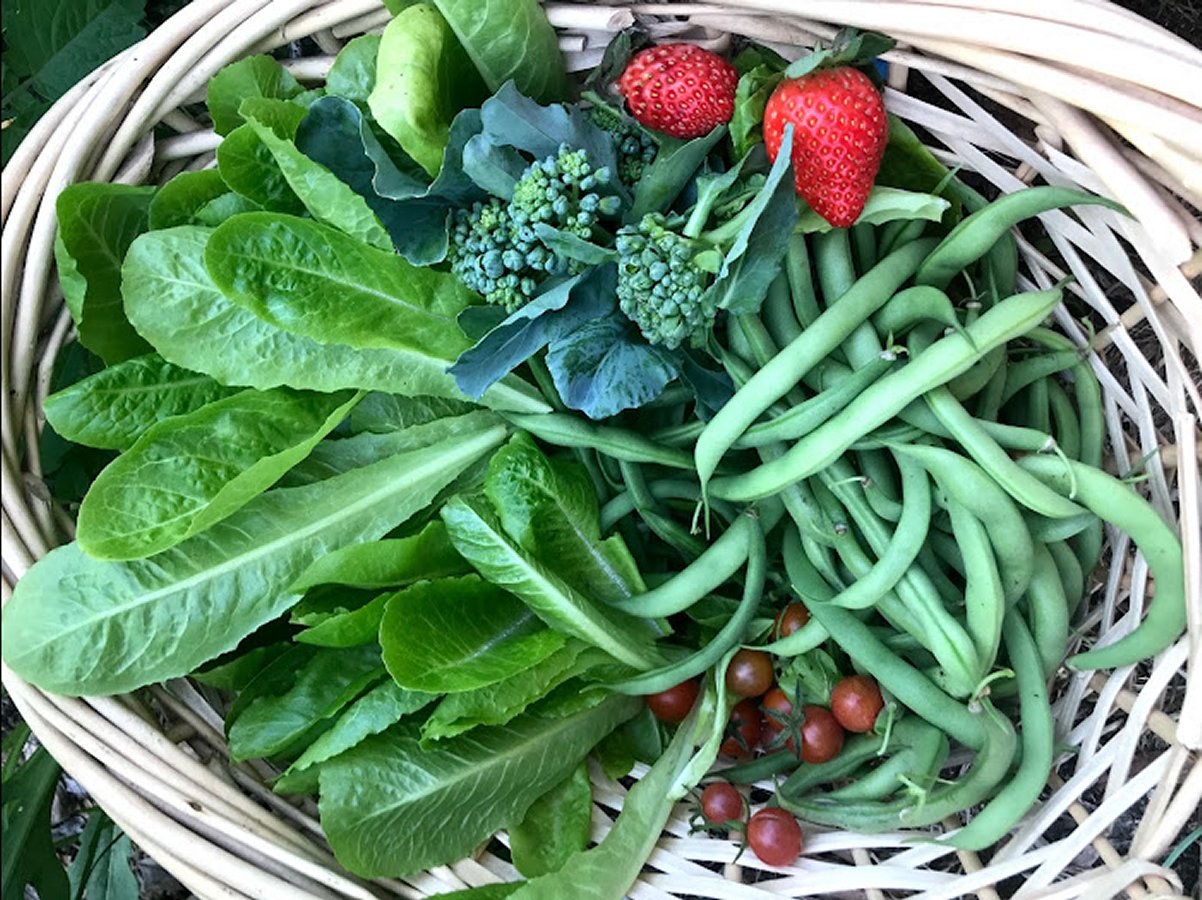
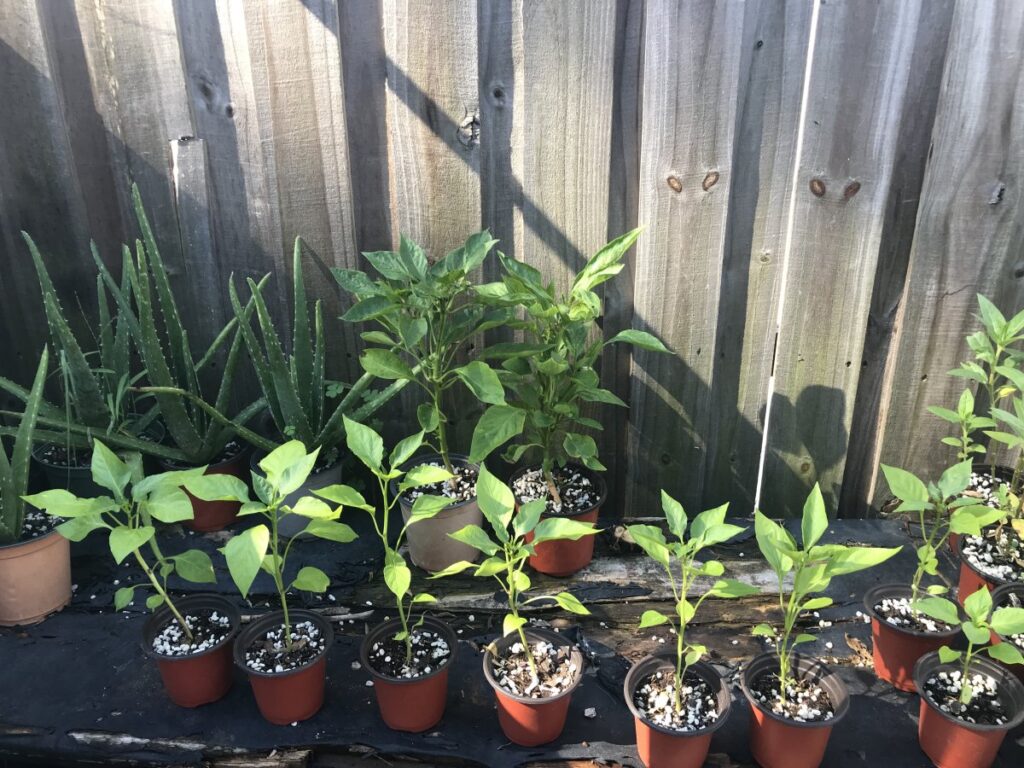
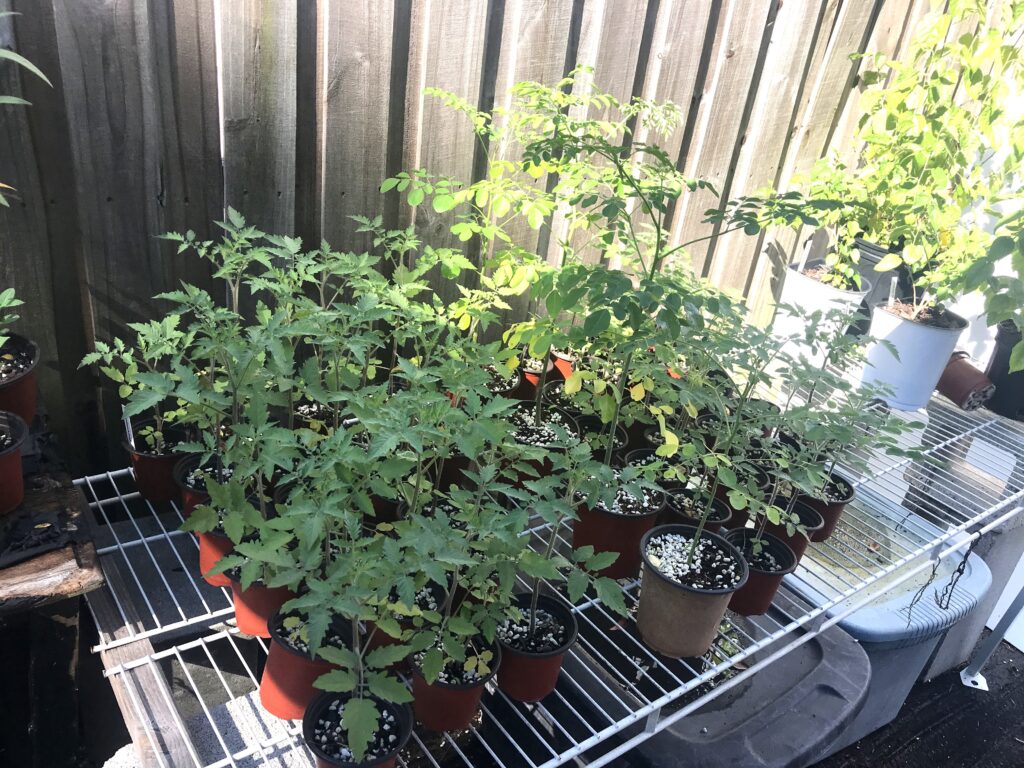
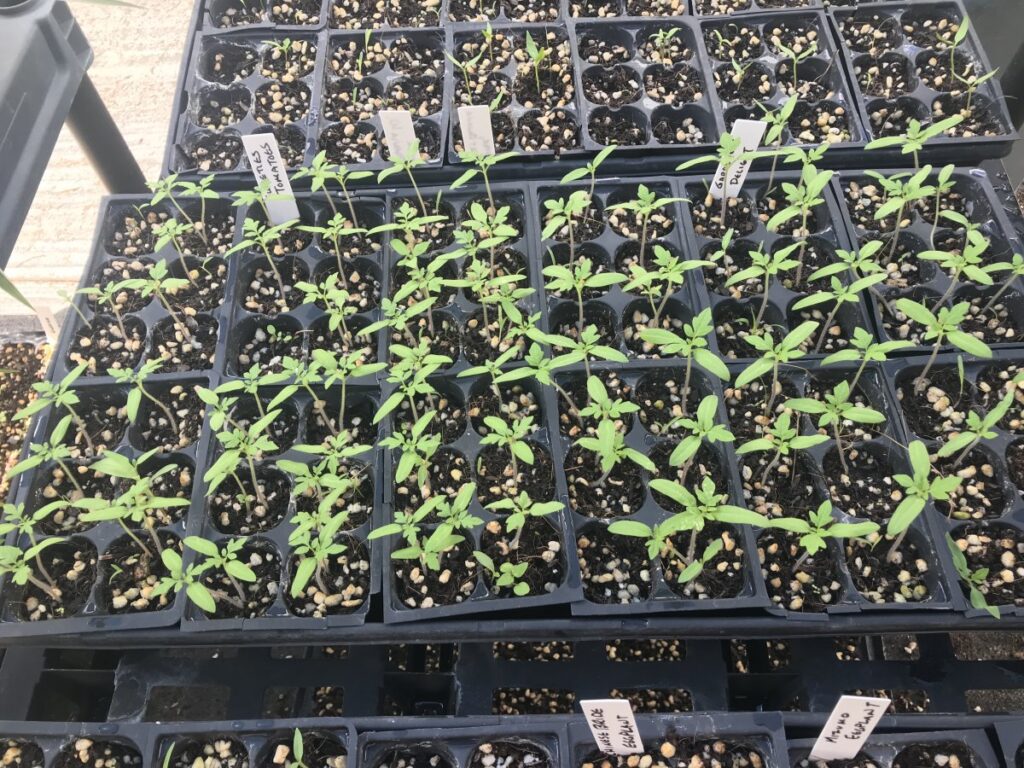
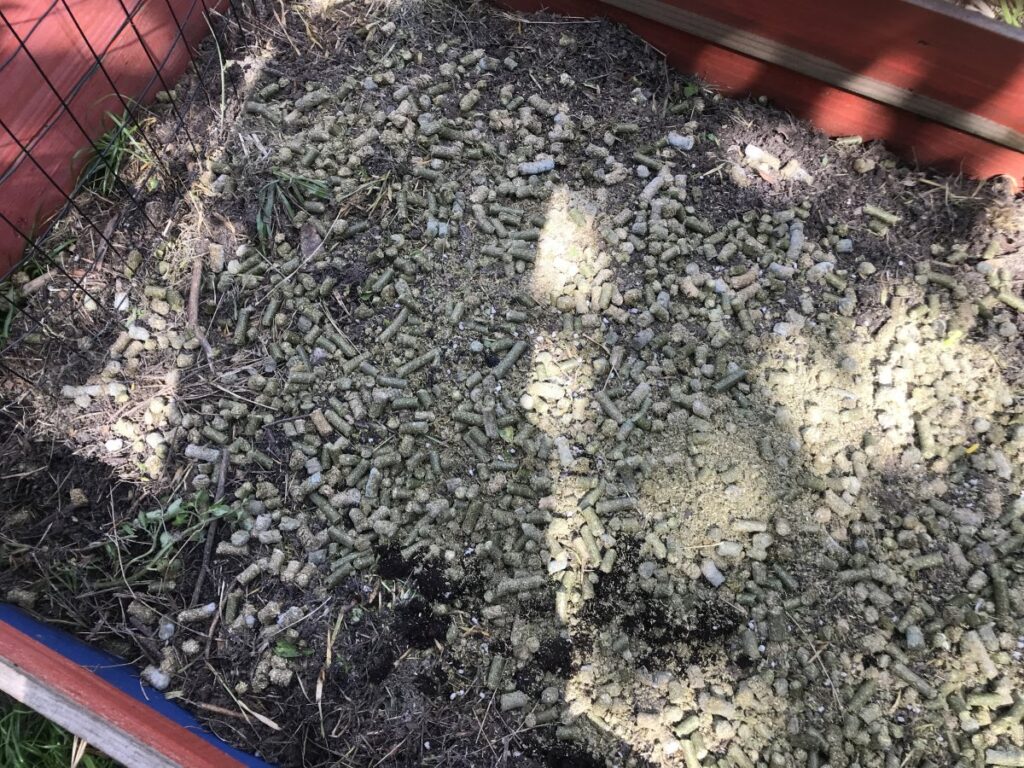

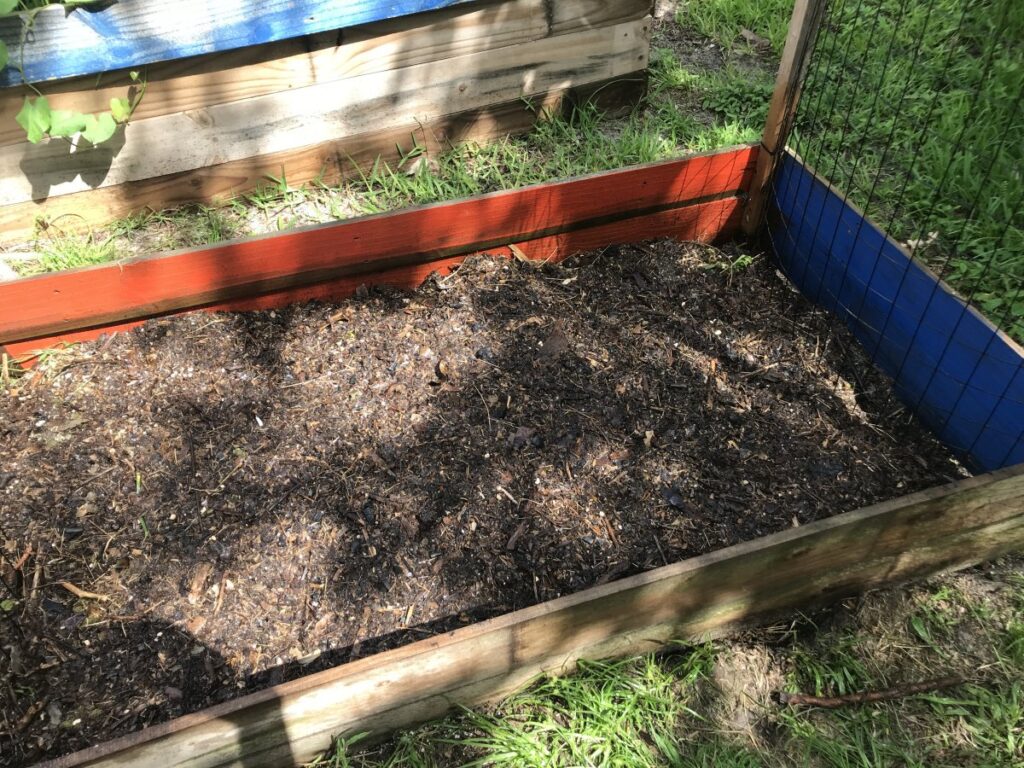
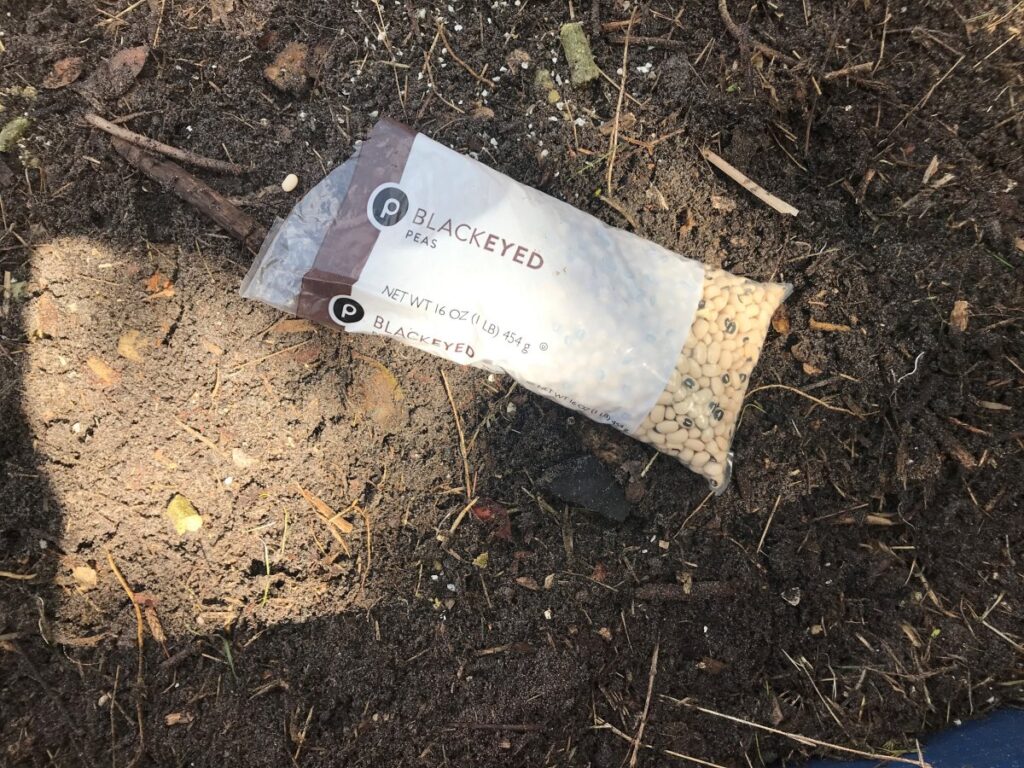
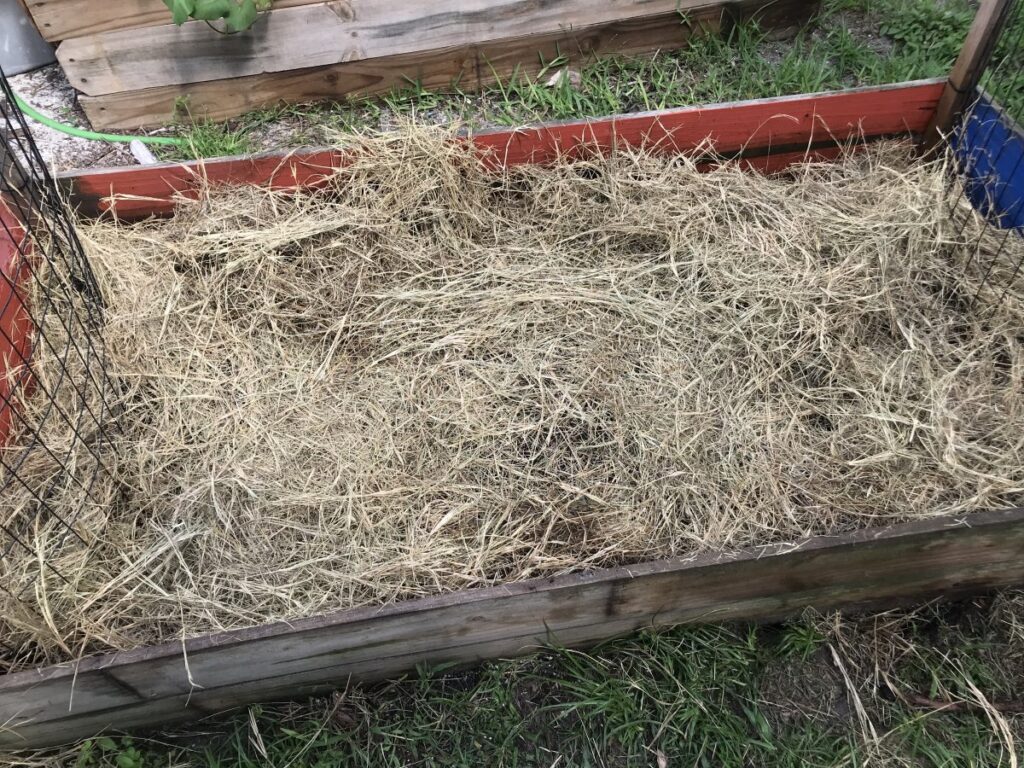

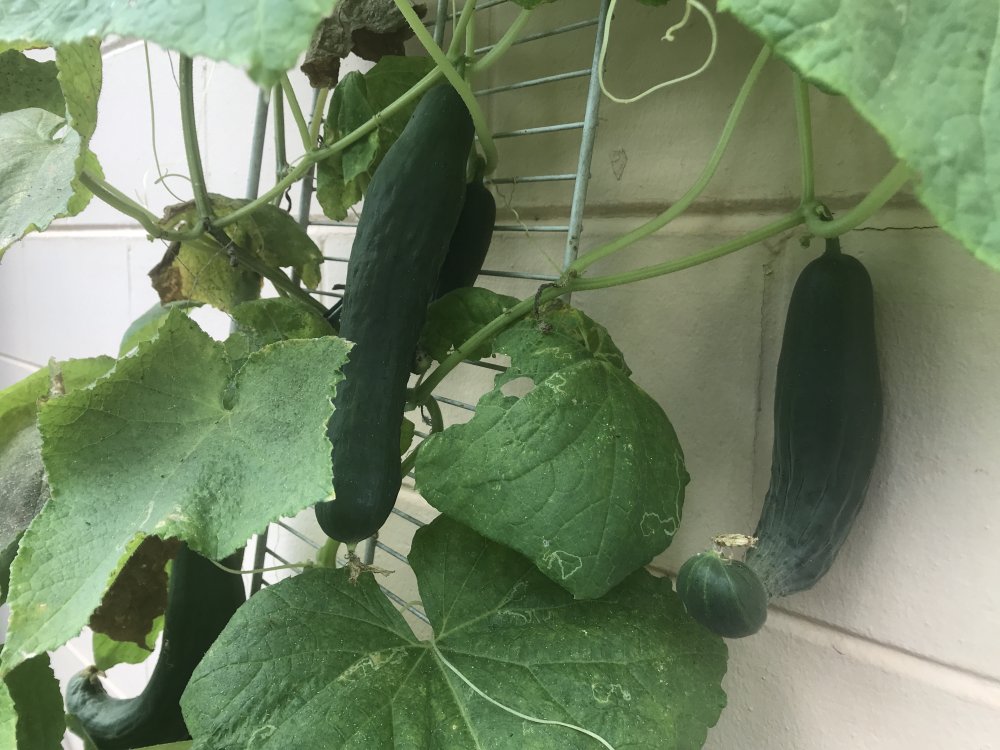
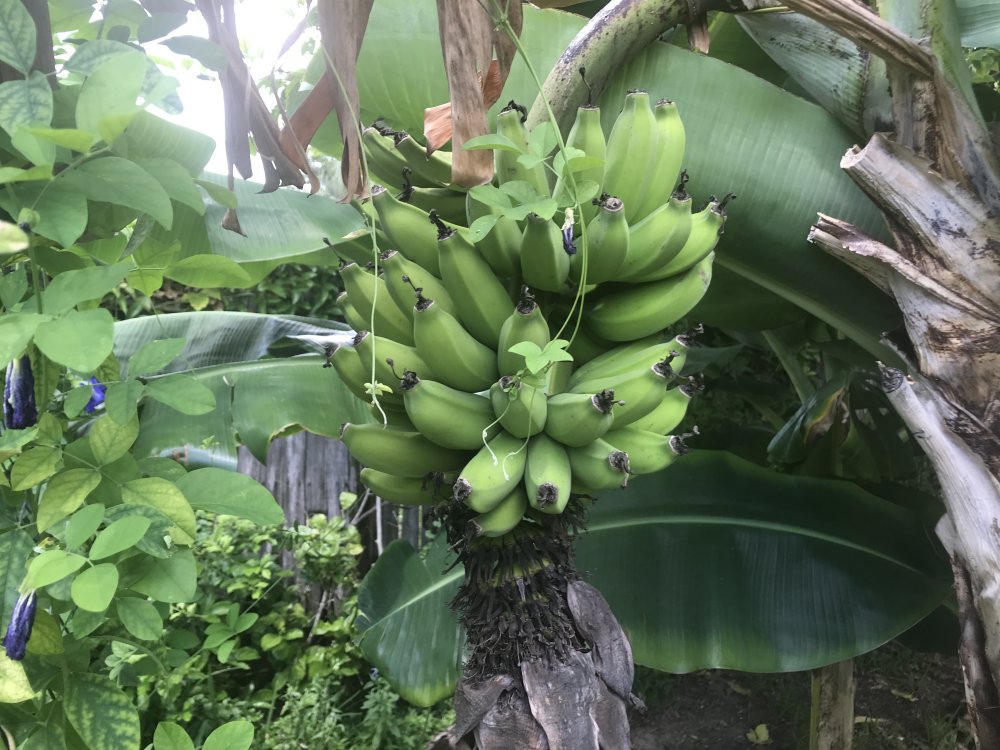
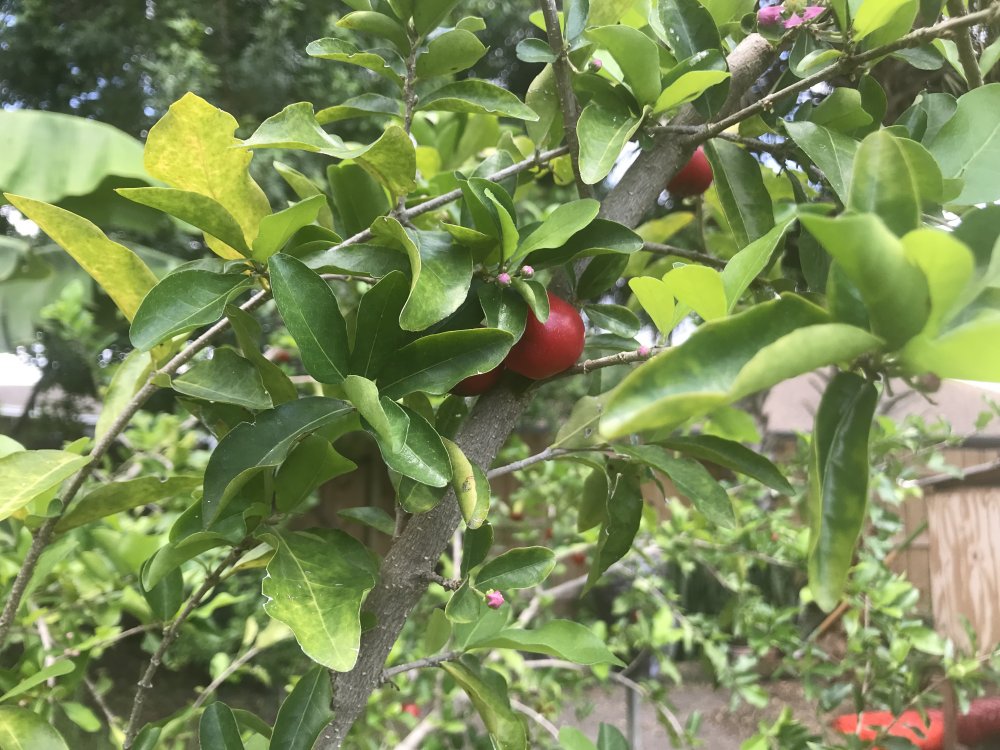


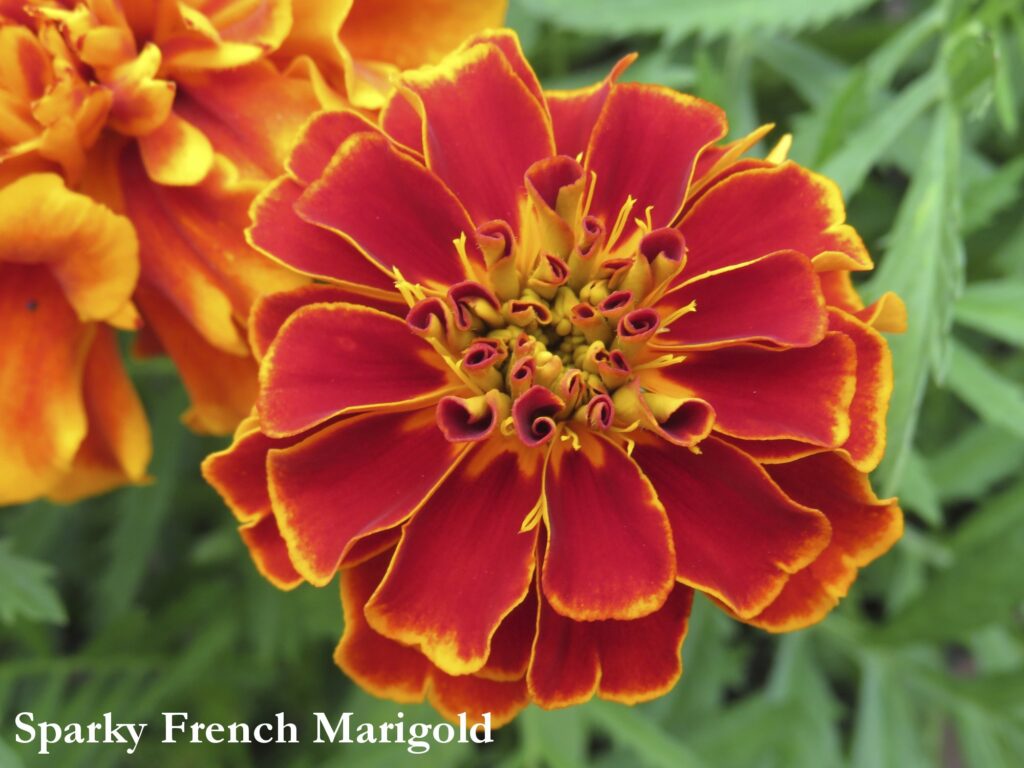
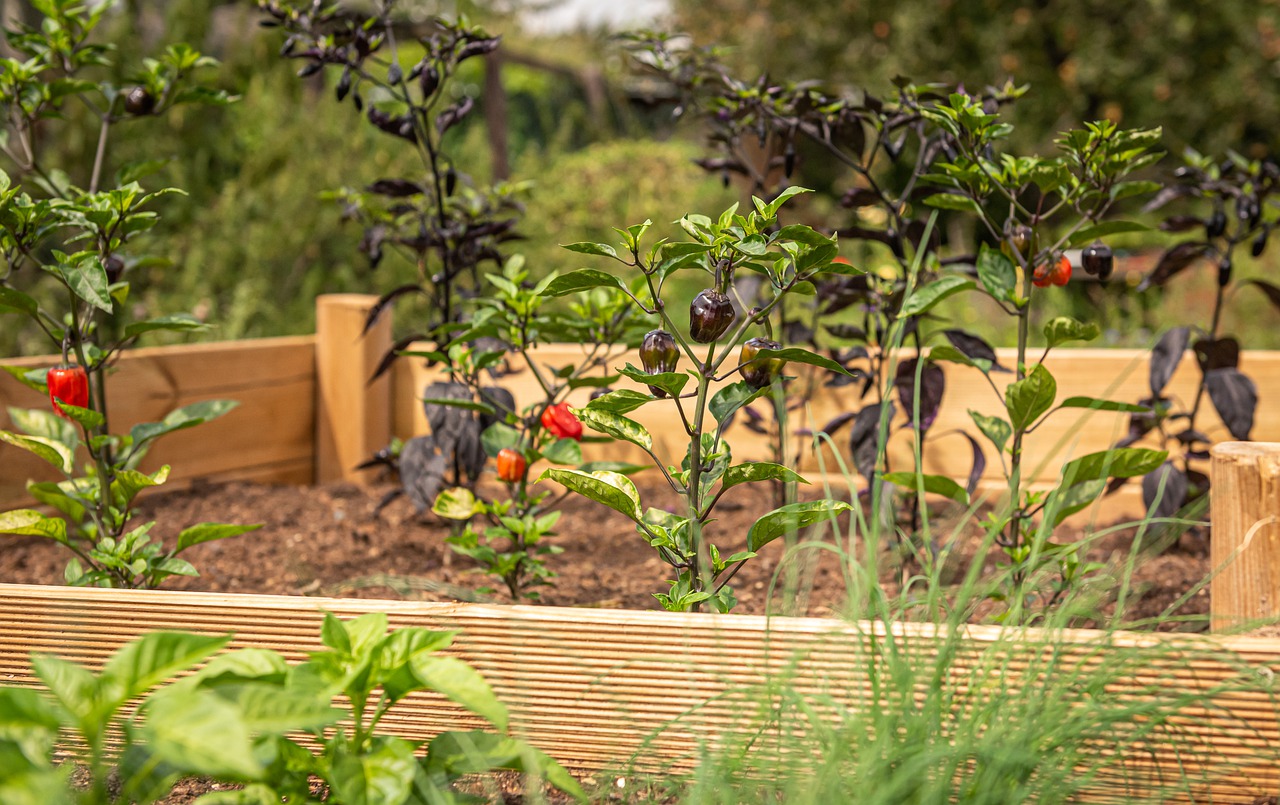
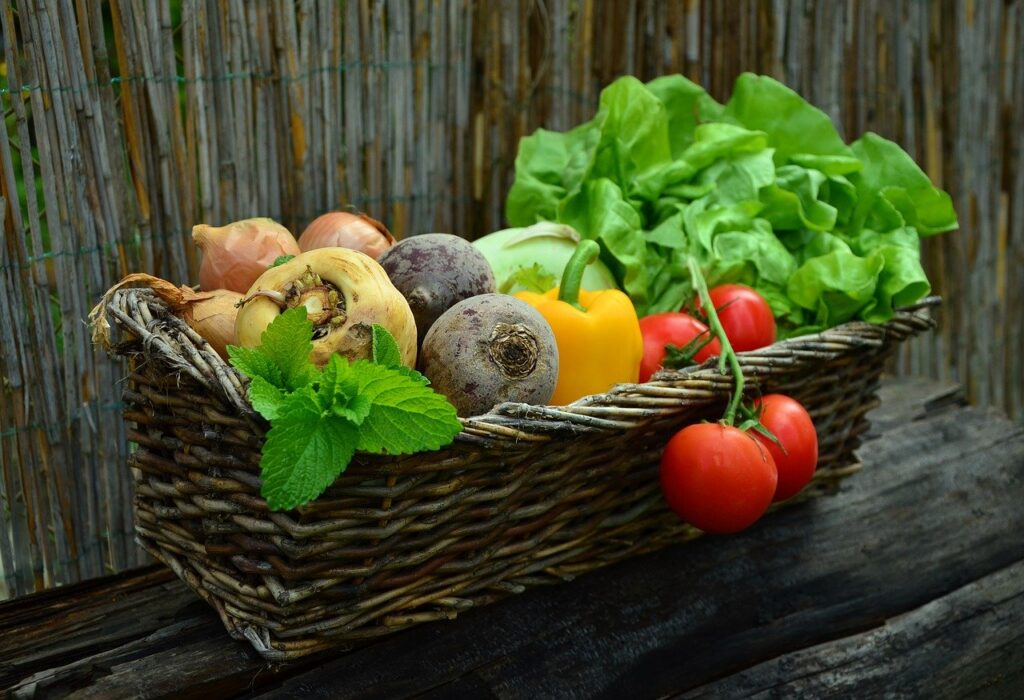
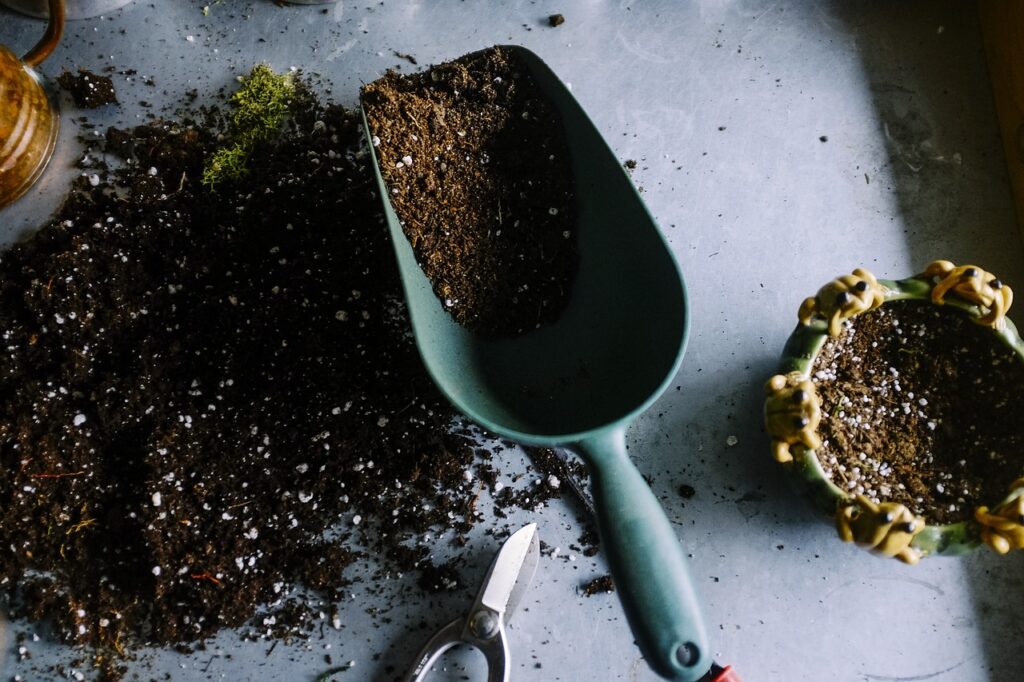
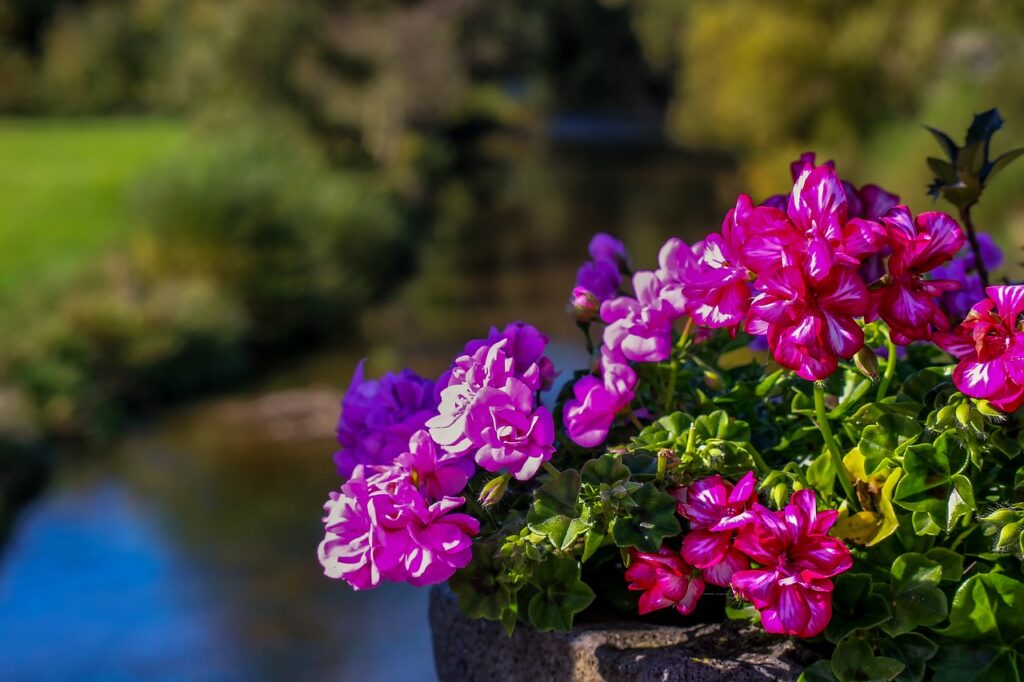


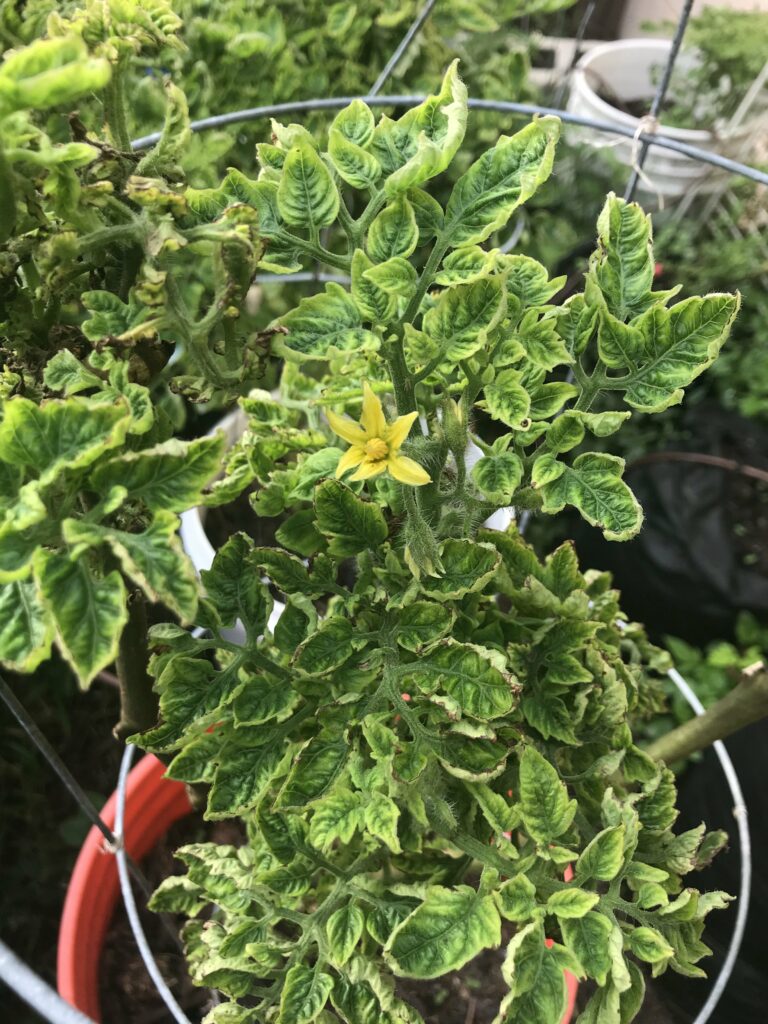
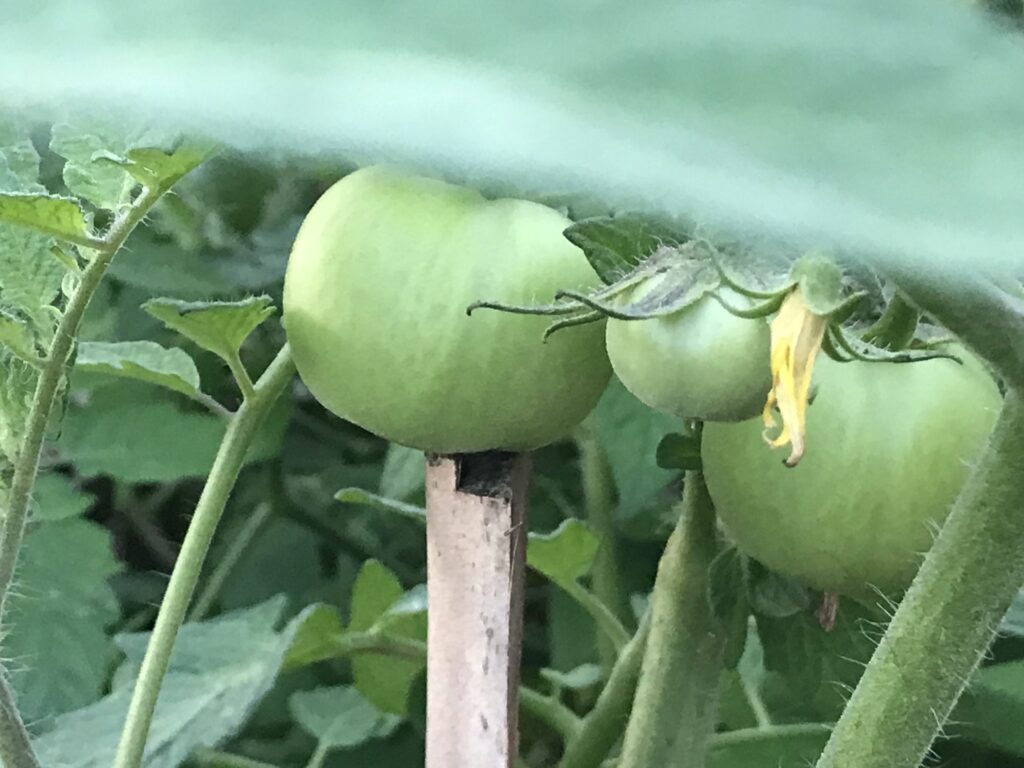
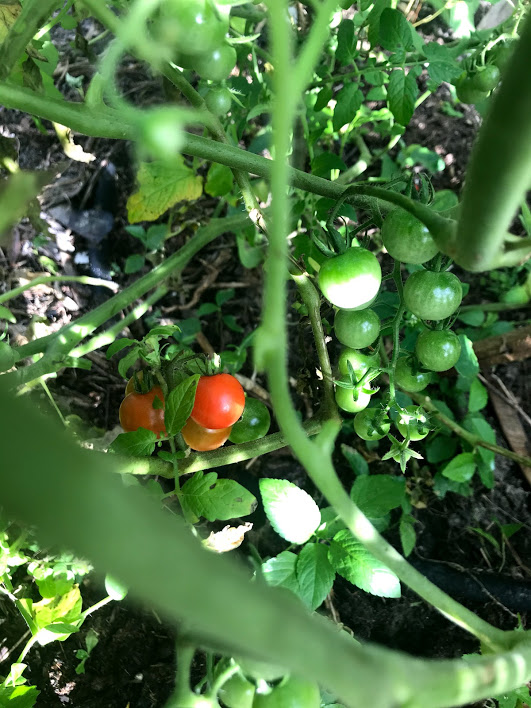
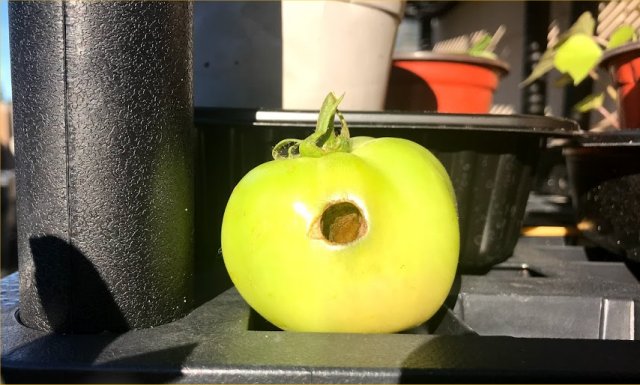
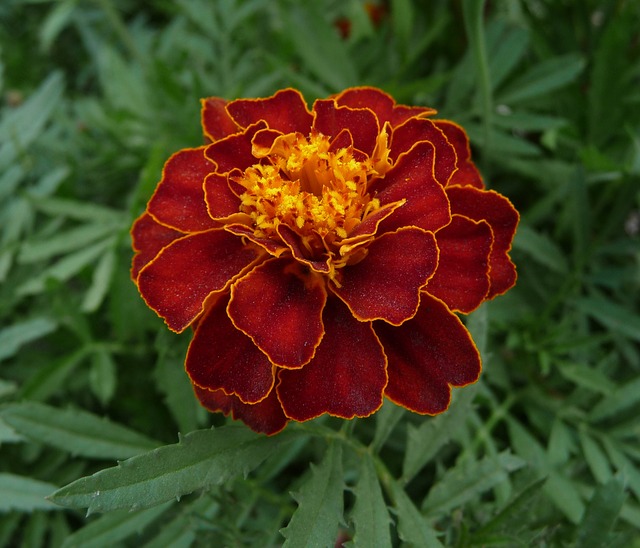
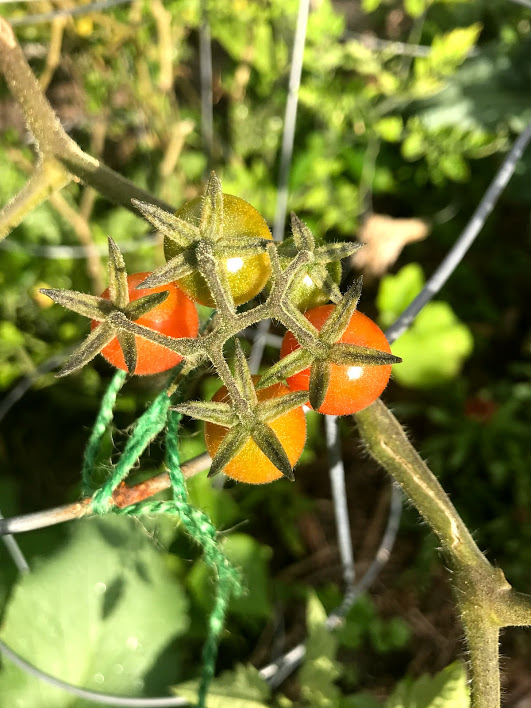
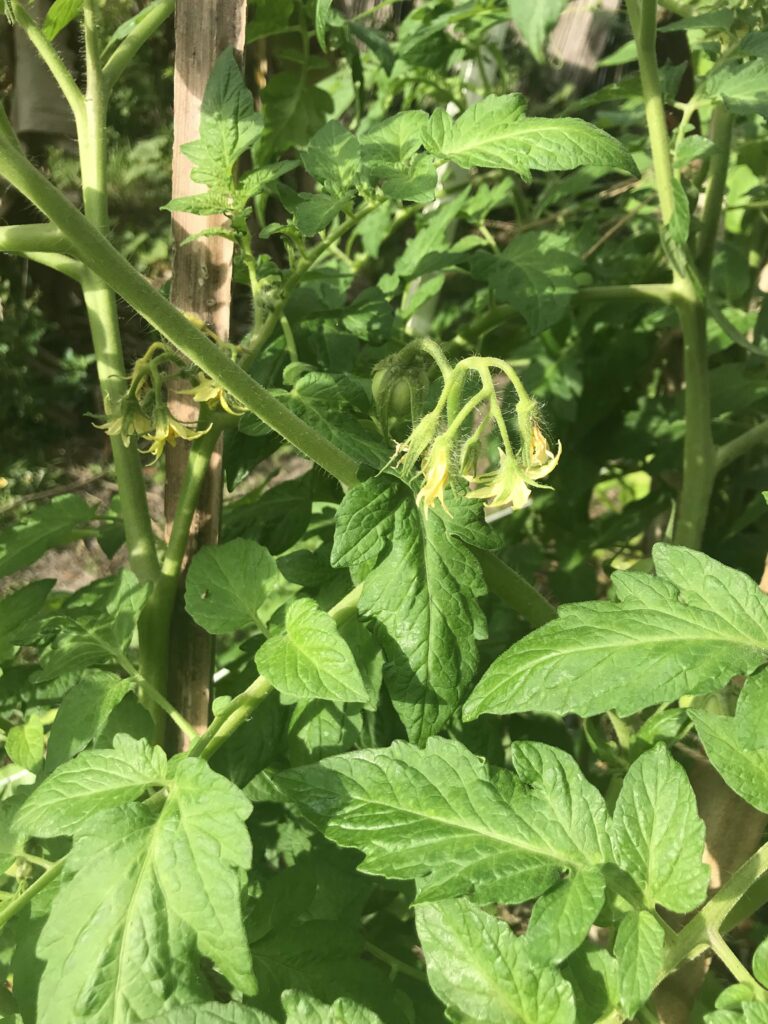
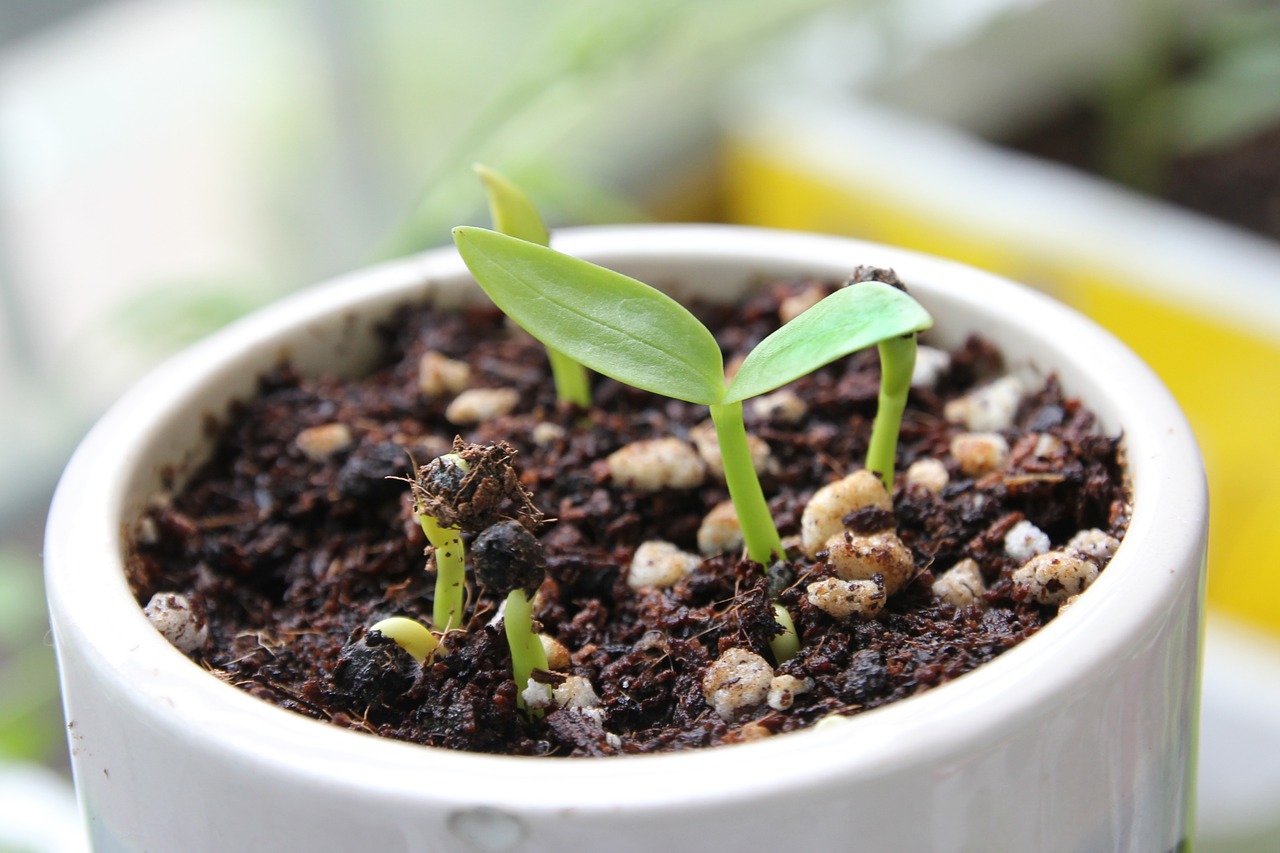
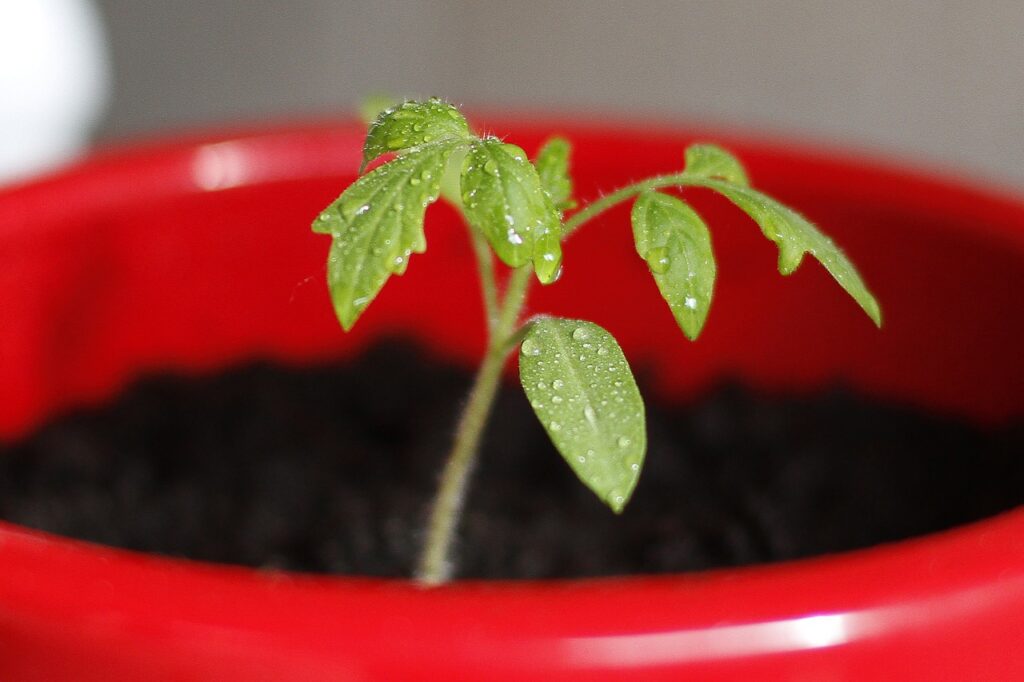


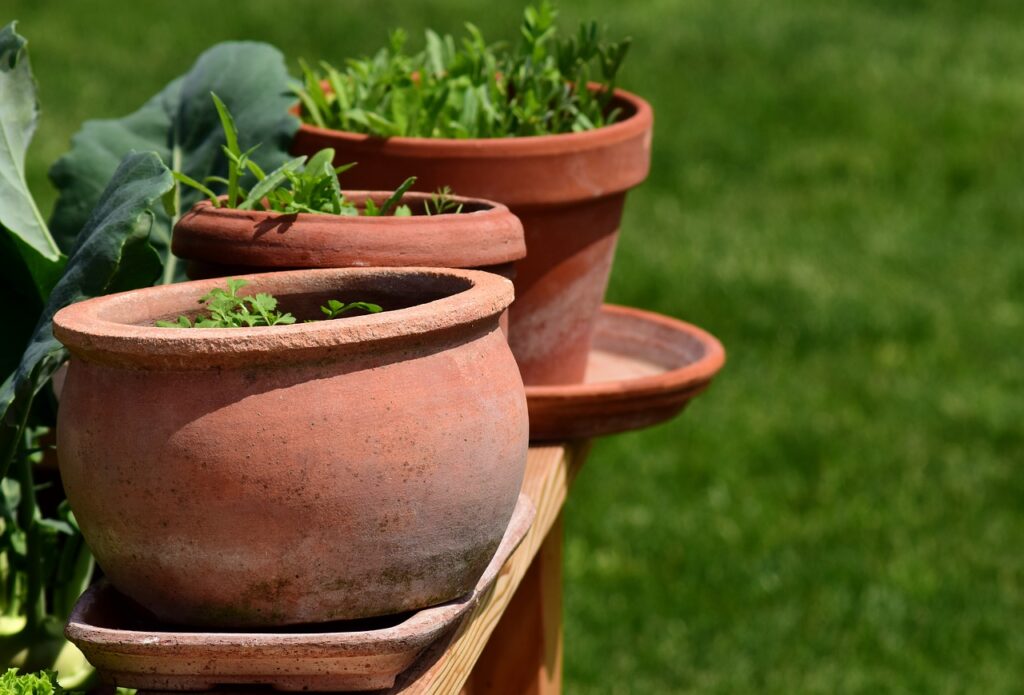
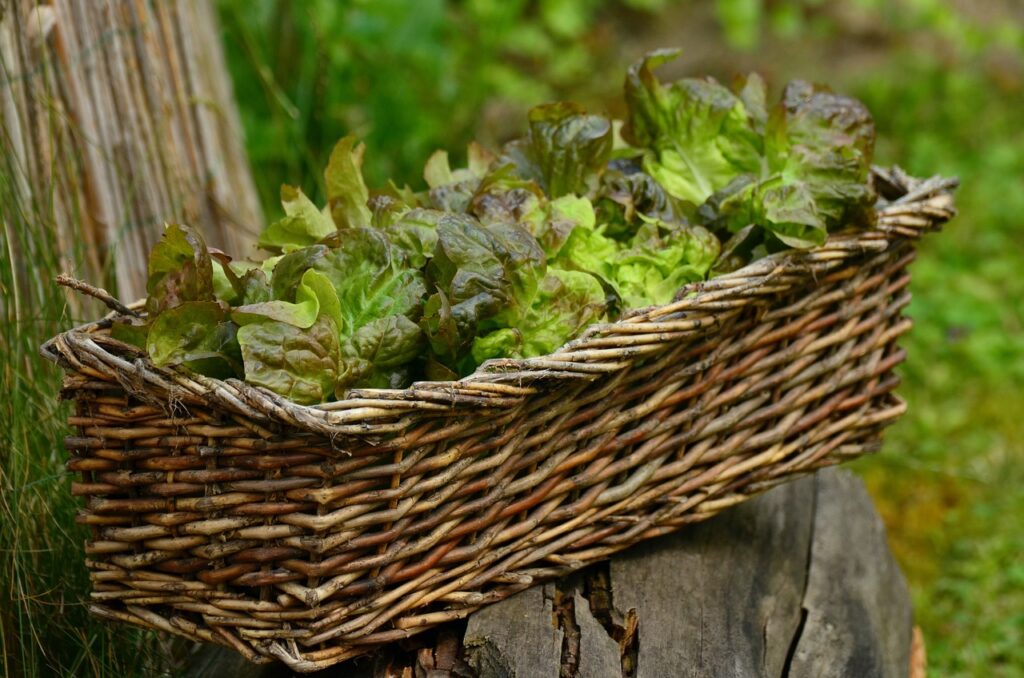
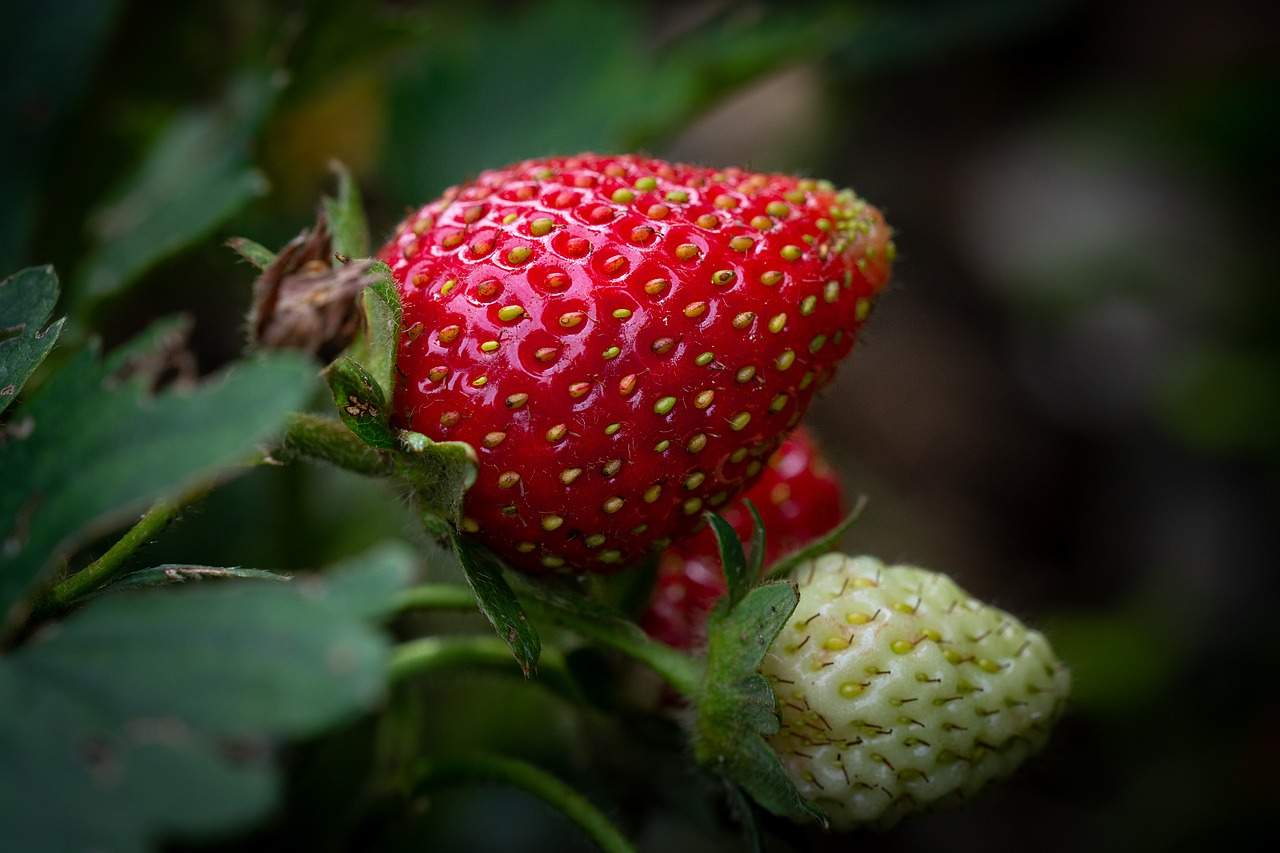


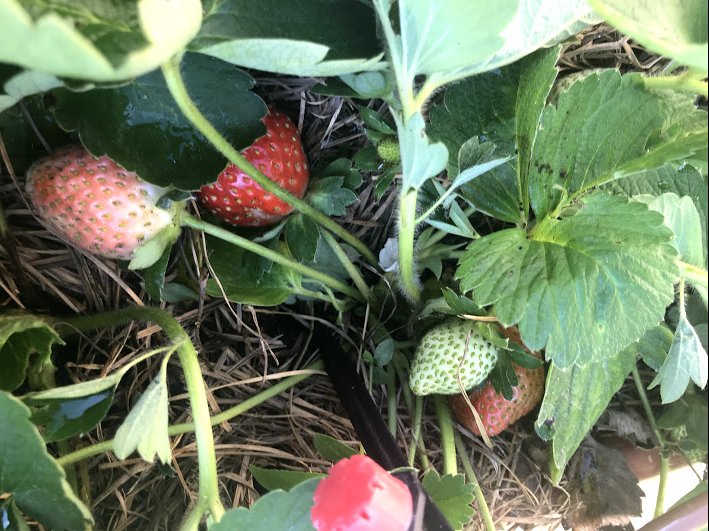
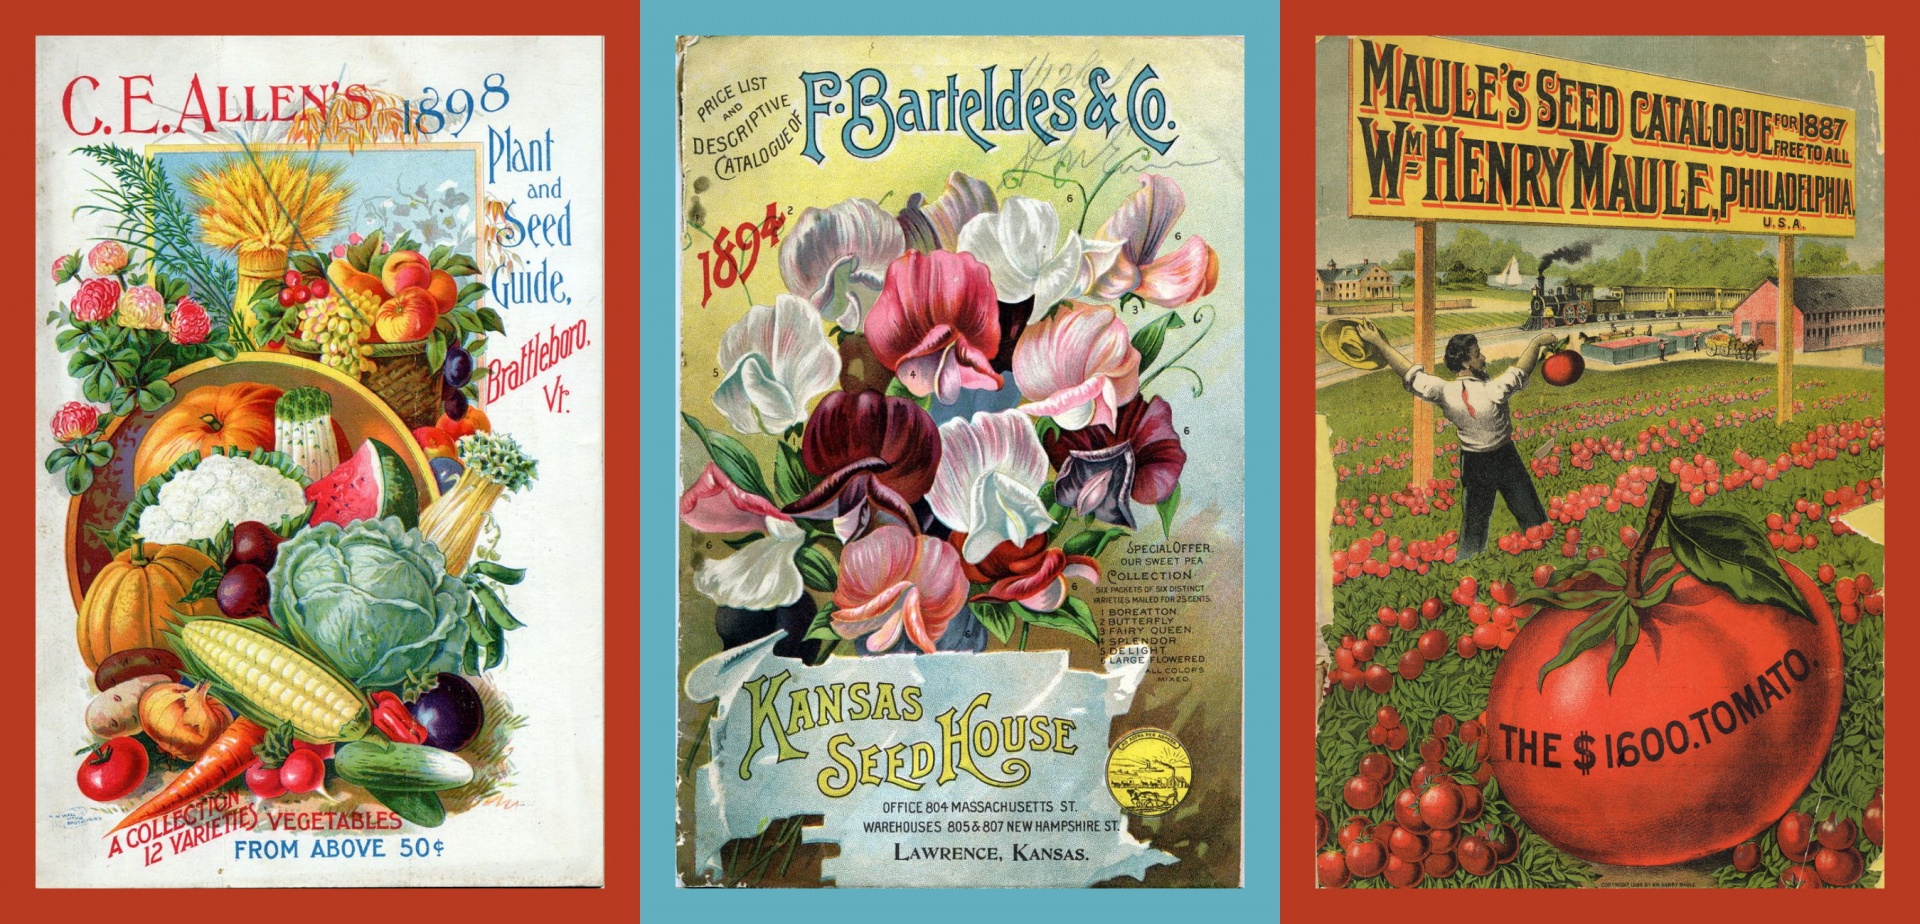
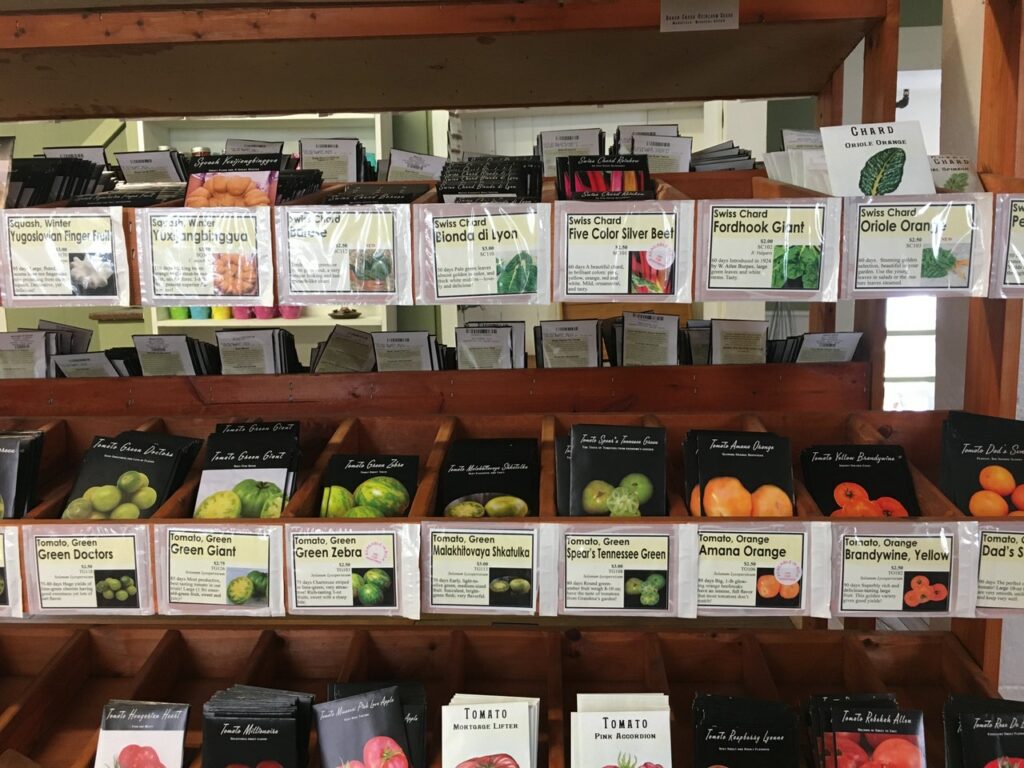
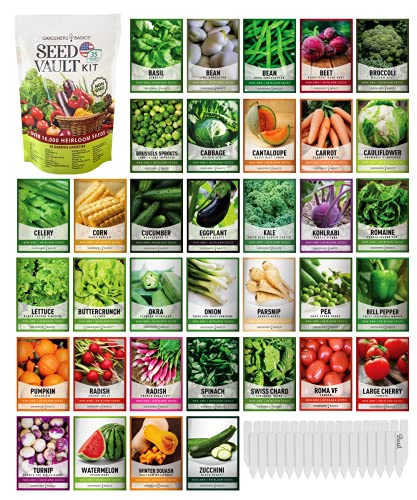
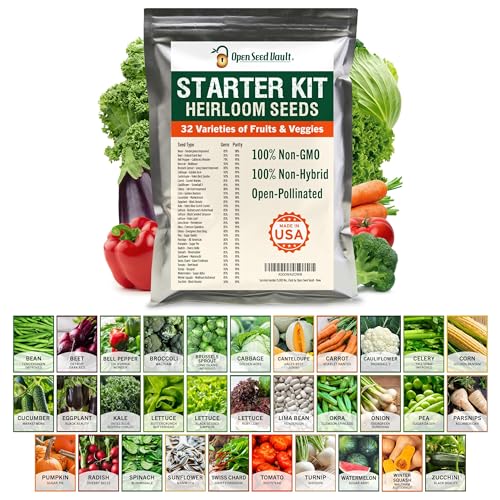


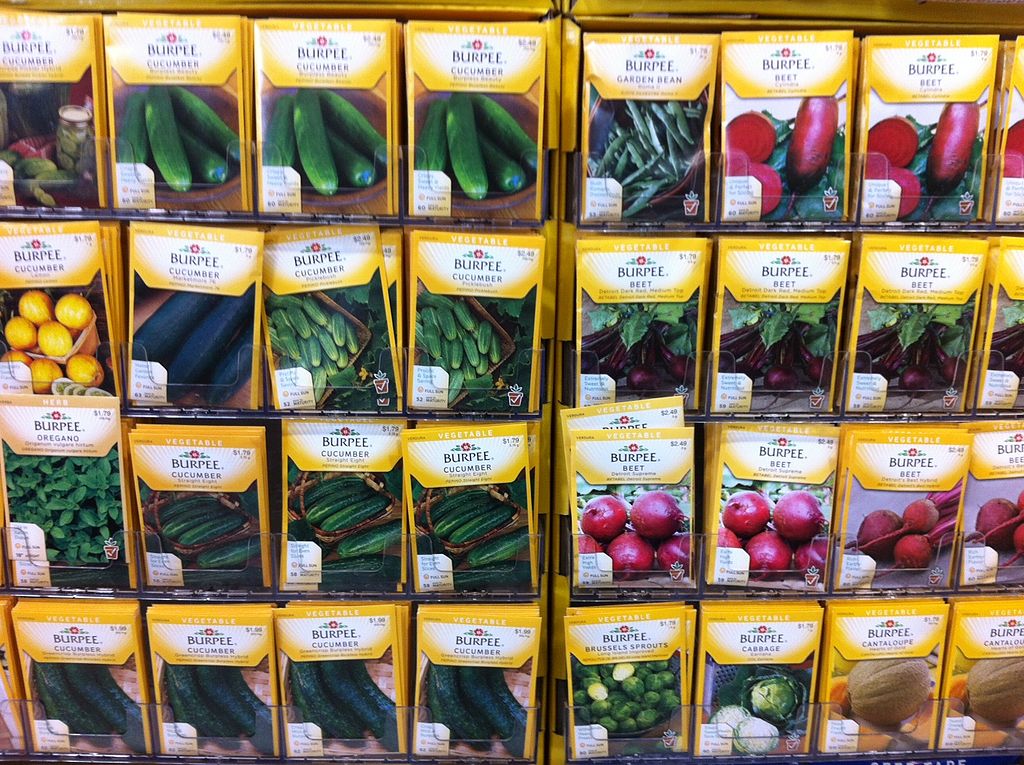

