Posted on

11 Best Self-Watering Containers for Florida Gardens

Best self-watering containers for plants

Did you know that using self-watering containers can reduce your garden’s water consumption by up to 65%? In Florida’s intense heat, that’s a game-changer. As someone who’s tested many self-watering containers in our challenging climate, I’ve discovered which features truly matter for Florida gardeners.

Let’s explore the top 10 picks for container gardening that can handle our scorching summers, frequent rains, and occasional freezes.

Essential Features for Florida Self-Watering Containers

Self watering containers for Florida should be durable

Florida’s climate presents unique challenges for gardeners, making it vital to choose self-watering containers designed to thrive in the state’s conditions. Here are the key features to look for:

UV-Resistant Materials for Sun Protection

Florida’s abundant sunshine can be intense, breaking down non-UV-protected plastics over time. Look for containers made from UV-resistant materials to ensure durability and longevity. These materials prevent cracking, fading, and brittleness, keeping your containers functional and looking good year-round.

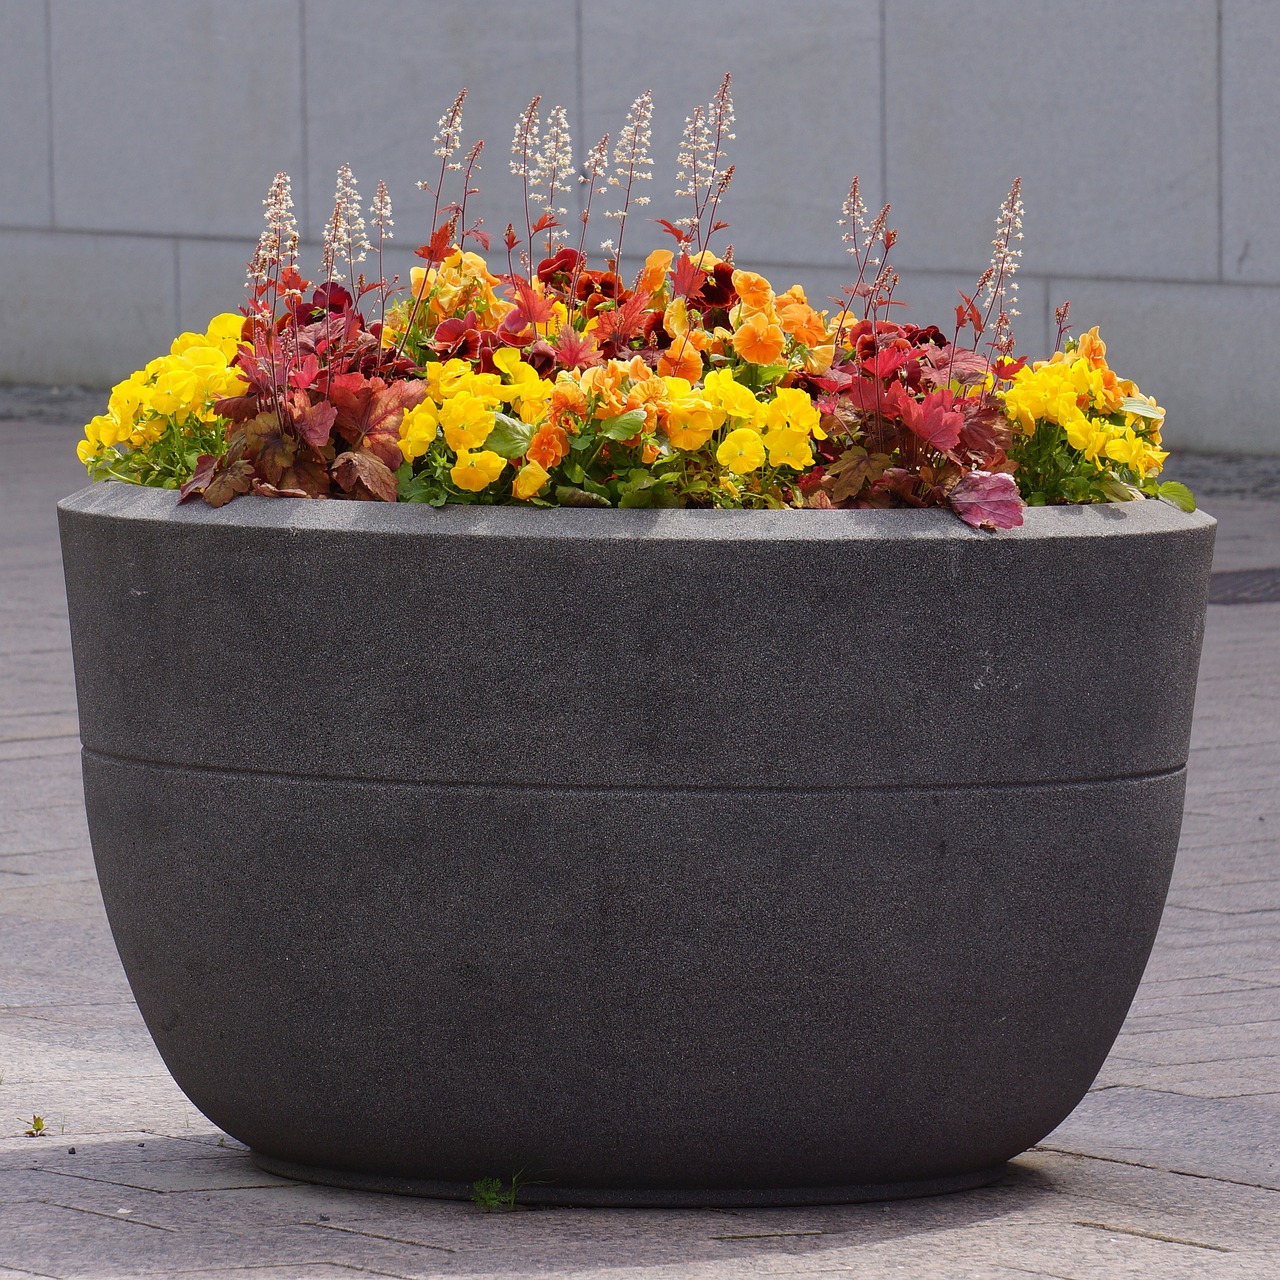
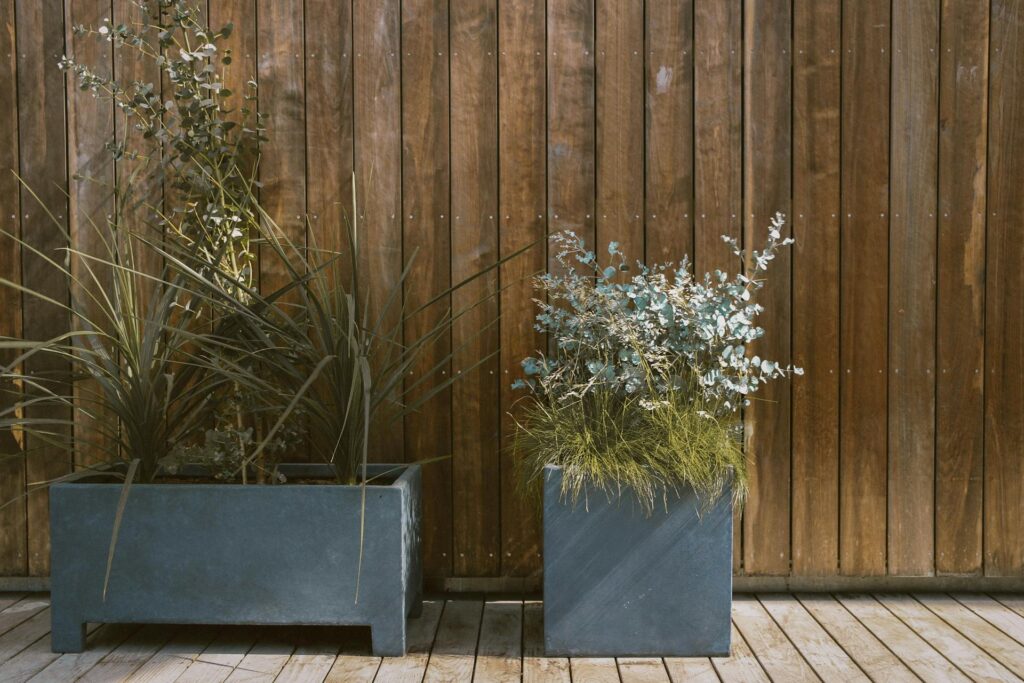
Light-Colored Options for Summer Use

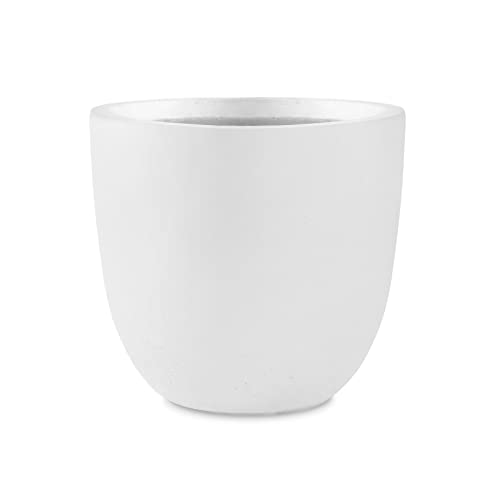
Dark containers absorb heat, which can stress plant roots during Florida’s hot summers. Opt for light-colored containers to reflect sunlight and help keep the root zone cooler. Colors like white, beige, or pastel shades are both practical and stylish.

Removable or Adjustable Water Reservoirs

Flexibility is critical when managing soil moisture in a self-watering container. Containers with removable or adjustable reservoirs make it easy to customize water storage based on your plants’ needs and the season. These features also simplify cleaning and maintenance to prevent algae buildup.

Hurricane-Resistant Design Features

Florida’s storm season requires sturdy containers that can withstand high winds and heavy rain. Look for containers with low profiles, weighted bases, or anchoring options to keep them stable during adverse weather. Lightweight plastic containers might tip over in strong winds, so consider heavier or reinforced designs, or be prepared to bring your plants indoors.

Smart Overflow Systems for Rainy Seasons

Florida’s frequent downpours can overwhelm poorly designed self-watering systems. Choose containers with overflow drains to prevent waterlogging and root rot. An effective overflow system ensures excess rainwater drains away while still allowing the reservoir to function as intended.

With these features in mind, your self-watering containers will be better equipped to handle Florida’s unique climate, keeping your garden thriving with less effort.

Top 10 Self-Watering Containers for Florida Gardens

Let’s look a bit closer at a few of the best models on the market.

1. Lechuza Balconera Color

Lechuza 15680 Balconera Color 80 Self-Watering Planter for Indoor and Outdoor Use, 31″ x 7″ x7″,…
  • Discover the perfect way to bring your patio and balcony to life with the Balconera, brackets sold separately
  • LECHUZA’s signature water reservoir supplies water to your plants as needed, extending the time between watering
  • The planter’s water-level indicator shows when the reservoir needs to be refilled

Specs:

  • Dimensions: 20″ (length) x 7″ (width) x 7″ (height)

Features:

  • Self-Watering System: The built-in sub-irrigation system delivers water directly to the roots, ensuring optimal hydration without overwatering.
  • UV-Resistant Material: Crafted from high-quality, UV-resistant plastic to withstand Florida’s intense sun, preventing fading or cracking.
  • Interchangeable Plant Liners: Removable liners make planting, repotting, and cleaning easy and convenient.
  • Overflow Drainage: Equipped with an overflow function to prevent waterlogging, particularly useful during Florida’s frequent rainstorms.

Pros:

  • Durable Construction: The UV-resistant material ensures long-lasting durability, even under harsh Florida weather.
  • Low-Maintenance Care: The self-watering system reduces the need for frequent watering, making it ideal for busy gardeners or those with frequent travel schedules.
  • Aesthetic Design: The sleek, modern look fits seamlessly into various garden styles, from traditional to contemporary.
  • Versatility: Suitable for a wide range of plants, from flowers and herbs to small vegetables like lettuce or peppers.

Cons:

  • Mounting Brackets Sold Separately: If you plan to mount this planter on a balcony or railing, the necessary brackets are not included and must be purchased separately.
  • Higher Price: The Lechuza Balconera Color is priced higher than many standard planters, which may be a consideration for budget-conscious shoppers. However, the features and build quality can justify the investment.
  • Limited Size for Large Plants: While great for smaller plants, the 20-inch length and shallow depth may not support larger, deep-rooted vegetables.

Availability:

Buy on Amazon.com or Walmart.com

The Lechuza Balconera Color is a durable, aesthetically pleasing, and functional self-watering planter that works well for Florida gardens. Its UV-resistant material and self-watering feature are especially beneficial for Florida’s hot climate, reducing the need for frequent watering.

While it may not be suitable for larger plants, it is perfect for flowers, herbs, and small vegetables. The higher price point and additional cost for mounting brackets may be a drawback for some, but overall, it’s a solid investment for anyone looking for a low-maintenance, high-quality planter.


2. EarthBox 80151 Garden Kit, Organic, Green

EarthBox 80151 Garden Kit, Organic, Green
  • Includes: 1 lb. Organic fertilizer, 1 lb. Organic dolomite, 4 casters, and 2 Black/White reversible mulch covers
  • Ub stabilized
  • Maintenance free
  • Award-winning, patented system
  • Green in color

Specs:

  • Dimensions: 29″ (length) x 14″ (width) x 10″ (height)
  • Water Reservoir Capacity: 3 gallons

Features:

  • Self-Watering System: Uses a sub-irrigation system with a water reservoir, providing consistent hydration to plants while preventing overwatering.
  • Pre-assembled Fertilizer: Comes with organic fertilizer included, offering a convenient and nutrient-rich growing solution for plants.
  • UV-Resistant Construction: The durable plastic construction is designed to withstand Florida’s intense sunlight without degrading.
  • Easy Setup: Designed for straightforward assembly and use, with a simple process for filling the water reservoir and adding soil.
  • Integrated Drainage: The self-watering system helps prevent overwatering while also providing built-in drainage to keep the plant roots healthy.

Pros:

  • Self-Watering Convenience: The system ensures that plants receive consistent water, reducing the need for frequent manual watering.
  • Organic Option: Comes with organic fertilizer, making it ideal for gardeners looking to grow produce without synthetic chemicals.
  • Space-Saving Design: Its compact size makes it perfect for small spaces like balconies, patios, or small gardens.
  • Durable and Long-Lasting: The UV-resistant materials ensure that it can handle Florida’s weather conditions over time.

Cons:

  • Large Size: It may not be suitable for those looking for a more compact container, as it requires more space than smaller containers.
  • Price: Compared to other basic planters, it is on the pricier side, though the included fertilizer and self-watering system may justify the cost.
  • Requires Setup: While it’s easy to assemble, it does require a bit of setup, which might not be ideal for gardeners looking for immediate use.

Best for:

  • Those looking for a self-watering container that’s perfect for growing vegetables, herbs, and flowers in small spaces like patios or balconies.
  • Organic gardeners who appreciate the inclusion of natural fertilizer for healthy plant growth.

Availability:

Buy on Amazon.com or Walmart.com

The EarthBox 80151 Garden Kit is an excellent option for Florida gardeners seeking a reliable, self-watering container that includes organic fertilizer and offers a simple setup. It’s particularly great for those with limited space who want a low-maintenance, efficient way to grow vegetables and herbs.

While it may be a bit large for some, and the price may be higher than some alternatives, the convenience of the self-watering system and organic materials make it a valuable investment for many gardeners.

3. City Jungle Self-Watering Planter

Sale
BioGreen Raised Garden Bed with Trellis CITY JUNGLE | 8.98 gal | 13“L x 24“W x 63.4“H |…
  • ROBUST TRELLIS FOR CLIMBING PLANTS: Enhance your garden with our trellis planter, designed for uninterrupted growth of vining flowers, vegetables, and top-heavy species like Tomatoes and Dahlias.
  • WEATHER-RESILIENT EXTENSIBLE DESIGN: Features a sturdy, weather-resistant trellis that extends up to 63 inches, ensuring optimal plant support and placement in any outdoor environment.

Specs:

  • Dimensions: 47.25″ (length) x 23.5″ (width) x 47″ (height with trellis)
  • Water Reservoir Capacity: 4.5 gallons

Features:

  • Self-Watering System: The built-in irrigation system keeps plants consistently watered, ideal for Florida’s hot summers and reducing maintenance.
  • Integrated Trellis: The attached trellis is perfect for climbing plants like tomatoes, cucumbers, and peas, allowing for vertical growth in smaller spaces.
  • Durable Construction: Made from high-quality materials designed to withstand the outdoor elements, including UV resistance to prevent fading and degradation from the sun.
  • Efficient Use of Space: With the raised bed and trellis design, this container maximizes gardening space in small areas like patios, balconies, and urban gardens.
  • Built-In Drainage: The bed features a drainage system that helps to prevent waterlogging and ensures healthy root growth.

Pros:

  • Space-Saving Design: The vertical trellis and raised bed design make it ideal for small spaces while still providing ample room for plants to grow.
  • Convenient Watering: The self-watering system reduces the need for frequent watering, making it a low-maintenance option for busy gardeners.
  • Versatile Planting: Suitable for growing a wide range of vegetables, herbs, and climbing plants, including tomatoes, beans, and cucumbers.
  • Durable and Weather-Resistant: The UV-resistant construction ensures it will last in Florida’s sunny climate without deteriorating.
  • Easy Assembly: Most users find the bed easy to assemble with minimal effort.

Cons:

  • Size Limitation: While it’s a great option for small spaces, it may not be ideal for gardeners who want to grow larger quantities of plants.
  • Water Reservoir Capacity: The 3.5-gallon reservoir may not be sufficient for larger or more thirsty plants, requiring extra watering during dry spells.
  • Trellis Height: The trellis is somewhat short for taller plants like tomatoes, so gardeners may need to adjust or use additional supports.

Best for:

  • Urban gardeners or those with limited space, like apartment dwellers or homeowners with small patios or balconies.
  • Gardeners looking for an easy-to-maintain, self-watering solution for growing a variety of plants, especially those that need vertical support.

Availability:

Buy on Amazon.com or Walmart.com

The BioGreen Raised Garden Bed from City Jungle is a fantastic choice for Florida gardeners with limited space who are looking for a self-watering, easy-to-assemble solution. Its space-saving design and integrated trellis are perfect for growing a variety of plants, especially those that require vertical support.

While the water reservoir might be a bit small for larger plants, and the trellis could be taller for some crops, its durability and low-maintenance watering system make it an excellent option for small-space urban gardeners.

4. Bloem Ariana Self-Watering Planter Pots

Bloem AP20908 Ariana Self Watering Planter 20″, Charcoal Gray
  • Capacity: 11 Gallons / Size: 21.5 in. Top width x 12 in. Bottom width x 17 in. Height
  • Self-watering disk included. The disk helps to store reserved water, which can be used up by the plants at a later time. Plant will absorb water when needed.
  • Sealed bottom to prevent leakage indoors. Optional knock-out drainage holes when used outdoors.

Specs:

  • Dimensions: 20″ (diameter) x 14″ (height)
  • Water Reservoir Capacity: 3.2 gallons

Features:

  • Self-Watering System: Equipped with an easy-to-use self-watering feature that helps maintain consistent moisture levels for your plants, reducing the need for frequent watering.
  • Durable Construction: Made from lightweight, high-quality resin that resists cracking and fading, even in full sun exposure typical in Florida.
  • Sleek Design: The modern, clean lines of the planter fit seamlessly into any garden or patio, adding aesthetic value without overpowering the surrounding space.
  • Drainage Hole: Comes with a drainage hole to prevent water from pooling at the bottom, ensuring your plants don’t suffer from root rot.
  • UV-Resistant: Built to withstand harsh sunlight, making it ideal for Florida’s year-round sun exposure.

Pros:

  • Self-Watering Convenience: The self-watering system means you don’t have to water as often, making it a great option for busy gardeners.
  • Lightweight and Easy to Move: Despite its large size, the planter is made from lightweight materials, making it easy to move around your garden or patio.
  • Aesthetic Appeal: The sleek, simple design complements a variety of plants, from native flowers to small vegetables, adding a touch of elegance to your outdoor space.
  • Durable in Sun: Resists fading and cracking under Florida’s intense sun, providing long-term use.
  • Affordable: This planter is reasonably priced, offering good value for its features, especially for those seeking a low-maintenance gardening solution.

Cons:

  • Size Limitation: While great for small to medium-sized plants, larger plants may not have enough space to fully thrive in this planter.
  • No Water Level Indicator: Unlike some other self-watering planters, this one doesn’t have a clear water level indicator, making it harder to gauge when to refill the reservoir.

Best for:

  • Florida gardeners looking for an easy-to-use, aesthetically pleasing self-watering planter for small to medium-sized plants like flowers, herbs, or small vegetables.
  • Gardeners who prefer low-maintenance options that don’t require daily attention.

Availability:

Buy on Amazon.com or Walmart.com

The Bloem Ariana Self-Watering Planter is an excellent choice for Florida gardeners seeking a sleek, low-maintenance option for smaller to medium-sized plants. Its self-watering feature and UV-resistant construction make it an ideal fit for the state’s sunny, often dry climate.

While it may not be the best choice for large plants or those with deep root systems, its ease of use, aesthetic appeal, and affordability make it a popular option for urban gardeners, patio enthusiasts, and those with limited gardening space.

5. Emsco City Pickers Raised Planter Beds

Emsco City Pickers Raised Planter Beds, Terra Cotta Colored, Pack of 2
  • Set of 2 raised planter beds, each with a terra cotta colored finish
  • Resin construction remains durable for many seasons
  • Casters on the base of each planter allow you to reposition them as needed

Specs:

  • Dimensions: 24″ (length) x 20″ (width) x 12″ (height

Features:

  • Self-Watering System: Helps reduce the frequency of watering by automatically supplying moisture to your plants.
  • UV-Protected Plastic: Designed to endure the Florida sun with its UV-resistant polypropylene construction.
  • Raised Design: The elevated height of the planter reduces strain on the back and knees, making it accessible for gardeners of all abilities.
  • Overflow Drainage: Prevents waterlogging by allowing excess water to drain away, protecting plant roots from being too wet.

Pros:

  • Easy Maintenance: The self-watering system makes it easier to maintain plants with less frequent watering required.
  • Durable Construction: UV-protected plastic ensures that the planter can withstand the Florida sun and rain without deteriorating.
  • Ergonomic Design: The raised height of the planter allows gardeners to work without bending over, making it great for anyone with mobility concerns.
  • Value for Money: A budget-friendly self-watering planter, offering convenience without a high price tag.

Cons:

  • Water Reservoir: While the self-watering feature is convenient, some users may find that the reservoir needs to be refilled more frequently, especially during hot, dry periods.
  • Depth: The planter’s depth may not be sufficient for larger plants or deep-rooted vegetables.

Best for:

  • People with limited space who want a self-watering option for small plants like herbs, flowers, or compact vegetables.
  • Those who prefer an easy-maintenance solution for gardening without needing to water as frequently.

Availability:

Buy on Amazon.com or Walmart.com

The EMSCO City Pickers 24″x20″ planter is an affordable and convenient choice for gardeners looking for an easy-to-maintain, self-watering planter. It’s perfect for herbs, flowers, and small vegetables, especially for those with limited space.

While it may not be suitable for larger plants, it offers great value for the price and performs well in Florida’s weather with its UV-resistant construction and self-watering features.


6. CedarCraft Convenient Self-Watering Elevated Cedar Planter

Specs:

  • Dimensions: 37.5″ (length) x 15.75″ (width) x 31.5″ (height)

Features:

  • Elevated Design: The planter is raised to a comfortable working height, reducing strain on your back and knees.
  • Self-Watering System: Includes a water reservoir to automatically irrigate plants, promoting healthy growth with minimal watering.
  • Durable Cedar Construction: Made from high-quality cedar wood, known for its natural resistance to pests and decay.
  • Overflow Drainage: Features drainage holes to allow excess water to escape, preventing waterlogging and root rot.

Pros:

  • Ergonomic: The elevated height makes it accessible for people with mobility issues, reducing the need for bending down while gardening.
  • Aesthetically Pleasing: The natural cedar wood gives the planter a rustic, attractive look that fits well in various garden settings.
  • Self-Watering: Reduces the frequency of watering and provides consistent moisture to plants, especially during the hotter months.
  • Durable and Long-Lasting: Cedar is naturally resistant to rot, making this planter a great option for long-term use.

Cons:

  • Assembly Required: Some users find the assembly process a bit challenging, as it involves multiple parts and tools.
  • Limited Depth for Larger Plants: The depth of the planter may not be sufficient for larger or deep-rooted plants.
  • Price: While it’s a high-quality product, some users feel it’s on the expensive side, especially when compared to other self-watering planters.

Best for:

  • Gardeners looking for a space-saving solution for small to medium-sized plants, herbs, and vegetables.
  • Those who prefer the aesthetic appeal of natural wood in their garden décor.
  • People with mobility issues who need an elevated planting option to avoid bending down.

Availability:

Buy on Amazon.com or Walmart.com

The CedarCraft Convenient Self-Watering Elevated Cedar Planter is a stylish and practical option for gardeners looking to grow herbs, flowers, or small vegetables with less maintenance. Its elevated design makes gardening comfortable, and the self-watering system helps keep plants hydrated.

While assembly may take some time and it may not be suitable for larger plants, this planter’s durability and aesthetic appeal make it a great choice for those seeking an attractive, functional addition to their garden or patio.

7. Dexceder 13.2 Gallon Self Watering Raised Garden Bed with Ventilation Transparent Lid Greenhouse

Dexceder 13.2 Gallon Self Watering Raised Garden Bed with Ventilation Transparent Lid Greenhouse,…
  • SELF WATERING & NO MORE ROOT ROT – The smart unique sub-irrigation system is one of the most appealing aspects among all Dexceder planters. The easy-to-use separated integrated water reservoir or catcher keeps your soil well aerated and automatic supplies plants with the right amount of ongoing…

Specs:

  • Dimensions: 35.8″ (length) x 17.7″ (width) x 17.7″ (height)
  • Water Reservoir Capacity: 13.2 gallons

Features:

  • Self-Watering System: Includes a built-in water reservoir at the bottom that automatically waters plants, ensuring consistent hydration.
  • Ventilated Transparent Lid: The transparent lid allows sunlight to reach the plants while providing ventilation to regulate temperature and humidity.
  • Durable Plastic Construction: Made from high-quality, UV-resistant plastic, designed to withstand outdoor elements and protect plants from harsh weather.
  • Raised Design: The raised bed design helps reduce strain on your back and knees, making gardening more accessible.

Pros:

  • Self-Watering Convenience: The self-watering system significantly reduces the need for frequent watering, making it ideal for busy gardeners or those in hot climates.
  • Ventilation and Temperature Control: The transparent lid with ventilation openings helps regulate temperature and humidity, creating a greenhouse-like environment for plants.
  • Durability: The UV-resistant plastic construction ensures the planter lasts longer, even when exposed to the sun and rain.
  • Ergonomic: The raised design makes it easier on the back and knees, perfect for those who want to garden without bending over.

Cons:

  • Lid May Get Too Hot: While the transparent lid provides sunlight, some users have mentioned that the plants can get too hot under direct sunlight, particularly during peak summer months.
  • Assembly: The setup process can be a bit tricky, and some customers found it challenging to assemble the unit without clear instructions.
  • Size Limitations: The bed may be a bit small for larger plants or a significant number of vegetables, limiting the range of crops that can be grown.

Best for:

  • Gardeners with limited space who need a compact, raised garden bed.
  • Those looking for a self-watering option to reduce the need for daily watering.
  • Individuals who want to grow small vegetables, herbs, or flowers with some protection from the elements.

Availability:

Buy on Amazon.com

The Dexceder 13.2 Gallon Self-Watering Raised Garden Bed with Ventilation Transparent Lid Greenhouse is an excellent choice for small-space gardeners looking for a self-watering solution with some protection from the elements.

While it may not be suitable for large plants and requires careful monitoring of temperature under the lid, its ease of use, durability, and ergonomic design make it a solid option for growing a variety of herbs, flowers, and compact vegetables.

8. Keter Urban Bloomer 12.7 Gallon Raised Garden Bed

Keter Urban Bloomer 12.7 Gallon Raised Garden Bed and Outdoor Herb Garden Planter with Self Watering…
  • DIMENSIONS: 32. 3 in. L x 14. 7 in. W x 30. 7 in. H
  • The easiest outdoor herb garden planter with built in water gauge it indicates when plants need additional moisture
  • DRAINAGE SYSTEM that can be opened or closed for full control of watering

Specs:

  • Dimensions: 24.2″ (length) x 15.7″ (width) x 30″ (height)

Features:

  • Self-Watering Reservoir: Features a built-in water reservoir that helps maintain consistent moisture levels, reducing the need for frequent watering.
  • Ergonomic Design: Elevated design allows for easy gardening without bending over, reducing strain on your back and knees.
  • Durable Resin Construction: Made from weather-resistant resin material, designed to withstand outdoor elements, and maintain its appearance over time.
  • Modern Look: The sleek, contemporary design complements urban and modern garden spaces, making it an attractive addition to balconies, patios, and small yards.
  • Easy Assembly: Snap-together design that doesn’t require any tools for assembly.

Pros:

  • Ergonomic Height: The elevated design is perfect for gardeners who want to avoid bending over, making it easier for those with mobility issues or back pain.
  • Low Maintenance: The self-watering system minimizes the frequency of watering, making it ideal for busy gardeners or those who travel often.
  • Durable and Weather-Resistant: The high-quality resin construction ensures that the planter will last through the seasons without cracking or fading.
  • Stylish Design: The sleek graphite color and modern look make it a great fit for urban or contemporary gardens.

Cons:

  • Smaller Planting Area: While it’s ideal for smaller plants, the limited planting space may not be suitable for larger vegetable varieties with expansive root systems.
  • Watering Reservoir Needs Monitoring: Some users mention that the water reservoir needs to be regularly checked to ensure it doesn’t dry out or overflow, especially in very hot climates.

Best for:

  • Urban gardeners with limited space looking for a compact, self-watering solution.
  • Gardeners who prefer an ergonomic, elevated design to avoid bending down.
  • Those with small or medium-sized plants, like herbs, flowers, or compact vegetables.

Availability:

Buy on Amazon.com

The Keter Urban Bloomer 12.7 Gallon Raised Garden Bed is an excellent choice for urban gardeners or those with limited space looking for an ergonomic, self-watering solution.

While it’s best suited for smaller plants and requires occasional monitoring of the water reservoir, its durable construction, easy assembly, and stylish design make it a worthwhile option for anyone looking to garden comfortably and efficiently in small spaces.

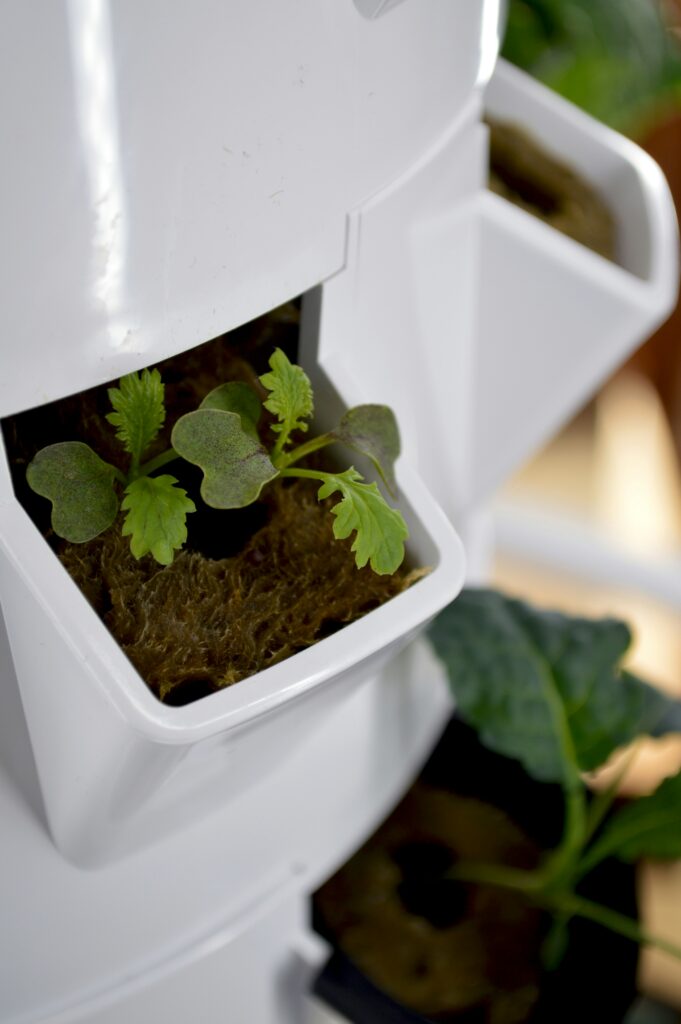
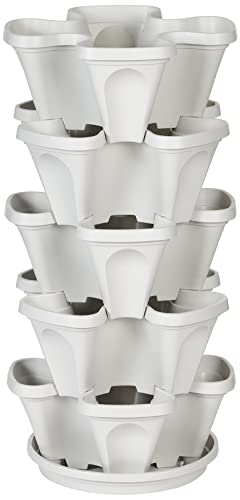
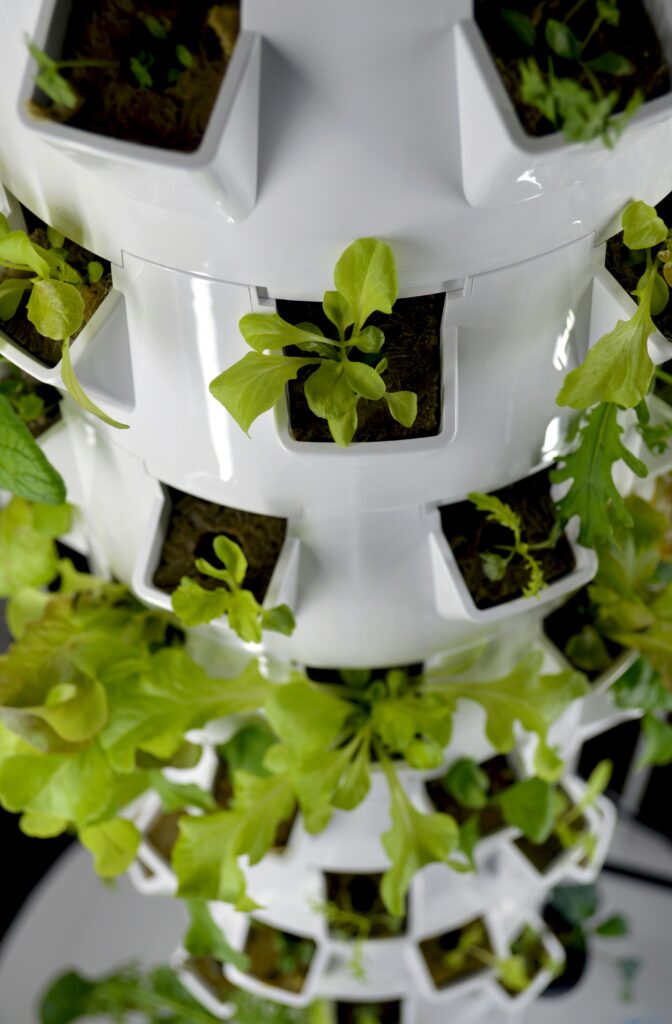
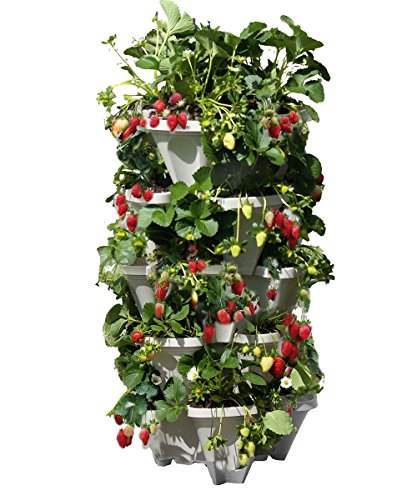
9. Mr Stacky Smart Farm

Mr. Stacky Smart Farm – Automatic Self Watering Garden – Grow Fresh Healthy Food Virtually Anywhere…
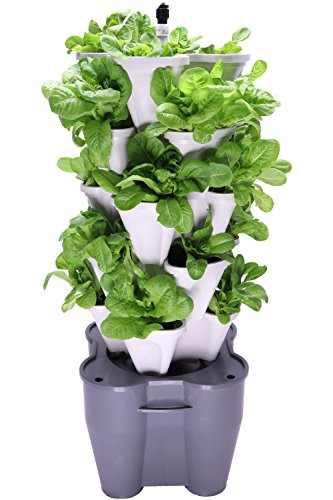
  • Change Your Lifestyle: Grow Healthy, Nutrient-Rich Food Easier, Faster, And More Convenient Than Ever Before All Year-Round, With or Without Soil. – We Believe That Growing Food At Home Not Only Provides A Healthier Life But A Happier One!​

Specs:

  • Dimensions: 18.5″ (width) x 36″ (height) x 18.5″ (depth)

Features:

  • Modular Stacking Design: The Smart Farm includes multiple stackable planting tiers that allow for vertical gardening, making it perfect for small spaces.
  • Hydroponic System: Designed for hydroponic gardening, it allows plants to grow without soil, using water and nutrient solutions for faster growth and healthier plants.
  • Self-Watering: The self-watering feature ensures that the plants receive adequate moisture without the need for frequent manual watering.
  • Durable, Food-Safe Materials: Made with high-quality, food-safe plastic materials, ensuring that your plants grow safely for consumption.
  • Expandable Design: You can stack multiple units together to expand your growing area vertically as your garden grows.

Pros:

  • Space-Efficient: The vertical stacking design allows you to maximize space, making it ideal for small gardens, balconies, or patios.
  • Low Maintenance: The self-watering and hydroponic features minimize the need for constant care and watering, making it perfect for beginners or those with limited time.
  • Faster Plant Growth: The hydroponic system promotes faster growth compared to traditional soil gardening, thanks to the constant access to water and nutrients.
  • Customizable: You can add or remove tiers to adjust the system’s size to fit your needs and available space.

Cons:

  • Learning Curve: While hydroponic gardening is efficient, it can be tricky for beginners who may need time to adjust to the system and monitor nutrient levels carefully.
  • Requires Regular Maintenance: The system needs occasional cleaning and checking of the nutrient solution to ensure optimal plant health. If not maintained properly, the plants may suffer.
  • Not Ideal for Larger Plants: Due to the vertical design and compact space, the system may not be ideal for larger plants or vegetables with deep root systems.

Best for:

  • Urban gardeners or those with limited space looking for a vertical gardening solution.
  • Hydroponic enthusiasts or beginners who want to try growing plants without soil.
  • Gardeners interested in growing herbs, small vegetables, or leafy greens.

Availability:

Buy on Amazon.com

The Mr. Stacky Smart Farm is an excellent choice for gardeners with limited space who want to try hydroponic gardening. Its vertical design and self-watering features make it a low-maintenance, space-efficient solution for growing herbs, small vegetables, and leafy greens.

While it may take a little time to get used to the hydroponic system, the faster plant growth and customizable design make it a worthwhile investment for urban gardeners or those new to hydroponics.

10. Vegepod – Raised Garden Bed

Vegepod – Raised Garden Bed – Self Watering Container Garden Kit with Protective Cover, Easily…
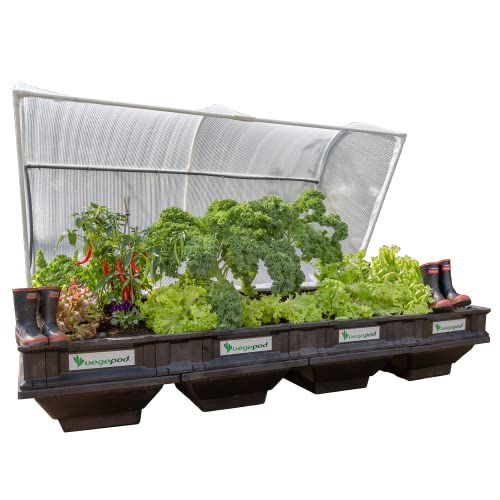
  • RAISED GARDEN BED KIT Vegepod Raised Garden Bed Kits are simply the easiest way to grow your own vegetables. You get the size of a raised garden bed with all the benefits of container gardening. The base contains the soil so neighbouring trees don’t steal nutrients.

Specs:

  • Dimensions: 48″ (length) x 48″ (width) x 30″ (height)

Features:

  • Self-Watering System: Includes an integrated self-watering system with a water reservoir and irrigation pipe, ensuring consistent moisture for your plants.
  • Protective Cover: Comes with a UV-resistant, breathable cover to protect plants from harsh sunlight, pests, and cold weather, extending the growing season.
  • Raised Bed Design: The raised bed design reduces strain on your back and makes gardening easier and more accessible.
  • Modular Setup: The system is modular, allowing you to link multiple units together for a larger growing area.
  • Durable Materials: Made from high-quality, UV-resistant materials to withstand outdoor conditions, including Florida’s hot sun and humidity.
  • Includes Legs: Elevated legs raise the garden bed off the ground, making it easier to access and protect the plants from ground pests.

Pros:

  • Effortless Watering: The self-watering feature ensures your plants receive consistent moisture, reducing the need for constant attention.
  • Space Efficient: Ideal for small spaces, balconies, or patios, where traditional garden beds may not fit.
  • Protects Plants: The included cover shields plants from pests and environmental stresses, allowing for a longer growing season.
  • Ergonomic Design: The raised height makes it easier to maintain your garden without the need to bend down, which is especially beneficial for those with physical limitations.
  • Quality Construction: Durable, UV-resistant materials are designed to stand up to outdoor conditions, making the Vegepod a long-lasting investment.

Cons:

  • Size Limitations: While perfect for small gardens, the 4×4 foot size may not be large enough for larger crops or for those with extensive gardening needs.
  • Initial Setup: Some users find the initial setup of the self-watering system and protective cover a bit time-consuming.
  • Price: The Vegepod is extremely expensive compared to other self-waterting raised beds, which could be a downside for budget-conscious gardeners.

Best for:

  • Small-space gardeners, including those with patios, balconies, or limited yard space.
  • Beginners or gardeners looking for a low-maintenance, self-watering system.
  • Anyone looking to grow vegetables, herbs, or flowers in a protected, ergonomic setup.

Availability:

Buy on Amazon.com or Walmart.com

The Vegepod is a great option for small-space gardeners, those looking for an easy-to-maintain, ergonomic garden bed, or anyone interested in extending the growing season with its protective cover. Its self-watering system is perfect for busy gardeners, while the durable materials and modular design make it a solid long-term investment.

While it may be expensive and somewhat limited in size, the convenience, ease of use, and additional features make it a great choice for anyone looking to grow veggies or herbs with minimal hassle.

11. Vego garden Tomato Planter Box with Trellis

Sale
Vego garden Tomato Planter Box with Trellis Self-Watering Rolling Raised Garden Bed for Climbing…
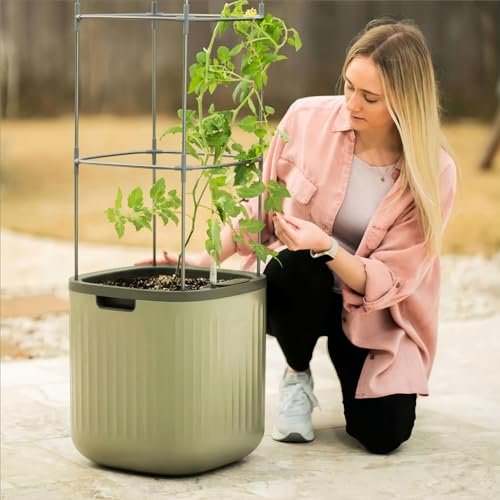
  • Innovative Watering System in Raised Garden Planter: A reliable and efficient solution for delivering water to your plants without having to worry about overflow. The water storage volume of the tomato planter box is about 9L, fill it once to water your planter for up to 1.5 months! This innovative design gives new gardeners a hassle-free way to start growing!

Specs:

  • Dimensions: 24″ (length) x 24″ (width) x 20″ (height)

Features:

  • Self-Watering System: Includes a self-watering feature with a water reservoir that ensures plants receive consistent moisture for optimal growth.
  • Trellis for Climbing Plants: Comes with a sturdy trellis designed to support climbing plants like tomatoes, cucumbers, or peas, ideal for vertical gardening.
  • Durable Materials: Made from high-quality, rust-resistant, and UV-resistant materials to withstand outdoor weather conditions.
  • Easy Setup: The planter is designed for quick assembly with minimal tools required.
  • Modular Design: The system is expandable, allowing you to link multiple planter boxes together to create a larger gardening area.

Pros:

  • Ideal for Vertical Gardening: The trellis system is perfect for growing vining plants like tomatoes, providing vertical space and preventing plants from sprawling on the ground.
  • Self-Watering Feature: Helps conserve water and reduces the need for frequent watering, which is especially beneficial for busy gardeners or in hot climates.
  • Durable Construction: The materials used are UV-resistant and rust-proof, making it a long-lasting option for outdoor gardening.
  • Easy Assembly: The planter box can be set up quickly, even for beginners, without the need for specialized tools.
  • Expandable: Can be connected with other Vego Garden planters, allowing you to create a larger gardening system.

Cons:

  • Size Limitations: The 24×24 inch planter may be too small for gardeners looking to grow larger tomato varieties or multiple plants in one box.
  • Water Reservoir: Some users mentioned that the water reservoir is relatively small for the size of the planter, requiring more frequent refilling during peak growing seasons.

Best for:

  • Tomato growers or those interested in vertical gardening who want to save space and grow climbing vegetables.
  • Small-space gardeners, especially those with limited horizontal space but room for vertical growth.
  • Beginners or those looking for a simple, low-maintenance gardening solution with self-watering features.

Availability:

Buy on Amazon.com or Walmart.com

The Vego Garden Tomato Planter Box with Trellis is a solid choice for small-space gardeners looking to grow tomatoes or other climbing vegetables. Its self-watering system reduces maintenance, and the included trellis helps maximize vertical space.

While it may not be the best option for larger plants or those needing a more extensive water reservoir, the planter offers great value for anyone focused on growing compact crops in a space-efficient manner.

Seasonal Considerations for Self-Watering Containers

When selecting self-watering containers for your Florida garden, understanding how seasonal changes can affect plant health and watering needs is crucial. The right container for the job can make all the difference, helping you keep your plants thriving year-round despite the state’s hot summers, occasional cold snaps, and rainy seasons.

Here are some key factors to consider when choosing and maintaining self-watering containers throughout the year:

Summer Strategies for Light-Colored Containers

During Florida’s long, hot summers, light-colored containers can help keep plants cooler by reflecting sunlight and reducing heat absorption. Dark containers tend to absorb heat, which can stress plants by raising soil temperatures.

Opting for white, light gray, or pastel-colored planters can help mitigate this issue, keeping your plants comfortable while maintaining proper hydration levels.

Additionally, containers with reflective surfaces may help prevent evaporation from the soil, keeping the water reservoir functioning efficiently during the hottest months.

Winter Adjustments with Darker Containers

In the cooler months, dark-colored containers may be your best bet. These containers absorb more sunlight, which helps keep the soil temperature higher—critical for plants that require warmth to thrive.

This is particularly important for container plants grown in the fall and winter, as the soil in light-colored containers can become too cool, slowing down root growth and overall plant health.

Dark containers can also hold onto a little extra heat on chilly nights, offering additional protection to sensitive plants.

Rainy Season Reservoir Management

Florida’s rainy season can pose a unique challenge to container gardening, especially when it comes to managing the water reservoir in self-watering containers. Heavy rains can fill reservoirs quickly, potentially leading to waterlogging and root rot if not properly managed.

Some containers are equipped with overflow drainage systems that help prevent excess water buildup, which is crucial for Florida’s intense storms. If your container doesn’t have this feature, consider adding a manual overflow or positioning containers in slightly elevated areas to help with drainage.

Hurricane Preparation Tips

Hurricanes and tropical storms are a part of life in Florida, so preparing your garden containers for high winds and heavy rain is essential. For larger containers, consider securing them with ties or moving them to sheltered locations during storm warnings.

Self-watering containers are often quite sturdy, but it’s still wise to avoid leaving them in places where they might topple or get blown over, even if the reservoirs are full.

Frost Protection Methods

While frost is rare in Florida, it can still happen in the winter, especially in northern regions of the state. Plants in containers are more vulnerable to temperature changes than those in the ground, so it’s important to take protective measures.

To help prevent frost damage, you can move self-watering containers to more sheltered areas, such as under eaves or near walls that retain heat. Wrapping containers with frost-resistant material or covering them with a light fabric at night can also help.

For extremely cold nights, consider using heating cables or blankets designed for plants to offer additional protection. You can also move them into sheds, garages and even under large trees.

Consider moving particularly sensitive plants indoors for the night.

Size Guide for Different Plant Types

Choosing the right size container for your plants is essential to ensuring their health and productivity. In Florida’s diverse growing conditions, container size can have a significant impact on how well plants develop.

From herbs to trees, understanding each plant’s space needs will help you make the best selection for your garden. Here’s a breakdown of the ideal container sizes for different plant types:

Herb Container Requirements

Herbs tend to have shallow root systems and don’t require very large containers, but they still need enough space to grow and spread. A container that is at least 12 to 16 inches in diameter is typically sufficient for most herbs.

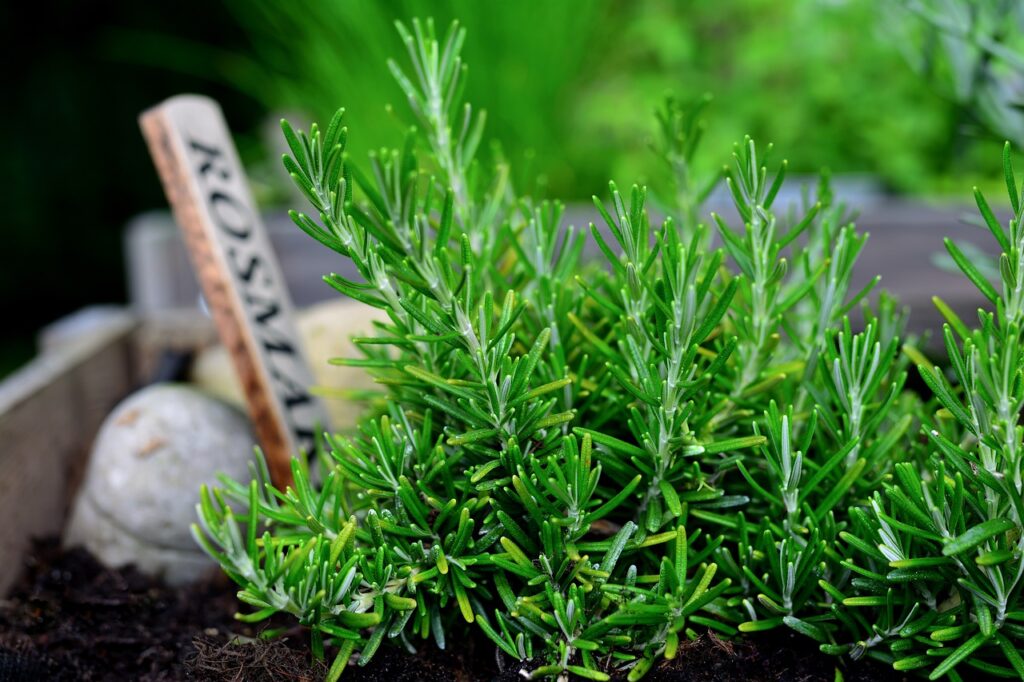
For a single herb like basil, parsley, or thyme, a smaller container may be adequate, but larger herbs like rosemary or oregano may need more space.

If you’re planting multiple herbs together in one container, look for a size around 18 to 24 inches in diameter to allow them to grow comfortably without overcrowding.

Vegetable Planter Sizing

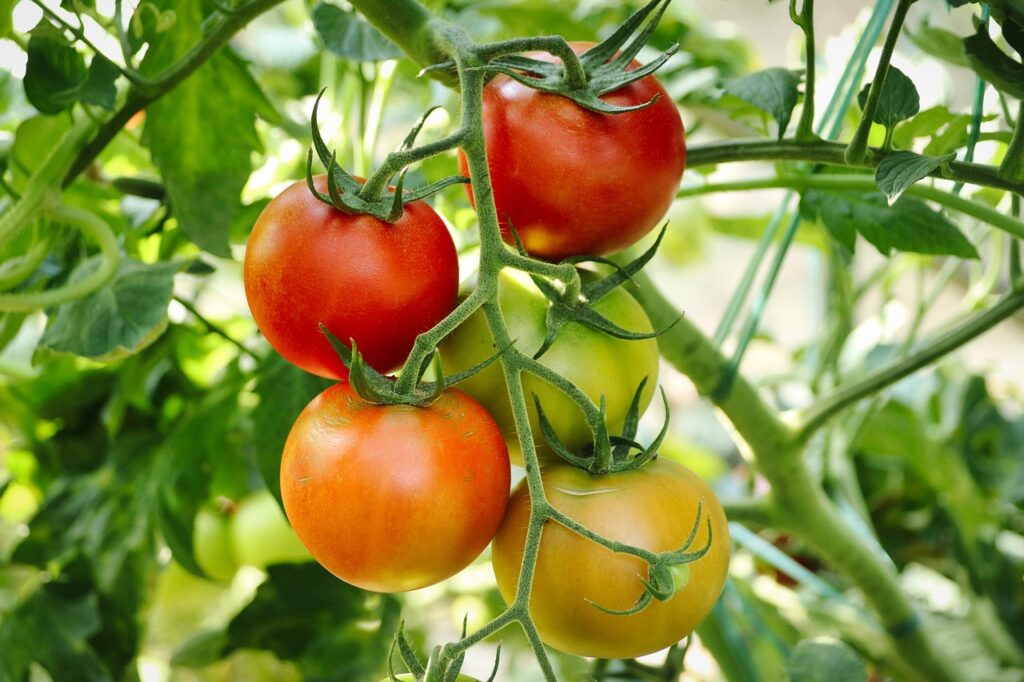
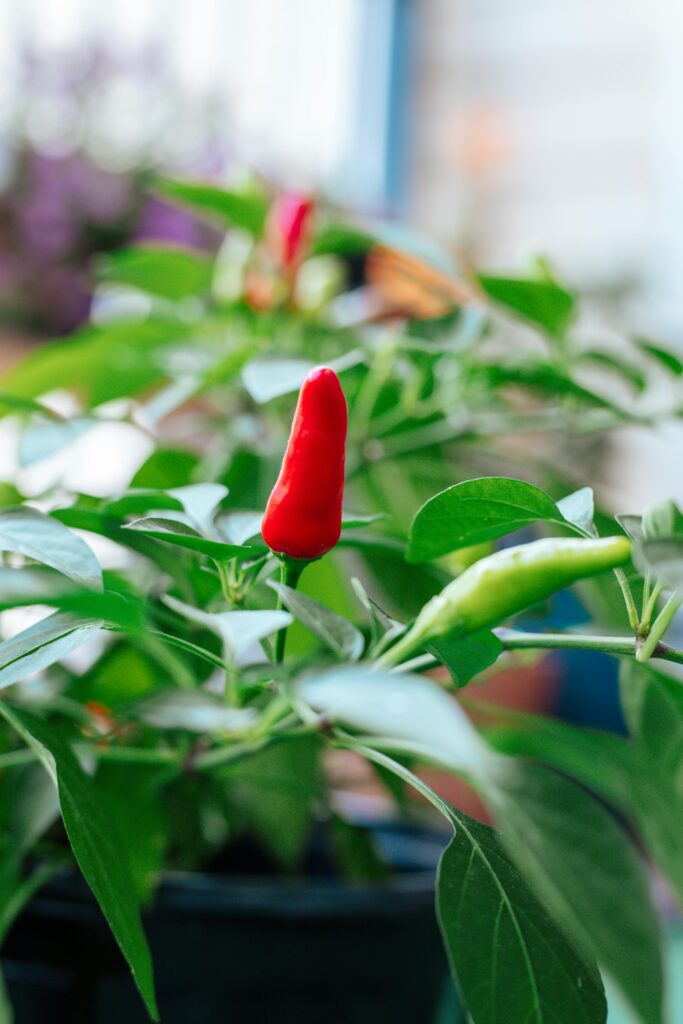
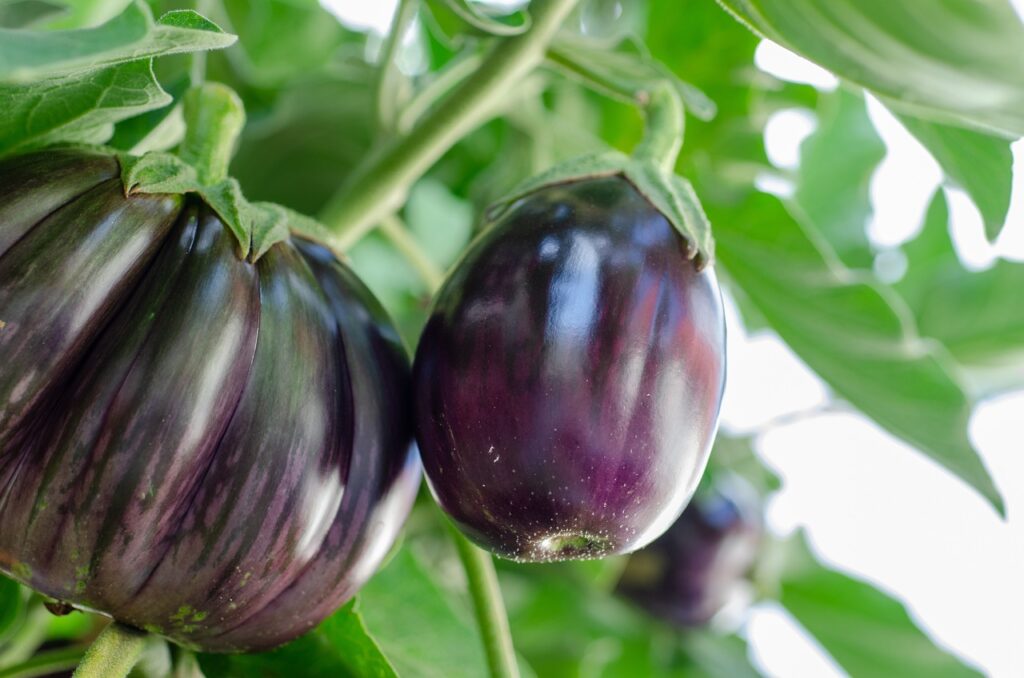
Vegetables generally require more space than herbs to accommodate their deeper roots and larger growth habits. For most vegetables like tomatoes, peppers, or eggplants, a 5 to 10-gallon container (approximately 16 to 20 inches in diameter) is ideal.

Larger crops like squash or zucchini may need larger planters—15 to 20 gallons or even more. For root vegetables like carrots or potatoes, deeper containers with a minimum depth of 12 inches are necessary to allow for proper root development.

Be sure to choose a container that can handle both the root depth and the width required for healthy growth.

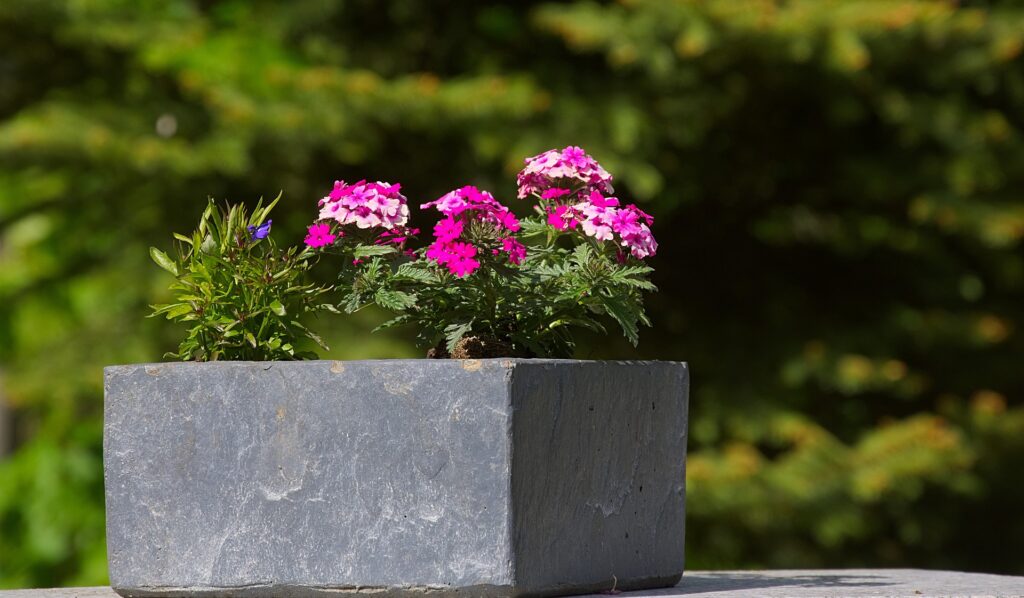
Flowering Plant Specifications

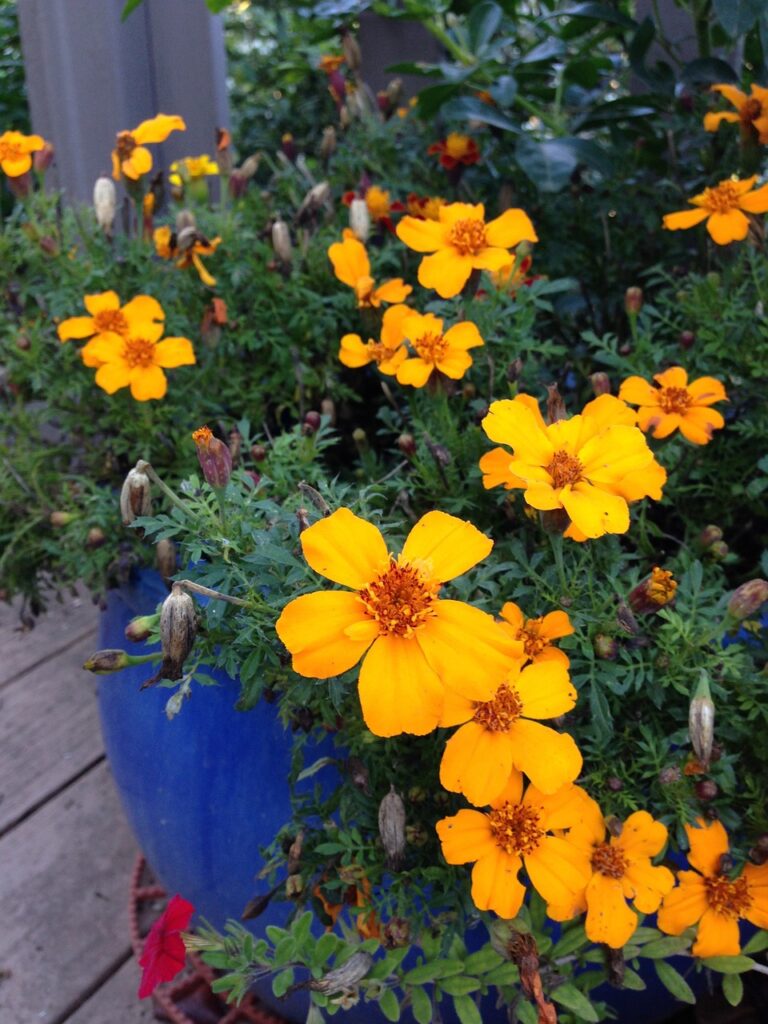
Flowering plants, especially annuals like petunias or marigolds, generally do well in medium-sized containers. A 10 to 14-inch container is typically large enough to accommodate flowering plants, but larger varieties or those with extensive root systems, like hibiscus or geraniums, may require 18 to 24 inches in diameter.

If planting perennials or flowers that will need to be in the same container for multiple years, consider opting for a larger size to ensure the roots have enough space to grow each season.

Consider the growth habit of the plant as well—vining plants like sweet peas or morning glories may require deeper containers to accommodate their trailing roots.

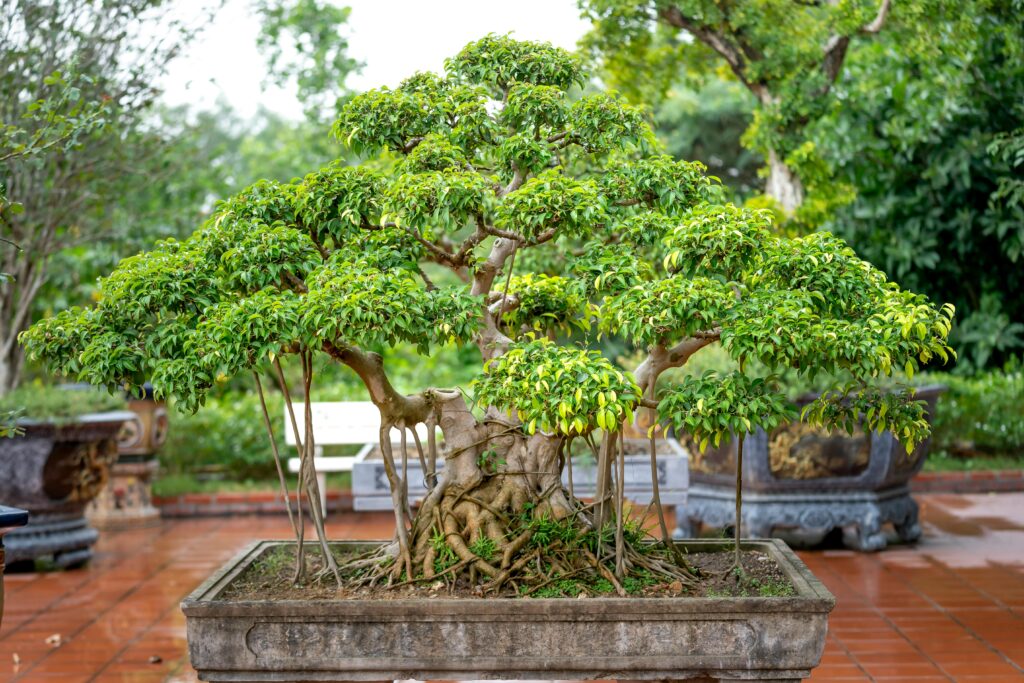
Tree and Shrub Container Needs

Trees and shrubs require the most space, as their root systems are larger and need more room to develop. A 15 to 30-gallon container (typically 24 to 36 inches in diameter) is necessary for small trees or large shrubs.

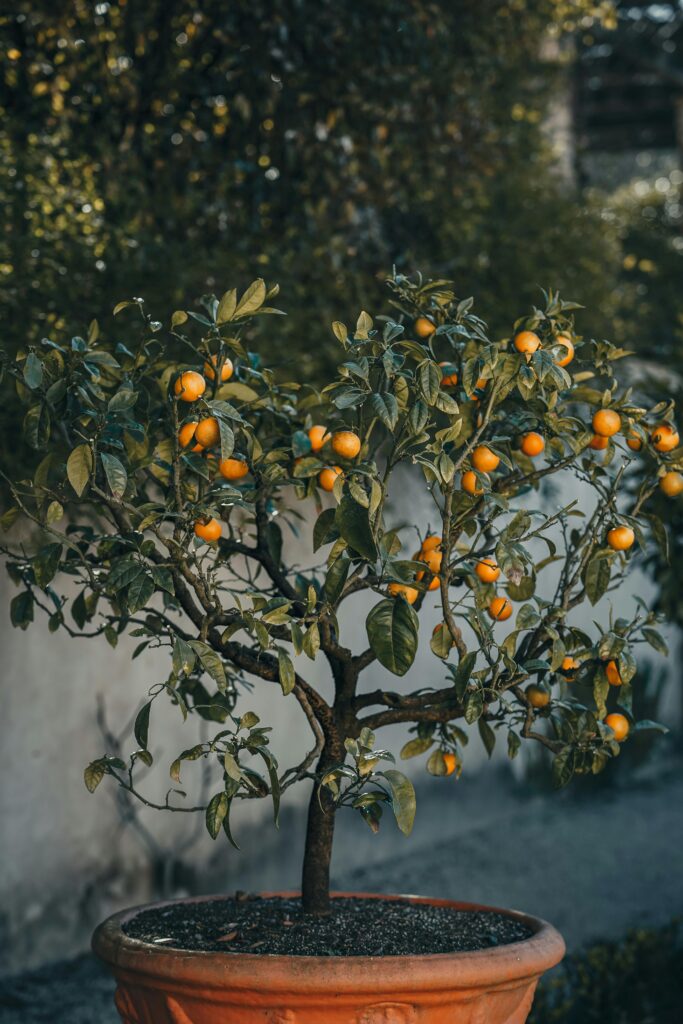
Larger trees may need even bigger containers to thrive in a container setting. For example, citrus trees, which are popular in Florida, do well in 20-gallon containers, while larger trees like palms or smaller fruit trees may need a 30-gallon container or more.

Always ensure the container is deep enough to support the full growth potential of the root system.

Mixed Planting Recommendations

When planting multiple types of plants together in one container, you’ll need to consider the size requirements of all the plants involved. For mixed plantings, choose a container that is at least 20-30 inches in diameter to ensure that the plants have enough space for root growth without competing for nutrients and water.

For instance, a combination of herbs, vegetables, and flowers might do well in a 24-inch diameter container or larger, with adequate depth to accommodate the varied root systems. Remember to group plants with similar water and light needs to ensure they thrive together in a shared space.

By selecting the right size container for each plant type, you can ensure that your Florida garden flourishes throughout the year. Always consider the mature size of your plants and the root space they’ll require to avoid overcrowding and poor plant health.

Maintenance and Care

Proper maintenance and care are essential to ensuring that your self-watering containers continue to function effectively year-round. While these containers are designed to make gardening easier, a little attention goes a long way in keeping them in top condition.

Here are some key maintenance tasks for self-watering containers in Florida’s climate:

Cleaning and Sanitizing Procedures

To keep your self-watering containers functioning properly, it’s important to clean them regularly. Over time, dirt, algae, and mineral buildup can accumulate in the water reservoir and wicking system, which can affect water flow and plant health.

Begin by emptying the container and removing any plants. Use a mild soap solution or a 10% bleach solution to clean the container thoroughly, scrubbing all surfaces, including the water reservoir, the wick, and any drainage holes.

Be sure to rinse thoroughly to remove any soap or bleach residue, as they may harm plants. Clean your containers at least once every season, or more often if you notice algae or mold growth.

Winterizing Techniques

During Florida’s occasional cold snaps, it’s important to protect your self-watering containers from potential damage caused by frost or freezing temperatures. While Florida’s winter conditions are usually mild, it’s still wise to take precautions.

If you’re growing more frost-sensitive plants, move containers to a sheltered spot or cover them with frost cloth or blankets. For the containers themselves, you may want to store them in a dry, sheltered area if possible.

For those left outdoors, ensure that the drainage holes are not blocked, as trapped water can freeze and damage the container. Additionally, empty out any excess water from the reservoir to avoid freezing and cracking.

Reservoir Adjustment Guidelines

Proper reservoir management is crucial to maintaining healthy plants, especially during Florida’s hot summer months when containers can dry out quickly. Regularly check the water level in the reservoir and refill as needed, making sure to only fill it to the recommended level to prevent overflows.

During the rainy season, you may need to adjust the water reservoir levels to account for heavy rainfall, which can lead to waterlogging. In these cases, ensure that the overflow system is working properly and consider temporarily reducing the water in the reservoir if necessary.

In drier months, be mindful of evaporation and replenish the reservoir as needed to maintain consistent moisture levels.

Filter Maintenance

Many self-watering containers come equipped with filters to keep the water reservoir free from debris and to help with proper drainage. These filters should be checked and cleaned regularly to ensure that the system remains efficient. Use a soft brush or sponge to clean the filter, removing any accumulated dirt or organic material.

In some cases, filters may need to be replaced every season or sooner if they become clogged beyond cleaning. Regular filter maintenance will help ensure that your self-watering system continues to deliver clean, effective moisture to your plants.

Self-Watering Container Installation and Setup

Setting up your self-watering container correctly from the start will help ensure its effectiveness and longevity. While these containers are designed for ease of use, following the right installation procedures can significantly improve the growing conditions for your plants.

Here’s a step-by-step guide to getting your self-watering container ready for planting.

Location Selection Guidelines

Choosing the right location for your self-watering container is essential for plant health. For Florida gardeners, this means considering the amount of sunlight your plants need, as well as the protection from the elements.

Self-watering containers should be placed in an area that receives adequate sunlight based on the plants you’re growing. Most vegetables and flowering plants require at least 6-8 hours of direct sunlight, while herbs and leafy greens may tolerate partial shade.

Additionally, if you’re using the containers on a balcony or patio, ensure they are on a flat, stable surface to prevent tipping.

Initial Setup Procedures

The first step in setting up your self-watering container is ensuring the bottom of the container is prepared for the water reservoir system.

Many self-watering containers come with a built-in water reservoir that needs to be filled properly before planting. Start by placing the container in its designated spot and checking that it’s level.

If the container has a built-in wick or water reservoir, ensure it is correctly positioned to allow water to move from the reservoir into the soil. If the container has an overflow valve, double-check that it’s free of debris and working correctly to prevent waterlogging.

Once your container is in place and level, fill the reservoir with water to the recommended level, but avoid overfilling.

Water Level Monitoring Systems

Self-watering containers often include a built-in water level monitoring system, allowing you to keep track of the moisture in the reservoir. These systems can come in the form of a simple water level indicator or more sophisticated sensors.

Regularly monitor the water level to make sure the plants are getting the right amount of moisture. Most containers feature a visual indicator that will show you when the water reservoir is low and needs to be refilled.

In Florida’s hot climate, you may need to check the water level more frequently during the summer months, as evaporation rates can be high. Adjusting the water level as needed will help keep your plants healthy and thriving.

Drainage Modifications

While self-watering containers typically have built-in drainage systems, there may be times when additional modifications are needed, especially during Florida’s rainy season.

Make sure the drainage holes at the bottom of the container are unobstructed to allow excess water to escape and prevent root rot. If you notice that the container isn’t draining properly, consider adding small pebbles or gravel to the bottom of the reservoir to prevent clogging.

Soil Mixture Recommendations

The right soil mix is key to the success of your self-watering container. For most plants, you’ll want a soil blend that is lightweight, well-draining, and moisture-retentive.

A good base soil mixture should consist of equal parts of potting soil, compost, and perlite or vermiculite. This combination allows for optimal moisture retention without becoming too compact, which can restrict root growth.

If you’re growing vegetables or flowers, it’s especially important to ensure that the mix drains well, as these plants are sensitive to waterlogged roots. Avoid using regular garden soil, as it can be too heavy and may clog the water wicking system.

For herbs, you may prefer a slightly drier, more sandy mix, as many herbs don’t tolerate overly moist conditions.

Troubleshooting Common Issues

Even with the best self-watering containers, issues may arise from time to time. Knowing how to address these challenges can help ensure the health and longevity of your plants. Here’s a guide to troubleshooting common problems that Florida gardeners might face with their self-watering containers.

Dealing with Algae Growth

Algae growth is a common issue in self-watering containers. Algae can develop on the surface of the water reservoir or even in the soil if the conditions are right.

While algae itself isn’t usually harmful to plants, it can promote the growth of unwanted pests and block sunlight from reaching the soil.

To prevent algae growth, regularly clean the container, especially the water reservoir. If you notice algae on the surface, scrub it off with a mild soap solution or a mixture of water and vinegar.

Additionally, ensure your container is placed in a location with proper airflow to prevent excess humidity, which can contribute to algae buildup.

Preventing Root Rot

Root rot is a serious issue that occurs when plant roots become waterlogged and suffocate due to poor drainage. While self-watering containers are designed to prevent this, it can still happen if the drainage system becomes clogged or the water reservoir is overfilled.

To prevent root rot, make sure your container has adequate drainage, even if it’s a self-watering model. Check the drainage holes regularly and ensure they are free from debris.

Managing Overflow Problems

Overflow can occur if your self-watering container is receiving more water than it can handle, either due to heavy rain or incorrect watering habits. Most high-quality self-watering containers are designed with overflow systems to prevent this, but occasionally they can get blocked or malfunction.

If you find your container is overflowing during a rainstorm, check that the overflow hole is clear of dirt and debris. If needed, gently tilt the container to allow excess water to drain. Additionally, ensure that the water reservoir is not filled beyond the recommended level to prevent spillage.

For added protection during heavy rain, you may also want to move your container to a sheltered spot, such as under a porch or overhang.

Handling Extreme Heat

Florida’s intense summer heat can be a challenge for self-watering containers. Extreme heat can cause the soil to dry out more quickly, especially if the container is placed in full sun.

To manage heat stress, consider moving your container to a location that provides some afternoon shade or using a reflective material to shield the container from the sun. It’s also a good idea to check the water reservoir more frequently during heatwaves, as the plants may consume more water.

Additionally, adding mulch to the top of the soil can help retain moisture and keep the roots cool. Be sure not to overfill the reservoir in an attempt to keep the plants hydrated; the self-watering system is designed to deliver water as needed, and too much water can lead to other issues like root rot.

Use Self-Watering Containers to Elevate Your Florida Garden

Self-watering containers are an excellent investment for Florida gardeners, offering a convenient and efficient way to manage watering needs, especially considering our persistant hot and sunny weather. With the right container, you can enjoy healthier plants with less effort, whether you’re growing herbs, vegetables, or flowers.

From UV-resistant materials to thoughtful design features like overflow drainage and adjustable reservoirs, these containers are built to withstand Florida’s unique climate challenges. However, it’s important to choose the right size, style, and features for your specific garden needs, ensuring your plants receive the best care possible.

While high-quality self-watering containers can be pricey, there are ways to stay within your budget without sacrificing performance. By carefully considering your needs and shopping around for deals or even building your own container, you can enjoy the benefits of self-watering gardening without breaking the bank.

Whether you’re a seasoned gardener or just starting out, these containers can simplify your gardening experience, and with a little research and planning, you’ll be able to find a solution that works for both your plants and your wallet. Happy gardening!

Posted on

Top 10 Plants for a Container Vegetable Garden in Florida

Container vegetable garden harvest

Florida’s climate, with its sunny days and mild winters, offers an excellent opportunity for growing fresh, healthy vegetables year-round. A container vegetable garden is an especially convenient for Floridians.

Using containers is an adaptable way to cultivate your favorite veggies, whether you live in a high-rise apartment, have limited yard space, or simply prefer the flexibility of moving plants to the best light or shade.

It’s also one way many gardeners can insure quality soil, despite our nutrient-poor and sandy soils.

With the right techniques, container-grown vegetables can thrive in Florida’s unique conditions, producing abundant harvests for your table.

Why Choose a Container Vegetable Garden?

Start your Container Vegetable Garden from Seed or buy starts from a nursery.

Adaptability to Space Limitations

Container gardening is perfect for gardeners without a large backyard. You can grow vegetables on patios, balconies, or even indoors near a sunny window. This flexibility makes fresh produce accessible no matter where you live.

Control Over Soil Quality

Florida’s native soils can range from sandy and nutrient-poor to heavy and waterlogged. By growing in containers, you can use high-quality potting mixes tailored to your vegetables, ensuring optimal growth conditions.

Mobility for Sun and Weather Protection

Containers allow you to move your plants to chase the sun during shorter winter days or provide shade during the intense summer heat. Additionally, you can bring containers indoors or to sheltered areas during Florida’s unpredictable storms or rare cold snaps.

Reduced Pest Issues

Growing vegetables in containers elevates them off the ground, making them less accessible to certain pests like nematodes and soil-borne pathogens. This can lead to healthier plants and better yields.

Water and Fertilizer Efficiency

Containers let you deliver water and nutrients directly to the roots, reducing waste and runoff. With proper care, a container vegetable garden often grows faster and more vigorously than their in-ground counterparts.

Container Requirements for Florida Vegetable Gardens

Herbs are perfect to add to your Container Vegetable Garden, like these edible nasturtiums.
Herbs are perfect to add to your container vegetable garden, like these edible nasturtiums.

Success in container gardening begins with proper setup. Florida’s unique climate calls for thoughtful choices in containers, soil, and placement. Here’s what you need to know:

Choosing the Right Container

Selecting the right container is essential for healthy vegetables in Florida’s conditions.

Size Matters: Most vegetables need containers at least 12 inches deep to accommodate their roots. Larger vegetables like tomatoes or peppers thrive in containers closer to 18 inches deep.

Drainage is Key: Look for containers with multiple drainage holes to prevent waterlogging, which can lead to root rot, especially during Florida’s rainy season. If your container lacks sufficient drainage, consider drilling extra holes.

Temperature Control: Light-colored containers are ideal for keeping roots cooler in the summer, reflecting heat rather than absorbing it. In cooler winter months, darker containers can help retain warmth for year-round growing.

Self-Watering Containers: Consider self-watering containers for vegetables that require consistent moisture, such as leafy greens or cucumbers. These systems reduce watering frequency and help prevent soil from drying out in the summer heat.

Soil and Drainage

The right soil mix ensures strong, productive plants in containers.

Use Quality Potting Soil: A lightweight, well-draining potting soil designed for vegetables provides the nutrients and structure plants need. Avoid using garden soil, which can compact in containers and lead to poor aeration.

Enhance with Additives: To help retain moisture during Florida’s scorching summers, consider mixing in moisture-retaining crystals or organic materials like coconut coir. These additions prevent your plants from drying out too quickly.

Focus on Drainage: Incorporate materials like perlite or coarse sand into your potting mix to further improve drainage, ensuring that your vegetables don’t sit in soggy soil.

Positioning and Protection

Proper placement and care can make or break a container vegetable garden in Florida’s challenging weather.

Maximize Sunlight: Place containers in a location that receives 6-8 hours of direct sunlight daily, such as a sunny patio or south-facing balcony.

Mobility for Protection: Use containers with built-in wheels or invest in plant caddies for larger pots. This mobility allows you to easily move plants during storms, Florida’s summer downpours, or even chilly winter nights.

Shade During Heat Waves: During the peak of summer, vegetables may need afternoon shade to avoid overheating. Use shade cloths or position containers under an awning or tree during the hottest part of the day.

Microclimate Benefits: Group containers together to create a microclimate, which helps retain humidity and shields plants from drying winds. This setup is especially useful during Florida’s dry spring months.

Top 10 Plants for Your Container Vegetable Garden

Here are my recommendations for the top 10 vegetables for container gardens to grow in your Florida landscape. These recommendations are based on the plants’ size and ability to deliver in container conditions:

1. Cherry Tomatoes: A Container Garden Favorite

Tomatoes are a top choice for a container vegetable garden in Florida.

Cherry tomatoes are among the most rewarding vegetables to grow in containers. Their compact growth habit and continuous fruit production make them ideal for Florida’s unique climate.

Best Varieties

  • ‘Sweet 100’: Prolific producer with sweet, bite-sized fruits.
  • ‘Everglades’: Native to Florida, this variety thrives in heat and humidity.
  • ‘Sun Gold’: A gardener favorite for its vibrant orange fruit and tangy-sweet flavor.

Container Size: Choose a container with a minimum 5-gallon capacity to provide ample room for the plant’s roots. Ensure the container has adequate drainage holes to prevent waterlogging.

Growing Tips

Support System: Install a tomato cage, stake, or trellis at planting time to avoid damaging roots later. Cherry tomatoes are vigorous climbers and need proper support to stay healthy and productive.

Prune Suckers: Regularly remove the small shoots (suckers) that grow between the main stem and branches. This helps direct energy toward fruit production. This step is not neccessary with ‘Everglades’ tomatoes, however.

Watering: Water deeply to encourage strong root development, but take care to avoid wetting the leaves, which can lead to fungal issues. Allow the top inch of soil to dry out between waterings.

Common Issues

Leaf Roll: In intense heat, cherry tomato leaves may curl to conserve moisture. This is often a sign of stress but not necessarily harmful. Move containers to a location with light afternoon shade during extreme heat to minimize stress.

Blossom Drop: High temperatures can cause flowers to fall off before setting fruit. Keep plants well-hydrated and provide some shade to improve fruit retention.

Pests: Monitor for common pests like whiteflies or aphids. Treat infestations with insecticidal soap or neem oil, ensuring applications occur in the early morning or evening to prevent leaf burn.

2. Bush Beans: A Compact and Productive Choice

Bush beans are fast and easy in a container vegetable garden.

Bush beans are an excellent option for container gardens, offering quick growth and abundant harvests. These heat-tolerant plants are easy to care for and ideal for small spaces.

Recommended Varieties

  • ‘Contender’: A reliable, early-producing variety with tender pods.
  • ‘Provider’: Known for its disease resistance and high yields, even in challenging conditions.

Container Requirements: Select a container that is at least 2-3 gallons in size and a minimum of 6 inches deep. Bush beans don’t require extensive root space, making them well-suited to smaller pots or window boxes. Ensure the container has multiple drainage holes to avoid waterlogged roots.

Growing Success

Succession Planting: To enjoy a continuous harvest, sow new seeds every 3 weeks throughout the growing season. This staggered planting approach ensures fresh beans over an extended period.

Consistent Moisture: Beans thrive in evenly moist soil. Use a watering schedule to prevent the soil from drying out completely or becoming overly saturated. A layer of mulch can help retain moisture during hot weather.

Frequent Harvesting: Pick pods regularly once they reach the desired size. Frequent harvesting encourages the plant to produce more beans and prevents pods from becoming tough or stringy.

Pest Management

Aphids: These small insects can cluster on leaves and stems, sucking sap and weakening the plant. Use a strong stream of water to dislodge them or apply insecticidal soap if the infestation persists.

Ants: Ants often appear when aphids are present, as they feed on the honeydew aphids produce. Address the ant problem to reduce aphid activity.

Fungal Issues: Ensure proper air circulation by spacing plants adequately and avoiding overhead watering to reduce the risk of fungal diseases.

3. Bell Peppers: Sweet and Versatile

Bell peppers thrive in Florida’s heat when grown in containers, producing colorful, sweet fruits that are perfect for cooking or fresh eating. With proper care, they can yield abundantly even in challenging conditions.

Heat-Tolerant Varieties

  • ‘California Wonder’: A classic variety known for its blocky, thick-walled fruits.
  • ‘Big Bertha’: Produces extra-large, sweet peppers that mature quickly in warm climates.

Container Specs: Each bell pepper plant requires its own 3-5 gallon container to ensure sufficient root space and stability. Containers should have multiple drainage holes to prevent waterlogging.

Care Guidelines

Calcium-Rich Fertilizer: Feed plants with a fertilizer high in calcium to prevent blossom end rot, a common issue with peppers. Look for fertilizers labeled as “tomato and vegetable” formulas with added calcium.

Fruit Support: As peppers grow and fruit begins to develop, their stems may need support. Use stakes, small cages, or plant ties to keep heavy branches upright.

Moisture Management: Water consistently to maintain even soil moisture. Avoid allowing the soil to dry out completely, as fluctuations in moisture can lead to stress and reduced fruit production.

Disease Prevention

Air Circulation: To reduce the risk of fungal diseases, place containers with adequate spacing to ensure airflow between plants. Avoid overcrowding and prune excess foliage if necessary.

Watering Technique: Water at the base of the plant rather than overhead to keep foliage dry, minimizing the risk of fungal infections.

Mulching: A thin layer of mulch on the soil surface can help maintain moisture and reduce the risk of soil-borne diseases splashing onto the plants.

4. Eggplants: Beautiful and Productive

Eggplants are a great choice for Florida container gardening, combining striking foliage with edible fruits that thrive in warm weather. These versatile vegetables are as decorative as they are delicious.

Florida-Friendly Options

  • ‘Black Beauty’: A classic, large-fruited eggplant variety that performs well in Florida’s climate.
  • ‘Chinese Bride’: A slender, pale-lavender variety that matures quickly and produces prolifically.

Growing Requirements

Container Size: Use a minimum 5-gallon container for each plant to provide ample root space.

Location: Place in a full sun area where plants can receive at least 6-8 hours of direct sunlight daily.

Soil: Use rich, well-draining potting soil mixed with compost or a slow-release fertilizer to ensure consistent nutrients.

Maintenance

Branch Support: Eggplants produce heavy fruits that can weigh down branches. Use stakes, tomato cages, or plant ties to prevent breakage.

Watering: Keep the soil consistently moist but not waterlogged. Eggplants are sensitive to drought stress, which can reduce fruit size and quality.

Pest Watch: In dry conditions, spider mites can become a problem. Regularly mist plants or rinse the undersides of leaves to discourage infestations. Inspect for other common pests, like flea beetles, and treat promptly if found.

5. Loose-Leaf Lettuces: Crisp Greens for Florida’s Cool Seasons

Loose-leaf lettuces are a fast-growing, rewarding choice for Florida container gardeners. They thrive in the cooler months and offer continuous harvests with proper care.

Heat-Resistant Varieties

  • Black-seeded Simpson: A classic, tender variety known for its rapid growth.
  • Oak Leaf: Attractive, deeply lobed leaves that resist bolting in mild heat.
  • Mesclun Mix: A blend of baby greens that includes lettuces, arugula, and other cool-season favorites.
  • Red Sails: Adds a pop of color with its reddish-bronze leaves while tolerating mild heat.

Growing Success

Season: Plant from fall to spring and even through the winter for the best results in Florida’s climate.

Harvesting: Snip outer leaves regularly to encourage new growth and extend the life of the plant. For a larger yield, avoid cutting into the plant’s central crown.

Watering: Keep soil consistently moist to prevent stress, which can lead to bitter-tasting leaves.

Extended Season

Shade Cloth: Use lightweight shade cloth in early fall or late spring to reduce sun intensity and delay bolting as temperatures rise.

Container Placement: Position containers in a spot that receives morning sun and afternoon shade as the weather warms.

Mulching: Apply a thin layer of organic mulch to retain soil moisture and keep roots cool.

6. Bush Cucumbers: Crisp and Compact for Containers

Bush cucumbers are an excellent choice for Florida container gardens, offering prolific yields in a relatively small footprint. These compact varieties are ideal for growing in tight spaces with the right setup and care.

Compact Varieties

  • Spacemaster: A compact variety designed for containers, producing sweet, crisp fruits.
  • Bush Champion: Known for its high yield and adaptability to smaller spaces.

Container Setup

Size: Use a sturdy 5-gallon container to allow roots adequate space.

Trellis Support: Even bush varieties benefit from a small trellis or cage to keep vines off the ground and improve airflow.

Soil: Fill with nutrient-rich, well-draining potting soil mixed with compost.

Light: Position in full sun to encourage vigorous growth and fruiting.

Care Tips

Watering: Keep soil consistently moist but not soggy; cucumbers are particularly sensitive to drought stress.

Fertilization: Feed with a balanced vegetable fertilizer every 2-3 weeks during active growth.

Harvesting: Pick fruits regularly while they are still small to avoid bitterness and encourage continued production.

7. Spring Onions: Easy to Grow in Containers with Quick Harvests

Spring onions are a fantastic option for container gardening in Florida. Their compact growth and ability to regrow from root bulbs make them a great addition to any small garden or patio setup.

Container Varieties

  • White Lisbon: A popular variety, offering mild-flavored onions that are perfect for early harvests.
  • Evergreen Hardy: A cold-tolerant variety that can grow year-round in Florida’s mild winter climate.
  • Red Baron: Adds color to your container garden with its vibrant red stems and mild taste.

Growing Success

Container Size: Use a wide, shallow container, like a window box planter, to allow room for the bulbs to spread out. A 12-18 inch wide container works well.

Soil: Use light, well-draining soil enriched with organic matter. Spring onions don’t need deep soil but require good drainage for healthy roots.

Light: Ensure your container is placed in full sun for at least 6 hours a day. Onions thrive in sunny spots with plenty of warmth.

Regrowing: After harvesting, save the root bulbs and replant them to regrow new spring onions in the same container. This provides continuous harvests.

Pest Resistance

Spring onions are naturally resistant to most pests due to their strong scent. However, be mindful of soil-borne diseases and keep containers well-drained to prevent rot.

8. Radishes: Fast-Growing and Ideal for Your Florida Container Vegetable Garden

Radishes are an excellent choice for container gardens in Florida due to their rapid growth and ability to thrive in cooler months. They can be harvested in as little as 3 to 4 weeks, making them a great option for gardeners looking for a quick return on their efforts.

Container Requirements

Container Size: Use a wide, shallow container, at least 6 inches deep. Radishes have relatively shallow roots, so a container with plenty of surface area is ideal.

Soil: Plant in a rich, loose soil mix. Radishes prefer soil that is well-draining, airy, and slightly sandy to allow for easy root development. Avoid heavy, clay-based soils that can hinder root growth.

Drainage: Make sure the container has sufficient drainage holes to prevent waterlogging, which can lead to root rot.

Growing Period

Planting Time: Radishes grow best in cooler weather, so plant from fall through late spring in Florida, avoiding the peak of the summer heat.

Growing Tips: Radishes thrive in temperatures between 55°F and 75°F (13°C to 24°C), making them ideal for Florida’s late fall and winter gardening seasons. Direct sow seeds into the container about 1/2 inch deep, and space them 1 to 2 inches apart.

Watering: Keep the soil consistently moist, especially during the growing period, but avoid waterlogging the container.

Radishes are one of the easiest and most rewarding vegetables to grow in Florida containers. They don’t require much space, and with a little attention to soil and watering, you can enjoy a fresh harvest in just a few weeks.

9. Hot Peppers: Spicy and Thriving in Florida Containers

Hot peppers are perfect for container gardening in Florida, where the warm climate helps them grow abundantly. These plants not only provide a steady supply of spicy fruits but also bring vibrant color and texture to your garden.

Florida Favorites

  • ‘Datil’: A Florida native known for its fiery heat and distinctive flavor, perfect for making hot sauces and salsas.
  • ‘Bird’s Eye’: A small, super-hot pepper variety commonly used in Southeast Asian cooking.
  • ‘Habanero’: Known for its intense heat and fruity flavor, the habanero pepper is popular in many spicy dishes.

Container Needs

Container Size: Choose a 3-gallon container at a minimum for each plant. Larger containers can accommodate the pepper’s root system as it grows.

Drainage: Ensure excellent drainage, as peppers do not like their roots sitting in water. Make sure the container has multiple drainage holes to prevent root rot.

Soil: Use a well-draining, rich potting mix with a slightly acidic to neutral pH. Consider mixing in some compost for extra nutrients.

Care Tips

Sunlight: Hot peppers love the sun! Ensure they get at least 6-8 hours of full sun each day to thrive and produce fruit.

Watering: During the early stages of growth, keep the soil consistently moist. However, reduce watering once the fruits begin to ripen to avoid excess moisture, which can dilute the pepper’s heat and flavor.

Fertilization: Feed your peppers with a balanced fertilizer, but avoid excessive nitrogen, which can promote lush foliage at the expense of fruit production.

Hot peppers are a great addition to your Florida container garden, providing not only a bounty of heat-packed fruit but also a visually striking presence. With proper care, you’ll have fresh peppers ready for harvest throughout the growing season.

10. Culinary Herbs

Herbs are a fantastic addition to any container vegetable garden, especially in Florida’s climate. Not only do they thrive in pots, but they also provide fresh flavors for your kitchen. Here are some popular herbs to grow in containers:

Basil

Basil thrives in full sun and well-drained, fertile soil. It prefers warmer temperatures, making it a great choice for Florida. Pinch back flowers to encourage bushier growth and prevent it from becoming leggy.

Container Size: 1-3 gallon pots

Care Tips: Regular trimming promotes bushy growth. Keep it moist but not soggy. Basil can be sensitive to cold, so harvest before temperatures drop too much in the winter.

Oregano

Oregano loves the heat and does well in full sun. It requires little maintenance, as it tolerates dry conditions once established. However, it thrives with occasional watering and occasional fertilizing.

Container Size: 1-3 gallon pots

Care Tips: Oregano is a perennial herb that grows back year after year. Be sure to prune it regularly to prevent it from getting too leggy, and keep it in a sunny spot for the best flavor.

Rosemary

Rosemary loves full sun and well-drained soil. It is drought-tolerant once established, making it perfect for Florida’s heat. Plant in a container with excellent drainage to prevent root rot.

Container Size: 3-5 gallon pots

Care Tips: Trim regularly to prevent it from becoming too woody. If grown in pots, rosemary benefits from regular feeding with balanced fertilizer.

Cilantro

Cilantro grows quickly in cool weather, making it ideal for Florida’s fall and winter months. It prefers well-drained soil and full sun to part shade.

Container Size: 1-3 gallon pots

Care Tips: Cilantro bolts (goes to seed) quickly in hot weather, so it’s best to grow it in the cooler months. Keep the soil consistently moist but not soggy, and harvest leaves before it flowers to maximize flavor.

Marjoram

Marjoram prefers full sun and warm temperatures, similar to oregano. It thrives in containers with well-drained soil, which allows its delicate leaves to develop their signature sweet flavor.

Container Size: 1-3 gallon pots

Care Tips: Regular trimming helps marjoram stay compact and healthy. While it’s drought-tolerant once established, occasional watering helps maintain flavor. Protect it from excessive rain, which can cause mildew.

Sage

Sage is a hardy herb that loves full sun and thrives in well-drained soil. It can tolerate heat and drought once established, but it does best with only occasional watering. In fact, it’s a good idea to keep it (and rosemary) under cover during the summer rainy season to prevent disease.

Container Size: 3-5 gallon pots

Care Tips: Keep sage trimmed to prevent it from becoming leggy. You can also harvest it year-round, but avoid over-watering. Sage also appreciates a little protection during Florida’s occasional cold snaps.

These herbs are great for Florida container gardens, offering not only culinary benefits but also aromatic beauty. They work well in small pots and require minimal care once established, making them perfect for container gardening in Florida’s unique climate. Enjoy adding them to your garden and your meals.

Essential Care Tips for Success with Your Container Vegetable Garden

Growing vegetables in containers can be incredibly rewarding, but ensuring their health and productivity requires a bit of attention to detail. Here are essential care tips to help your Florida container vegetable garden thrive.

Watering Guidelines

Watering is one of the most important factors in container gardening, as plants in containers dry out faster than those in the ground. Proper watering techniques ensure your plants get the hydration they need without over-watering or underwatering.

Water deeply when the top inch of soil feels dry: Check the soil moisture regularly and water thoroughly to ensure the water reaches the root zone.

Water early morning or evening: Avoid watering during the hottest part of the day to prevent evaporation and reduce the risk of sunburn on your plants. Early morning or evening watering helps retain moisture longer.

Use moisture meters for accuracy: A moisture meter can help you determine the precise moisture level of the soil, helping you avoid guesswork.

Apply mulch to retain moisture: A layer of mulch on top of the soil helps to keep the soil cool and retains moisture. It also prevents weed growth, which can compete with your vegetables for water and nutrients.

Fertilization

Fertilizing your container vegetables is essential to provide the nutrients they need to grow strong and produce healthy yields. Container-grown plants often need more regular feeding than those grown in the ground due to the limited soil volume.

Opt for organic slow-release fertilizers that gradually release nutrients over time. This provides consistent feeding without overwhelming the plants with excess nutrients.

Feed every 4-6 weeks during the growing season: Most vegetables require a steady supply of nutrients throughout the growing season. Feeding every 4-6 weeks ensures your plants continue to grow strong.

Supplement with compost tea monthly: Compost tea is a nutrient-rich liquid made from compost and water. Applying it once a month provides your plants with beneficial microorganisms that help them thrive.

Watch for nutrient deficiency signs: Yellowing leaves, stunted growth, or poor fruit development can indicate nutrient deficiencies. Common deficiencies in container gardens include nitrogen, potassium, and calcium.

Pest Management

Pests can be a challenge in any garden, and container vegetable gardens are no exception. However, with the right strategies, you can manage pests without resorting to harmful chemicals.

Inspect plants weekly: Regularly check the tops and bottoms of leaves for signs of pests such as aphids, caterpillars, or spider mites. Early detection can help prevent major infestations.

Beneficial insects like ladybugs, predatory beetles, and parasitic wasps help control pest populations naturally. Planting flowers that attract these beneficial insects, such as marigolds and nasturtium, can improve pest management in your garden.

Look for insecticidal soaps to treat if necessary: If pests are becoming a problem, insecticidal soaps made from plant-based oils like neem or pyrethrin can help control them without harming beneficial insects or the environment.

You can also look to biopesticides such as Bacillus thuringiensis or Spinosad. Both comprise naturally occuring bacteria that are harmless to plants and humans, but will interfere with pest insects.

By following these care tips, you’ll set your container vegetable garden up for success. Regular attention to watering, fertilization, and pest management will help ensure a productive and healthy garden, even in the heat of Florida’s climate.

Harvesting and Storage Tips

Harvesting at the right time and storing your vegetables properly are crucial steps in maximizing the flavor, texture, and longevity of your crops. Here are some helpful tips to guide you through the process.

Optimal Harvesting

Harvesting vegetables at their peak ensures the best flavor and texture. Proper harvesting techniques also help preserve the plant and encourage more growth.

Harvest in early morning: Early morning is the best time to harvest as temperatures are cooler, and plants are fully hydrated. This minimizes stress on the plants and helps preserve freshness.

Pick vegetables when ripe but firm: Make sure vegetables are fully ripe but still firm. Overripe vegetables can lose flavor and deteriorate faster, while under-ripe vegetables won’t have developed their full flavor.

Use clean, sharp tools: A sharp knife or pair of scissors helps you make clean cuts, reducing the chance of damage to the plant. Always disinfect your tools before use to prevent disease spread.

Handle produce gently: Vegetables can bruise easily, so handle them with care. Gently support the vegetable while harvesting to avoid damaging it.

Storage Recommendations

Proper storage helps extend the life of your vegetables while maintaining their quality and nutritional value.

Most vegetables: 40-50°F: Most vegetables should be stored in a cool, dry place. A refrigerator or cool pantry works well for most, except for certain vegetables like tomatoes.

Tomatoes: room temperature: Tomatoes should be stored at room temperature, away from direct sunlight. Refrigerating them can affect their flavor and texture, so only refrigerate them if they are very ripe and need to be used soon.

Leafy greens: wash, dry, refrigerate: For leafy greens, wash them gently in cool water, dry them thoroughly, and store them in the fridge. A salad spinner works well to remove excess water. To keep them fresh longer, store them in a sealed container or perforated bag.

Check stored produce regularly: Inspect stored vegetables regularly for signs of spoilage. Remove any produce that shows signs of rot or wilting to prevent it from affecting the rest of the batch.

By following these harvesting and storage tips, you can enjoy the fruits of your container vegetable garden for longer, maximizing both flavor and shelf life. Regular harvesting ensures that your plants continue to produce, and proper storage allows you to enjoy your homegrown vegetables even after they’ve been picked.

Ready to Get Growing Your Own Container Vegetable Garden?

Growing vegetables in containers is the perfect solution for Florida gardeners, and these 10 varieties are proven winners in our challenging climate.

Remember, success comes from choosing the right plants, providing proper care, and learning from each growing season. Start with one or two varieties and expand as you gain confidence.

For detailed information about when to plant each vegetable throughout the year, check out our comprehensive Florida Gardening Planner. This valuable resource will help you time your plantings perfectly for optimal harvests year-round.

Before you know it, you’ll be harvesting fresh, homegrown vegetables from your own Florida container garden!

Posted on

How to Create a Stunning Vertical Container Garden in Your Florida Home

a vertical container garden in a conservatory space

Imagine turning your bare outdoor walls and fences into a stunning tapestry of living plants! Did you know that an outdoor vertical container garden in Florida can create microclimates that reduce the surrounding temperatures by up to 15 degrees Fahrenheit?

As someone who’s spent countless hours in the hot Florida sun, I can tell you that vertical gardening is a game-changer for cooling off our outdoor spaces.

Tired of looking at that plain fence? Struggling with limited patio space? Anyone can master the art of creating stunning outdoor vertical container gardens that can handle Florida’s intense sun, heavy rains, and occasional tropical storms.

Here are some proven strategies for turning your outdoor vertical space into a thriving, head-turning container garden that not only survives but thrives in our challenging climate. Ready to take your outdoor space to new heights? Let’s dig in!

Planning Your Florida Vertical Container Garden

Western Style Vertical Container Garden

Creating a vertical container garden in Florida starts with thoughtful planning. Here’s how to set yourself up for success:

Assessing Your Space and Sunlight Conditions

Begin by evaluating the area where you’ll place your vertical container garden. Is it a sunny patio, a shaded balcony, or a wall with partial light? Most plants suitable for vertical gardens need at least 4-6 hours of sunlight daily.

Observe the space throughout the day to understand light exposure, as Florida’s intense sunlight can differ dramatically depending on your location.

Choosing the Right Location for Optimal Growth

Position your vertical garden where plants can thrive but also where you can easily access them for watering, pruning, and harvesting. South- or east-facing walls work well for sun-loving plants, while west-facing walls might require additional shading during the hottest parts of the day.

If you’re limited on space, consider portable systems that can be relocated to catch the best light.

Understanding Florida’s Microclimate Challenges

Florida’s climate varies from humid and rainy to dry and windy, depending on the season and region. Coastal areas might deal with salty air, while inland areas face intense heat and humidity.

Choose materials for your vertical container garden that can withstand these conditions, such as UV-resistant plastic or treated wood. For plants, select varieties that are heat-tolerant and adaptable to changing weather patterns.

Setting Realistic Maintenance Expectations

Vertical gardens require a bit more attention than traditional container gardens. Watering can be more frequent, as plants in vertical systems tend to dry out faster.

Fertilizing and pest control may also require a closer eye. Consider starting small to get the hang of maintenance routines before expanding your setup.

Budgeting for Materials and Plants

Costs can add up quickly with vertical container gardening, especially if you’re investing in modular systems, trellises, or specialized planters. Determine your budget for essential items like containers, soil, and plants.

DIY options like repurposed pallets or inexpensive hanging baskets can help you save money while creating a unique aesthetic. Allocate funds for long-term essentials like fertilizers, water systems, and replacements for any wear-and-tear.

With thoughtful planning, you’ll be ready to build a vertical container garden that thrives in Florida’s unique climate while enhancing your home with greenery and color.

Essential Vertical Garden Systems for Florida Homes

Pocket system vertical container garden

When creating a vertical container garden for your Florida home, choosing the right system is key. Here’s a breakdown of the pros and cons of popular vertical gardening options:

Wall-Mounted Planters and Pocket Systems

  • Pros: Great for small spaces; visually striking; perfect for herbs, leafy greens, and flowers. Pockets are often lightweight and easy to install.
  • Cons: Require frequent watering, especially in Florida’s heat; wall damage may occur if not properly sealed against moisture; not ideal for heavy plants.

Modular Vertical Garden Panels

  • Pros: Customizable and scalable; excellent drainage and irrigation options; professional appearance.
  • Cons: Higher upfront cost; may need professional installation; some systems can be heavy and require a sturdy structure for support.

DIY Pallet Gardens with Weather Protection

  • Pros: Affordable and eco-friendly; customizable size; a rustic, charming aesthetic.
  • Cons: Wood may degrade in Florida’s humidity unless sealed; can harbor pests like termites; requires careful positioning to prevent waterlogging.
Stackable Vertical Container Garden for edible plants

Trellis and Vine Support Systems

  • Pros: Ideal for climbing plants like tomatoes, beans, and passionflower; allows vertical gardening for larger plants; cost-effective and easy to set up.
  • Cons: May not provide as much density for plant coverage; requires regular maintenance to guide and secure vines; exposed plants may suffer from wind damage.

Stackable Container Options for Flexibility

  • Pros: Portable and easy to rearrange; perfect for small spaces or renters; great for layering herbs, strawberries, or compact vegetables.
  • Cons: May require more frequent watering; less stable in windy conditions; limited root space for larger plants.

Each system offers unique advantages, so mix and match to find what works best for your space, plants, and budget. A Florida vertical container garden can be as simple or elaborate as you like!

Best Plants for a Florida Vertical Container Garden

Succulent living wall

Choosing the right plants is essential to creating a thriving vertical garden in Florida’s unique climate. Here are some top picks for each category:

Heat-Tolerant Flowering Varieties

  • Bougainvillea: Vibrant and hardy, perfect for sunny spots.
  • Mandevilla: Elegant trumpet-shaped blooms in shades of pink, red, and white.
  • Portulaca (Moss Rose): Small, colorful blooms that thrive in the heat.
  • Angelonia: Long-lasting “summer snapdragons” in soft pastels or vivid purples.

Trailing Plants for Cascading Effects

  • Sweet Potato Vine: Fast-growing with bold, colorful foliage.
  • Petunias: Cascading blooms in a range of colors, ideal for sunny locations.
  • Bacopa: Tiny flowers that spill gracefully over edges, perfect for partial shade.
  • Ferns: Delicate, feathery fronds that add lush greenery.

Drought-Resistant Succulents and Air Plants

  • Sedum: Hardy and colorful, with varieties like ‘Dragon’s Blood’ or ‘Autumn Joy.’
  • Echeveria: Rosette-forming succulents that add texture and charm.
  • Tillandsia (Air Plants): No soil needed! Just tuck them into crevices or hang them.
  • String of Pearls: Unique bead-like foliage that cascades beautifully.
Drought-tolerant Vertical Container Garden

Edible Options for Vertical Herb Gardens

  • Basil: Perfect for containers and thrives in full sun.
  • Thyme: A low-growing herb that spills over edges attractively.
  • Parsley: Easy to grow and ideal for culinary use.
  • Strawberries: Compact and great for hanging pockets or wall systems.

Native Florida Plants Perfect for Vertical Growing

  • Twinflower (Dyschoriste oblongifolia): A petite groundcover with lavender flowers that can adapt to vertical spaces.
  • Wild Poinsettia (Euphorbia cyathophora): Compact size and bright red bracts make this native a standout.
  • Corkystem Passionflower (Passiflora suberosa): A small, non-invasive passionflower vine with tiny blooms and berries.
  • Pineland Twinflower (Dyschoriste angusta): Delicate and compact, perfect for small containers or wall pockets.

By incorporating a mix of these plant types, you can create a lush, diverse vertical garden that thrives in Florida’s heat and humidity while offering beauty and functionality.

Installation Tips for Your Vertical Garden

Creating a vertical garden in Florida requires careful preparation and installation to ensure the structure thrives in the hot, humid climate. Follow these detailed steps to set up your vertical garden for success:

1. Preparing Your Vertical Space

  • Choose the Right Surface: Select a sturdy wall, fence, or freestanding frame capable of supporting the weight of plants, soil, and water. Brick, wood, or metal structures work well.
  • Clean and Prep the Area: Remove debris, dirt, or old paint from the surface. This ensures better adherence for brackets, panels, or other support systems.
  • Consider Sunlight Needs: Observe the area throughout the day to determine the amount of sunlight. Choose locations that match the light requirements of your plants, whether full sun, partial shade, or full shade.
  • Plan for Drainage: Ensure the area below your garden has adequate drainage to avoid water pooling, especially during Florida’s rainy season.

2. Installing Support Systems and Waterproofing

Casual Vertical Container Garden
  • Wall-Mounted Systems: Use mounting brackets or hooks to attach planters, pockets, or panels to walls. Anchor them securely to handle the weight of soil and water.
  • Freestanding Frames: Position A-frame structures or tiered plant stands on level ground. Use stakes to secure them in place if exposed to wind.
  • Add Waterproof Barriers: For wall-mounted systems, install a waterproof membrane or plastic sheeting between the garden and the wall to protect the surface from moisture and prevent mold growth.
  • Install Backing Boards: Consider using treated wood or PVC boards as a base for attaching plants, ensuring durability in Florida’s humidity.

3. Setting Up Irrigation Systems

  • Drip Irrigation: Install drip lines or soaker hoses along each tier of your vertical garden. These systems provide consistent moisture without overwatering, crucial in Florida’s heat.
  • Self-Watering Systems: Use containers with built-in reservoirs to reduce the need for frequent watering, especially in hotter months.
  • Timers for Efficiency: Add a timer to your irrigation system to automate watering, ensuring plants are hydrated even during busy days or vacations.
  • Monitor Runoff: Direct excess water into collection trays or nearby groundcover to prevent waste.

4. Proper Container Placement and Spacing

  • Plan for Growth: Arrange containers with the mature size of plants in mind, leaving enough space for foliage to expand without overcrowding.
  • Top-Down Planning: Place larger, bushier plants in lower tiers to prevent shading smaller ones above.
  • Balanced Weight Distribution: Spread heavy containers evenly across the structure to maintain stability.
  • Accessibility: Ensure containers are within reach for watering, pruning, and harvesting.

5. Initial Planting Techniques and Tips

  • Prepare the Soil: Use a lightweight, well-draining potting mix with added compost or slow-release fertilizer for nutrient retention.
  • Plant Strategically:
    • Group plants with similar water and light needs together.
    • Place trailing plants along the edges for a cascading effect.
    • Anchor climbing plants near trellises or support systems.
  • Secure Root Systems: Gently press down the soil around roots to eliminate air pockets, ensuring plants are stable.
  • Water Thoroughly: After planting, water each container until moisture drips from the drainage holes to help roots settle.
  • Monitor Regularly: Check for signs of transplant shock or stress, such as wilting or yellowing leaves, and adjust care as needed.

By following these steps, you’ll establish a thriving vertical garden that complements your Florida home while withstanding the state’s unique climate challenges.

Smart Irrigation Solutions for Vertical Gardens

A well-designed irrigation system is essential for vertical gardens, especially in Florida’s challenging climate. The heat and humidity can quickly dry out containers, while sudden downpours can lead to overwatering. Here’s how to ensure your vertical garden stays hydrated without wasting water or causing issues.

1. Drip Irrigation System Setup

  • Select a System: Opt for a low-pressure drip irrigation kit tailored for vertical gardens. These systems deliver water directly to the base of plants, reducing evaporation and runoff.
  • Install Drip Lines:
    • Place drip lines along each tier of your vertical garden.
    • Use emitters or micro-drippers for individual plants to ensure even coverage.
  • Connect to a Water Source: Attach the system to an outdoor faucet or a rain barrel. Include a pressure regulator to avoid excessive water flow that might damage plants.
  • Add a Timer: Automate watering by installing a timer to run the system during early morning or evening hours when evaporation is minimal.
  • Regular Maintenance: Check for clogs in emitters, especially after heavy rains that might introduce debris.

2. Self-Watering Container Options

  • Integrated Reservoirs: Use containers with built-in water reservoirs at the base. These systems wick water upward as the soil dries out, keeping roots consistently hydrated.
  • Wicking Systems for DIYers: Line containers with a capillary mat or use fabric wicks to pull water from a reservoir into the soil.
  • Advantages for Florida Gardens: Self-watering containers are ideal for conserving water and ensuring plants stay hydrated during Florida’s intense heat, especially if you’re away for a few days.

3. Water Conservation Techniques

  • Group Plants by Water Needs: Arrange plants with similar moisture requirements together to simplify watering and reduce waste.
  • Mulch for Moisture Retention: Add a layer of organic mulch, such as coconut coir or bark chips, on top of the soil to reduce evaporation and maintain consistent moisture.
  • Collect Rainwater: Install rain barrels to capture water during Florida’s rainy season, using it to irrigate your vertical garden during dry spells.
  • Recycled Water: Use water from rinsing fruits, vegetables, or dishes (without soap or chemicals) to hydrate non-edible plants.

4. Moisture Monitoring Systems

  • Soil Moisture Meters: Place sensors in different containers to measure soil moisture levels accurately. Choose meters with digital displays or Bluetooth connectivity for real-time updates.
  • Smart Irrigation Controllers: Use controllers with built-in sensors that adjust watering schedules based on soil conditions and weather forecasts.
  • Manual Testing: If you prefer low-tech solutions, stick your finger 1-2 inches into the soil. If it feels dry, it’s time to water.

5. Dealing with Florida’s Rainy Season

  • Overflow Management: Ensure all containers have adequate drainage holes to prevent waterlogging during sudden downpours.
  • Adjust Irrigation Systems: Turn off automated irrigation systems temporarily when heavy rains are expected. Use manual overrides or rain-sensing devices to avoid overwatering.
  • Raise Containers: Elevate pots slightly off the ground using plant feet or stands to ensure excess water drains freely.
  • Protect Against Root Rot: During prolonged rains, inspect plants for signs of root rot (yellowing leaves, wilting) and allow containers to dry out completely before the next watering.

By using these smart irrigation solutions, you can maintain a thriving vertical garden in Florida, ensuring your plants get the water they need—without overdoing it. This balanced approach saves time, conserves resources, and keeps your garden looking its best year-round.

Maintenance and Care in Florida’s Climate

A vertical container garden in Florida requires consistent maintenance to handle the heat, humidity, and occasional storms. With regular care, your plants will stay healthy, vibrant, and productive. Here’s a guide to keeping your garden thriving.

1. Regular Pruning and Trimming Schedules

  • Encourage Healthy Growth: Regularly trim overgrown branches and remove dead or yellowing leaves. This promotes airflow and reduces the risk of fungal diseases in Florida’s humid conditions.
  • Shape for Aesthetics: Prune trailing plants and vines to maintain an attractive form, ensuring they don’t overwhelm neighboring plants.
  • Deadheading Blooms: For flowering plants, snip off spent blooms to encourage new flowers and prevent unnecessary energy expenditure.
  • Frequency: Aim for a bi-weekly pruning session, increasing to weekly during the peak growing season.

2. Fertilizing Vertical Container Plants

  • Choose the Right Fertilizer: Use a balanced, slow-release fertilizer for most plants, or tailor nutrients based on plant type (e.g., high phosphorus for flowering plants, nitrogen-rich for leafy greens).
  • Frequency of Feeding:
    • Fertilize every 4-6 weeks with slow-release granules.
    • For quick results, supplement with liquid fertilizers every 2-3 weeks during active growth periods.
  • Special Tip for Florida’s Rainy Season: Apply fertilizers after heavy rains to replenish nutrients that might have been leached from the soil.
Bestseller No. 1
FoxFarm – Big Bloom Plant Food, Liquid…
  • Big Blooms Start with Big Bloom: Achieve vibrant, healthy blooms with our…
Bestseller No. 2
Espoma Organic Grow! Liquid Concentrate…
  • FOR USE ON: Use Espoma Organic Grow! for plants in the landscape or for…
SaleBestseller No. 3
True Organic Liquid Tomato & Vegetable…
  • Boosts Organic Yields: True Liquid Tomato & Vegetable Food promotes…

3. Pest Management Strategies

  • Common Florida Pests: Watch for aphids, whiteflies, spider mites, and caterpillars, all of which thrive in warm climates.
  • Preventative Measures:
    • Use companion planting to deter pests. For example, marigolds can repel aphids.
    • Inspect plants regularly, focusing on the undersides of leaves where pests often hide.
    • Keep the garden tidy by removing fallen leaves and debris, which can attract pests.
  • Eco-Friendly Solutions:
    • Spray plants with neem oil or insecticidal soap to control infestations.
    • Encourage natural predators like ladybugs and lacewings by planting nectar-rich flowers nearby.

4. Seasonal Care Adjustments

  • Summer: Provide afternoon shade for heat-sensitive plants, increase watering, and use mulch to retain soil moisture.
  • Fall: Transition to heat-tolerant cool-season plants like leafy greens and herbs.
  • Winter: Protect tender plants during cold snaps by covering them with frost cloths or moving portable containers indoors.
  • Spring: Refresh your garden with vibrant annuals and warm-season vegetables, and check irrigation systems for damage from winter freezes.

5. Replacing and Rotating Plants

  • Replace Fading Plants: Remove spent annuals or underperforming plants to make room for new ones. This keeps your garden fresh and prevents pests or diseases from taking hold.
  • Rotate Crops for Edibles: To maintain soil health, rotate herbs and vegetables with similar needs but different nutrient demands. For example, alternate between tomatoes and leafy greens in the same containers.
  • Replenish Soil: When replacing plants, add fresh potting mix or compost to revitalize the soil with essential nutrients.

With these strategies, you’ll maintain a lush and thriving vertical container garden no matter what Florida’s climate throws your way. Routine care and attention will ensure your garden remains a vibrant centerpiece of your home.

Design Tips for Eye-Catching Vertical Gardens

Designing a vertical garden is as much about aesthetics as it is about functionality. The right mix of plants, colors, textures, and thoughtful planning can turn a simple wall or vertical structure into a stunning feature in your Florida home. Let’s explore how to create a garden that draws the eye and sparks joy year-round.

Creating Visual Interest with Plant Combinations

A successful vertical garden isn’t just about individual plants—it’s about how they interact. Combine plants with varying growth habits to create a layered, multidimensional effect.

  • Why It Works: Blending trailing, upright, and bushy plants creates depth, turning a flat vertical surface into a dynamic living tapestry.
  • Examples:
    • Pair trailing plants like creeping Jenny or golden pothos with upright plants like rosemary or dracaena.
    • Combine edible greens like lettuce with flowering varieties such as petunias for a functional yet decorative garden.

Color Schemes That Pop in Vertical Spaces

Use bold color combinations to make your vertical garden visually striking. Think about contrasting or complementary colors that stand out against Florida’s bright sunlight.

  • Why It Works: Strategic color choices can create focal points, draw attention to specific areas, or enhance the overall atmosphere of your garden.
  • Examples:
    • Bright yellows and purples (e.g., lantana and verbena) for a high-energy look.
    • Subdued pastels like dusty miller and pink calibrachoa for a calming effect.
    • Monochromatic schemes, such as various shades of green from ferns, succulents, and ivy, for a minimalist aesthetic.

Texture and Height Variations

Incorporating plants with different textures and heights adds interest and keeps the eye moving. Choose a mix of smooth, spiky, feathery, and velvety foliage for variety.

  • Why It Works: Contrast in texture creates a sensory experience and prevents the garden from looking too uniform or flat.
  • Examples:
    • Combine the feathery fronds of asparagus fern with the bold, waxy leaves of croton.
    • Use grasses like fountain grass alongside succulents such as echeveria to mix softness and structure.
    • Place tall, upright plants like snake plant near shorter, mounding varieties like coleus.

Year-Round Interest Planning

To ensure your vertical garden stays vibrant through every season, choose plants that peak at different times of the year.

  • Why It Works: Year-round interest keeps your garden looking lush and alive, no matter Florida’s weather.
  • Examples:
    • Use warm-season flowers like zinnias for summer, transitioning to hardy ferns or pansies in the cooler months.
    • Incorporate evergreen foliage plants like philodendrons to provide a consistent backdrop.
    • Add seasonal edibles like strawberries in spring and kale in fall for practical beauty.

Incorporating Lighting Elements

Don’t let your vertical garden fade into the background at night. Use lighting to highlight your plants and create ambiance.

  • Why It Works: Proper lighting transforms your garden into an evening feature and makes it more usable in the cooler nighttime hours.
  • Examples:
    • String fairy lights or LED strips around the edges of your structure for a soft glow.
    • Install spotlights to illuminate standout plants or trailing greenery.
    • Use solar-powered lights for eco-friendly, low-maintenance illumination.

By thoughtfully combining colors, textures, heights, and lighting, you can design a vertical garden that’s as visually captivating as it is practical. With these design tips, your garden will be a unique, ever-changing showcase of Florida-friendly plants.

Troubleshooting Common Florida Vertical Garden Issues

Vertical gardens in Florida come with unique challenges, from intense weather conditions to the potential for structural damage. Proactive troubleshooting ensures your garden stays healthy and your home remains protected. Here’s how to address the most common issues.

Managing Water Runoff

Vertical gardens can produce significant water runoff, especially in Florida’s rainy season. Excess water can damage surfaces and create waste.

  • Solution:
    • Install drip trays or gutters beneath your planters to collect and redirect runoff.
    • Use water-absorbing mats behind wall-mounted systems to catch excess moisture.
    • Water sparingly and use drip irrigation to ensure plants get just enough water without oversaturating.

Preventing Wall Damage and Mold

Moisture and soil residue from vertical gardens can seep into walls, leading to structural damage or mold growth.

  • Solution:
    • Use a waterproof barrier or backing board between the garden and your wall.
    • Opt for freestanding systems or ensure wall-mounted planters are properly sealed and spaced for airflow.
    • Regularly inspect for signs of mold or water damage, and address them promptly with mold-resistant sprays or repairs.

Dealing with Plant Diseases in Vertical Settings

Closely spaced plants in vertical gardens are more susceptible to diseases spreading quickly. Florida’s humidity further exacerbates this issue.

  • Solution:
    • Maintain good airflow by spacing plants appropriately and pruning overcrowded areas.
    • Choose disease-resistant varieties suited to Florida’s climate.
    • Inspect plants weekly for early signs of diseases like mildew or root rot, and treat with organic fungicides or neem oil.

Adjusting for Uneven Growth

Some plants may grow faster than others, leading to an unbalanced appearance in your vertical garden.

  • Solution:
    • Use growth rate as a guide when planning placements—slower growers like succulents should be combined with similar species.
    • Rotate plants or switch out faster-growing species to maintain balance.
    • Prune regularly to keep aggressive plants in check and ensure sunlight reaches slower-growing ones.

Hurricane Season Preparations

Florida’s hurricane season can pose serious risks to vertical gardens, including wind damage and plant loss.

  • Solution:
    • Anchor freestanding systems securely or relocate them to sheltered areas during storms.
    • Use lightweight containers that are easy to move but sturdy enough to withstand wind.
    • Avoid using delicate or top-heavy plants in exposed vertical gardens—opt for more resilient species like native grasses.
    • If a storm is approaching, remove lightweight planters and secure wall-mounted systems with additional supports.

By addressing these potential issues before they arise, you can enjoy a thriving, low-maintenance vertical garden that withstands Florida’s unique challenges. With the right care, your garden will remain a stunning feature for years to come.

You’re Ready for Your Backyard Retreat

You’re now equipped with everything you need to create your own slice of vertical paradise! Remember, vertical gardening in Florida is an adventure, and every garden tells its own unique story.

Don’t be afraid to experiment and let your creativity climb to new heights (pun intended!). Start small, learn from each success and setback, and watch as your vertical garden transforms into a stunning living masterpiece.

Your walls are waiting to come alive – so grab those containers and let’s get growing! And hey, when your friends ask about your gorgeous green wall, you’ll know exactly how to help them create their own vertical oasis.

Posted on

15 Heat-Tolerant Plants Perfect for Florida Container Gardens

heat resistant container plants

Wow, did you know that temperatures in Florida can soar up to 100°F during peak summer? That’s hot enough to fry an egg on the sidewalk! But don’t let the heat wilt your gardening dreams. As a passionate Florida gardener, I’ve discovered a secret weapon: heat-tolerant container plants.

These tough beauties laugh in the face of our scorching summers, turning even the most sun-baked patio into a lush, tropical paradise. Ready to beat the heat and create your own container garden oasis? Let’s dive into my top 15 picks for heat-tolerant plants that’ll thrive in your Florida containers!

Colorful Blooms: Heat-Tolerant Flowering Plants for Florida Containers

When it comes to Florida container gardening, choosing heat-tolerant plants that thrive in the intense sun is key. Luckily, there are plenty of flowering options that not only survive but flourish in Florida’s heat, adding vibrant color and life to your patio or garden. Here are five fantastic choices to consider:

Pentas: A Butterfly Magnet with Star-Shaped Clusters

Pentas (Pentas lanceolata) are a go-to for Florida gardeners who want continuous color and wildlife-friendly plants. With their star-shaped clusters of pink, red, lavender, and white blooms, pentas are highly attractive to butterflies and hummingbirds.

These plants thrive in full sun and can tolerate the hottest summer days. Their long blooming season makes them perfect for container gardens, and they are relatively low-maintenance, needing only regular watering and deadheading to promote more blooms.

Gaillardia (Blanket Flower): Drought-Tolerant with Daisy-Like Blooms

Gaillardia, commonly known as blanket flower, offers striking daisy-like flowers in shades of red, orange, and yellow. This hardy perennial is drought-tolerant once established and can withstand Florida’s sandy soils and heat, making it an ideal choice for containers.

With regular deadheading, Gaillardia blooms continuously throughout the summer and into fall. Its vibrant colors and ability to attract pollinators make it a must-have for adding some bold color to your Florida garden.

Lantana: Low-Maintenance with Multicolored Flower Clusters

By Patrice78500 – Own work, CC BY-SA 4.0, https://commons.wikimedia.org/w/index.php?curid=69133910

Lantana is a tough, low-maintenance flowering plant that can handle just about anything Florida throws at it—intense sun, heat, humidity, and even occasional drought.

Known for its clusters of small, multicolored flowers, lantana provides bright splashes of color in shades of orange, pink, yellow, and purple. It’s perfect for containers, especially since it requires very little watering once established. Bonus: it’s a favorite for pollinators, particularly butterflies!

Look for the native variety at nurseries near you.

Purslane: Succulent-Like Leaves with Vibrant Flowers

Purslane is an excellent choice for Florida gardeners looking for a heat-tolerant plant that combines the hardiness of succulents with beautiful, vibrant blooms. This trailing plant features fleshy, succulent-like leaves and produces bright, jewel-toned flowers in pink, yellow, red, and orange.

Purslane thrives in full sun and can tolerate poor soils, making it ideal for containers where other plants might struggle. Its low water needs make it especially well-suited for Florida’s hot summers, and it looks stunning spilling over the sides of pots or hanging baskets.

Angelonia (Summer Snapdragon): Vertical Spikes of Delicate Blossoms

If you’re looking to add vertical interest to your container garden, Angelonia—also known as summer snapdragon—is a fantastic option. This heat-tolerant annual (or perennial in some parts of Florida) produces tall spikes covered in small, delicate flowers in shades of purple, pink, white, and blue.

Angelonia thrives in full sun and blooms all summer long, even in Florida’s hottest months. Its upright growth habit makes it perfect for mixing with lower-growing plants in containers to create depth and dimension.

These colorful, heat-tolerant flowering plants are perfect for brightening up your Florida container garden. With their resilience to heat and humidity, they’ll keep your space looking vibrant and beautiful all summer long.

Lush Foliage: Heat-Resistant Leafy Plants for Shade and Texture

While colorful blooms are fantastic for any container garden, lush foliage can add depth and texture, particularly in shaded areas.

If you’re looking for heat-resistant leafy plants to elevate your Florida container garden, consider these five stunning options that bring vibrant colors and unique shapes:

Coleus: Vibrant Foliage in a Rainbow of Colors

Coleus (Solenostemon scutellarioides) is a fantastic choice for adding bold, vibrant color to your container garden. Available in a stunning array of shades—think deep reds, bright greens, and striking yellows—these plants thrive in partial shade, making them perfect for brightening up shadier spots on your patio.

Coleus is also quite versatile; it can be used as a centerpiece in larger pots or as a border plant in mixed arrangements. Just be sure to keep their soil consistently moist, and you’ll enjoy their colorful foliage all summer long.

Caladium: Heart-Shaped Leaves Perfect for Shady Spots

Caladiums are beloved for their heart-shaped leaves and stunning variegated patterns. These tropical perennials thrive in the shade and are an excellent choice for adding a splash of color to your container garden without direct sunlight.

Available in various shades of green, pink, red, and white, caladiums can create a striking contrast when paired with darker foliage or brightly colored blooms. They prefer moist, well-drained soil and will flourish with regular watering, making them perfect for a shaded patio or garden corner.

Silver Buttonwood: Silvery Foliage for a Coastal Vibe

By Judgefloro – Own work, CC0, https://commons.wikimedia.org/w/index.php?curid=58330110

For a touch of coastal charm, consider the Silver Buttonwood (Conocarpus erectus). This hardy shrub features attractive silvery-green leaves that can add a unique texture to your container arrangements. Silver Buttonwood is not only drought-tolerant but also salt-tolerant, making it an excellent choice for coastal areas in Florida.

Whether used as a standalone plant or as a backdrop to colorful blooms, its distinctive foliage provides a beautiful contrast that enhances any garden design. Ensure it receives plenty of sunlight and water moderately for optimal growth.

Croton: Bold, Multicolored Leaves for a Tropical Feel

If you want to inject a tropical vibe into your container garden, look no further than Croton (Codiaeum variegatum). Known for its stunning, multicolored leaves in shades of yellow, red, and green, Croton can be a true showstopper.

These vibrant plants thrive in full sun and will appreciate well-drained soil. Crotons are perfect for larger containers, where their bold foliage can shine as a focal point. Keep the soil consistently moist (but not soggy), and prune occasionally to maintain a tidy appearance.

Ti Plant (Cordyline): Dramatic, Sword-Like Leaves in Various Hues

The Ti Plant, or Cordyline, is a stunning option for adding dramatic foliage to your container garden. With its long, sword-like leaves available in vibrant hues of green, red, and purple, this plant can serve as a striking centerpiece.

Ti Plants thrive in bright, indirect light, making them well-suited for patios with filtered sunlight. They prefer well-drained soil and benefit from regular watering, especially during dry spells. Incorporate them into mixed arrangements for a dramatic effect, or let them stand alone for a bold statement.

With these lush, heat-resistant leafy plants, you can create a beautiful and textured container garden that thrives in Florida’s unique climate. Their resilience to heat and humidity ensures your garden remains vibrant and inviting throughout the season.

Edible Delights: Heat-Tolerant Herbs and Vegetables for Container Gardens

If you’re looking to grow your own fresh produce while enjoying the beauty of container gardening, you’ll love these heat-tolerant herbs and vegetables.

Perfectly suited for Florida’s warm climate, these options will thrive in your garden while providing delicious flavors for your culinary creations.

Rosemary: Aromatic Herb That Loves the Heat

Rosemary (Rosmarinus officinalis) is a must-have herb for any Florida container garden. This hardy perennial thrives in the heat and full sun, making it an excellent choice for our warm climate. Not only does rosemary have a delightful aroma, but it’s also versatile in the kitchen—perfect for seasoning meats, vegetables, and even breads.

Plant rosemary in well-drained soil and water it moderately, allowing the soil to dry out between waterings. Regular pruning will encourage bushy growth and prevent the plant from becoming too woody.

Cuban Oregano: Succulent-Like Herb with a Strong Flavor

By Michael Rivera – Own work, CC BY-SA 4.0, https://commons.wikimedia.org/w/index.php?curid=61309762

Cuban Oregano (Plectranthus amboinicus), also known as Spanish thyme, is a succulent-like herb that adds a punch of flavor to various dishes. This heat-loving plant thrives in full sun and well-drained soil, making it ideal for container gardening.

Cuban Oregano features thick, fleshy leaves that can be harvested year-round, providing a fresh supply of flavor for soups, stews, and marinades. Water it moderately, ensuring the soil dries out slightly between waterings. This herb also has lovely purple flowers, making it a beautiful addition to your garden.

Cherry Tomatoes: Compact Varieties Perfect for Containers

When it comes to container gardening, cherry tomatoes are a fantastic choice. Compact varieties, such as ‘Tiny Tim’ or ‘Tumbling Tom,’ are bred specifically for small spaces and can thrive in pots on your patio. These sweet, bite-sized tomatoes love the heat and will produce abundantly throughout the growing season.

Plant them in well-draining potting mix and provide support, like a small cage or stake, as they grow. Make sure to water them regularly, especially during dry spells, and consider fertilizing every few weeks to encourage healthy fruit production.

Hot Peppers: Thrive in Florida’s Heat and Add Spice to Your Garden

Hot peppers are another excellent option for container gardens in Florida. Varieties like jalapeños, habaneros, and cayennes flourish in the warm weather and add a delightful kick to your dishes. Plant your peppers in a sunny spot with well-drained soil, and they’ll reward you with a bountiful harvest.

Water consistently, keeping the soil moist but not soggy, and consider fertilizing with a balanced fertilizer every few weeks. With proper care, your peppers will produce a stunning array of colorful fruits that can be harvested throughout the season.

Eggplant: Stunning Purple Fruits and Attractive Foliage

Eggplant (Solanum melongena) is not only a delicious addition to your meals but also brings striking visual interest to your container garden with its glossy purple fruits and lush foliage. Varieties like ‘Black Beauty’ or ‘Fairy Tale’ are compact enough to thrive in containers.

These heat-loving plants prefer full sun and well-drained soil, so choose a pot that allows for good drainage. Regular watering is essential, especially during hot spells, but be careful not to overwater. Fertilize with a balanced fertilizer to support fruit production, and enjoy the vibrant bounty throughout the season.

With these heat-tolerant herbs and vegetables, you can enjoy the satisfaction of growing your own fresh ingredients right on your patio. Their resilience to Florida’s heat ensures that you’ll have a productive and flavorful garden all summer long!

Care Tips for Heat-Tolerant Container Plants in Florida

Caring for your heat-tolerant container plants in Florida requires a bit of attention to detail, especially in the summer months. With the right techniques, you can ensure your plants thrive even in the intense heat. Here are some actionable tips to help you keep your garden lush and productive.

Watering Techniques for Hot Weather 

Watering your plants effectively is crucial during Florida’s sweltering summers. Here are some techniques to keep in mind:

Early Morning Watering: Aim to water your container plants in the early morning when temperatures are cooler. This allows plants to absorb moisture before the heat of the day sets in, minimizing evaporation.

Deep Watering: Instead of frequent light watering, opt for deep watering sessions. Ensure that water reaches the root zone by saturating the soil until it drains from the bottom of the container. This encourages roots to grow deeper and enhances drought resistance.

Use Drip Irrigation: Consider using a drip irrigation system or self-watering containers. These methods deliver water directly to the roots, reducing water waste and providing a consistent moisture supply.

Proper Fertilization to Support Growth in High Temperatures 

High temperatures can stress plants, making them more susceptible to nutrient deficiencies. Here’s how to properly fertilize:

Slow-Release Fertilizers: Use slow-release fertilizers to provide a steady supply of nutrients throughout the growing season. Look for a balanced formula (like 10-10-10) or one designed for container gardens, and follow the manufacturer’s instructions for application rates.

Liquid Fertilizers: For an immediate nutrient boost, use liquid fertilizers every few weeks during the growing season. Dilute according to the instructions and apply directly to the soil to enhance nutrient uptake.

Monitor Plant Health: Keep an eye on your plants for signs of nutrient deficiency, such as yellowing leaves or stunted growth. Adjust your fertilization schedule as needed based on their appearance.

Mulching to Retain Moisture and Cool Roots 

Mulching is an excellent technique for managing soil temperature and moisture levels. Here’s how to do it effectively:

Choose the Right Mulch: Use organic materials like pine bark, straw, or shredded leaves. These materials not only retain moisture but also improve soil structure as they break down.

Apply a 2- to 3-Inch Layer: Spread a 2- to 3-inch layer of mulch on top of the soil in your containers. This will help reduce evaporation, keep the soil cooler, and suppress weeds.

Replenish as Needed: Check your mulch periodically and replenish it as it breaks down to maintain effective moisture retention.

Providing Afternoon Shade for Sensitive Plants 

Some plants, even those classified as heat-tolerant, may struggle in full sun during the hottest parts of the day. Here’s how to protect them:

Use Shade Cloth: If you notice your plants wilting or browning, consider using shade cloth to provide some relief. Hang it above your containers to filter sunlight during the afternoon heat.

Strategic Placement: Arrange your containers in a way that taller plants or nearby structures can provide shade to more sensitive varieties. This can help them thrive while still getting the necessary sunlight.

Move Containers: If you have mobile containers, consider moving them into shadier spots during extreme heat periods. Just ensure any relocation is gradual to minimize stress on the plants.

Pruning and Deadheading for Continued Blooms 

Regular maintenance through pruning and deadheading can promote healthy growth and blooming. Here’s what to do:

Deadheading Flowers: Remove spent flowers regularly to encourage new blooms. This not only keeps your plants looking tidy but also directs energy back into producing more flowers.

Prune for Shape and Health: Trim back overgrown or leggy plants to maintain a desirable shape and to promote bushier growth. For some plants, pruning back about one-third of the stems can stimulate new growth.

Monitor for Pests: While pruning, check your plants for signs of pests or disease. Early detection is key to managing issues before they spread.

By following these care tips, your heat-tolerant container plants will thrive in Florida’s challenging climate. With proper attention to watering, fertilization, mulching, shading, and maintenance, you’ll enjoy a vibrant and flourishing garden throughout the warm months!

Designing with Heat-Tolerant Plants: Container Combinations That Pop

Designing a stunning container garden with heat-tolerant plants involves creativity and strategic planning. By combining various plants thoughtfully, you can create visually appealing arrangements that thrive in Florida’s sunny climate. Here’s how to design vibrant container combinations that will make your garden stand out.

Creating Height and Depth with Plant Combinations 

Layering plants of varying heights not only adds visual interest but also helps maximize space in your containers.

Tall Plants: Start with taller plants like Angelonia or Lantana in the back or center of the container. These will serve as focal points and add vertical interest to your arrangement.

Medium Plants: Include medium-height plants such as Pentas or Gaillardia around the edges to create a soft transition from the tall plants to shorter ones.

Low-Growing Plants: Fill in with low-growing varieties like Purslane or groundcover herbs. These will create a lush, full appearance and help soften the overall look of the container.

Color Schemes That Thrive in Florida’s Bright Sunlight 

Choosing the right color scheme can enhance your container garden’s beauty while ensuring the plants flourish.

Warm Colors: Opt for warm colors like reds, oranges, and yellows to create a vibrant, energetic feel. Plants like Marigolds and Zinnias work beautifully here.

Cool Colors: For a calming effect, select cool colors such as blues and purples. Salvia and Calibrachoa are excellent choices that will add depth and contrast.

Contrasting Shades: Consider using contrasting shades to create visual drama. Pairing deep purples of Ti Plants with the bright yellows of Coreopsis can make each color pop.

Mixing Textures for Visual Interest


Combining plants with different textures will add dimension and intrigue to your arrangements.

Broad Leaves vs. Fine Leaves: Mix broad-leaved plants like Croton with fine-leaved herbs like Rosemary. This contrast will catch the eye and create a layered effect.

Succulents and Foliage: Incorporate succulents like Aloe Vera or Echeveria with leafy plants such as Caladiums.Their differing shapes and sizes will enhance the overall texture.

Trailing Plants: Add trailing plants like Lantana or Sweet Potato Vine to spill over the sides of your containers, creating a soft, cascading effect that adds movement and life.

Companion Planting for Pest Control and Mutual Benefits 

Incorporating companion planting techniques can enhance plant health and reduce pest issues.

Herbs with Vegetables: Plant Basil alongside Tomatoes to repel pests and improve flavor. The two thrive together and maximize your container’s productivity.

Flowers with Edibles: Add **Marigolds** to your vegetable containers to deter aphids and root-knot nematodes, benefiting both your flowers and vegetables.

Nectar Plants: Include nectar-rich plants like Pentas in your vegetable garden to attract beneficial pollinators that can help with fruit and vegetable production.

Seasonal Rotation Ideas for Year-Round Interest 

To keep your container garden looking fresh throughout the year, consider rotating your plants seasonally.

Spring and Summer: Start with heat-tolerant annuals like Zinnias and Cosmos that bloom vibrantly. Add in herbs like Basil and Oregano for both beauty and culinary use.

Fall and Winter: Transition to more resilient plants like Pansies and Snapdragons for cooler months. Adding Kale and Chard not only provides a colorful edible option but also thrives in the lower temperatures.

Mix Seasonal Blooms: Create containers that transition between seasons by mixing perennials like Salvia that will return year after year with seasonal annuals for a dynamic look.

By applying these design strategies, you can create stunning, heat-tolerant container combinations that not only thrive in Florida’s climate but also bring joy and beauty to your outdoor spaces. Happy gardening!

Troubleshooting Common Issues with Heat-Tolerant Plants

Even the most heat-tolerant plants can face challenges in Florida’s climate. By knowing how to troubleshoot common issues, you can ensure your container garden remains healthy and vibrant all season long. Here’s how to handle various challenges effectively.

Dealing with Sunscald and Leaf Burn 

Sunscald and leaf burn occur when plants are exposed to excessive sunlight, leading to unsightly brown patches or crispy edges on leaves. Here’s how to manage it:

Provide Shade: Consider using shade cloth or strategically placing taller plants to offer some protection during the hottest parts of the day. For sensitive plants, providing afternoon shade can help mitigate sunburn.

Acclimatization: Gradually expose newly planted heat-tolerant plants to full sun. Start them in a partially shaded area and slowly increase their sun exposure over a week or two to prevent shock.

Hydration: Ensure your plants are well-watered, as dry soil can exacerbate sunscald. Water deeply in the morning to keep the roots hydrated, especially during heatwaves.

Managing Pests That Thrive in Hot Weather 

Hot weather can lead to a rise in pests that target your container plants. Here’s how to keep them at bay:

Regular Monitoring: Check your plants regularly for signs of pests such as aphids, whiteflies, or spider mites. Early detection is key to effective management.

Natural Predators: Attract beneficial insects like ladybugs or lacewings by planting flowers such as Marigolds or Yarrow nearby. These insects help control pest populations naturally.

Organic Treatments: If pests are spotted, use insecticidal soap, Spinosad, or bt as a safe, organic option to control outbreaks. Spray in the early morning or late afternoon to avoid harming beneficial insects.

Preventing Root Rot in Humid Conditions 

Florida’s humidity can lead to root rot, especially if containers don’t have proper drainage. Here’s how to prevent it:

Choose the Right Containers: Use containers with adequate drainage holes. Consider raised planters or pots made from breathable materials like terra cotta to enhance air circulation.

Soil Mix: Use a well-draining potting mix designed for container gardening. You can create your own by mixing standard potting soil with perlite or coarse sand to improve drainage.

Watering Practices: Avoid overwatering. Ensure the top inch of soil is dry before watering again, and consider using self-watering containers to help regulate moisture levels.

Reviving Wilted Plants During Heatwaves 

When extreme heat hits, even heat-tolerant plants can become stressed and wilt. Here’s how to revive them:

Immediate Watering: If you notice wilting, water the plant thoroughly right away. Check the soil moisture level and ensure it’s adequately hydrated.

Mulching: Apply a layer of mulch around the base of the plants. Mulch helps retain soil moisture and keeps roots cool, reducing heat stress.

Temporary Shade: Create temporary shade using a garden umbrella or lightweight fabric to protect plants from intense sunlight until they recover.

Adjusting Care for Sudden Temperature Changes 

Florida’s weather can be unpredictable, with sudden temperature drops or spikes. Here’s how to adjust your care routine accordingly:

Monitor Weather Conditions: Keep an eye on local forecasts. If a cold snap is expected, move sensitive plants closer together or indoors if possible.

Insulation: For particularly sensitive plants, consider wrapping pots with burlap or using frost cloth to provide insulation against cold temperatures.

Watering Adjustments: Adjust your watering schedule based on temperature changes. In cooler weather, plants may need less water, while hot spells will require more frequent hydration.

By staying proactive and addressing these common issues with heat-tolerant plants, you can maintain a flourishing container garden that stands up to Florida’s unique climate challenges. Happy gardening!

Expanding Your Florida Container Garden: Beyond the Basics

Once you’ve mastered the fundamentals of container gardening in Florida, it’s time to expand your horizons. There are countless opportunities to create a stunning, vibrant garden that not only thrives in the heat but also supports local wildlife and embraces the natural beauty of Florida. Here are some exciting ideas to take your container garden to the next level!

Experimenting with Rare Heat-Tolerant Varieties 

Don’t be afraid to think outside the box! Florida’s warm climate allows for the exploration of less common, heat-tolerant plants that can add unique flair to your garden.

Research Uncommon Varieties: Look for rare flowering plants, exotic herbs, or unique vegetable cultivars that can withstand high temperatures. Plants like Mexican Tarragon or Pigeon Pea can be eye-catching and functional.

Visit Local Nurseries: Check out local garden centers or farmers’ markets for unusual plant varieties that are not typically found in big-box stores. The staff can offer advice on what will thrive in your specific conditions.

Creating a Butterfly and Hummingbird Haven 

A container garden can be a beautiful sanctuary for butterflies and hummingbirds, enhancing both your outdoor space and local biodiversity.

Select Nectar-Rich Plants: Choose flowering plants that attract these pollinators, such as Native Lantana, Pentas, and Salvia. Group these plants together to create vibrant, inviting spaces.

Add Water Sources: Incorporate shallow dishes filled with water or birdbaths to provide hydration. You can also add pebbles to give butterflies and hummingbirds a safe landing spot.

Create Shelter: Use native plants or decorative elements like small shrubs or grasses to provide shelter for these creatures, making your garden a go-to spot for foraging.

Incorporating Native Florida Plants Into Your Containers 

Native plants are an excellent choice for container gardens—they’re adapted to the local climate, require less maintenance, and support local ecosystems.

Select Native Varieties: Explore plants like Florida’s native milkweed, frogfruit, or Coontie. These options are hardy, drought-tolerant, and attract native pollinators.

Promote Biodiversity: By including native species, you can support local wildlife and contribute to the ecological health of your area. Native plants typically require less water and are more resilient against pests and diseases.

Vertical Gardening Ideas for Heat-Tolerant Climbers 

When space is at a premium, vertical gardening is a fantastic solution. It allows you to grow more plants while adding visual interest to your container garden.

Choose Climbing Plants: Select heat-tolerant climbers such as Passionflower, Sweet Potato Vine, or Scarlet Runner Beans. These plants can add height and drama to your garden.

Utilize Trellises and Arches: Incorporate decorative trellises, arbors, or even repurposed fencing to provide support for your climbing plants. Vertical elements can create stunning focal points in your garden.

Hanging Planters: Consider using hanging baskets for trailing varieties, like Trailing Petunias, to create layers of color and texture.

Water-Wise Container Garden Designs for Extreme Heat 

In Florida’s intense heat, conserving water while keeping your plants thriving is essential. Here are some design tips to create a water-wise garden:

Use Water-Saving Techniques: Incorporate self-watering containers to help maintain consistent moisture levels, reducing the need for frequent watering.

Select Drought-Resistant Plants: Opt for plants that can withstand dry conditions, like succulents or certain native species. These plants require less water and are perfect for Florida’s hot climate.

Implement Mulching: Add a layer of mulch to your container garden to help retain moisture, regulate soil temperature, and suppress weeds. Organic options like pine straw or shredded bark work well.

Expanding your Florida container garden can be a rewarding and fun journey. By experimenting with diverse plant varieties, attracting wildlife, incorporating native species, utilizing vertical space, and designing for water efficiency, you’ll create a vibrant, thriving garden that brings joy and beauty to your outdoor space. Happy gardening!

The Heat is On

There you have it, fellow Florida gardeners – 15 heat-tolerant plants that’ll turn your container garden into a slice of paradise, no matter how high the mercury rises!

Remember, even these tough plants appreciate a little TLC, so keep them well-watered and show them some love. With this lineup of heat-beating beauties, you’ll be the envy of the neighborhood, enjoying a lush, colorful garden all summer long.

So grab your sunhat, pour yourself a tall glass of iced tea, and get ready to create the Florida container garden of your dreams. Happy gardening, and may your plants always be cooler than you are!

Posted on

Best Containers for Florida Gardens: Top Picks for Every Plant Type

kitten examining a containers for Florida gardens

Did you know that choosing the right containers for Florida gardens can make or break your Florida garden? It’s true! In fact, a study by the University of Florida found that proper container selection can increase plant survival rates. It improves by up to 30% in our challenging climate.

As a fellow Florida gardening enthusiast, I’ve learned through trial and error (and more than a few crispy plants!) that picking the right pot is crucial. Today, I’m excited to share my top container picks for every plant type. I’m hoping this will help you create a lush, thriving garden that’ll be the envy of your neighborhood. Let’s dive in and find your perfect pots!

Understanding Florida’s Unique Container Gardening Challenges

Container gardening in Florida is rewarding, but the state’s unique climate does come with its own set of challenges. Understanding how Florida’s heat, humidity, and occasional weather extremes affect your plants can help you choose the best containers for Florida gardens.

The Impact of Intense Heat and Humidity on Containers in Florida Gardens

containers for Florida gardens and patios

Florida’s intense sun and high humidity can cause container plants to dry out quickly or, in some cases, become too moist. During the summer months, the sun can heat up containers fast. Especially vulnerable are those made of metal or dark-colored plastic. These can bake the roots and stress out your plants. Opt for lighter-colored containers. Or, you can consider materials like terracotta or glazed ceramic, which stay cooler in the heat and help regulate soil temperature.

Dealing with Sudden Temperature Fluctuations

While Florida is generally warm, sudden cold snaps in the winter can catch you off guard. Container plants are more vulnerable to these fluctuations since their roots don’t have the insulation of the ground. If a chilly night is coming, it’s easy to move smaller containers to a sheltered spot. You can cover larger ones with frost blankets. Choosing containers for Florida gardens with good mobility or placing them on rolling carts can make a big difference.

Importance of Proper Drainage in Florida’s Rainy Season

Florida’s rainy season can drench your container garden, and without proper drainage, plants can suffer from root rot. When choosing containers for Florida gardens, make sure they have plenty of drainage holes to allow excess water to escape.

Using well-draining soil can also help prevent water-logging. Raised containers can be a great solution for areas prone to heavy downpours, as they ensure water doesn’t pool at the base of your plants.

Considerations for Salt Air in Coastal Areas

If you live near the coast like I do, salt air can be an added challenge for your container plants. Salt can accumulate on leaves and in the soil, causing damage over time.

Look for salt-tolerant plants like succulents, coastal natives, or even certain herbs. You’ll also want to rinse your containers and plants occasionally with fresh water to wash away any salt buildup, especially after a windy day by the ocean.

Balancing Sun Exposure and Shade for Container Plants

containers for Florida gardens made of natural materials can break down quickly

Florida’s strong sun is great for many plants, but too much exposure can scorch delicate foliage. Keep your containers in areas where you can adjust their light exposure throughout the day.

For plants that prefer partial shade, consider using shade cloth or placing them under patio covers. With container gardening, you have the flexibility to move plants as needed—just make sure to keep an eye on how the sun shifts in your space.

By addressing these unique challenges, you can create a thriving container garden perfectly suited to Florida’s climate!

Essential Features of Containers for Florida Gardens

Choosing the right containers for your Florida garden is key to helping your plants thrive, especially with the state’s heat, humidity, and occasional storms. Here’s a detailed guide on what to look for in containers that can handle Florida’s unique climate and keep your plants happy and healthy.

1. Heat-Resistant Materials to Protect Plant Roots

Florida’s intense sun can cause containers to heat up, which can bake plant roots and stress them out. The material of your container plays a big role in keeping your plants cool.

Choose containers made from heat-resistant materials like terracotta, glazed ceramic, or fabric grow bags. These materials help keep soil cooler, allowing for better root health.

Avoid dark-colored plastic or metal containers for Florida gardens. They absorb heat and can cause soil temperatures to rise too quickly. If you already have dark containers, try wrapping them in a lighter fabric or shade cloth to reflect heat.

2. Proper Drainage Holes to Prevent Water-logging

Florida’s rainy season brings heavy downpours, and without proper drainage, your plants can drown in too much water, leading to root rot.

Make sure your containers have multiple drainage holes. A single hole may not be enough during Florida’s frequent storms, so check that your container allows excess water to escape freely.

If your container doesn’t have enough drainage holes, drill extra holes in the bottom. A layer of gravel or stones at the bottom can also help keep the roots above any standing water.

Elevate containers slightly off the ground by placing them on pot feet or bricks. This helps water flow out and keeps plants from sitting in pooled water during heavy rains.

Light-Colored Containers to Reflect Sunlight

In Florida’s strong sun, the color of your container matters. Lighter shades reflect sunlight, helping to keep the container—and the soil inside—cooler.

Choose containers for Florida gardens in light colors such as white, beige, or pastel shades, especially during the summer months. These colors reflect more sunlight and keep your plants’ roots from overheating.

If you already have dark containers, consider painting them a lighter color or using reflective wraps around them to protect your plants.

I use dark containers outdoors only during the winter months, particularly when trying to encourage root growth in cuttings.

Worth Garden 2-Pack 21″ H. White Tall Planters – 14” Dia Resin Large Round Flower Pots for Outdoor…
  • Classic Appearance: Its curved silhouette and raised details offer up a touch of classic character,…
Veradek V-Resin Indoor/Outdoor Taper Planter, Set of 2 (30 inch, White)
  • GARDEN DECOR: Decorate your space with the Veradek Taper planter; Whether you use it as a patio,…
Kante 18 Inch Dia Round Concrete Planter, Indoor Outdoor Large Plant Pot with Drainage Hole and…
  • Stylish Concrete Planter – Unveil a modern design boasting graceful curves and an authentic surface…
Sale
Worth Garden 22″ Tall Planters Set of 2 – Plastic White Square Plant Pots – Modern Big Tapered Matte…
  • Modern & Stylish Design: Worth Garden large square planters are designed with matte finishing…

4. Durability to Withstand Florida’s Weather Extremes

Florida’s weather can be unpredictable, with everything from strong sun to sudden tropical storms. Your containers need to be durable enough to handle it all.

Invest in high-quality containers for Florida gardens made from sturdy materials like heavy-duty plastic, fiberglass, or glazed ceramic. These materials can stand up to heat, rain, and strong winds without cracking or deteriorating.

Secure lightweight containers or place them in sheltered areas to prevent them from toppling over in high winds. Heavy containers like terracotta or concrete are more stable but harder to move, so think about where you’ll place them long-term.

5. Size Considerations for Different Plant Types

The size of your container will affect plant growth, root health, and how much watering is needed—especially important in Florida’s heat.

For larger plants like fruit trees or shrubs, choose containers that are at least 18-24 inches wide and deep. These give the roots enough room to spread and hold moisture longer between waterings.

For smaller plants, herbs, or annual flowers, a container 12-16 inches deep will suffice. Make sure the pot is big enough to support root growth without needing constant watering.

When using grow bags, choose the right size for your plant. For example, a 5- to 10-gallon grow bag works well for vegetables like tomatoes or peppers, while a 1- to 3-gallon bag is great for herbs or smaller plants.

By choosing containers with these essential features, you’ll set your Florida garden up for success, ensuring your plants stay cool, hydrated, and protected from the elements.

Top Container Picks for Florida Vegetable Gardens

Growing lettuce in containers in Florida gardens

Choosing the right containers for your Florida vegetable garden can make all the difference in how well your crops thrive, especially in the hot, humid climate. Here’s a breakdown of the best container options for different types of veggies, helping you maximize space, conserve water, and keep your plants healthy.

1. Self-Watering Containers for Thirsty Veggies

Florida’s heat can cause containers to dry out quickly, and thirsty vegetables like cucumbers, eggplants, and squash need consistent moisture. Self-watering containers are a great solution, as they have built-in reservoirs that help regulate water supply.

  • Choose a self-watering container with a large water reservoir. This reduces the need for frequent watering, which is especially useful during Florida’s scorching summer days.
  • Keep an eye on the reservoir, especially during extended dry periods, and refill as needed. For vegetables that like a lot of moisture, such as cucumbers or melons, this ensures the soil stays evenly moist.

2. Large, Deep Pots for Tomatoes and Peppers

Tomatoes and peppers have deep root systems and need plenty of space to grow strong and healthy. Large, deep containers provide the room they need and help retain moisture longer, reducing how often you’ll need to water.

  • Select pots that are at least 18 inches deep and wide for tomatoes, and 14-18 inches for peppers. The extra depth gives roots room to expand and supports taller plants.
  • Choose sturdy materials like terracotta or heavy-duty plastic to support the weight of the plants, soil, and fruit. If you’re growing indeterminate tomatoes, consider adding a cage or trellis directly into the container for support.

3. Vertical Gardening Containers for Space-Saving

containers for Florida gardens can be low raised beds or vertical planting boxes

If you’re working with a small patio or balcony, vertical gardening containers are ideal for maximizing space. These containers stack or hang, allowing you to grow a variety of vegetables without taking up much floor space.

  • Look for vertical garden systems with multiple tiers or pockets that can support smaller vegetables, like lettuce, spinach, or even strawberries.
  • Position vertical containers near a wall or railing that can provide stability, especially during windy conditions. Make sure the structure allows for proper drainage at all levels, so water doesn’t pool at the base.

4. Fabric Grow Bags for Root Vegetables

VIVOSUN 5-Pack 5 Gallon Grow Bags Heavy Duty 300G Thickened Nonwoven Plant Fabric Pots with Handles
  • Sturdy Fabric Material: Made of 300g of thickened nonwoven fabric, these pots are moderately…
HYH 6 Pack 10 Gallon Potato Grow Bags with Flap Colorful Plant Grow Bags for Growing Potatoes Heavy…
  • Versatile Planter Bags: Ideal for growing potatoes, these 6 colorful bags are also great for other…
Gardzen 2-Pack 40 Gallon Grow Bags, Aeration Fabric Pots with Handles, Pot for Plants
  • 【Premium Quality Material】Made of high quality and durable non-woven fabric, which is fluffy and…

Fabric grow bags are perfect for root vegetables like carrots, potatoes, and beets. They’re breathable, providing excellent drainage and air circulation, which prevents the soil from becoming waterlogged and promotes healthy root development.

  • Use 5- to 10-gallon grow bags for most root vegetables. These bags give your crops the space they need to grow deep without restricting root movement.
  • Place grow bags in a spot where they’ll get full sun, but be ready to water more frequently during hot weather, as fabric containers can dry out faster. Add mulch on top of the soil to help retain moisture.

5. Shallow, Wide Containers for Herbs and Leafy Greens

Herbs like basil, oregano, and cilantro, as well as leafy greens like lettuce and arugula, thrive in shallow containers with plenty of surface area. These plants don’t need deep soil but benefit from being spaced out for good air circulation.

  • Choose shallow containers that are 6-8 inches deep but wide enough to accommodate several plants. This allows you to grow a variety of herbs or greens together in one container.
  • Use a well-draining potting mix, and consider placing these containers in partial shade during the hottest part of the day to prevent greens from wilting or bolting prematurely.

By selecting the right containers for your vegetables, you’ll set yourself up for a productive and manageable Florida garden, no matter the size of your space or the challenges of the climate!

Best Containers for Florida’s Flowering Plants and Shrubs

Florida container garden with flowers and bulbs

Florida’s climate is perfect for growing a wide range of flowering plants and shrubs, but choosing the right container is essential for keeping them healthy and vibrant year-round. Here’s a guide to selecting the best containers for different types of flowering plants and shrubs, with tips on keeping them looking their best in Florida’s unique conditions.

1. Decorative Ceramic Pots for Colorful Annuals

Ceramic Modern Glaze Succulent Planter Pot with Drainage Hole and Saucer 6 Inch Round Flower Plant…
  • Ceramic Plant Pot: The ceramic pot is high temperature fired stoneware which are durable and lightweight that convenient for you to use
AVLA 3 Pack Ceramic Plant Pots, Gardening Drip Glazed Planters, Decorative Flower Pot with Drainage…
  • You will get 3 different sizes of ceramic plant pots, the measurement of S,M,L size: S: 4″D * 3″H; M: 5.5″D * 4″H; L: 7″D * 5″H. Different sizes meets your different needs, which are suitable for different plants, like succulent, herbs, cactus, orchid, aloe vera, pothos, peace lily.
DeeCoo 3 Piece Ceramic Plant pots Indoor Pots Set with Drainage Holes, 5.7/4.7/3.5/inch, Modern…
  • 【COMBINATION SETS IN DIFFERENT SIZES】The ceramic flower pots have three different sizes. They are suitable for growing most kinds of family/office, plants in both small and medium size, such as orchids, Iilies, bamboo, african violets, snake plants, peppermint plants, cactus, aloe and succulent plants.

Annual flowers like marigolds, petunias, and impatiens add pops of color to patios and gardens. Decorative ceramic pots not only enhance their beauty but also provide the insulation needed to keep roots cooler during Florida’s hot summer days.

  • Choose glazed ceramic pots for annuals, as these retain moisture better than unglazed options. This is especially important in Florida’s heat, where moisture can evaporate quickly.
  • Make sure the pot has good drainage holes to prevent water-logging during the rainy season. If the pot doesn’t have adequate drainage, consider drilling extra holes or adding a layer of gravel at the bottom.
  • Pair brightly colored flowers with contrasting or complementary pot colors to create a striking visual effect on your patio or in the garden.

2. Hanging Baskets for Trailing Flowers

Using hanging planters in a Florida container garden

Trailing flowers like verbena, lobelia, and ivy geraniums thrive in hanging baskets, adding vertical interest to patios and porches. Hanging baskets are great for maximizing space while giving you the freedom to move plants into or out of the sun.

  • Choose sturdy hanging baskets made from materials like wire, resin, or metal with a coconut coir or moss liner for proper drainage. Avoid plastic liners, as they can retain too much water and cause root rot.
  • Position the baskets where they’ll get enough sunlight but can be moved into the shade during particularly hot afternoons to prevent scorching.
  • Water hanging baskets more frequently, as they tend to dry out faster, especially in Florida’s warm, breezy weather. Self-watering baskets can also help maintain moisture levels.

3. Lightweight Resin Containers for Easy Mobility

Garden Elements Indoor/Outdoor Glazed Brushed Happy Plastic Planter, Large, Dark Teal, 15″
  • Elegant, Glazed Design – Features the stylish look of ceramic with a glossy finish and horizontal brush lines that enhance your plant’s natural beauty; available in bold, vibrant colors to suit any decor.
Classic Home and Garden Corinthian Resin Flower Pot Planter, Desert Tan, 13″
  • CLASSIC DESIGN: Our plant pot features a stunning, on-trend classic design that complements a variety of aesthetic settings. It seamlessly blends into modern, minimalist, traditional décor and indoor and outdoor settings.
Classic Home and Garden Rosie Modern Planter w/Drainage – Contemporary Planter Bowls – Shallow Round…
  • CLASSIC DESIGN: Featuring a stunning design, this shallow bowl planter has a pottery-like finish and a classic design that features a complementary range of colors that seamlessly blend into modern and traditional settings.

Resin containers are lightweight, durable, and weather-resistant, making them perfect for gardeners who like to rearrange their outdoor space or move plants to protect them from extreme weather.

  • Choose resin containers with UV protection to prevent fading or cracking in the Florida sun. They come in a variety of styles that mimic more expensive materials like stone or ceramic but are much easier to move.
  • These containers are ideal for medium-sized flowering plants, such as hibiscus or gardenias. Their lightweight design means you can easily relocate them if needed—whether to catch more sun, avoid a storm, or bring them indoors during cold snaps.
  • Make sure the containers have proper drainage, and consider using a saucer underneath to catch excess water during heavy rains.

4. Large, Sturdy Pots for Flowering Shrubs

Flowering shrubs like hydrangeas, oleanders, and azaleas need more room to grow and thrive. Large, sturdy pots are essential to give their roots space and to support their size and weight.

  • Opt for large containers—at least 18-24 inches deep and wide—to accommodate the root systems of shrubs. Terracotta or heavy-duty resin containers work well because they’re both durable and stable, preventing the pots from tipping over in high winds.
  • Place shrubs in spots where they’ll get the right balance of sun and shade based on their specific needs. For example, hydrangeas do well in partial shade, while hibiscus prefers full sun.
  • Water shrubs deeply but less frequently, allowing the water to reach the deeper roots, and fertilize regularly with a slow-release fertilizer to support flowering.

5. Window Boxes for Small-Space Flower Gardens

Window boxes filled with flowers

If space is limited, window boxes are perfect for creating a colorful flower garden without taking up ground space. They’re ideal for small flowers like pansies, nasturtiums, or even small trailing varieties that spill over the sides.

  • Choose window boxes made from materials like wood, plastic, or metal, with enough drainage holes to prevent water buildup, especially after Florida’s heavy rains.
  • Position the boxes in areas where the flowers can get plenty of sunlight, but keep an eye on them in the hottest part of the day. Window boxes tend to dry out faster, so regular watering is key.
  • Mix flowering plants with a variety of textures and heights, combining upright flowers with trailing ones for a balanced and eye-catching display. Add herbs or edible flowers for a practical, decorative touch.

By choosing the right containers for your flowering plants and shrubs, you’ll ensure they thrive in Florida’s climate, creating a stunning, low-maintenance garden that’s easy to manage all year long.

Ideal Containers for Florida Native Plants and Succulents

Growing native tropical plants in a container garden

Florida’s native plants and succulents thrive in containers that provide the right drainage, space, and aesthetic appeal to complement their natural beauty.

Whether you’re growing drought-tolerant natives or creating a striking succulent display, choosing the right container is key to ensuring they flourish in Florida’s unique climate. Here’s a guide to selecting the best containers for these hardy plants.

1. Terra Cotta Pots for Excellent Drainage

Terra cotta pots are a go-to choice for native plants and succulents, particularly in Florida’s humid environment, because they allow excess moisture to evaporate easily through the porous material.

  • Choose terra cotta pots with drainage holes, which are essential for preventing water buildup and root rot—especially important for succulents and drought-tolerant natives like blanket flower and coreopsis.
  • Because terra cotta pots can dry out more quickly, check soil moisture frequently, but avoid overwatering. Many native plants prefer drier conditions, and terra cotta helps mimic their natural habitat.
  • Place your terra cotta containers in a sunny spot but be mindful that they can absorb heat. Mulching around the base of your plants can help keep the soil cooler in Florida’s intense sun.

2. Shallow Dishes for Succulent Gardens

Container full of succulent plants

Succulents, such as aloe, echeveria, and agave, thrive in shallow containers that offer plenty of surface area for sprawling, shallow root systems. Shallow dishes also create a beautiful, compact display, perfect for patios or balconies.

  • Select a wide, shallow dish with good drainage holes. Succulents hate sitting in water, and shallow containers help prevent overwatering by allowing water to drain quickly.
  • Create a well-draining soil mix by adding sand or fine gravel to a cactus mix. This ensures that water doesn’t linger around the roots, reducing the risk of rot.
  • Arrange your succulents in aesthetically pleasing groupings, mixing different shapes and colors. Succulents are slow growers, so you can pack them in tighter for a fuller look.

3. Hypertufa Containers for a Natural Look

Hypertufa containers are a great option for creating a rustic, natural look that complements the simplicity of native plants and succulents. These lightweight, porous pots are made from a blend of cement, peat moss, and perlite, giving them a stone-like appearance that weathers beautifully over time.

  • If you’re using hypertufa containers, their porous nature means they’ll help with drainage, which is perfect for drought-tolerant natives and succulents. However, you’ll still need to ensure they have proper drainage holes.
  • These containers are ideal for Florida natives like muhly grass or coontie, which thrive in dry conditions and don’t need frequent watering. Their rustic, stone-like finish also pairs well with succulents, adding texture and charm to your garden.
  • Hypertufa containers are easy to make at home if you’re feeling crafty! You can create custom shapes and sizes to suit your space and plant preferences.

4. Rock Gardens and Repurposed Containers for Natives

Florida’s native plants often grow well in unconventional containers like repurposed items or even directly in rock gardens. This approach blends aesthetics with function, creating a naturalistic look that mimics their original habitat.

Use repurposed containers like old wooden crates, metal troughs, or stone basins for a unique and eco-friendly garden. Ensure these containers have adequate drainage, especially after Florida’s frequent rain showers.

For a rock garden, place native plants like Florida tickseed or goldenrod directly into large rocks or shallow containers filled with well-draining soil. These settings replicate the dry, rocky environments many natives prefer, reducing the need for frequent watering.

Add some crushed gravel or small stones around the base of the plants to enhance drainage and provide a decorative finish that complements the natural look.

5. Small Pots for Propagating Native Plant Cuttings

If you’re looking to propagate native plants, such as saw palmetto or firebush, small pots are perfect for getting cuttings started before transferring them to larger containers or the ground.

  • Choose small, well-draining plastic or terra cotta pots for propagating cuttings. These containers are easy to manage and move around, allowing you to place them in optimal lighting conditions as needed.
  • Fill the pots with a lightweight, well-draining potting mix. I use a 50/50 blend of coconut coir and perlite. Native plant cuttings prefer a loose medium that allows for good airflow and root development.
  • Keep the soil moist, but not soggy, while the cuttings establish roots. Once they’ve grown strong enough, you can transfer the young plants to larger containers or directly into your garden.

By selecting the right containers for your Florida native plants and succulents, you’ll create a low-maintenance garden that thrives in the Sunshine State’s unique conditions. Whether you opt for terra cotta pots, shallow succulent dishes, or naturalistic hypertufa containers, you can enjoy a beautiful and resilient garden all year long.

Specialized Containers for Tropical and Citrus Trees

Florida’s tropical and citrus trees can thrive in containers if you choose the right setup. Whether you’re growing dwarf citrus or exotic tropical plants, picking the proper containers ensures your trees have the space and care they need to flourish. Here’s how to find the best specialized containers for your fruit-bearing beauties.

1. Large, Wheeled Planters for Easy Movement

Tropical trees and citrus plants benefit from mobility, especially when you need to shield them from Florida’s occasional cold snaps or intense summer heat. Large, wheeled planters provide the flexibility to move your plants with ease.

  • Choose a large container with sturdy wheels capable of supporting the weight of your tree, soil, and water. Look for wheeled planters with locks to keep them stable once in place.
  • Ensure the container is deep enough for the root system—tropical trees like banana or papaya need room to grow vertically, while citrus trees like lemon or lime require ample space for roots to spread.
  • Position your planter in a sunny spot during the day, then easily move it to a more sheltered location during extreme weather, especially as cooler evenings approach.

2. Half Whiskey Barrels for Dwarf Citrus Trees

Half whiskey barrels make excellent containers for dwarf citrus varieties, providing both depth and width for healthy root development. They also add a rustic aesthetic to your patio or garden.

  • Purchase a half whiskey barrel or repurpose one by drilling several drainage holes in the bottom to prevent water from pooling. Citrus trees are sensitive to waterlogged roots.
  • Fill the barrel with a high-quality potting mix designed for citrus, ensuring good drainage and aeration. You may need to add sand or perlite to improve drainage in Florida’s humid climate.
  • Plant your dwarf citrus tree (such as Meyer lemon or Calamondin) in the center of the barrel, allowing enough room for the roots to grow. Water deeply and place the barrel in full sunlight.

3. Air-Pruning Containers for Healthy Root Systems

Air-pruning containers are designed with porous fabric or mesh sides that encourage root pruning when roots reach the edge of the container. This promotes a dense, healthy root system, which is especially beneficial for tropical trees.

  • Choose an air-pruning container sized for your tropical tree. These containers are typically made from breathable fabric, which allows air circulation to the roots and prevents root-bound issues.
  • Use a lightweight potting mix to complement the air-pruning design. The mix should drain well and be rich in nutrients to support growth.
  • Regularly monitor the moisture levels, as air-pruning containers tend to dry out faster in Florida’s heat. Water your tree more frequently, but be cautious not to overwater, as the fabric allows for efficient drainage.

4. Decorative Urns for Tropical Statement Plants

If you’re growing large tropical plants like Bird of Paradise, hibiscus, or palms, decorative urns offer both style and functionality. These containers elevate the appearance of your garden while providing enough space for your plants to thrive.

  • Select a decorative urn that complements the aesthetic of your patio or garden. Ensure it’s large enough to accommodate the plant’s root system and has proper drainage holes.
  • Line the bottom of the urn with gravel or broken pottery to prevent soil loss through drainage holes, then fill it with a rich, organic potting mix suitable for tropical plants.
  • Position your urn in a sunny area where your tropical plant can soak up plenty of light, but be prepared to move it to a shaded spot during Florida’s hottest months to prevent leaf scorch.

5. Raised Bed Planters for Multiple Small Trees

If you’re growing more than one small fruit tree, such as dwarf bananas or figs, raised bed planters provide the perfect solution for keeping them contained while giving them enough space to thrive. These planters offer excellent drainage and flexibility for managing multiple plants at once.

  • Set up a raised bed planter that’s at least 18–24 inches deep to accommodate the root systems of small trees. This ensures they have room to grow while staying manageable.
  • Use a well-draining, nutrient-rich soil mix, and consider incorporating compost to provide additional nutrients. Raised beds tend to dry out quickly, so keeping the soil healthy is key.
  • Plant your small trees with sufficient spacing to prevent overcrowding. Water regularly and add mulch around the base of each tree to help retain moisture and regulate soil temperature.

By selecting specialized containers for your tropical and citrus trees, you’ll create a thriving, productive garden that can handle Florida’s unique climate. With the right containers—whether wheeled planters for mobility or whiskey barrels for rustic charm—you’ll have the flexibility to enjoy fresh fruit and tropical beauty right in your backyard.

Innovative Container Solutions for Florida Gardeners

When it comes to container gardening in Florida, innovation can make all the difference in dealing with the unique challenges of the climate. Whether you’re looking for convenience, year-round growth, or eco-friendly options, there are plenty of innovative containers designed to help you garden smarter, not harder. Here are some of the best solutions to consider.

1. Self-Watering Systems for Vacation-Proof Gardens

Florida’s heat can be intense, and keeping your plants hydrated while you’re away—or even just during the hottest days—can be a challenge. Self-watering containers take the guesswork out of keeping your plants moist by providing a steady water supply.

  • Choose a self-watering container with a built-in reservoir. These containers store water at the base and allow plants to draw up moisture as needed through a wicking system.
  • Fill the reservoir, and top off the container with high-quality potting mix that allows for good wicking action. Make sure the soil reaches the bottom to absorb water efficiently.
  • Plant your vegetables, herbs, or flowers as usual. Self-watering containers are especially beneficial for water-loving plants like tomatoes, cucumbers, and herbs. Check the reservoir every few days, and refill as needed.
Bestseller No. 1
QRRICA Plant Pots 10/9/8/7.5/7 Inch Self Watering Pots, Set of 5 Plastic Planters with Drainage…
  • 【Different Size Combo】These Self watering pots combines with 5 different sizes.10inch/9inch/8inch/7.5inch/7inch plant pots.Suitable for indoor and outdoor planting of various plants and flowers,Such as Snake Plant,ZZ Plant,Aloe,African,Violet,Monstera etc.
Bestseller No. 2
TYMENSH Plant Pots 12/10/9 inch Set of 3, Self Watering Flower Pots Indoor Outdoor, Planters with…
  • VERSATILE 3-POT SET IN VARIOUS SIZES: Includes large (12″D*10″H), medium (10″D*8.5″H), and small (9″D*7.5″H) pots to accommodate various plant sizes, such as orchids, cacti, herbs, mosses, or artificial plants (plants NOT included). These versatile sizes make it ideal for repotting your favorite plants.
Bestseller No. 3
YNNICO Indoor Self Watering Planters with Drainage Holes and Saucers, 8, 7, 6.5, 6, 5.5, 5 Inches,…
  • 【Practical Size Combo】-These plastic planters indoor combines with 6 different sizes, 8 inch 7inch 6.5 inch 6 inch 5.5 inch 5 inch which are suitable for planting most small and medium-sized home office plants.Ideal gift, Carbonfree Certified.
Bestseller No. 5
HYNZ 6-Inch Self-Watering Plant Pot with Visual Reservoir and Drainage Hole, Set of 5, Plastic…
  • Indoor plants are beneficial to mental health and our well-being, not to mention a great way to enhance the overall look and feel of your home. every time you look at these plants they add a smile to your face.

2. Hydroponic Containers for Year-Round Growing

If you want to maximize growing potential without soil, hydroponic containers offer a soilless solution ideal for Florida’s climate. These systems are perfect for growing leafy greens, herbs, and even small fruiting plants year-round.

  • Set up your hydroponic container by assembling the unit according to the manufacturer’s instructions. Most systems use water and nutrient solutions to deliver everything the plant needs directly to the roots.
  • Plant seedlings in the designated compartments, often using a lightweight medium such as coconut coir or perlite to support the roots.
  • Regularly monitor the nutrient solution and water levels, topping up and adjusting pH as needed. Hydroponic systems can thrive indoors or outdoors, giving you the flexibility to grow fresh produce all year, regardless of Florida’s weather.

3. Stackable Planters for Vertical Gardening

Maximize your space with stackable planters, a great solution for small patios or balconies. These vertical gardening containers allow you to grow multiple plants in a compact area, making the most of your space without sacrificing plant variety.

  • Select stackable planters that allow for drainage between layers. Many designs are lightweight and easy to assemble, letting you create as tall a garden as you need.
  • Fill each tier with potting mix and plant a variety of shallow-rooted plants like strawberries, herbs, or leafy greens. You can mix and match plants, creating beautiful combinations in small spaces.
  • Water from the top and let gravity do the rest, as water will naturally flow down to lower levels, ensuring every tier gets hydration. Rotate your planters regularly to ensure even sun exposure.
Mr. Stacky 5 Tiered Vertical Gardening Planter, Indoor & Outdoor
  • A Simple Space Saving Garden Solution: Plant & Stack
  • Grow More Healthy Organic Fruits/Veggies/Flowers @ Home (Strawberries, Tomatoes, Peppers, Herbs, Greens, Green Beans, Beets…)

4. Smart Pots with Built-in Water Indicators

For Florida gardeners who want precision without constant monitoring, smart pots with built-in water indicators offer an easy way to ensure plants are watered correctly. These pots let you know exactly when your plants need moisture, preventing both under and overwatering.

  • Purchase a smart pot with a visible water level indicator. These containers typically have a float or gauge that rises or falls with the water level in the reservoir.
  • Plant as usual, ensuring good soil drainage and enough space for your plants to grow. Keep an eye on the water indicator and refill the reservoir as needed, especially during hot, dry periods.

Smart pots work well with a variety of plants, from flowering annuals to herbs and vegetables. They’re especially useful for gardeners who tend to overwater or under-water, as the built-in system makes watering more intuitive.

TPHRAVAL Intelligent Flower Pot, Electronic Bud, Maintenance Plant Assistant, Fun Interactive Flower…
  • 【Intelligent maintenance assistant】Usually we are worried about the maintenance of plant survival, the smart planter is equipped with 7 kinds of multi-dimensional sensors specifically for plants to help us protect the health of plants to the maximum extent.
  • 【Planter for 36 kinds of plants】The planter contains 36 plant care modes, which makes us not need to have maintenance experience, as long as you choose your favorite plants and give it to the smart planter, it will help us take care of the plant growth.
  • 【Fun and interactive】It seems to be a cute pet like a dog. Inverter touch sensing technology allows the planter to carry out rich interactive sessions in daily life, such as good cold, thirsty, low battery and other sensory transmission.
  • 【Support connecting smart home】If your home has a smart home system installed, the smart planter can be connected to them to meet your needs to a greater extent.
  • 【Rich usage scenarios】In the living room, bedroom, office desk, bedroom nightstand, the smart planter can accompany your life and bring you happiness, it is also the best choice for gifts for our girlfriends, parents or other friends.

5. Biodegradable Containers for Eco-Friendly Gardening

If sustainability is a priority in your gardening practice, biodegradable containers offer an eco-friendly alternative to plastic pots. These containers break down over time, reducing waste while still providing a reliable home for your plants.

  • Choose biodegradable containers made from materials like coconut coir, peat, or paper pulp. These containers are perfect for starting seeds or transplanting young plants, as they can be planted directly into the soil.
  • Fill the biodegradable pot with seed-starting mix and plant your seeds or seedlings. These containers allow roots to grow through the walls, so the plant can easily establish itself once transplanted.
  • When your plants are ready to move into a larger container or the ground, simply plant the entire biodegradable pot. Over time, the container will decompose naturally, leaving no trace behind.

By integrating these innovative container solutions into your Florida garden, you can streamline care, enhance productivity, and maintain a more sustainable approach to growing plants in the unique climate. Whether you’re aiming for convenience, efficiency, or eco-friendliness, there’s a container option perfect for every gardener’s needs.

Bestseller No. 1
Huvai 100 Pack 3.15″ Round Biodegradable Peat Pots Plant Seedling Saplings & Herb Seed Starters Kit…
  • Package included: 100 pack Biodegradable Peat Pots and 100 Pcs White Plastic Plant Labels. Use these peat pots in a ventilated environment or outdoors, let your plant grow faster.
SaleBestseller No. 2
ARGCONNER 4 Inch Peat Pots, 50PCS Biodegradable Plant Starting Pots Round Nursery Pot, Garden…
  • Peat Pots Dimensions: 50 plant starter pots(4inch) with 20 Plant Labels, Ideal for both indoor and outdoor gardening, Comes with 20 pcs plastic plant labels you can use them to mark the seeds in your peat pots
SaleBestseller No. 3
Dalzom® 60Pcs 3.1” Peat Pots with 60Pcs Plant Labels, Biodegradable Pots for Seedlings with…
  • 【Package Included】 The package include 60Pcs 3.1″ Biodegradable Peat Pots and 60Pcs Plant Labels.

Get Growing in The Right Pot for the Right Plant

There you have it, fellow Florida gardeners – a comprehensive guide to the best containers for every plant type in our unique climate. Remember, the perfect pot is more than just a pretty face; it’s a crucial tool in creating a thriving garden. Whether you’re growing juicy tomatoes, vibrant flowers, or a mini citrus grove, the right container can make all the difference. So go ahead, experiment with different options, and watch your Florida garden flourish! And hey, if you end up with more beautiful plants than you know what to do with, you know where to find me – I’m always up for a plant swap!

Posted on

Bring the Outdoors into Your Home with Stylish Indoor Plant Pots

Show off your houseplant collection with the latest indoor plant pots.

I walked outside this morning, inspired to connect with nature and take care of some much-needed nursery chores, like taking cuttings from my flower bushes. With the first squelch of my feet, I hesitated. The Duranta and Plumbago were lush and full and ready for me to take cuttings. But they were also soaking wet. Yuck. Better to stay inside. The rainy season gives me a chance to take care of houseplants instead, but I don’t really have any nice indoor plant pots.

Most of them need an upgrade for their living quarters. My houseplant pots were looking rough, and many of them were still in growing pots. Time to find some new indoor plant pots and come up with a few plant container ideas.

Houseplants have become an integral part of interior design, adding beauty, tranquility, and a touch of nature to our homes. The interest in houseplants, especially unique and rare varieties, has risen in the last 10 years, especially during the pandemic when everyone was stuck inside with no way to connect with nature.

I’m usually a nut for outdoor landscape plants, as well as fruit and vegetable gardening, but now I was ready to transform my home into a lush oasis!

The Latest Houseplant Trends

I haven’t spent much time inside the last few years, so I haven’t been following the interior design trends. I was happy to find a few new interesting houseplant décor ideas to use.

Statement Plants

Large dramatic statement houseplants need large dramatic indoor plant pots

Large, eye-catching plants such as Fiddle Leaf Fig (Ficus lyrata), Monstera deliciosa, and Bird of Paradise (Strelitzia reginae) can make fantastic focal points. Their lush foliage and unique shapes make them ideal for creating a striking visual impact. These plants need large Indoor plant pots with as much grace and style as the specimens they contain.

Vertical Gardens

I could fill up some blank wall space, particularly in my office, with a vertical garden. I can create living walls with cascading plants like Devil’s Ivy (Epipremnum aureum) or Philodendron Brasil without taking up space with houseplant pots.

Desert Chic

Succulent houseplants need low, shallow indoor plant pots

I don’t have a lot of time to care for indoor plants, so going for the minimalist appeal of succulents and cacti might be a good idea. They feature sculptural forms, muted colors, and low maintenance requirements.

Biophilic Design

This new trend focuses on integrating nature into living spaces to create a harmonious connection with the environment. I always feel better when I’m around my plants, so incorporating a variety of plants in small indoor plant pots throughout my house could really improve my indoor peace of mind.

The Latest Fashions and Technology in Houseplant Containers

As a grower who focuses on outdoor pollinator plants and edible gardening, I’ll admit I haven’t paid very much attention to the newest houseplant container designs. I was pleasantly surprised to see how new technologies have impacted the range of plant container ideas available.

Minimalist and Sleek Designs

Sleek modern indoor plant pots lets the foliage speak for itself.

Clean lines, neutral colors, and simple shapes are on-trend for houseplant containers. Opt for pots with a minimalist aesthetic to complement contemporary or Scandinavian-inspired interiors.

Sustainable Materials

With a growing emphasis on eco-friendly living, containers made from sustainable materials like bamboo, recycled plastics, or natural ceramics are gaining popularity. These materials not only reduce environmental impact but also add a touch of organic beauty to your home.

Self-Watering Systems

Innovative self-watering containers are perfect for busy individuals or those who struggle with plant care. These containers feature reservoirs that provide a consistent water supply to the plants, ensuring they receive the right amount of hydration without constant monitoring.

Hanging and Wall-Mounted Containers

Hanging planters and wall-mounted containers are great for maximizing space and adding visual interest. They allow you to create stunning vertical displays, bringing plants to eye level and adding a unique dimension to your home decor.

Artistic and Unique Shapes

Unconventional indoor plant pots with interesting shapes, colors, and textures have gained popularity, allowing you to express your personal style and make a statement. Consider containers with geometric patterns, textured finishes, or even handcrafted artisan pieces to add character to your plant display.

DIY, Eco-Friendly, and Cheap Indoor Plant Pots

Anyone who knows me knows that I have a passion for frugal living. Reusing, recycling, and upcycling isn’t just thrifty, it’s also a good way to reduce waste and leave a gentler impact on the envrionemt.

Incorporating recycled and upcycled houseplant containers into your home decor also provides an opportunity for creative expression. There are some fun ways to recycle and upcycle items from around your house to create unique houseplant decor.

Recycle or Upcycle: Giving New Life to Household Items

Instead of letting unused items gather dust, why not repurpose them into charming houseplant decor? Here are some ideas to inspire your recycling and upcycling endeavors

Vintage Containers

Turn vintage teacups, tin cans, or mason jars into planters by drilling drainage holes or using them as cachepots for smaller potted plants. Their nostalgic charm adds character to your plant display.

Indoor Plant Pots from Glass Bottles and Jars

Remove labels and repurpose glass bottles and jars as terrariums or vases to create indoor plant pots. Create a self-contained ecosystem or showcase a single stem or small bouquet for a minimalist and eco-friendly touch.

Wooden Crates and Boxes

Wood crates make great indoor plant pots

Transform wooden crates or boxes into rustic plant shelves, creating multi-level displays for a variety of houseplants. Sand and paint them in desired colors or leave them in their natural state for a charming, farmhouse-inspired look.

Hanging Macrame Plant Holders

Repurpose old t-shirts, ropes, or yarn to create macrame plant holders. The intricate knots and flowing designs add a bohemian and trendy vibe to your indoor space.

Upcycled Drawers or Suitcases

Salvage old drawers or vintage suitcases and convert them into charming planters. Line the bottom with a plastic sheet, add soil, and plant directly inside. This repurposing idea adds a touch of nostalgia and whimsy to your indoor garden.

Hanging Globe Planters

Repurpose clear glass or plastic globes, such as old light fixtures or fish bowls, into hanging planters. Add a layer of pebbles for drainage, fill with soil, and hang them with ropes or chains. These hanging planters create a captivating display for trailing or air plants.

Choosing the Best New Indoor Plant Pots

When it comes down to it, the right houseplant pots are those that fit your style and make it easy for you to care for them. I want to add some large vining plants on a pole, so I’ll be looking for a three-gallon size pot to hold my Jade Pothos.

Posted on

Finding the Best Soil for Raised Beds in Your Garden

best soil for raised beds

It seems like everyone is using raised beds these days, and they’re more popular with gardeners than ever. Experts from all styles of gardening recommend them — from old-school horticulturists to chop and drop sustainability advocates. One place you’ll notice a big difference in opinion, however, is when it comes on which is the best soil for raised beds.

You’ll find big bags of garden soil at your local home center or big box store. And if you’re willing to spend a small fortune, you could definitely blow the budget filling up those raised beds. But depending on the type of raised bed you’re using and what you’re planning to grow, you may want to do a little planning first. Right?

So, what types of raised beds do gardeners use?

Raised Beds Types

A “raised bed” basically means lifting your soil above ground level. It’s one way of prepping your garden for planting. But it’s not until you decide which kind you’re going to use before you even need to work about which is the best soil for raised beds.

Some critical factors to consider before deciding on what type are your budget, your physical endurance, and any time constraints.

Double-dug Raised Garden Bed

The most basic type of raised bed isn’t raised very high at all. A double-dug raised bed only results in a few inches of height above the normal ground level of your garden.

In double-digging, you dig the soil twice over, while loosening the deeper layers with a garden fork. While digging, you can work in extra organic matter, like compost or manure. With enough aeration and organic matter, you’ll increase the volume of soil in the garden bed, raising it slightly.

You want to loosen the soil up to 2 feet deep, so that fast-growing vegetables and fruit plants aren’t hindered by packed earth. Double-digging is hard work, but it will give you lighter and better-aerated soil for your plants. It also helps raise the planting area for better drainage.

This is the form of raised bed I used most often, mainly because it’s so economical. First of all, you don’t need to purchase lumber to surround the bed when it’s only 6 or so inches high. Secondly, if you make your own compost and other soil amendments, you won’t have to purchase the best soil for raised beds. You’ll be making it – right at the site you need it. \

The best part of double-digging is that you only need to do it once. In fact, I recommend that after you’ve initially prepared your garden bed, you go no-till.

Framed Raised Garden Bed

You created framed raised garden beds directly onto the ground with no barrier between the planting area and the ground soil. This allows for complete drainage and offers access to microbes and worms.

More gardening experts are focusing on soil quality these days, which means creating a healthy ecosystem with the right fungi and bacteria for plant health. And the ones that do the best work for you are those found in your own backyard.

Most gardeners build a framed raised bed with wood, cement block, or even sheet steel from 10 to 12 inches or so above ground level.

While this can be expensive, it does offer some protection for your plants. For one thing, they’re less likely to get stomped on by careless children and enthusiastic dogs.

Before building your raised bed, make sure you loosen the ground soil beneath it with that handy garden fork. This helps improve drainage and breaks up the soil to allow plants to really dig in. For extra protection from weeds, you can also line the bottom with many sheets of newspaper or a sheet of cardboard. Don’t worry – the worms love it and it will soon break down and improve your soil.

Once you build your frame, you’ll want to find a good growing medium to fill it with. You can either buy the best soil for raised beds or mix your own. The best type really depends on what you’re planting in it.

Raised Container Bed

While not technically a “raised bed,” a lot of gardeners like to use large containers and planters for their fruit and vegetable plants. And you may see them listed as “raised beds” by the manufacturer.

But note that the real difference between a raised bed and a container is whether it has a bottom that isolates the plants from the native soil.

Some gardeners like to use container raised beds to lift the entire garden off the ground. This makes it easier to tend if you have physical challenges. If you decide to go with a “planter” or any kind of enclosed container, whether off the ground or on, make sure the bottom has been punctured for plenty of drainage.

One caveat, however, with this type of garden planter — you should fill it with the best soil for raised beds that you can afford. Container soil needs to last several seasons, with very few amendments. When they’re isolated in a container and can’t reach the soil below, your plants receive very limited moisture and nutrients. So, make sure that you choose a soil that isn’t too heavy, provides good drainage, and still holds moisture and nutrients.

So, invest in a good mix and then add some compost or slow-release fertilizer at the beginning of each season.

Specialty Raised Beds

If you do a bit more research, you’ll also find a few specialty type raised garden beds you may want to try. Some of them feature explicit instructions for the best type of soil for raised beds using these designs. And in one interesting case, the design is part of what creates the garden soil.

Square-Foot Gardening Raised Beds

Square-foot gardening has been around since the early 1980s and has a lot of advocates. This method uses a simple raised bed laid out in a grid. When you do a little research into this type of bed, you’ll find that it calls for a very specific type of soil mix, and many gardeners say it’s definitely the best soil for raised beds.

Hugelmound

“Hugelkultur” has gained popularity recently as many home gardeners look for ways to work more sustainably. A hugelmound is a unique way of creating optimal conditions for growing a wide range of plants in a small space. Form a big, mounded garden plot, starting with logs and yard debris in a shallow pit. Then add compost and soil.

You’ll get extra room to grow, and the best part is that a hugelmound creates a variety of microclimates. So you can add Meditterenan herbs to the top, where the drainage is best. For plants that like their feet a bit damp, plant around the bottom of the mount.

Depending on how you orient your hugelmount, you can add your sun-lovers on the south-facing side, or give them a little relief in some shade by planting on the north side.

The logs help retain moisture in the soil, and the yard debris will break down slowly, adding nutrients to your raised bed. Don’t be surprised if your hugelmound starts to shrink after a year or two as the organic matter is broken down by happy soil microbes.

Lasagna Raised Bed

Often called the “lazy gardener” method, “Lasagna” raised beds are great for no-till, no-weeding maintenance. It’s also called sheet mulching, and it’s simple and effective if you have the materials.

Start your lasagna raised bed directly on the ground by adding a thick layer of cardboard. Then, add layers of yard waste, fallen leaves, scraps from the kitchen, and compost. Lasagna fans say to layer it up to a foot high.

Lasagna gardening is said to turn even desiccated, exhausted soil into a rich planting area wit the best soil for raised beds.

The Best Soil for Double-Dug Raised Garden Beds

If you decide to go with the double-dug raised bed, you may want to have your soil tested first at your local county extension office. It can help you identify if you need to make specific amendments to your soil, such as lime or pine mulch.

Your local extension office can offer an in-depth test to see if you need to add particular macronutrients to your soil and if it has any deficiencies.

Soil Amendments for Macros

Now that you know what you need to add before getting your garden going, take a look at some excellent organic amendments that you can mix in to improve your harvest.

Nitrogen

Is your soil poor in nitrogen? Add the following:

Phosphorus

Needs more phosphorus? Try:

Potassium

You can add potassium using:

Organic matter and compost

To improve the structure as well as the nutrient levels, add compost, composted manure, or worm castings to your raised beds. It will also help feed those vital microbes in the soil that work to keep your garden veggies healthy.

The Best Soil for Raised Beds

For larger raised beds or containers, you’ll need to buy or mix garden soil to fill them. As I mentioned before, there’s a lot of disagreement about what makes the best soil. It really comes down to what you’re trying to grow and where and when you’re trying to grow it.

That said, here are some excellent recommendations from gardening gurus worth looking at:

The Old Farmer’s Almanac

You’ll find this homemade soil mix recipe on the Farmer’s Almanac website:

Raised Bed Soil Recipe

  • 4 bags (2 cubic feet) topsoil
  • 2 bags (3 cubic feet each) peat moss or coconut coir
  • 2 bags (2–3 cubic feet each) compost or composted cow manure
  • A 2-inch layer of shredded leaves or grass clippings (free of pesticides and herbicides)

Joe Lamp’l

The Joe Gardner podcast says this mix is “perfect.” You’ll find the following mix on his website:

  • 50 percent high-quality topsoil (bulk or bags)
  • 30 percent compost (homemade or purchased)
  • 20 percent mix of organic matter, including any of the following:
    • Shredded leaves
    • Worm casting
    • Mushroom compost
    • Aged chipped or ground bark
    • Composted Cow or chicken manure

Gardeners.com Mix

Gardeners.com will show you how to build your own raised bed, as well as showing you what to put into it.

  • 60 percent topsoil
  • 30 percent compost
  • 10 percent perlite or vermiculite

The Square Foot Garden Soil

The inventor of Square Foot Gardening, Mel Bartholomew, has a special mix he recommends. It’s called “Mel’s Mix,” and the formula is easy to remember.

Mel’s Mix

  • 1 part vermiculite
  • 1 part peat moss
  • 1 part compost

If you don’t like using peat moss — and many gardeners don’t — you can also use coconut coir.

Which Is Really the Best Soil for Raised Beds?

There’s never a simple answer when it comes to gardening, since there are so many external factors that affect your results. If you’re double-digging, you may not need to buy or mix any soil at all. I never have – although I do garden in containers a lot.

The mix you choose may change depending on what you grow. Do your vegetables need rich, fertile soil? Or do they need a lighter mix with better drainage??

Root vegetables, on the other hand, prefer something easier to spread out in, like Mel’s Mix.

Fast-growing and hungry vegetables like tomatoes, eggplant, and squash prefer a soil that holds moisture and is rich in nutrients. They may do better in the Joe Gardener or the Farmer’s Almanac mixes.

Leafy greens need plenty of nitrogen as soon as they’re planted. So, the best soil for raised beds for growing salad greens would include composted manure. Organic matter might take too long to break down to do them much good. So, the mix from Gardeners.com might be best.

Get Growing

Once you know what plants you’ll be growing, let their needs guide you to the best soil for raised beds. Make sure you understand their optimal conditions, and then choosing will be much simpler.

Light, loose, even sandy soil is great for carrots, rutabagas, turnips, and potatoes. Leafy greens like a soil that’s high in nitrogen. Fruiting vegetables like tomatoes, eggplant, and peppers like lots of nutrients and steady moisture.

Posted on

Getting Started on Vegetable Container Gardening in the South

vegetable container gardening

With our erratic weather and poor soil, some gardeners in the South have all but given up on growing their own vegetables. But whether you live where the soil is red clay or soft sand, you can always focus on container gardening.

In fact, for years after moving to Florida I refused to try to grow anything outside of container gardening. Between poor soil and nematodes, I just couldn’t take the heartbreak of watching as my tomato plants fell one by one, stricken by fusarium wilt or malnutrition.

And even though I have now cultivated some nutrient-rich garden beds over the last couple of years, I still turn to containers every growing season.

If you’re one of the many that have resigned in disgust because of heat, humidity, bugs, or crummy soil, container gardening with vegetables may just be what you need to get your gardening mojo back.

Advantages to Container Gardening

Vegetables can be some of the most challenging plants to grow. Unlike flowers or decorative foliage, gardeners need to stay alert through every stage of a vegetable plant’s development. It would be so much easier if we just needed to get them to grow beautiful leaves or pretty flowers.

Most vegetables require a bit more. Many of them are pretty picky when it comes to the soil quality or moisture levels. Others are magnets for voracious insects that will strip month\’s worth of growth overnight.

Luckily, some of these challenges because so much easier to overcome when you’re growing vegetables in pots on a balcony or back porch.

Improved Soil Quality

The most significant advantage to container gardening is improved soil quality. Many gardeners have struggled for years trying to create the perfect loam in their garden beds. They add compost, manure, and mulch. They encourage earthworms and assemble massive irrigation systems.

But containers are easy. You can buy the perfect soil for any vegetable plant and control what goes in your planters. And best of all, you can grow a wide variety of edible plants that require diverse types of soil when you’re using containers.

Sunlight and Temperature Control

While some vegetable plants need plenty of sun to thrive, others need a bit of shade to do well. With container gardening, you can move your vegetable plants around to take advantage of changing light patterns in your yard.

It’s a terrific way to keep cool-weather plants – like lettuce and spinach – protected from the hot sun and extend your growing season. I grow my lettuce in containers so I can start them early in the fall while it\’s still ab it hot and grow them into May just by moving them into the shade.

Longer Harvest

If you live in an area of the South that gets the occasional frost or even freeze, you can bring your container vegetables indoors to protect them. There’s no reason to let your tomatoes freeze when you can place them in a garage or enclosed porch overnight.

Gardening in a Small Space

Last, and certainly not least, if you have very little room, container gardening lets you grow more. Small yards aren’t a problem when you can stack planters vertically to add space for herbs, greens, and strawberries.

Even if all you have is a balcony or tiny patio, container gardening allows you to grow a wide range of vegetables and fruits.

Planning Your Container Garden

If you’re ready to get started growing your own fruits and vegetables in planters and pots, the first thing you need to do is devise a plan.

Container vegetable gardening 101 requires that you start keeping track of the conditions around your gardening space. Once you know how much rain and sunlight you have available in your outdoor space, you’ll want to create a container vegetable garden layout.

Container Vegetable Garden Layout.

Pick out the space you want to place your containers and spend a day off seeing where the light falls in the space. You’ll need at least six hours of sunlight a day to grow most vegetables. You may even want to sketch out your space the sunniest spots highlighted so you can position your plants for optimal production.

Also, get an idea of what kind of rainfall you can expect. Are there lots of trees blocking your container gardening space? What above overhangs? Make sure you have easy access to an outdoor hose bibb, in any case.

You’ll also need some outdoor storage space for your gardening supplies. Whatever your good intentions, it’s far easy to leave tools and products laying around. Unfortunately, this leaves them vulnerable to rust and degradation.

Make sure you have a watertight shed or cabinet for storing your tools and supplies.

SaleBestseller No. 2
Best Choice Products 48x24x30in Raised Garden Bed, Elevated Wooden Planter for Backyard w/Foot Caps,…
  • LARGE PLANTING SPACE: Designed with a long bed space (5CuFt) deep enough to…
Bestseller No. 3

Best Vegetables for Container Gardening

Once you have your space picked out, you’ll want to decide what kinds of plants you want to grow. Make sure the plants you choose are suitable for container gardening. But don’t be too surprised by the variety you can still grow in a pot.

For example, it never occurred to me to start growing snap peas in pots until I watched a little-known gardening show from Ireland that proved that they can do better in containers than in the ground.

Container gardening lettuce is also an easy-peasy solution for fresh salad greens. I grow my lettuce in shallow containers, planting a fresh one every week until I have about 12 growing at any given time. I use the cut and come again method, starting at the most mature. By the time I get through the last one, the first one has grown back enough to harvest again.

Container gardening herbs is one of the easiest steps for new gardeners, and many choose a large container to grow a number of different herbs together. However, make sure that you don’t mix herbs with different growing needs. Mediterranean herbs, like oregano, rosemary, and thyme, all need drier conditions than fast-growing herbs with high demands like basil, tarragon, and mints.

One excellent method to approach container gardening is to choose compact varieties of your favorite plants. For example, if you want to grow tomatoes, consider patio tomatoes or even Tiny Tim or Tumbling Tom varieties.

If you’re keen on beans, then consider bush beans instead of pole varieties, which need 6 feet of trellis and can run amok.

If you’re brand new to gardening, pick a handful of basic vegetable plants that you know you’ll enjoy eating. Check with your local extension office to find out what’s growing best this season.

Simple Container Garden Ideas

And if you just want to dip your toe into container gardening, consider the following themes for one or two planters to get started:

Salad in a Planter

In a large planter, add Tiny Tim tomatoes, Mesclun mix lettuce, a few radishes, and maybe a fast-maturing bush variety of cucumber. EarthBoxes and other self-watering containers are perfect for “Salad in a Planter” setup

Mixed Herb Container Gardens

Another great container gardening idea for beginners is mixed herb container gardens. Depending on the varieties you want to grow, you may need two or three large containers. For most culinary herbs like oregano, rosemary, thyme, and marjoram, you’ll need one large container with low-nutrient soil with good drainage. For lusher herbs, like basil, tarragon, parsley, and cilantro, add another container with richer potting soil and even a self-watering reservoir.

Best Soil for Container Vegetables

The best soil for container gardens really depends on what you’re planning to grow. Most vegetables have optimal conditions depending on their origins. Most do well with potting soil mixes that contain organic material and soil lighteners, for loose potting soil.

Check the label on your potting soil and look for things like peat moss, coconut coir, tree bark, vermiculite, and perlite.

It’s possible to use plain garden soil from your yard, but you’ll need to amend it drastically if you have poor soil, like I do. However, British horticultural hero, Monty Don, recommends putting a shovelful of garden soil in containers to add natural bacteria and micro-organisms. So, don’t worry if you accidentally used garden soil in pots for container gardening.

Tips for Choosing Containers for Gardening

Now that you know how much space you have and what you’ll be growing, it’s time to choose containers. For safe container gardening, make sure you use natural materials or at least food-safe plastics.

That said, you can find many cheap containers to grow vegetables by using a little imagination and by recycling and upcycling old materials. Some gardeners – like myself – have been reusing the same free landscape pots from other plants for years and years.

Safe materials

While you want your container garden to look attractive, you also want to be sure you use materials that work well for your vegetable plants. For example, terra cotta is a classic beauty, but here in Florida, they dry out far too quickly to sustain demanding veggies like tomatoes and eggplant. I only use them for culinary herbs and arid-loving ornamentals.

If you’re planning to move your vegetable plants often, you may want to stick to plastic containers. Some are quite decorative and best of all, easy to move.

The color of your containers can also impact your vegetable plants. Here in the South, dark containers can kill delicate vegetable plants in a single summer day. They\’ll absorb heat from the sun and send the temps in the soil skyrocketing. I only use these in the winter or in partial shade. The rest of the time and in very sunny spaces, I stick to light-colored pots.

Size counts

While many gardeners start seeds in small starter trays and move them to larger pots later, you don’t want to have to transplant your vegetable plants too often.

Transplanting is sure to cause a little shock, and since vegetables need to grow and flower and fruit so quickly, you don’t want to set them back any more than you must.

So, make sure you have large enough pots for your container gardening, depending on the mature size of your plants.

Some common container sizes and the plants they accommodate are:

Half Gallon Pots

  • Bush Beans
  • Herbs
  • Salad greens

One Gallon Pots

  • Cabbages
  • Cucumber
  • Green beans
  • Leaf lettuce
  • Spinach
  • Chard
  • Cherry tomatoes
  • Patio Tomatoes

Three Gallon Pots

  • Eggplant
  • Sweet and hot pepper
  • Determinate tomatoes
  • Broccoli

Five Gallon Pots

  • Indeterminate tomatoes
  • Squash
  • Zucchini

Seven- or Ten-Gallon Pots

  • Potatoes
  • Sweet Potatoes
  • Blueberries

You can also grow a number of different vegetables in larger pots and planters, such as planting 12 to 14 peas in a three-gallon pot, etc.

DIY Garden Containers

You can even try your hand at getting creative by making your own garden containers. Many gardeners swear by five-gallon buckets from their favorite home improvement stores or local bakeries.

One year, I was enthralled by the idea of grow bags, but I didn’t want to spend the money to buy the 40 or more I needed. So, I just purchased some landscape fabric from the fall clearance section and sewed my own.

You can aim for practical or whimsical, but either way, before you take out the recycle bin, do some shopping around inside to see if you can convert anything to a growing container.

Container Gardening Tips

Now that you’re ready to start growing your healthy veg the easy and convenient way, here are a few pro tips to ensure a good crop.

You may wonder how often water container plants. The bad news is that containers can dry out very quickly, especially in the summer months. You may need to water up to twice a day. Consider self-watering containers or adding trays for a water reservoir under your containers.

Fertilize often and early. You can add organic matter or slow-release fertilizers, but since the resources your container plants have available is pretty limited, you may want to use liquid fertilizer. You can choose fish emulsion for an organic option or simple Miracle-Gro tomato food.

For the most bang for your buck, plant your vegetables sequentially. If your bush beans mature fully in 60 days, make sure you have something ready to go in starter trays to replace them for the rest of the season. Mix in a little composted manure after harvesting your beans and then add seeds you’ve already started for squash or cucumbers.

Get Growing

As winters grow increasingly mild in the South, the time to start container gardening with vegetables can be all year round. Here in Zone 10a, we’re enjoying 76 to 80-degree sunny days with mild nights that are perfect for fall and winter vegetables.

The best part is that if we get a cold snap, I can move my container gardening onto a warm, covered porch or even indoors. They’re also easier to cover with fleece when they’re in containers because I can huddle them together for warmth and cover more than one at a time. When the temps rise the next day, they can go back into their sunny slots in the yard.

Ready to grow your own? What are your favorite vegetables for container gardening?