Pigeon peas could be the perfect addition to your garden. These hearty plants, scientifically known as Cajanus cajan, are known for their resilience, drought tolerance, and ability to enrich the soil with nitrogen. Best of all, growing pigeon peas is easy.
So, whether you’re an experienced gardener or just starting out, this step-by-step guide will help you grow and enjoy fresh pigeon peas right from your own backyard.

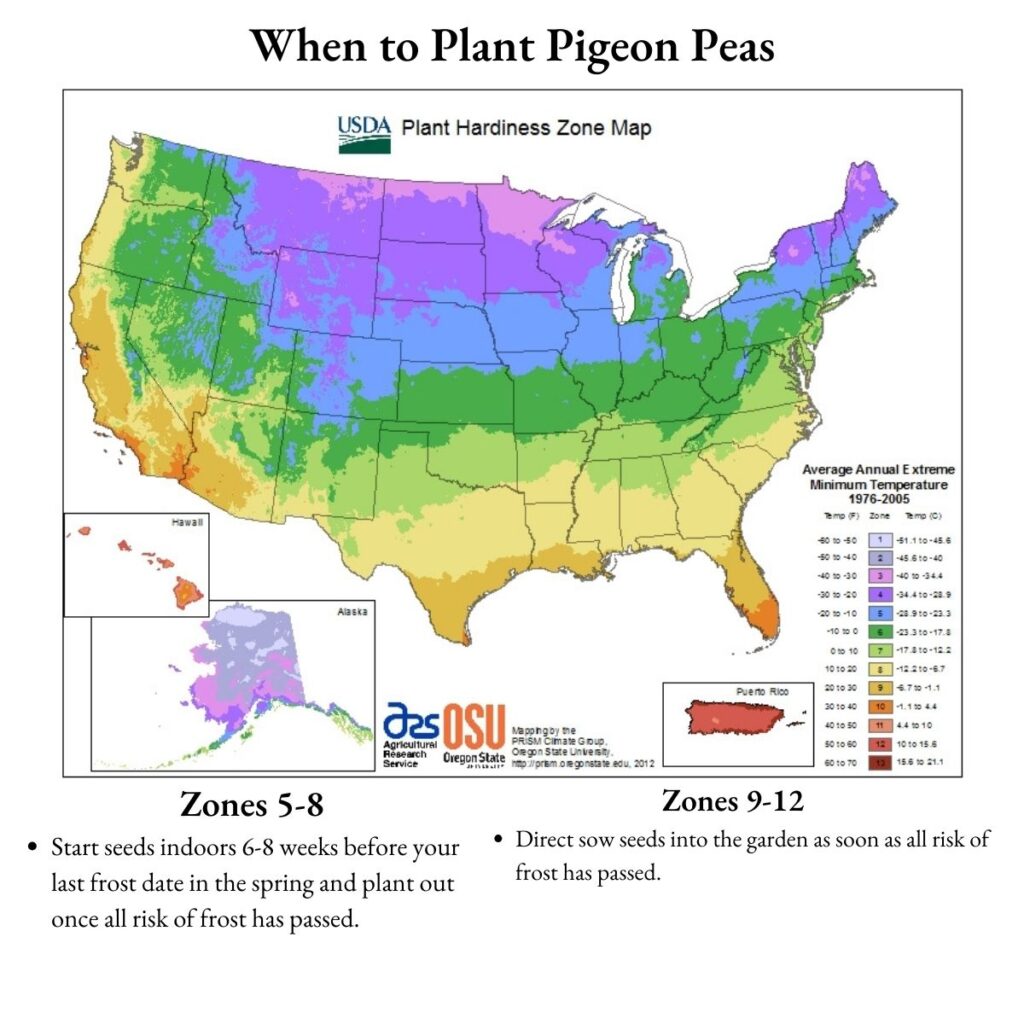
Pigeon peas are a warm-season perennial shrub in the tropics and subtropics. They can be grown as annuals in more temperate regions with long growing seasons.
They can reach up to 10 feet in height, making them a striking addition to your garden. These legumes are ideally suited for USDA hardiness zones 9-11, where warm temperatures prevail.
Pigeon peas go through several growth phases, including germination, vegetative growth, flowering, and pod formation, taking about 4-6 months to mature.
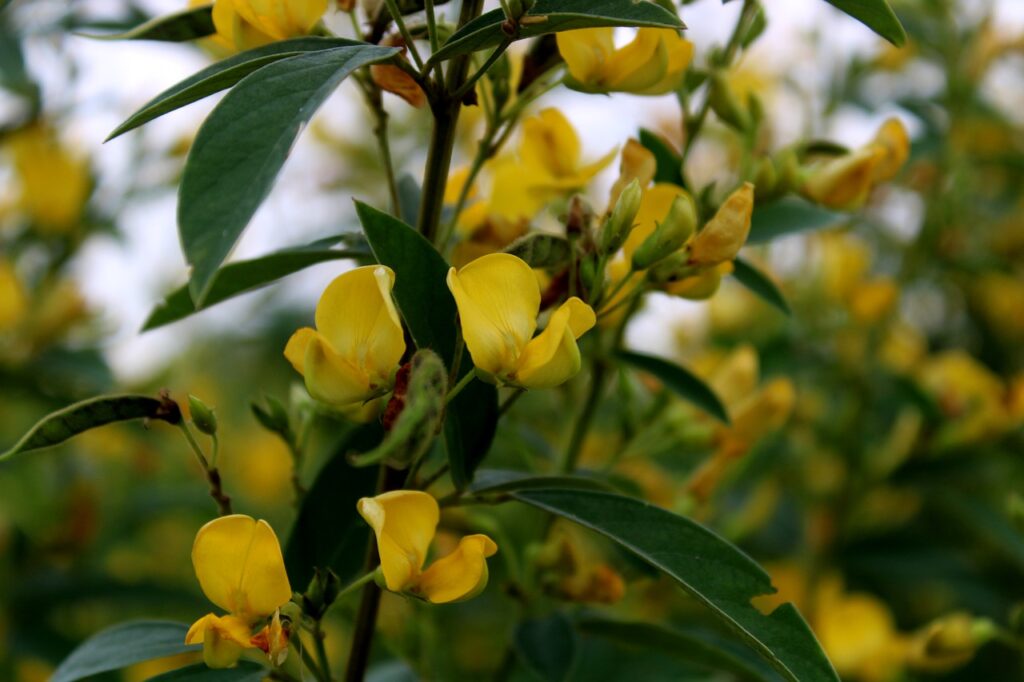
They’re also very fragrant, attracting and feeding all manner of pollinator insects, including honeybees and native bees.
Preparing Pigeon Pea Seeds for Planting
Before planting, give your pigeon pea seeds a head start by soaking them in very warm water for about 24-36 hours. This simple step softens the seed coat and encourages quicker germination
Creating the Perfect Growing Environment
To set the stage for your pigeon peas’ success, consider the following steps:
Choosing a Location
Pigeon peas thrive in sunny spots, so pick a location that receives at least 6-8 hours of direct sunlight daily.
Soil Preparation
Clear the chosen area of weeds and debris. If the area has never been planted before, loosen the soil with a garden fork or broad fork. However, avoid disturbing the soil too much or too deeply to retain soil integrity.
Amending the Soil
Conduct a soil test to check nutrient levels. Pigeon peas prefer slightly acidic to neutral soil with a pH of 6.0-7.0.
Enhance soil fertility and structure by adding a layer of organic matter like compost.
Room for Growth
Space a clump of your pigeon pea plants about 3-4 feet apart within rows, and maintain 3-4 feet of space between rows. This spacing allows for proper growth and air circulation.
Direct Sowing of Pigeon Peas
Plant a cluster of about 3 to 5 of your soaked pigeon pea seeds about 1-2 inches deep and place the clusters about 10-12″ apart, then water thoroughly.
Applying a balanced slow-release organic fertilizer at planting and adding mulch around the plants can help conserve moisture and suppress weeds.
As the plants sprout, begin thinning to leave clumps of 3 or 4 pigeon pea plants about 3 feet apart.
Caring for Your Pigeon Pea Plants:
To ensure your pigeon pea plants thrive:
Watering
Keep the soil consistently moist but not waterlogged. While these plants are drought-tolerant, regular watering, especially during dry spells, is beneficial.
Fertilization
Apply a balanced slow-release fertilizer during the growing season according to the timing stated in the manufacturer’s instructions. Make sure to feed again once the plants begin to flower and throughout pod production.
Tips and Tricks for Success:
A few things to keep in mind when growing pigeon peas:
Pest Management
Keep an eye out for aphids, leafhoppers, and pod borers. Combat infestations with insecticidal soap.
Disease Prevention
Maintain good garden hygiene to ward off fungal diseases. Proper spacing and adequate air circulation are key.
Support and Pruning
Depending on the variety, some pigeon pea plants may benefit from staking to keep delicate branches covered in heavy pods from breaking. Pruning can help maintain plant health by removing dead or diseased branches.
Harvesting Pigeon Peas:
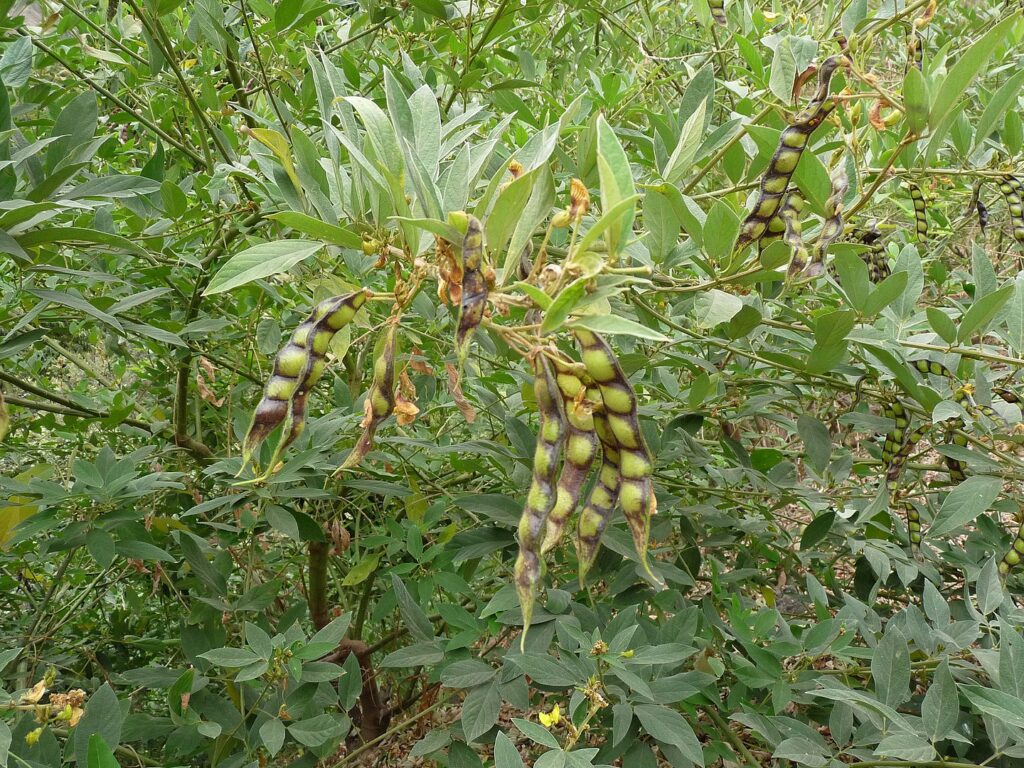
You’ll know it’s time to harvest when the pigeon pea pods are mature and the seeds inside are firm and plump. This typically occurs 4-6 months after planting.
Harvesting pigeon peas is a key part of growing these versatile legumes. The great thing about pigeon peas is that you have options—pick them green and fresh for immediate consumption, or allow them to mature fully on the plant for drying and long-term storage. Let’s delve into both aspects of harvesting pigeon peas:
Picking Pigeon Peas for Fresh Use
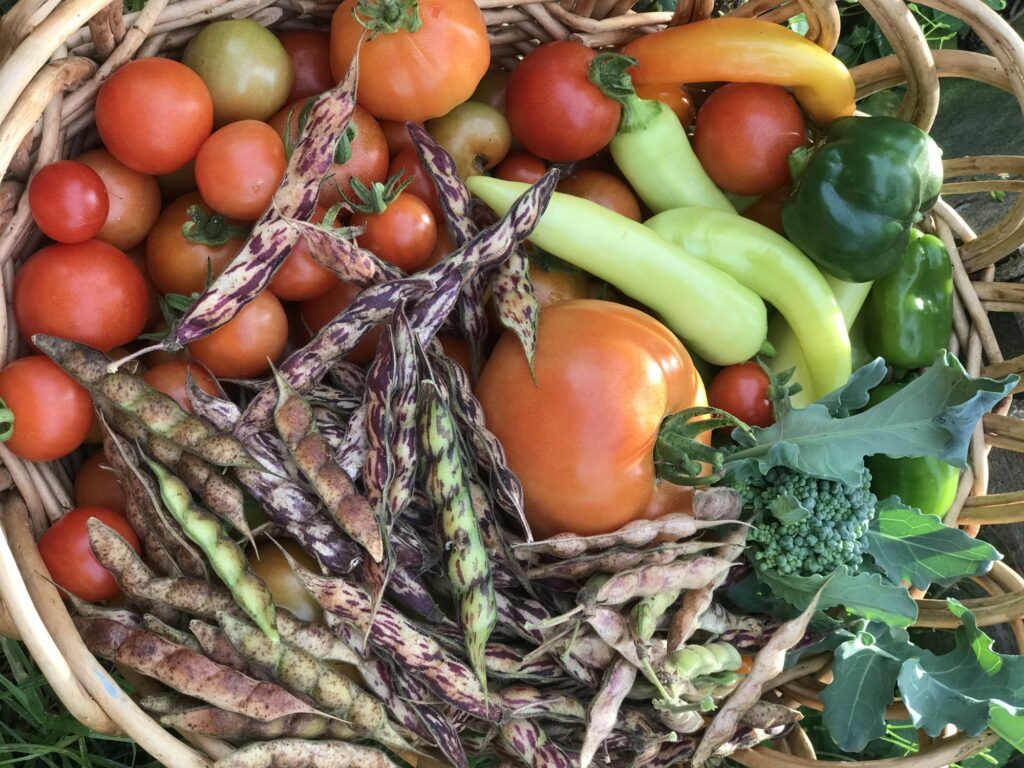
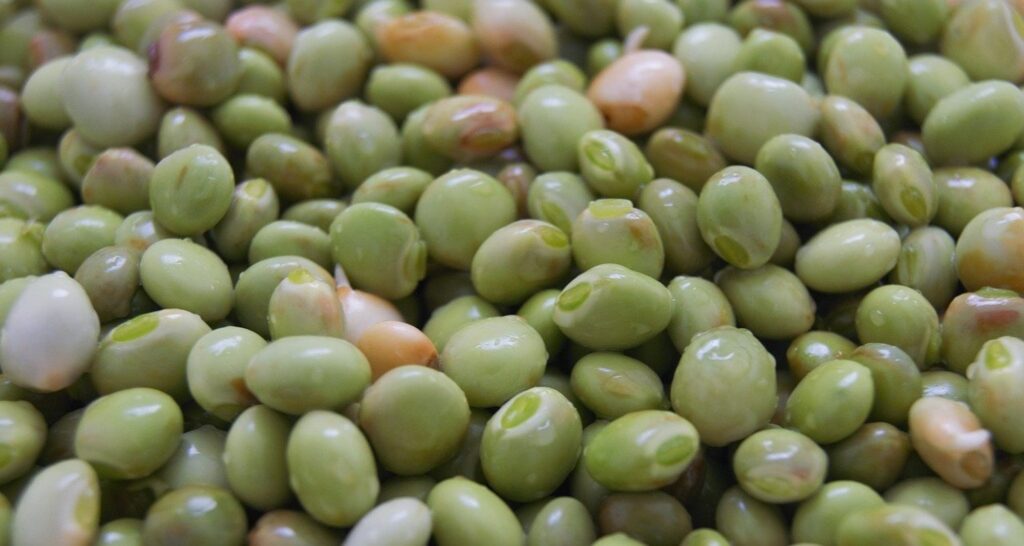
When the pigeon pea pods are still green and the seeds inside are tender and immature, you can harvest them for immediate consumption. This is typically done for dishes where you want the peas to have a fresh, crunchy texture.
How to Harvest Fresh Pigeon Peas
Inspect the pods and look for pods that are plump and vibrant green in color.
Gently hold the base of the pod with one hand, and use your other hand to snap the pod off the plant. Alternatively, you can use scissors or garden shears to cut the pods from the plant.
Ways to Shell Dried Pigeon Peas
You can use your thumb to open the pods and remove them, but the quickest way is to boil them IN the pod for 5 to 7 minutes. Then, transfer them to an ice bath to chill. Remove them from the ice water, and they will be much easier to shell.
Picking Pigeon Peas for Drying and Storage
If you prefer to have pigeon peas available throughout the year or want to enjoy their richer flavor in certain dishes, you can let the pods mature fully on the plant and then dry them for long-term storage.
How to Harvest Mature Pigeon Peas for Drying:
Patience is key: Allow the pods to remain on the plant until they turn brown and brittle, indicating that the peas inside have reached full maturity.
Harvest carefully: Snap or cut the mature pods from the plant. Be gentle to avoid damaging the seeds.
Air-dry the pods: Lay the harvested pods in a single layer in a cool, dry, and well-ventilated area. You can use screens or trays to allow for better airflow. Leave them to air-dry for several weeks until the pods become completely dry and the seeds rattle inside when shaken.
Shelling dried pigeon peas: Once the pods are thoroughly dry, it’s time to remove the dried peas.
Ways to Shell Dried Pigeon Peas
By hand: Hold a dried pod in one hand and squeeze it gently to crack it open. Then, use your fingers to remove the dried peas from the pod. This method is simple but can be time-consuming for larger quantities.
Rolling pin or mallet: Place the dried pods in a cloth bag or between two clean towels to prevent peas from scattering. Use a rolling pin or mallet to gently crush the pods, making it easier to extract the peas.
We put them in a pillowcase and then smash the bag against the tile floor.
Rubbing or threshing: Place the dried pods in a large container, like a bucket or bag, and rub or thresh them against each other. The friction will help release the peas from the pods. You can then winnow the mixture to separate the peas from any remaining pod fragments.
By following these guidelines, you can make the most of your pigeon pea harvest, whether you’re enjoying them fresh or storing them for future use. Pigeon peas truly offer a world of culinary possibilities!
Storing Your Home-Grown Pigeon Peas
To store dried pigeon peas for later use, shell them and allow them to air dry for a few days. Store the dried peas in an airtight container in a cool, dry place, where they can remain fresh for up to a year.
To store green pigeon peas, blanch in boiling water for 4 to 5 minutes and then remove a bowl to halt cooking. Drain and spread onto a sheet pan lined with paper towels and allow to dry completely. Once dry, pour the green pigeon peas into a freezer bag and store in the freezer for up to six months.
Cooking with Pigeon Peas:
Now that you’ve successfully grown pigeon peas, it’s time to explore their culinary potential. Pigeon peas are incredibly versatile and can be used in stews, curries, rice dishes, soups, and more. They add both protein and flavor to your meals. For dried pigeon peas, remember to soak them overnight to reduce cooking time.
Pigeon peas, with their earthy and nutty flavor, are a delightful addition to a wide range of culinary creations. These versatile legumes have a mild, slightly sweet taste that pairs well with various spices and ingredients. Let’s explore the flavor profile of pigeon peas and some traditional dishes where they shine:
Flavor Profile
Pigeon peas have a distinct earthiness that adds depth to dishes. They also offer a subtle nutty flavor that complements both savory and sweet dishes.
Pigeon peas have a gentle sweetness that balances out the flavors in your recipes. When cooked, pigeon peas develop a creamy texture, making them perfect for stews, curries, and soups.
Traditional Dishes Featuring Pigeon Peas
Arroz con Gandules (Puerto Rican Rice with Pigeon Peas) is a classic Puerto Rican dish, this flavorful rice and pigeon pea dish is often seasoned with sofrito (a fragrant mix of herbs and spices) and cooked with saffron for a vibrant color and flavor.
Toor Dal (Indian Pigeon Pea Curry): Toor dal is a staple in Indian cuisine. Cooked with aromatic spices like turmeric, cumin, and mustard seeds, it’s a comforting and nutritious lentil curry.
Jamaican Gungo Peas and Rice: Pigeon peas pair beautifully with creamy coconut milk in Caribbean and Southeast Asian cuisines. The combination of spices and coconut creates a rich and aromatic curry.
Pigeon peas bring a delightful blend of flavors and textures to your table. Don’t hesitate to explore the world of pigeon pea recipes and discover the many ways they can elevate your meals.