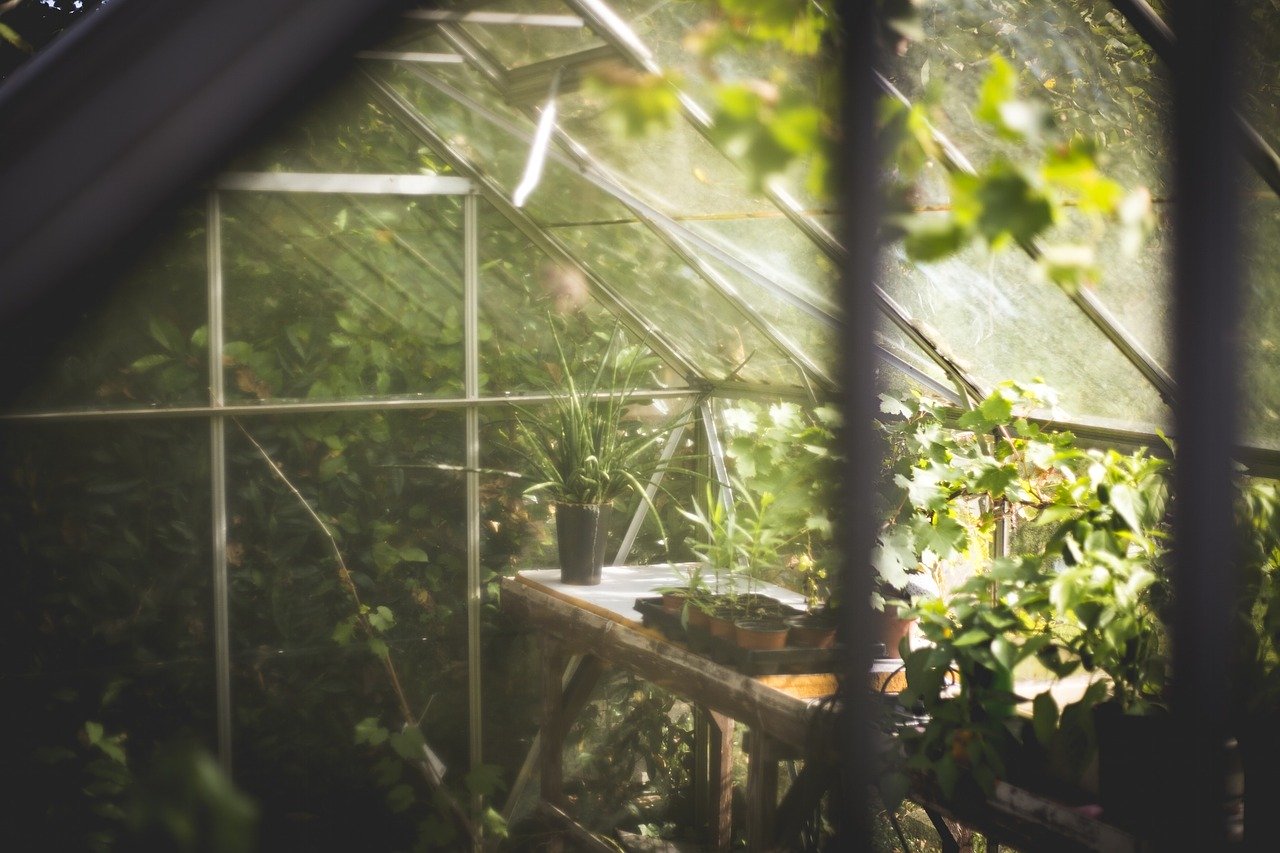
Posted on 2 Comments

Best Greenhouse Kits for Southern Gardens

best greenhouse kits for Southern gardens

Now that Florida is facing its annual cold season, it’s time to think about frost protection. Even here in Zone 10a, the temperatures can drop overnight, even to freezing and below. For Southern gardeners whose passion is tropical gardening, temperatures below just 50°F can be devasting. So, what ARE the best greenhouse kits for Southern gardens and our unique needs?

Between blistering sunlight in summer, torrential downpours, and sudden sharp frosty nights, gardening in Florida — or anywhere along the Gulf Coast — can be quite a challenge. The best greenhouse kits for Southern gardens will provide protection from frosts, hot sun, and torrential downpours.

Currently, we’re enjoying a freak winter downpour. Since it’s following a long drought, I’m not going to complain. But so far, my fall tomato plants have already been fried, drowned, and tipped with cold damage. Granted, I have a love-hate relationship with tomatoes.

A few years ago, my husband promised to build me a greenhouse. He even described his elaborate plans to reuse some PVC pipe. That was in 2020, after we had already spent four months rushing outside during the rare bitter cold snap, teeth chattering, covering tomato plants with every spare sheet or blanket we could find.

Then, we “enjoyed” the freak three-night freeze of 2022, and I knew it was time to invest in a real greenhouse, even if I didn’t have much of a budget.

What was the best greenhouse I could find without breaking the bank?

Easy-peasy — The King Bird extended polytunnel with sprinkler system.

A quick tour of my favorite new greenhouse

Why Do You Need a Greenhouse in the South?

While I have three growing seasons here, it seems that my fall garden plants just get started producing in the winter when we suddenly get a cold snap.

It’s the same with the spring — they just get established and start to bloom when a blistering hot day puts an end to progress.

I knew that I really COULD grow fool all year round if I had the right infrastructure. It’s entirely possible to grow all year long, if you have one of the best greenhouse kits for extending the season.

For example, it’s still too hot and humid in September to grow large tomato varieties, and they don’t really get going until October. That leaves them vulnerable in late December and January.

And while most people use their greenhouse in the winter, I decided that I could also use a greenhouse kit in the summer by adding a shade cloth to keep out the worst of the afternoon sun.

I lucked into the best buy I could make when I discovered the King Bird greenhouse that included a sprinkler kit for cooling off during the hot summer.

Wouldn’t it be great to have a shade house in place to save time (and sunburn)?

Most gardeners in the South just take the summer off. But the best greenhouse kit could be quickly modified with some shade cloth.

The best greenhouse kits make the most of your garden all year round.

Best Greenhouse Kits to Consider

I’m sold on my new King Bird greenhouse, but you may have other needs, less space, or even more budget. Here’s a shortlist to work from. I’ve also added a few others that look like likely options for a wide range of gardeners.

And of course, my top recommendation is:

1. KING BIRD Upgraded 15×6.6×6.6FT Large Walk-in Greenhouse

KING BIRD Upgraded 15×6.6×6.6FT Large Walk-in Greenhouse Heavy Duty Galvanized Steel Frame 2…
  • 【Watering Greenhouse】comes with a 15-ft water hose and irrigation kit that lets you water your plants easily and efficiently. You can adjust the water mist size and direction to suit your needs…
  • 【Steady Greenhouse】Less worry about strong winds or heavy snow damaging your greenhouse. KING BIRD greenhouse is built with galvanized steel, 3 top crossbars, 10 vertical bottom poles, and 2…
  • 【Ventilated Greenhouse】Enjoy two entrances with PE and zippered screen doors that allow you to access your plants from both sides. You can also roll up the screen windows and use the water…
  • 【Warm Greenhouse】The PE grid cover of KING BIRD greenhouse is specially designed to resist UV rays and extend its lifespan. It is also waterproof, odorless, and fits snugly over the frame to keep…
  • 【Trustful Greenhouse】KING BIRD always values customers’ experience the most. All KING BIRD greenhouse kits are provided with a 1-year warranty or more. Feel free to contact KING BIRD Team when you…

This greenhouse is GINORMOUS, and the durable white PE cover keeps it cool in the summer and warm in the winter.

This model has stood up to two named Florida storms as well as some freakishly late rain and windstorms over this winter.

2. King Bird Upgraded 10×6.6×6.6 Walk-in Greenhouse

KING BIRD Upgraded 10×6.6×6.6FT Large Walk-in Greenhouse Heavy Duty Galvanized Steel Frame 2…
  • 【Watering Greenhouse】comes with a 15-ft water hose and irrigation kit that lets you water your plants easily and…

If you don’t have 15 feet to spare, don’t hesitate to check out this smaller version, with the same high quality and special features as the larger version.

3. GoSunny Deluxe Greenhouse Kit

MEFELE Cln Deluxe Green House 56″ W x 56″ D x 77″ H, Walk-in Outdoor Plant Gardening Greenhouse 2…
  • Constructed with 12 wired shelves – 6 on each side, and measures 56″W x 56″D x 77″H, which makes space for all your…
  • Strong frame – built with heavy-duty powder coated steel. Include 4 ropes and 4 stakes to secure the greenhouse and…
  • Place the greenhouse indoor inside your garage during the cold winter or outside with no PVC cover during the hot…

This GoSunny model is one of the first portable greenhouse kits I’ve used in my current location, and it’s pretty darn good for the price.

This greenhouse is 56 inches wide by 56 inches deep, and it stands 77 inches tall. This means you have plenty of room to move around inside.

The powder-coated metal tubing frame is 16mm and the reinforced polyurethane cover is 0.4mm thick, so it’s durable and offers excellent protection from any cold spells.

It features straps to hold the zippered door open to allow ventilation, as well as two side windows with mesh.

This greenhouse kit comes with nail stakes and tie-downs to keep your greenhouse in place under windy conditions.

Inside, it offers 12 built-in wire shelves. You can also adjust them to your collection. And the whole assembly offers additional headroom for heat lamps or fans.

Unfortunately, it may not stand long against the Florida heat and humidity, but it’s a bargain for protecting plants against harsh sun, cold nights, and sudden downpours.

4. Eagle Peak 8×6 Portable Pop-Up Greenhouse

Sale
EAGLE PEAK 8×6 Portable Walk-in Greenhouse, Pop-up Indoor Outdoor Garden Green House, Zippered Doors…
  • EASY SETUP: Innovative easy setup technology allows ONE PERSON to set up this greenhouse in seconds. EAGLE PEAK pop-up greenhouse is ready straight…
  • STABLE AND STURDY: With a steel-ceiling roof, the construction of this greenhouse is rigid and durable enough to endure most outdoor conditions with…
  • SPACE TO WORK: Enjoy freedom of movement with the spacious walk-in 8×6 ft greenhouse. Shelving fits comfortably in it (Please search ASIN: B08ZJ8H558…

When I purchased my King Bird, I also purchased two of these pop-up greenhouses for emergency use. They were on sale at the time, and I couldn’t resist the price.

These are especially useful for covering in-ground climbing plants like cordoned tomatoes or cucumbers. I purchased them for hanging houseplants and in the hope that they would be easy to put up by myself when I sold plants at local farmer’s markets.

It turned out they were a bit too heavy for the purpose, but one has made a most excellent shade house. The structure is easily sturdy enough to hold many hanging plants for display. And it’s shady enough for Monstera and pothos on poles, too.

5. Gardman 7600 Extra Wide 4-Tier Greenhouse 

Gardman USA 7600 Greenhouse, 4 tier
  • Extra wide mini greenhouse
  • Easy to use
  • This product is manufactured in China
  • Quality construction and materials to last many seasons
  • Heavy duty reinforced polyethylene cover

If you don’t have much space and are looking for apartment patio greenhouse kits, this Gardman model provides roomy shelves and protection from the co

This is the perfect size for planting a few starts for spring.

It measures 63 inches high and is tall enough for four shelves of seed trays. It’s 18 inches deep and also extra wide, at 47 inches.

It has a sturdy, modular steel tubing frame that will hold up to the elements. You can also snap it together without any tools.

The reinforced polyurethane cover has a zipper front and each shelf is about 14 inches high. So, you can even add a heat lamp for extra warmth.

Gardman is a UK company that sources its materials responsibly. They have a 27-year history and specialize in garden décor, lighting, and bird feeders.

6. Strong Camel Large Walk-in Wall Greenhouse

Strong Camel Large Walk-in Wall Greenhouse 10x5x7’H w 3 Tiers/6 Shelves Gardening with Two Door…
  • Suitable Size:The new Walk-in greenhouse size: 10ft x 5ft x 7ft. 6 shelves height 15.7”, width 11”; net size…
  • Excellent Quanlity:The cover is water resistant, UV protected thick polyethylene (PE) which is non toxic and odorless,…
  • Useful design: Our greenhouse has 3 levels, and 6 shelves. Roll up zip doors at both ends for easy access, ventilation…

If you’re looking for lean-to greenhouse kits, check out this affordable and durable Strong Camel model. You can place it against any exterior wall for stability and reflected heat.

The CO-Z greenhouse is 10 feet long, 5 feet deep, and a generous 7 feet tall. It creates a warm little nest for your delicate plants on cold winter nights.

You can also protect your delicate seedlings from being washed out. The UV protection and green checking also prevent scorching in the dry spring heat.

The door zips open and rolls up to stay out of the way when you’re working and to allow in plenty of fresh air on warm days.

It also comes with wire shelving to make the most of the space.

It boasts a tubular steel frame and UV-protected polyethylene cover. You’ll also get guy lines, ground nails, and a screw kit for securing it to your exterior wall.

7. Outsunny 15′ x 7′ x 7′ Walk-in Tunnel Hoop Greenhouse

Sale
Outsunny 14.6′ x 6.6′ x 6.6′ Walk-in Tunnel Hoop Greenhouse with Mesh Door & 8 Windows, Large Green…
  • Walk-In Hoop Greenhouse Kit: This walk-in greenhouse gives you a personal plant nursery for your garden. Control heat,…
  • Look in or Let Air Out: Control the heat and humidity in your outdoor greenhouse by making use of the eight…
  • Heavy-Duty, Outdoor Ready: Our backyard greenhouse protects plants from wind, rain, and cold with a 140 GSM PE cover, a…

For those focused on high production, Outsunny offers an affordable tunnel greenhouse that offers professional size protection for the backyard grower.

This hoop house is great for year-round growing and urban farming. It’s 15 feet long by 7 feet wide and stands 7 feet tall when assembled. So, you can add heaters or fans for year-round use.

The reinforced galvanized steel tube frame is rust-resistant, and the 140 GSM polyethylene cover is reinforced with mesh. This also diffuses harsh sunlight in the summer season and allows 85% of sunlight in.

This makes it the perfect greenhouse for Florida, where the sun can defy even the chill of winter. It also provides much needed shade for spring and summer growing.

8. Quictent Large Portable Walk-in Greenhouse

Quictent 12×6.6×6.6 FT Greenhouse for Outdoors, Heavy Duty Large Garden High Tunnel Walk-in Green…
  • Mesh Zipper Door & 6 Vents – The front door of the greenhouse is equipped with 1 screen door to keep small unwanted…
  • Powder-Coated Steel Frame – Made of reinforced powder-coated steel, there’s less worry about rust which makes the whole…
  • Extended Cover – The extra skirt part of the cover at the bottom of the greenhouse makes it more airtight and secure:…

If you have a long and narrow yard, this Quictent model might be the best greenhouse kit for your garden.

It’s 12 feet long and 7 feet wide and measures 7 feet high.

The powder-coated steel frame offers extra support from middle rails and the polyethylene cover is extra long for attachment to the ground for stability.

It’s easy to assemble with Velcro straps and plenty of stakes to hold it down. There are doors on either end as well as six screened vents on the side for superior ventilation.

Quictent is also a Texas manufacturer with an A+ BBB rating, and they offer camping tents as well.

9. Palram Polycarbonate Greenhouse

Sale
Palram – Canopia 6×4 Greenhouse for Outdoors, Walk-In, UV Polycarbonate Panels, Heavy Duty Aluminum…
  • TWO PANEL TYPES PROVIDE ULTIMATE BALANCED GROWING CONDITIONS – Virtually unbreakable twin-wall polycarbonate roof panels…
  • STURDY THOUGHTFUL CONSTRUCTION WILL LAST A LIFETIME – Chosen by Better Homes and Gardens as the Best Overall Greenhouse…
  • STEP-BY-STEP DIY INSTRUCTIONS DESIGNED FOR HOMEOWNER INSTALLATION – Easy installation accomplished with sliding panels’…

If you’re in the market for a more permanent solution, Palram offers one of the highest reputations with buyers for greenhouse kits. While only measuring 6×4 feet, it’s a gorgeous specimen that will surely become the shining centerpiece in an ornamental garden.

It features twin-wall polycarbonate roof panels to protect plants from strong sunlight and an aluminum frame. The wall and ceiling panels are 4mm transparent polycarbonate.

10. Lovtimber 6×10 FT Polycarbonate Greenhouse

Lovtimber 6×10 FT Polycarbonate Greenhouse, Heavy Duty Walk-in Garden Plants Green House, Adjustable…
  • 【Walk-in Spacious Greenhouse】The ideal growing environment is large enough for you to plant numbers of plants,…
  • 【Heavy-duty & Durable Frame】The 4mm thick polycarbonate board can withstand outdoor temperature from -20℃ to 70…
  • 【Great Vents & Slide Doors】The greenhouse have 1 window vents are designed with 5 adjustable angles for proper air…

If you need more space for less money and are willing to give a newcomer a go, this 6×8 polycarbonate greenhouse has all the features of more established brands without the price tag.

It offers adjustable vents for reducing summer heat build-up and protects from cold with 4mm polycarbonate panels.

11. HOWE 8x14x7.5 FT Polycarbonate Greenhouse

No products found.

Add a professional-grade polycarbonate greenhouse for about half the cost by doing your own installation.

Protect a whole season’s worth of starter plants and store your garden equipment securely out of the elements.

Features double sliding doors and four vents for temperature control. The 6mm polycarbonate panels do double duty protecting your delicate plants from the cold, heat, and heavy rains.

Get a high-quality greenhouse and outdoor living space in one.

Using a Greenhouse in Florida and Other Hot Climate Zones

A Jump on Spring

I normally start my spring seeds in December. But quite frankly, I don’t have enough room for everything if we get a cold night. Last year, I moved dozens of seedlings inside when the temperatures plummeted. I lost a few trays because I foolishly stacked them and they crushed each other.

But a greenhouse means I’ll have plenty of room to keep my starts toasty and safe all winter long. I may even get some spring tomatoes this year.

Variety is the Spice of Life

Speaking of tomatoes, because I live in an area of the country that suffers from terrible heat and humidity, I have trouble growing big tomato varieties. They just suffer under the sun long before they produce.

So, I’ve been focusing on early maturing varieties and cherry tomatoes – which means I don’t get to enjoy the wide variety of heirloom vegetables I want to grow.

Choosing the Best Greenhouse for Winter

Too often, I’ll jump into buying something for my garden on a whim. Just ask me about all those soaker hoses I bought last month.

But in this case, I’m doing my research and due diligence before making a big purchase that will take up a lot of yard space.

Here are some things to think about before choosing a greenhouse.

Code Violations

In some neighborhoods or towns, you may need to get a permit. Usually, this will be for a permanent structure, perhaps with an electrical line or water access. You probably won’t need one for a small portable greenhouse or hoop house.

But do check with your local planning commission about what type of structures require a permit.

And don’t forget to check with your HOA or neighborhood association to make sure it doesn’t violate their requirements.

Allocating Space

Do you have enough room on your property for a greenhouse? Sometimes, you’ll find that the best place to put it for maximum efficiency is smack-dab in the middle of your back yard.

You’ll want it in the sunshine for the winter, but remember that placement under a tree canopy can help protect plants from a hard freeze, too.

Make the most of any southern exposure available to help keep your greenhouse warm. Also, placing your greenhouse near a light-painted wall with southern exposure can be the warmest spot in the yard. Buildings can reflect sunlight onto nearby plants as well as absorb heat during the day and release it over the night.

Place your greenhouse so it gets at least six hours of sunshine during the day. And remember, it’s also a good time to trim trees and bushes during their dormant periods.

Accessibility

You’ll also want to place your greenhouse where it’s easy to access from your home. Especially if it gets cold, you’re more likely to keep an eye on things if you don’t have to freeze to do so.

You may also want access to the outdoor hose bibb or GFCI outlet. Adding a portable electric heater turns even a cheap model into one of the best greenhouse kits for growing vegetables in the winter.

Knowing where you’re going to place it will help you narrow down all the possible choices to one that will work best in your garden.

Lovely greenhouse in a back yard.

Features to Look for in the Best Greenhouse Kit

Greenhouse kits come in a wide range of price points and durability options. You can find inexpensive models that hold a few shelves of seedlings for very little money. You can also find models the size of a small family bungalow, with sturdy metal frames.

So, think of what features you might need to get started.

How Big?

Last year, I only set up a few seed trays to get my spring garden started. So, I really only needed an economy model.

If you’re just getting a jump on spring starters for early vegetables, a smaller indoor/outdoor model will probably be one of the best greenhouse kits for you.

However, if you’re growing a significant number of plants and rely on them to feed your family, you may want to look at a more sizeable model. You’ll find hoop houses provide plenty of room for low cost.

If you need to overwinter delicate full-grown plants, you may want to look for height in a greenhouse as well as square footage. Check out models that offer shelving systems and hanging hooks.

And if you want to make a statement in your landscape design, take a look at some of the best greenhouse kits from makers like Grandio and Palram. While they do require some DIY skills to assemble, they’re much less expensive than hiring a contractor to build one.

Construction Materials

Portable greenhouses use plastic sheeting to protect your plants from the elements. The thickness can vary, but most provide adequate protection from winter chills in Zones 8 to 11.

More durable greenhouse kits use polycarbonate sheets, which are clear plastic, but sturdy like acrylic sheeting.

Poly-Sheeting Greenhouses

Most portable and economy greenhouse kits include polyethylene plastic sheeting and a frame made of aluminum, steel, or PVC piping.

The polyethylene plastic sheeting in kits usually runs between 2 to 6 mils thick. Although it may not last more than two or three years, you can also patch or even replace it should it be required.

Polycarbonate Greenhouses

The best greenhouse kits feature polycarbonate plastic panels in an aluminum frame. While they’re more expensive, they’re suitable for permanent installation.

However, they’re also harder to assemble. Especially if you’re planning on adding electricity and water to your greenhouse.

But if you have the DIY skills, they can really make a statement in your landscaping. Many are quite charming and attractive.

Commercial Greenhouse Kits

At one point in my budding horticultural career, I considered starting a hobbyist nursery. Then I discovered that you needed an inspection to sell plants to other gardeners. The good news was that I didn’t need one to sell produce.

A commercial size hoop house is just the thing if you have the room or are thinking of expanding into an urban farm.

Remember to check with your local extension office about any laws or regulations in place for your state. But who knows, you may have discovered the side gig that opens up a whole new career.

Greenhouse DIY

If you’re looking for a build your own greenhouse kit, you’ll find plenty of plans available online. All it takes is a few DIY skills and access to your local home improvement center.

And depending on your needs and ambition, you can build something as simple a hoop house or something as intricate and challenging as a solar-heated grow hut.

Walden Labs offers free plans online. I’ve been saving soda bottles for their Recycled Model for about a year now.

And if you’re looking for a fun craft, this small greenhouse DIY uses CD cases to create a cloche for a treasured favorite.

Gimme Shelter

I’m still not sure which one I’m going to opt for, but something tells me that I’m picking out my own Christmas present this year.

Either way, the best greenhouse kits are the ones you can afford and the ones you can use.

It may seem odd to get a greenhouse when you live in Florida and only get a few cold nights a year. But it will be nice knowing that I won’t have to stumble around in the dark, covering up whatever I can manage to see with whatever I can manage to find.

Do you have a greenhouse or hoop house? How did you finally settle on what kind to buy? Share your greenhouse tips in the comments.

Posted on

10 Awesome Gifts for Gardeners on Your List

Gifts for gardeners, mom, dad, or significant other

It’s that time of year, again! It’s the holidays, and for most people, thoughts of the garden are far off. Not in Florida! We garden year-round here, so our next plant or crop is always at the top of our minds. So, if you’re looking for great gifts for gardeners, we know exactly what to suggest.

Top Gifts for Gardeners At Every Price Point

Times are tight, so you don’t want to spend more than you have to in order to impress that “special someone who gardens” on your list.

Choose from our favorites below, from thrifty to indulgent.

1. Roo Gardening Apron with Pockets and Harvesting Pouch

If your gardener is anything like me, you may find yourself fishing seeds and green beans out of your pants pockets on wash day.

This is SO on my wish list!

The Roo Gardening Apron is the ultimate tool for hands-free, efficient gardening. This innovative apron keeps all your essential tools within arm’s reach.

The best part of the Roo Apron is the large harvesting pouch. Made of water-resistant ripstop nylon, this spacious pocket is ideal for collecting harvest or debris.

It features an adjustable cotton rope for easy emptying, ensuring you stay clean and dry during any task.

It also features multiple smaller pockets for your phone, tools, and gloves, making it a versatile companion for all your gardening needs.

Ergonomically designed, the Roo Apron ensures maximum comfort with a unique strap system that distributes weight away from the neck and shoulders.

It’s adjustable to fit a wide range of gardener sizes, suitable for anyone from 4’6” to 6’4”. It comes in green, blue, purple, and gray, so it makes one of the perfect gifts for gardeners of any size or type on your holiday list

2. Home & Garden Trends Garden Kneeler

One of my younguns got me one of these for Christmas a few years ago, and I still love it.

This version is extra wide for more comfortable seating. It’s also lightweight and easy to fold, but it still holds up to 330 pounds.

The best part is the tool pouches, which let you carry everything to any part of the yard without losing them or having to trudge back and forth.

These make excellent gifts for gardeners of a certain age, so make sure grandma and grandpa can putter in the yard in comfort.

3. Garden Hair Don’t Care Hat

Gardeners always have a sense of humor, and this is one of those gifts for gardeners that lets them know you’re in on the joke.

But it’s not just funny, it’s also practical. this hat

It’s a perfect blend of style, comfort, and practicality for garden enthusiasts. Crafted from 100% cotton, this classic baseball cap offers a natural, relaxed fit that ensures comfort while maintaining a balance between style and technical performance.

It features six panels and six ventilation holes, ensuring breathability and comfort in any weather, making it ideal for spring and summer activities.

This versatile hat comes with an adjustable size to fit most head sizes comfortably. The convenient metal closure allows for a custom fit, ensuring comfort and a secure fit at all times.

It offers protection against harmful UV rays with its pre-curved visor, keeping your skin safe and hair out of your face. Its moisture-wicking interior headband acts as a sweatband, keeping you cool and comfortable during hot summer days.

4. Play22 Complete Garden Tool Kit

The PLAY22 Garden Tools Set is one of the perfect gifts for gardeners who have just started on their journey. This comprehensive and high-quality collection of gardening essentials includes a sturdy carrying case and includes nearly every hand tool a new gardener could want.

Each tool in this set is made from sturdy steel, ensuring they are rust-proof, break-proof, and easy to clean. The ergonomic handles offer comfort during use, so it’s perfect for seniors or others with arthritis or carpel tunnel syndrome.

However, its thoughtful design and robust construction make this set an ideal gift for gardeners of all skill levels.

This set saves time and energy, providing immediate access to all the necessary tools for tending to the garden. With a lifetime warranty, the PLAY22 Garden Tools Set is a reliable and long-lasting companion for any gardening adventure.

5. Survival Vegetable Seeds Garden Kit

There may not be anyone as obsessed with seed collection as I am, but this Survival Vegetable Seed kit comes close with a wide range of veggie seeds to plant.

This collection makes great gifts for gardeners and preppers, both novice and experienced. This kit offers an extensive range of over 16,000 seeds across 35 easy-to-grow vegetable varieties, all non-GMO and heirloom.

It includes favorites like lettuce, beets, carrots, onions, squash, zucchini, tomatoes, peppers, broccoli, peas, beans, and more, making it ideal for creating a diverse and thriving home garden.

Each packet includes complete growing and harvesting instructions. Grown, sourced, and packaged in the USA, this seed bank is an excellent gift choice for gardening enthusiasts, providing a sense of food security and self-reliance.

This Survival Vegetable Seeds Garden Kit is not just a collection of seeds; it’s an investment in sustainable, self-sufficient gardening.

6. NISAKU NJP650 The Original Hori Hori Namibagata Japanese Stainless Steel Weeding Knife

This is one of my favorite gardening tools that I own.

This is one of my top-tier gifts for gardeners, with an affordable price and made with craftsmanship and functionality.

Crafted in Japan, this weeding knife is made from the finest stainless steel, ensuring quality and longevity. The blade features inch markings, allowing gardeners to measure soil depth accurately, which is especially useful for planting bulbs and seedlings at the correct depth. This feature adds a level of precision to your gardening that standard tools simply can’t match.

The NISAKU NJP650 is a versatile multi-use tool, boasting both serrated and straight-edge blades. Its durability is unmatched, with a rust and scratch-resistant blade that maintains a razor-sharp edge through extensive use.

Ergonomically designed for comfort and efficiency, the knife has a blade size of 7.25 inches and a wooden handle of 5.25 inches, providing a balanced grip for various tasks. Weighing just 10 ounces, it is lightweight yet sturdy, offering ease of use for prolonged periods without causing hand fatigue.

7. Plant Theatre Cocktail Herb Growing Kit

For your gardening buddy who has turned to drink (or your drinking buddy who has decided to spend more time in the garden.

These cocktail herb growing kits make great gifts for gardeners who also like a tipple or two.

It’s an innovative way to infuse natural flavors into your drinks. This kit is not just about growing herbs; it’s about elevating your cocktail experience with a touch of gardening fun.

This kit offers a delightful variety of seeds tailored for cocktail enthusiasts, including cucamelon, blue borage, lime basil, hyssop, lemon balm, and mint leaves.

These herbs are carefully selected to add a unique and fresh dash of flavor to any beverage, making your cocktails stand out with home-grown, fresh ingredients.

The kit comes fully equipped with all the essentials needed to start your herb garden. It includes six pots, six peat discs for easy plant starting, six plant markers to keep track of your herbs, and a selection of seeds.

These herbs are perfect for displaying on any plant stand, adding a touch of greenery to your living space.

8. Grow Dammit Garden Sign

Do you remember what I said about gardeners and our sense of humor? Well, sometimes you just have to laugh when the harvest is poor and the flowers refuse to sprout.

This “Grow Dammit” sign is a humorous gift for gardeners, and it’s ideal for anyone who appreciates the joys and challenges of gardening.

It comes beautifully packaged in a gift box, making it ready to give for any occasion. The phrase “grow dammit” resonates with gardeners, symbolizing perseverance and determination in a lighthearted way. It’s sure to bring a smile to anyone who enjoys gardening.

The design of the sign is both natural and vintage, crafted from metal with a natural rust mark surface. This distinctive look allows it to stand out in any garden setting, adding character and charm.

This “Grow Dammit” garden sign is more than just another yard decoration; it’s a statement of humor, resilience, and the spirit of gardening.

9. Gaucha Designs Leather Garden Tool Belt

Go pro with this full-grain leather garden tool belt.

Step up your gardening game with the Gaucha Designs Leather Garden Tool Belt, an exquisite blend of functionality and style for gardeners, florists, and various professionals. This tool belt is more than just a utility item; it’s a fashion statement that combines practicality with elegance.

Crafted from full-grain leather, this 100% leather tool belt is designed for both women and men. It’s an ideal companion for carrying all your hand tools, making it perfect for gardeners, florists, and farmers.

The tool belt’s durability makes it a reliable choice for storing gardening tools like scissors, pruners, pliers, tree grafting tools, woodwork tools, and more.

Each belt is handmade, reflecting a passion for style and quality. The fashionable flair of this leather tool pouch sets it apart, elevating any workwear look.

The Gaucha Designs tool belt is one of the best gifts for gardeners who take growing seriously.

10. KING BIRD Large Walk-in Greenhouse

Hands down one of my favorite garden purchases this year and one that I highly recommend. If you’re looking for showstopping gifts for gardeners in your life, this is it.

This greenhouse caters to their gardening needs throughout the year, combining practicality with durability.

The standout feature of the KING BIRD Greenhouse is its innovative watering system. It comes equipped with a 15-foot water hose and an irrigation kit.

The system is designed to adjust the water mist size and direction. This ensures your plants receive the right amount of water without waste. Additionally, this feature is a boon during the hot summer months. It can be used to cool down the greenhouse with a refreshing spray.

It features two entrances with PE and zippered screen doors, allowing easy access from both sides. The screen windows can be rolled up to control the temperature and humidity inside, creating an optimal growing environment for your plants. This design also helps in keeping out unwanted birds and pests.

The PE grid cover of the KING BIRD Greenhouse is another highlight. It offers UV resistance to prolong the lifespan of the structure and safeguard your plants.

KING BIRD places a high value on customer experience and product quality. This is why they offer a 1-year warranty or more on all their greenhouse kits, ensuring peace of mind for the gardener. The KING BIRD team is always available to assist with any questions or support, underlining their commitment to customer satisfaction.

Overall, the KING BIRD Large Walk-in Greenhouse is not just a structure; it’s a comprehensive gardening solution, ensuring your plants thrive in a controlled and nurturing environment, regardless of the external weather conditions.

Whatever Your Budget, There’s Great Gifts for Gardeners on Your List

No matter where they live, your favorite gardener is looking forward to spring. If they live in Florida, you know they’ll be out there the day after Christmas, playing with every new toy that Santa brings.

And it doesn’t matter if you have a lot to spend or just a few bucks, my favorite gift on this list is actually the cheapest one at the time of writing this.

Your favorite gardener is sure to love anything you choose when you keep their passion for growing in mind.

Posted on

Seed Starting Basics: A Comprehensive Guide to Getting Your Garden Started

seed starting basics -- everything you need to know

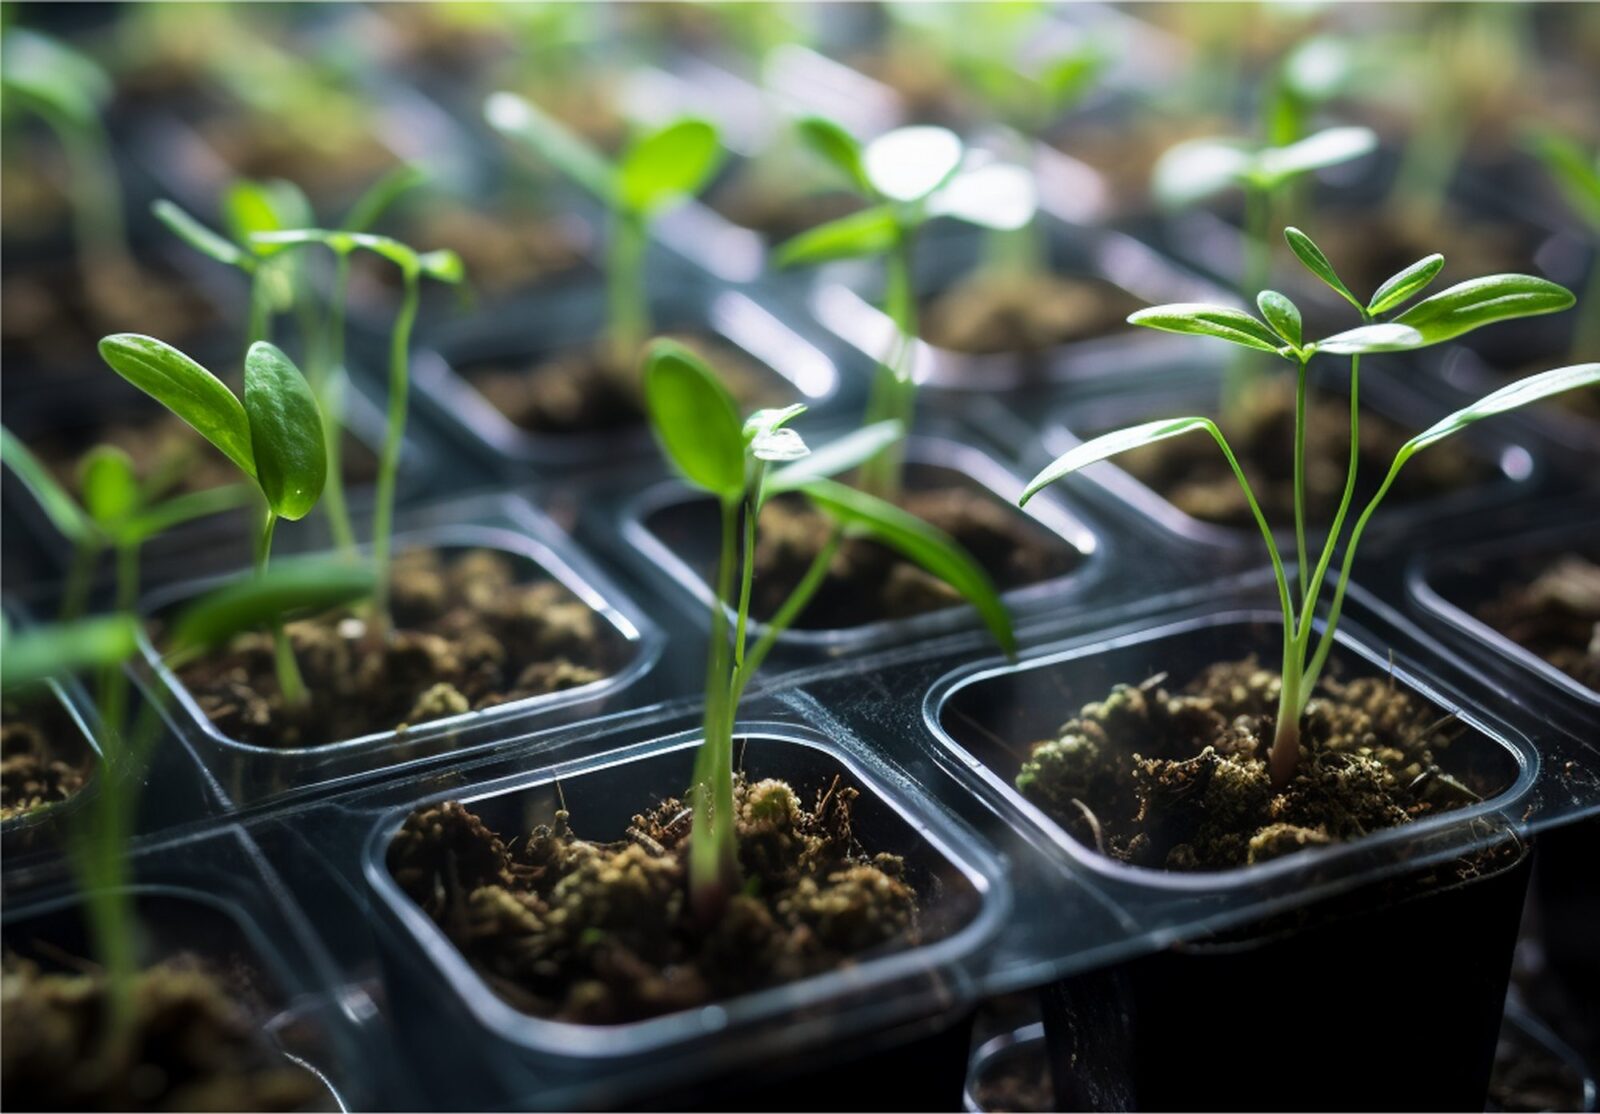
Whether you’re a novice or an experienced gardener, mastering the skill of seed germination is a fundamental skill. It’s the first step to a bountiful and abundant harvest. So, let’s dive into the seed starting basics of germination and provide you with valuable insights on how to successfully kickstart your garden from the very beginning.

How Seeds Germinate

Seed germination is a remarkable process by which a dormant seed transforms into a tiny, delicate seedling. Understanding the science behind this empowers you to become a more proficient seed starter. You’ll be able to give your plants the best possible start. Let’s take a look at nature at work.

Seed starting is very meditative and relaxing

The Anatomy of a Seed

Seeds are remarkable storehouses of life. They consist of three key parts:

  • embryo
  • endosperm
  • seed coat

The embryo is the embryonic plant inside the seed, containing the first leaves (cotyledons), the stem (hypocotyl), and the root (radicle).

The endosperm, a nutrient-rich tissue, provides nourishment to the developing embryo.

Finally, the seed coat acts as a protective shell, shielding the delicate contents from external threats.

Seed starting chart from 1913
Image from page 372 of “Plant life and plant uses; an elementary textbook, a foundation for the study of agriculture, domestic science or college botany” (1913)

The Trigger: Absorption of Water

The germination process begins with the absorption of water through the seed coat. As the seed absorbs water, it rehydrates. The dormant embryo awakens from its slumber.

This rehydration process also activates enzymes that break down stored nutrients within the endosperm, transforming them into simple sugars and other essential substances for the seedling’s early growth.

Activation of Growth Hormones

Water absorption triggers the production of growth hormones called gibberellins, which play a pivotal role in stimulating the embryo to initiate growth.

Gibberellins activate enzymes responsible for cell division and elongation, propelling the embryo’s root (radicle) to emerge from the seed coat in search of moisture and nutrients.

Emergence of the Root

As the root (radicle) elongates, it breaks through the seed coat and emerges into the surrounding soil.

The radicle becomes the primary root of the seedling, anchoring it in the growing medium and absorbing water and essential nutrients.

Unfurling the Cotyledons

Simultaneously, the stem (hypocotyl) elongates, pushing the cotyledons (seed leaves) above the soil surface.

Cotyledons vary in number and shape depending on the plant species and can be either one or two. These early leaves are instrumental in photosynthesis and provide the young seedling with initial sustenance until true leaves develop.

Photosynthesis Commences

With the cotyledons exposed to light, the process of photosynthesis begins.

Through photosynthesis, the seedling synthesizes glucose, a vital energy source, from carbon dioxide and water using sunlight.

This metabolic activity fuels the seedling’s growth, allowing it to develop into a robust and self-sustaining plant.

The intricate processes of water absorption, hormone activation, and the emergence of roots and cotyledons collectively orchestrate a marvelous transformation.

Seed starting in cell trays

What Seeds Need to Germinate

Seed germination is a critical stage in a plant’s life cycle, and providing the right conditions is essential for successful germination.

While individual plant species have specific germination requirements, some general factors influence seed germination across most plants.

Understanding these factors will help you create an optimal environment for seedlings to emerge and thrive.

Moisture

Water is a primary trigger for seed germination. During imbibition, the seed absorbs water, leading to the activation of enzymes that initiate metabolic processes and growth.

Sufficient moisture is vital during germination to ensure the seed swells, softens the seed coat, and facilitates the emergence of the radicle.

Warmth

Temperature plays a crucial role in germination. Each plant species has an optimal temperature range for germination.

Seeds typically require warmth to activate enzymes and metabolism. Low temperatures can slow or inhibit germination, while high temperatures can cause damage or desiccation.

The process of germination when seed starting
Germination.svg: *Germinacion.png: Kat1992derivative work: Begoonderivative work: Begoon, CC BY-SA 3.0, via Wikimedia Commons

Oxygen

Seeds respire during germination, converting stored energy into usable forms. Adequate oxygen supply is essential for these metabolic processes.

Soil structure and porosity influence the availability of oxygen to seeds in the growing medium.

Light

Light requirements for germination vary among plant species. Some seeds require light to trigger germination, while others germinate best in darkness.

Photoreceptor proteins in seeds sense light levels and influence germination responses.

Seed starting indoors requires plenty of sunlight

Factors that Affect Seed Starting and Germination

Seed Coat Permeability

The seed coat serves as a protective layer, and its permeability affects germination.

Some seeds have hard or impermeable seed coats, requiring scarification (mechanical or chemical abrasion) to enhance water absorption and germination.

Seed Dormancy

Scarification involves breaking or weakening the seed coat, promoting germination. Stratification refers to subjecting seeds to cold treatment, mimicking winter conditions.

Both techniques are used to overcome seed dormancy and synchronize germination with favorable conditions.

Germination Inhibitors and Hormones

Some seeds contain chemicals that inhibit germination until specific conditions are met.

Others require exposure to hormones like gibberellins or cytokinins to initiate germination.

Germination Time

Different seeds have varied germination periods. Some seeds germinate quickly, while others may require several weeks or even months.

Understanding the expected germination time helps manage expectations and avoid premature intervention.

Seeds that Need Light to Germinate

Some seeds need sunlight exposure to germination. Sunlight acts as a signal to the seed that it is close to the surface of the soil and has good conditions to begin growing.

Light-sensitive seeds won’t germinate if planted too deep in the soil.

Vegetable Seeds that Require Light to Germinate

  • Arugula (Eruca vesicaria subsp. sativa)
  • Bok Choy (Brassica rapa subsp. chinensis)
  • Cilantro/Coriander (Coriandrum sativum)
  • Dill (Anethum graveolens)
  • Endive (Cichorium endivia)
  • Lettuce (Lactuca sativa)
  • Mizuna (Brassica rapa var. japonica)
  • Mustard Greens (Brassica juncea)
  • Spinach (Spinacia oleracea)
  • Swiss Chard (Beta vulgaris)

Flower Seeds that Require Light to Germinate

  • Alyssum (Lobularia maritima)
  • Amaranthus (Amaranthus spp.)
  • Baby’s Breath (Gypsophila paniculata)
  • Calendula (Calendula officinalis)
  • Nigella/Love-in-a-Mist (Nigella damascena)
  • Pansy (Viola tricolor)
  • Portulaca (Portulaca grandiflora)
  • Stock (Matthiola incana)
  • Sweet Alyssum (Lobularia maritima)
  • Verbena (Verbena spp.)
Seeds starting is a great way to share plants with friends

Seeds that Need Darkness to Germinate

On the other hand, some seeds require darkness to germinate.

Light-sensitive inhibitors in these seeds prevent germination in the presence of light. When these seeds are covered by soil or kept in a dark environment, the light is blocked, and germination can occur.

Vegetable Seeds that Require Darkness to Germinate

  • Beets (Beta vulgaris)
  • Carrots (Daucus carota)
  • Parsnips (Pastinaca sativa)
  • Rutabaga (Brassica napus)
  • Salsify (Tragopogon porrifolius)
  • Scorzonera (Scorzonera hispanica)
  • Skirret (Sium sisarum)
  • Taro (Colocasia esculenta)
  • Turnips (Brassica rapa subsp. rapa)
  • Yam (Dioscorea spp.)

Flower Seeds that Require Darkness to Germinate

  • Browallia (Browallia speciosa)
  • Coleus (Plectranthus scutellarioides)
  • Cyclamen (Cyclamen spp.)
  • Dusty Miller (Senecio cineraria)
  • Forget-Me-Nots (Myosotis sylvatica)
  • Foxglove (Digitalis purpurea)
  • Impatiens (Impatiens walleriana)
  • Primrose (Primula spp.)
  • Sweet William (Dianthus barbatus)
  • Viola (Viola spp.)
Some seeds need to be soaked for better germination.

Seeds that Need to be Soaked to Germinate

Some seeds have hard seed coats that create a barrier to water absorption, slowing germination.

To overcome this dormancy, you can soak these seed before planting. You can also nick the hard shell before soaking. This softens the seed coat, allowing water to penetrate and trigger germination.

Vegetable Seeds that Can be Soaked before Sowing

  • Artichoke (Cynara cardunculus var. scolymus)
  • Beans (Phaseolus vulgaris)
  • Chard (Beta vulgaris subsp. cicla)
  • Cowpeas (Vigna unguiculata)
  • Lima Beans (Phaseolus lunatus)
  • Okra (Abelmoschus esculentus)
  • Peas (Pisum sativum)
  • Runner Beans (Phaseolus coccineus)
  • Scarlet Runner Beans (Phaseolus coccineus ‘Scarlet Emperor’)

List of Flower Seeds that Can be Soaked before Sowing

  • Four O’Clock (Mirabilis jalapa)
  • Moonflower (Ipomoea alba)
  • Morning Glory (Ipomoea purpurea)
  • Nasturtium (Tropaeolum majus)
  • Scarlet Sage (Salvia coccinea)
  • Sweet Acacia (Vachellia farnesiana)
  • Sweet Alyssum (Lobularia maritima)
  • Sweet Peas (Lathyrus odoratus)
  • Sweet Sultan (Centaurea moschata)
  • Sweet William (Dianthus barbatus)

Some seeds may require only a few hours of soaking, while others might need an overnight soak or even longer.

Seeds that Need Cold Stratification to Germinate

Some seeds requirem a spell of cold before germinating

Many seeds from temperate climates have built-in dormancy mechanisms that prevent immediate germination.

This can be a problem when gardening in warmer climates in Zones 8-12. We rarely get enough cold or long enough during the winter to stimulate these kinds of plant seeds.

In this case, cold stratification, a process of subjecting seeds to cold and moist conditions before seed starting, mimics winter conditions. This breaks seed dormancy, allowing them to germinate.

This treatment triggers biochemical changes within the seeds, preparing them for germination once conditions become favorable.

Flower Seeds that Benefit from Cold Stratification

  • Black-Eyed Susan (Rudbeckia hirta)
  • Columbine (Aquilegia spp.)
  • Delphinium (Delphinium spp.)
  • Foxglove (Digitalis purpurea)
  • Hollyhock (Alcea rosea)
  • Larkspur (Consolida spp.)
  • Purple Coneflower (Echinacea purpurea)

Seeds that Germinate at Cold Temperatures (40-50 degrees F)

Plants that have evolved to germinate best under cooler conditions may require cooler temperatures to germinate. This gives them a head start in competing in temperate climates.  

These cold-tolerant seeds germinate when the soil temperature is relatively low, which is often during early spring or late fall when the weather is cooler.

Vegetable Seeds that Germinate at Cold Temperatures (40-50 degrees F)

  • Arugula (Eruca vesicaria subsp. sativa)
  • Kale (Brassica oleracea var. acephala)
  • Lettuce (Lactuca sativa)
  • Mizuna (Brassica rapa var. japonica)
  • Mustard Greens (Brassica juncea)
  • Pak Choi (Brassica rapa subsp. chinensis)
  • Peas (Pisum sativum)
  • Radishes (Raphanus sativus)
  • Spinach (Spinacia oleracea)
  • Swiss Chard (Beta vulgaris)

Flower Seeds that Germinate at Cold Temperatures (40-50 degrees F)

  • Black-Eyed Susan (Rudbeckia hirta)
  • Delphinium (Delphinium spp.)
  • Hollyhock (Alcea rosea)
  • Larkspur (Consolida spp.)
  • Purple Coneflower (Echinacea purpurea)

Seeds that Germinate at Cool Temperatures (50-65 degrees F)

Some seeds germinate at temperatures within the range of 50-65 degrees Fahrenheit. These cool-tolerant seeds prefer milder conditions, making them suitable for seed starting during the cooler months of spring and fall.

In warmer growing zones, such as 9-12, these seeds can normally be planted and grown over the winter.

Vegetable Seeds that Germinate at Cool Temperatures (50-65 degrees F)

  • Beets (Beta vulgaris)
  • Carrots (Daucus carota)
  • Kale (Brassica oleracea var. acephala)
  • Mesclun Mix (Lepidium sativum, Eruca vesicaria, and others)
  • Mizuna (Brassica rapa var. japonica)
  • Radicchio (Cichorium intybus)
  • Spinach (Spinacia oleracea)
  • Swiss Chard (Beta vulgaris)

Flower Seeds that Germinate at Cool Temperatures (50-65 degrees F)

  • Alyssum (Lobularia maritima)
  • Baby’s Breath (Gypsophila paniculata)
  • Clarkia (Clarkia spp.)
  • Foxglove (Digitalis purpurea)
  • Iceland Poppy (Papaver nudicaule)
  • Love-in-a-Mist (Nigella damascena)
  • Nasturtium (Tropaeolum majus)

Seeds that Germinate at Moderate Temperatures (65-75 degrees F)

Moderate temperature conditions ranging from 65 to 75 degrees Fahrenheit are ideal for the germination of most garden seeds.

These seeds thrive in mild, favorable temperatures. In Zones 9-12, we generally plant these seeds under cover to plant out right after the last frost date, before it becomes too hot.

We also frequently start them indoors in the summer to plant out once temperatures drop in the fall.

Vegetable Seeds that Germinate at Moderate Temperatures (65-75 degrees F)

  • Corn (Zea mays)
  • Cucumbers (Cucumis sativus)
  • Eggplant (Solanum melongena)
  • Melons (Cucumis spp.)
  • Peppers (Capsicum spp.)
  • Pumpkins (Cucurbita pepo)
  • Squash (Cucurbita spp.)
  • Tomatoes (Solanum lycopersicum)

Flower Seeds that Germinate at Moderate Temperatures (65-75 degrees F)

  • Four O’Clock (Mirabilis jalapa)
  • Gaillardia (Gaillardia spp.)
  • Gazania (Gazania spp.)
  • Marigolds (Tagetes spp.)
  • Petunias (Petunia spp.)
  • Poppies (Papaver spp.)
  • Sunflowers (Helianthus annuus)

Seeds that Germinate at High Temperatures (75-90 degrees F)

Plants from tropical and subtropical regions of the world often germinate best at much warmer conditions. Their optimal germination temperatures range from 75 to 90 degrees Fahrenheit.

In Zones 9-12, we can sow these seeds directly in the garden in the early summer through early fall. They can also be started outside but should be kept under cover such as an awning to protect them from being flooded out by heavy rain or scorched by the summer sun.

Many of these plants are the few we can grow successfully through the summer in Florida. So, it’s worthwhile learning about these varieties and how to use them in your garden and your menu.

Vegetable Seeds that Germinate at High Temperatures (75-90 degrees F)

  • Amaranth (Amaranthus spp.)
  • Basil (Ocimum basilicum)
  • Cantaloupe (Cucumis melo)
  • Cowpeas (Vigna unguiculata)
  • Cucuzzi Squash (Lagenaria siceraria)
  • Malabar Spinach (Basella alba)
  • Okra (Abelmoschus esculentus)
  • Southern Peas (Vigna unguiculata)
  • Watermelon (Citrullus lanatus)
  • Yardlong Beans (Vigna unguiculata subsp. sesquipedalis)

Flower Seeds that Germinate at High Temperatures (75-90 degrees F)

  • Calendula (Calendula officinalis)
  • Celosia (Celosia spp.)
  • Cosmos (Cosmos bipinnatus)
  • Globe Amaranth (Gomphrena globosa)
  • Marigolds (Tagetes spp.)
  • Morning Glory (Ipomoea purpurea)
  • Nasturtium (Tropaeolum majus)
  • Sunflowers (Helianthus annuus)
  • Vinca (Catharanthus roseus)
  • Zinnia (Zinnia elegans)

How to Nick and Soak Seeds to Improve Germination

Seeds with tough outer coverings often require some help stepping out of their shells. You can nick the casing and soak them to speed up germination when seed starting these types.

Step 1: Gather Materials

Gather the seeds you wish to nick and soak. Ensure they are seeds that require scarification (nicking) or soaking for enhanced germination.

Step 2: Prepare the Nicking Tools

Use a pair of sharp scissors, a nail file, or sandpaper to nick the seed coat. Sterilize the tools with rubbing alcohol before use to prevent the spread of pathogens.

Step 3: Nicking the Seeds

Hold the seed firmly but gently with your fingers or tweezers to avoid damaging the embryo.

Locate the seed’s opposite end from the hilum (scar) where it was attached to the parent plant.

Make a small, shallow cut or nick on the opposite end of the seed coat using the prepared tools.

The goal is to break through the hard outer layer without damaging the delicate inner part of the seed.

Step 4: Soaking the Seeds

After nicking the seeds, place them in a container suitable for soaking. Glass or plastic containers work well.

Fill the container with warm water, about 100 degrees F or so. It should feel slightly warmer than your skin temperature. Cover the seeds completely. Don’t use water that’s too cold or too hot, as extreme temperatures may harm the seeds.

Let the seeds soak for the specified duration, which varies depending on the type of seeds. Some seeds may require only a few hours, while others may need overnight soaking.

Step 5: Monitor the Soaking Process

Keep a close eye on the seeds while soaking to prevent over-soaking. Different seeds have different soaking times, and excessive soaking can lead to seed damage or rot.

Step 6: Drain and Plant

Once the soaking time is up, remove any seeds that are floating in the water. They will likely not germinate

Drain the water from the container. Place the nicked and soaked seeds on a damp paper towel to remove excess moisture.

Plant the seeds immediately after nicking and soaking, following the recommended planting depth and spacing for each seed type.

Remember that not all seeds require nicking and soaking for successful germination. Generally, those with hard shells can be soaked prior to planting

However, make sure you research the specific germination requirements of each seed type before proceeding.

How to Cold Stratify Seeds

Seeds from plants native to cold climates or those with natural dormancy mechanisms may require cold stratification before planting.

  1. Find a sealable plastic bag or airtight container. To this, add a small amount of moistened coconut coir, perlite, or vermiculite to the container.
  2. Then, place the seeds on top of the damp medium.
  3. Seal the container and label it with the seed type and the date of stratification.
  4. Place the sealed container in the refrigerator, where it should remain at a consistent temperature between 32 to 45 degrees Fahrenheit.
  5. The duration of cold treatment varies depending on the seed type, so you’ll need to do some research on your specific seeds. Some require a few weeks while others require several months.
  6. Check the container periodically to ensure the medium remains consistently moist. Add a few drops of filtered water if the medium seems too dry.

After the required cold stratification period, remove the seeds from the refrigerator and allow them to warm up gradually at room temperature for a few days.

You can then sow your cold-stratified seeds following the recommended planting depth and spacing for each seed type.

Cold stratification is a valuable technique for enhancing the germination of certain seeds. It mimics natural winter conditions and prepares seeds to sprout when the warmer temperatures of spring arrive.

Planting Depth and Its Impact on Successful Growing

Planting depth is a critical factor in seed germination and seedling establishment, as it directly influences various physiological processes in plants.

Understanding the scientific aspects of why planting depth matters can help gardeners make informed decisions to achieve optimal growth in their gardens.

Here’s a scientific perspective on the importance of planting depth and its impact on successful growing:

1. Soil Temperature and Moisture

Planting depth affects the soil temperature experienced by the seed. Seeds planted closer to the surface experience higher soil temperatures, promoting faster germination.

Deeper planting can result in cooler soil conditions, which may delay germination.

Additionally, proper planting depth allows seeds to access adequate soil moisture levels, which are essential for initiating metabolic activities and cellular processes during germination.

2. Seed Respiration and Oxygen Availability

During germination, seeds undergo respiration, a process that provides energy for growth.

Adequate oxygen availability is crucial for efficient respiration.

 Shallow planting ensures better oxygen diffusion to the embryo, promoting healthier seedling development.

Deeper planting may reduce oxygen diffusion, leading to suboptimal respiration and potentially weak seedlings.

3. Photomorphogenesis and Light Perception

Photomorphogenesis is the process by which light influences plant growth and development. Some seeds exhibit photoblastic behavior, responding to light for germination.

Seeds that require light for germination (positive photoblastic) should be surface-sown to ensure they receive sufficient light.

On the other hand, seeds with negative photoblastic behavior, which require darkness for germination, should be planted at the appropriate depth to shield them from light.

4. Hypogeal and Epigeal Seedlings

Hypogeal and epigeal seedlings are terms used to describe two distinct types of seed germination and the initial stages of seedling development.

These terms highlight the differences in how seeds sprout and the subsequent growth patterns of emerging seedlings.

Understanding these concepts is crucial for successful gardening and plant propagation.

Hypogeal Seedlings

Hypogeal germination is characterized by the emergence of seedlings where the cotyledons, or embryonic seed leaves, remain below the soil surface.

In this type of germination, the cotyledons do not emerge above the ground but stay within the protective shell of the seed coat.

Instead, the epicotyl (the embryonic shoot) elongates and pushes the cotyledons and growing point above the soil.

Key Features of Hypogeal Germination
  • Cotyledons remain below ground.
  • Epicotyl elongates and emerges above the soil.
  • Cotyledons remain enclosed in the seed coat.
  • Typically observed in plants like beans, peas, and sunflowers.
Examples of Hypogeal Seedlings

Beans (Phaseolus vulgaris): Beans are a classic example of hypogeal germination. When a bean seed germinates, the cotyledons remain underground while the shoot (epicotyl) elongates and emerges above the soil. The cotyledons stay enclosed within the seed coat until the shoot reaches the surface.

Peas (Pisum sativum): Peas also exhibit hypogeal germination. As the pea seed germinates, the shoot pushes upward, bringing the growing point and cotyledons above the soil. However, the cotyledons themselves remain below ground, protected by the seed coat until the shoot emerges.

Sunflowers (Helianthus annuus): Sunflowers demonstrate hypogeal germination. The shoot of the germinating sunflower seed elongates and emerges above the soil, while the cotyledons remain within the seed coat below ground.

Epigeal Seedlings

Epigeal germination, on the other hand, involves the emergence of seedlings where the cotyledons are lifted above the soil surface.

As the embryonic shoot elongates, it pushes the cotyledons and growing point upward, breaking through the soil.

Once exposed to light, the cotyledons expand and begin to perform photosynthesis.

Key Features of Epigeal Germination
  • Cotyledons emerge above ground.
  • Cotyledons expand and perform photosynthesis.
  • Hypocotyl (stem below cotyledons) remains short.
  • Common in plants like lettuce, cucumber, and sunflower.
Examples of Epigeal Seedlings

Lettuce (Lactuca sativa): Lettuce is an example of epigeal germination. In lettuce seeds, the cotyledons emerge above the soil surface as the shoot elongates. Once exposed to light, the cotyledons expand and start performing photosynthesis.

Cucumber (Cucumis sativus): Cucumber seeds undergo epigeal germination. The cotyledons of cucumber seedlings emerge above ground, and as they unfurl, they begin capturing light energy for photosynthesis.

Melons (Cucumis melo): Melons, such as watermelon and cantaloupe, also exhibit epigeal germination. The cotyledons break through the soil surface and become exposed to light, where they start their photosynthetic activity.

For hypogeal seedlings, it’s crucial to plant seeds at the right depth to ensure that the epicotyl can push through the soil.

For epigeal seedlings, proper exposure to light is essential for the development of healthy cotyledons.

Understanding these examples of hypogeal and epigeal germination provides insight into how different plants handle the initial stages of growth. This knowledge can guide gardeners in providing the appropriate care and conditions for various types of seedlings.

5. Root Elongation and Establishment

The depth at which seeds are planted affects root growth and establishment.

Shallow planting encourages early root elongation near the soil surface, allowing seedlings to access surface nutrients effectively.

Deeper planting promotes downward root growth and establishment in search of deeper water and nutrient resources.

6. Seed Coat Integrity and Imbibition

Planting depth can impact seed coat integrity and imbibition (absorption of water by seeds).

Shallow planting minimizes the risk of seed coat damage during germination, enabling optimal water uptake by the seed.

7. Seedling Competition and Spacing

Proper planting depth helps maintain adequate spacing between seedlings. Appropriate spacing reduces competition for resources such as light, water, and nutrients, ensuring healthier individual plant growth.

8. How to Determine How Deep to Plant Seeds

Planting seeds at the appropriate depth is crucial for successful germination and seedling establishment.

The ideal planting depth varies depending on the size of the seed and its germination requirements.

Here are a few ways to determine the proper planting depth for different seeds:

Research the Seed: It often helps to read the seed packet, but additional research is a good idea.

Consider Seed Size: As a general rule, smaller seeds are typically planted at shallower depths, while larger seeds can be sown deeper.

Small seeds, like lettuce or petunias, may require only a light covering of soil or none at all.

Larger seeds, such as beans or squash, may need to be planted at a deeper depth.

Observe the Seed Shape: Some seeds have distinct shapes that influence planting depth. For example, flat seeds, like sunflower seeds, should be sown horizontally at a depth equal to their width.

Rounded seeds, like peas, are often sown at a depth two to three times their diameter.

Follow Recommendations: Pay attention to any specific recommendations provided for the seed variety you’re planting.

Some seeds, particularly those that require light for germination, should not be buried and should be surface-sown instead.

Soil Type Considerations: In heavy or clayey soils, it’s essential not to plant seeds too deep, as this can hinder seedling emergence.

In loose or sandy soils, consider planting slightly deeper to ensure adequate moisture retention.

Watering Considerations: Keep in mind that seeds planted too deep may struggle to reach the surface, and their access to moisture may be limited.

Planting at the correct depth ensures that seedlings can emerge and access essential water and nutrients after germination.

When to Start Seeds

Understanding the ideal timing for seed starting is crucial for successful gardening. Properly aligning seed sowing with the distinct growth preferences of warm-season and cool-season crops is essential to achieve robust and thriving plants.

What Are Warm Season Crops?

Warm-season crops flourish in the warmth of the spring through fall growing season. These crops, including tomatoes, peppers, cucumbers, and squash, exhibit specific characteristics that make them well-suited for the elevated temperatures of these seasons.

Characteristics of Warm Season Crops

Warm season crops require temperatures between 70-85°F (21-29°C) for optimal germination and growth. They thrive when exposed to abundant sunlight and have a longer growing cycle.

Requirements of Warm Season Crops

These crops need well-draining soil, ample sunlight (8-10 hours daily), and regular moisture. They are sensitive to frost, requiring careful timing for both indoor and direct sowing.

Seed Starting Times for Warm Season Crops

Indoors: Around 6-8 weeks before the anticipated planting months, aligning with the end of winter or early spring.

In Zones 9-12, we frequently start warm-season crops indoors in late December through January for planting out after the last frost date in February or March.

We also start seeds indoors or undercover in the late summer for planting out during the milder months of September and October after the heat of summer has worn down.

Outdoors: When the danger of frost has passed and temperatures consistently stay within the preferred range.

Examples of Warm Season Crops
  • Tomatoes
  • Peppers
  • Cucumbers
  • Squash (zucchini, butternut, etc.)
  • Eggplant
  • Okra
  • Watermelon
  • Cantaloupe
  • Pumpkin
  • Sweet potatoes
  • Corn
  • Beans (pole beans, lima beans, etc.)
  • Peanuts
  • Sunflowers

What Are Cool Season Crops?

Cool-season crops thrive in the moderate temperatures of fall and early spring.

These crops, including lettuce, spinach, carrots, and peas, possess unique attributes that enable them to flourish during the cooler months.

Characteristics of Cool Season Crops

Cool season crops tolerate temperatures within the range of 40-70°F (4-21°C) and often have a shorter growth cycle. They can endure light frosts and have rapid growth.

Requirements of Cool Season Crops

These crops thrive with well-drained soil, moderate sunlight (6-8 hours daily), and regular moisture. They can withstand cooler temperatures and even benefit from them.

Sowing Times for Cool Season Crops

Indoors: Begin around 6-10 weeks before the desired planting months, aligning with the end of summer or early fall.

In Zones 8-12, we can start many of these indoors or undercover during the late summer or early fall. Because of our mild winters, we can generally plant cool-season crops throughout the fall and winter, ending only in spring around late March.

Outdoors: Plan for direct sowing during the milder months of fall through early spring, avoiding extreme heat.

Examples of Cool Season Crops
  • Lettuce
  • Spinach
  • Kale
  • Broccoli
  • Cauliflower
  • Brussels sprouts
  • Cabbage
  • Carrots
  • Radishes
  • Peas
  • Swiss chard
  • Beets
  • Turnips
  • Onions
  • Garlic

What are Long-Season Crops?

Long-season crops encompass plant varieties that require an extended period to reach maturity and produce a harvest.

These crops demand a substantial growing season to develop fully, making them a strategic choice for gardeners in Zones 8-12 who have the luxury of extended warm weather.

Characteristics of Long-Season Crops

Long-season crops are marked by their slower growth rate and longer time to maturity. They often necessitate consistent warmth and a lengthy frost-free period to thrive.

Requirements of Long-Season Crops

These crops typically require well-draining soil, abundant sunlight, and regular moisture. The extended growing period allows them to develop deep root systems and produce bountiful yields.

Sowing Times for Long-Season Crops

Indoors: Start sowing seeds around 8-10 weeks before the projected planting months, aligning with the onset of the growing season.

You may need to pot these up after 6 to 8 weeks to provide adequate growing space.

Outdoors: Plan for direct sowing when the danger of frost has passed, and temperatures remain consistently warm.

Examples of Long-Season Crops
  • Tomatoes
  • Eggplant
  • Peppers
  • Melons (muskmelon, cantaloupe)
  • Winter squash (acorn, butternut)
  • Pumpkins
  • Sweet potatoes
  • Corn
  • Beans (pole beans)
  • Okra

What are Short-Season Crops?

Short-season crops are characterized by their ability to mature and yield within a shorter timeframe.

This often makes them quite suitable for the challenging subtropical conditions of Zones 8-12. Their fast growth rate allows you to get a harvest before it gets too hot or the pest pressure becomes overwhelming.

Characteristics of Short-Season Crops

Short-season crops have a quicker growth cycle, allowing them to complete their lifecycle before extreme weather conditions set in. They are often adaptable and can be grown as a reliable source of fresh produce.

Requirements of Short-Season Crops

These crops necessitate well-drained soil, moderate sunlight, and regular moisture. Their accelerated growth allows them to efficiently utilize available resources.

Seed Starting Times for Short-Season Crops

Indoors: Commence seed sowing approximately 4-6 weeks before the targeted planting months.

Because of their fast growth rate, it’s a good idea to sow seeds in succession. Planting another cell pack of seeds every two or three weeks allows you to plug in your small starters as space opens up in the garden.

You can use them for underplanting or filling in empty spaces. Or you can simply replace exhausted annuals in the garden.

Outdoors: Direct sow seeds when outdoor temperatures provide favorable conditions for germination and growth.

Again, succession seed starting is your friend. For many of these crops, you can direct sow in any empty spots in the garden for a quick harvest.

Examples of Short-Season Crops

  • Lettuce (leaf and butterhead varieties)
  • Spinach
  • Radishes
  • Carrots (early varieties)
  • Beets
  • Green onions
  • Peas
  • Bush beans
  • Turnips
  • Swiss chard

Planning for Big Harvests and Garden Abundance.

Understanding the distinct characteristics and growth requirements of warm season, cool season, long-season, and short-season crops equips gardeners with invaluable insights for effective garden planning.

This knowledge empowers gardeners to make informed decisions on when to start your seeds, optimizing their gardening efforts for successful yields and a thriving garden ecosystem.

By applying this understanding, gardeners can:

Optimize Seed Starting Times

Gardeners can confidently initiate seed starting activities at the appropriate times, aligning with the unique temperature preferences of each crop.

This ensures that seedlings develop robustly and are ready for transplanting when outdoor conditions are favorable.

Maximize Space Utilization

Armed with knowledge of crop growth duration, gardeners can strategically allocate garden space to accommodate the varying needs of long-season and short-season crops. This efficient space utilization enhances overall garden productivity.

Extend Growing Seasons

Gardeners can take advantage of the subtropical climate in Zones 8-12 by two growing seasons by selecting a combination of warm season and cool season crops.

This enables continuous harvests throughout the year, capitalizing on both spring and fall gardening opportunities.

Plan Crop Successions

Understanding the distinct timelines for different crop types empowers gardeners to plan successive plantings. As one crop nears maturity, gardeners can prepare to replace it with a different crop, ensuring a constant supply of fresh produce.

Mitigate Climate Challenges

Knowledge of the climate-appropriate crops allows gardeners to navigate challenges posed by subtropical conditions. By choosing short-season crops during periods of extreme heat, gardeners can ensure a successful harvest without being adversely affected by temperature fluctuations.

Enhance Biodiversity

Gardeners can foster biodiversity by incorporating a mix of warm season and cool season crops, as well as long-season and short-season varieties. This diversity attracts beneficial insects, improves soil health, and promotes a balanced garden ecosystem.

Promote Soil Health

By strategically rotating warm season and cool season crops, gardeners can prevent soil depletion and maintain optimal soil health. Different crop types have varied nutrient demands, reducing the risk of nutrient imbalances.

Seed Starting Basics: How to Start Every Type of Seed

Seed starting is very rewarding and easier than you'd thnk

Starting seeds in seed tray cells, soil blocks, or individual pots is a practical and efficient way to kickstart your garden.

By starting them in a controlled environment, you can ensure that only healthy plant starts end up in your garden.

If you have little space to work with, seed starting in small containers is the most efficient way to use your limited garden space.

Starting Small Seeds

Small seeds, such as those of herbs and flowers, require special care during germination due to their delicate nature.

Follow these step-by-step instructions to ensure successful germination and healthy growth of small seeds in seed tray cells:

Step 1: Select the Right Seed Tray

Choose a seed tray with small individual cells. These cells provide ample space for each seed to germinate without crowding.

Step 2: Fill Seed Tray with Growing Medium

Fill the seed tray cells with a high-quality, sterile seed-starting mix. The mix should be light, well-draining, and rich in nutrients to support early seedling growth.

Step 3: Moisten the Growing Medium

Gently water the seed-starting mix until it is uniformly moist. Avoid overwatering, as excessive moisture can lead to seed rot.

Step 4: Sow the Small Seeds

Carefully sow one to two small seeds per cell, following the recommended planting depth for each seed type. Use a toothpick or tweezers to handle small seeds delicately.

If using old seeds or multi-sowing, you can drop two or three or four seeds per compartment.

Step 5: Cover the Seeds (Optional)

Some small seeds require darkness for germination, while others benefit from exposure to light.

Refer to seed packets or reliable gardening references to determine whether covering the seeds with a thin layer of vermiculite or seed-starting mix is necessary.

Step 6: Label the Seed Tray

Use plant labels to identify the seeds sown in each cell. Proper labeling ensures easy identification as seeds germinate and grow.

Step 7: Provide Bottom Heat (Optional)

To encourage germination, consider placing the seed tray on a heating mat or a warm surface. Bottom heat can improve germination rates for some small seeds.

This may be unnecessary in Zones 9-12, although you may want to start seeds indoors during the winter months to ensure consistent temperatures provided by your home heating system.

Step 8: Provide Adequate Moisture

Place the seed tray in a shallow tray filled with water to allow for bottom watering. Ensure that the seed-starting mix remains consistently moist, but not waterlogged.

Step 9: Cover the Seed Tray (Optional)

Cover the seed tray with a clear plastic dome or plastic wrap to create a mini greenhouse effect. This helps retain moisture and humidity for optimal germination.

Step 10: Place the Seed Tray in a Warm Location

Position the seed tray in a warm location with consistent temperatures suitable for germination.

A bright windowsill or indirect light on a covered porch can provide enough light for those that require light to germinate.

Seed staring in cell trays is good if you want lots of plants

Step 11: Monitor Germination and Remove Cover

Keep a close eye on the seed tray for signs of germination. Once the seeds start sprouting, remove the cover to prevent mold growth and provide better air circulation.

For most plants, you’ll need to ensure that the new sprouts receive some light. Even seeds that require darkness to germinate will require sunlight once they’ve broken the surface.

Step 12: Thin Seedlings (If Needed)

If more than one seed germinates in a cell, gently thin the seedlings to leave only the healthiest one to grow.

You won’t want to do this if you’re multi-sowing, however.

Seed Starting for Large Seeds

Starting large seeds in soil blocks or pots provides ample space and nutrients for robust seedling development.

Large seeds, such as those of melons, cucumbers, and beans, benefit from a more substantial growing medium during germination. They grow so quickly that they’ll outgrow a smaller container before they’re ready to plant out.

Some plants benefit from up to three months of supervised cultivation before planting out, including tomatoes, peppers, and eggplant.

These long-season annuals are best planted once they’re well developed. To avoid stressing them with constant transplanting into larger containers, start with large soil blocks or small pots for germination.

Step 1: Choose the Right Containers

Select suitable containers for starting large seeds. Opt for individual pots or soil blocks with sufficient space to accommodate the size of the seeds and allow for root growth.

Step 2: Prepare the Growing Medium

Use a well-draining, nutrient-rich potting mix suitable for seed starting. Fill the containers with the growing medium, leaving about 1/2 inch (1.25 cm) space from the rim for easy watering.

Step 3: Water the Growing Medium

Moisten the potting mix thoroughly to ensure even moisture distribution. Avoid overwatering, as large seeds may rot in excessively wet conditions.

Step 4: Sow Seeds

Plant one large seed per pot or soil block. You can plant two per block when using old seeds.

Place the seed on top of the growing medium at the recommended planting depth for each specific seed type.

Step 5: Cover the Seeds

Cover the seeds with the recommended depth of soil mix.

Step 6: Label the Containers

Label each container or tray of soil blocks with the name of the plant variety to avoid confusion as the seedlings grow.

It’s also useful to add the date to your tags. This allows you to plan for succession crops based on the time to germinate.

You can start seeds in any small container with good drainage

Step 7: Provide Bottom Heat (Optional)

If starting in an unheated room during winter, using a heating mat or placing the containers on a warm surface encourages germination.

Step 8: Maintain Adequate Moisture

Keep the potting mix consistently moist by bottom watering the containers. Avoid overhead watering, which may dislodge the large seeds or create uneven moisture levels.

Step 9: Monitor Germination and Adjust Light

Keep a close eye on the containers for signs of germination. Once seedlings emerge, provide adequate light to ensure healthy growth.

Adjust the position of the containers to prevent leggy seedlings.

Step 10: Transplant Seedlings (If Needed)

As the seedlings grow, they’ll develop true leaves and become crowded in their pots. If the conditions in the garden aren’t optimal yet, consider transplanting them to larger containers or individual pots for further growth.

Step 11: Harden Off Seedlings

Before transplanting the seedlings outdoors, gradually expose them to outdoor conditions over several days. This process, called hardening off, prepares the seedlings for the change in environment.

Seed starting directly can sometimes lead to poor germination

How to Direct Sow Small Seeds in the Garden

Direct sowing small seeds in the garden allows for a natural and straightforward approach to gardening.

Whether you’re growing vegetables, herbs, or delicate flowers, direct sowing is the easiest method for many plant species.

I personally prefer seed starting in blocks or cells first, but if you’re establishing a wildflower meadow or looking to create large swathes of bedding annuals, direct sowing really is the most straightforward method.

Direct Sowing Small Seeds

Follow these step-by-step instructions to ensure successful germination and growth when direct seed starting small seeds in the garden:

Step 1: Choose the Right Location

Select a garden location that receives the appropriate amount of sunlight for the specific plant species you’re sowing. Consider factors like soil drainage and exposure to wind when choosing the site.

Step 2: Prepare the Soil

Clear the area of any weeds, rocks, or debris. Loosen the soil to a depth of about 2-3 inches (5-8 cm) using a garden fork or trowel. Rake the soil surface to create a smooth, level bed for sowing.

Adding a layer of compost or mixing some composted manure into the first inch or two of soil will help provide a good environment for your seeds to grow.

Alternatively, many wildflower seeds prefer poor soil condition, so don’t provide any garden amendments for these hardy troopers.

Step 3: Sow the Small Seeds

Gently sprinkle the small seeds evenly over the prepared soil surface. Follow the recommended planting depth and spacing for each seed type.

For very tiny seeds, mix them with fine sand or vermiculite to help distribute them more evenly.

Step 4: Cover the Seeds

Depending on the seed type, consider covering the seeds with a thin layer of fine soil, vermiculite, or compost. Some small seeds benefit from being exposed to light for germination, so do not cover them if indicated.

Step 5: Water the Seeded Area

After sowing, water the area gently to settle the soil and ensure good seed-to-soil contact. Avoid heavy watering, as it may dislodge the small seeds or cause them to clump together.

Step 6: Monitor Moisture Levels

Keep the seeded area consistently moist until germination occurs. Use a fine mist or a gentle watering can to avoid disturbing the seeds.

Step 7: Thin Seedlings (If Needed)

Once seedlings emerge and grow their first true leaves, thin them out if they appear crowded. This step ensures each seedling has sufficient space to develop properly. Consult the instructions on your seed packet for plant spacing.

Step 8: Mulch the Area (Optional)

Once seeds have germinated, been thinned, and have developed several sets of true leaves, consider applying a thin layer of organic mulch around the seedlings. This will conserve moisture, suppress weeds, and help to maintain an even soil temperature.

When starting large seeds with deep tap roots, sow them directly

How to Direct Sow Large Seeds in the Garden

Direct sowing large seeds in the garden is a simple and efficient way to grow a variety of plants.

Although I generally recommend seed starting in blocks or cell trays and then planting out, species with deep tap roots, hypersensitive roots, or those that grow extremely quickly can be direct sown.

Whether you’re planting beans, squash, or sunflowers, follow these step-by-step instructions to ensure successful direct sowing of large seeds in your garden:

Step 1: Choose the Right Location

Select a sunny location in your garden with well-draining soil. Ensure that the chosen spot provides ample space for the large plants to grow.

If seed starting for climbers or vines, it’s a good idea to install your trellis or support structure before sowing your seeds.

This 1) prevents any damage done to delicate seedlings by trying to install the support after it has started growing. And 2) Allows you to better eyeball plant spacing by using the trellis or support as a measure.

Seed starting at home will save you money in the garden.

Step 2: Prepare the Soil

Clear the area of any weeds, rocks, or debris. Decide where you’ll be planting each seed and cover each location with several inches of compost

If your soil is highly compacted, you can loosen the soil to a depth of about 4-6 inches in each location. We generally recommend no-dig methods and try to avoid disturbing the structure and living organisms below the soil surface.

Step 3: Sow the Large Seeds

Poke a hole to the depth recommended for the seeds and sow them directly into the prepared space.

Step 4: Cover and Firm the Soil

After sowing, cover over with the loose compost you provided. Firm the soil or compost over the seeds gently with your hands.

Step 5: Water the Seeded Area

Water the seeded area thoroughly after planting to help settle the soil around the seeds. Adequate watering is essential for proper germination.

Step 6: Monitor Moisture Levels

Keep the seeded area consistently moist until germination occurs. Regularly check the soil moisture and water as needed, especially during dry spells.

Step 7: Thin Seedlings (If Needed)

Once the large seedlings emerge and grow their first true leaves, thin them out if they are too close together. Thinning allows each seedling to have enough space to develop and access sunlight and nutrients.

Step 8: Feed and Mulch Your Plants

Once plants are a few inches high and have developed several sets of true leaves, you can apply vegetable fertilizer and mulch around the seedlings.

Consider applying a slow-release organic vegetable fertilizer or organic compost to support the growth of your plants. These once-a-month or once-a-season amendments can really save you many hours of hard work in the garden.

Water fertilizer or compost in well after application and then proceed to mulching.

Mulch can help retain moisture and keep the soil cool enough to support the beneficial microbiological organisms that plants need for healthy growth.

Consider straw or hay for mulching vegetable beds.

Wood chips are an excellent mulch for perennial plants, but don’t break down quickly enough for annual plantings and may interfere with your plants in future seasons.

Pale seedlings can mean overwatering or lack of nutrients

Common Problems in Seed Starting, Prevention, and Remedies

Starting seeds can be a rewarding endeavor, but it is not without its challenges. Gardeners may encounter various problems during the seed starting process, leading to germination failure or stunted seedling growth.

Here is a list of common problems that may occur when starting seeds, along with their symptoms and remedies:

1. Problem: Poor Germination

Symptoms: Low percentage of seeds germinating or seeds failing to sprout.

Remedies: Ensure seeds are fresh and not expired. If you decide to use old seed up, double up on the number you plant.

Make sure the temperature is right for your seed type. You can find a chart of optimal temperatures on our website here.

You may have over-covered seeds that require light to germinate. Sometimes, seed packets lie and I’ve seen many that say to plant seeds ½ deep that won’t germinate without sunlight. Do some additional research on your seeds to be sure.

Avoid overwatering. This can cause seeds to rot before they can sprout.

2. Problem: Damping Off

Symptoms: Seedlings appearing weak, wilting, and collapsing at the soil level due to fungal infection.

Remedies: Use sterile potting mix and clean containers.

Improve air circulation around seedlings to reduce humidity.

Avoid overwatering and allow the soil surface to dry between watering.

3. Problem: Leggy Seedlings

Symptoms: Seedlings with elongated and weak stems reaching for light, often resulting from insufficient light or crowded conditions.

Remedies: Provide adequate light to seedlings, either with grow lights or by placing them in a sunny location. Thin out seedlings to allow ample space for each to grow.

In some cases, particularly tomatoes and peppers, you can salvage leggy seedlings by replanting them deeply into a larger container.

Inadequate light leads to leggy seedlings

4. Problem: Seedlings Turning Yellow

Symptoms: Seedlings showing yellowing of leaves, usually due to nutrient deficiencies or overwatering.

Remedies: Although most seeds contain enough nutrients to support the initial growth of the seedlings, you may run into a nutrient deficiency if the seedling is in the cell too long.

You can use some dilute balanced liquid fertilizer when bottom watering.

To prevent this from happening, pot up your seedlings into larger containers sooner than later.

Yellowing may also be caused by overwatering. Bottom water with a very diluted fertilizer and allow the cells or pots surface to dry out before watering again.

5. Problem: Seedlings Growing Slowly

Symptoms: Seedlings not showing significant growth over time, possibly due to poor soil quality or low temperatures.

Remedies: Ensure the growing environment is warm enough to support seedling growth. Add a heat mat or move trays to a warmer location.

6. Problem: Fungal or Bacterial Diseases

Symptoms: Seedlings displaying discoloration, wilting, or lesions caused by fungal or bacterial infections.

Remedies: Remove affected seedlings promptly and destroy them.

Improve air circulation and avoid overcrowding to reduce disease spread. Use sterilized containers and tools.

Often, seed trays can show signs of algae growth on the tops. This is usually caused by exposure to sunlight when damp and is relatively harmless. The green sheen on top of your seed trays is annoying and unsightly, but it’s usually no detriment to the plant.

7. Problem: Insect Pests

Symptoms: Seedlings showing signs of pest infestations, such as chewed leaves or visible insects.

Remedies: Monitor seedlings regularly for pests and take appropriate measures, such as handpicking or using organic insecticides, to manage infestations.

If starting seeds outside, you may even find rodents digging into your seed trays to collect species like sunflowers, melons, or squash seeds. Cover seed trays with sturdy covers at night. You can also move them to a protected spot (like indoors) until they have sprouted to prevent this problem.

Don't crowd your plants when seed starting

8. Problem: Lack of Hardening Off

Symptoms: Seedlings showing shock when transplanted outdoors due to insufficient acclimatization.

Remedies: Gradually expose seedlings to outdoor conditions for a few hours each day over several days before transplanting, a process known as hardening off.

If possible, transplant your young seedling during a cloudy day, especially if there’s rain in the forecast. I find this helps them transition to outdoor garden life much better.

9. Problem: Overcrowding

Symptoms: Seedlings growing closely together, leading to competition for resources and weak growth.

Remedies: It’s tough, but it has to be done. Thin out seedlings to provide adequate space for each plant to grow and develop.

10. Problem: Insufficient Watering

Symptoms: Seedlings showing signs of wilting or dry soil due to inadequate watering.

Remedies: Water seedlings consistently and ensure the soil remains evenly moist without becoming waterlogged.

seed starting in pots is best for large seeds

FAQ

When is the best time to start seeds?

For successful seed starting in gardening Zones 8-12, there are generally two good times to start seeds. The first is four to six weeks before the last frost date in the spring for planting out in February and March. The second is in late summer in July and for planting out in September and October. This will vary depending on whether you’re planting warm season or short season crops.

Why should you start seeds indoors?

Starting seeds indoors in Zones 8-12 offers several benefits. It extends the growing season, giving delicate crops like tomatoes and peppers a head start before planting out. It also provides a controlled environment for germination, out of excessive heat and heavy rainfall.

Where is the best place to start seeds indoors?

In Zones 8-12, where warm and humid conditions prevail, the best location to start seeds indoors is a well-ventilated area with consistent warmth and ample sunlight. Choose a spot that receives abundant natural light or use grow lights. Be cautious not to overheat the seedlings. Adequate airflow is essential to prevent fungal issues, so ensure good ventilation while keeping the humidity in check.

How many seeds per starter pot should you sow?

When seed starting, it’s essential to strike a balance between providing adequate space for each seedling’s growth and maximizing your planting efficiency. Generally, aim to sow 2-3 seeds per starter pot, ensuring a higher likelihood of successful germination. If using old seeds from earlier seasons, consider sowing 3 to 4 seeds. This approach accounts for potential variations in seed viability and helps ensure at least one healthy seedling per pot. Once seedlings develop their first true leaves, you can carefully thin out the weaker seedlings, leaving the strongest ones to continue growing.

How many lumens for seed starting should a grow light have?

When using grow lights for seed starting, it’s important to provide your seedlings with the optimal amount of light to promote healthy growth. For most vegetable and flower seedlings, aim for a grow light that provides around 1000 to 1500 lumens per square foot. This light intensity mimics the brightness of natural sunlight and encourages sturdy stem development and vibrant leaf growth.

When do you begin starting fall seeds in Zones 8-12?

In Zones 8-12, the timing for starting fall seeds varies based on the type of seed you’re growing. In general, you’ll sow warm-season crops in late summer to plant out in the fall. You’ll sow warm-season crops again from late December through January to plant out after your last frost date.

For cool season crops, you can start seeds indoors in late summer and plant out from October through March as the weather allows. Most cool season crops can be planted in Zones 8-12 throughout the winter.

How many hours of light do seeds need to germinate?

Seeds require varying amounts of light for germination, depending on the plant species and its specific light preferences. In general, many seeds benefit from around 12-16 hours of light per day during the germination process. Remember that some seeds require darkness to germinate and should be covered or placed in a dark environment during this phase.

What are the 4 requirements for seed germination?

The four primary requirements for seed germination are water, proper temperature, oxygen, and suitable soil or growing medium. These factors work in conjunction to trigger the biochemical processes necessary for a seed to break dormancy, swell, and initiate growth.

Which seeds need light to germinate?

Seeds that require light for germination include lettuce, spinach, arugula, kale, radish, cilantro, dill, nasturtium, calendula, zinnia, sweet alyssum, and pansy. Providing these seeds with exposure to light during germination is essential for their successful sprouting and subsequent growth.

What not to do when germinating seeds?

When seed starting, it’s important to avoid overwatering, as excessive moisture can lead to fungal growth and rot. Additionally, refrain from planting seeds too deeply, as they may struggle to reach the surface. Avoid using contaminated soil, as it can hinder germination. Finally, placing seeds in an area with insufficient light or incorrect temperature can delay or prevent germination.

How do you know when a seed is germinating?

You can identify germination by observing the emergence of the seedling from the growing medium. As the seed absorbs water and swells, the outer shell cracks, and a tiny shoot, called the radicle, emerges. This initial growth is followed by the emergence of the seedling’s first leaves, called cotyledons.

How do you know if seeds are too old?

Seeds that are too old may exhibit reduced germination rates or fail to germinate altogether. You can assess seed viability by performing a simple germination test. Place a specific number of seeds on a damp paper towel, seal it in a plastic bag, and keep it in a warm location for the recommended time period. Afterward, count the number of seeds that have sprouted. If a significant percentage fails to germinate, it indicates reduced viability.

Which is the best seed starting mix?

We recommend a blend of coconut coir, perlite, compost, and a slow-release fertilizer that contains beneficial mycorrhizal fungi and beneficial bacteria. You can purchase a commercial blend like ProMix, or make your own. Avoid heavy garden soil or potting mixes, as they can impede seedling development.

How do I make my own seed starting mix?

A basic recipe includes mixing together coconut coir and perlite in equal parts. To make a larger batch, use a bucket or large container and thoroughly blend the ingredients until well combined. Optionally, you can add a small amount of finely screened compost or vermicompost for added nutrients. we also recommend adding a slow-release fertilizer for seed starting in small pots or soil blocks where the plants will remain for many weeks before planting out. This DIY mix offers a cost-effective and customizable solution for starting seeds, ensuring a suitable medium for germination and early growth.

What is a good recipe for soil block mix?

Mix the following components thoroughly to create a peat-free soil block mix. Coconut coir serves as an environmentally friendly alternative to peat moss, providing adequate moisture retention and aeration. It also adds structure to the soil block mix to ensure they hold together. Compost adds nutrients to support seedling growth, while vermiculite and perlite contribute to proper drainage and texture. This peat-free mix offers a sustainable option for starting seeds in soil blocks, promoting healthy germination and early development.

  • Coconut Coir: 4 parts
  • Compost: 2 parts
  • Vermiculite or Perlite: 2 part
Posted on

Gulf Coast Gardening: Bougainvillea for Year-Round Vibrant Color in Your Garden

Imperial Delight Bougainvillea

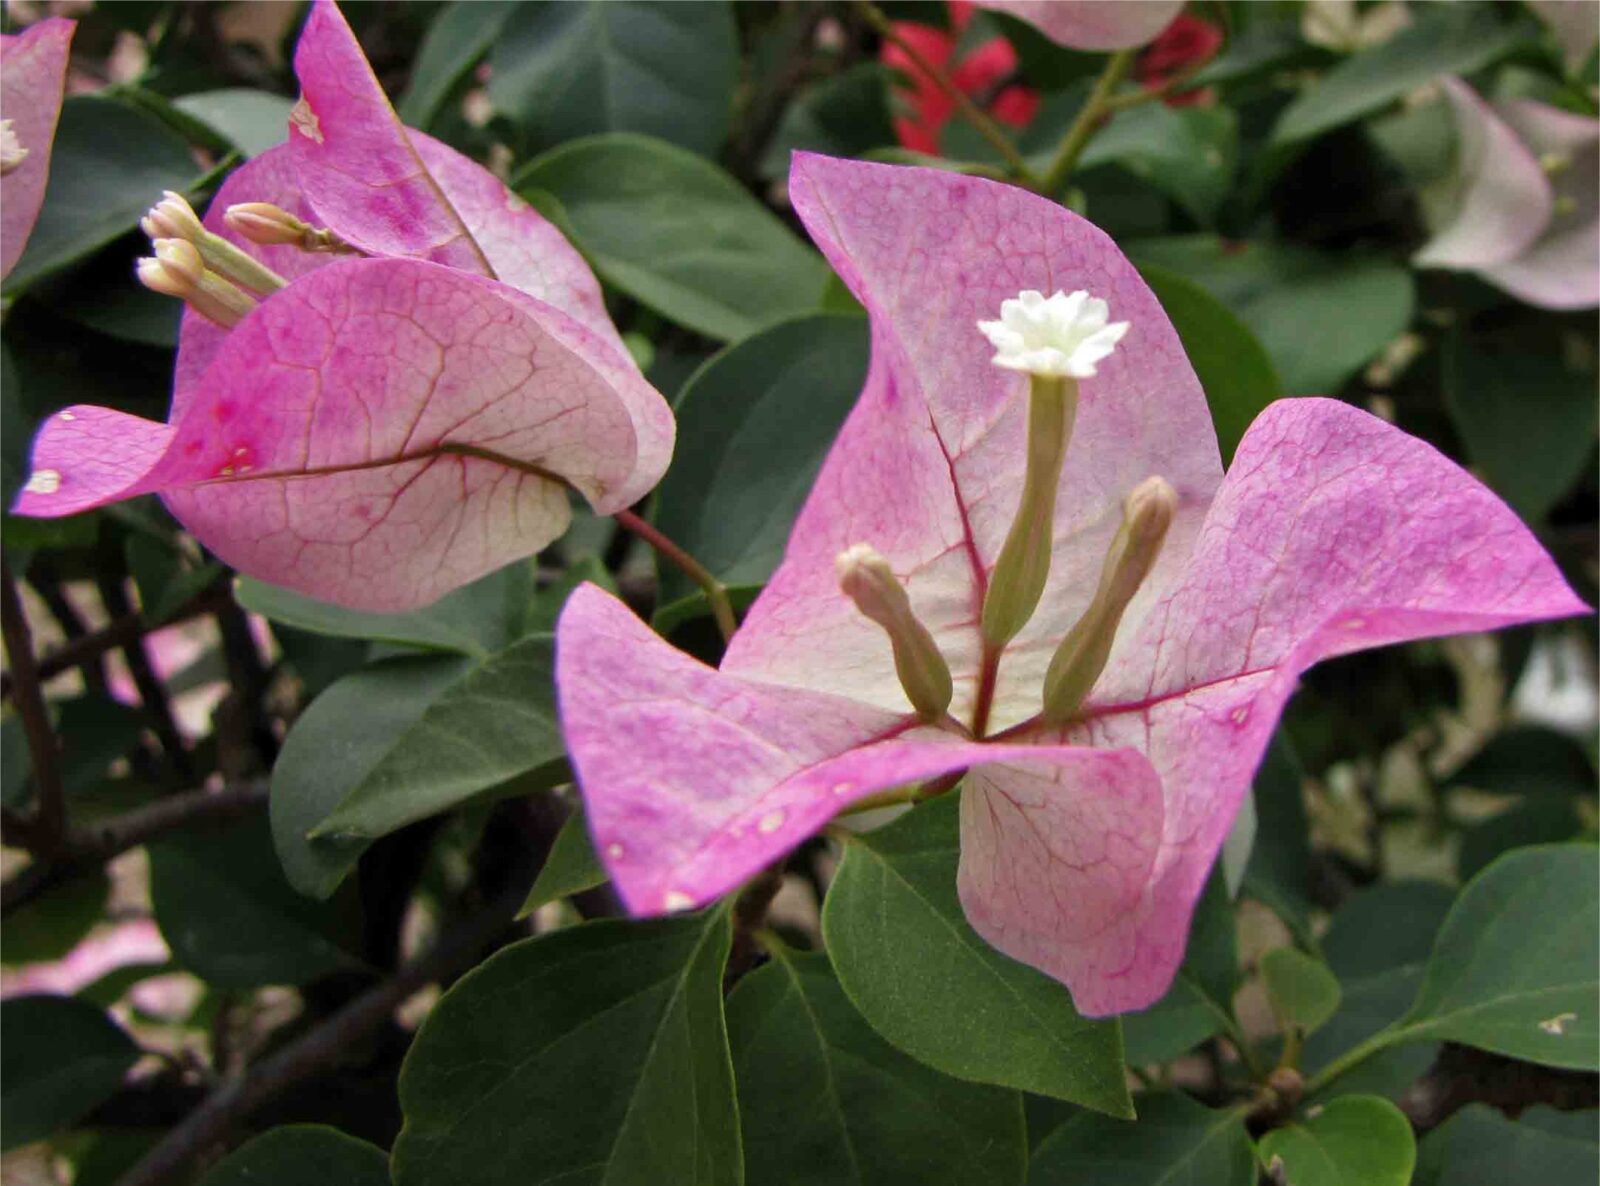
Bougainvillea (pronounced boo-guhn-VIL-yuh) is a stunning and vibrant flowering plant that originates from the tropical and subtropical regions of South America. Named after the French navigator Louis Antoine de Bougainville, who discovered the plant in Brazil during the 18th century, bougainvillea is now widely cultivated for its breathtaking display of color.

Bougainvillea is a vigorous and woody vine that can either climb or sprawl depending on its surroundings. It features glossy green leaves that are ovate in shape and slightly textured. The foliage provides a lush and verdant backdrop to the magnificent flowers that steal the show.

What we often perceive as bougainvillea’s flowers are, in fact, modified leaves called bracts. The true flowers of the plant are small and inconspicuous, nestled within the center of the bracts. These bracts come in a wide range of vibrant colors, including shades of pink, purple, red, orange, yellow, and white, creating a dazzling visual spectacle.

The showy bracts serve an important purpose for bougainvillea. They help attract pollinators like bees and butterflies to the true flowers concealed within. Once pollinated, the true flowers give way to small, inconspicuous fruit that contains tiny seeds.

Bougainvillea is perennial in mild climates, providing years of vibrant beauty to your garden. With proper care and maintenance, it can reach an impressive height of 15 to 30 feet and spread out over a similar distance, creating a sprawling and eye-catching display of color.

Bougainvillea Varieties: Dwarf, Semi-Dwarf, and Extra Large

Bougainvillea cultivars come in various sizes, allowing you to choose the perfect fit for your garden or landscape.

Dwarf Bougainvillea

dwarf bougainvillea
Dwarf Dougainvillea

Dwarf bougainvillea varieties are compact and well-suited for smaller gardens, containers, or areas where space is limited. They offer all the beauty of bougainvillea in a more manageable size range.

Popular Dwarf Bougainvillea Cultivars

‘Helen Johnson’: This dwarf variety features stunning magenta-pink bracts and a compact growth habit. It reaches a height of 3 to 4 feet and is perfect for borders or small spaces.

‘La Jolla’: ‘La Jolla’ displays vibrant pink bracts and has a trailing habit, making it an excellent choice for hanging baskets or cascading over walls. It grows to a height of 2 to 3 feet.

La Jolla Bougainvillea
George Hull, CC BY-SA 2.5, via Wikimedia Commons

‘Pixie Queen’: With its variegated bracts in shades of pink and white, ‘Pixie Queen’ adds a touch of elegance to any garden. It has a bushy growth habit and reaches a height of 2 to 3 feet.

‘Vera Purple’: This dwarf cultivar boasts intense purple bracts and a compact, rounded growth habit. It is well-suited for borders or containers, growing up to 3 to 4 feet in height.

‘Tango’: ‘Tango’ offers vibrant orange bracts and a semi-dwarf growth habit. It is a prolific bloomer and reaches a height of 3 to 4 feet, making it an eye-catching addition to any landscape.

Tango bougainvillea

‘Singapore Pink’: This dwarf variety showcases delicate pink bracts and a low, spreading growth habit. It grows to a height of 2 to 3 feet, making it ideal for ground cover or rock gardens.

Semi-Dwarf Bougainvillea

Semi-dwarf bougainvillea varieties offer a balance between compact size and impressive floral displays. They are well-suited for hedges, trellises, or as standalone specimens.

Popular Semi-Dwarf Bougainvillea Cultivars

‘Torch Red’: With its vibrant red bracts, ‘Torch Red’ adds a fiery splash of color to the garden. It has a semi-dwarf growth habit, reaching a height of 4 to 6 feet, and is perfect for accentuating fences or arbors.

Friedrich Haag, CC BY 3.0, via Wikimedia Commons

‘Double Gold’: This semi-dwarf cultivar features double-layered bracts in a dazzling golden-yellow hue. It has a bushy growth habit and grows to a height of 4 to 5 feet.

‘Raspberry Ice’: ‘Raspberry Ice’ displays striking raspberry-pink bracts with white accents. It has a semi-dwarf growth habit and reaches a height of 4 to 5 feet, making it a standout choice for borders or containers.

Photo by David J. Stang, CC BY-SA 4.0, via Wikimedia Commons

‘California Gold’: With its brilliant golden-yellow bracts, ‘California Gold’ adds a touch of warmth to the garden. It has a semi-dwarf growth habit, growing up to 4 to 6 feet in height.

‘Sundown Orange’: This semi-dwarf variety showcases vibrant orange bracts and a compact growth habit. It reaches a height of 4 to 5 feet, making it an attractive choice for landscaping or container planting.

‘Double Pink’: ‘Double Pink’ offers beautiful double-layered pink bracts and a semi-dwarf growth habit. It grows to a height of 4 to 6 feet and is a charming addition to any garden or patio.

Extra Large Bougainvillea

Extra large bougainvillea varieties make a bold statement in the landscape with their impressive size and profusion of colorful bracts. They are ideal for creating focal points or providing maximum coverage.

Popular Extra Large Bougainvillea Cultivars

‘Spectabilis’: ‘Spectabilis’ showcases stunning magenta bracts and has a vigorous climbing habit. It can reach a towering height of 20 to 30 feet, adding a dramatic touch to arbors or pergolas.

Forest & Kim Starr, CC BY 3.0, via Wikimedia Commons

‘San Diego Red’: This extra large variety features brilliant red bracts and a sprawling growth habit. It can reach a height and spread of 15 to 25 feet, creating a breathtaking display in the landscape.

‘Purple Queen’: ‘Purple Queen’ offers vibrant purple bracts and a climbing habit. It can grow up to 20 to 30 feet in height, making it a striking choice for trellises or fences.

Tomwsulcer, CC0, via Wikimedia Commons

‘Royal Purple’: With its rich purple bracts, ‘Royal Purple’ adds regal beauty to any garden. It has a vigorous climbing habit and can reach a height of 20 to 30 feet.

‘Miss Alice’: This extra large cultivar displays pure white bracts and a sprawling growth habit. It can grow up to 15 to 25 feet in height and spread, creating a stunning display against dark green foliage.

Miss Alice Bougainvillea
Dinesh Valke from Thane, India, CC BY-SA 2.0, via Wikimedia Commons

‘Rosenka’: ‘Rosenka’ offers unique apricot-colored bracts and a climbing habit. It can reach a height and spread of 20 to 30 feet, adding a warm and inviting touch to trellises or walls.

Ideal Growing Conditions for Bougainvillea

Bougainvillea thrives in hot and humid subtropical climates, making it an ideal choice for gardeners in the southern regions of the United States. It flourishes in regions with warm summers and mild winters, where temperatures rarely drop below freezing.

It is most commonly grown in USDA Hardiness Zones 9 through 11, encompassing areas such as the Gulf Coast, Southern Florida, and parts of California and Arizona.

To ensure the successful growth and blooming of your bougainvillea, it’s crucial to provide it with the optimal growing conditions. Here are the key factors to consider:

Type of Climate Required

Temperature

Bougainvillea thrives in temperatures between 60°F (15°C) and 90°F (32°C), with temperatures around 70°F to 85°F (21°C to 29°C) being ideal for growth and blooming.

It is important to protect the plant from freezing temperatures, as they can damage or kill it. If you live in an area prone to frost, consider growing bougainvillea in containers that can be moved indoors during colder months.

Temperature Tolerance

When temperatures consistently drop below 50°F (10°C), bougainvillea’s growth may slow down or temporarily cease. However, it can resume growth when warmer conditions return.

Temperatures below 32°F can cause damage to bougainvillea. Prolonged exposure to freezing temperatures can result in wilting, leaf discoloration, leaf drop, and damage to the stems and branches. In severe cases, it can lead to plant death.

Bougainvillea can tolerate high temperatures, but extreme heat, especially above 100°F, can stress the plant. It may result in wilting, scorched leaves, reduced blooming, and overall decline. Providing shade or ensuring adequate hydration during hot spells can help mitigate the effects of excessive heat.

Free pink flower and window image, public domain spring CC0 photo.

Humidity

Bougainvillea appreciates moderate to high humidity levels, which are typically found in subtropical regions.

If you live in a drier climate, you can increase humidity around the plant by misting it regularly or placing a tray filled with water near the plant to create a humid microclimate.

Sunlight Exposure

Bougainvillea thrives in full sunlight. It requires at least 6 to 8 hours of direct sunlight each day to produce an abundance of colorful bracts. Choose a location in your garden that receives ample sunlight and is not shaded by trees or buildings.

Ensure you plant bougainvillea in a location with maximum exposure to sunlight.

Soil Type

Bougainvillea prefers well-draining soil that is rich in organic matter. Sandy loam or loamy soil is ideal for bougainvillea cultivation. If your soil is heavy or clay-like, consider improving its drainage and fertility by adding compost or well-rotted manure.

Bougainvillea thrives in slightly acidic to neutral soil with a pH range of 6.0 to 7.0. Conduct a soil test to determine the pH of your garden soil. If the pH is outside the preferred range, adjust it by adding amendments.

For increasing acidity, use elemental sulfur, and for increasing alkalinity, add dolomite lime.

When and How to Plant Bougainvillea

The best time to plant bougainvillea in the ground is during the warm months of spring or early summer when the soil has warmed up and all danger of frost has passed. This allows the plant to establish its roots before the colder months arrive.

However, if you live in a region with mild winters, planting can also be done in fall.

Planting Bougainvillea Step-by-Step

When you’re ready to plant your bougainvillea, follow these steps:

Find a Good Location

Choose a location in your garden that receives full sunlight and has well-draining soil. Ensure there is enough space for the bougainvillea to grow and spread comfortably.

Prepare the Soil

Amend the soil by incorporating organic matter such as compost or well-rotted manure. This helps improve soil fertility, drainage, and water-holding capacity. Remove any weeds or debris from the planting area.

Dig the Planting Hole

Dig a hole that is twice as wide and deep as the bougainvillea’s root ball. This allows the roots to spread out easily. Ensure the hole is deep enough to accommodate the entire root system without bending or crowding.

Remove the Plant from its Container

Gently tap the sides of the container to loosen the root ball. Carefully slide the plant out, holding it by the base of the stems.

Planting the Bougainvillea

Place the root ball in the center of the planting hole, ensuring the top of the root ball is level with or slightly above the soil surface.

Backfill the hole with soil, firming it gently around the roots to eliminate air pockets.

Watering and Mulching

After planting, thoroughly water the bougainvillea to settle the soil and encourage root establishment.

Apply a layer of organic mulch, such as wood chips or straw, around the base of the plant, leaving a small gap around the stems to prevent rotting.

Care and Maintenance of Bougainvillea

Once you’ve planted your bougainvillea, you’ll want to make sure it thrives.

Red climbing bougainvillea

Watering Throughout the Year

During the active growing seasons of spring and summer, water bougainvillea deeply and thoroughly, allowing the soil to dry out slightly between waterings. Aim to provide regular, consistent moisture without waterlogging the roots.

Reduce watering frequency during the dormant period around late fall through the winter. Water sparingly, allowing the soil to dry out more between waterings.

However, ensure the plant doesn’t experience prolonged drought stress, especially as temperatures begin to rise in February.

Optimal Fertilizer Composition and Schedule:

Fertilize your bougainvillea according to its stage of development and the needs of the season.

Spring

Use a balanced fertilizer with equal NPK (nitrogen, phosphorus, potassium) ratios or a slightly higher nitrogen content.

Apply the fertilizer every 4 to 6 weeks during the active growing season.

Summer

Switch to a bloom-boosting fertilizer with a higher phosphorus content to promote abundant flowering. Apply every 6 to 8 weeks.

Fall and Winter

Reduce or suspend fertilization during the dormant period. Bougainvillea generally requires less fertilizer during this time.

Follow the instructions on the fertilizer package for specific application rates and guidelines. Then, adjust fertilization based on the plant’s response and the quality of your soil.

Protecting Bougainvillea from Cold

Bougainvillea in snow

Even though we can grow tropical plants, we can still get the occasional cold snap in Florida and in states around the Gulf Coast.

Our normally mild winters can even mean that a cold snap is that much more devastating to plants that aren’t equipped to deal with them.

How you protect your bougainvillea will vary depending on how long the cold snap is predicted to last.

Watering

If you’ve lived in Florida for any length of time, you know how insane our weather can be. In the winter, for example, the temperature during the day could be 85°F and then sink to 38°F during the night, usually with the lowest temperature right before sunrise.

This happens several times a year in Central Florida, sometimes in December, but usually in January and February.

If the forecast is for a brief overnight cold snap, you should water your bougainvillea well during the warmth of the day prior.

The moist ground will store the warmth of the sun during the day, carrying through the night. So, make sure you water as early as possible to make the most of the sunlight.

If the cold period is predicted to last through daylight hours or last for several nights, excess moisture in the soil is a bad thing. So, in that case, do not water your bougainvillea during cold days or when it will be below 40°F for several nights in a row.

Bougainvillea overhanging snowy steps
Sctamar, CC BY-SA 3.0, via Wikimedia Commons

Mulching

Whether your water or not, it’s a good idea to apply a thick layer of organic mulch around the base of the plant, extending it to cover the root zone. This helps insulate the soil and protect the roots from extreme cold.

Covering

Before the arrival of frost or freezing temperatures, cover the bougainvillea plant with a frost blanket or horticultural fabric. Secure the cover to the ground to create a protective barrier against cold winds.

I generally try to cover my plants well before sunset and the warmth of the day fade.

Container Plants

If you have bougainvillea in containers, move them to a sheltered location, such as a garage or greenhouse, during periods of freezing temperatures.

Pruning Bougainvillea for Optimal Growth and Shape

Pruning bougainvillea is essential for maintaining its shape, encouraging healthy growth, and promoting abundant flowering. Here’s a guide on how and when to prune your bougainvillea:

Timing of Pruning:

The best time to prune bougainvillea is during late winter or early spring, just before new growth begins. This timing allows the plant to recover and produce new shoots and blooms during the active growing season. However, minor pruning to remove dead or damaged branches can be done throughout the year. You may also need to prune it to keep it under control.

Tools Needed:

  • Pruning shears or sharp bypass hand pruners
  • Gardening gloves
  • Loppers or a pruning saw for thicker branches (if necessary)
  • Disinfectant solution (such as rubbing alcohol or bleach) to sterilize your pruning tools (before and after use) to prevent the spread of diseases.

The Pruning Process

Pruning bougainvillea while avoiding the thorns.

Follow these steps to prune your bougainvillea effectively:

Step 1: Assess the Plant:

Observe your bougainvillea and identify the branches that need to be pruned. Look for dead, damaged, or diseased branches, as well as any overly long or unruly growth that needs shaping.

Step 2: Prepare Your Tools:

Ensure your pruning tools are clean and sharp. Sterilize them with a disinfectant solution to prevent the spread of diseases from one plant to another.

Step 3: Prune Dead or Damaged Branches:

Start by removing any dead, damaged, or diseased branches. Make clean cuts just above a healthy bud or side branch, using sharp pruning shears. Cut at a slight angle to allow water to drain off the wound.

Step 4: Control the Plant’s Size and Shape:

To maintain the desired size and shape of your bougainvillea, selectively prune long or unruly branches. Identify branches that are extending beyond the desired boundaries or obstructing walkways, fences, or structures. Make pruning cuts just above a bud or side branch, leaving a stub of the branch to promote new growth.

Step 5: Thinning Out the Canopy (Optional)

If your bougainvillea is dense and overcrowded, you may consider thinning out the canopy to improve airflow and light penetration. Remove some of the interior branches to open up the plant and reduce the risk of pests or diseases.

Step 6: Clean Up and Disinfect:

After pruning, gather and remove the pruned branches and debris from the area. Dispose of them properly. Clean and disinfect your pruning tools with a sterilizing solution to prevent the spread of diseases.

Step 7: Post-Pruning Care:

After pruning, water your bougainvillea thoroughly to help it recover and encourage new growth. Apply a balanced fertilizer to provide the necessary nutrients for the plant’s recovery.

Remember, bougainvillea blooms on new growth, so avoid excessive pruning that removes too many potential blooming branches. Pruning should focus on maintaining the plant’s shape, removing dead or damaged branches, and promoting healthy growth.

Propagating Bouganvillea Cheap and Easy

The method works for me, so thanks to David the Good for this video.

Common Pests, Diseases, and Special Care for Bougainvillea

Bougainvillea, like any other plant, can be susceptible to certain pests, diseases, and specific care requirements. Here’s a breakdown of common pests, diseases, and special care for bougainvillea:

Common Bougainvillea Pests

Aphids

Aphids are small, soft-bodied insects that feed on plant sap, causing leaves to curl, yellow, or become distorted. To remedy aphid infestations, you can:

Spray a strong stream of water on the affected plant parts to dislodge the aphids.

Apply insecticidal soap or horticultural oil following the product instructions.

Introduce natural predators like ladybugs or lacewings to control aphid populations.

Caterpillars

Caterpillars, such as the bougainvillea looper or cabbage looper, can chew on leaves, causing significant damage. To remedy caterpillar infestations, you can:

Handpick and remove caterpillars from the plant.

Apply Bacillus thuringiensis (Bt), a biological insecticide that targets caterpillars.

Use insecticidal sprays labeled for caterpillar control, following the product instructions.

Whiteflies

Whiteflies are tiny, sap-sucking insects that cluster on the undersides of leaves, causing yellowing, leaf drop, and a sticky residue called honeydew. To remedy whitefly infestations, you can:

Use yellow sticky traps to capture adult whiteflies.

Spray the affected foliage with insecticidal soap or horticultural oil, ensuring thorough coverage.

Encourage natural predators like parasitic wasps or ladybugs to control whitefly populations.

Common Bougainvillea Diseases

Leaf Spot

Leaf spot diseases, caused by fungi, manifest as dark spots or lesions on the foliage. To remedy leaf spot diseases, you can:

Prune and remove affected plant parts to improve airflow and reduce disease spread.

Apply copper-based fungicides according to the product instructions.

Powdery Mildew

Powdery mildew appears as a white, powdery coating on leaves, stems, and flowers. To remedy powdery mildew, you can:

Prune and thin out the plant to improve airflow.

Apply fungicides labeled for powdery mildew control, following the product instructions.

Root Rot

Root rot is a fungal disease caused by overly wet or poorly draining soil. It leads to root decay, wilting, and overall decline of the plant. To remedy root rot, you can:

Improve soil drainage by amending the soil with organic matter.

Adjust watering practices to avoid waterlogging the roots.

Apply fungicides labeled for root rot control, following the product instructions.

Special Needs and Care for Bougainvillea

Pruning and Training

Regular pruning is essential for maintaining shape, promoting airflow, and removing dead or diseased branches. Train bougainvillea to climb or grow in a desired direction using trellises, fences, or stakes.

Support for Climbing Varieties

If you have climbing varieties, provide proper support structures like trellises, arbors, or wires to guide the vines and prevent damage to nearby structures.

Winter Protection in Colder Zones

In regions with colder winters, protect bougainvillea from freezing temperatures by covering with frost blankets, moving potted plants indoors, or providing a sheltered location.

Landscape Design Ideas and Companion Plants for Bougainvillea

Bougainvillea’s vibrant colors and sprawling growth make it a fantastic addition to any landscape design in subtropical regions. Here are some design ideas and appropriate companion plants to complement bougainvillea.

Design Ideas Using Bougainvillea:

Colorful Fences and Walls

Use bougainvillea to add a splash of color and create a living tapestry along fences or walls. The vibrant bracts will create an eye-catching display and provide a beautiful backdrop for your outdoor space.

Pergolas and Trellises

Train bougainvillea vines to climb and adorn pergolas, trellises, or arbors. The cascading bracts will create a stunning overhead canopy, providing shade and a vibrant atmosphere.

ManuelBarreira (talk · contribs), CC BY-SA 3.0, via Wikimedia Commons

Container Planting

Plant bougainvillea in large containers or pots to add a vibrant focal point to patios, balconies, or entryways. Choose compact or dwarf varieties to keep the plant size manageable and ensure it thrives in the container environment.

Courtyard Gardens

Create a Mediterranean-inspired oasis in your courtyard by incorporating bougainvillea. Use it as a backdrop for a tranquil seating area or plant it in containers for a burst of color amidst lush greenery.

Hedge or Border Planting

For privacy or to define garden boundaries, consider planting bougainvillea as a hedge or border. Prune it regularly to maintain a desired height and shape while enjoying its colorful display.

bougainvillea hedge
Fjmustak, CC BY-SA 4.0, via Wikimedia Commons

Companion Plants for Bougainvillea

Plumbago (Plumbago auriculata):

Plumbago’s delicate blue flowers provide a lovely contrast to the bold colors of bougainvillea. It is a versatile shrub that can be used as a low hedge or ground cover, adding depth and texture to the garden.

Mexican Flame Vine (Senecio confusus):

With its cascading orange or red flowers, Mexican Flame Vine creates a stunning combination when paired with bougainvillea. Allow it to climb or trail through the bougainvillea for a captivating display.

Dinesh Valke from Thane, India, CC BY-SA 2.0, via Wikimedia Commons

Dwarf Bottlebrush (Callistemon spp.):

Dwarf bottlebrush is known for its vibrant, brush-like flowers in shades of red, pink, or yellow. Planted alongside bougainvillea, it adds height variation and attracts pollinators to the garden.

Hibiscus (Hibiscus rosa-sinensis):

Hibiscus and bougainvillea together create a tropical paradise. The large, showy flowers of hibiscus complement the bracts of bougainvillea, enhancing the overall visual impact of the landscape.

Bush Morning Glory (Convolvulus cneorum):

With its silver foliage and delicate white flowers, bush morning glory offers a beautiful contrast to the vibrant bracts of bougainvillea. Plant it as a low-growing ground cover or in containers.

When selecting companion plants for bougainvillea, consider their sunlight, water, and soil requirements to ensure they are compatible. Aim for a harmonious combination that enhances the visual appeal and complements the colors and textures of bougainvillea.

Bougainvillea can be incorporated into various landscape designs, from vibrant walls and fences to container plantings and courtyards. Pairing it with appropriate companion plants adds depth and creates a visually stunning garden.

The Beauty and Versatility of Bougainvillea in Your Garden

Bougainvillea trellis

Bougainvillea, with its vibrant and abundant display of colorful bracts, is a true gem for subtropical gardens in USDA Zones 9 to 11. Its versatility, resilience, and stunning visual appeal make it a cherished addition to any landscape design. Bougainvillea’s ability to thrive in hot and humid climates, coupled with its preference for full sunlight, allows it to create a striking visual impact on walls, fences, trellises, and in containers. Whether used as a focal point, a living tapestry, or a cascading canopy, bougainvillea adds a touch of tropical beauty and splendor to outdoor spaces. With proper care, pruning, and companion planting, bougainvillea can transform your garden into a vibrant paradise, captivating the senses with its vivid colors and exuberant blooms. So, embrace the beauty of bougainvillea and let it infuse your garden with its warmth, charm, and botanical splendor.

FAQ – Frequently Asked Questions About Bougainvillea

Do bougainvillea like acidic soil?

Yes, bougainvillea prefers slightly acidic to neutral soil with a pH range of 6.0 to 7.0.

Do bougainvillea like coffee grounds?

Coffee grounds can be beneficial for bougainvillea as they help to slightly acidify the soil, which is favorable for their growth.

Is bougainvillea poisonous to dogs?

While bougainvillea is generally considered non-toxic to dogs, it’s always best to keep pets from ingesting any part of the plant to avoid potential digestive issues.

Do bougainvillea like sun or shade?

Bougainvillea thrives in full sunlight and requires at least 6 to 8 hours of direct sunlight each day for optimal growth and blooming.

Is bougainvillea better in pots or ground?

Bougainvillea can be grown both in pots and in the ground. However, they require proper care and attention in containers to ensure adequate drainage and regular watering.

How do you keep bougainvillea alive in the winter?

In colder regions, protect bougainvillea from freezing temperatures by covering them with frost blankets, moving potted plants indoors, or providing a sheltered location.

Do bougainvillea bloom year-round?

Bougainvillea typically blooms in cycles, producing vibrant bracts for several months at a time. While they may have intermittent blooms throughout the year, they don’t usually bloom year-round.

Do hummingbirds like bougainvillea?

Yes, hummingbirds are attracted to the bright and showy bracts of bougainvillea, making it a favorite plant to attract these delightful birds to your garden.

Does bougainvillea attract rodents?

Bougainvillea itself does not attract rodents. However, rodents may seek shelter in the dense foliage if the plant is grown against structures or near their nesting areas.

What month is best to plant bougainvillea?

Spring is the ideal time to plant bougainvillea, as the warmer temperatures and longer daylight hours promote healthy root establishment and growth.

Do bougainvillea need lots of water?

Bougainvillea prefers regular watering but should be allowed to dry out slightly between waterings. Avoid overwatering, as it can lead to root rot and other issues.

How do you get bougainvillea to spread?

Bougainvillea naturally spreads through its vining growth habit. You can encourage lateral spreading by pruning and training the plant, or by providing support structures for the vines to grow horizontally.

How do I keep my bougainvillea blooming all summer?

To keep bougainvillea blooming throughout the summer, ensure it receives adequate sunlight, provide regular watering, and fertilize appropriately during the active growing season.

How do you keep bougainvillea bushy?

Regular pruning helps to keep bougainvillea bushy and encourages branching. Prune back long or unruly branches to promote a compact and bushy growth habit.

Do you cut back bougainvillea?

Yes, bougainvillea benefits from regular pruning to maintain its shape, remove dead or diseased branches, and promote new growth. Pruning is typically done in late winter or early spring.

What does an overwatered bougainvillea look like?

An overwatered bougainvillea may exhibit yellowing leaves, wilting, root rot, and a general decline in health. The soil may feel excessively wet or waterlogged.

How often should bougainvillea be trimmed?

Bougainvillea can be trimmed as needed to control its size and shape. Major pruning is typically done once a year in late winter or early spring, but minor pruning for maintenance can be done throughout the year.

Featured Image via Wikimedia 阿橋 HQ, CC BY-SA 2.0, via Wikimedia Commons

Posted on

The Top 7 Florida Gardening YouTube Channels to Watch

Top Florida Gardening YouTube Channels

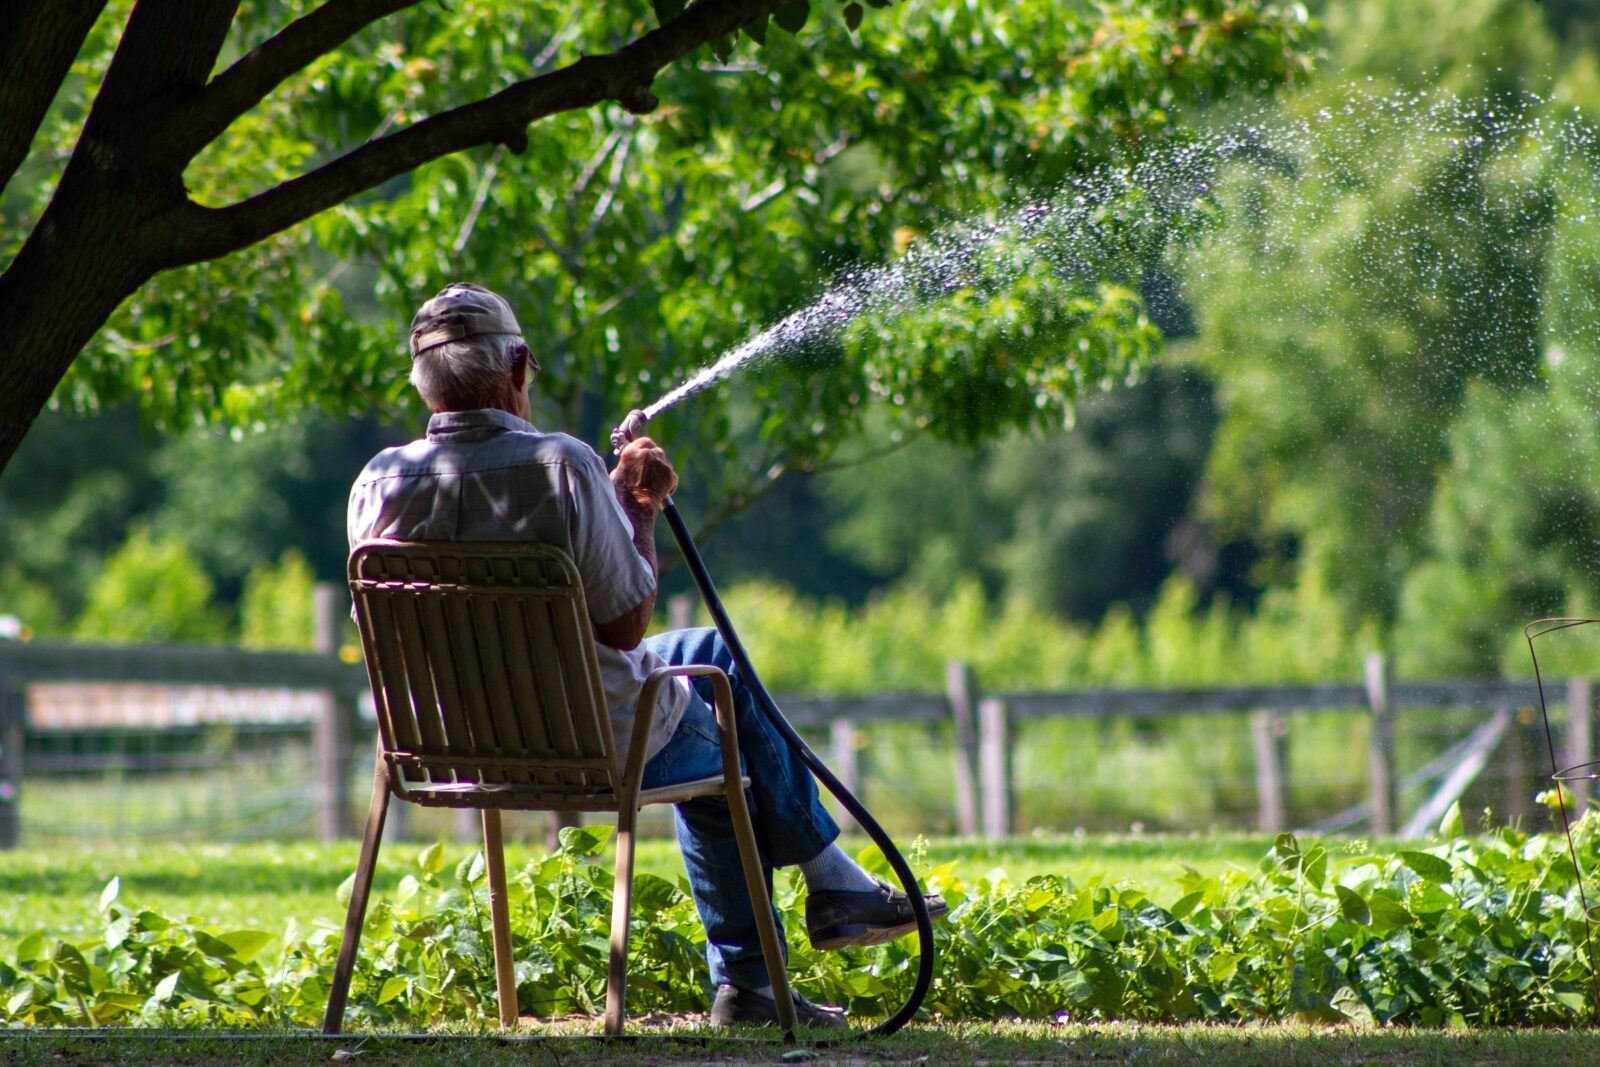
if you’re a Florida gardener, not just any gardening YouTuber will give you the information you need. Florida is so weird, the Farmer’s Almanac print version actually has an entirely separate section devoted to our whacky planting schedule. Gardening in Zones 9-11 is difficult enough, but gardening on the Gulf Coast is just “special.” What you need is Florida gardening YouTube video channels.

Gardening channels on YouTube have really exploded over the last five years. Many of my favorite YouTubers have gone from tiny suburban gardens to purchasing big ol’ homesteads. And I’m guessing that the popularity of their channels has a lot to do with that.

But which Florida gardening YouTube channels are the best? Which of the many garden YouTubers really, TRULY understands the struggle of gardening in the Gulf Coast region?

Because the struggle is real.

While the rest of the country watches their sweet corn reaching for the clouds, we’re hiding inside behind hurricane shutters.

While temperate climate gardeners are dumping zucchini anonymously on doorsteps throughout their neighborhoods, we’re tossing the blackened, shriveled stumps of our failed summer squash into the compost heap.

Again.

Many of us have turned to YouTube for help and instruction.

If you’re new to gardening in Florida or new to YouTube garden videos, I’m happy to help you find the best Florida gardening YouTube channels. As much as I love classic shows like PBS’s Victory Garden and BBC’s Gardeners World, let’s face it: very little of the content on either show has anything to do with Zone 9-11 gardening.

So, Which Are the Best Florida Gardening YouTubers?

The best YouTubers all have their own special gifts and perspectives to add to the conversation. So, I’ll start with my top choices, and you can decide who your own favorites are.

Here is a list of my favorites that I’ve been watching over the last four or five years. While not all of them are specifically for Florida, much of their content is relevant to our interests. They’re on the Gulf Coast or garden in a subtropical climate.

7. Wild Floridian

I can’t believe it took me so long to find “Wild Floridian” on YouTube. After all, like me, the presenter is in Zone 10A, and I think she lives a few miles away. So, naturally, she’s a great source of super-local information for me and anyone else living in Central Florida along the coast.

Jacqueline focuses a lot on gardening for pollinators, so she has tons of videos about native Florida plants. And her extensive knowledge isn’t just academic. Her videos are a serious deep-dive demonstration of how to use them in your landscape.

She’s only been on YouTube since 2019, but it’s obvious that she knows a lot about gardening in this region. She’s my top choice when it comes to information on gardening in Florida for wildlife.

6. The Urban Harvest

Elise of Urban Harvest in the Tampa Bay area knows what she’s talking about. While her YouTube channel doesn’t offer a plethora of videos, she also offers more information on her website.

She also has a seed club that sends you seeds for plants that are timed right for our unusual growing cycles. She also offers classes on garden planning, composting, and other topics.

Elise is one of the few Florida gardening YouTubers that really understands how to work with our wonky seasons and unique (i.e. humid) conditions. She’s also extremely knowledgeable about those little-known alternative vegetables and herbs that grow easily here.

When I first reviewed The Urban Harvest on this blog, Elise only had a few dozen videos on YouTube. Now, she has over 100. Most are short and to the point, which I think is a positive attribute when I’m looking for information.

5. Scott Head / Black Gumbo

Sometimes, the best Florida gardening YouTube channels aren’t run by Floridians. In this case, Scott Head lives in Coastal Texas, along the Gulf, in Zone 9a. So, he has a good idea of what kind of climate and growing calendar we use in Florida.

You’ll find many seasonal videos covering all things edible in the garden, plus some great instructionals on how to cook those things. His blog goes back even further, should you prefer reading to viewing. Sometimes, you just need the deets and don’t have time for chit-chat or garden tours.

He offers an extensive library of information videos about Southern gardening, cooking, and even preserving food. Extra credit for backyard chicken videos.

Southerners are pretty laid back, and sometimes Scott can be a bit too laid back if you’re in a hurry to get answers. But honestly, it’s a nice change of pace from some of the more frantic garden YouTubers I’ve seen.

4. The Millenial Gardener

Another one of my favorite not-Florida gardening YouTube channels with useful info. This YouTuber (can’t find his name anywhere) lives and gardens in 8a on the coast of North Carolina, so definitely subtropical, and definitely a hot & steamy Southern climate.

You’ll certainly learn a lot on this channel. The Millenial Gardener offers tons of tips and hacks for dealing with the downside of gardening in the South. Hacks for heat, humidity, bugs, and disease. His presentation style is simple and scientific, with demonstrations and explanations of how and why they work.

I’ve tried a few of his trick over the last year or two, and every single one has been a winner.

3. Pete Kanaris / GreenDreamsTV

Pete’s nursery and landscaping service, GreenDreams, sits north of Tampa. Along with an extensive array of edible and permaculture-friendly plants, GreenDreams also offers design and installation services.

However, the best thing about Pete’s YouTube channel is that you’ll become inspired. Pete shares his experience of subtropical and tropical edible plants and explains their unique flavors and growing needs. You’re going to want half a dozen of whatever he’s talking about by the time the video is over.

Pete’s a professional plantsman with specialized knowledge of unique and unusual edible and beneficial plants for a Florida landscape. Probably the most knowledgeable Florida gardening YouTube channel you’ll find.

However, you won’t find much about growing the common zucchini on Pete’s channel, although occasionally, he’ll visit with a market gardener, Joe Kowaleski, who grows them. The two have teamed up to produce a vegetable garden masterclass, but it’s pretty expensive unless you’re going pro.

2. Mark Valencia / Self-Sufficient Me

Another great Florida gardening YouTube channel that isn’t filmed in Florida at all — not even close! Mark’s a stay-at-home dad from Australia. But even though he gardens on the other side of the planet, he also gardens in a subtropical climate. Many of the edible fruits and veg you’ll see him plant are the same ones that grow here in Florida.

And believe it or not, he’s got even more intimidating pests than we have!

Mark’s website also features a lot of great information if you’d prefer to read up. He also has an active user forum for sharing information with other gardeners.

Mark’s super knowledgeable about growing in a subtropical and tropical climate without being too academic or pedantic. Mark is as entertaining to watch as he is informative. His relaxed and somewhat hokey style is just what’s called for if you need low-stress gardening entertainment.

Keep in mind that, even though Mark’s climate is very similar to ours, it’s still on the other side of the planet. That means that if you want information for our current season, you need to search back on his channel about six months to find the relevant information.

1. David the Good (Goodman)

I’ve been reading David’s Survival Gardener blog for several years and have even purchased many of his Florida-specific gardening books. But it took the pandemic for me to discover that he also has a YouTube channel. (Granted, it took the pandemic to get me back to YouTube after Vevo took over music videos.)

David’s irreverent humor is obvious in his written work, and it carries over into his videos. His specialty is “survival gardening,” which we can assume means information for preppers when the SHTF. And although he does provide a lot of good prepper info, it’s also excellent information for those of us who simply want to be more sustainable. Sustainable is better for the earth, and it’s cheaper, too. What’s not to love?

Because of his many years of experience, wry style, and deep dives into growing on the cheap (and natural), David gets my vote as the single best Florida gardening YouTube channel to watch. Even though he now lives in Alabama.

David is fun to watch. He provides plenty of actionable information for any type of vegetable gardener, but his wit is much appreciated. His gardening experiments are especially helpful. He always seems to have plenty of land to play with new methods and new crops.

Who Are Your Favorites?

Those are my top picks for the best Florida gardening YouTube channels to watch. More specifically, they’re my top five picks for Florida gardeners, since not all of the Tubers involved are in Florida.

If you have a favorite Florida-specific gardening channel on YouTube, please let me know. I’m always interested to see what else is available on the platform.

Posted on 3 Comments

Florida Gardening: What to Plant in July

Vegetables and flowers to plant in July in Florida, Louisiana, and Texas

If you’ve been paying attention to the weather forecast, it’s likely that the last thing on your mind is what to plant in July in Florida. The heat indexes have easily been in the triple digits, and the rainfall reports are way down.

The good news is that if you’re just as addicted to gardening as I am, there are a few things you can do to feed that urge, even in all this heat.

That’s right, Florida gardeners — it’s July! It’s not time to get back into the garden quite yet, but it IS time to start collecting supplies and sowing seeds indoors and under cover.

It’s time to get ready for the fall garden. Start stocking up on your favorite seeds and get cracking. It’s go time.

It’s Time to Get Seeding!

We had a ridiculously cold winter and a frighteningly dry spring. It’s even been a dry summer.

While you may have given up on your tomatoes months ago, you can certainly try again now.

While you can grow nearly anything between September and December in Florida (at least Central and South Florida), the time to start long-season crops is right now.

Tomato Time

Start tomato seeds in mid-July through Mid August in order to plant out into the garden or containers in September.

You’ll want to be sure that the temperatures have dropped low enough that tomatoes can flower and form fruit, so keep an eye on the weather.

The best way to be ready to have well-developed plants to add to the garden as early as feasible is to start them indoors in July.

You can grow your seedlings under cover and pot them up as they grow for up to three months if necessary. In containers, you can better control their exposure to scalding sun and downpouring rains.

We’ll be selling a new line of vegetable starters suited for Florida gardens in our nursery. If you’re not nearby, we invite you to check out our seeds for sale. We’ve curated the best varieties for the hot & humid Southeastern states, Gulf Coast region, and blistering hot Southwest garden.

And all of our tomato seeds come with a free pack of companion French Marigolds, because we know the tragedy that is root knot nematodes.

Peppers

Everyone loves peppers because they’re easy to grow, come in a wide variety of colors, and have different flavor profiles for a range worldwide cusines.

But boy, can they be lazy.

Peppers can take forever to take off. I don’t know how many times I’ve stared pointedly at cell trays of peppers wondering whether to even bother misting them after two weeks.

Because they do take some time to get going, start them now so you’ll have time to plant them out as early as possible.

They don’t like the cold at all, so if we get another chilly December, it will be nice to get some sweet bells before then.

Check out our California Wonder pepper seeds to plant in July in soil blocks or cells.

Protecting Your Seedlings

Sowing under cover in Florida isn’t an issue of protecting delicate seedlings from the cold. Here, it’s a matter of preventing them from getting washed out by heavy rainstorms.

Starting seeds out of the elements can help keep them from burning up when the heat index is in the triple digits and even your hot peppers are getting scalded.

Whether you start them on a patio, lanai, or indoors, make sure they get plenty of light once the seeds germinate.

Since the long-season peppers and tomatoes like to germinate in warm temperatures, keep your seed starting trays somewhere where they’ll stay at a minimum of 75°F.

They’ll also need some airflow, which not only reduces the chance of dampening off but also stimulates the growth of strong, sturdy stems.

What Else to Plant in July in Florida?

Along with starting your Fall crops by seed, there are also a few heat-loving veggies you can direct sow. Summer is great for planting Okra and Southern Peas. If you’re not a big fan of black-eyed peas or cowpeas, you can also sow them as cover crops to improve your soil for fall planting out.

If you’ve already sown or purchased starts of tropical vegetables or Mediterranean herbs, you can add them to your garden. You’ll find exotic veggies like Okinawa spinach or Longevity spinach at many Florida nurseries. We sell Okinawa spinach starts too.

Make sure your Mediterranean herbs have plenty of drainage, as they can get root rot from our persistent (and seemingly unending) rainfall.

And don’t forget to plant flowers! Many annual flowers you can add to the garden will attract pollinators and beneficial insects that help nurture and protect your crops. Some will grow and bloom in just 60 to 75 days. Quick-growing annual flowers add beauty and diversity to your garden, and many provide critical root exudates for your soil.

Winter Florida Tomatoes
Start your broccoli and tomato plants in late July in Central and South Florida.

Here’s what you can start sowing in July in Florida, as well as other Gulf Coast states in the U.S>

South Florida (Zones 10 to 11)

If you’re in South Florida, and some parts of coastal Central Florida, the weather is steaming, even dangerous.

However, it changes fast, so it’s a good idea to be ready with healthy vegetable plants starts so you’re ready to plant out in September.

Start under cover (plant out in 6 to 8 weeks)

  • Broccoli
  • Collards
  • Eggplants
  • Peppers, sweet and hot
  • Tomatoes

Direct sow in the garden

  • Malabar Spinach
  • Okra
  • Pumpkins
  • Roselle
  • Southern Peas

Veggie starts to plant out now

  • Boniato slips
  • Chaya
  • Longevity spinach
  • Mint
  • Okinawa spinach
  • Oregano
  • Sweet potato slips

Flowers to plant in July

Central Florida (Zone 9)

July in Central Florida is still the height of summer, so make sure you keep your delicate seedlings protected from rainstorms and sunscald.

However, it’s also a good time to start seeds for those fall vegetables that can benefit from time to mature before planting out.

Start under cover (plant out in 6 to 8 weeks)

  • Brocolli
  • Collards
  • Eggplant
  • Peppers, sweet and hot
  • Tomatoes

Direct sow in the garden

  • Malabar spinach
  • Okra
  • Pumpkins
  • Roselle

Veggie starts to plant out now

  • Boniato slips
  • Chaya
  • Katuk
  • Longevity spinach
  • Okinawa spinach
  • Rosemary
  • Sweet potato slips

Flowers to plant in July

Coleus is suitable to plant in July in Florida
Coleus is a beautiful addition to your garden to plant in July

North Florida (Zone 8)

While the gardening schedule in North Florida is more similar to the one for the rest of the country, July is not the time to change allegiances.

However, if you live in the northern part of the Sunshine State, that time is soon. So, you’re safe to start more of your Fall veggies in July.

Start under cover (plant out in 6 to 8 weeks)

  • Broccoli
  • Chinese cabbage
  • Chives
  • Cucumbers
  • Peppers
  • Tomatoes
  • Winter squash

Direct sow in the garden

  • Cucumbers
  • Pumpkins
  • Roselle
  • Southern peas

Veggie starts to plant out now

  • Chaya
  • Katuk
  • Longevity spinach
  • Okinawa spinach
  • Sweet potato slips

Flowers to plant in July

  • Bee balm
  • Bulbine
  • Celosia
  • Coleus
  • Gaillardia
  • Gladiolas
  • Gomphrena
  • Impatiens
  • Kalanchoe
  • Pentas
  • Scarlet Sage
  • Society garlic
  • Vinca
  • Zinnias
Scarlet Sage loves the heat and will draw in bees and hummingbirds to your garden.

Pace Yourself When Gardening in Florida in July

Don’t try to start everything at once. Remember, it’s still very hot out there, and it looks like it will stay dry. So, no regular summer storms to cool things off a bit. There’s still a risk of heat exhaustion and skin damage from UV rays.

The wonderful thing about gardening in Florida is our mild autumn and the length of our growing season. Start with vegetables that take the longest time to mature, such as tomatoes and peppers. In Central and South Florida, you can usually plant these out as late as October and overwinter them by covering them on cold nights.

I’m never happy to see the days get shorter, but I’m always excited for the Fall gardening season. To make the most of it, you can get many of your vegetables and flowers started in July.

Happy gardening.

Posted on

Perpetual Spinach Chard: Heat-Tolerant Greens for Subtropical Gardens

perpetual spinach chard

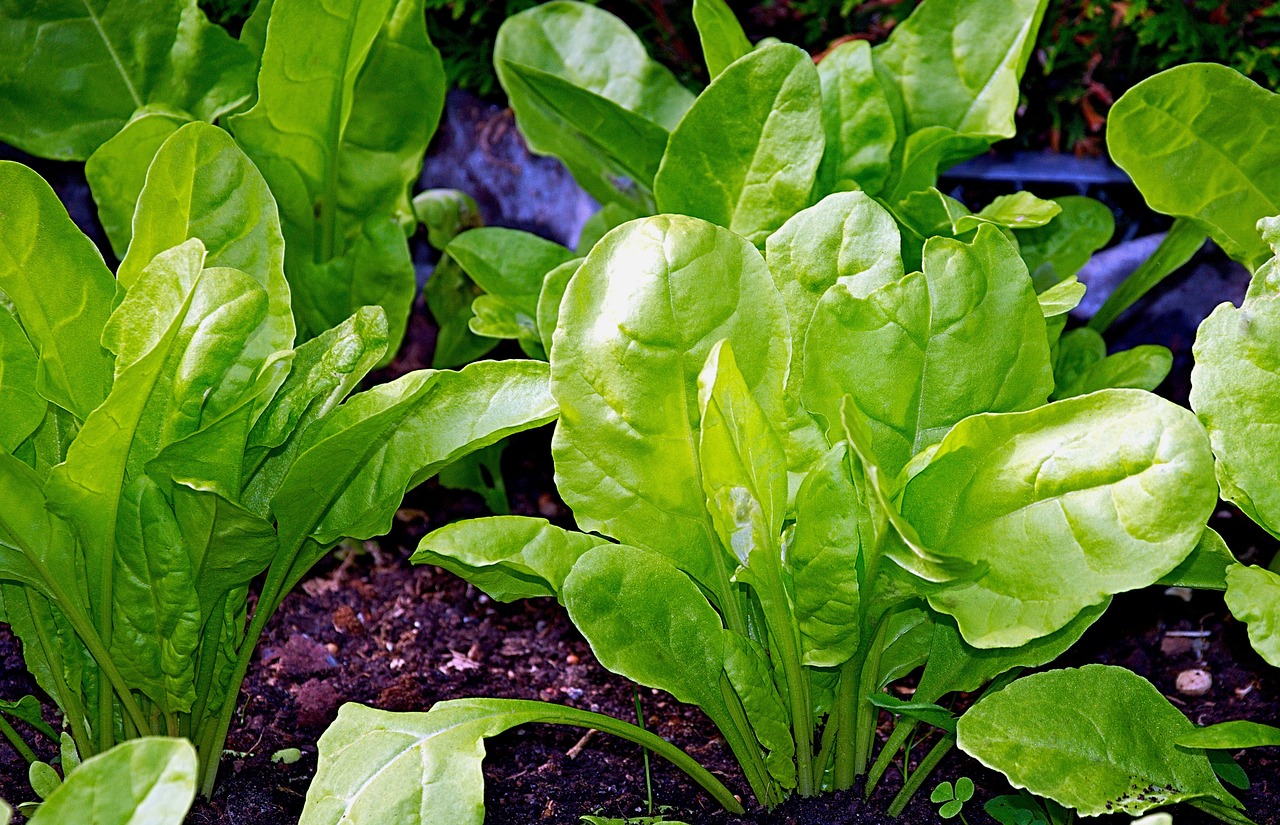
Perpetual spinach chard is a rare leafy vegetable that thrives in subtropical climates. With its rich heritage and impressive adaptability, this hardy plant is a must-have for gardeners residing in warmer zones 9 through 11.

Perpetual spinach chard, scientifically known as Beta vulgaris subsp. cicla var. cicla ‘Perpetual Spinach’, belongs to the beet family. It is believed to have originated in the Mediterranean region, where it was cultivated for centuries. This versatile vegetable has a long history of culinary use, with its origins dating back to ancient Greek and Roman times.

Perpetual Spinach Chard Plant Details

Perpetual spinach chard features large, tender leaves that are glossy and dark green, similar to true spinach but with a slightly thicker texture. The leaves grow on sturdy, succulent stalks.

The plant has a biennial growth habit, although it is often cultivated as an annual in cooler climates. It typically reaches maturity within 55 to 60 days from sowing. When fully grown, this leafy vegetable forms a compact rosette of lush foliage, reaching a height of about 12 to 18 inches and spreading approximately 12 inches in width. Its compact size makes it an excellent choice for container gardening as well.

Where and When to Grow Perpetual Spinach

For gardeners residing in the U.S. perpetual spinach chard thrives in subtropical regions with warmer climates. Specifically, it performs exceptionally well in USDA Hardiness Zones 9 through 11. The milder winters and longer growing seasons found in these areas create the perfect conditions for this robust leafy green.

perpetual spinach in the garden

Optimal Growing Conditions for Perpetual Spinach Chard

For the best results and the most abundant harvest, keep the following factors in mind.

Temperature

Perpetual spinach chard thrives in moderate temperatures, preferring a range between 60°F and 80°F. However, it is very heat tolerant and will tolerate cold snaps down to 32°F. Growth will slow during extreme heat and cold.

Humidity

The plant prefers moderate humidity levels. While it can tolerate higher humidity, it is important to provide good air circulation to prevent fungal diseases.

Sunlight

Perpetual spinach chard requires full sun to partial shade, with a minimum of 4 to 6 hours of direct sunlight each day. In hotter regions, providing some afternoon shade can help prevent wilting or scorching of the leaves. It’s suitable for shady patches of the garden in subtropical zones.

Soil Type

It thrives in well-drained, fertile soil rich in organic matter. It prefers a slightly acidic to neutral pH level between 6.0 and 7.0. Amending the soil with compost or well-rotted manure before planting will help provide the necessary nutrients and improve soil structure.

Buy seeds

Planting Times

Since perpetual chard acts as a perennial edible plant in subtropical zones, you can plant it nearly any time of year. However, avoid planting out during the hottest or coldest times.

For spring planting, start indoors up to 8 weeks before the last frost date and plant out once that date has passed.

In the summer or fall, start seeds indoors, and plant out once the plant has fully developed (about 8 weeks). For best cold resilience, sow and establish at least one month before the first frost date.

Starting Perpetual Spinach Chard Seeds

We recommend starting perpetual chard seeds in cell trays or soil blocks. This allows you to plant out a healthy, well-developed young plant that is more resistant to pests and disease.

  • Fill cell trays or soil blocks with a high-quality seed-starting mix, moistening it slightly before planting.
  • Sow the seeds about ¼ to ½ inch deep.
  • Place the trays or blocks in a warm location with temperatures around 70°F to 75°F.
  • Maintain consistent moisture by misting the soil surface or using a bottom-watering technique.
  • Germination typically occurs within 7 to 14 days.

Once the seedlings have developed their second set of true leaves, you can transplant them into the garden. However, we recommend planting out once the plant is 6” and has developed several sets of true leaves. This ensures it will better survive transplant shock or environmental pressures.

Transplanting Perpetual Spinach Chard

Once you have healthy young seedlings, you’ll want to transplant them into your garden or into a larger container.

Into Garden Beds:

  1. Choose a well-prepared garden bed with loose, amended soil.
  2. Dig holes that are slightly larger than the root ball of the seedling.
  3. Gently remove the seedlings from the module cell or soil block tray, taking care not to damage the roots.
  4. Place the seedlings into the holes and backfill with soil, firming it gently around the base of the plants.
  5. Space the plants 8 to 12 inches (20 to 30 cm) apart to allow sufficient room for growth.
  6. Water the newly transplanted seedlings thoroughly to help them establish.

Into Containers:

Select containers that are at least 6 to 8 inches deep to accommodate the root system.

  1. Fill the containers with a well-draining potting mix, leaving about an inch of space below the rim.
  2. Gently remove the seedlings from the cell trays or soil block trays, being careful not to disturb the roots.
  3. Place the seedlings in the center of each container and fill in the remaining space with potting mix.
  4. Water the containers thoroughly until excess water drains from the bottom.

Temp Tolerance for Perpetual Spinach

Perpetual chard may require some extra care when the weather is extreme.

Protect from Excessive Heat

High temperatures above 95°F can cause the leaves to wilt, scorch, and lose flavor. Providing shade or mulching can help protect the plants during extreme heat.

Protection from Cold

To protect perpetual chard from a deep cold snap, apply a layer of mulch around the base of the plants to insulate the roots and conserve moisture. Cover the plants with row covers or frost blankets during freezing temperatures.

Watering Schedule

During the winter and spring, water the plants deeply once or twice a week, ensuring the soil remains consistently moist but not waterlogged.

During the summer and fall, water as needed to provide moisture if it doesn’t rain adequately.

Fertilizer Composition and Schedule

Prior to planting, incorporate compost or well-rotted manure into the soil for nutrient enrichment.

During the growing season, apply a balanced organic fertilizer or a slow-release granular fertilizer according to the package instructions every 4 to 6 weeks.

Avoid excessive nitrogen fertilization, as it can promote leafy growth at the expense of root development. Opt for a balanced fertilizer instead.

Common Pests

Perpetual spinach chard may be subject to a few pests.

Aphids: Use a strong blast of water or insecticidal soap to control aphid infestations.

Slugs and Snails: We recommend Sluggo baits, which are very effective, very affordable, and certified OMRI for organic use.

Leaf Miners: Remove infested leaves and destroy them to reduce leaf miner populations.

Caterpillars: Handpick caterpillars or use organic insecticides labeled for vegetable use. We recommend products containing a naturally occurring bacteria called Bacillus thuringiensis (or bt for short), such as Thuricide.

Similar products that contain Spinosad are also organic and are affective against a wider range of pest insects, including aphids. Monterey’s Spinosad is an excellent choice.

Common Diseases

Downy Mildew: Ensure good air circulation, avoid overhead watering, and apply appropriate fungicides if necessary.

Leaf Spot: Remove affected leaves and practice good sanitation to prevent the spread of the disease.

For significant infections, we recommend applying an organic copper spray after removing the affected foliage.

Powdery Mildew: Improve air circulation, avoid overhead watering, and apply fungicides labeled for powdery mildew control. Apply a mixture of 8 Tbs of household hydrogen peroxide (3%) mixed with one gallon of water with a sprayer every three days for a week or two for an inexpensive organic fungicide against powdery mildew.

Regularly monitor your plants for any signs of pests or diseases and take prompt action to prevent damage or spread.

Special Needs and Care for Perpetual Spinach Chard

Thinning: When sowing directly, think seedlings when they reach a height of about 2 to 3 inches to ensure proper spacing between plants. Remove the weaker seedlings, leaving the healthiest and strongest ones to grow. These plants grow best when spaced at around 12”.

Mulching: Apply a layer of organic mulch around the base of the plants to help conserve moisture, suppress weed growth, and regulate soil temperature.

Companion Plants for Perpetual Spinach

Perpetual spinach chard can benefit from companion planting, which involves growing compatible plants in close proximity to enhance growth, deter pests, and promote overall garden health. Here are some suitable companion plants for perpetual chard:

Herbs

Plant aromatic herbs like basil, dill, parsley, and cilantro near perpetual spinach chard to repel pests and attract beneficial insects.

Nasturtiums

Nasturtiums serve as sacrificial plants, attracting pests like aphids away from perpetual chard.

Harvesting Perpetual Spinach

Regularly harvest outer leaves when they reach a size of about 6 to 8 inches long. This will encourage continuous growth and prevent the plants from bolting.

If the plants start to bolt (produce flower stalks), it is best to remove them to maintain quality. Alternatively, you can allow them to flower for your bee population and to collect seeds once matured.

Perpetual chard can be harvested as soon as the outer leaves reach a desirable size. Here’s how to harvest:

  • Select the outer leaves, starting with the largest ones, leaving the smaller inner leaves to continue growing.
  • Use a sharp knife or scissors to cut the leaves off at the base, or you can gently twist and pull them from the stem.
  • Harvest regularly to encourage new leaf growth and a continuous harvest throughout the growing season.

Cooking with Perpetual Spinach

Perpetual spinach chard is a versatile leafy green that can be enjoyed in various culinary creations. Here are some cooking and meal ideas:

Fresh Salads

Use young and tender leaves as a nutritious base for salads. Mix with other greens, add your favorite toppings, and dress with a light vinaigrette.

Sautéed or Stir-Fried

Heat olive oil or butter in a pan, add chopped leaves, and sauté with garlic, onions, or other vegetables for a flavorful side dish. Stir-frying with soy sauce and sesame oil also creates a delicious Asian-inspired dish.

Quiches and Frittatas

Add cooked and chopped leaves to quiches, frittatas, or egg muffins for a nutrient-packed and flavorful meal.

Soups and Stews

Incorporate into soups, stews, or hearty winter dishes for added nutrition and a vibrant green color.

Wraps and Sandwiches

Use large perpetual spinach chard leaves as a substitute for tortillas or bread in wraps and sandwiches for a healthy and low-carb option.

Experiment with different recipes and cooking techniques to make the most of the versatile chard in your culinary endeavors. Enjoy the fresh and vibrant flavors it brings to your meals!

Your Subtropical Garden Needs Perpetual Spinach Chard

Perpetual chard is a versatile and visually appealing addition to subtropical gardens in the United States. Its origins in the Mediterranean region and its ability to flourish in warmer climates make it an ideal choice for gardeners in USDA Hardiness Zones 9 through 11.

Whether used as an ornamental plant or harvested as a nutritious leafy green, perpetual spinach chard offers gardeners a delightful and productive gardening experience.

You can purchase seeds for perpetual spinach chard from our website.

FAQ – Frequently Asked Questions About Growing and Using Perpetual Spinach

Why is it called perpetual spinach?

Perpetual spinach got its name because it produces a continuous harvest of spinach-like leaves throughout the growing season.

What are some perpetual spinach chard benefits?

Perpetual chard is packed with vitamins, minerals, and antioxidants, supports immune health, promotes digestion, and provides essential nutrients.

What is the difference between spinach and perpetual spinach?

It has thicker leaves and sturdier stalks compared to true spinach. It is much more heat tolerant and tends to have a longer growing season.

Does perpetual spinach taste like spinach?

Yes, it has a mild, slightly sweet taste similar to true spinach but with a heartier texture.

Can you eat perpetual spinach stalks?

Yes, the succulent stalks are edible and can be enjoyed in various culinary preparations.

Is perpetual spinach the same as chard?

Yes, perpetual spinach is a type of chard, specifically a variety that resembles and tastes like true spinach.

What is another name for perpetual spinach?

Another name for perpetual spinach is “leaf beet.”

What grows well with perpetual spinach?

It grows well with herbs like basil and dill, brassicas like broccoli, and beans.

How do you cook perpetual spinach?

You can cook it by sautéing, stir-frying, adding to soups or stews, or using it raw in salads and wraps.

How long will perpetual spinach last?

With regular harvesting and proper care, you’ll get a continuous harvest for several months. In subtropical regions with mild winters, it will easily last for a year or more.

What is perpetual spinach good for?

It’s good for adding nutrition to meals, supporting overall health, and providing a versatile leafy green option in climates that are too hot to grow traditional salad greens.

How do you maintain perpetual spinach?

Maintain the plant by ensuring consistent moisture, proper spacing, regular harvesting, and protecting from extreme temperatures.

Where do you cut perpetual spinach?

When harvesting, cut the outer leaves close to the base of the plant, leaving the inner leaves to continue growing.

What does perpetual spinach taste like?

It has a mild, slightly sweet taste with a hint of nuttiness.

Is perpetual spinach the same as New Zealand spinach?

No, perpetual spinach and New Zealand spinach are different plants, although they are both leafy greens commonly used as spinach alternatives.

Posted on

Gulf Coast Gardening: Duranta Erecta’s Tropical Splendor

Duranta erecta with butterfly

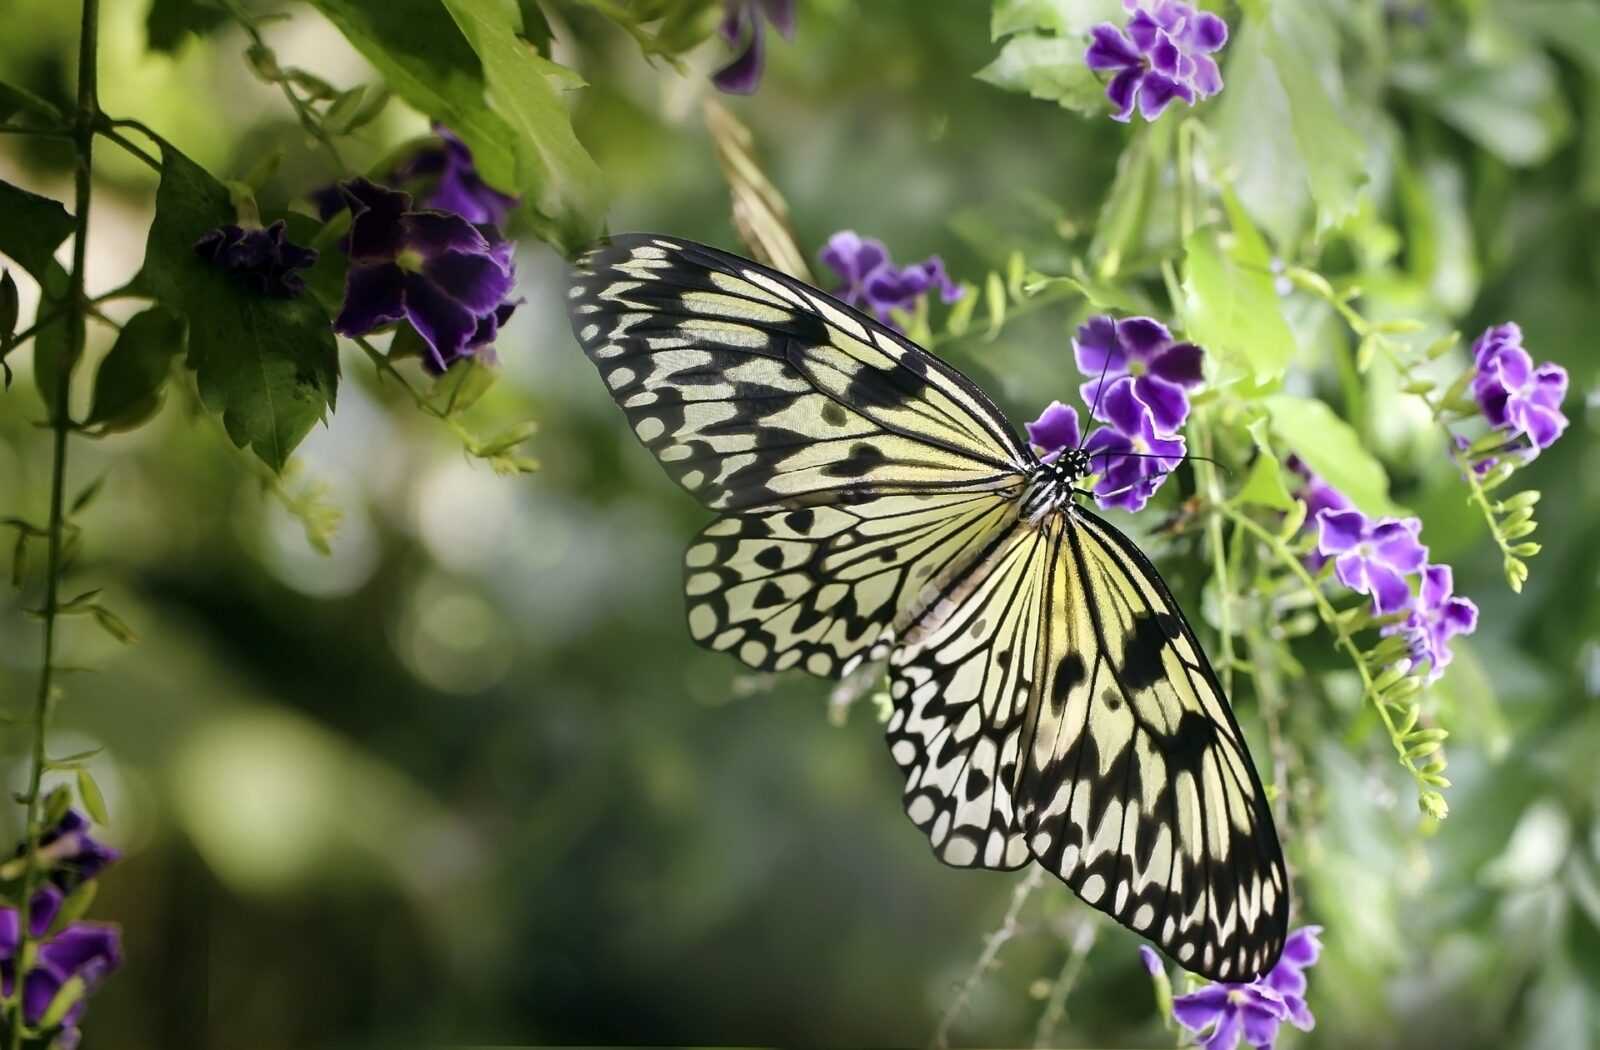
With its glorious sprays of deep purple flowers that dangle in graceful sprays, Duranta erecta brings vivid tropical color to any Gulf Coast area garden. Native to the tropical regions of the Americas, the most used Duranta erecta common name is Golden Dewdrop, though some call it Pigeon Berry. It boasts vibrant color and an elegant weeping shape, blooming profusely and attracting bees and butterflies.

Duranta erecta is a multi-stemmed shrub that can reach a height of 6 to 15 feet with a spread of 6 to 10 feet. It features an upright and bushy growth habit, adorned with glossy green foliage and clusters of vibrant flowers.

The foliage of the Duranta erecta plant consists of small, elliptical leaves arranged in an opposite or whorled pattern along the stems. The leaves have a lustrous green color and provide an attractive backdrop to the blossoms. The plant is evergreen in subtropical and tropical climates.

One of the highlights of Duranta is its showy flowers. The pendulous flower clusters, known as racemes, dangle from the branches and are adorned with tubular blossoms. The flowers come in various colors, including shades of purple, blue, white, or a combination of these hues, creating a striking visual display.

Duranta Origins

Duranta erecta plant
Mokkie, CC BY-SA 3.0, via Wikimedia Commons

Duranta erecta originates from the Caribbean, Mexico, and South America, where it thrives in warm and tropical climates. It has since become naturalized in many parts of the world, including the Gulf Coast region of the United States.

In its native habitat, you’ll find Duranta growing in open woodlands, thickets, and disturbed areas. It is well-adapted to tropical and subtropical environments, showcasing its resilience and versatility.

Duranta is generally suitable for growing in USDA hardiness zones 9 to 11. Growing Duranta in Florida provides a particularly favorable climate for the successful cultivation of this tropical beauty. It also thrives along the Gulf Coast in Texas and Louisiana.

Optimal Growing Conditions

Duranta erecta thrives in full sun to partial shade, making it adaptable to different light conditions. It prefers well-draining soil with moderate moisture retention. Once established, it can tolerate periods of drought.

Golden Dewdrop Duranta erecta delivers a prolonged flowering season, typically spanning from spring to late fall. During this time, the plant produces an abundance of blossoms, drawing in squadrons of delighted bees.

Duranta berries are small, spherical fruits that develop after the flowering period. They are a vibrant golden or yellow color, hence the common name for Duranta: “Golden Dewdrop.”

These berries, typically about 1/2 inch in diameter, add ornamental value to the plant and contribute to its overall visual appeal. However, it is important to note that the berries are considered toxic if ingested, especially to children and pets, so precautions should be taken to prevent accidental ingestion.

Wildlife Benefits of Golden Dewdrop Duranta Erecta

Duranta butterfly

Duranta erecta serves as a valuable host plant for butterfly species such as the Gulf Fritillary (Agraulis vanillae) and the White Peacock (Anartia jatrophae). These butterflies lay their eggs on the leaves, and the resulting larvae, or caterpillars, feed on the foliage.

Duranta Erecta Care

Care of your Golden Dewdrop plant is relatively straightforward when grown under the right conditions.

Light Requirements

Duranta erecta thrives in full sun to partial shade. It prefers a minimum of 6 hours of direct sunlight per day for optimal growth and flowering. In areas with intense afternoon sun, providing partial shade during the hottest part of the day can help prevent stress and sunburn.

Soil Type

Duranta prefers well-draining soil that retains some moisture without becoming waterlogged. It adapts well to various soil types, including loam, sandy, or clay soils.

Soil pH

The ideal soil pH for Duranta ranges between slightly acidic to slightly alkaline, around 6.0 to 7.5. Conduct a soil test to determine the pH level and amend the soil if necessary to maintain the desired range.

Climate Requirements

Golden Dewdrop is well-suited to tropical and subtropical climates. It thrives in areas with warm temperatures, moderate humidity, and mild winters.

Temperature Tolerances

The optimal temperature range for Duranta is between 65°F and 85°F, providing the ideal conditions for growth and flowering.

Duranta growth may slow or temporarily stop when temperatures drop below 50°F.

Prolonged exposure to temperatures below 32°F can cause damage and the plant may experience leaf drop, browning, or dieback of branches.

In extremely hot conditions above 95°F, Golden Dewdrop may experience heat stress, resulting in wilting, leaf burn, or reduced overall vigor. Providing shade or adequate watering can help mitigate the effects of high temperatures.

Protecting Duranta from Cold

When temperatures drop below freezing, protect Duranta from cold damage:

  • Water well and deeply during the warmth of the day.
  • Apply a layer of organic mulch around the base of the plant to insulate the roots and retain soil moisture.
  • Cover the plant with a frost cloth or blanket during freezing temperatures to protect it from frost damage.

Elevation Concerns

Duranta is adaptable to various elevations within its suitable hardiness zones. However, keep in mind that colder temperatures at higher elevations may require additional protection during winter months.

Planting Duranta for Successful Establishment

Duranta
Dinkum, CC0, via Wikimedia Commons

Considering your landscape carefully before planting your Duranta. Remember, it will grow to a large size if not regularly pruned.

Choosing a Location

Select a site that receives full sun to partial shade, ensuring at least 6 hours of direct sunlight per day.

Consider the plant’s mature size and provide enough space for it to grow without overcrowding nearby plants or structures.

Ensure the planting location has well-draining soil to prevent waterlogging.

Step-by-Step Instructions for Planting a Duranta erecta Plant:

Dig a hole: Dig a hole that is twice the width and slightly deeper than the root ball of the Duranta erecta plant.

Prepare the soil

If the soil is heavy clay or lacks organic matter, mix in compost or well-rotted manure to improve drainage and fertility.

Remove the plant from its container

Gently tap or squeeze the container to loosen the root ball, then carefully slide the plant out.

Position the plant

Place the plant in the center of the hole, ensuring that the top of the root ball is level with or slightly above the soil surface.

Backfill the hole

Fill the hole with the amended soil, gently firming it around the root ball to eliminate air pockets.

Water thoroughly

Give the newly planted Duranta erecta a deep watering to settle the soil and establish good root-to-soil contact.

Aftercare

Provide regular watering, keeping the soil consistently moist but not waterlogged, especially during the first few months after planting.

Apply a layer of organic mulch around the base of the plant, keeping it a few inches away from the stem. Mulch helps conserve soil moisture and suppress weeds.

Watering Schedule

Duranta can be a thirsty plant, so consider the weather and temperature when deciding how frequently to water your plant.

  • Spring: Water thoroughly and regularly as new growth emerges.
  • Summer: Increase watering during hot and dry periods to ensure adequate soil moisture.
  • Fall: Maintain regular watering as the plant prepares for winter.
  • Winter: Reduce watering, allowing the soil to dry out slightly between waterings.

Optimal Duranta Fertilizer Composition and Schedule

To make the most of your fertilizer dollars, make sure you feed your Golden Dewdrop appropriately throughout the year.

Leafing Out (Spring)

Use a balanced slow-release fertilizer, such as a 10-10-10 or 14-14-14. Apply according to the package instructions, typically in early spring when new growth begins. Follow recommended rates based on the size and age of the plant.

Blossom (Summer)

Switch to a fertilizer higher in phosphorus, such as a 10-20-10 or 15-30-15. Apply as directed on the package during the active blooming period to support flower production and quality.

Pre-Winter/Over Winter

Avoid fertilizing during late fall and winter when the plant enters a period of dormancy. Instead, focus on providing adequate moisture and protecting the plant from cold temperatures.

Placing a thick layer of compost or other organic matter under the mulch to break down over winter will provide better growing conditions in spring.

Note: It is crucial to follow the specific instructions provided by the fertilizer manufacturer and adjust the amounts based on the plant’s needs and growing conditions.

Duranta erecta alba
Forest & Kim Starr, CC BY 3.0 US, via Wikimedia Commons

Common Duranta Pests

There are a few pests that might make a meal of your Golden Dewdrop. Remember that you don’t have to remove them if you choose not to. Many of these pests provide food for wildlife, so you may want to refrain from treatment unless they threaten the life of your plant.

Aphids

These small, soft-bodied insects cluster on new growth, sucking sap from the plant. Use a strong jet of water to dislodge them and let ladybugs feast on the rest.

It’s also a good idea to look for ants if you see an aphid infestation. Ants will protect aphids from predators in order to farm them for their “dew.”. An ant trap with boric acid will reduce the number of ants and aphids in an environmentally friendly way.

Whiteflies

These tiny, white insects congregate on the undersides of leaves, causing yellowing and stunted growth. Remedy: Use insecticidal soap, neem oil, or introduce natural predators like ladybugs or lacewings.

Caterpillars

Various caterpillar species, such as the caterpillars of the Gulf Fritillary butterfly, can feed on the leaves. We recommend handpicking them, but only if they seem to be a real threat to your Duranta erecta plant.

Note that Oleander moth caterpillars may also infest your Duranta plant and become devastating. Unfortunately, it is easy to confuse them with Gulf Fritillary caterpillars.

Spider Mites

These tiny pests cause yellow stippling on leaves and produce fine webbing. Spray the foliage with a strong jet of water to dislodge them or apply insecticidal soap or horticultural oil. Spider mites usually appear only on dry and desiccated plants, so spray the plant frequently and water more regularly.

Golden Dewdrop Common Diseases

Leaf Spot: Fungal leaf spot diseases can cause dark spots or patches on the leaves. Prune infected branches to improve air circulation around the plant. Fungicidal sprays may be necessary for severe infections. Copper sprays are generally considered safe and affordable and most are listed for organic gardening.

Powdery Mildew

This fungal disease forms a white, powdery coating on the leaves, stems, and flowers. Prune to Improve air circulation, avoid overhead watering, and apply fungicidal sprays as needed.

A solution of 8-12 tablespoons of household hydrogen peroxide (3%) in 1 gallon of water sprayed every three days for a week will reduce powdery mildew with diligent application.

Root Rot

Overwatering or poorly drained soil can lead to root rot, causing yellowing leaves, wilting, and eventual plant decline. Remedy: Ensure proper drainage and adjust watering practices. If unable to remediate the soil quality, you may need to move the plant to a location with better drainage.

Duranta Eerecta Propagation

Although it may take several tries and some time to propagate Duranta from cuttings, it’s well worth your effort.

  1. Select a stem cutting: Choose a healthy, non-flowering stem measuring about 4 to 6 inches (10 to 15 cm) in length.
  2. Prepare the cutting: Use clean, sharp pruning shears to make a clean cut just below a leaf node.
  3. Remove lower leaves: Remove the lower leaves, leaving a few leaves at the top of the cutting.
  4. Apply rooting hormone (optional): Dip the cut end of the cutting into a rooting hormone powder or gel to enhance root formation.
  5. Plant the cutting: Insert the cut end of the stem into a well-draining potting mix or a mix of peat moss and perlite, ensuring at least one node is below the soil surface. I use a 50/50 mix of coco coir and perlite that provides both moisture retention and excellent drainage.
  6. Provide optimal conditions: Place the potted cutting in a warm, bright location with indirect sunlight. Maintain a consistently moist but not waterlogged soil.
  7. Rooting process: Keep the soil moist and provide high humidity by covering the cutting with a plastic bag or using a propagation tray with a clear lid. Roots should develop in a few weeks to a few months.
  8. Transplanting: Once the roots have developed, carefully transplant the rooted cutting into a larger pot or desired planting location.

Landscaping with Duranta

Duranta erecta wildlife butterfly
Adam Jones Adam63, CC BY-SA 3.0, via Wikimedia Commons

Golden Dewdrop’s striking appearance and adaptability make it a valuable addition to various landscaping designs.

One of the benefits is that you can prune Duranta erecta into a tree shape. You can also create a Duranta erecta hedge with a row of specimens.

Here are some other creative ideas to incorporate this versatile plant into your landscape:

Colorful Hedges and Borders

Use Duranta erecta as a hedge or border plant to create a vibrant living fence. Its dense foliage and colorful flowers add visual interest and define spaces. Consider planting them in a row along a pathway or around garden beds for a lively and eye-catching border. Prune regularly to ensure bushy growth and increase the density of the hedge.

Focal Point in Mixed Borders

Plant Duranta as a focal point within mixed borders or perennial beds. Its tall stature and profusion of blooms draw the eye and provide a stunning centerpiece. Combine it with other flowering plants that complement its colors, such as salvias, lantanas, or petunias.

Container Gardening

Duranta is well-suited for container gardening. Place potted specimens on patios, balconies, or porches to add a tropical touch to your outdoor living spaces. Choose large containers to accommodate the plant’s mature size and pair it with cascading or trailing plants for added texture and visual interest.

Poolside Landscaping

The lush foliage and attractive flowers of Duranta erecta make it an excellent choice for poolside landscaping. Plant it as a backdrop to create a tropical oasis around your pool area. The reflection of the blooms on the water’s surface adds a touch of tranquility.

Butterfly and Pollinator Gardens

Duranta’s nectar-rich flowers attract butterflies, bees, and other pollinators. Create a dedicated butterfly or pollinator garden by incorporating Golden Dewdrop along with other butterfly-friendly plants, such as milkweed, butterfly bush, and zinnias. This will not only enhance the visual appeal but also contribute to the local ecosystem.

Landscape Ornamentals that Pair Well with Duranta

When choosing companion plants for Duranta, consider those with similar soil, light exposure, water, and fertilization requirements. Here are a few examples:

Native Lantana (Lantana depressa)

These colorful flowering perennials share similar growth habits and requirements with Duranta. Their vibrant yellow blooms complement the deep purple of Duranta and attract pollinators.

Pentas (Pentas lanceolata)

With their long-lasting clusters of star-shaped flowers, Pentas create a beautiful contrast when planted alongside Golden Dewdrop. They thrive in similar conditions and provide additional pops of color.

Tropical Sage (Salvia coccinea)

The upright, red flower spikes of Tropical Sage create an excellent complement to Duranta’s vivid purple blooms.

Plumbago (Plumbago auriculata)

The delicate blue flowers of Plumbago complement the colors of Golden Dewdrop and both plants thrive in similar conditions.

Cape Honeysuckle (Tecomaria capensis)

This evergreen shrub displays clusters of vibrant orange or red tubular flowers, creating a stunning contrast when planted alongside Duranta.

Firebush (Hamelia patens)

With its fiery red-orange tubular flowers, Firebush adds a splash of color and attracts hummingbirds, making it an excellent companion plant.

Society Garlic (Tulbaghia violacea)

This perennial herb features attractive gray-green foliage and clusters of purple flowers. It pairs well with Duranta erecta and adds a delightful fragrance to the garden.

Mexican Flame Vine (Senecio confusus)

Known for its bright orange blooms, Mexican Flame Vine creates a beautiful backdrop when combined with Duranta.

Coral Honeysuckle (Lonicera sempervirens)

This native Florida vining plant that produces attractive red-orange tubular flowers, which can create a beautiful contrast when planted near Duranta colorful blooms. Additionally, Coral Honeysuckle is known to attract hummingbirds, further enhancing your garden’s appeal to wildlife.

These plant selections will provide a diverse landscape, attracting pollinators, beneficials, and other wildlife to your subtropical garden.

Vivid Gulf Coast Garden Color

Duranta erecta, with its vibrant purple flowers, bright golden berries, and attractive foliage offers numerous opportunities for tropical landscaping designs. Planted with native Gulf Coast region flowering perennials and other wildflowers, your garden will soon be bursting with life, movement, and color.

FAQ – Frequently Asked Questions About Growing Duranta

Can Duranta take full sun?

Yes, Duranta erecta thrives in full sun but can also tolerate partial shade.

Is a Duranta a perennial?

Yes, Duranta erecta is a perennial shrub.

Will Duranta survive a freeze?

Duranta is sensitive to freezing temperatures and may experience damage or die back in severe freezes.

Does Duranta erecta like sun or shade?

Duranta prefers full sun to partial shade.

How cold can Duranta tolerate?

Duranta can tolerate temperatures down to around 25°F (-4°C), but extended cold periods can cause damage or even kill the plant.

Do hummingbirds like Duranta?

Yes, hummingbirds are attracted to the vibrant flowers of Duranta erecta.

What hardiness zone is Duranta erecta?

Duranta erecta is typically suitable for USDA hardiness zones 9 to 11.

Should I deadhead Duranta?

Deadheading spent flowers can encourage continued blooming and maintain a neat appearance, but it is not necessary. You may want to trim off and dispose of the berries if you have concerns about their toxicity.

How big does Duranta get?

Duranta erecta can grow to a height of 6 to 15 feet (1.8 to 4.6 meters) with a spread of 6 to 10 feet (1.8 to 3 meters).

Does Duranta bloom all summer?

Duranta erecta has a prolonged flowering season, typically blooming from spring to fall, but the intensity and duration of flowering can vary.

Is a Duranta a tree or a bush?

Duranta erecta is typically grown as a bushy shrub, but it can be trained into a small duranta erecta tree form with proper pruning.

How do you take care of Duranta in the winter?

In winter, protect Duranta erecta from frost by covering it with a frost cloth or blanket and applying a layer of organic mulch around the base to insulate the roots.

Does Duranta attract bees?

Duranta erecta does attract bees and butterflies with its nectar-rich flowers.

What is the common name for Duranta?

Duranta erecta is commonly known as Golden Dewdrop or Pigeon Berry.

Does Duranta erecta have medicinal uses?

While Duranta erecta has some traditional medicinal uses, it is primarily cultivated as an ornamental plant. In certain cultures, various parts of Duranta erecta, such as the leaves and roots, have been used in traditional medicine to treat conditions like fever, cough, respiratory ailments, and skin infections.

What is Duranta erecta aurea?

Duranta erecta aurea is a cultivar of Duranta erecta with golden or yellow foliage.

What is Duranta erecta alba?

Duranta erecta alba is a cultivar of Duranta erecta with white flowers.

Where can I purchase Duranta erecta?

We frequently carry Duranta in our nursery. You can check out our Etsy shop for the current inventory.

Posted on 1 Comment

Gulf Coast Gardening: Growing Plumbago for Tropical Beauty

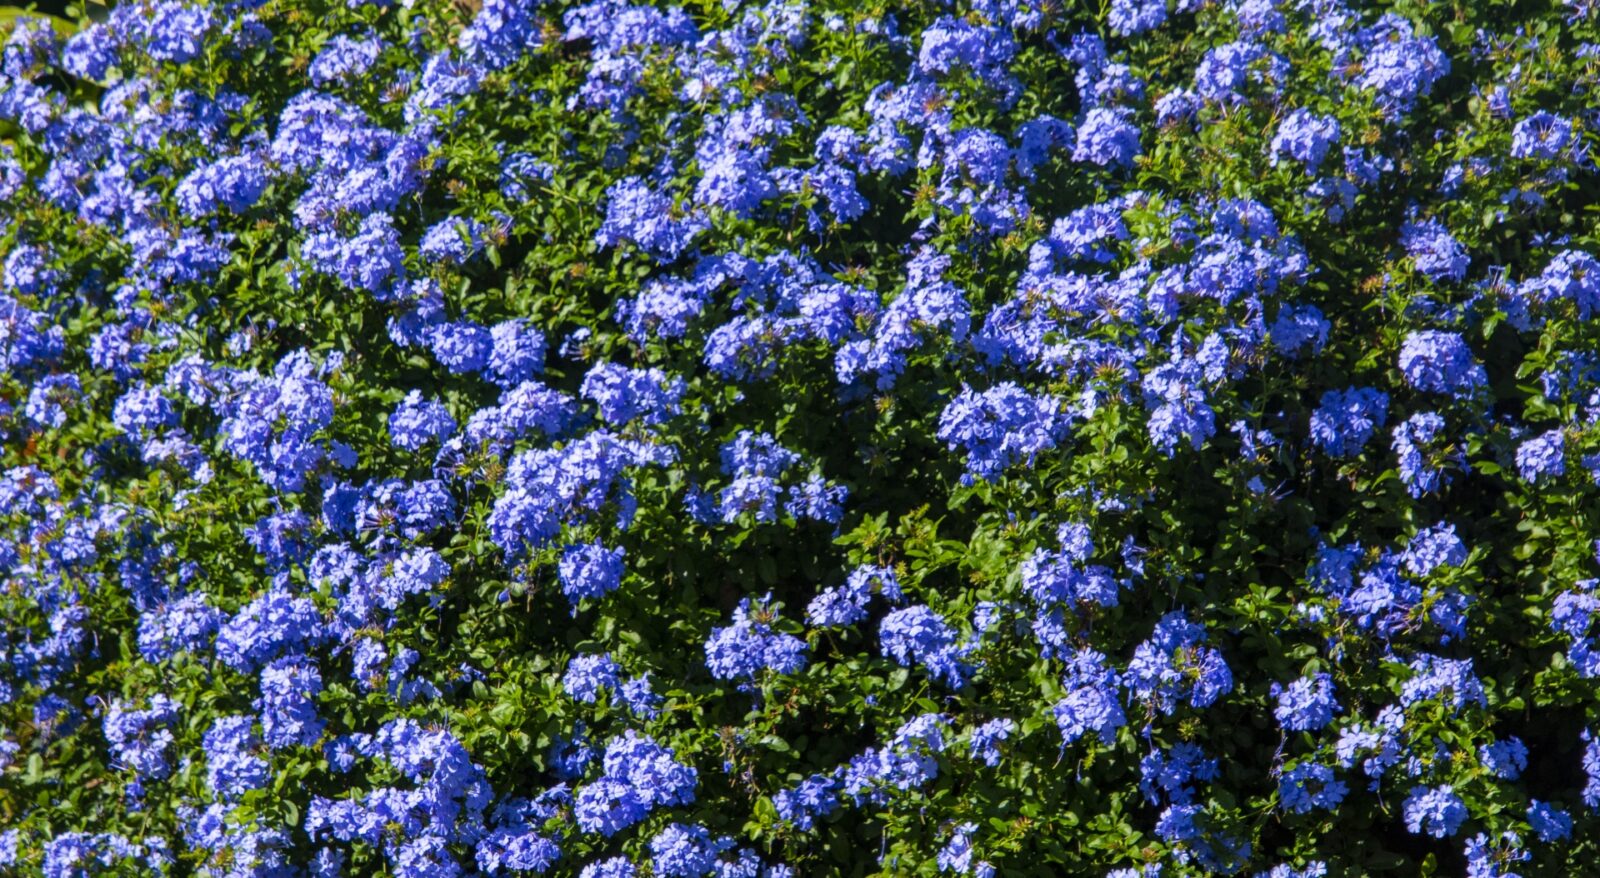
Plumbago, a genus comprising several species of flowering plants, has captured the hearts of gardeners and horticulturists around the world with its dazzling beauty and ability to thrive in tropical and subtropical climates.

Gulf Coast gardeners may find three species available within the Plumbago genus, each possessing its own unique characteristics and charm.

Plumbago auriculata

Plumbago auriculata, Cape Plumbago
Vengolis, CC BY-SA 4.0, via Wikimedia Commons

Originating from South Africa, Plumbago auriculata, commonly known as Cape leadwort, Cape Plumbago, or blue plumbago, thrives in the Gulf Coast region of the United States. This is the species you will most likely encounter in commercial nurseries. It is most often a light to bright blue, but you can also find a white variety of the flower.

In its native habitat, this evergreen shrub thrives in a variety of environments, from rocky slopes to coastal dunes.

It’s a versatile and visually striking plant. It typically grows into a dense, rounded shrub, reaching an average height of 6 to 10 feet with a spread of 6 to 8 feet. Its glossy, deep green leaves are elongated and lance-shaped, creating an elegant backdrop for the plant’s vibrant blue flowers.

Blue Plumbago is known for its proliferation of flowers. Throughout the warm months, usually from late spring to fall, even into winter in zones 10 and 11, the plant offers multiple clusters of tubular flowers in hues ranging from white to pale sky blue to deep cobalt blue. The delicate blossoms, about 1 inch in diameter, have a very subtle fragrance and attract various pollinators, including bees and butterflies.

When it comes to hardiness zones, it thrives in zones 8 to 11 within the U.S., making it a suitable choice for gardeners along the Gulf Coast and other mild-winter regions. However, in colder areas, it can be grown in containers and brought indoors during the winter months.

Cape Plumbago with white flowers
No machine-readable author provided. Calvin Teo assumed (based on copyright claims)., CC BY-SA 2.5, via Wikimedia Commons

Species care details

To achieve optimal growth and bloom, provide Plumbago auriculata with full sun to partial shade. This species is adaptable to a wide range of soil types, but it prefers well-draining soil enriched with organic matter. Regular watering is necessary, especially during drier periods, to maintain healthy growth.

This is one of the most reliable landscape ornamentals in my garden, and I find that it’s very fussy (hungry and thirsty) for the first three years but after that, it flourishes with very little care.

The plant’s nectar-rich flowers serve as a valuable food source for pollinators, while its foliage offers shelter for various insects and small animals. I frequently find Florida anoles napping in the branches.

Several butterfly species, such as the Zebra Blue (Leptotes plinius) and the Common Blue (Polyommatus icarus), utilize this species as a host plant for their larvae.

Plumbago indica (or Plumbago rosea):

Plumbago indica, Plumbago rosea, Red Plumbago
Wiethase, CC BY-SA 3.0, via Wikimedia Commons

Plumbago indica (or Plumbago rosea), commonly known as Indianleadwort or red plumbago (or pink plumbago), is from India, so does wonderfully along the Gulf Coast in our hot, humid climate.

In its natural habitat, it thrives in the tropical and subtropical regions of Asia, including India and Sri Lanka. This species has adapted to a variety of environments, from open woodlands to rocky hillsides and coastal areas.

The plant itself presents a graceful and compact form, growing up to 3 to 6 feet in height and spreading 3 to 4 feet wide. Its slender branches bear lush, dark green leaves that create an attractive backdrop for the blossoms to come.

When it comes to flowering, this species offers a stunning display of vibrant red or pink clusters. These tubular flowers, measuring about 1 inch in diameter, emerge in abundance throughout the warm months, from spring to fall. The delicate blooms emit a gentle fragrance, attracting butterflies and hummingbirds to the garden.

Red plumbago flowers
Vengolis, CC BY 4.0, via Wikimedia Commons

Species care details

In terms of hardiness zones, Plumbago indica thrives in zones 9 to 11 within the U.S. It appreciates full sun to partial shade and prefers well-draining soil that is rich in organic matter. Regular watering is essential for optimal growth and flowering, particularly during dry periods.

The flowering season coincides with the warmer months, providing a refreshing burst of color to gardens and landscapes. Its abundant flowers and compact growth habit make it an excellent choice for borders, hedges, or container gardening.

Plumbago zeylanica

Plumbago zeylanica, Wild Plumbago, Florida Native Plumbago
Bob Peterson from North Palm Beach, Florida, Planet Earth!, CC BY-SA 2.0, via Wikimedia Commons

Hailing from tropical regions of Asia, but also native to coastal regions of Florida, Plumbago zeylanica, also known as Ceylon leadwort or wild plumbago, possesses a natural allure. This herbaceous perennial has made its mark in various ecosystems and now finds itself cherished by gardeners in the Gulf Coast region and beyond.

Wild Plumbago is not as showy as the other two species we’ve discussed, but it has the benefit of being a Florida native plant, supporting our unique ecosystems.

It thrives in diverse habitats, including grasslands, open forests, and scrublands. Its adaptability allows it to flourish in a range of soil types, from sandy to clayey compositions.

The plant itself displays a unique growth habit, forming clumps of sprawling, vine-like stems that reach a height of 1 to 3 feet. Its lance-shaped leaves, arranged alternately along the stems, add an attractive touch of green to the landscape.

Plumbago zeylanica showcases clusters of pale blue or white blossoms. These tubular flowers, about 0.5 inch in diameter, bloom throughout the warm months, from spring to fall. The delicate flowers emit a faint, sweet fragrance that entices pollinators, including bees and butterflies.

Native Florida plumbago
Forest & Kim Starr, CC BY 3.0, via Wikimedia Commons

Species care details

This species typically grows in zones 9 to 11 within the U.S., where it thrives in the warm and humid conditions of the Gulf Coast region. It prefers full sun to partial shade and well-draining soil enriched with organic matter. Regular watering is necessary to maintain its lush foliage and promote healthy growth.

The flowering season coincides with the warmer months, providing a delightful display of pale blue or white flowers. Its sprawling growth habit makes it an excellent choice for ground cover, cascading over walls, or spilling out of containers.

Plumbago zeylanica attracts various pollinators, contributing to the local ecosystem. While specific wildlife interactions may vary, Wild Plumbago is known to support the life cycles of several butterfly species.

Planting Plumbago: Creating a Beautiful Foundation

Blue Plumbago
Ввласенко, CC BY-SA 3.0, via Wikimedia Commons

Plumbago brings a touch of tropical splendor to any Gulf Coast garden with its abundant flowers and ease of care. Plumbago is what they call “a doer” in the garden. It delivers nearly year-round and once established, it sets the foundation for a lush tropical landscape.

Choosing a Location to Plant Plumbago:

Selecting the right location for planting is crucial to its growth and overall health. Consider the following factors when choosing a spot:

Sunlight

This species thrives in full sun to partial shade. Choose a location that receives at least 6 hours of direct sunlight per day for optimal growth and flowering.

Soil Drainage

Plumbago prefers well-draining soil to prevent waterlogging, which can lead to root rot. Ensure the chosen location has soil that allows water to drain freely.

Space

Consider the mature size of the species you are planting. Allow enough space for the plant to spread and grow without overcrowding other nearby plants.

Step-by-Step Instructions for Planting a Plumbago Plant

Once you have chosen the ideal location, follow these steps to plant Plumbago:

Prepare the soil:

Dig a hole that is wider and slightly deeper than the root ball of the plant.

Loosen the soil in the hole to allow for easy root penetration.

Preparing the plant:

If the plant is in a container, gently remove it by tapping the sides of the container or squeezing the base. Avoid pulling the plant out forcefully to prevent root damage.

If the plant is root-bound, tease out the roots gently to encourage outward growth.

Planting the Plumbago:

Place the plant in the center of the hole, ensuring that the top of the root ball is level with or slightly above the surrounding soil.

Backfill the hole with soil, gently pressing it down to eliminate air pockets.

Water the plant thoroughly to settle the soil around the roots.

Mulching:

Apply a layer of organic mulch, such as wood chips or bark, around the base of the plant. This helps retain moisture, suppresses weeds, and insulates the roots.

Caring for Plumbago: Nurturing the Tropical Beauty

Plumbago, with its vibrant blooms and lush foliage, requires proper care to thrive and reach its full potential. Let’s delve into the details and discover how to care for these tropical beauties.

Light Requirements

It thrives in full sun to partial shade. It benefits from at least 6 hours of direct sunlight each day to promote healthy growth and abundant flowering.

Soil Conditions

Plumbago prefers well-draining soil that retains some moisture but does not become waterlogged. A loamy or sandy soil enriched with organic matter provides an ideal growing medium.

Soil pH:

Plumbago tolerates a wide range of soil pH levels, from slightly acidic to slightly alkaline. A pH range of 6.0 to 7.5 is generally suitable for optimal growth.

Climate Preferences

This plant is well-suited for tropical and subtropical climates. It thrives in warm and humid conditions, making it an excellent choice for the Gulf Coast region and similar regions.

Temperature Tolerances

Despite its tropical origins, plumbago is surprisingly hardy.

Optimal Temperature

It thrives in temperatures ranging from 70°F to 90°F (21°C to 32°C).

Temperature Limit for Growth

It may slow down its growth when temperatures drop below 50°F (10°C).

Temperature Causing Damage

Plumbago can suffer damage when exposed to temperatures below 32°F (0°C). Frost or freezing conditions can cause wilting, browning, and leaf drop.

Effects of High Temperatures

It can tolerate high temperatures, but extreme heat, especially when combined with prolonged drought, can lead to stress, wilting, and reduced flowering.

Protection from Cold

In regions with colder winters, provide protection for your plant during freezing temperatures. Mulch around the base of the plant to insulate the roots, and cover the plant with a frost cloth or blanket. If grown in containers, move them to a protected area or indoors during winter.

Elevation Concerns

Plumbago does not have specific elevation concerns and can be grown successfully at various elevations.

Watering Schedule

Water Plumbago regularly to keep the soil evenly moist but not waterlogged. Adjust the watering schedule based on weather conditions and rainfall. A general guideline is to provide deep watering once or twice a week during the growing season and reduce frequency during cooler months.

Fertilization

Adjust your plumbago’s feeding schedule to the season.

Leafing Out

In early spring when new growth appears, apply a balanced slow-release fertilizer according to the manufacturer’s instructions.

Blossoming

As the plant prepares to bloom, switch to a fertilizer higher in phosphorus to promote flower production. Follow the product recommendations for application rates.

Pre-Winter or Over Winter

In late summer or early fall, apply a balanced fertilizer to support root development and overall plant health before winter dormancy.

Pruning Schedule

Prune in late winter or early spring, before new growth emerges. Follow these steps:

  • Remove any dead, damaged, or crossing branches.
  • Prune back about one-third of the plant’s height to promote compactness and encourage new growth.
  • Lightly shape the plant to maintain an appealing form.

Common Pests and Diseases

Plumbago is generally resistant to pests, but it can suffer from disease.

Common Pests

Aphids: Use insecticidal soap or a neem oil-based spray to control aphids. Rinse the plant with water or use a gentle stream to dislodge them.

Whiteflies: Use yellow sticky traps or apply an insecticidal soap or oil spray to manage whiteflies.

Spider mites: Spray the plant with water to remove mites or use an insecticidal soap or horticultural oil for control.

Jack’s Dead Bug is an organic solution that uses a naturally occurring bacteria that has worked well for me for many pest problems.

Common Diseases:

Powdery Mildew: Ensure good air circulation and avoid overhead watering. Apply a fungicide labeled for powdery mildew if necessary.

Leaf Spot: Remove and destroy infected leaves. Maintain proper spacing and avoid overhead watering to reduce leaf spot occurrence.

Root Rot: Ensure proper drainage and avoid overwatering. Treat with a fungicide if root rot is detected.

Special Care Considerations

Plumbago may require regular pruning to maintain a compact shape and encourage abundant flowering.

Regularly monitor moisture levels to prevent overwatering or drought stress.

Apply a layer of organic mulch around the base of the plant to conserve moisture, suppress weeds, and protect the roots.

Provide support, such as a trellis or stakes, if growing a climbing variety of Plumbago.

Propagating Plumbago

Now that you’ve planted your plumbago and it’s growing nicely, you may decide you want more. What’s better than free plants?

Here’s how you do it:

Propagating Plumbago from Cuttings

Taking cuttings and rooting them in a soft, light medium is the easiest way to grow more plumbago from your existing plants.

Select a healthy stem

Choose a non-flowering stem from the parent plant that is free from any diseases or pests.

Prepare the cutting

Using clean, sharp pruning shears, cut a 4-6 inch section of the stem just below a node (where leaves emerge).

Remove lower leaves

Remove the lower leaves from the cutting, leaving only a few leaves at the top.
Hormone application (optional): Dip the cut end of the cutting into a rooting hormone powder or gel, following the product instructions.

Plant the cutting

Insert the cut end of the cutting into a well-draining potting mix, ensuring that at least one node is below the soil surface.

I use a 50/50 mix of coconut coir and perlite, which stays moist without going anaerobic.

Provide optimal conditions

Place the pot in a warm, bright location with indirect sunlight. Maintain a consistently moist but not waterlogged soil.

Rooting process

Over the next few weeks, roots should begin to develop. Monitor the soil moisture and mist the cutting occasionally to maintain humidity.

Transplanting

Once the roots have formed, typically within 6-8 weeks, carefully transplant the rooted cutting into a larger container or desired planting location.

Here’s an excellent video showing the process step by step.

Propagating Plumbago from Air Layering:

Air layering is another technique that many use to grow more plants. For many plants, it’s a more reliable way to ensure rooting.

Select a healthy stem

Choose a healthy, non-flowering stem from the parent plant that is flexible and suitable for air layering.

Make a wound

With a sharp knife or pruner, make a 1-inch (2.5 cm) diagonal cut halfway through the stem, just below a node.

Apply rooting hormone (optional)

Apply a rooting hormone powder or gel to the exposed area of the wound to stimulate root development.

Moss and plastic wrap

Moisten sphagnum moss and wrap it around the wounded area. Enclose the moss with plastic wrap, securing it with twine or a rubber band at the top and bottom.

Alternatively, you may want to try air layering pods or propagation balls to ensure the sphagnum stays moist.

Provide moisture and wait

Keep the moss consistently moist by misting or watering as needed. After a few weeks to several months, roots will develop within the moss.

Check for root development

Once roots have formed and are visible through the plastic wrap, carefully cut below the rooted section of the stem.

Plant the new plant

Remove the plastic wrap and moss, and plant the rooted section in a well-draining potting mix or desired planting location.

Provide post-transplant care

Water the newly planted cutting thoroughly and keep it in a warm, bright location with indirect sunlight. Continue to care for it as you would for an established Plumbago plant.

By following these step-by-step instructions for propagating Plumbago from cuttings and air layering, you can expand your collection and share the beauty of these plants with others.

Landscaping with Plumbago

Use Plumbago as a vibrant hedge or border planting. Incorporate it into mixed shrub beds for pops of color.

Plant it near fences, trellises, or pergolas, and train it to climb for vertical interest.

Utilize containers and place Plumbago on patios, decks, or balconies to create a tropical ambiance.

Complementing Plumbago

Combine Plumbago with other colorful flowering plants in butterfly or hummingbird gardens. Here are some ornamental plants that can thrive alongside Plumbago while creating a harmonious and visually appealing landscape:

Native Lantana (Lantana involucrata and Lantana depressa)

Lantana’s colorful clusters of flowers in various shades, including yellow, orange, and pink, complement Plumbago’s blooms. It is also a pollinator magnet, attracting butterflies and hummingbirds.

Pentas (Pentas lanceolata)

Pentas produces clusters of vibrant star-shaped flowers in colors such as red, pink, and white. It attracts pollinators and adds a burst of color alongside Plumbago.

Mexican Bush Sage (Salvia leucantha)

Mexican Bush Sage features striking velvety purple or white flower spikes that add vertical interest and contrast to Plumbago’s mounding growth habit. It is also a favorite of hummingbirds.

Duranta (Duranta erecta)

Horologium, CC BY-SA 3.0, via Wikimedia Commons

Duranta displays clusters of vibrant blue or purple flowers, adding a complementary color contrast to Plumbago. Its glossy foliage and cascading growth habit make it an excellent choice for borders or hanging baskets.

Dwarf Poinciana (Caesalpinia pulcherrima)

Dwarf Poinciana features striking red, orange, or yellow flowers reminiscent of miniature bird-of-paradise blooms. Its vibrant colors can create a stunning visual impact alongside Plumbago.

Tropical Hibiscus

Tropical hibiscus are easy-care plants that add another layer of exotic beauty to your garden while enjoying similar growing conditions. They come in a range of vivid colors that will harmonize with plumbago into a stunning tropical display.

These plant suggestions share similar requirements with Plumbago, ensuring harmonious growth and care. When combined, they create an alluring landscape with a diverse range of colors, textures, and forms. Always consider the mature size of each plant and their compatibility in terms of growth habits and maintenance to achieve a well-balanced and cohesive garden design.

Reliable Beauty

With its ease of care, consistent and abundant flowering, and evergreen foliage in mild climates, plumbago is a reliable tropical beauty in the Gulf Coast garden. With a little pampering during the first three years of establishment, plumbago is a visually stunning addition to your garden.

Visit our Etsy shop for Blue Plumbago, Duranta, Pentas, and other perennial flowering plants for your butterfly garden.

FAQ – Frequently Asked Questions About Growing Plumbago

Is plumbago easy to grow?

Yes, Plumbago is generally considered an easy-to-grow plant, especially in tropical and subtropical regions, given its tolerance for various soil types, adaptable nature, and relatively low maintenance requirements.

What month does plumbago bloom?

Plumbago typically blooms from late spring to fall, depending on the mildness of your winter.

Do hummingbirds like plumbago?

Yes, hummingbirds are attracted to the tubular flowers of Plumbago and often visit them for nectar, making it a favorite plant for hummingbird enthusiasts.

Which butterflies, months, and other insects like plumbago?

Plumbago attracts various butterflies, including species such as Zebra Blue (Leptotes plinius), Common Blue (Polyommatus icarus), and other pollinators. The specific months of butterfly activity can vary based on the region, but generally, the warmer months from spring to fall are when butterflies are most active around Plumbago. Additionally, bees and other beneficial insects are also attracted to the nectar-rich flowers of Plumbago.

When should you plant plumbago?

Plumbago can be planted in the spring after the last frost date, as it thrives in warm weather. This allows the plant to establish itself and take advantage of the growing season.

Where is the best place to plant plumbago?

The best place to plant Plumbago is in a location that receives full sun to partial shade.

How do you keep plumbago blooming?

To keep Plumbago blooming, provide it with full sun to partial shade, regular watering, well-draining soil, and regular fertilization with a bloom-boosting fertilizer.

When should you prune plumbago?

Plumbago should be pruned in late winter or early spring before new growth emerges. This timing allows for rejuvenation, shaping, and stimulating new growth for the upcoming growing season.

Does plumbago come back every year?

Yes, Plumbago is a perennial plant that typically comes back every year in suitable growing conditions. It is an evergreen in subtropical and tropical climates.

How do you winterize blue plumbago?

To winterize blue Plumbago, provide a layer of organic mulch around the base of the plant to insulate the roots, and cover the plant with a frost cloth or blanket during freezing temperatures.

Should you cut back plumbago?

Yes, it is beneficial to cut back Plumbago in late winter or early spring before new growth emerges. Pruning helps maintain a compact shape, encourages new growth, and stimulates abundant flowering. You can also cut it back during summer if it overgrows its allotted space.

How do you make plumbago bushy?

To make Plumbago bushy, prune it back by about one-third of its height in late winter or early spring before new growth begins. This encourages branching and promotes a more compact, bushy growth habit.

What other ornamental plants pair well with plumbago?

Several ornamental plants pair well with Plumbago to create a visually appealing garden. Some suitable companions include Lantana, Pentas, Mexican Bush Sage, Duranta, Dwarf Poinciana, and other flowering perennials that share similar soil, light, and water requirements.

How big does plumbago get?

Plumbago can reach an average height of 6 to 10 feet (1.8 to 3 meters) and have a spread of 6 to 8 feet (1.8 to 2.4 meters), depending on the specific species and growing conditions.

Posted on

What Every Southern Gardener Needs to Know About Tropical Hibiscus

tropical hibiscus care for Florida gardens

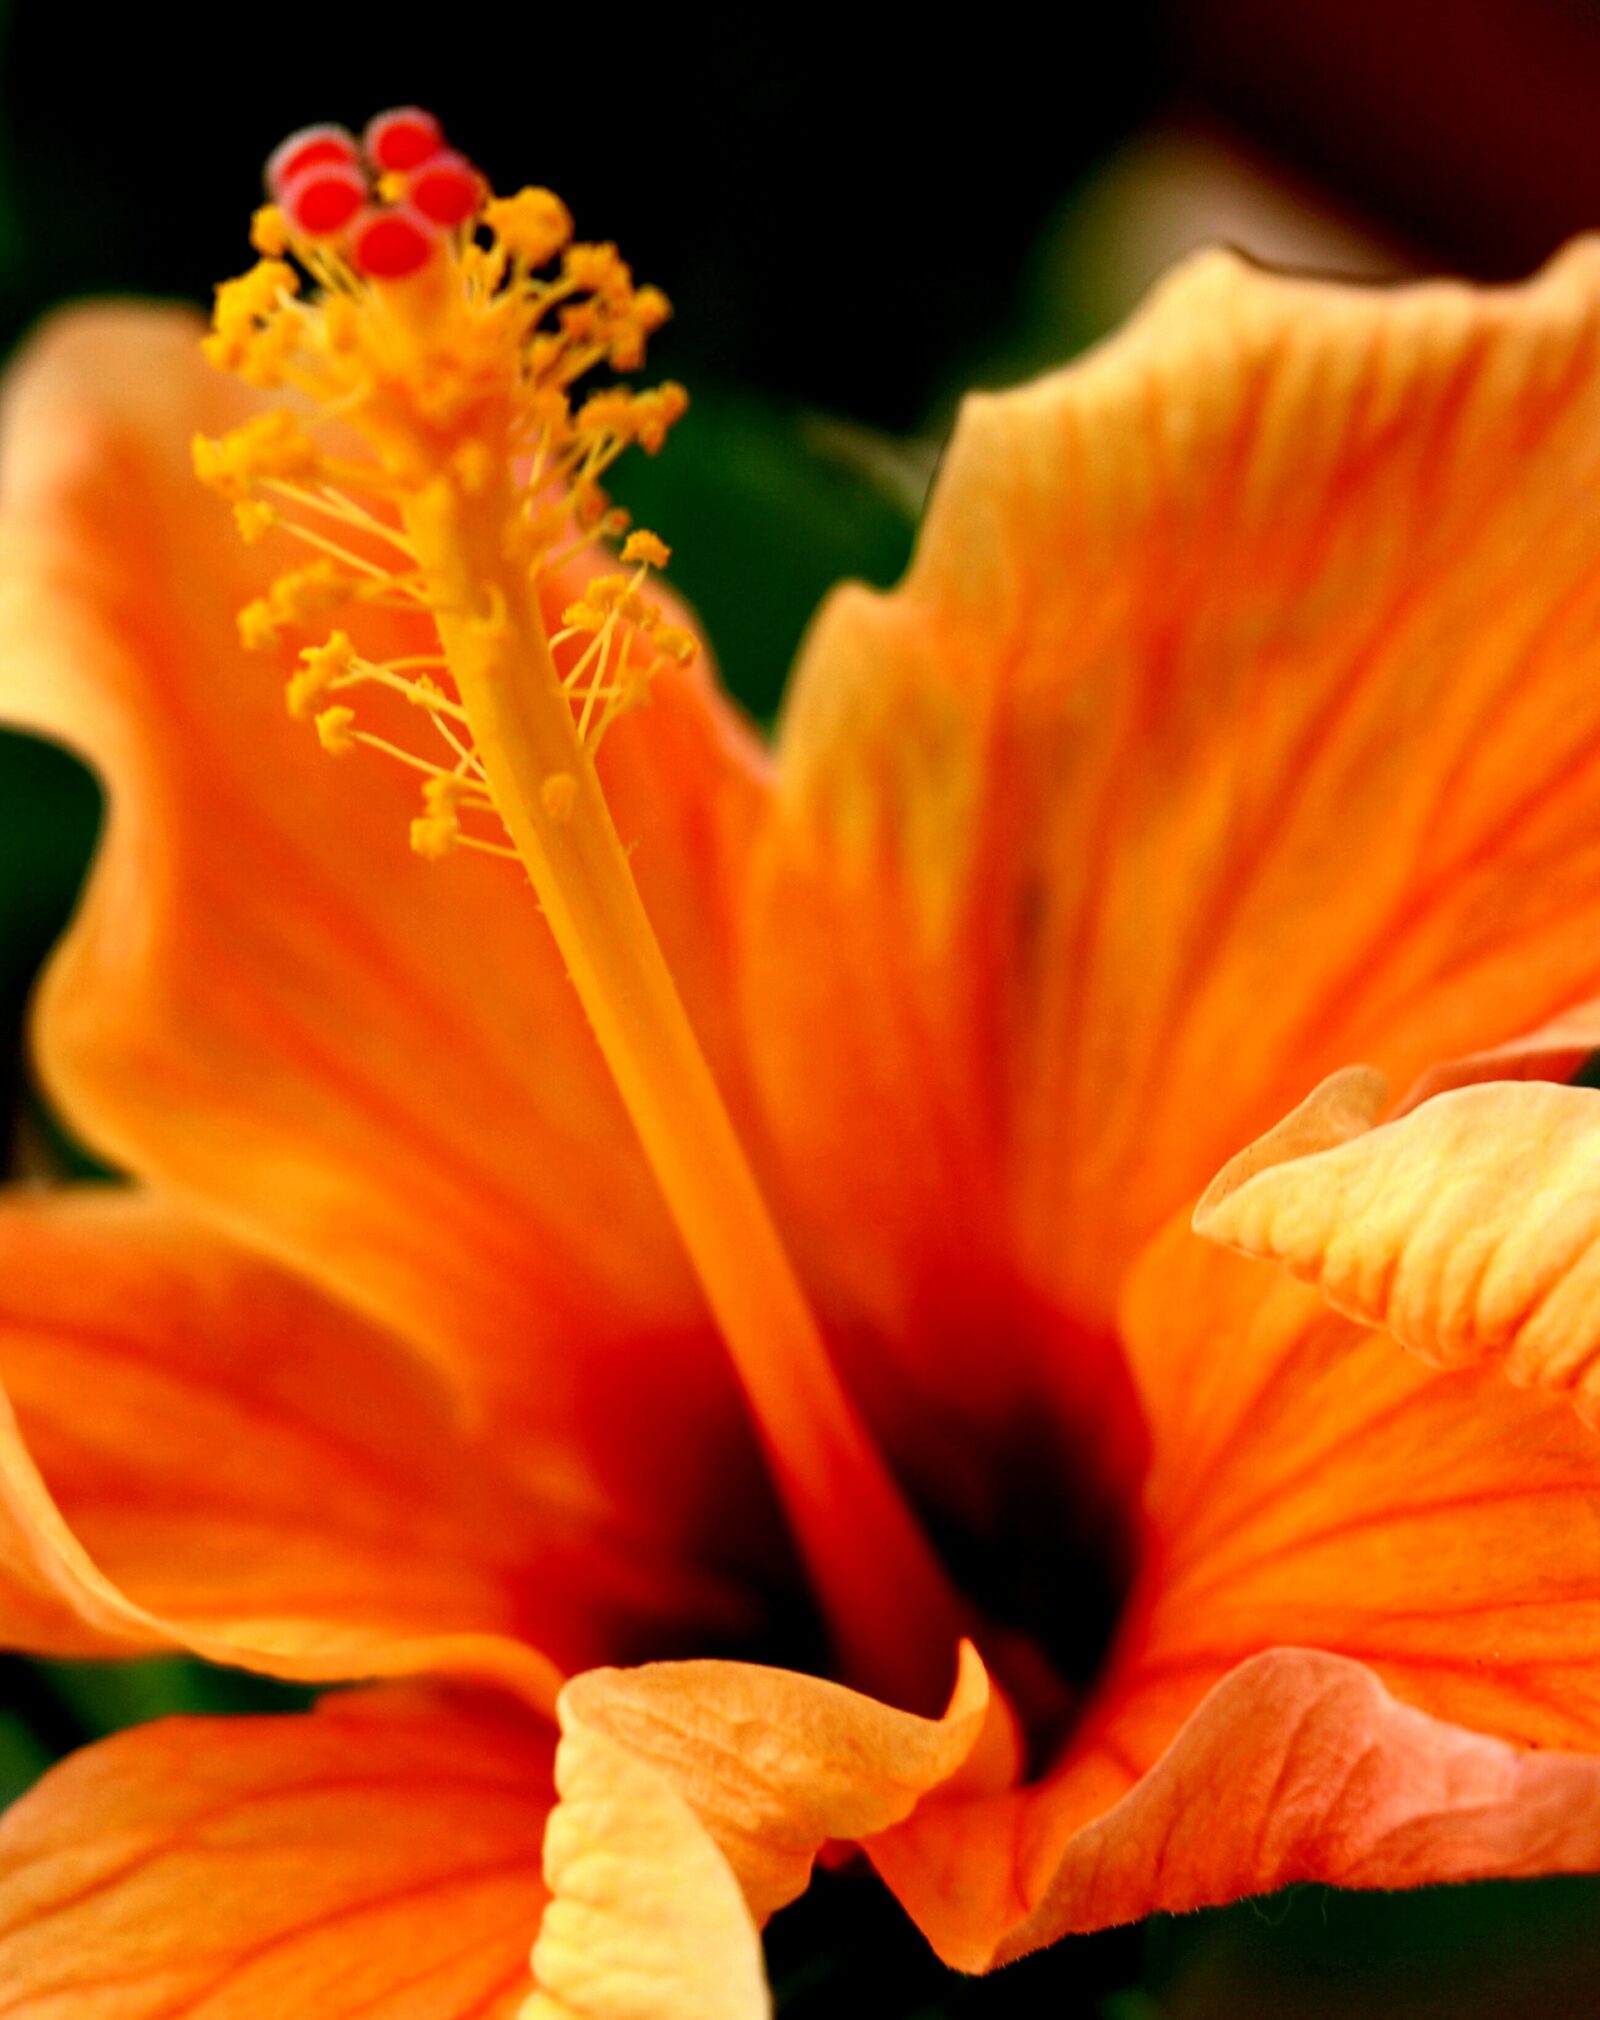
Tropical Hibiscus has to be the Hail Mary throw for any Florida gardener. These beautiful flowering shrubs are so easy to grow in our climate that cultivating a variety is a no-brainer. Tropical hibiscus care is simple and straightforward, and the amount of bloom you get for your buck (and effort) is simply incredible.

There seem to be an endless number of tropical hibiscus varieties, including some extravagantly flamboyant hybrids. Unfortunately, there are also a lot of scams floating around. If you seed tropical hibiscus for sale promising impossible-in-nature colors, it may be a complete scam.

If you live in the Southeastern U.S., specifically around the hot and humid Gulf Coast, you may have seen tropical hibiscus for sale and been tempted to purchase plants. Perhaps you thought they were fussy. They’re so pretty, they must be a pain to care for, right? Turns out, they’re not. They’re dead easy, and these showy exotics turn even the most mundane suburban spread into a tropical paradise.

Tropical Origins

Tropical hibiscus with single red flowers

Tropical hibiscus, or Hibiscus rosa-sinensis, is believed to have originated in China, particularly in the southern regions. It’s also native to India, Malaysia, Indonesia, Thailand, and the Philippines, along with the Pacific Islands, like Fiji, Samoa, Tonga, and Hawai’i.

Over the years, these beautiful plants have spread to other tropical climates in Africa, Australia, Central and South America, and the Caribbean. In these tropical regions, the hibiscus thrives in rainforests and coastal areas.

In Hawai’i, tropical hibiscus is part of native culture, making up the iconic lei garlands worn on special occasions. These blooms are worn in the hair, are used in floral displays, and signify beauty. Tropical hibiscus is also used medicinally and as offerings in spiritual ceremonies.

The tropical hibiscus embodies the spirit of “aloha’ – love, compassion, and hospitality.

How can you fail to fall in love with that?

I always like to joke that I don’t live in the Southern U.S., I live in the North Caribbean, so tropical hibiscus is one of the first ornamentals I added to our landscape.

Tropical hibiscus is a woody shrub that can reach a height of 6 to 10 feet tall, with a spread of 4 to 6 feet. The foliage is glossy and dark green, creating an attractive backdrop for its stunning flowers.

Tropical Hibiscus Flowers

Pink Tropical hibiscus flower

These evergreen plants produce large, showy blooms in a wide range of tropical hibiscus colors, including red, orange, pink, yellow, and white. These flowers can reach diameters of 4 to 8 inches and exhibit a striking trumpet-like shape. The nectar-rich flowers of tropical hibiscus attract hummingbirds and butterflies, enhancing the beauty and biodiversity of any garden.

Tropical hibiscus can be classified into two main types: singles and doubles.

Singles

Single tropical hibiscus flowers have a single row of petals, creating a striking focal point. They often feature a prominent stamen in the center. Some popular tropical hibiscus varieties feature vivid colors of red, yellow, pink, orange, and even white.

Doubles

Double tropical hibiscus flowers have multiple rows of petals, creating a fuller and more ruffled appearance. These varieties are known for their lush and showy blooms. Many of your favorite tropical hibiscus colors have a double version, as well.

In addition to these main color categories, tropical hibiscus cultivars can exhibit variations and combinations of colors, including blends, streaks, and bicolor patterns. This diverse range of tropical hibiscus colors and petal forms allows for endless possibilities in creating captivating displays and adding vibrant beauty to tropical gardens and landscapes.

Some hybrid “fancy” cultivars are even more exotic-looking, include maroon and purple and even blue. You’ll find electric pink and purple blooms, like ‘Voodoo Queen.’ Some don’t even look real, and I suspect a bit of photoshopping is going on.

Wildlife Magnets

Hummingbird visiting a red tropical hibiscus flower

Tropical hibiscus attracts various pollinators and other wildlife:

Bees

Various species of bees are attracted to the nectar-rich flowers of tropical hibiscus. This includes honeybees, bumblebees, and native solitary bees such as carpenter bees, mason bees, metallic green sweat, and mining bees.

Butterflies

Several butterfly species are drawn to the vibrant colors and nectar of hibiscus flowers. This includes swallowtails, admirals, painted ladies, and hairstreaks.

Our Florida state butterfly, the Zebra Longwing, also seems to love dive-bombing the tropical hibiscus blooms.

Florida White Butterflies with their distinctive black markings are commonly found visiting hibiscus flowers for nectar.

Hummingbirds

These small, agile birds are highly attracted to the tubular-shaped flowers of tropical hibiscus. Their long, slender beaks are perfectly adapted for sipping nectar from deep within the flower.

Ruby-throated Hummingbirds are known to visit hibiscus flowers for their nectar, especially during their migration and breeding season in Florida.

Other Wildlife

While not directly interacting with the flowers, anole lizards are often seen snoozing in hibiscus plants at night.

The flowers can also make a meal for iguanas and turtles enjoy munching on the foliage. I’ve also seen squirrels enjoying a blossom or two.

Creating a wildlife-friendly garden with tropical hibiscus can help support and attract a diverse range of critters, contributing to the overall health of the ecosystem.

Optimal Growing Conditions for Tropical Hibiscus

Pink and yellow tropical hibiscus flower

Tropical hibiscus thrives in warm and humid climates and is commonly found in tropical rainforests and coastal areas, where it enjoys the protection of tree canopies and the moist, well-drained soils prevalent in these habitats.

Light Requirements

Tropical hibiscus thrives in full sun to partial shade. It requires at least 6 hours of direct sunlight daily to promote robust growth and abundant flowering.

Soil Type

Well-draining soil is essential for tropical hibiscus. A rich, loamy soil mixed with organic matter provides the ideal growing medium. Avoid heavy clay soils that can lead to waterlogged conditions.

Tropical hibiscus (Hibiscus rosa-sinensis) generally prefers slightly acidic to neutral soil conditions. While they are not considered strict acid-loving plants like azaleas or blueberries, they can benefit from a slightly acidic soil pH in the range of 6.0 to 6.8.

Climate

Tropical hibiscus thrives in warm and humid climates. It requires consistently warm temperatures above 60°F, preferably over 80°F during the growing season for optimal growth and flowering.

Elevation

Elevation is generally not a significant concern for tropical hibiscus unless you are growing it in high-altitude regions where temperatures can drop significantly.

Tropical Hibiscus Cold Tolerance

Tropical hibiscus temperature tolerance can be a factor in USDA Zones 8 and above. Growth may slow or cease below 50°F, and temperatures near or below freezing can cause severe damage or even death to the plant.

Tropical hibiscus is not frost-tolerant and is typically grown as a container plant in regions with colder climates.

Here on the Gulf Coast, they’re a garden staple in the landscape. They’re best suited for USDA hardiness zones 9 to 11. You can probably even baby them in Zone 8 with adequate frost blankets.

Protecting from Cold: During colder months, it is crucial to protect tropical hibiscus from freezing temperatures. Move container-grown plants indoors or provide adequate insulation for in-ground specimens. Use frost cloth or blankets to cover plants and provide additional heat sources like Christmas lights for added protection.

Planting Tropical Hibiscus in the Ground

Select a suitable location. Choose a spot in your garden that receives full sun for at least six hours a day. Tropical hibiscus thrives in warm, sunny conditions.

Prepare the soil

Ensure the soil is well-draining and enriched with organic matter. Hibiscus prefers slightly acidic to neutral soil with a pH between 6.0 and 7.0. Amend the soil with compost or well-rotted manure to improve its fertility and drainage.

Dig the planting hole

Dig a hole that is slightly wider and deeper than the root ball of the hibiscus shrub. The hole should be large enough to accommodate the roots comfortably.

Remove the hibiscus from its container

Gently tap or squeeze the sides of the container to loosen the root ball. Carefully slide the hibiscus out of the container, taking care not to damage the roots.

Place the hibiscus in the hole

Position the hibiscus in the center of the hole, ensuring that it sits at the same depth as it was in the container. The top of the root ball should be level with the soil surface.

Add Amendments

For the best start, add an organic fertilizer in the planting hole that contains mycorrhizal fungi to improve nutrient uptake and root health. Compost is also another great soil amendment that adds richness to mediocre soils.

Backfill the hole

Fill the hole with the excavated soil, gently firming it around the roots as you go. Ensure there are no air pockets around the roots.

Water thoroughly

After planting, water the hibiscus thoroughly to settle the soil and hydrate the plant. Provide enough water to moisten the entire root ball as well as the soil around it.

Mulch around the plant

Apply a layer of organic mulch, such as wood chips, around the base of the hibiscus. This will help conserve moisture, suppress weeds, and regulate soil temperature.

First year care

Regularly water the hibiscus, keeping the soil evenly moist but not waterlogged. Water deeply whenever the top inch of soil feels dry.

Care of Tropical Hibiscus

White tropical hibiscus flower

Following these steps will help ensure a successful planting of your tropical hibiscus shrub. Remember to provide regular care, including watering, fertilizing, and proper maintenance, to keep your hibiscus healthy and thriving.

Watering Schedule

Tropical hibiscus prefers regular watering to keep the soil consistently moist but not waterlogged. Water deeply when the top inch of soil feels dry and adjust watering frequency based on environmental conditions.

Fertilizer Composition

Provide tropical hibiscus with a balanced fertilizer, such as a slow-release granular formula with an N-P-K ratio of 10-10-10 or 14-14-14. Feed every four to six weeks during the growing season, reducing or stopping fertilization during winter dormancy.

Horticulturists often recommend specific macronutrients and micronutrients for the optimal production of tropical hibiscus. Here are the essential nutrients that are typically recommended.

Macronutrients

Nitrogen (N) is essential for promoting leafy growth and overall plant vigor. It is particularly important during the active growth stages of tropical hibiscus.

Phosphorus (P) plays a crucial role in root development, flowering, and fruit production. It helps promote strong root systems and enhances flower and fruit formation.

Potassium (K) is vital for overall plant health, disease resistance, and flower quality. It aids in the regulation of water movement within the plant and supports the development of strong stems and roots.

Micronutrients

Iron (Fe) is necessary for chlorophyll synthesis and plays a key role in photosynthesis. It is important for maintaining healthy foliage and preventing yellowing of leaves (chlorosis).

Magnesium (Mg) is an essential component of chlorophyll and is critical for photosynthesis. It supports energy production and enzyme activation within the plant.

Zinc (Zn) is involved in various enzymatic processes and plays a role in hormone regulation, protein synthesis, and carbohydrate metabolism. It is essential for overall plant growth and development.

Manganese (Mn) is necessary for chlorophyll production and is involved in enzyme activation. It contributes to photosynthesis, nitrogen metabolism, and carbohydrate synthesis.

Copper (Cu) is required for various enzymatic reactions and is involved in plant respiration, photosynthesis, and lignin synthesis. It aids in overall plant growth and development.

It’s important to note that the specific nutrient requirements may vary depending on factors such as soil composition, growing conditions, and plant health. Conducting a soil test and consulting with your ag extension service can provide more precise nutrient recommendations tailored to your specific growing environment and goals.

Specialized Tropical Hibiscus Fertilizer

Fertilizers formulated specifically for tropical hibiscus, often labeled as “Hibiscus Fertilizer” or “Tropical Plant Fertilizer,” are available in the market and are formulated to meet the specific nutrient needs of these plants.

Fertilizing tropical hibiscus with acid-loving plant fertilizers can be beneficial if the soil pH is alkaline or if you are aiming to lower the pH slightly. Acid-loving fertilizers typically contain higher amounts of sulfur, which helps lower soil pH.

These fertilizers may also include additional nutrients that are beneficial for acid-loving plants, such as iron and manganese.

If you notice signs of nutrient deficiency or if your soil pH is consistently high, using an acid-loving plant fertilizer can help provide the necessary nutrients while also slightly adjusting the soil pH.

However, it’s important to note that tropical hibiscus can also thrive in slightly alkaline soils as long as the necessary nutrients are available.

Before applying any fertilizer, it’s recommended to conduct a soil test to determine the pH and nutrient levels of your soil.

Pruning Your Tropical Hibiscus

While tropical hibiscus is a low-care plant, it does require some pruning to make it look its best. You’ll want to prune in late winter or early spring before new growth emerges. You may also want to prune during the growing season to prevent it from becoming overgrown and leggy.

Pruning During the Growing Season.

You can prune your hibiscus back any time during the growing season as required to maintain its shape.

Timing

During the growing season, you can prune your tropical hibiscus every 4-6 weeks to maintain its size and shape. Start pruning when new growth is about 6 inches long.

Tools

Gather a pair of clean, sharp pruning shears or scissors. Ensure the tools are sanitized to prevent the spread of diseases.

Assess the Plant

Examine the hibiscus plant and identify branches that are growing too vigorously or extending beyond the desired size or shape.

Determine the Pruning Length

Decide on the amount you want to prune to control the size of the plant. Aim to remove around one-third of the branch’s length.

Prune Vigorous Branches

Locate the node or leaf joint where you want to make the cut. Position the pruning shears just above the node and make a clean, angled cut. Cutting above a node encourages new growth from that point.

Control Branch Length

To prevent the hibiscus from becoming too leggy, prune the branches to a desirable length. Identify branches that have grown excessively long or are crowding other parts of the plant, and trim them back to a suitable length, just above a node.

Remove Suckers

Suckers are new shoots that emerge from the base of the plant. They can divert energy from the main growth. Remove these suckers by pruning them at the base.

Regular Maintenance

Throughout the growing season, continue to monitor the growth of your hibiscus. As new growth appears, repeat the pruning process, removing any excessive or unwanted branches to maintain the desired size and shape.

Clean Up

After pruning, remove any fallen leaves or debris from the base of the plant to maintain a tidy and healthy growing environment.

Aftercare

Following pruning, provide your tropical hibiscus with water and fertilizer to support healthy regrowth.

By following these step-by-step instructions and regularly pruning your tropical hibiscus during the growing season, you can effectively manage its size, prevent excessive growth, and maintain the desired shape of the plant.

Remember to adjust the frequency and intensity of pruning based on the growth rate and specific needs of your hibiscus variety.

Annual Winter Pruning for Tropical Hibiscus

Double tropical hibiscus flower

Late winter or early spring is the perfect time to prune your hibiscus to remove any dead or diseased branches. This step is critical for maintaining the health of your plant.

Timing

Prune your tropical hibiscus just before it breaks dormancy, typically in late winter or early spring. This allows new growth to emerge on a well-shaped plant.

Assessment

Examine the plant for dead, damaged, or diseased branches. Look for crossing or rubbing branches that can impede airflow and create wounds.

Sterilization

Clean and sterilize your pruning tools before use. Dip the blades in disinfectant spray or wipe them down with rubbing alcohol to prevent the spread of diseases.

Thinning

Thin out overcrowded branches by selectively removing some of the older or weaker stems. Aim for an open and balanced growth habit.

Size control

If necessary, trim back the overall size of the plant to maintain a desirable shape or control its height. Cut back the branches to the desired length, just above a set of healthy leaves.

Pruning cuts

Make clean, angled cuts above leaf nodes or buds, ensuring the remaining branches face outward to encourage outward growth.

Clean-up

Remove all the pruned branches and debris from the area around the plant. This helps prevent the spread of pests and diseases.

Aftercare

After pruning, provide regular care to support new growth. Water the plant appropriately, ensure it receives adequate sunlight, and follow up with a spring feeding once new growth emerges.

Tropical Hibiscus Propagation

There are a few different methods you can use for tropical hibiscus propagation: stem cuttings, air layering, or seed propagation. Stem cuttings are the most common and easiest method.

Prepare the Cuttings

Select a healthy and mature branch of the tropical hibiscus plant. Using clean and sharp pruning shears, cut a 4-6 inch section of the stem just below a leaf node (where leaves emerge). Remove any leaves from the lower half of the cutting.

Hormone Application (Optional)

To enhance root development during tropical hibiscus propagation, you can apply a rooting hormone to the base of the cutting according to the manufacturer’s instructions. This step is optional but can increase the success rate.

Planting the Cutting

Prepare a small pot with a well-draining potting mix. Make a hole in the soil using a pencil or your finger and insert the cutting about 1-2 inches deep into the soil. Firmly press the soil around the cutting to secure it.

Provide Ideal Conditions

Place the pot in a warm and bright location with indirect sunlight. Maintain a consistent temperature between 70-80°F (21-27°C). Keep the soil moist but not waterlogged. You can cover the pot with a plastic bag or place it in a propagation tray to create a humid environment.

Root Development

Over the next several weeks, the cutting will develop roots. Check the soil moisture regularly and mist the leaves if necessary to maintain humidity. Avoid direct sunlight, as it can scorch the cutting.

Transplanting

Once the cutting has developed a healthy root system, usually after 6-8 weeks, you can transplant it into a larger pot or into the garden if the conditions are suitable. Ensure the soil is well-draining and provide adequate watering and care as the plant establishes itself.

Note: Tropical hibiscus propagation from seed is also possible but requires more time and effort. It’s an approach for expert gardeners. It involves harvesting and germinating the seeds, followed by nurturing the seedlings until they are ready for transplanting.

Winter Care for Tropical Hibiscus

Protecting tropical hibiscus during the winter is crucial in regions where temperatures drop below their cold tolerance. Here are some steps to help safeguard your plants:

Timing

Begin winter protection measures when temperatures consistently fall below 50°F (10°C) or when frost is expected.

Pruning

Before the first frost, consider pruning your tropical hibiscus to a manageable size. Remove any dead or diseased branches and aim for a compact shape.

Mulching

Apply a layer of organic mulch around the base of the plant, such as straw or wood chips. This helps insulate the roots and retain moisture.

Covering

Use frost blankets, burlap, or old bedsheets to cover the entire plant during extremely cold nights. Secure the cover loosely to allow for airflow and prevent moisture buildup.

Remove the cover as soon as possible after sunrise. If temperatures are expected to drop for several nights in a row, you can leave the covers on.

Container plants

If your hibiscus is in a container, move it to a protected area like a garage or basement. Ensure the plant receives adequate light and water sparingly to prevent root rot.

Watering

During winter, reduce watering frequency to avoid waterlogged soil. Only water when the top inch of soil feels dry to the touch.

If the cold snap will be brief, water the day before the overnight temperatures drop. Water early enough to allow the day’s sunlight to heat the root zone. This will help keep the soil around the plant warmer overnight.

However, this technique is not suitable for longer cold spells. If you are expecting several nights of cold weather, don’t water until the weather warms enough to remove the coverings.

Temperature monitoring

Keep an eye on weather forecasts and be prepared to provide additional protection if unexpected cold snaps occur.

By implementing these measures, you can help protect your tropical hibiscus from winter damage and promote its health for the following growing season.

Tropical Hibiscus Pests and Diseases

Keep an eye out for common pests like aphids, spider mites, and whiteflies. Treat any infestations promptly using appropriate organic or chemical controls. Monitor for signs of diseases like leaf spot or powdery mildew and take necessary steps to address them.

Common Pests

Common pests affecting tropical hibiscus include aphids, whiteflies, spider mites, and mealybugs. Regularly inspect the plant for signs of infestation.

Here’s some guidance on identifying common insect pests that can infest tropical hibiscus:

Aphids

Look for clusters of small, soft-bodied insects on the undersides of leaves, flower buds, or stems.

Aphids can be green, black, brown, or other colors, depending on the species.

They often leave behind a sticky residue called honeydew, which can attract ants and promote the growth of sooty mold.

Whiteflies

Whiteflies are tiny, white or pale yellow insects that resemble small moths. They can be found on the undersides of leaves, typically in large numbers. When disturbed, whiteflies will fly up in a cloud of tiny insects.

Spider Mites

Spider mites are very small and may appear as tiny dots on the leaves. Look for fine webbing on the undersides of leaves, especially in cases of severe infestation. Spider mites can cause stippling or yellowing of the foliage.

Mealybugs

Mealybugs are soft-bodied insects covered in a white, cottony, waxy substance. They tend to congregate in protected areas, such as leaf axils, leaf undersides, and stem joints. Look for cottony masses and sticky residue on the plant surface.

Oleander caterpillars

Oleander caterpillars are vibrant and distinctive in appearance. They have a black body with bright orange or red stripes running along their length. The caterpillars have a slightly hairy or spiky texture.

When inspecting your hibiscus for pests, be sure to examine the undersides of leaves, as many pests prefer to hide in those areas. Additionally, closely monitor the overall health of your plant for signs of wilting, yellowing leaves, or stunted growth, as these can be indicators of a pest infestation.

Pest Remedy

Control pests by spraying the plant with an appropriate insecticide, focusing on the undersides of leaves where pests often congregate. Follow the product instructions and repeat applications as necessary.

Common Diseases

Tropical hibiscus can be susceptible to diseases such as leaf spot, root rot, and powdery mildew. Ensure proper watering practices, good air circulation, and avoid overhead watering to minimize disease incidence.

Leaf Spot

Leaf spot is a common fungal disease that affects tropical hibiscus. Look for circular or irregularly shaped spots on the leaves, usually with defined margins. The spots can vary in color, ranging from brown, black, or yellow to dark purple.

As the disease progresses, the spots may enlarge and merge, leading to the yellowing and defoliation of affected leaves.

Root Rot

Root rot is a fungal disease caused by overwatering, poor drainage, or soilborne pathogens. Observe the plant for signs of wilting or yellowing leaves that don’t respond to watering.

Gently remove the plant from the pot or dig around the root zone to inspect the roots. Healthy roots should appear white or off-white, while rotting roots may appear brown, mushy, or have a foul odor.

Severely affected plants may exhibit stunted growth and eventually die.

Powdery Mildew

Powdery mildew is a fungal disease characterized by a white or grayish powdery growth on the foliage. Look for a fine, talcum-like coating on the upper surfaces of leaves, stems, and even flowers.

Affected leaves may become distorted, curl, or drop prematurely. In severe cases, the powdery growth can cover a significant portion of the plant, inhibiting photosynthesis and weakening its overall health.

When identifying these diseases, careful observation of the plant’s symptoms and characteristics is essential. If you suspect any of these diseases, it is recommended to take appropriate measures for prevention, treatment, and control to minimize their impact on your tropical hibiscus.

Disease Remedy

To combat diseases, remove and dispose of affected plant material, improve air circulation, and apply appropriate fungicides as recommended by a local garden center or professional.

Special Needs or Care

Tropical hibiscus benefits from regular grooming to remove spent flowers and encourage continuous blooming. Additionally, the plant may require occasional staking or support as it grows taller to maintain an upright habit.

Yellow Leaves Troubleshooting

Several factors can contribute to yellowing leaves in tropical hibiscus. Here are some common causes:

Overwatering

Excessive watering can lead to waterlogged soil and root rot, resulting in yellowing leaves. Ensure proper drainage and avoid overwatering the plant.

Underwatering

On the other hand, if the plant is not receiving enough water, the leaves may turn yellow and wilt. Check the soil moisture regularly and water the plant when the top inch of soil feels dry.

Nutrient Deficiencies

Yellowing leaves can be a sign of nutrient deficiencies, such as iron or nitrogen. A lack of essential nutrients can affect the plant’s ability to photosynthesize and maintain healthy foliage. Fertilize the plant with a balanced fertilizer formulated for tropical plants to ensure it receives adequate nutrients.

Environmental Stress

Tropical hibiscus is sensitive to environmental changes. Exposure to cold temperatures, drafts, or sudden temperature fluctuations can cause leaves to yellow and drop. Ensure the plant is placed in an appropriate location with stable temperatures.

Pests and Diseases

Infestations of pests like aphids, whiteflies, or spider mites, as well as diseases like leaf spot or powdery mildew, can cause yellowing leaves. Inspect the plant regularly for any signs of pests or diseases and take appropriate measures for control.

Natural Leaf Shedding

It is normal for tropical hibiscus to shed older leaves as part of their natural growth cycle. If the yellowing is limited to older leaves at the bottom of the plant, it may be a natural process.

By identifying the specific cause of yellowing leaves, you can take appropriate steps to address the issue and promote healthy foliage growth in your tropical hibiscus.

Landscaping Design Ideas for Tropical Hibiscus

Tropical hibiscus adds a vibrant and tropical touch to any landscape. Plant it as a focal point in garden beds, mix it with other tropical plants for a lush oasis, or grow it in containers to add color to patios and balconies.

Create tropical-themed gardens by combining tropical hibiscus with companion plants such as palms, bird of paradise, or ginger lilies for a stunning display of foliage and flowers.

Companion Plants for Tropical Hibiscus

The following plants have similar water, sunlight, and soil requirements as tropical hibiscus, so should be suitable for companion planting in your landscape.

Flowering Plants

  • Bird of Paradise (Strelitzia reginae)
  • Ixora (Ixora spp.)
  • Plumeria (Plumeria spp.)
  • Ti Plant (Cordyline fruticosa)
  • Firebush (Hamelia patens)

Flowering Bulbs:

  • Canna Lily (Canna spp.)
  • Ginger Lily (Hedychium spp.)
  • Blood Lily (Haemanthus spp.)
  • Amazon Lily (Eucharis spp.)
  • Spider Lily (Hymenocallis spp.)

Perennial Flowering Shrubs

  • Bougainvillea (Bougainvillea spp.)
  • Mandevilla (Mandevilla spp.)
  • Plumbago (Plumbago auriculata)
  • Mexican Petunia (Ruellia brittoniana)
  • Shrimp Plant (Justicia brandegeana)

Creating a Tropical Paradise with Hibiscus

Tropical hibiscus (Hibiscus rosa-sinensis) is a captivating and vibrant plant native to warm tropical regions. Its glossy foliage and large, showy flowers make it a delightful addition to gardens and landscapes.

By providing the right growing conditions, including adequate sunlight, well-drained soil, and protection from cold temperatures, you can enjoy the beauty of tropical hibiscus throughout the year.

Remember to care for your plant by regular watering, appropriate fertilization, and addressing any pests or diseases promptly. With proper care, tropical hibiscus will reward you with its stunning blooms and bring a touch of the tropics to your garden.

FAQ – Frequently Asked Questions About Growing Tropical Hibiscus

How tall do tropical hibiscus get?

Tropical hibiscus can grow anywhere from 3 to 10 feet tall, depending on the specific variety and growing conditions. Compact varieties are more suitable for containers or smaller spaces and may stay around 3 to 4 feet tall, while larger varieties can reach heights of 6 to 10 feet.

What is the lowest temperature for tropical hibiscus?

Tropical hibiscus is generally not tolerant of freezing temperatures. Prolonged exposure to temperatures below 28°F for several hours or more is likely to cause severe damage or kill the plant.

What is the tropical hibiscus growth rate?

The growth rate of tropical hibiscus can range from 6 to 12 inches in height per year during the peak growing season.

Is tropical hibiscus annual or perennial?

Tropical hibiscus is a perennial plant in its native tropical and subtropical regions where it can thrive year-round. However, in areas with cold winters, tropical hibiscus is often grown as an annual or treated as a tender perennial.

What are the signs of tropical hibiscus frost damage?

Frost damage on a tropical hibiscus plant typically manifests as wilting, browning, or blackening of the foliage and stems. The leaves may become limp and appear water-soaked. In severe cases, the plant may exhibit leaf drop or defoliation.

Do tropical hibiscus come back every year?

No, tropical hibiscus will not grow back after a cold winter in temperate climates. However, in frost-free regions or with proper protection, it may survive and continue to grow year-round.

What is the cause if my tropical hibiscus lost all leaves?

There can be several possible causes for a tropical hibiscus plant losing all its leaves. It could be due to environmental stressors such as cold temperatures, frost damage, or excessive exposure to direct sunlight. Overwatering or underwatering can also lead to leaf drop.

Can you grow tropical hibiscus from seed?

Yes, you can grow a tropical hibiscus from seed. However, it’s important to note that tropical hibiscus seeds can be a bit challenging to germinate and require specific conditions for successful growth.

What is the difference between tropical hibiscus vs hardy hibiscus?

Tropical hibiscus thrives in warm, tropical or subtropical climates and cannot tolerate freezing temperatures, while hardy hibiscus is adapted to colder regions and can withstand freezing temperatures.

Is tropical hibiscus tea safe to drink? Is tropical hibiscus what they use to make tea?

Yes, tropical hibiscus, specifically Hibiscus sabdariffa, is the variety commonly used to make herbal tea known as hibiscus tea or roselle tea. The calyces (the fleshy covering around the seed pod) of the Hibiscus sabdariffa plant are harvested and used to make the tea.

Do hibiscus grow better in pots or ground?

Hibiscus can thrive both in pots and in the ground, but each option has its considerations. When grown in pots, hibiscus plants offer the advantage of portability, allowing you to move them indoors during colder months or place them in optimal locations for sunlight. Potted hibiscus may require more frequent watering and fertilization due to limited soil volume.

How hot is too hot for hibiscus?

The optimal temperature range for hibiscus is typically between 60°F (15°C) and 90°F (32°C). When temperatures consistently exceed 90°F (32°C), hibiscus may experience reduced growth, wilting, leaf drop, and flower damage. High heat combined with intense sunlight can also lead to sunburn on the leaves.

How do you keep hibiscus blooming?

Ensure your tropical hibiscus receives consistent moisture. Feed your tropical hibiscus plant with a water-soluble bloom booster for acid-loving plants. Then work in some slow-release fertilizer formulated for flowering plants around the root zone and apply a layer of organic mulch to help retain moisture. Deadheading regularly will encourage the development of new buds.

Where can I find tropical hibiscus plants for sale?

Our nursery carries tropical hibiscus for sale and can ship them conveniently to your home. Visit our shop at: https://southerngarden.net/shop/