Posted on

Learn How to Grow Bananas in Florida

Grow Bananas in Florida

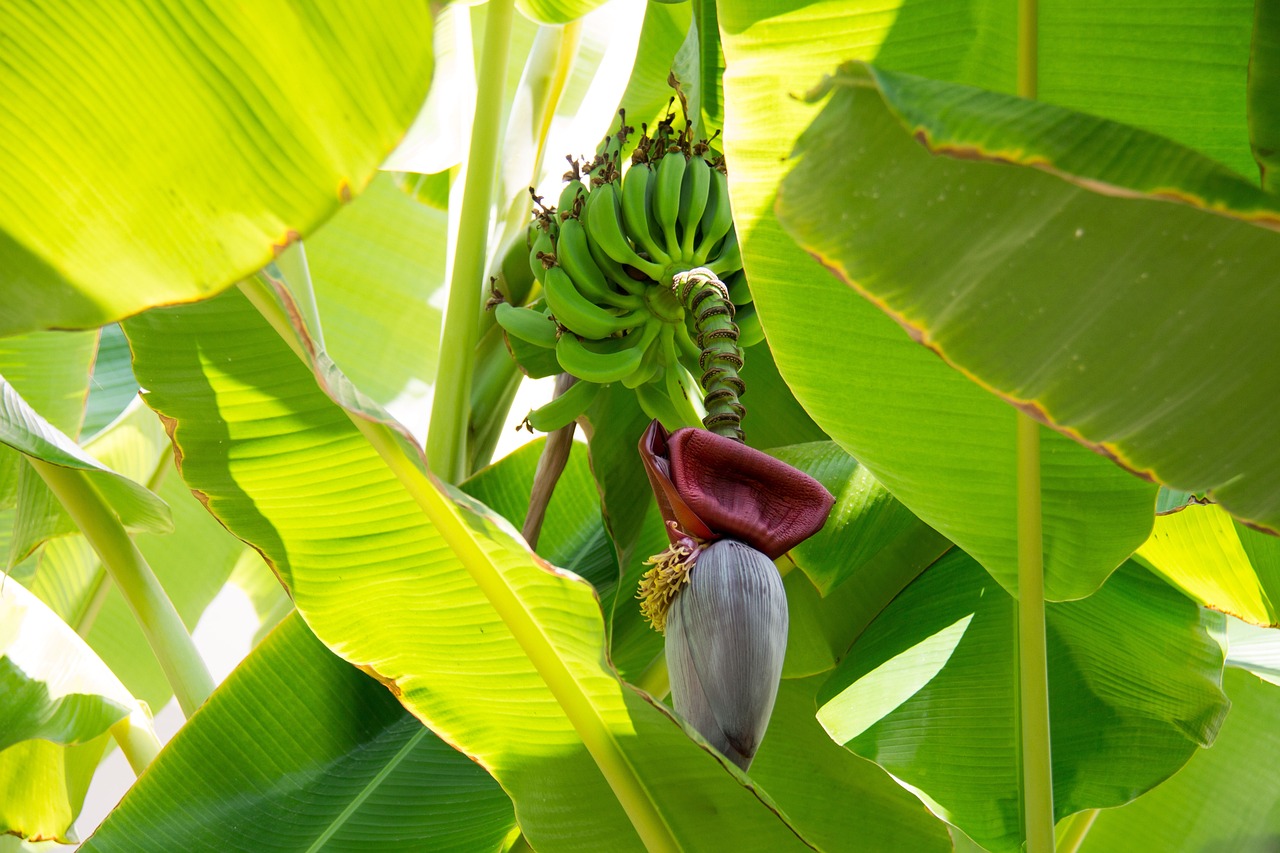
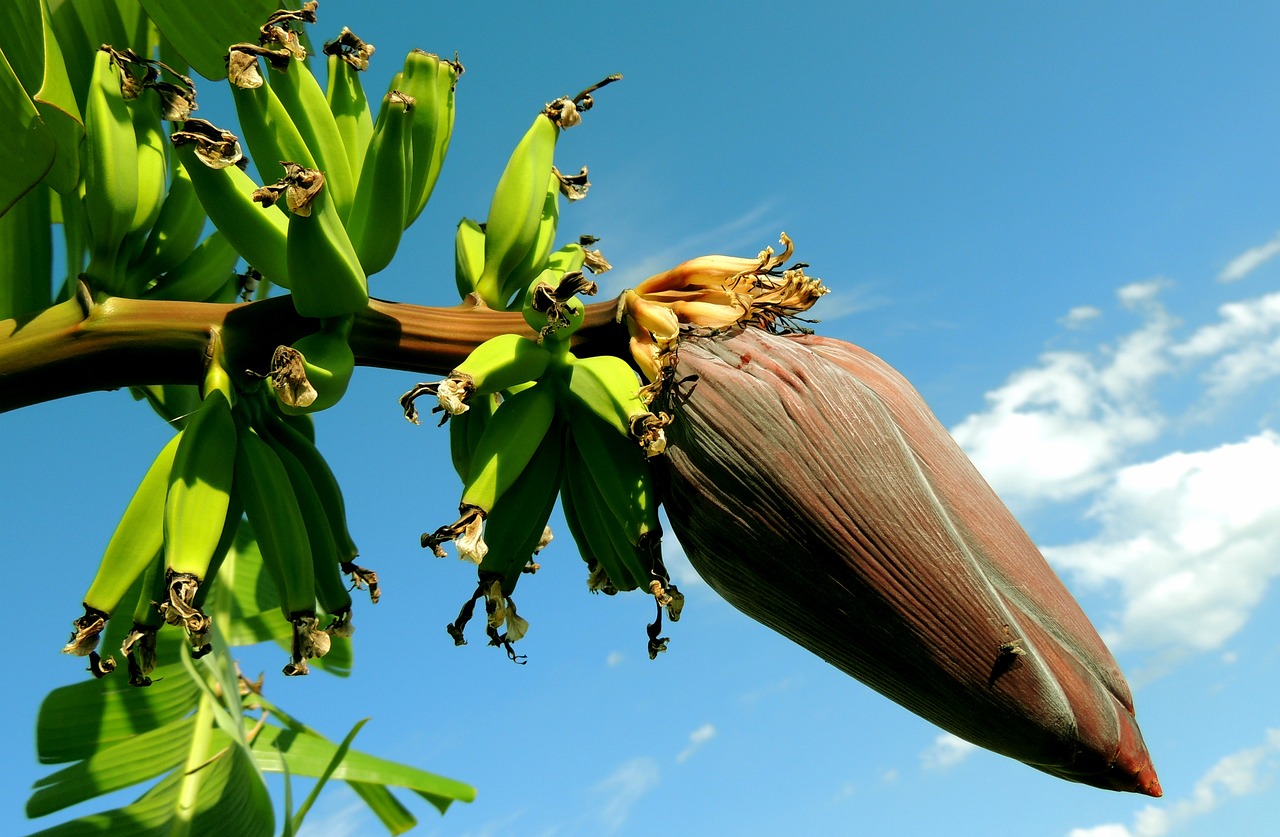
If you’re a Florida gardener dreaming of growing your own tropical fruit paradise, look no further than the magnificent banana plant. With their lush foliage and delicious fruit, bananas can thrive in Florida’s subtropical climate. Let’s explore the best varieties suited for each zone, share valuable tips on growing conditions, soil requirements, and planting times, and find out more about how to grow bananas in Florida.

Ornamental vs. Edible Bananas

Before we delve into the specifics, it’s important to distinguish between ornamental and edible bananas. While both types offer stunning foliage, ornamental varieties produce inedible or barely edible fruit. To truly enjoy the flavor and sweetness of homegrown bananas, opt for edible varieties specifically bred for fruit production.

It’s important to note that while these ornamental varieties add visual interest to gardens, their fruit is either inedible or of very poor quality. Therefore, for those looking to grow bananas for their delicious fruit, it’s essential to select edible banana varieties specifically bred for fruit production.

Here are some varieties to avoid if you’re hoping for a harvest:

  1. Musa ornata: Known for its vibrant pink inflorescence and attractive dark green leaves with red midribs, this ornamental banana adds a touch of tropical beauty to gardens.
  2. Musa velutina: Also called the Pink Banana, this variety showcases stunning pink fruits and velvety pink bracts. It’s a favorite among collectors for its ornamental appeal.
  3. Ensete ventricosum ‘Maurelii’: While technically a close relative of the banana, this ornamental variety, commonly known as the Red Abyssinian Banana, is primarily grown for its striking red foliage.
  4. Musa sikkimensis ‘Red Tiger’: This ornamental banana boasts maroon-red leaves with prominent green stripes, creating a visually captivating display in gardens and landscapes.

Best Banana Varieties to Grow in Florida

Growing bananas successfully in Florida requires selecting suitable varieties for each USDA zone. Let’s explore some of the top banana types known to thrive in the Sunshine State:

North Florida / Zone 8:

  1. ‘Dwarf Cavendish’ (Musa acuminata): This compact variety grows well in containers, making it ideal for Zone 8 gardens. It produces tasty, medium-sized bananas with a pleasant flavor profile.

Central Florida / Zone 9:

  1. Goldfinger Banana (FHIA-01): Resistant to Panama disease, this variety excels in Zone 9. Its creamy fruit has a sweet flavor reminiscent of dessert bananas.
  2. Lady Finger Banana (Musa acuminata ‘Lady Finger‘): Thriving in Zone 9, these slender, aromatic bananas offer a delicate and sweet taste.

South Florida / Zone 10:

  1. Mona Lisa Banana (FHIA-2): Perfect for Zone 10, this variety produces large bunches of sweet, aromatic bananas. It offers excellent disease resistance and handles Florida’s hot climate well.
  2. Honey Banana (Musa johnsii): Well-suited for Zone 10, this unique banana variety features a honey-like flavor and attractive red-purple skin when ripe.

Choosing Banana Plants for Your Florida Garden

I don’t know about you, but when they’re small, all bananas pretty much look the same to me. It’s always a good idea to choose the variety carefully, so look for the label when you’re at your local nursery. If you don’t see one, ask someone. You really don’t want to end up with an ornamental type when you’re hoping to be making home-grown banana bread someday.

Dwarf Cavendish

‘Dwarf Cavendish’ (Musa acuminata) is a popular banana variety renowned for its compact size and delectable fruit. This cultivar typically reaches a height of around 6 to 8 feet (1.8 to 2.4 meters) at maturity, making it an excellent choice for smaller gardens or container cultivation.

The ‘Dwarf Cavendish’ features broad, lush green leaves that create a tropical ambiance wherever it grows. This variety takes approximately 2 to 3 years to reach maturity and begin flowering, producing pendulous clusters of creamy yellow fruit.

The fruit of the ‘Dwarf Cavendish’ is medium-sized, with a smooth, thin skin that turns yellow when ripe. Its flavor is delightfully sweet, often described as having a subtle and creamy banana taste with hints of tropical notes.

When fully ripened, the ‘Dwarf Cavendish’ offers a luscious and satisfying eating experience, making it a favorite choice for banana enthusiasts.

Goldfinger

The Goldfinger Banana (FHIA-01) is a remarkable banana variety known for its resistance to several diseases, making it an excellent choice for growers. This hybrid cultivar combines the genetics of the wild banana (Musa balbisiana) and the Dwarf Cavendish (Musa acuminata).

At maturity, the Goldfinger Banana typically reaches a height of 8 to 10 feet (2.4 to 3 meters) with a spread of about 4 to 6 feet (1.2 to 1.8 meters). It exhibits sturdy and upright growth habits, producing large, attractive leaves with green foliage. The Goldfinger Banana matures in approximately 9 to 12 months and starts flowering when it reaches about 7 feet (2.1 meters) in height.

The fruit it bears is elongated and has a vibrant yellow skin when fully ripe. The flavor profile of the Goldfinger Banana is exquisite, with a rich and sweet taste complemented by hints of tropical flavors.

Its firm and creamy texture enhances the overall culinary experience, making it a highly desirable choice for both fresh consumption and culinary uses.

You may not be about to grow bananas in Florida quite this big unless you're in the Keys

Lady Finger

The Lady Finger Banana (Musa acuminata ‘Lady Finger‘) is a distinguished banana variety appreciated for its petite size and delectable fruit. Also known as “Sucrier” or “Sugar Banana,” this cultivar is treasured for its sweetness and fine texture.

The Lady Finger Banana typically grows to a height of 6 to 8 feet (1.8 to 2.4 meters) at maturity, with a spread of approximately 3 to 5 feet (0.9 to 1.5 meters). It displays an upright growth habit, producing slender leaves that add an elegant touch to any garden. This variety takes around 12 to 16 months to reach maturity and begin flowering.

The fruit of the Lady Finger Banana is small and cylindrical, with a thin golden-yellow skin when fully ripe. Its flesh is creamy and tender, offering a delectable balance of sweetness and subtle tanginess.

The Lady Finger Banana is often praised for its dessert-like flavor, reminiscent of vanilla and honey. Its petite size and exceptional taste make it a favorite choice for enjoying fresh or incorporating into various culinary creations.

Mona Lisa

The Mona Lisa Banana (FHIA-2) is a captivating banana variety that stands out for its exceptional flavor and ornamental features. This hybrid cultivar, bred from the Honduran Foundation for Agricultural Research (FHIA), offers both aesthetic appeal and delectable fruit.

The Mona Lisa Banana grows to a height of about 10 to 12 feet (3 to 3.6 meters) at maturity, with a spread of approximately 5 to 6 feet (1.5 to 1.8 meters). It showcases large, lush green leaves that create a tropical ambiance in any garden. This variety typically takes around 12 to 14 months to reach maturity and start flowering.

The fruit of the Mona Lisa Banana is medium-sized, with a slightly curved shape and a vibrant yellow color when ripe. Its flavor profile is highly regarded, characterized by a rich, sweet taste with hints of caramel and hints of citrus. The fruit’s creamy texture further enhances the eating experience.

The Mona Lisa Banana excels as a dessert banana due to its delectable flavor and also adds an aesthetic appeal to landscapes and gardens with its lush foliage and graceful presence.

Honey Bananas

Honey Banana (Musa johnsii) is a unique and lesser-known banana variety that offers a delightful taste and distinctive characteristics. This species is highly regarded for its exceptional sweetness, earning its name “Honey Banana.”

The Honey Banana plant reaches a height of about 6 to 8 feet (1.8 to 2.4 meters) at maturity, with a spread of around 3 to 4 feet (0.9 to 1.2 meters). It displays a compact growth habit, making it suitable for smaller gardens or container cultivation. The time it takes for Honey Bananas to reach maturity and start flowering is approximately 12 to 14 months.

The fruit of the Honey Banana is medium-sized with a slender shape and a bright yellow skin when fully ripe. Its flavor is the highlight, characterized by an intense sweetness reminiscent of honey, along with subtle floral notes. The Honey Banana’s velvety smooth texture adds to the overall eating experience.

While not as widely known as some other banana varieties, the Honey Banana surprises with its unique flavor profile, making it a delightful choice for those seeking a distinct and sweet tropical treat.

Blue Java

The Blue Java banana (Musa acuminata × balbisiana ‘Blue Java’) is a fascinating and sought-after banana variety, renowned for its unusual blue-green coloration and distinctive flavor. This cultivar, often referred to as the “Ice Cream Banana,” offers a unique combination of visual appeal and delectable taste.

The Blue Java banana plant reaches a height of 10 to 20 feet (3 to 6 meters) at maturity, with a spread of approximately 6 to 8 feet (1.8 to 2.4 meters). It displays a robust growth habit, with large, sturdy leaves that create a lush tropical atmosphere. The time it takes for the Blue Java banana to grow to maturity and start flowering is typically around 12 to 20 months.

The fruit of the Blue Java banana is medium-sized, with a thick, pale blue-green skin when fully ripe. Its flavor is what sets it apart, often described as resembling vanilla ice cream or custard. The flesh is creamy and velvety, offering a rich and sweet taste with subtle hints of vanilla.

The Blue Java banana’s unique flavor profile, combined with its visually stunning appearance, makes it a highly sought-after variety among banana enthusiasts and a true delight for those seeking a tropical treat with a twist.

Plantains vs. Bananas

Plantains, often confused with bananas, are a versatile staple in tropical cuisine. While they resemble bananas, plantains require different cooking methods due to their starchier texture. Plantains are often cooked before consumption and used in various savory dishes.

Best Plantain Bananas to Grow in Florida

To enjoy the goodness of plantains in your Florida garden, consider these top varieties:

Platano Burro

Well-adapted to Florida’s climate, this plantain variety offers large, starchy fruit with a mildly sweet flavor.

Platano Burro (Musa paradisiaca), also known as the “Burro Banana” or “Horse Banana,” is a popular plantain variety valued for its versatility and distinct flavor. Unlike sweet bananas, the Platano Burro is primarily used for cooking due to its starchy nature.

This plantain cultivar grows to a height of 15 to 20 feet (4.5 to 6 meters) at maturity, with a spread of approximately 10 to 15 feet (3 to 4.5 meters). It displays large, broad leaves that provide a tropical ambiance to the landscape. The time it takes for the Platano Burro to reach maturity and start flowering is typically around 12 to 16 months.

The fruit of the Platano Burro is larger and more angular compared to sweet bananas, with a thick green skin that turns yellow-black as it ripens. When cooked, the fruit takes on a soft and creamy texture, perfect for making delicious dishes such as plantain chips, mashed plantains, or plantain fritters.

The flavor profile of the Platano Burro is unique, offering a mild, slightly sweet taste with subtle hints of tanginess. Its versatility in various culinary applications, combined with its hearty and flavorful nature, makes the Platano Burro a favored choice among those seeking to explore the world of plantain-based cuisine.

Saba

Thriving in Florida’s warm climate, Saba plantains produce large, starchy fruit perfect for cooking and frying.

The Saba Plantain (Musa acuminata × balbisiana ‘Saba’) is a popular and robust plantain variety cherished for its versatility in both cooking and baking. This hybrid cultivar, known for its large size and starchy texture, is highly valued in tropical cuisines.

The Saba Plantain grows into a sizeable plant, reaching heights of 15 to 20 feet (4.5 to 6 meters) at maturity, with a spread of approximately 10 to 15 feet (3 to 4.5 meters). It showcases broad leaves that create a lush and tropical atmosphere in the garden. The time it takes for the Saba Plantain to mature and start flowering typically ranges from 10 to 14 months.

The fruit of the Saba Plantain is elongated and thick-skinned, transitioning from green to yellow-black as it ripens. Unlike dessert bananas, the Saba Plantain is not typically consumed raw due to its starchy nature. When cooked, however, it transforms into a delectable treat. The flavor profile of the Saba Plantain is characterized by a mildly sweet taste and a dense, creamy texture.

Its versatility makes it ideal for a wide range of culinary creations, from savory plantain chips and stews to delectable plantain bread or cakes. The Saba Plantain’s substantial size, adaptability, and hearty flavor make it a staple ingredient in many tropical cuisines and a favorite among plantain enthusiasts.

How to Grow the Best Tasting Bananas

To ensure your banana plants thrive, it’s essential to understand the environmental factors that influence their growth:

Temperatures

Bananas thrive in consistently warm to hot conditions. The optimal temperatures are between 78°F to 82°F, although they fruit best at 84°F to 86°F.

When temperatures drop below 60°F, the growth of banana plants slows down, and it completely stops at 50°F. So, you won’t see much progress on your bananas during the winter.

Unfortunately, cooler winter days can really stunt the growth of your banana fruits when temperatures are between 32°F and 50°F.

The plants themselves can become damaged when temperatures drop below freezing for many hours. Signs of freeze damage include the death of leaves and browning of the trunk and fruit.

Temps below 28°F (-2°C) may even kill the plants, but they usually regrow from the underground rhizome once warm weather returns.

On the other hand, excessively high temperatures at or above 98°F (37°C) can lead to leaf scorch, and newly emerging leaves may appear very narrow. This is why you may want to consider planting your bananas in some dappled shade if you’re in South Florida.

Sun and Wind Exposure

Wind can damage banana leaves, so consider planting in a sheltered location or using windbreaks. This may also provide some protection from summer scorching.

Bananas thrive in full sun but can tolerate partial shade, especially during the hottest part of the day.

Drought and Flooding: While bananas prefer consistent moisture, they can tolerate short periods of drought. Avoid waterlogged conditions.

Grow Bananas in Florida Soil

Bananas thrive in well-drained soil rich in organic matter. Sandy loam soils are ideal, but heavy clay soils can be amended with organic matter to improve drainage. Add compost or well-rotted manure to enhance soil fertility.

Bananas are sensitive to high salt levels in the soil. Choose well-draining soils with low salinity.

When to Grow Bananas in Florida

The ideal time to plant bananas in Florida varies by zone:

  • Zone 8: Plant bananas in early spring after the threat of frost has passed.
  • Zone 9: Plant in late winter or early spring.
  • Zone 10: Plant year-round, avoiding the hottest months of summer.

Circle the Bananas

Banana circles, also known as banana pits or banana circles, have gained popularity among permaculture enthusiasts as an innovative and sustainable way to grow bananas.

This method draws inspiration from traditional agricultural practices found in various cultures around the world. While the exact origins of banana circles are difficult to trace, their use can be seen in regions such as Southeast Asia, Africa, and South America, where bananas have been cultivated for centuries.

The concept behind banana circles revolves around creating a self-sustaining ecosystem that mimics the natural conditions in which bananas thrive. It involves digging a circular pit in the ground and gradually building up layers of organic matter within it. The organic materials used can include kitchen scraps, compost, mulch, leaves, straw, animal manure, and any other biodegradable waste readily available. As these materials decompose, they release nutrients into the soil, creating a fertile environment for banana plants.

Banana circles offer several advantages for banana cultivation. Firstly, the circular shape provides an efficient use of space, allowing multiple banana plants to be grown in a compact area. This is especially beneficial for home gardeners with limited space.

Additionally, the layers of organic matter create a moisture-retaining and nutrient-rich environment, reducing the need for frequent watering and fertilization. The organic matter also acts as a mulch, helping to suppress weeds and maintain soil moisture levels.

Banana circles are a holistic way to grow bananas in Florida and they utilize natural processes and recycle organic waste. They promote soil health, conserve water, and encourage biodiversity by creating microhabitats that attract beneficial insects and microorganisms.

Banana circles contribute to the overall resilience of the garden ecosystem, as the decomposing organic matter feeds not only the banana plants but also neighboring plants and soil organisms.

These circles not only provide an abundant harvest of bananas but also provide a lightly shaded understory for growing more sun-sensitive plants in rich and fertile soil.

Planting a Banana Circle

Creating a banana circle, as practiced in permaculture, can optimize growth and provide a sustainable environment for your banana plants. Follow these simple steps to create a banana circle:

  1. Choose a sunny or partially shaded location that is somewhat sheltered from harsh or excess wings.
  2. Dig a circular trench approximately 1-3 feet deep and 3 feet wide.
  3. Place organic matter, such as leaves or compost, kitchen scraps, composted manure, etc. in the bottom of the trench.
  4. Plant your banana pups around the inner edge of the circle, leaving space for growth.
  5. Backfill the trench with soil and water thoroughly.
  6. Mulch the area around the circle to conserve moisture and suppress weeds.

Care Tips for the Best Tasting Banana

To ensure healthy and fruitful banana plants, follow these care tips:

Feeding Your Bananas

Fertilizing bananas is essential for promoting healthy growth and maximizing fruit production. The timing and nutrient requirements may vary based on the growth stage and the specific USDA growing zone in Florida. In general, it is recommended to fertilize bananas during the active growing season, which typically spans from spring to early fall.

USDA Zone 8

For USDA Zone 8, it is advisable to apply fertilizer in early spring, around March or April, to provide the necessary nutrients for robust growth. Repeat the application every six to eight weeks until early fall.

USDA Zone 9

In USDA Zone 9, where the growing season is longer, you can begin fertilizing in late winter or early spring, around February or March. Continue fertilization every six to eight weeks throughout the growing season.

USDA Zone 10

In USDA Zone 10, with its year-round warm climate, bananas benefit from regular fertilization. Begin fertilizing in early spring and continue every six to eight weeks, maintaining a consistent nutrient supply.

The Macros and Micros

When it comes to nutrient requirements, bananas have specific needs to thrive. The primary macronutrients required are nitrogen (N), phosphorus (P), and potassium (K). The recommended NPK formula for edible bananas is generally around 3-1-6 or 2-1-6. This means that the fertilizer should have a higher potassium content compared to nitrogen and phosphorus. This balanced ratio helps promote healthy foliage growth, sturdy stems, and enhanced fruit development.

In addition to the macronutrients, bananas also require various micronutrients for optimal growth. Some essential micronutrients for bananas include magnesium (Mg), iron (Fe), manganese (Mn), zinc (Zn), copper (Cu), and boron (B). These micronutrients play crucial roles in enzyme activation, chlorophyll production, and overall plant health. It is recommended to use a fertilizer that includes these micronutrients in its formulation or supplement with micronutrient-specific products as needed.

Organic Fertilizer for Bananas

For those preferring organic alternatives to commercial fertilizers, several options are available. Organic materials such as compost, well-rotted manure, and worm castings can provide a rich source of nutrients for bananas. Additionally, organic fertilizers made from natural sources like fish emulsion, seaweed extracts, and bone meal can be effective in meeting the nutritional needs of banana plants. These organic alternatives offer sustainable options while nourishing the soil and supporting healthy growth.

Irrigation for Bananas

Bananas require consistent moisture. Provide regular deep watering to keep the soil evenly moist.

Mulching helps suppress weeds and conserve moisture. Use chop and drop when trimming browned leaves. They will break down in the soil and provide nutrients while helping to retain moisture in the soil until they do.

It’s especially important to provide water throughout the winter and spring in Central and South Florida. Once you pass your last freeze date, you’ll need to water your bananas regularly until the rainy season begins.

How to Harvest Your Banana Crop

Bananas typically take around 9-15 months to mature, depending on the variety. Once the flower has produced as much fruit as it will, the bananas will begin to grow larger and become plump.

At this point, you can cut off the remaining flower if you like. I haven’t noticed any difference between leaving them on or cutting them off. Many people enjoy eating banana flowers in regional dishes, but I normally cut them down to prevent stressing the pseudostem. I drop them into the middle of the circle to compost.

Once they reach their mature size, the top bananas on the stalk will begin to turn yellow. That’s when it’s time to harvest.

You can harvest each hand of bananas individually as they become ripe, if you choose. Cut them from the stalk with a sharp knife.

Alternatively, you can harvest the whole stalk by cutting it about 10-12″ above the top hand of bananas. You can hang them up in a utility room or garage to finish ripening.

Note that the bananas will begin to fall off the stem as they ripen, so you’ll want to make sure you harvest them regularly so you don’t end up with a pile of rotten bananas under the stalk.

The Tragedy of Bananas

Once a banana plants fruits, it will die off. So, you won’t get any more bananas from the same plant once it has. However, you will get new banana plants growing from the rhizomes below.

Many times, you’ll see several pop up before the plant even blooms, which is reassuring when you realize that the plant will die after fruiting.

I’ve noticed that Dwarf Cavendish will definitely throw out two or three pups before blooming. I have a few other varieties that I’ve forgotten the names of that don’t send up pups as prolifically.

Sometimes you’ll get more pups from the rhizome, even though the mother plant appears to be completely dead. If you’re using the banana circle method, allow the “tree” to brown and dry out completely. Once it is completely dead, you can just push it over and allow it to gently decompose within the circle.

Time to Grow Bananas in Florida

By now, you’re equipped with the knowledge you need to grow bananas in your Florida garden. Take advantage of the summer rainy season to get your own mini-plantation going this summer.

Roll up your sleeves, get your hands dirty, and embrace the joy of growing bananas in Florida. Start your journey towards self-sustainability and enjoy the delectable flavors of homegrown tropical fruits right in your own backyard. Happy gardening!

Posted on

What We’re Growing in June 2023 – Summer Garden Central Florida

bananas in the summer garden in central florida

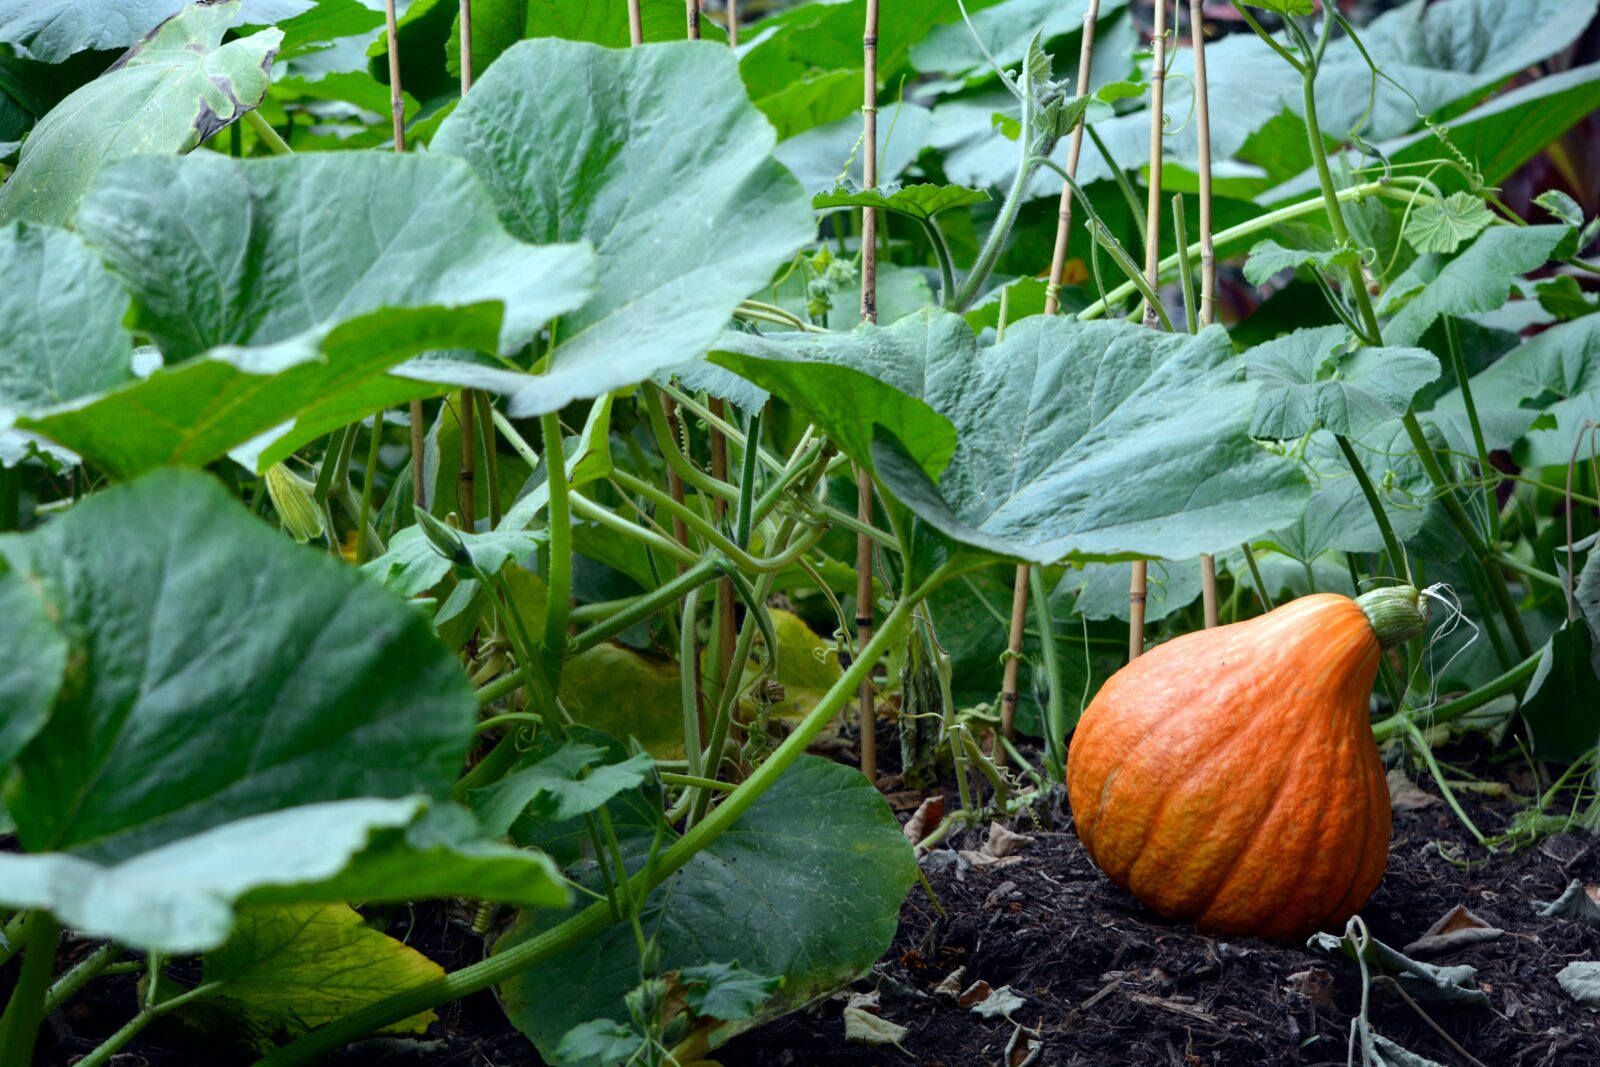
It’s been a cold winter and a dry spring, but now it’s June and the summer garden in Central Florida is … well … hot, wet, full of bugs, and still struggling.

But that’s okay. Zone 10 and Zone 9 Florida gardening is usually filled with challenges. Who else still has debris from Hurricane Ian or Hurricane Nicole? I know I do!

The rains have finally started, although it may be too little, too late. We need the rain badly, and for anyone growing perennials or trying to establish a food forest, the rains are always welcome.

Vegetable Gardening – What Can I Plant in June in Florida?

What are you planting in June this year in Florida? Are you ready for the challenge? There are a few vegetable varieties, specifically tropical edibles, that love our summer heat and humidity.

Very few of the traditional vegetables will make it if planted between now and August. It really isn’t the heat – it’s the humidity. In fact, the temperature often settles to a relatively comfortable level in the summer, thanks to the overcast skies and the regular rains.

But anything with any susceptibility to fungal disease won’t make it.

So long, tomatoes!

It’s been fun, cukes!

Sayonara, squash!

A few vegetables you can plant in June in all Florida gardening zones include:

  • boniato slips
  • calabaza squash
  • cassava
  • chaya
  • chayote
  • ginger
  • katuk
  • longevity spinach
  • Malabar spinach
  • molokhia
  • okra
  • Okinawa spinach
  • Pigeon peas
  • Seminole pumpkins
  • Southern peas (Crowder, Cowpeas, Black-eyed peas)
  • sweet potato slips
  • taro
  • tindora

A few herbs and spices to plant out are:

  • basil
  • cumin
  • galanga
  • ginger
  • oregano
  • papalo
  • rosemary
  • tindora

Note that basil, oregano, and rosemary love the heat but hate the humidity. If you can keep them under some cover to keep them from drowning, they will love you for it.

What I’m planting in June 2023

I'm growing sugar baby watermelon in June in Central Florida

Vegetable gardening is taking a bit of a backseat in my backyard this year. I still have peppers and watermelons that I’m hoping to keep harvesting for a while.

The yard-long beans are producing faster than I can prep them for storage.

But the big project this summer is nursery expansion.

We’ll be adding more covered space with a new greenhouse (or two) to increase the growing area. And the gardening focus is on building inventory.

I’ll be air-layering star jasmine and propagating cuttings of plumbago, fire bush, bougainvillea, and golden dew drop.

And of course more mulberry trees.

Summer is also a good time to start perennial flowers from seed. I’m hoping to have more salvias and blue butterfly pea vine plants to ship soon.

I’ll also be stocking up the inventory for more annual seeds for the shop.

Fruit Trees Love the Summer Garden in Central Florida

My family loves bananas, and it’s a good thing, because we have dozens of banana “trees,” with at least 10 in flower or fruiting.

The rainy season is a good time to get your own banana circle started. Bananas need a lot of moisture, especially to get established.

I’m hoping to start carrying banana plants in the nursery next spring, but for now, I’ll just enjoy being a home grower.

Flower Gardening — What can I plant in June in Florida?

Duranta erecta

If you’re uninspired by the small range of edibles to grow in the summer garden in Central Florida, you’ll be happy to know that adding flowers for pollinators is always in season.

You’ll find a wide range of heat-tolerant and even heat-loving flowers that attract bees and butterflies to your yard. Getting a good pollinator garden established now will come in handy in September and October when your cucumbers need pollinating.

Some great varieties for Florida gardening zone 9 and 10 are:

Florida Summer Garden Tip

If you’ve ever wept over pounds of scabby-looking tomatoes, pocked with yellow spots, and covered by horrible little orange insects, then you know the pain of dealing with leaf-footed bugs (squash bugs) is real.

I tried this.

It works.

You really need to soak the little buggers down, but it works.

Go forth and claim back your garden from the leaf-footed menace.

And happy gardening!

Posted on

Flowers for Florida – What We’re Planting in February

Blanket flowers are one of the best choices in flowers for Florida

It’s Valentine’s Day, and that means flowers. Lots and lots of flowers. If you’d prefer to grow your own, the good news is that this month sees Florida warming up and drawing closer to our last frost dates. Flowers for Florida for gardeners means it’s time to start sowing and planting.

Purchasing Flowering Plants and Bedding Plants

If you plan to purchase plants at your local nursery or home improvement center, you can begin planting them out now in South Florida. Be aware that some of these plants have been treated with systemic pesticides. While these make it easier for the grower to present you with beautiful, undamaged plants, it can also mean they could harm your pollinators.

Be especially diligent by avoiding plants that have been treated with Neonicotinoid insecticides. These are particularly harmful to bees.

Sowing Flower Seeds

You can avoid all synthetic pesticides when you sow your own flower seeds. Florida flower gardeners are particularly lucky, as our growing season is long enough to allow some scheduling leeway for sowing from seed.

South Florida, Zones 10 and 11

Flowers for Florida -- coreopsis is Florida's official state wildflower
Coreopsis is Florida’s State Wildflower

The USDA and Farmer’s Almanac say that South Florida doesn’t have a last frost date. But that doesn’t mean we shouldn’t be careful with tender seedlings.

In February, it’s still a good idea to nurture small seedlings under cover in case of a late frost or cold snap. This winter, it seems more important than ever. We seem to be heading toward a trend of cooler winters. Last year, we had a cold snap in mid-March.

Some varieties you can plant out or start in seed trays include:

  • asters
  • bachelor’s buttons
  • bee balm
  • bulbine
  • calendula
  • cosmos
  • dianthus
  • gaillardia
  • impatiens
  • lobelia
  • marigolds
  • nasturtiums
  • nigella
  • salvias
  • snapdragons
  • sunflowers
  • tithonia
  • verbena
  • vinca
  • zinnias

Central Florida, Zone 9

Tithonia delivers in Florida’s hot summers

The last frost date for Zones 9a and 9b fall in mid-to-late February. While you can still plant out fully developed plants from the nursery, starting fast-growing annuals from seed right now is a great way to reduce your landscaping costs.

For flowers in February, plant out starter plants of the following varieties. You can still start seeds as well, and plant out in 4 to 6 weeks. This will ensure that none of your plants are damaged by a late cold snap.

  • asters
  • bachelor’s buttons
  • bee balm
  • calendula
  • dianthus
  • lobelia
  • nasturtiums
  • nicotiana
  • nigella
  • pansies
  • petunias
  • snapdragons
  • sunflowers
  • tithonia
  • verbena

North Florida, Zone 8

Love-in-a-Mist, or Nigella

The last frost for Zone 8 falls in mid-March. So, it may be too early to plant out most flowers for Florida. However, it’s a great time to sow annual flowers for your butterfly garden indoors or under cover where you can keep them warm.

Consider the following varieties for planting out or sowing now:

  • agapanthus
  • asters
  • bee balm
  • crinum lily bulbs
  • dahlia bulbs
  • dianthus
  • lavender
  • nigella
  • pansies
  • snapdragons
  • viola

Flowers for Florida in February Guaranteed

One of the best ways to ensure you’ll have flowers in February is to plant out perennial flower bushes in the previous fall. Our mild temperatures and regular fall rainfall create the perfect conditions to establish flowering bushes and trees like plumbago, duranta, and hibiscus.

It seems there is far too much to do in February for the Florida gardener, but we’re lucky. You can plant annual flower seeds nearly year-round for a regular succession of colorful blooms.

Posted on

Best Vegetable Varieties to Grow in Florida

pumpkin vegetable varieties for Florida

Most Florida gardeners are starting to plan our fall gardens right about now. Even if it’s still way too hot to work outside. We can sit indoors in the air conditioning with a sweet tea, watching the storms, dreaming of an abundance of vegetables in just a few months. But what vegetable varieties are you planning?

If you’re wondering what vegetables to grow in Florida, the answer is all of them!

English plantswoman and gardening icon Beth Chatto taught us “Right plant, right place.”

In Florida, we get another dimension – the right time.

We’re heading for fall. We’re ready for fall. We know when. We even know where.

All we need now is to know which are the right plants.

Understanding Vegetable Varieties

Plants fall into different families, and these are separated into different genera, and then different species.

Within species, say, tomatoes, you’ll find different “varieties.” Some are natural varieties produced by mutation. Others have been cultivated by people for specific characteristics..

Plant Families

Plants in the same families share similar characteristics in their germination, growth, flowering, and fruiting habits. Some of the most common plant families in home gardening include these plant families.

Many gardeners swear by rotating every plot on their land by these plant families. Theoretically, any soil disease or pest that develops over one season is sure to damage the same type of plant in the following season.

The issue of nutrients is also a factor. Some plant families all require a great deal of nitrogen. Repeatedly growing members of these plant families in the same plot can lead to nitrogen depletion and poor results.

Common Plant Families in Gardening

While not wholly inclusive, the following represent some of the more common plant families in home gardens.

Solanaceae

Also known as the “nightshade” family, this group includes some of the most popular home garden vegetables.

  • Tomatoes
  • Peppers
  • Eggplants
  • Tomatillo
  • Irish Potatoes

Cucurbitaceae

We often refer to these as cucurbits, and this family (for gardening purposes) includes many vining gourds:

  • Cucumbers
  • Pumpkins
  • Zucchini
  • Butternut squash
  • Melons

Fabaceae

This is the legume family, which are those that harvest nitrogen from the atmosphere and store it in nodules in their roots. This includes a wide range of garden beans as well as other crops, like clover and alfalfa, which fix nitrogen into the soil in the same way.

  • Bush beans
  • Pole beans
  • English Peas
  • Snow peas
  • Southern peas

Brassicaceae

Commonly referred to as cole crops, the brassicas include all those wonderful winter vegetables with dark green and delicious leaves.

  • Broccoli
  • Mustard greens
  • Cabbages
  • Collards
  • Turnips
  • Radishes

Alliaceae

Even a homegrown meal would be a little dull without these members of the onion, or allium, family.

  • Onions
  • Green onions
  • Garlic
  • Shallots
  • Chives

Lamiaceae

Many of our culinary herbs are members of this family, often called the “mint” family.

  • Mint
  • Basil
  • Rosemary
  • Sage
  • Oregano

Apiaceae

These cool-season crops are all members of the parsley family, and include:

  • Carrots
  • Parsley
  • Cilantro
  • Fennel
  • Celery

Chenopodiaceae

We don’t normally call these by their common name, the “Goosefoot” family, but this group includes:

  • Beets
  • Chard
  • Spinach

Asteraceae

Although they look nothing alike, many home gardeners grow members of the “aster” family in their home gardens:

  • Lettuce
  • Artichoke
  • Sunflower

Vegetable Varieties and Hybrids

So, if you’re wondering which of these vegetables to grow in Florida, the answer is any of them that you want, as long as you plant in the right season for our wonky weather. However, if you want to improve your rate of success, you’ll look for varieties that have proven themselves in our climate.

What are Vegetable Varieties

You may have heard the term “variety” or may have seen the term “cultivar.” Many gardeners use them interchangeably, and I suppose I am one of them, although I know better.

When it comes to vegetables, however, home gardeners only need to understand the difference between a variety and a hybrid. Especially if you grow from seed.

Varieties are a type of plant that is in all important aspects just like any other member of its species. However, it has demonstrated a small difference, such as the color of the flower or the shape of the fruit.

Nature is wonderful. It’s always mutating to fill the gaps.

Gardening in Florida is one of those gaps. Trying to grow vegetables that most of us recognize and want to eat in a subtropical climate is definitely a specialized niche. A gap, as it were.

So, you may find that some naturally occurring varieties do better in our climate than others. In some cases, careful scientists from our heroic Ag Department have spent years nurturing these sports to ensure they will perform true to type.

What are Vegetable Hybrids

Then there are hybrids. Hybrid seeds are often one-offs that have been bred to perform in specific conditions.

  • F1 Hybrid: A combination of two distinct varieties of plants that will produce a known result.
  • F2 Hybrid: Seeds produced by self or open pollination in F1 plant fruits
  • F3 Hybrid: Seeds produced by self or open pollination F2 plants

You’ll rarely find F2 or F3 seeds for sale because the results can vary so much. You may collect them and experiment with them.

You’ll definitely find plenty of F1 Hybrid plant seeds on the market when you’re shopping for your fall garden. They have some distinct advantages and two very solid disadvantages.

Pros

  • Bred for a unique or particularly attractive appearance
  • Combines the best of two parent varieties
  • Generally produced to be resistant to several diseases

Cons

  • Usually expensive
  • Not a good candidate for seed saving

Choosing the Best Vegetable Varieties for Florida Gardens

Now you know a few of the basics about what constitutes a variety and a hybrid. You’re going to want to know which ones the best for your garden.

YMMV – which to me, in gardening, means, “Your Microclimate May Vary.”

I’ve collected some varieties (and hybrids) for consideration. These selections have been recommended by Florida state Ag experts or other experienced growers. Some have been solid gold winners for me.

Some are heirlooms, some are simply open-pollinated, and some are hybrids. Knowing which they are can help you decide to buy or not. This may depend on your budget and your desire to save seed for next season.

All are in alphabetical order.

Bush Beans

  • Annihilator
  • Bush Blue Lake
  • Cherokee Wax
  • Contender
  • Roma II
  • Royal burgundy
  • Tenderette
  • Tendergreen improved

Pole Beans

  • Blue Lake
  • Dixie Butterpea Lima beans
  • Early Thorogreen Lima beans
  • Foodhook 242 Lima beans
  • Kentucky Wonder
  • McCaslan
  • Storage / Shell Beans
  • Wase Adzuki

Beans, Long/Snake

  • Kurosanjaku
  • Mosaic Yardlong Beans
  • Red Noodle
  • White Seeded
  • You Fong Wong Yardlong Beans

Beets

  • Asgrow Wonder
  • Cylindra
  • Detroit Dark Red
  • Early Wonder
  • Green Top
  • Little Ball
  • Pacemaker III
  • Red Ace

Heading Broccoli

  • Early Dividend
  • Early Green
  • Green Duke
  • Green Goliath
  • Green Sprouting
  • Packman
  • Waltham

Sprouting/Flowering Broccoli  

  • Calabrese
  • De Cicco
  • Piracicaba

Brussels Sprouts

  • Jade Cross
  • Long Island Improved

Cabbage

  • Bravo
  • Bronco
  • Copenhagen market
  • Flat Dutch
  • Rio Verde
  • Round Dutch
  • Savoy Red Acre
  • Wakefield

Asian Greens and Cabbages

  • Cabbage Blues
  • Choho Hybrid Tatsoi
  • Early Mizuna
  • Green Rocket
  • Green Spray Mibuna
  • Jung Green
  • Kosaitai
  • Okame Hybrid Spinach
  • Red Komatsuna Tatsoi
  • Shuka Flowering
  • Tokyo Bekana
  • Wakamine Green

Melons

  • Ambrosia Cantaloupe
  • Athena Cantaloupe
  • Charleston Grey 133 watermelon
  • Crimson Sweet watermelon
  • Florida Giant watermelon
  • Galia Cantaloupe
  • Ginkaku Korean Melon
  • Hakucho Charentais Cantaloupe
  • Hime Kansen Icebox Watermelon
  • Honey Rock Cantaloupe
  • Ichiba Kouji Honeydew
  • Jubilee Watermelon
  • Sugar Baby Watermelon

Carrots

  • Chantenay
  • Danvers
  • Imperator 58
  • Kuroda Subtropical
  • Lunar White
  • Nantes
  • Purple Haze
  • Solar Yellow
  • White Satin

Cauliflower

  • Brocoverde
  • Cheddar
  • Graffiti
  • Snow Crow
  • Snowball

Celery

  • Conquistador
  • Giant Pascal
  • Giant Red
  • Golden Pascal
  • Utah

Collards

  • Georgia
  • Georgia Southern
  • Morris Heading
  • Top Bunch
  • Vates

Corn, Sweet

  • Early Sunglow
  • How Sweet It Is
  • Kandy Korn
  • Merit
  • Peaches and Cream
  • Silver Queen
  • Sweet Ice
  • Sweet Riser

Corn, Field

  • Black Aztec
  • Bloody butcher
  • Blue Clarage
  • Hickory King
  • Johnson County White
  • Mandan Bride
  • Reid’s Yellow
  • Roy’s Calais
  • Seneca Red
  • Tennessee Red Cob
  • Trucker’s Favorite

Cucumber, Slicing

  • Ashley
  • Bush Slicer
  • Cherokee
  • Dasher II
  • General Lee
  • Greensleeves
  • Marketmore 76
  • Poinsett
  • Sooyow Nishiki
  • Speedway
  • Summer Dance
  • Sweet Success
  • Thunder

Cucumber, Pickling

  • Boston
  • Calypso
  • Eureka
  • Jackson classic
  • Napoleon
  • Royal
  • Transamerica

Endive

  • Batavian Broadleaf

Garlic

  • Lorz Italian
  • Thermadrone

Eggplant

  • Asian Bride
  • Black Beauty
  • Cloud Nine
  • Dusky Long
  • Florida Market
  • Ichiban
  • Mizuno Takumi
  • Shoyo Long

Kale

  • Blue Curled Scotch
  • Dwarf Blue
  • Lacinato (dinosaur)
  • Red Russian
  • Siberian
  • Suiho Chinese
  • Winterbor

Kohlrabi

  • Early White Vienna
  • Purple Vienna

Lettuce

Heading

  • Bibb
  • Buttercrunch
  • Ermosa
  • Great Lakes
  • Manoa
  • Okayama Buttercrunch
  • Tom Thumb

Looseleaf

  • Black Seeded Simpson
  • Oak Leaf
  • Red Deer Tongue
  • Red Fire Leaf
  • Red Sails
  • Ruby Red Leaf
  • Salad Bowl

Cos

  • Jericho Romaine
  • Outredgeous
  • Parris Island Cos
  • Red Romaine

Mustard Greens

  • Florida Broadleaf
  • Giant Red
  • Greenwave
  • Southern Giant Curled

Okra

  • Annie Oakley II
  • Burgundy
  • Cajun Delight
  • Clemson Spineless
  • Emerald
  • Jambalaya

Onion, Bulbing

  • Cippolini White
  • Granex
  • Granex Yellow
  • Matador Shallot
  • Shonan Red
  • Superex “Maui”
  • Texas Grano
  • Tropicana Red
  • White Libson

Onions, Green

  • Evergreen bunching

English peas

  • Green Arrow
  • Oregon Sugarpod II
  • Sugar Snap
  • Wando

Southern Peas

  • California Blackeye No 6
  • Hull
  • Pinkeye Purple
  • Pinkeye Purple Hull cowpeas
  • Southern Seminole
  • Texas Cream

Peppers, Sweet

  • Big Bertha
  • California Wonder
  • Chinese Big Red
  • Sweet Banana

Peppers, Hot

  • Ancho
  • Cayenne
  • Ghost pepper
  • Habanero
  • Hungarian Hot Wax
  • Jalapeno

Irish potatoes

  • French Fingerling
  • Red Pontiac
  • Yukon Gold

Pumpkins

  • Jack O Lantern
  • Seminole

Quinoa

  • Brightest Brilliant Rainbow

Radish

  • Cherry Belle
  • French Breakfast
  • Giant White Daikon
  • Hailtone
  • Karaine Daikon
  • Mantanghong Beauty
  • Scarlet Globe
  • Sparkler White

Rutabaga

  • American Purple Top

Spinach

  • Bloomsdale Longstanding
  • Viroflay

Summer Squash

  • Aehobak Korean
  • Black Beauty Zucchini
  • Chayote
  • Cocozelle Zucchini
  • Crookneck
  • Desert Zucchini hybrid
  • Early White Scallop
  • Spineless Beauty Zucchini
  • Teot Bat Avocado Squash

Winter Squash

  • Butterscotch Butternut
  • Calabaza
  • Spaghetti
  • Table Queen Acorn
  • Tatume
  • Waltham Butternut

Sweet Potatoes

  • Beauregard

Swiss Chard

  • Bright Lights
  • Canary
  • Fantasia Orange
  • Flamingo
  • Fordhook Giant
  • Perpetual Spinach
  • Pink Lipstick
  • Red Ruby

Determinate Tomatoes

  • Celebrity
  • Floradade
  • Floragold
  • Homestead
  • Maraglobe
  • Solar Set
  • Tasti-lee

Indeterminate Tomatoes

  • Amelia
  • Better Boy
  • Bonnie’s Best
  • Celebrity
  • Cherokee purple
  • Green Zebra
  • Heat Wave II
  • Mortgage Lifter

Cherry Tomatoes

  • Everglades
  • Gardener’s Delight
  • Sun Gold Cherry
  • Sweet 100
  • Sweetie

Paste Tomatoes

  • San Marzano

Turnips

  • Japanese Red Round
  • Purple Top White Globe
  • Seven Top

Strawberries

  • Camarosa
  • Chandler
  • Festival
  • Florida Beauty
  • Florida Brilliance
  • Florida Radiance
  • Oso Grande
  • Sweet Charlie
  • Sweet Sensation

Tropical Greens

  • Green Leaf Amaranth (callaloo)
  • Molokhia Egyptian Spinach
  • New Zealand spinach
  • Red Garnet Amaranth
  • White Leaf amaranth

Finding Seeds for the Best Vegetable Varieties to Grow in Florida

It’s not hard to find seeds many vegetable varieties for our subtropical climate. But you will need to look outside the box. Instead of shopping at the big box stores, check out smaller specialty suppliers.

These are some of my favorites:

And if you’re just looking for Floradade tomatoes, you can find them in my online shop.

Several of these are owned by passionate Florida gardeners just like you. Keep it local!

And happy planting!

Posted on

Soil Temperature Matters: Why Your Seeds Didn’t Germinate

soil temperature and seed germination

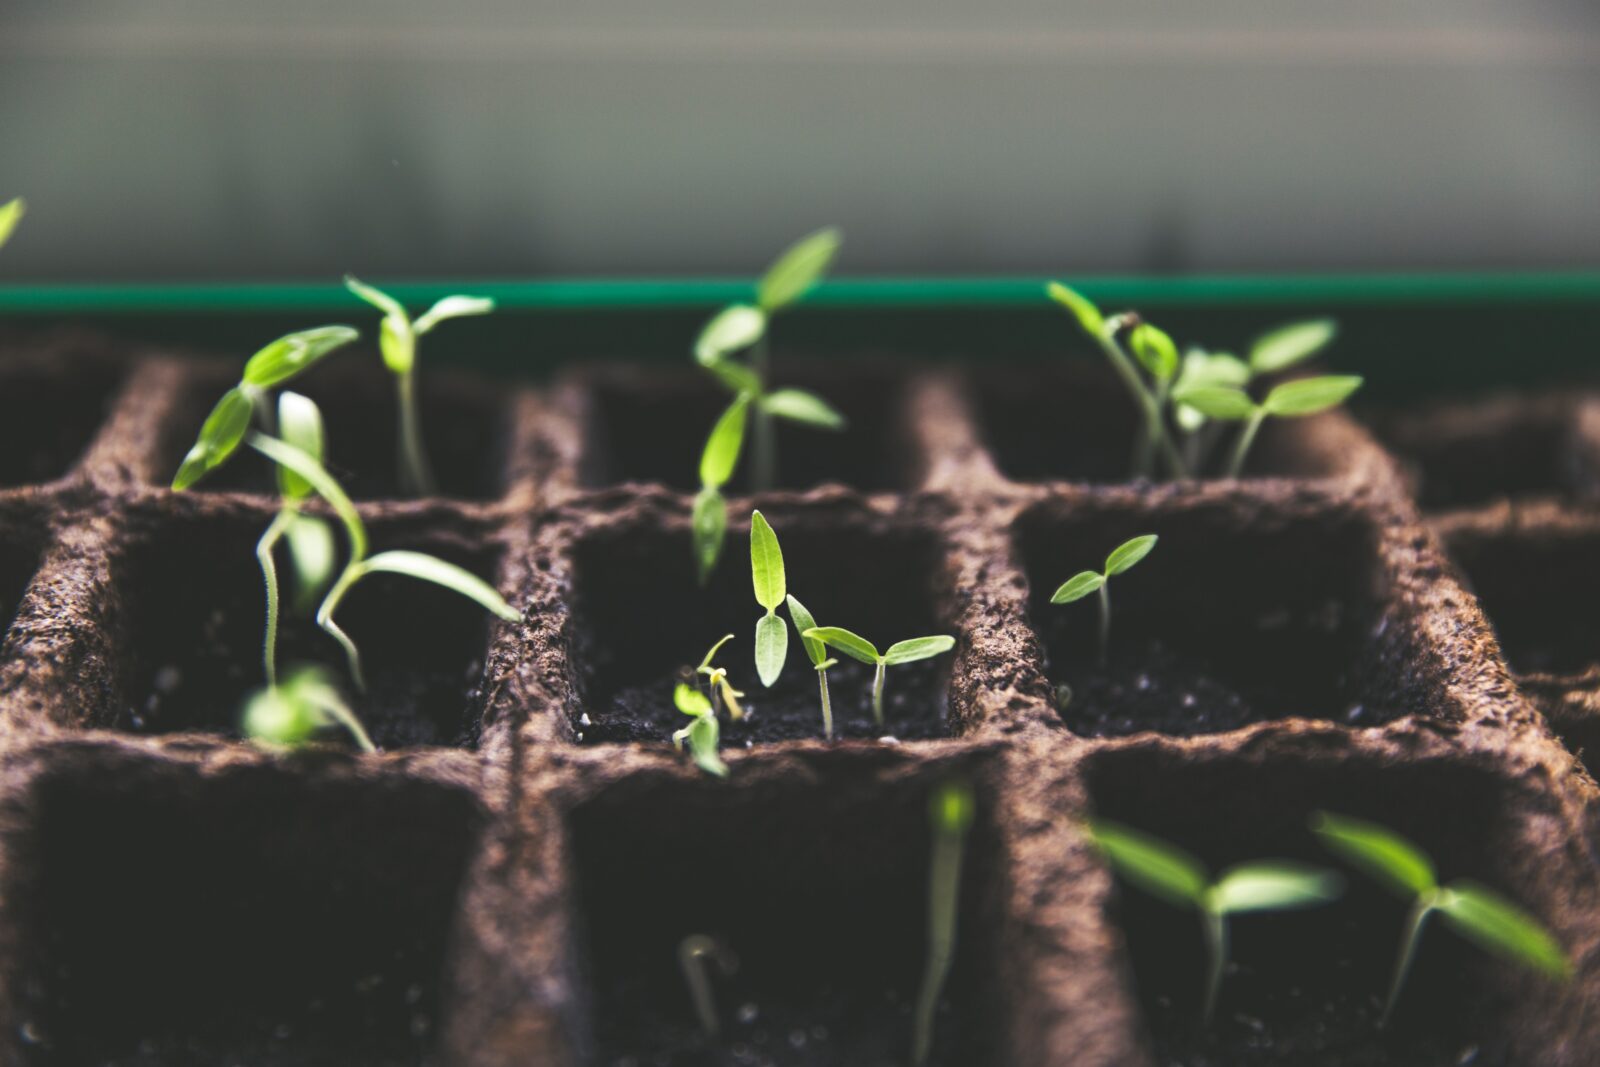
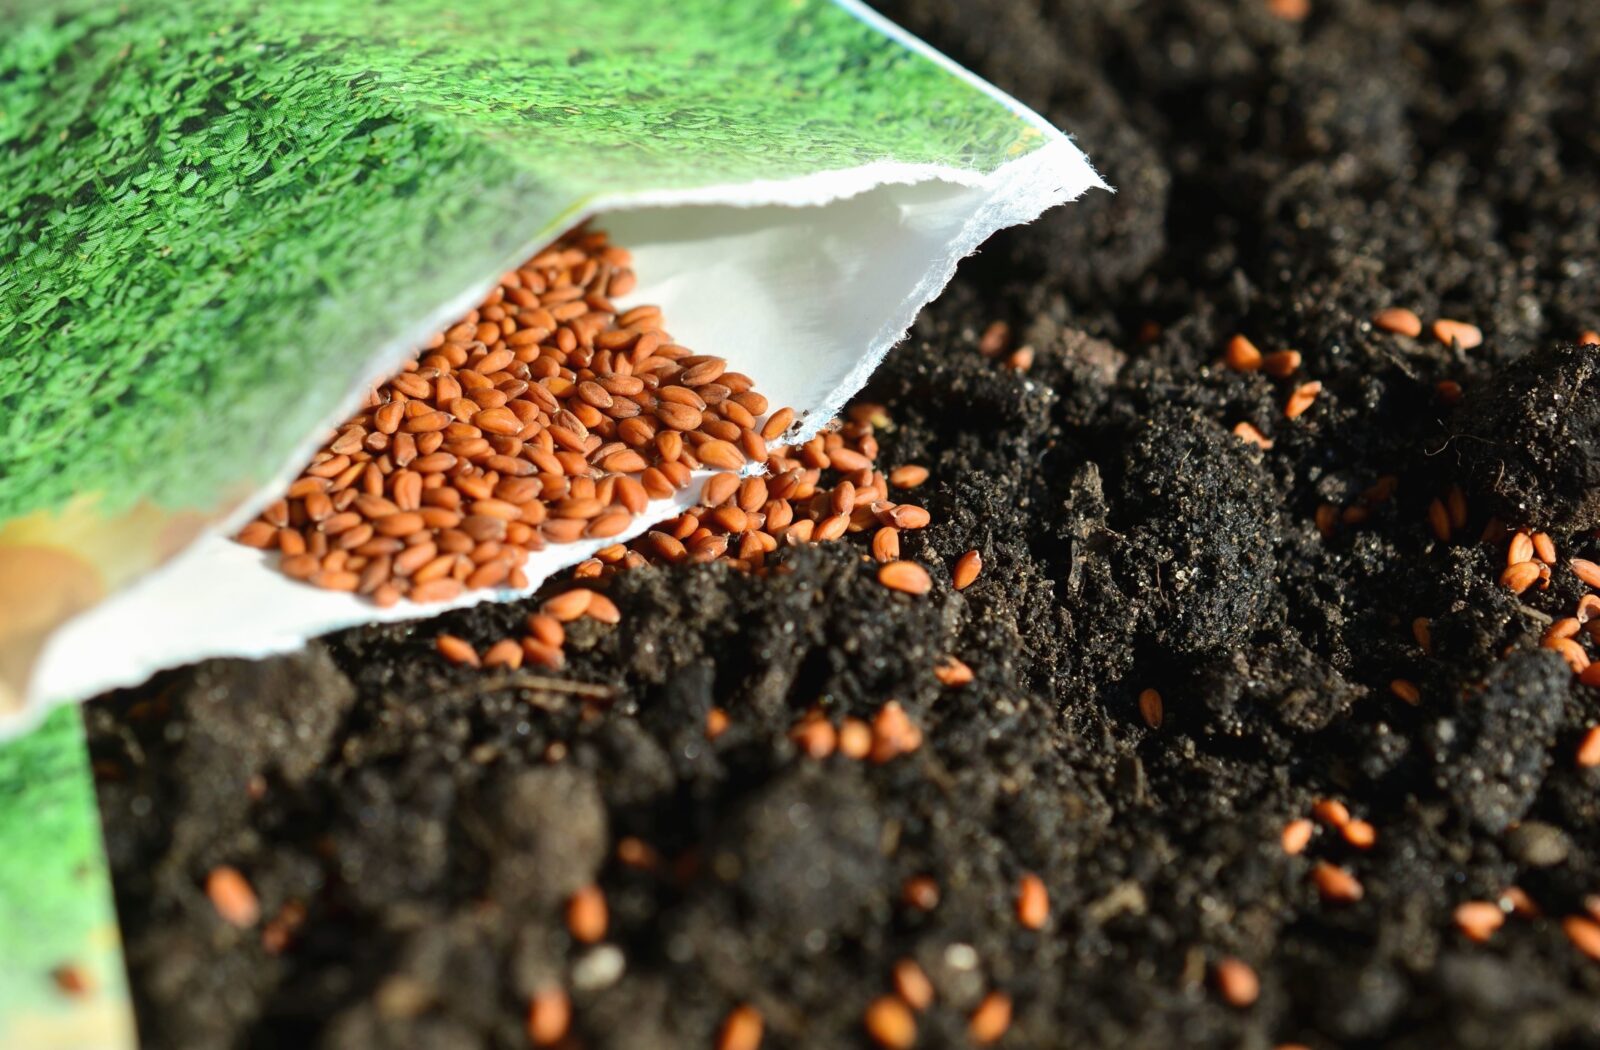
New and experienced gardeners often find themselves frustrated by seeds that don’t pop. After spending hours deliberating over your garden plan and then money on starting mix, it’s a huge disappointment when your little cell trays remain empty. But one of the primary reasons your seeds didn’t germinate is soil temperature.

If you’re new to gardening, you may think that growing plants from seeds is simple – toss them in some dirt, and boom – a few weeks later, you have a yard full of flowers. Or vegetables. And yes, while nature uses this method, more or less, nature also uses hundreds if not thousands of seeds to produce one viable plant. Survival of the fittest, and all that.

I get it. You’re excited for spring and keen to get growing. You’ve had a miserable cold winter and need some green in your life. However, jumping the gun will lead to disappointment. If you want an abundant garden, you’ll need to learn about the importance of soil temperature.

What Seeds Need to Grow

Last week, I touched lightly on the importance of proper seed storage. To keep your seed stash viable as long as possible, you need to deny them the very things they need to germinate:

  • Light
  • Moisture
  • Heat
  • Oxygen

There is a pretty wide range of optimal germination temperatures depending on where the plant evolved and the climate of its origins. Some plants prefer cooler temperatures and will germinate very early in the spring. Others prefer higher temperatures and will do wonderfully in the summer heat.

Nature abhors a vacuum and will work to ensure a steady supply of flowering plants throughout the growing season. So, some flowers have evolved to germinate at 45 or 50 degrees, while others will take over when temperatures hit 85.

For a long-lasting and beautiful garden throughout the growing season, it’s critical to understand what you can grow and at which temperature to start them.

Container gardening lets you control moisture and soil temperature for a variety of plant species
Container gardening lets you control moisture and soil temperature for a variety of plant species.

Soil Temperature vs. Ambient Temperature

One mistake I have commonly seen made by new gardeners is not understanding the difference between soil temperature and air temperature. While soil temperatures are relatively stable 10 feet below the surface, it’s much more variable at root level for your new seedlings.

Even at root level, soil temperatures are very different than the air temperature. For good germination, you need to be sure the soil temperature is right.

In cooler regions, the soil temperature may stay much cooler, even though the sun feels hot on your skin on a clear spring day. Worst of all, they may plummet in the night when the sun goes down. The soil — and your little seeds — could even freeze.

In warmer regions, however, the soil can remain much warmer than the air temperature, which isn’t always a good thing.

Last January, for example, our nearby IFAS weather station recorded lows of 26 degrees Fahrenheit, but the soil temperature barely dropped below 60. Now that it’s summer, the soil can reach up to 86 degrees F, even as the air cools towards evening into the 70s. Many flower seeds just won’t germinate above 85.

Optimal Soil Temperature Varies

The best temperature for germinating flower seeds will vary by plant species, plant origins, and even moisture levels.

Seeds too cold

Seeds in conditions that are too cold will not germinate. If those conditions are also moist, it’s likely the seed will rot before it sprouts. Heavy spring rains can also keep your garden soil from warming up, further slowing the process. And that’s if you don’t have a sudden late frost!

Seeds too hot

Seeds in conditions that are too hot may also not germinate. There’s a reason gardening experts recommend getting your compost pile above 100 degrees. That’s to kill whatever weed seeds may lie dormant in the pile. Too much heat kills.

Seeds just right

Seeds have been programmed by millions of years of evolution, along with careful cultivation by humans, to germinate when the ongoing conditions will be optimal for the plants to grow and thrive.

This is reinforced by the fact that the microbiology in the soil that will help your plants thrive also needs optimal temperatures to thrive.

Germination Temperature vs. Growing Temperature

More annoyingly, many plants prefer lower growing temperatures once they’ve germinated. So, that beautiful new packet of petunia seeds may need 75 degrees to germinate, but will perhaps grow better under cooler conditions around 60 to 65.

Other plants may be stimulated by a freakish warm spell or even the odd late freeze that cracks the shell.

Plants are weird.

This need for a particular sequential set of conditions is one of the reasons why so many gardeners turn to native plants. Rather than spending money on heaters and lights and misting systems, many gardeners prefer to take their cues from the natural conditions where they live and let nature sort it out.

Group plants by their preferred soil temperature when direct sowing a variety of plants.

Control Freak Gardening

Over the years, I’ve evolved from the hopeful and random scattering of seeds into a complete control freak, where nearly everything I grow is started in cell trays or soil blocks.

Aside from beans and Ipomoea spp. (and sometimes even those), I’m all about controlled conditions. While I do enjoy an extended growing season in Coastal Central Florida, I also have very little room. I take Charles Dowding to heart when he suggests starting as many plants as possible in trays so you’ll always have something to plug into the garden beds. I’m a big fan of soil blockers.

With flowers, I’m a little less controlling, but then, I’ve got more experience with vegetable gardening and I’m really just starting to experiment with growing ornamentals and wildflowers from seeds. I’ve had equal success with easy flowers with direct sowing as with using starter trays.

But as I talk to more gardeners across the country, both new and experienced, I learn more about how important soil temperature is for germination. I admit it — I’m spoiled by an excellent climate. We almost always have reasonable soil temperatures where I live. If anything, it’s managing moisture we struggle with most here in Florida.

As I learn more about optimal soil temperatures for germinating flower seeds, the more I become fascinated and keen to experiment. We’re in the hottest part of the summer, with daily UV alerts and heat indexes in the 100s. I’m excited to see if I can start some more heat-sensitive flowers indoors in my “farm office” for planting out as the weather cools toward autumn.

In temperate zones, many gardeners get a start on spring by starting seeds indoors in the winter.

Here in the subtropics, we can do the same thing to get a jump on fall gardening.

Starting plants indoors lets you provide optimal soil temperature for a variety of plants.

Optimal Soil Temperature for Flower Seeds

Most internet resources will tell you that anything between 68 and 75 degrees Fahrenheit is fine. But since I deal with a lot of flowers that are native to tropical and subtropical regions, I wanted to dive deeper than “just fine.”

I was also able to find some other critical information on the Iowa State University website that may prove useful — the common flower seeds that require light to germinate.

Some seeds require surface sowing, as they need exposure to sunlight to sprout. Others should be covered with soil, generally with 2 times the depth of the size of the seed.

For seeds that require light to germinate, barely cover with a sprinkling of soil. Or sprinkle lightly onto moist starting mix and press gently into the soil. Use a mister to keep seeds moist without disturbing them or displacing them.

With seeds that require darkness, remember that as soon as they sprout, they will need sunlight. Don’t leave them in the dark too long without checking them.

Flower Germination Temperature and Light Conditions

Flower SeedOptimal Temperature for GerminationLight Requirements for Germination
Alyssum 55° to 70°Light
Angelonia 70° to 75°Light
Aster65° to 70°Light or Dark
Bachelor’s Buttons (Centaurea cyanus)65° to 70°Light or Dark
Begonia 70° to 75°Light
Blanket Flower (Gaillardia aristate) 70° to 75°Light
Blue Sage (Salvia farinacea)70° to 75°Light
Borage65° to 85°Dark
California Poppy (Eschscholzia californica)55°Light
Canna70° to 85°Dark
Celosia 70° to 75°Dark
Cleome70° to 75°Light
Coleus70° to 75°Light
Columbine (Aquilegia spp.)65° to 75°Light
Coneflower (Echinacea spp.) 65° to 70°Light
Coreopsis55° to 75°Light
Dahlia70° to 80°Light or Dark
Daisy (Bellis perennis)65° to 70°Light
Delphinium60° to 68°Dark
Dianthus60° to 68°Dark
False Queen Anne’s Lace (Ammi majus)55° to 65°Light
Four O’ Clocks (Mirabilis) 65° to 75°Dark
Foxgloves (Digitalis)60° to 65°Light
French Marigold (Tagetes spp.)70° to 75°Light
Geranium (Pelargonium) 70° to 75°Dark
Gomphrena70° Light or Dark
Hollyhocks (Alcea rosea)60° to 70°Light
Impatiens70° to 75°Light
Lavender70° to 80°Light
Liatris55° to 72°Dark
Lisianthus 75°Light
Lobelia65° to 75°Light
Lupine55° to 65°Dark
Mexican Sunflower (Tithonia rotundafolia)70° to 75°Light
Milkweed (Asclepias)70° to 75°Light or Dark
Monarda60° to 70°Light
Moonflower (Ipomea alba)85° to 95°Dark
Morning Glory (Ipomea spp.)70° to 85°Dark
Nasturtium65° to 70°Dark
Nicotiana 70° to 75°Light
Nigella65° to 70°Light
Pansy (Viola tricolor)65° to 70°Dark
Petunia70° to 80°Light
Phlox60° to 65°Dark
Portulaca75° to 85°Light
Red Poppy (Papaver rhoeas)65° to 70°Light
Roselle75° to 85°Dark
Rudbeckia70° to 75°Light or Dark
Scarlet Sage (Salvia coccinea)70° to 75°Light
Snapdragon (Antirrhinum) 60° to 70°Light
Statice (Limonium)68° to 75°Light
Stocks (Matthiola incana)60° to 65°Light or Dark
Strawflower (Xerochrysum bracteatum)70° to 75°Light or Dark
Sunflower (Helianthus) 70° to 85°Dark
Verbena70° to 75°Dark
Vinca (Catharanthus roseus)70° to 75°Light or Dark
Yarrow (Achillea millefolium )65° to 75°Light
Zinnia70° to 80°Dark

How to Make Optimal Soil Temperature Work for You

Now that you know the best soil temperatures for common garden flowers, you can use this information for better germination. Consult your local extension office to find the best source of soil temperature data for your area. I use, appropriately, the Florida Automated Weather Network, or “FAWN.”

If you’re starting early in the spring, you can use black plastic sheets several weeks before direct sowing to warm the soil.

The most popular option is to start your seeds indoors where it’s warmer. Many gardeners swear by heat mats for starting seeds and cuttings at any time of year. Heat mats will ensure a steady perfect temperature, regardless of the weather or the blasting AC in August.

If you’ve already hit high summer temperatures, you can choose to start seeds indoors or under cover where they’ll receive some shade. The summer sun on a bare garden bed can play havoc on seeds and other soil life. Growing them under cover until they’re mature enough to handle the heat is one technique to add to your gardening toolbox.

For my part, I know I’ll never try to start alyssum or nigella after April ever again.

Time to Grow

Adding flowers to your garden plan is always a good idea. They’re not just beautiful – they also add critical forage for those pollinator friends that help us with our squashes and cucumbers. Many also bring in necessary predatory insects that can help protect our work.

They add diversity to the garden with their own root exudates, enriching the soil and in some cases, purifying it as well.

Flowers bring all good things to the garden.

Posted on 1 Comment

How Long Will Flower Seeds Last?

open packet of flower seeds

It’s only June, but you’ve already filled your garden to the brim with summer vegetables and herbs. The flower borders are chock full, and you’ve even tucked a few spare cosmos and zinnias into the squash patch. The problem is, you still have packets and packets of flower seeds left to plant. Can you save them for next year? How long will flower seeds last in storage?

Maybe you just got swept away with gardening enthusiasm and bought too many seeds. Or maybe you ran into a great sale. We all do it – buy too many seeds. They’re relatively inexpensive, and it’s easy to fall in love with the picture on the packet. But too many seeds can also mean a few broken dreams.

How long can you keep these extra seeds without having to throw them away? Do flower seeds expire?

How Long Can Flower Seeds Be Stored

Depending on the variety, flower seeds will last in storage for 1 to 5 years.

How long flower seeds will last will depend on a few key factors. Are they annuals or perennials? What kind of seed coating or shell does the seed have? Where are you storing your flower seeds?

And finally – how important are these seeds to your gardening plans?

That seems like a harsh question, but it’s a valid one when it comes to deciding whether to simply toss them or to use critical storage space to keep them in the right conditions.

Seed Saving Priorities

If your garden is already full of zinnias, whose seeds are extremely easy to save, should you really bother to save that damp, torn, half-packet you found at the bottom of your seed stash?

Perhaps you have a small garden and very limited space for seed starting. Should you bother to save seeds when you know you won’t have room to plant them next spring?

Where Does Your Garden Grow?

For those of us who garden in the South and the subtropics, in particular, saving seeds after spring planting means saving them for fall planting. If you live on the Gulf Coast, for example, you may want to plant those zinnias in February, May, and September.

If you live in Iowa or Nebraska, however, when the season is short, you want to be ready right out of the spring gate. Perhaps you have a large property, with room to experiment? If your spring priority is getting food in the ground, perhaps you don’t want to spend time or money on flower seeds. You may want to save the ones you have to help bring in pollinators, but it’s not your top priority. In that case, you may want to save your flower seeds even if the germination rate is low.

If you’re anything like me, you save everything – obsessively — even seeds that are likely to fail. Even seeds for flowers that you hate and vegetables you won’t eat.

Because seed saving sometimes becomes a bit of a lifestyle.

So, how do you determine what’s worth keeping?

How Long Do Packaged Flower Seeds Last?

When you purchase seeds from a big box store, you’ll often find the package labeled with the “best-by” date and date of expiration. This date isn’t when the seeds expire, but it is the date that stores will remove them from their inventory.

Companies that handle a lot of seed packets will purchase and package all the seed they sell in one year and mark it for sale for the following year. For example, they’ll buy mass quantities of those same zinnia seeds harvested by farmers in 2022 to sell at your local garden center starting in January of 2023.

You may also see markings on the packets that include lot numbers and germination rates. While there are federal standards for vegetable seed germination rates, flower seeds are regulated at the state level. And to be honest, they’re pretty low standards. In many cases, germination rates as low as 40 or 50 percent are considered acceptable.

Seed Germination Rates Vs. Vigor

Many new gardeners are surprised to learn that good germination doesn’t always result in a strong healthy crop. Even though I’ve been gardening for many years, I made this mistake with an overlarge package of bush bean seeds. The first four crops were amazing, but planting number 5, about three years later, produced dismal-looking specimens.

So, while your flower seeds might sprout beautifully under the best conditions, the seeds may be too old to produce tall, strong, vigorous plants.

Oregon State University has proposed several methods of testing seed vigor, but they may be considered excessive by the average home gardener.

However, the difference between germination rates vs. vigor is another reason you need to determine your gardening priorities when saving flower seeds. Unless you’re a professional grower or garden designer, you may be willing to take more chances on old seed.

How long do perennial flower seeds last?

When stored properly, perennial flower seeds may last up to 5 years.

How long do annual flower seeds last?

Annual flower seeds, except for a few exceptions, will normally last up to 3 years.

Flower Seed Viability Chart

When properly stored, your flower seeds may last as long as shown on the following flower seed viability chart. The years listed are the maximum to expect under optimal conditions.

Flower Seed Viability Chart

How long to store seeds.
Ageratum4Echinacea4Petunia3
Alyssum5Euphorbia4Phlox2
Amaranthus5Forget Me Not2Poppy4
Ammi majus2Four O'Clocks2Portulaca2
Artemisia5Gaillardia3Rudbeckia2
Asclepias1Gomphrena5Salvia3
Aster2Helianthus3Saponaria5
Bachelor's Buttons5Heliotrope2Scabiosa3
Borage5Hollyhocks3Stocks3
Calendula6Impatiens2Snapdragon5
Campanula3Larkspur3Strawflower2
Carnation5Lavender3Sunflowers5
Celosia4Linaria3Sweet Pea5
Clarkia3Lisianthus3Tithonia2
Columbine2Lobelia4Verbena5
Coreopsis2Lupine5Vinca1
Cosmos4Marigold5Viola1
Chrysanthemum5Monarda4Wallflower5
Dahlia5Morning Glory4Yarrow5
Daisy3Nasturtium7Zinnia6
Delphinium3Nicotiana5
Dianthus5Nigella2
Digitalis2Pansy2

So What Are Optimal Conditions to Keep Flower Seeds Viable

There are several elements that can hasten the demise of your stored flower seeds – and they’re the same elements that make them sprout: heat, light, moisture.

Experts recommend ensuring the following to provide optimal conditions to extend the life of your saved seeds:

Home Gathered Seed

If you’re collecting your own seed from the garden:

  • Remove any chaff, leaves, or stems
  • Air dry for one to three days
  • Freeze seeds for a few days to kill any insects
  • Package in a paper bag or paper packet for short-term storage
  • Refrigerate in a sealed container with desiccant packets

Long Term Storage

If you’re storing seed over the winter or for the long term, you’ll need to take better note of conditions. Once processed and whether home-gathered or purchased:

Ensure seeds are dry – 7 to 8 percent is optimal. You can dry your seeds on screens with a fan or out of the sun on a warm day.

  • Keep at temperatures below 50 degrees Farrenheit
  • Store below 50 percent humidity
  • Store in paper packets
  • Label thoroughly
  • Place paper bags or packets
  • Keep packets in a closed container such as a canning jar or baby food jar
  • Add a desiccant packet to reduce moisture damaging seeds

Store in the refrigerator or freezer. Note that your freezer provides a more consistent temperature since it is opened less frequently than the average refrigerator.

Wildflower seed, dandelion. Free public domain CC0 photo.

Saving Flower Seeds to Last

Now that you have a good idea of how long your flower seeds will last, it’s time to start winnowing. If you’re done planting for the year – or even just for the summer – assess your inventory.

If you have seeds that are years old, with no hope of germination, it’s time to toss them and make room for others.

If you have seeds you’ll plant soon, dry them completely and put them in a cool, dark place until fall sowing.

For next year, make sure you tuck them away into the freezer. You don’t want them exposed to heat, moisture, and light before you’ve had a chance to plant them.

Posted on 1 Comment

The Best Heat-Tolerant Annual Flowers for Southern Gardens

In the South, it’s just too hot and humid for gardening much. We’re reduced to an hour or two of tolerable temperatures in the morning and maybe at dusk. But the good news is that we don’t have to forgo all gardening completely. There are many heat-tolerant annual flowers that thrive in the scorching sun, and many of them reach maturity pretty quickly.

Summer is when vegetable gardens in the South seem to perish in front of our very eyes. (If you’ve seen bacterial blight, then you know what I’m talking about.) Forget about summer tomatoes, much less lettuce. Our peppers will survive the summer, but don’t expect much in the way of a harvest.

So, it’s time to turn to sturdier, less fussy garden plants, and you may wonder what flowers tolerate full sun and heat?

Heat-Tolerant Annual Flowers You Can Plant Now

June 1st is when I turn my attention to ornamentals. I used to stick to perennial flowering bushes because of the low-care factor. June is a fine time to take cuttings, too.

However, once I discovered what annuals are heat tolerant and can thrive in our damp summers, I’ve found that annuals can flourish with summer neglect as well.

Best of all, most grow quickly and require little care. So, once they’ve germinated and put out true leaves, you won’t even need to stand in the blazing sun to water them.

Indian Blanket Flower, Gaillardia pulchella

heat tolerant indian blanket flower

Indian Blanket Flower is a quick-growing annual that just loves the heat. It’s native to the eastern and southeastern U.S., and while it’s drought-resistant, it can handle more moisture than its Western cousin, the Common Blanket Flower.

So, if you have hot, wet summers, like we do in Florida, Indian Blanket will add color to sunny areas in your garden. It will also tolerate partial shade. It reaches 1 to 2 feet high, with bright, cheerful yellow and red flowers.

It’s considered of special value to native bee populations as well. If you’re gardening for wildlife and don’t have room in your beds for flowers, it’s also one of the best heat tolerant annuals for containers.

Indian Blanket is one of the heat-tolerant annual flowers that are perennial in subtropical coastal regains. And in many areas, it will reseed prolifically.

Best of all, you’ll get flowers in only about 8 weeks!

You can purchase Indian Blanket Flower seeds here.
Buy seeds

Coreopsis, Coreopsis tinctoria

heat tolerant southern wildflowers

Sometimes called tickseed and plains Coreopsis, the Florida state wildflower produces masses of happy yellow and red flowers that bees simply adore. It puts up with a lot – even a hot Southern summer. You’ll find coreopsis available in other shades, as well, with deep red being the most common.  

If you have poor, sandy soil, coreopsis will love you and produce flowers in about 60 to 70 days. This Southern U.S. native wildflower requires no feeding but do like some moisture.

This wildflower ranges from 1 to 3 feet tall and flowers in about 80 to 90 days.

Purchase Coreopsis tinctoria seeds here, or Tall Red Coreopsis tinctoria seeds here.
Buy seeds

Salvias

Salvias are often perennial in the South, which makes them a particularly good choice for summer color. When the temperatures start to rise, it’s nice to know that your future holds flowers, even if it’s too hot for gardening.

Scarlet Sage

Salvias come in a range of colors, but Scarlet Salvia is native to the southeast and provides food for hummingbirds and butterflies. Its natural range is coastal areas, from South Carolina, around Florida, and up the Gulf Coast to Texas. Best of all, it blooms nearly all year long in subtropical climates and self-seeds like a champ.

You can purchase Scarlet Sage seeds here.
Buy seeds

Blue Salvia

heat tolerant blue salvia

Even though it’s native to the Southwest, Blue Salvia (Salvia farinacea), or Blue Sage, also does well in the Southeast. Hummingbirds love it and in frost-free areas, it will bloom year-round.

Because it’s so drought-tolerant, it makes a fantastic water-wise flower to add to your landscaping or butterfly garden.

You can purchase Blue Salvia seeds here.
Buy seeds

Zinnias

zinnias are heat and sun tolerant for southern summer gardens

Zinnias are native to Mexico and Central America, and have become naturalized to the Southwest U.S. But they grow anywhere that offers heat and sunshine. They come in a wide range of colors and heights, and they’re easy to grow.

Zinnias are a no-brainer for summer color, particularly for beginning gardeners, lazy gardeners, and kids. These heat-tolerant annual flowers germinate in as little as three days in the right conditions, but no more than 7 to 10. Best of all, they flower in about 50 days, which means you can add them now and add beauty to your garden well before fall.

You can buy Zinnia seeds here.
Buy seeds

Celosia, Celosia

flame shaped celosia

Celosia looks like we feel on the beach in July – like we’ve burst into flames. In fact, the name is derived from the Greek word for “burning.” It’s a dramatic addition to any garden because of the vivid colors and unique flame shape.

It likes some moisture but loves full sun. You’ll find it in a range of bright, jewel-toned colors.

There are a variety of flower shapes, however, including Celosia cristata, which is also called cockscomb. Celosia spicata resembles wheat.

They offer plenty of nectar for bees and butterflies, but also make excellent dried flowers.

Buy Celosia seeds here.
Buy seeds

Cosmos, Cosmos bipinnatus

heat tolerant cosmos flowers

Cosmos looks so delicate, but it’s tough as nails in the summer garden. This Mexican native plant loves the heat and will thrive under the sun.

Cosmos feature frothy, fernlike leaves reaching from 2 to 4 feet tall. They have small, dainty blossoms in a wide range of colors. Most are in the pink and white shades, but you’ll also find them in rich maroons and deep lavender.

They’ll grow anytime the weather is warm and bloom in only two months. So, it’s not too late to grow a cottage-garden style annual flower, even in June.

You can purchase cosmos seeds here.
Buy seeds
And a dwarf variety here that only reaches about 1 foot tall.
Buy seeds

French Marigolds

French marigold

These sunny, yellow flowers just seem built for hot summer gardens. French marigolds are usually just called “marigolds” in the U.S., but it distinguishes them from Calendula, which are commonly called “marigolds” in the UK and EU.

French marigolds are members of the Tagetes genus and native to Mexico and Central America.

French marigolds are long-lived annuals with a wide range of colors, heights, and growth habits. Some reach as tall as 3 feet, while other works as a compact ground cover. Because of their compact growth, they’re one of the best heat tolerant annuals for containers.

As well as being easy to grow, they’re also easy to propagate. You can take cuttings at nearly any time during the active season, so if you can preserve your favorite bloom color indefinitely.

They grow quickly and mature in about 45 to 50 days, tolerating heat and drought once established.

You can purchase French Marigolds here.
Buy seeds

Mexican Sunflower, Tithonia rotundafolia

Mexican sunflower, Tithonia bloom

If you like height and drama during the hot summer days, consider adding Tithonia to your flower garden. It isn’t a fast-growing annual, like others on this list, but in areas of the country with mild or late winters, it will bloom beautifully throughout the fall until the first frost of winter

Tithonia delivers heights up to 6 feet tall and can grow up to 3 feet wide. It features soft, spade-shaped foliage and vivid orange flowers with red centers.

It prefers poor, well-draining soil and can be sown directly or into large cells for transplanting.

Purchase Mexican Sunflower seeds here.
Buy seeds

Heat Tolerant Annual Flowers Add Sunshine During the Rainy Season

Depending on where you live in the South, summer can really be the gloomiest time of the year. Much of the Gulf Coast and Atlantic Coast enjoy a rainy season, with regular storm watches. Some years, it seems that most of the color is in the cocktails we concoct for Hurricane Parties.

But I’m here to tell you that it doesn’t have to be that way.

Sure, your spring tomatoes are all dead. The squash has been quashed by pests. The latest storm blew over your pole beans.

Even the bananas, who should be able to stand up to all this, seem sad and beaten.

It’s not too late to add a little color to your Southern garden with some fast-growing annuals.

Posted on

Flowers Aren’t Frivolous: French Marigold Benefits for the Garden

French marigold

Southern gardens are plagued by insect pests and harsh growing conditions. And even in other parts of the country, gardeners are looking for more natural and sustainable ways to deter pests and disease without the use of synthetic and dangerous chemicals. Enter companion planting, and enter one of the more famous flowers used for this technique: French Marigold benefits the garden in numerous ways.

Companion Planting

If you’ve been gardening in the 21st century for more than a couple of weeks, you’ve heard of companion planting. In short, this is the practice of planting mutually beneficial plants together in one space to support each other. It can also be the planting of herbs and flowers near vegetable plants that will support those vegetables in some way.

Complicated Combinations

One of my chief complaints about the practice of companion planting is that it can involve complicated combinations of herbs, flowers, and edibles. While I would love to go into a deep dive on the science of each, that will have to wait for next summer during the down season.

The subject of what to plant together and what not to plant can become mind-boggling. Add in a rotation schedule and you’ve got all the makings of a migraine.

I’m lazy and I like my gardening simplified. I plant diversely and densely and let nature sort it out. I like to think that if I have the basic makings of biodiversity and support my soil microbiology, it will all come out the way nature intends in the long run — even if I don’t’ get what I want in the short run.

This drives my family crazy because the ones that like to cook (or feed the rabbits from the garden) end up wandering around the whole yard trying for find what they’re looking for. No, I don’t have endless patience for labels. And no, I don’t plant all the same plants in one area so they’re easy to find and harvest.

That’s intentional. I figure that if my stepson can’t find the Pak Choy, then the slugs will also have some trouble finding it. The same goes with beans and aphids and cabbage and cabbage loopers.

We’re supposed to be the species with the big brains and the ability to generalize, after all.

French marigold
French marigold, Tagetes patula

Steady Go-To Companions

However, one thing I definitely do is to plant flowers (and sometimes herbs — I have trouble with herbs) within ALL of my vegetable garden beds. Flowers attract pollinators and predator insects that hunt down those cabbage loopers and aphids.

If I was to offer any recommendations to new gardeners in any zone, the first would be to plant seasonal annual flowers within EVERY single fruit and vegetable planting.

French Marigold Benefits

French marigold (Tagetes patula) has a reputation as the wunderkind of companion plants. Most of that reputation is well deserved and well documented.

Along with being available in a number of varieties for various applications, they’re also very attractive, with bushy foliage and bright, cheerful blooms. Best of all, they’re incredibly easy to grow and maintain.

I’ve grown French marigolds in both Central Ohio and Central Florida, and both times I’ve been impressed by their dogged resilience.

Pest Repellants

In short, French Marigold benefits include deterring root-knot nematodes, the bane of the Florida gardener’s existence. They’re also said to deter slugs and hornworms.

I can tell you from experience that they do NOT deter snails. Snails LOVE French marigolds. In fact, they make serve as an excellent trap crop for snails. I regularly find snails clinging to my French marigolds. I break the stem and carry it, snail and all, to my chicken yard.

Chickens LOVE snails. And they also like marigolds.

Tagetes patula
Tagetes patula from my garden

Methods to the Madness

It seems that French marigolds repel pests using different mechanisms, depending on the pest. Volatile chemicals in the foliage and flowers that give them their distinctive odor can sometimes confuse insects that seek their target plants through smell. Other insects may simply find the odor repulsive and unpleasant.

Another mechanism is through root exudates. Plants emit various elements through their roots in order to attract beneficial bacteria to trade nutrients. These elements include sugars, which the bacteria adore, and offer micronutrients and macronutrients in exchange with the plants.

And by no means the last method, some French marigold benefits include using the flower as a trap crop, as I mentioned above regarding snails. In fact, in the case of root-knot nematodes, there is some debate as to whether marigolds repel them through root exudates or simply attract them to themselves, thereby “trapping” them in their own roots.

White Fly Results

A 2019 study examined the theory that French marigolds will reduce whitefly populations in tomatoes. I’ve never found them on tomatoes, but my peppers always seem to attract a crowd.

A few experiments found that planting French marigolds alongside tomatoes reduced the whitefly population in the greenhouse. In this case, it was the volatile compound, limonene, these flowers produce that repelled the pests.

Root Knot Nematodes

Root-knot nematodes can completely destroy a once-thriving garden. And it seems that Southern gardens are particularly rife with this soil pest. I remember moving to Florida as an experienced temperate zone gardener in 1993 and being warned that they were public enemy number one.

The UF/IFAS website recommends French marigolds as a cover crop before planting. It posits that the action of alpha-terthienyl, a root exudate, inhibits the hatching of many nematode eggs. It also suggests planting them at least two months prior to your crop, and disking or hoeing them in is the most effective method. The site says interplanting isn’t particularly effective.

In my case, I grow year-round and successively. I don’t do cover crops on beds in production, so using marigolds this way wouldn’t work for me. Especially since I do no-till.

So, I simply interplant several marigold “crops” throughout the year and then crop and drop them on top of the soil at the beginning of each season. At the same time, I plant more marigolds throughout the beds.

I harvest seeds and plant them again later. I even sell them in my Etsy shop for very little profit so other gardeners can be sure they have the right type of marigolds.

As I vaguely recall, the action of nematode suppression in marigolds extends to about a meter, or three feet in diameter, so I make sure that I have at least one planted every yard or so, staggered throughout the beds.

Tagetes patula, French marigold
French marigold in my garden

Medicinal Uses

Because of its rich components of chemical constituents, French marigolds have a number of traditional medicinal and cosmetic uses, many of which could translate well today.

A 2016 paper suggests that the blossoms, containing the flavonoids patuletin, quercetagetin, and quercetin, help protect against oxidative stress and offer anticancer properties when used in an infusion (i.e., tea).

I’m not a doctor and don’t intend to play one on the internet, so make sure you do all your due diligence before compounding your own herbal medicinals. Some are harmless, some are effective, and some can prove quite dangerous.  

It’s important to remember that there are two different species of flowers we call “marigold,” with French marigold being “Tagetes” variety. There is also Calendula officinalis, also known as “Pot marigold,” which is used extensively in cosmetics.

Fortunately, while the common name is very similar, the two plants don’t resemble each other and have very different appearances.

Pot marigold, Calendula officinalis
Calendula officinalis , or “Pot Marigold”

Beauty and Function

Tagetes patula, French marigolds, offer a host of garden benefits. However, perhaps their most important quality is the beauty they add to the garden. Even if you’re immune to the superficial beauty of flowers, any dedicated gardener has to admit that the practical beauty of an increase in bee visitors is a spectacle to behold.

Posted on

A Summer Glut: Dehydrated Eggplant

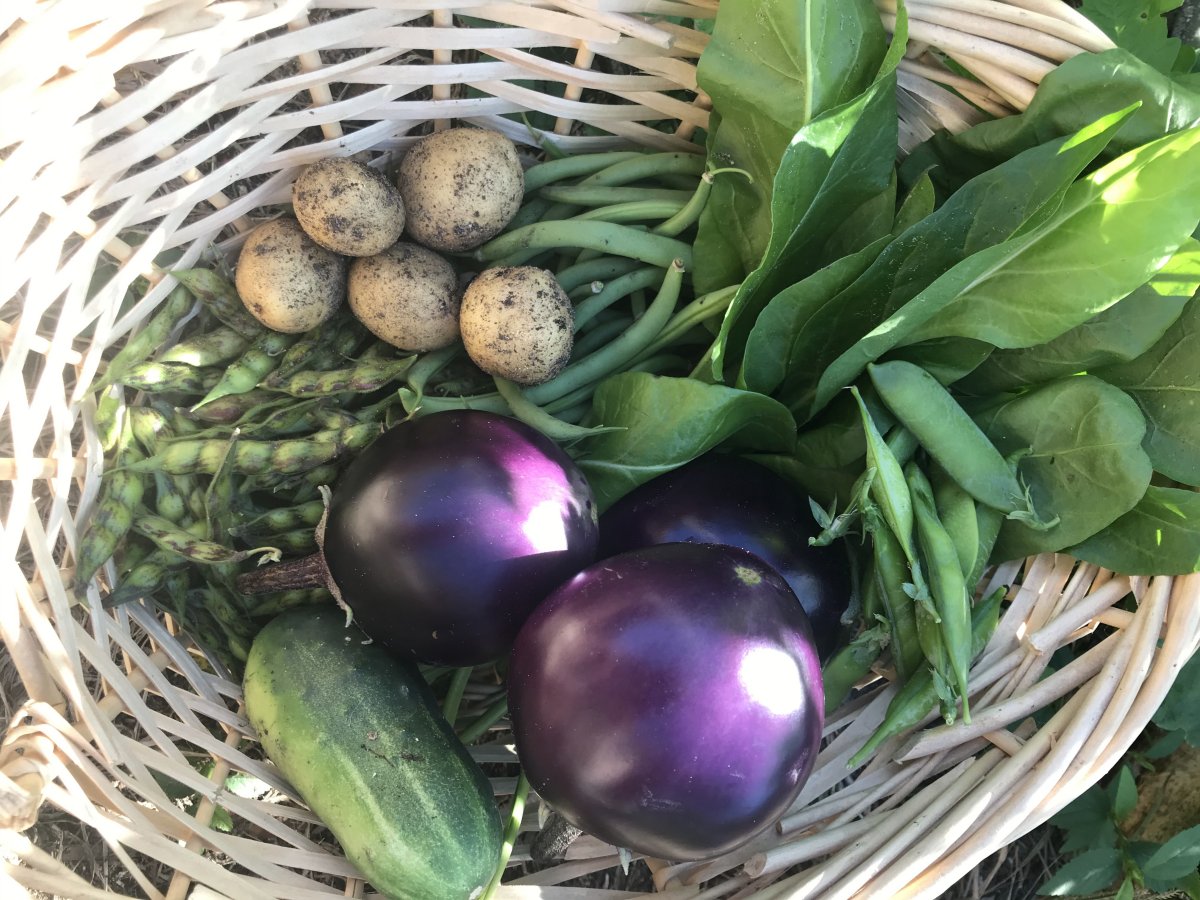
The end of summer often means we get a lot more than we bargained for, which isn’t a bad thing unless you don’t know what to do with it all. Learning how to preserve a summer glut is one of the key homesteading skills you learn early. Dehydrated eggplant is an excellent pantry staple and easy to use.

For me, the summer glut turned out to be eggplant last year. We were buried in the stuff. Now, I like eggplant, but it wasn’t long before we got a bit sick of eating the stuff.

Time to pull out the dehydrator!

We’ve got a Nesco American Harvester that has to be 30 years old if it’s a day. Works fabulous. I got bags and bags of dried eggplant that still remain good on the shelf whenever I need them.

Low Carb Eggplant Lasagna

Best of all, I’ve been able to integrate them into a keto / low carb menu all year. My favorite way to use eggplant is as a substitute for pasta in lasagna. Best of all, it’s so easy, you barely need a recipe.

Ingredients

  • Dehydrated eggplant slices
  • 1 lb ground beef or pork
  • 1 egg
  • 1 quart marinara / spaghetti sauce
  • 1 8-ounce carton of ricotta cheese
  • 1 16-ounce bag of mozzarella cheese
  • 1/4 cup parmesean cheese
  • salt, pepper, oregano, basil, marjoram
dehydrated eggplant slices soaked

Take your dehydrated eggplant planks and soak them in boiling water for 20 to 30 minutes. If you prefer more tender eggplant, you can boil them for 5 to 8 minutes.

Drain completely and allow to cool.

Filling

While your eggplant is soaking or cooling, brown 1 lb of lean ground beef. You can also use ground Italian sausage or a combination of the two.

Once cooked, drain the beef well, and add to 1 quart of your favorite marinara sauce. This is one of my favorites, as it’s incredibly simple and delicious.

Mix one 8-ounce carton of ricotta cheese with 1/4-cup parmesan cheese and one egg. Season with salt, pepper, basil, oregano, and marjoram to taste. Mix well.

Layering

Spoon a layer of the sauce into a 9×13 baking pan, then add a layer of eggplant. Top with a layer of the cheese mixture, then a layer of shredded mozzarella.

Alternate the layers, finishing with a layer of shredded mozzereall.

Bake at 350°F for 45 minutes, until the top cheese layer is nicely browned.

No Dehydrator?

If you don’t have a dehydrator and aren’t ready to invest in one, check out this video on how to dry vegetables without one — using no electricity at all.

The Dirtpatchheaven YouTube channel has some great content on homesteading and gardening, and it’s one of my go-to channels. Check it and and subscribe if you’re interested in practical, creative, old-school homesteading skills.

Make-Ahead Lasagna

This is also an easy recipe for making ahead and meal planning. If you use a Pyrex dish, you can just wrap it after baking once it has cooled. Then, freeze the entire pan.

Defrost in the fridge or microwave and then reheat whenever you like.

Dehydrated eggplant is a super pantry staple for keto / low carb diets and it’s a great way to store and use a summer glut.

Posted on

What’s Your Gardening Stupidpower? Garden Mistakes We Keep Making

garden mistakes I've made

Gardening is hard work, with all the soil toil and heat and the lugging around of pots. But you don’t really think about throwing in the towel until you realize that you keep making the same dumb garden mistakes over and over.

That’s when you start to second-guess yourself.

As age catches up with me, I find my dexterity less than optimal. Put simply, over the weekend, I was beginning to think my unique gardening talent lie in knocking over multiple pots of expensively rich potting soil.

But that’s just clumsy, that’s not a stupidpower.

A gardening stupidpower is when you find yourself repeating the same dumb garden mistake over and over. Gardening stupidpowers are EPIC!

The kind where you should know better. The kind you have told yourself over and over NOT to repeat.

Gardening is fun, even with all the hard work, but when you’re growing for real production, to put food on the table, garden mistakes can cost you real money.

Common Garden Mistakes

Some of the most common garden mistakes are the result of inexperience. Planting at the wrong time of year is a pretty common one, and it’s one that most new gardeners make. In fact, it’s pretty common for experienced gardeners as well, especially as climate change seems to wreak havoc with our annual growing conditions and timings.

Another common garden mistake is buying the wrong varieties for your microclimate, just because the seeds are cheap and plentiful in your area. (Yeah, I’m looking at YOU, Marketmore cucumber!)

Another bad habit I have found myself falling into is heeding the watering advice of pro gardeners from temperate zones. In fact, I could even classify that as a gardening stupidpower, except I finally learned THAT lesson.

A lot of temperate zone garden gurus say you should water deep, not often, for best results. They say it results in stronger plants.

Honestly, in Florida, along the Gulf Coast, in sandy soil, playing tough love with your annual vegetable plants through the heat of midday does not result in them digging in deep for moisture.

In my experience, it mainly results in a lot of dead plants.

My Personal Gardening Stupidpower

I must be a water-type Pokemon, because all my gardening stupidpowers involve H2O:

  • Overwatering
  • Watering at night
  • Watering extensively when rain is forecast
  • Forgetting to water entire sections of the garden … for days…

But my really, truly epic gardening stupidpower is attempting to lay out soaker hoses AFTER putting in starts. By myself.

I’ve crushed, stomped, choked, and lassoed to death more poor innocent vegetable starts than I want to admit to. All because I’m so anxious to get their little green heads into the garden.

Hoses are bad, ‘mkay?

Garden hoses all seem to have a personal vendetta against humanity and its agriculture.

I have often wondered if hoses want nothing more than to lay in the shed, rolled up comfortably, undisturbed. I wonder if they resent being dragged into the sunlight. Perhaps they’re in pain? Does watering hurt them?

Because they will seemingly do as much damage as possible to any and every plant they come near, no matter how careful you are. If there’s any way for a garden hose to take out your flowers, herbs, or vegetable plants, it will find that way.

Soaker hoses aren’t much better, but at least you should (conceivably) only have to place them once. I don’t really like using irrigation hoses. I like to hand water — it’s meditative. So, I often decide not to bother with putting down my soaker hoses and just start adding in my little plants as they grow big enough.

And inevitably, three weeks later, I decide that I really need to put down the soakers because I’m just flat out tired of dragging the hose around every morning or even just tired of the time it takes.

And yet again, this year, this last weekend, I made the mistake of trying to wrestle them into a reasonably even distribution across the garden beds after I had already planted a few of my fall starts.

Anyway, this year, there will be far fewer summer squash than originally anticipated.

What’s Your Gardening Stupidpower?

Many philosophers say that you’ll keep repeating the same mistakes until you finally learn the lesson they’re meant to teach you.

So, how are you educating yourself in the garden this year?