Lovage (Levisticum officinale) is a magnificent perennial herb that has graced European kitchen gardens since medieval times. Many gardeners start growing lovage for its bold celery-like flavor and impressive stature.
This member of the Apiaceae family — which includes celery, parsley, carrots, and fennel — originated in the Mediterranean region and southwestern Asia, where it was cultivated extensively in the Liguria region of northwest Italy.
The Romans valued lovage so highly that they carried it with them during their conquest of Britain, and European colonists refused to leave it behind when traveling to the New World.

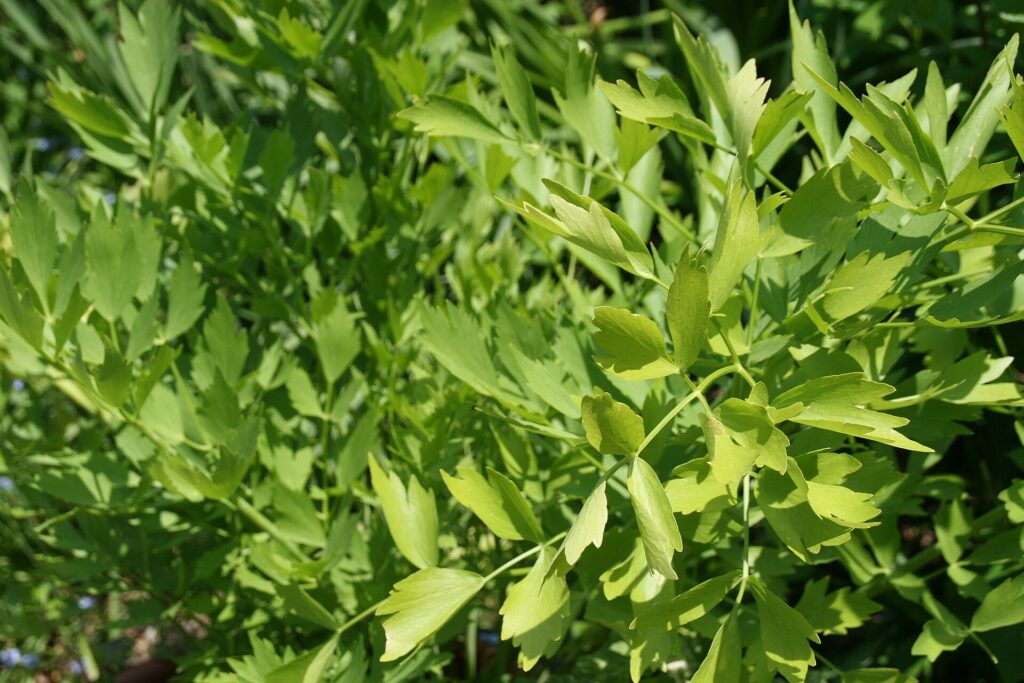
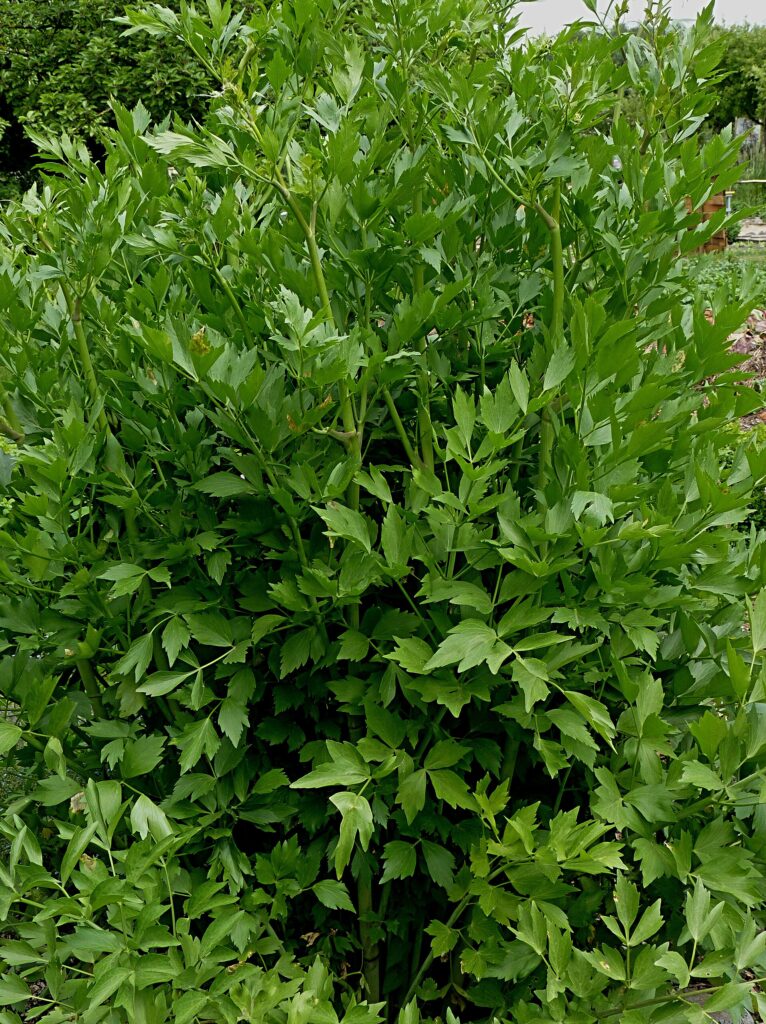
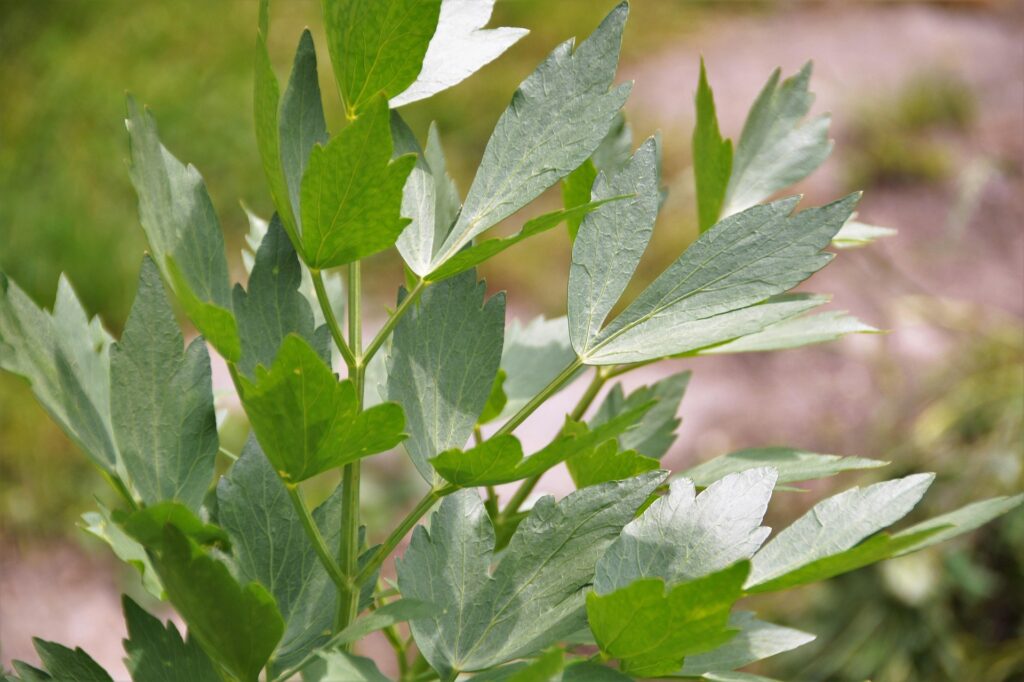
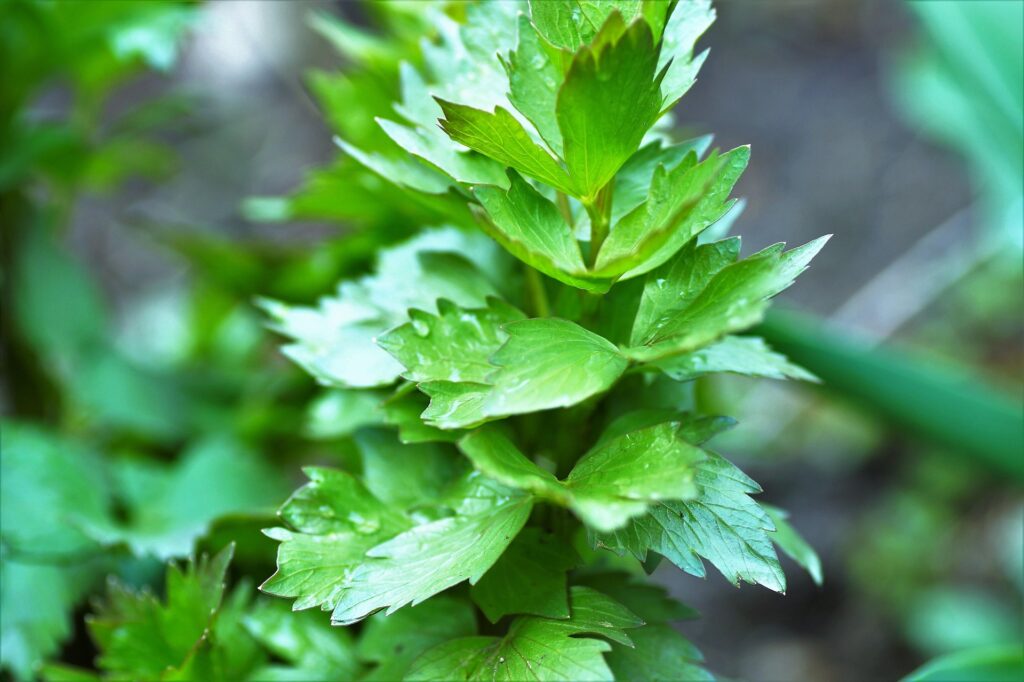
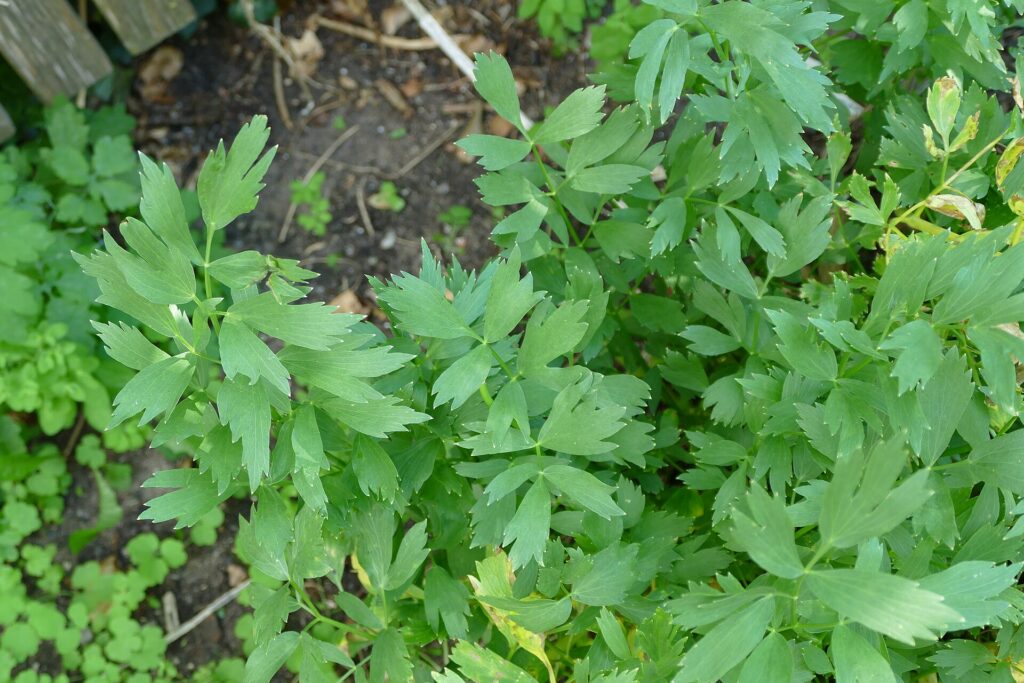
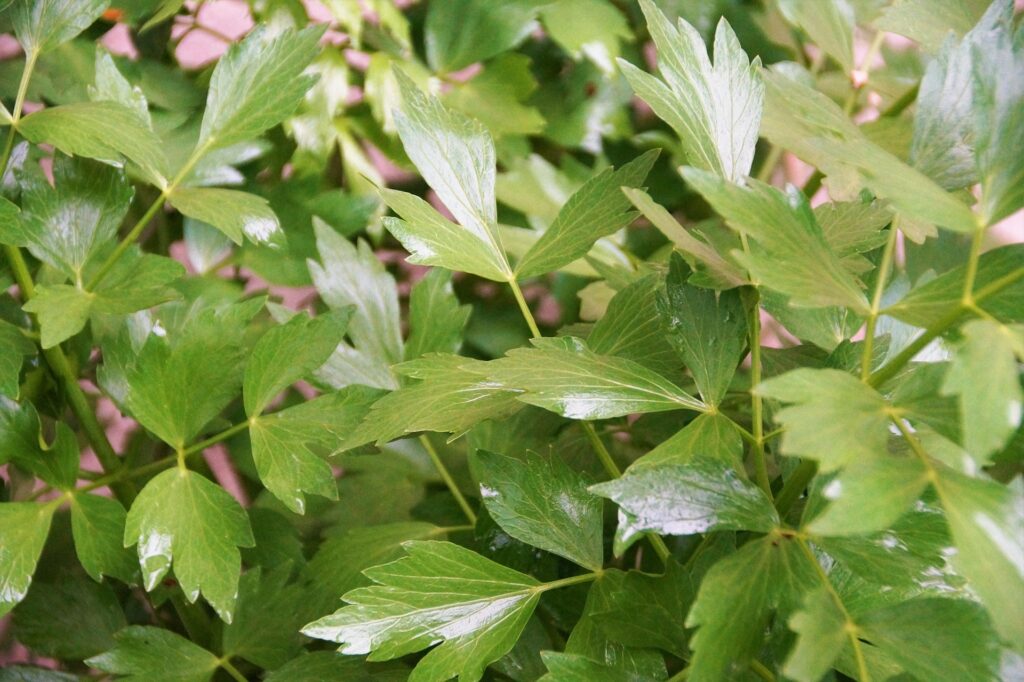
This hardy herbaceous perennial grows 3 to 7 feet tall with a spread of 2 to 3 feet, featuring glossy, deeply divided dark green leaves that resemble celery or flat parsley.
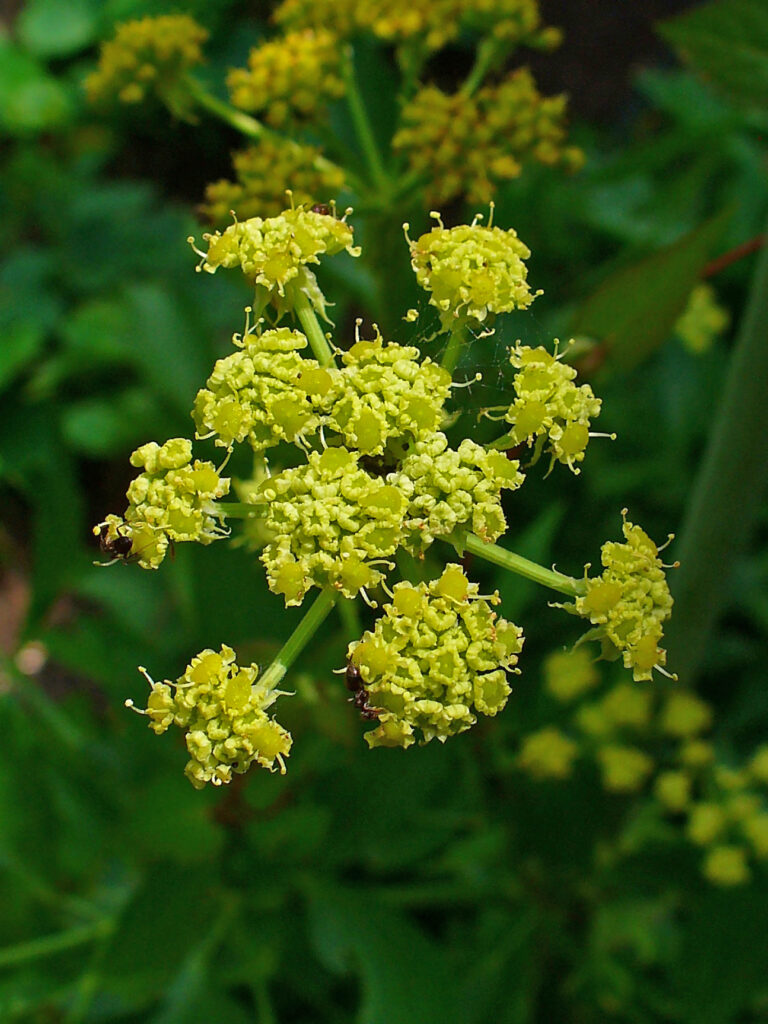
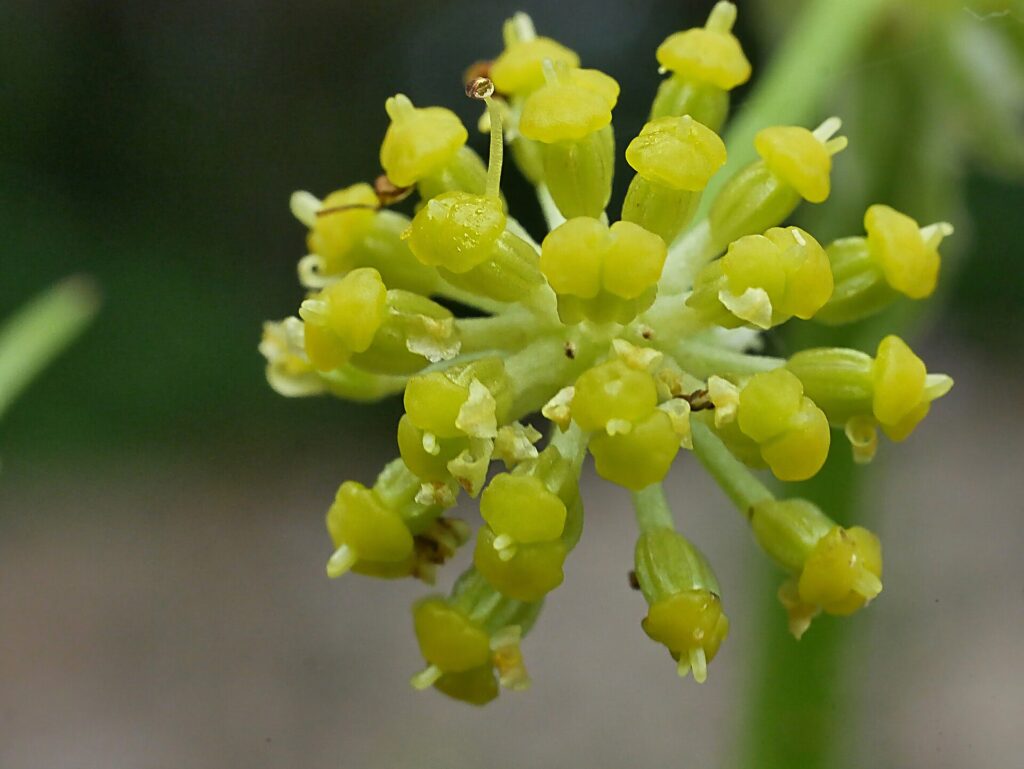
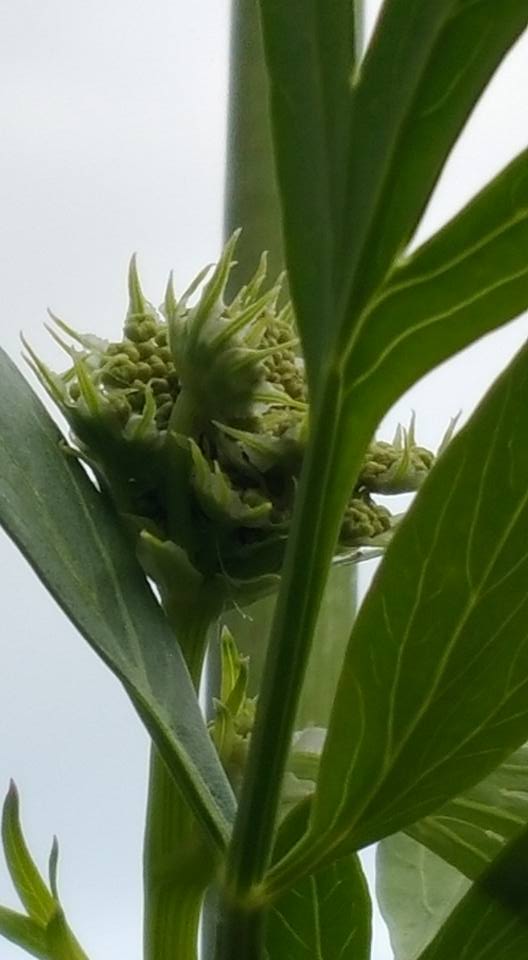
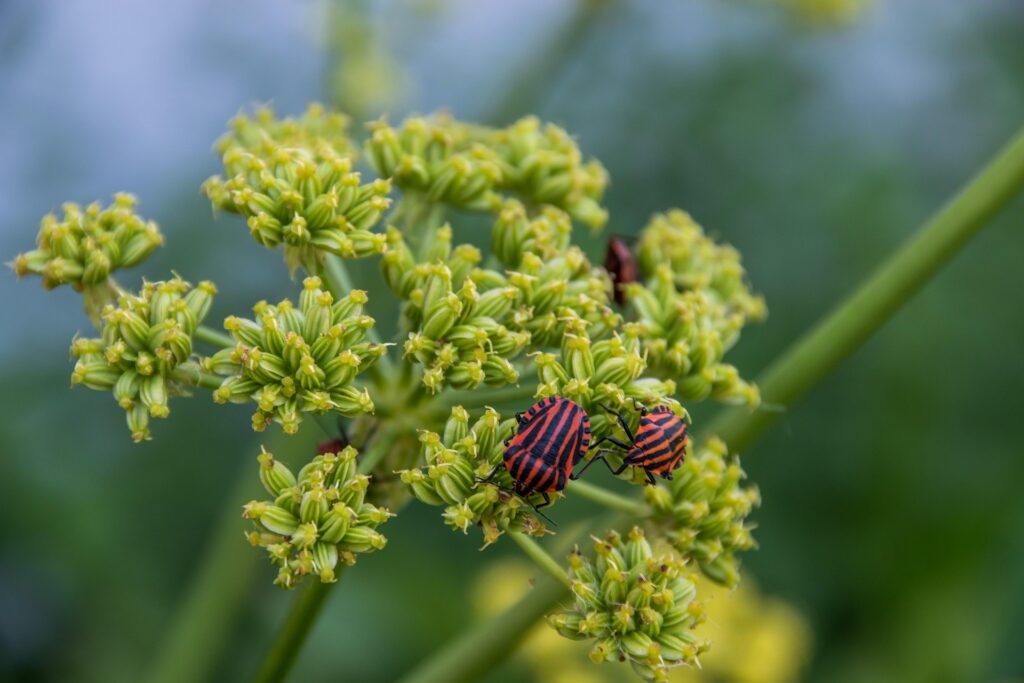
The plant produces striking greenish-yellow umbrella-shaped flower clusters (umbels) in midsummer that attract beneficial insects including parasitic wasps, tachinid flies, and numerous pollinators.
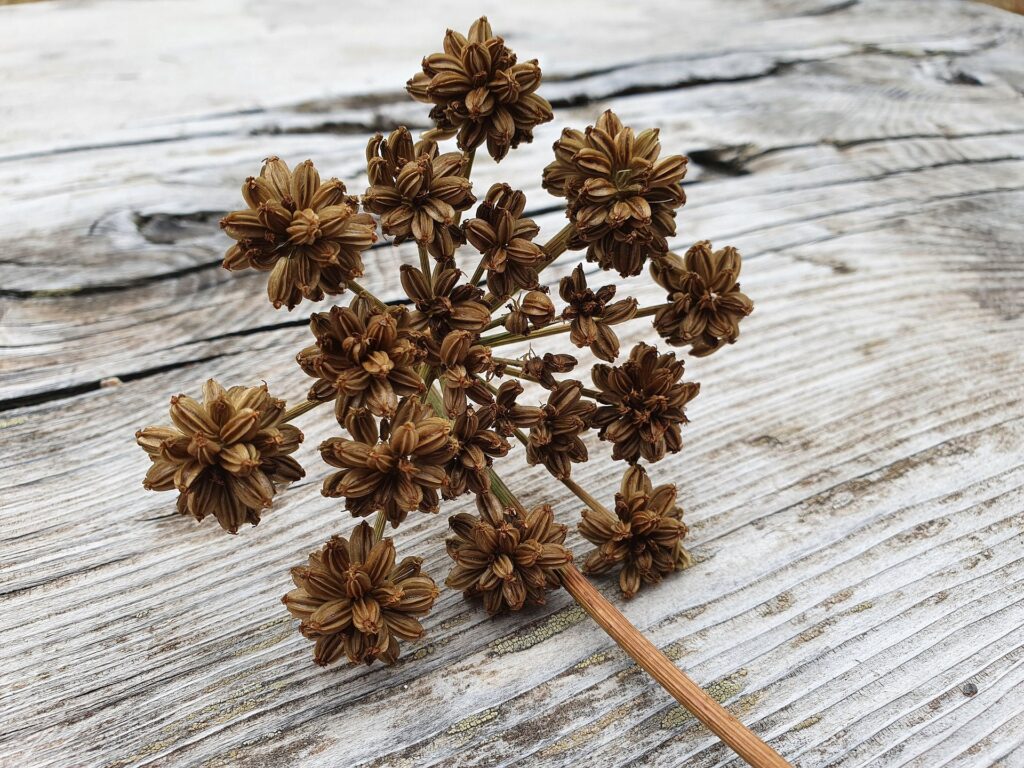
The fragrant flowers give way to aromatic seeds valued for their celery-like flavor.
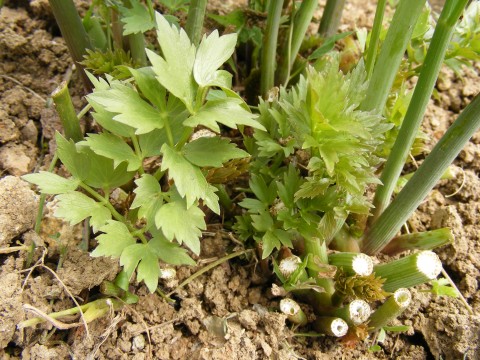
Lovage dies back completely to the ground each winter and reemerges vigorously in early spring, making it one of the most reliable and productive perennial herbs for temperate gardens.
Why Grow Lovage in Your Garden
Lovage thrives in USDA Hardiness Zones 3 through 9, performing best in cooler climates with adequate moisture. It tolerates cold exceptionally well — down to -5°F — but struggles in intense summer heat.
This cold-hardy perennial produces fresh foliage from late winter through autumn, with peak leaf production in spring and early summer before flowering begins.
Culinary Uses of Lovage
Every part of the lovage plant is edible and useful. The leaves, which taste like a stronger, more complex version of celery with hints of parsley and anise, can be used fresh in salads or dried for winter use.
The thick, hollow stems serve as celery substitutes in soups and stews, or can be blanched for a milder flavor. The roots of plants three years or older can be harvested and used as a cooked vegetable.
The aromatic seeds flavor breads, vinegars, and confections. In England, traditional lovage liqueur mixed with brandy remains a popular winter drink.
Medicinal Uses for Lovage
Beyond culinary applications, lovage has been used medicinally for centuries to aid digestion, reduce inflammation, act as a diuretic, and soothe digestive complaints.
Modern research supports some of these traditional uses, particularly its antibacterial and anti-inflammatory properties. The plant’s essential oil contains quercetin, a powerful antioxidant with multiple health benefits.
Environmental Uses of Lovage
In the garden, lovage serves as an excellent companion plant, reportedly improving the health and flavor of neighboring plants, particularly potatoes and other root vegetables.
The yellow flowers draw beneficial predatory insects that help control garden pests, while the plant can serve as a trap crop to lure tomato hornworms away from tomato plants.
With its tall, architectural presence and aromatic foliage, lovage adds both beauty and function to herb gardens, cottage gardens, and kitchen plots.
When To Start Lovage Seeds

The timing for starting lovage seeds varies based on your USDA Hardiness Zone and whether you choose to start indoors or direct sow. This perennial herb can be started either way, though indoor starting typically produces earlier blooms and stronger first-year growth.
In Zones 3-5
Start lovage seeds indoors 6-8 weeks before the last expected frost date in early spring. This extended indoor growing period allows seedlings to develop strong root systems before transplanting into cold-climate gardens.
Direct sow outdoors in early spring as soon as the soil can be worked, or in early fall for germination the following spring. Fall-sown seeds will naturally cold stratify over winter and germinate when soil temperatures warm in spring.
In Zones 6-8
Start seeds indoors 6-8 weeks prior to the last frost date. Indoor starting gives plants a head start on the growing season and typically results in some flower production the first year.
Direct sow outdoors in early spring when soil temperatures reach 50-60°F, or in early to mid-fall. These moderate zones allow flexibility in planting timing, with both spring and fall sowings producing good results.
In Zones 9
Start seeds indoors 4-6 weeks before the planned outdoor planting date. In this warmest hardiness zone suitable for lovage, focus planting times during cooler months for best establishment.
Direct sow in late fall through winter during the coolest part of the year. Lovage struggles in extreme heat, so establishing plants during cool months is critical for success in warmer climates. Plants may require afternoon shade and consistent moisture in zone 9.
How to Start Lovage Seeds Indoors
To get a head start on the growing season and ensure strong first-year growth, start lovage seeds indoors. Fresh seed germinates most reliably, so use seed harvested and packaged within the past year when possible.
Choosing or Making a Seed Starting Mix
Choose or prepare a well-draining seed starting mix suitable for herb cultivation. A mix with good drainage and moderate fertility works best. You can make your own mix by combining equal parts peat moss or coconut coir, perlite, and vermiculite, with a small amount of compost added for nutrients.
Choosing Containers for Starting Lovage
Opt for individual pots or deep cell trays at least 3-4 inches deep to accommodate lovage’s developing taproot. Avoid very shallow trays that restrict root growth. Containers must have drainage holes to prevent waterlogging. Since lovage develops a substantial taproot early, deeper containers produce healthier transplants with less transplant shock.
Depth to Plant
Sow lovage seeds approximately 1/4 inch deep in the prepared seed starting mix. Cover seeds lightly with soil or a fine layer of sand. Pressing seeds gently into contact with the soil improves germination rates.
Moisture Requirement for Seeds
Keep the seed starting mix consistently moist but never waterlogged. Water from below by setting containers in a tray of water, or mist the surface gently with a spray bottle to avoid disturbing seeds. Check moisture daily and maintain even dampness throughout the germination period, which can take 2-3 weeks.
Optimal Temperature for Germination
Maintain temperatures between 60-70°F for ideal germination. Lovage seeds germinate at moderate temperatures and do not require additional heat from heating mats. Consistent moderate warmth produces the most reliable germination.
Light Requirements for Germination
Lovage seeds do not require light for germination and can be covered with a thin layer of soil. However, once seedlings emerge, provide bright light immediately. Place under grow lights for 12-16 hours daily, or in a very bright south-facing window. Inadequate light causes leggy, weak seedlings.
Time to Germination
Lovage seeds typically germinate in 10-21 days, though germination can be erratic if seeds are not fresh. Seeds harvested in fall and planted immediately show the highest germination rates. Once seedlings have developed 4 true leaves—the leaves that appear after the initial seed leaves—they are ready for transplanting to individual pots or outdoor planting.
Preparing Your Garden Bed for Growing Lovage
Proper garden bed preparation ensures strong establishment and years of productive growth from this substantial perennial herb.
Selecting a sunny to partially shaded location is the first step in preparing for lovage. This herb grows best with at least 6 hours of direct sunlight daily in cooler climates, though it appreciates some afternoon shade in hotter regions.
Choose a spot with good air circulation but protected from strong winds that can damage the tall stems. Since lovage grows 3-7 feet tall with a 2-3 foot spread, select a location where the mature plant won’t shade smaller herbs or vegetables.
Lovage prefers deep, fertile, moist but well-drained soil. Unlike many Mediterranean herbs that thrive in lean soil, lovage demands rich, organic soil to support its vigorous growth.
The ideal soil pH ranges from 6.0 to 7.0—slightly acidic to neutral. Test your soil pH and amend as needed using lime to raise pH or sulfur to lower it according to test recommendations.
To prepare the planting bed, begin by clearing the area of weeds, debris, and stones. Loosen the soil to a depth of at least 12-18 inches, as lovage develops an extensive taproot system that requires deep soil penetration. This deep preparation is essential for long-term plant health and productivity.
Work in generous amounts of aged compost or well-rotted manure—at least 3-4 inches incorporated into the top 12 inches of soil. This organic matter improves soil structure, increases water retention, and provides sustained nutrients throughout the growing season.
For particularly heavy clay soils, add sand or perlite to improve drainage, as lovage will not tolerate waterlogged conditions despite preferring consistent moisture.
If planting lovage in containers, choose pots at least 18-24 inches deep and equally wide to accommodate the substantial root system. Use a rich, high-quality potting mix amended with compost rather than garden soil.
Container-grown lovage requires more frequent watering and feeding than garden-planted specimens.
Direct Sowing Lovage
Direct sowing lovage outdoors works well in both spring and fall, though fall sowing often produces stronger plants through natural cold stratification over winter.
Sow lovage seeds approximately 1/2 inch deep directly in the prepared garden bed. Plant seeds more thickly than needed—about 2 seeds per inch—to account for germination variability, particularly if seeds are not freshly harvested. Cover seeds lightly with soil and tamp down gently to ensure good seed-to-soil contact.
Space seed rows 24-36 inches apart to allow room for mature plants. Mark rows clearly, as lovage germination can take several weeks and you’ll need to distinguish seedlings from weeds.
Water the seeded area thoroughly but gently immediately after planting. Keep the soil surface consistently moist throughout the germination period. If spring weather is dry, water daily or every other day to prevent the soil surface from crusting, which can prevent seedling emergence. Germination typically occurs in 2-3 weeks when soil temperatures reach 50-60°F.
When seedlings reach 3-4 inches tall, thin them to stand 6 inches apart. Once plants are well-established and beginning to produce multiple leaves, thin again to final spacing of 18-24 inches between plants. Thinnings can be transplanted to other locations if handled carefully, though lovage’s taproot makes transplanting challenging once roots are established.
For fall sowing, plant seeds in early fall—4-6 weeks before the first expected frost. Seeds will remain dormant through winter and germinate naturally when soil warms in early spring. Mark the planting area clearly to avoid disturbing dormant seeds during spring garden preparation.
Transplanting Your Growing Lovage Plants
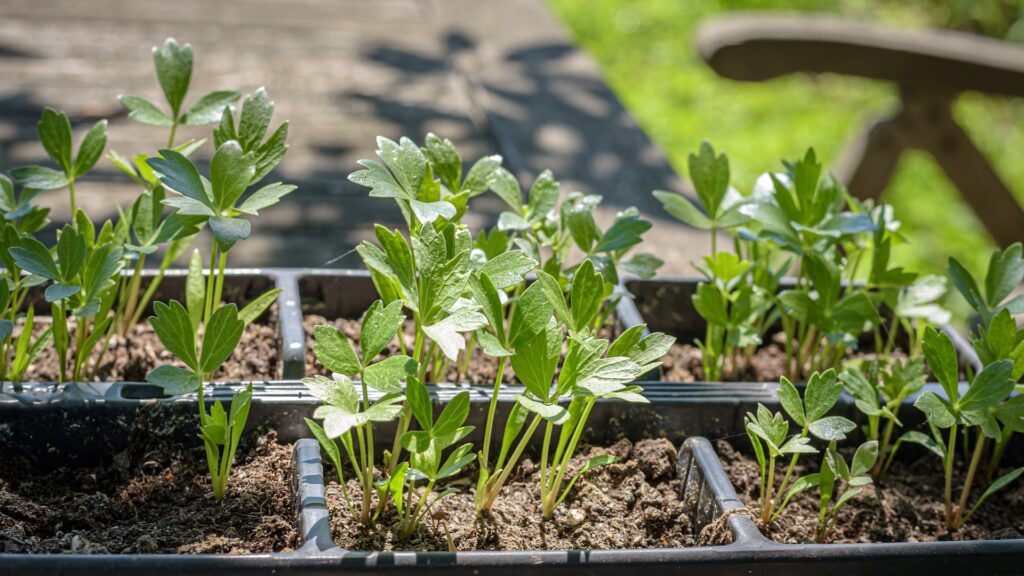
Lovage seedlings are ready for transplanting outdoors when they have developed at least 4 true leaves and stand 3-4 inches tall. The seedlings should appear sturdy with thick stems and healthy green foliage. Check that the root system is well-developed but not yet circling the container—lovage develops a taproot quickly, and delaying transplant once roots become pot-bound increases transplant shock.
Lovage is quite cold-hardy, but young transplants should not go outdoors too early. Wait until nighttime temperatures consistently stay above 40°F and all danger of hard frost has passed. In zones 3-5, this typically occurs in mid to late spring; in zones 6-8, early to mid-spring; and in zone 9, late winter to early spring.
Hardening Off Lovage Starter Plants
About 7-10 days before the planned outdoor transplant date, begin hardening off lovage seedlings. This gradual acclimation to outdoor conditions prevents transplant shock and ensures successful establishment.
Begin on a mild, overcast day by placing seedlings outdoors in a shaded or partially shaded location for 2-3 hours. Protect plants from strong winds and heavy rain during this initial exposure. Lovage stems are relatively sturdy, but young seedlings can be damaged by harsh conditions.
Over the following week, gradually increase both the time seedlings spend outdoors and their exposure to direct sunlight. Add 1-2 hours of outdoor time daily and move plants into progressively sunnier locations. By day 7-10, seedlings should tolerate full sun and can remain outdoors overnight if temperatures cooperate.
Monitor seedlings closely for signs of stress including wilting, yellowing, or leaf scorch. If stress symptoms appear, reduce outdoor exposure temporarily and provide shade during the hottest part of the day.
After the hardening off period is complete, lovage seedlings are ready for permanent outdoor planting. The gradual transition ensures plants can handle full outdoor conditions without shock, leading to faster establishment and better first-year growth.
Planting Out Lovage Starter Plants
Transplant lovage seedlings on an overcast day or in the evening to reduce transplant stress from sun exposure.
Dig planting holes in your prepared garden bed that are slightly larger than the seedling root balls. Space holes 18-24 inches apart for most varieties, or up to 30-36 inches apart if growing lovage primarily for ornamental effect or in particularly fertile soil where plants will reach maximum size.
Carefully remove seedlings from their containers, taking care not to damage the developing taproot. If roots are slightly pot-bound, gently tease them apart with your fingers. However, avoid excessive root disturbance—lovage doesn’t transplant as easily as many herbs once its taproot develops fully.
Place each seedling in its planting hole at the same depth it was growing in the container. The soil line on the stem should match the garden soil level. Planting too deeply can cause stem rot, while planting too shallow exposes roots to drying.
Backfill the holes with soil, firming it gently around the roots to eliminate air pockets. Create a shallow depression around each plant to hold water during irrigation.
Water transplants thoroughly immediately after planting, soaking the root zone deeply. This initial watering settles soil around roots and provides the moisture needed for establishment.
Apply a 2-3 inch layer of organic mulch such as straw, shredded leaves, or compost around each plant, keeping mulch pulled back slightly from the stem to prevent rot. Mulch conserves moisture, moderates soil temperature, and suppresses weeds—all beneficial for establishing lovage plants.
Water transplants regularly for the first 2-3 weeks after planting, keeping soil consistently moist but not waterlogged. Once new growth appears, indicating successful establishment, reduce watering frequency while maintaining consistent soil moisture.
Caring for Your Growing Lovage
Lovage requires moderate ongoing care focused on maintaining consistent moisture, providing adequate nutrition, and managing the plant’s substantial size.
Watering
Lovage has higher water requirements than most Mediterranean herbs. Keep soil consistently moist throughout the growing season, particularly during the critical periods of spring growth and summer flowering. The soil should feel damp to the touch but never waterlogged—dry soil causes leaves to develop an unpleasant bitter flavor and can stunt plant growth.
Water deeply once or twice weekly during normal weather, increasing frequency during hot, dry periods. Container-grown lovage requires more frequent watering than garden plants and may need daily irrigation in hot weather. Apply water at the soil level rather than overhead to reduce disease risk and prevent the tall stems from becoming water-weighted and flopping.
Decrease watering in fall as plants prepare for dormancy, but never allow soil to dry out completely. Even dormant roots benefit from occasional winter moisture in zones with dry winters.
Feeding
Lovage is a heavy feeder that benefits from regular fertilization throughout the growing season. In spring as new growth emerges, apply a balanced organic fertilizer or a 2-3 inch layer of compost around the base of the plant. Supplement with liquid fertilizer every 4-6 weeks during active growth if growing in containers or particularly lean soil.
Alternatively, side-dress plants with additional compost in midsummer to support flowering and seed production. Avoid high-nitrogen fertilizers that promote excessive leaf growth at the expense of the plant’s essential oils and flavor intensity.
Container-grown lovage requires more frequent fertilization than garden plants. Feed container specimens with diluted liquid fertilizer every 2-3 weeks throughout the growing season.
Weeding
Keep the area around lovage plants free of weeds, particularly during the first year of establishment. Weeds compete for the moisture and nutrients that lovage requires for vigorous growth. The mulch layer applied at planting helps suppress weed growth. Hand-pull any weeds that emerge, being careful not to disturb the shallow feeder roots near the soil surface.
As lovage matures and fills out, its dense foliage naturally shades out most weeds, reducing maintenance requirements in subsequent years.
Tips and Tricks for Growing Lovage

If you want lovage plants to produce maximum foliage rather than flowers and seeds, cut the plant back to the ground once or twice during the growing season. This “cut-and-come-again” approach forces the plant to produce fresh, young growth that is more tender and less bitter than older leaves. Water thoroughly after cutting back to encourage rapid regrowth. New foliage typically appears within 2-3 weeks.
To maximize leaf production and minimize bitterness, remove flower stalks as soon as they appear. Flowering diverts the plant’s energy from leaf production and causes remaining leaves to develop a bitter flavor. However, if you want to harvest seeds, encourage beneficial insects, or simply enjoy the ornamental yellow blooms, allow flowers to develop fully.
Supports
Mature lovage plants typically stand upright without support due to their thick, sturdy stems. However, in very fertile soil, exposed windy locations, or after heavy rain, tall flower stalks may benefit from staking. Install stakes in early summer before flower stalks fully develop to avoid root damage. Use soft ties to secure the main stems loosely to stakes, allowing some natural movement.
Addressing Pests
Lovage is relatively pest-resistant but may occasionally host leaf miners, which create winding tunnels in leaves. These pests rarely cause serious damage and can be controlled by removing and destroying affected leaves promptly. Aphids may cluster on tender new growth or flower buds but are easily controlled with a strong spray of water or insecticidal soap.
Interestingly, lovage serves as a trap crop for tomato hornworms, drawing these large caterpillars away from tomato plants. If using lovage as a trap crop, check plants regularly and remove hornworms by hand.
Avoiding and Treating Disease
Lovage is generally disease-resistant when grown in appropriate conditions. Proper spacing, good air circulation, and avoiding overhead watering prevent most fungal issues. In consistently wet conditions or humid climates, leaf spot diseases may occasionally appear. Remove affected leaves promptly and improve air circulation by thinning crowded growth if necessary.
Root rot can occur in poorly drained soil or from overwatering. Prevention through proper soil preparation and appropriate watering is the only reliable solution, as root rot cannot be cured once established.
What to Expect from Lovage
Lovage typically begins producing harvestable foliage 8-10 weeks after transplanting or 12-16 weeks after direct sowing. First-year plants focus energy on establishing robust root systems and may not flower. Beginning in the second year and continuing throughout the plant’s life, expect impressive growth and productivity.
Plants emerge very early in spring—often among the first herbs to show new growth when soil temperatures reach 40-50°F. This early emergence makes lovage particularly valuable for fresh herb use in late winter and early spring when few other herbs are available. Growth accelerates rapidly through spring, with plants reaching 3-6 feet in height by early summer.
Flowering occurs in midsummer during the second and subsequent years, typically July through August depending on climate. The greenish-yellow umbrella-shaped flower clusters are highly attractive to beneficial insects and produce aromatic seeds by late summer. After flowering and seed production, plants often look somewhat ragged and may benefit from cutting back to encourage fresh autumn growth.
As temperatures cool in fall, lovage growth slows and eventually stops. The above-ground portions die back completely with the first hard frost, turning brown and collapsing to the ground. This dormancy is natural and necessary—lovage requires a winter chill period to perform well year after year.
Lovage is exceptionally long-lived for an herb, often thriving for 10-15 years or more with minimal care. Plants can be divided every 3-4 years in early spring or fall to maintain vigor, but division is not necessary for plant health unless you want to propagate new plants or control spread.
This herb self-seeds readily if flowers are allowed to mature. Volunteer seedlings often appear in spring near the parent plant. These can be transplanted when small or thinned to prevent overcrowding.
How to Harvest Lovage
Lovage can be harvested throughout the growing season from spring through fall, with different plant parts available at different times.
Harvesting Leaves and Stems
Begin harvesting leaves once plants reach 8-10 inches tall by pinching or cutting individual leaves or stems as needed. Young, tender spring leaves have the mildest flavor and are excellent fresh in salads. As the season progresses, leaves develop a stronger flavor ideal for cooking.
For larger harvests, cut entire stems at the base, taking no more than one-third of the plant at a time to allow continued growth. Regular harvesting encourages the plant to produce fresh, tender foliage and prevents flowering if that is desired.
Harvest lovage leaves in mid-morning after dew has dried but before intense midday heat. This timing captures maximum essential oil content and flavor. Leaves can be used fresh immediately or dried for storage. To dry, hang small bunches in a warm, dry, well-ventilated area out of direct sunlight, or use a dehydrator at low heat (95-100°F).
For stems to use as celery substitutes, harvest before the plant flowers when stems are still tender and mild. Stems can be “blanched” by wrapping the lower two-thirds in paper or burlap 2-3 weeks before harvesting, which reduces bitterness and creates a milder, more celery-like flavor.
Harvesting Flowers
If you choose to harvest flowers for decorative use or to attract beneficial insects to other areas, cut flower stalks when blooms are fully open but before seeds begin forming. Flowers can be used fresh in arrangements or dried for winter decoration.
Harvesting Seeds
Allow flowers to mature on the plant if you want to harvest seeds. Seeds ripen in late summer to early fall, turning from green to brown and developing their characteristic aromatic scent. Seeds are ready when they easily separate from the flower head and are dry and hard.
Cut entire seed heads into a paper bag before seeds begin dropping naturally. Hang seed heads in a warm, dry place for 1-2 weeks to complete drying. Once fully dry, separate seeds from chaff by gently rubbing seed heads or shaking them in a bag. Store clean seeds in airtight containers in a cool, dark place. Seeds remain viable for planting for 3-4 years and retain culinary flavor for 1-2 years.
Harvesting Roots
Lovage roots can be harvested from plants three years old or older in fall after the plant has died back or in very early spring before new growth begins. Dig carefully around the plant to expose the large taproot, then use a spade or garden fork to lift the root from the soil.
Roots are substantial—similar to carrots but often larger and more branched. Wash thoroughly, peel if desired, and use fresh as a cooked vegetable similar to celeriac. Roots can also be sliced and dried for later use in soups and stews. Note that harvesting roots kills the plant, so only harvest from plants you intend to remove or from divided sections when rejuvenating overcrowded plantings.
Start Growing Lovage From Seed
This impressive perennial herb rewards minimal effort with decades of productivity and flavor. From its early spring emergence to late summer flowering, lovage provides continuous harvests of celery-flavored leaves, stems, seeds, and eventually roots. Whether you’re growing it for culinary use, as a beneficial insect attractor, or simply to add vertical interest to your herb garden, lovage proves itself an invaluable addition to temperate gardens. Remember that gardening is not just about the final outcome but also about the growth and learning that happens along the way.