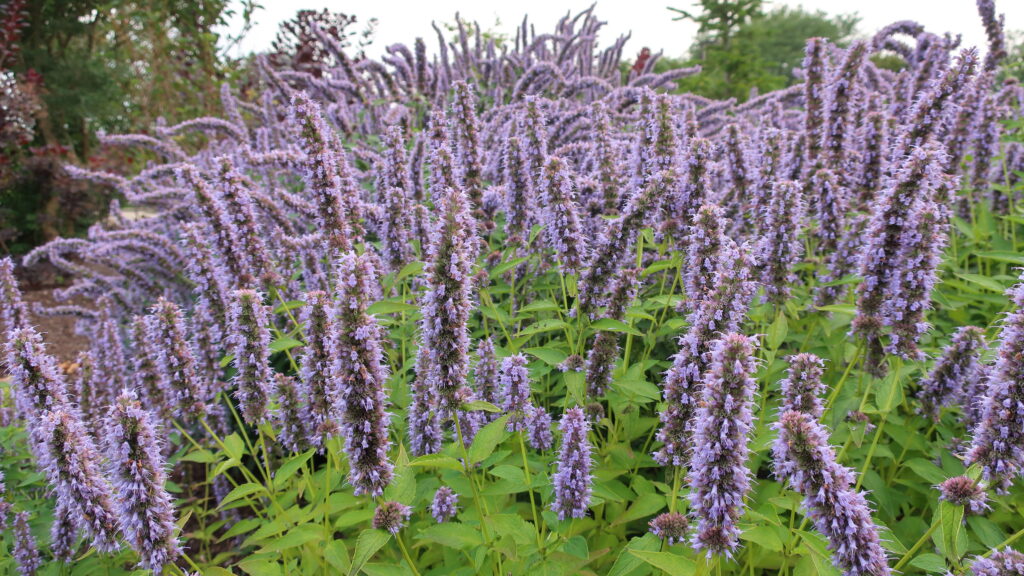
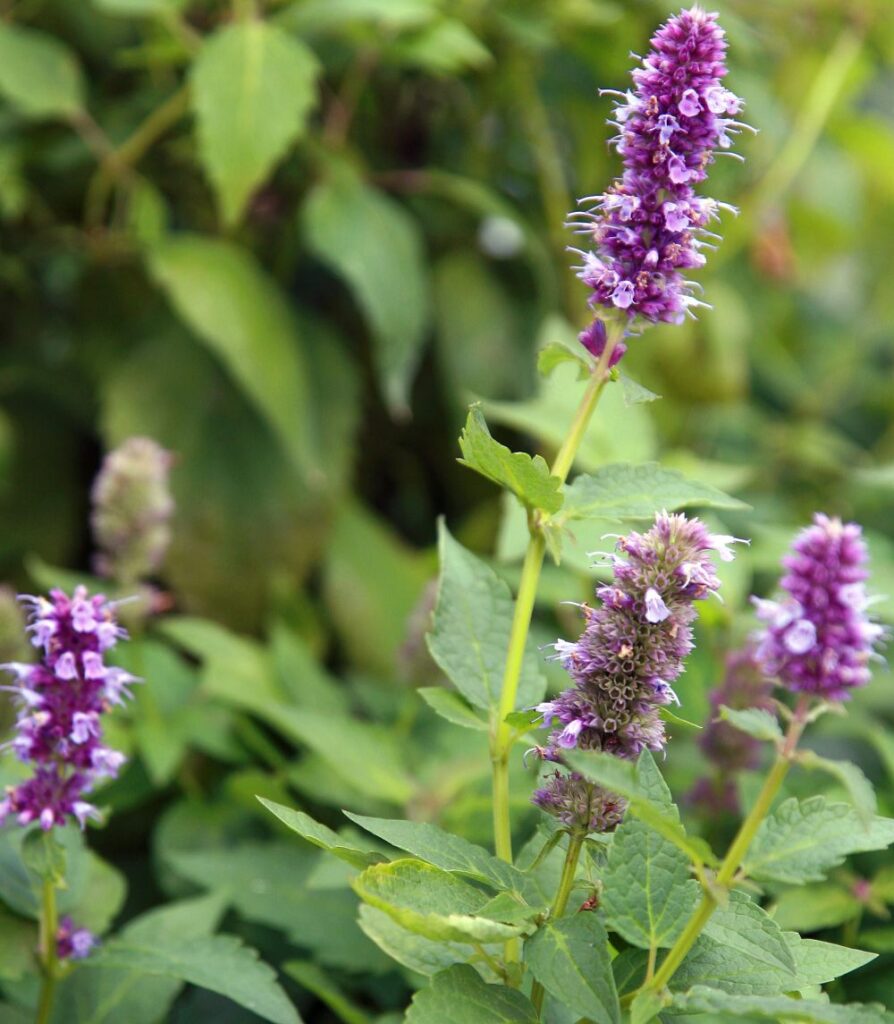
Agastache foeniculum is a native North American perennial herb that offers gardeners growing anise hyssop fragrant foliage, stunning lavender-purple flower spikes, and exceptional pollinator appeal. This short-lived perennial in the mint family (Lamiaceae) is beloved for its licorice-scented leaves, drought tolerance once established, and ability to thrive in USDA Hardiness Zones 4 through 9.
Despite its common name, Anise Hyssop is neither true anise (Pimpinella anisum) nor true hyssop (Hyssopus officinalis). It grows wild across the upper Midwest and Great Plains prairies from northern Colorado to Wisconsin and throughout Canada from Ontario to British Columbia. The plant’s edible leaves and flowers have been used for centuries in culinary and medicinal applications, and they make delicious herbal tea with a sweet anise-mint flavor.
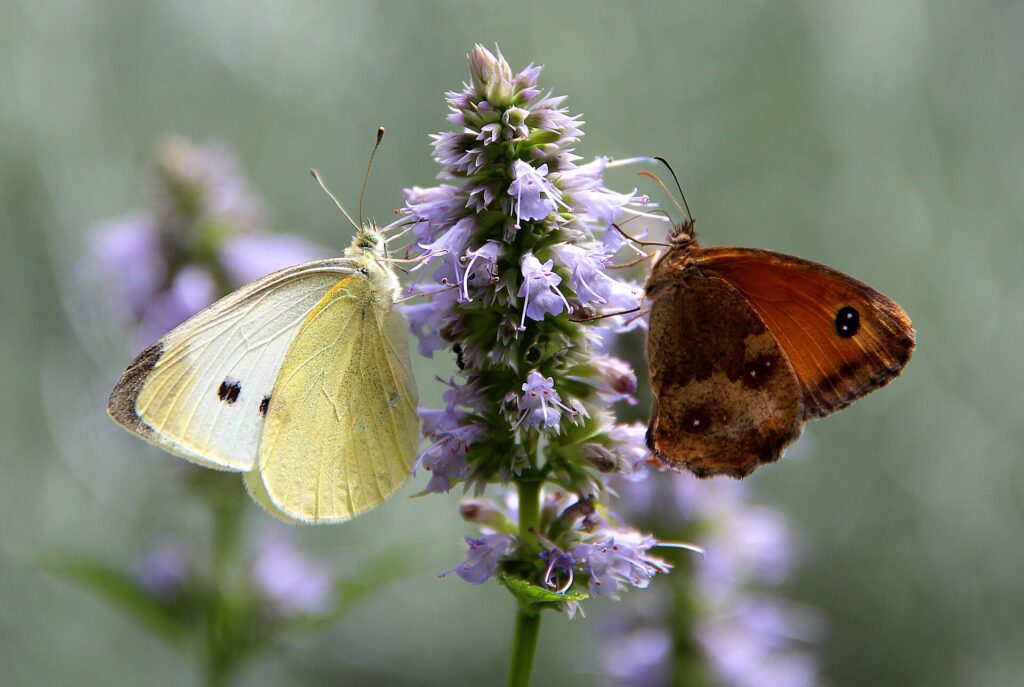
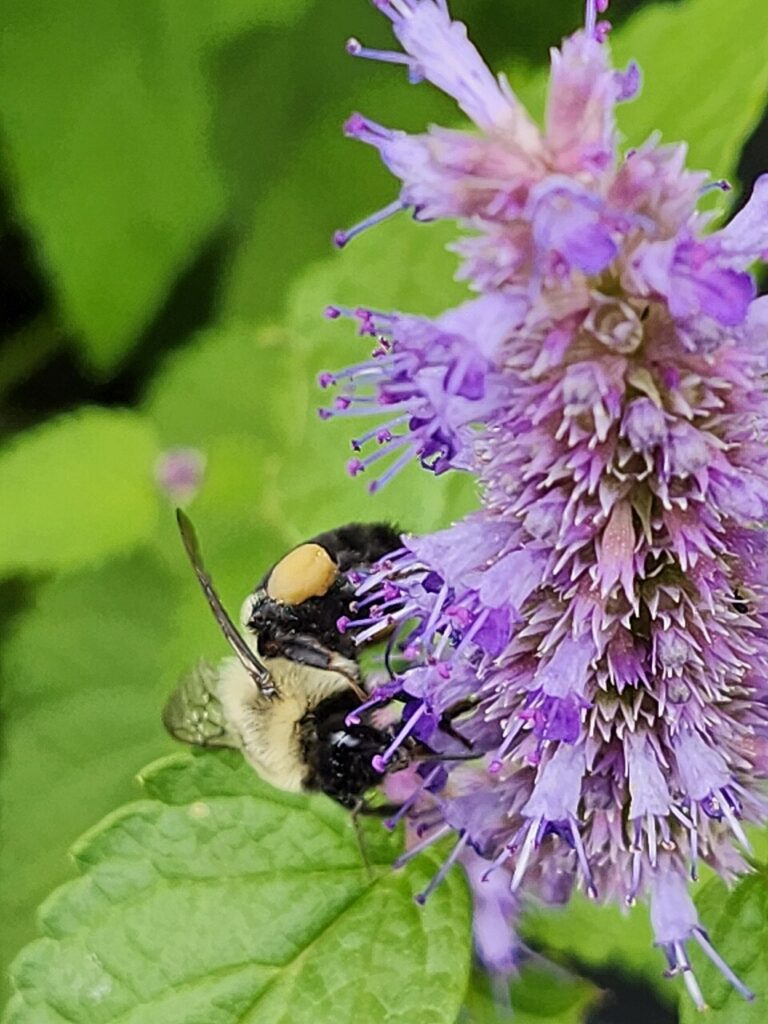
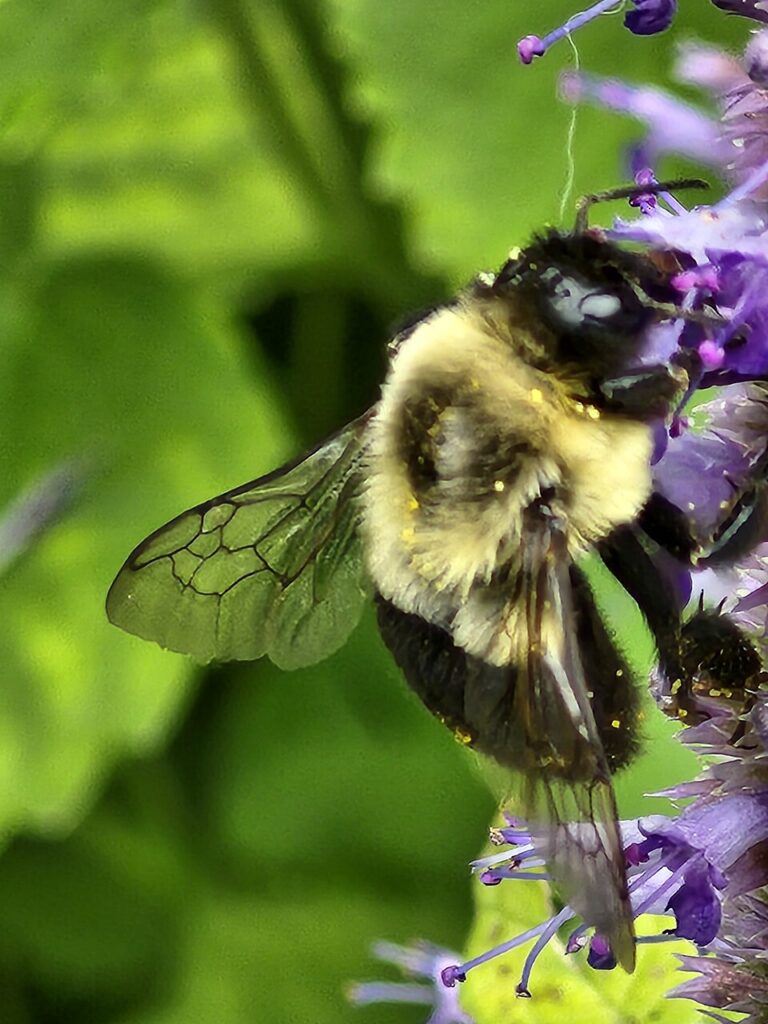
Native pollinators particularly love Anise Hyssop. Bumblebees, honeybees, butterflies, hummingbirds, and beetles flock to the nectar-rich blooms from June through September, making this one of the top pollinator plants according to the Xerces Society. Learning to grow Anise Hyssop from seed brings beauty, fragrance, and vital pollinator support to your garden for years to come.

Where to Grow Anise Hyssop from Seed
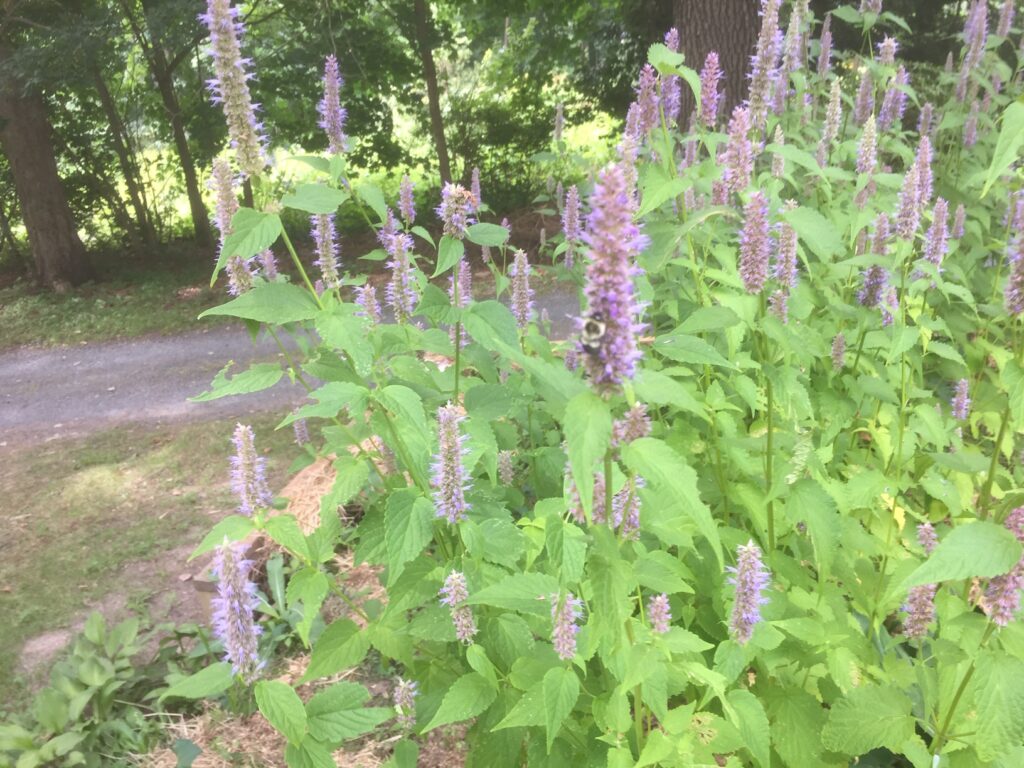
Anise Hyssop is a short-lived herbaceous perennial typically lasting about three years, though it self-sows readily and spreads via rhizomes, allowing it to naturalize and persist indefinitely in suitable conditions. This native prairie plant thrives in USDA Hardiness Zones 4 through 9, with some sources extending the range to Zones 3 through 10 for particularly hardy cultivars.
The plant performs best in full sun with well-drained soil, tolerating a wide range of soil types from sandy to loamy. Once established, Anise Hyssop demonstrates excellent drought tolerance, though young seedlings require consistent moisture during establishment.
When to Start Anise Hyssop Seeds
Anise Hyssop seeds benefit from cold stratification to break dormancy and improve germination rates. You can achieve this naturally through winter sowing or artificially by refrigerating seeds before spring planting.
In Zones 3-5
In these cooler climates, start seeds indoors 6 to 8 weeks before the last expected frost date after completing 30 days of cold stratification. Alternatively, winter sow seeds outdoors in late fall or early winter for natural stratification. Seeds sown outdoors will germinate when soil warms in spring.
In Zones 6-8
In these intermediate zones, start seeds indoors 4 to 6 weeks before the last frost after cold stratification, or direct sow in early fall for natural winter stratification and spring germination. You can also direct sow in early spring after last frost if seeds have been pre-stratified.
In Zones 9-12
In these warmer zones, Anise Hyssop seeds should be artificially stratified for 30 days, then started indoors in late winter or direct sown in early spring. In very warm climates, choose locations with afternoon shade to prevent heat stress.
For all zones, Anise Hyssop often blooms in its first year from seed, especially when started early indoors. Established plants will return year after year, spreading moderately through rhizomes and self-seeding in optimal conditions.
Understanding Cold Stratification for Anise Hyssop
Cold stratification is the process of exposing seeds to cold, moist conditions to break dormancy. In nature, Anise Hyssop seeds experience this naturally when they fall to the ground in autumn and endure winter’s cold before germinating in spring. While Anise Hyssop will germinate without stratification, cold treatment significantly improves germination rates and seedling vigor.
To stratify seeds using the refrigerator method, mix them with a small amount of moistened (not wet) seed starting mix, sand, perlite, or vermiculite. Place the mixture in a sealed plastic bag or container and refrigerate at 35 to 40 degrees Fahrenheit for 30 days (some sources recommend 4 to 6 weeks). Check weekly and add moisture if the medium begins to dry out. After stratification is complete, plant seeds as directed in the sections below.
Winter sowing provides natural cold stratification and often produces the strongest seedlings. This method involves sowing seeds directly in the garden in early fall (September through November in most zones). Scatter seeds lightly on prepared soil and barely press them in, as they need light to germinate. Seeds will experience natural winter cold and germinate when soil warms in spring. This method closely mimics natural conditions and often yields excellent results.
How to Start Anise Hyssop Seeds Indoors
Starting Anise Hyssop seeds indoors gives you earlier blooms and better control over growing conditions.
Choosing or Making a Seed Starting Mix
Select a light, well-draining seed starting mix. You can create your own by combining coconut coir, perlite, and vermiculite in equal parts. Anise Hyssop seeds are tiny, so a fine-textured mix prevents seeds from falling too deep.
Choosing Containers
Use shallow cell trays or soil blocks with good drainage. Depth of 2 to 3 inches is adequate for seedling development before transplanting.
Depth to Plant
Anise Hyssop seeds need light to germinate. Barely cover seeds with a thin layer of seed starting mix, or simply press them gently into the surface. Seeds scattered on top of moist soil and pressed down will germinate successfully.
Moisture Requirement for Seeds
Keep soil consistently moist but not waterlogged. Use a spray bottle or misting nozzle to water gently without disturbing tiny seeds. A humidity dome helps maintain moisture during germination.
Optimal Temperature for Germination
After completing cold stratification, Anise Hyssop seeds germinate best at temperatures between 65 and 70 degrees Fahrenheit. Germination may occur at cooler temperatures but will take longer.
Light Requirements for Germination
Anise Hyssop requires light to germinate. Place seed trays in bright, indirect light immediately after sowing. A sunny windowsill or grow lights positioned 2 to 3 inches above seeds work well.
Time to Germination
Seeds typically germinate within 1 to 4 weeks after stratification, with most sprouting within 2 weeks under optimal conditions. Germination may be uneven, with some seeds taking longer than others.
How to Prepare a Garden Bed for Anise Hyssop
Anise Hyssop adapts to various soil conditions but performs best with proper site selection and preparation.
Choosing a Location
Select a site that receives full sun for optimal growth and flowering. Anise Hyssop needs at least 6 to 8 hours of direct sunlight daily. In hot summer climates (Zones 8-9), afternoon shade prevents heat stress and extends the blooming period.
Light Requirements
Full sun produces the most robust plants with abundant flowers. Partial shade is tolerated, especially in warmer zones, though plants may grow taller and require staking. Too much shade results in weak, leggy growth and reduced flowering.
Moisture
Well-drained soil is essential. Anise Hyssop will not tolerate soggy conditions or heavy clay soil without amendments. The plant evolved in prairies with excellent drainage and once established becomes quite drought tolerant.
Soil Type Preferred
Anise Hyssop thrives in sandy to loamy soils enriched with organic matter. Avoid heavy clay unless amended with sand, compost, and perlite to improve drainage. The plant tolerates poor to moderately fertile soils and doesn’t require rich conditions.
Soil pH
Anise Hyssop prefers slightly acidic to neutral soil pH between 6.0 and 7.0. Test your soil’s pH and amend if necessary, though the plant tolerates a fairly wide pH range.
Preparing the Garden Bed
Begin by removing weeds and debris from the planting area. Loosen soil to a depth of 8 to 12 inches with a garden fork or broad fork to improve drainage and root penetration.
Mix in 2 to 3 inches of compost or well-rotted manure to improve soil structure and provide moderate nutrients. Anise Hyssop doesn’t require highly fertile soil, so avoid excessive fertilization which can lead to weak, floppy growth.
Level the bed with a rake, creating a smooth surface for sowing or transplanting.
How to Direct Sow Anise Hyssop in the Garden
Direct sowing works well for Anise Hyssop, especially with fall sowing for natural winter stratification.
For fall sowing (the recommended method), sow seeds in early fall by scattering them lightly over prepared soil. Press seeds gently into the surface without covering, as they need light to germinate. Seeds will undergo natural cold stratification over winter and germinate when soil warms in spring.
If spring sowing, complete artificial stratification first, then direct sow seeds in early spring after last frost when soil reaches 60 degrees Fahrenheit. Scatter seeds on soil surface and press gently. Space seeds 3 to 6 inches apart. Thin seedlings when they reach 2 to 3 inches tall, spacing plants 12 to 18 inches apart.
Keep soil consistently moist until germination occurs. Once established, reduce watering frequency.
Transplanting Anise Hyssop Seedlings
Anise Hyssop transplants easily at any age, making it forgiving for beginning gardeners. Seedlings are ready for transplanting when they have at least two sets of true leaves beyond the initial seed leaves and are 3 to 4 inches tall. Plants should appear sturdy with good green color.
Begin hardening off 7 to 10 days before your intended transplant date. Place seedlings outdoors in a sheltered, partially shaded location for 1 to 2 hours on the first day. Gradually increase outdoor exposure time and sun intensity over the hardening-off period. By day 7, seedlings should tolerate full sun for most of the day. Monitor plants for signs of stress such as wilting and adjust exposure accordingly.
When ready to plant, dig holes slightly larger than the root ball. Plant seedlings at the same depth they were growing in containers. Space plants 12 to 18 inches apart for compact varieties, or 18 to 24 inches apart for larger cultivars. Wider spacing improves air circulation and allows room for the plant’s natural spread via rhizomes.
Apply a 2 to 3 inch layer of organic mulch around plants after transplanting. Mulch helps retain moisture, regulate soil temperature, and suppress weeds. Keep mulch a few inches away from plant stems to prevent rot. Water transplants thoroughly after planting to settle soil around roots and eliminate air pockets. Continue providing consistent moisture during the first growing season while roots establish. Once established, Anise Hyssop becomes drought tolerant.
Caring for Anise Hyssop Plants

Anise Hyssop is a low-maintenance perennial requiring minimal care once established.
Watering
Water deeply once per week during the first growing season, providing about 1 inch of water. Established plants are drought tolerant and require watering only during extended dry periods. Overwatering can lead to root rot, so err on the side of too little rather than too much water.
Feeding
Anise Hyssop requires minimal fertilization. A single application of compost or balanced organic fertilizer in spring is sufficient. Excessive nitrogen produces lush foliage but reduces flowering and can cause floppy growth requiring staking. As a native prairie plant, Anise Hyssop evolved in nutrient-poor soils and doesn’t need rich feeding.
Weeding
Keep the planting area weed-free, especially during the first year. Anise Hyssop is a relatively slow grower when young and can be overwhelmed by aggressive weeds. Once established, plants compete well with weeds.
Pruning and Deadheading
Deadhead spent flower spikes to promote additional blooming and prevent excessive self-sowing if desired. Pruning plants lightly during the growing season encourages bushier growth and more flowering. In late winter or early spring, cut back any remaining dead growth to make room for new shoots. Leave some spent flower heads through winter to provide food for goldfinches and other seed-eating birds.
Tips and Tricks for Growing Anise Hyssop
Growing Anise Hyssop successfully involves understanding its prairie plant origins and minimal requirements. Excellent drainage is the most critical factor for success. Heavy clay soils must be amended with sand, compost, and perlite, or plants should be grown in raised beds to prevent root rot. Remember that seeds need light to germinate, so avoid burying them deeply during planting. Cold stratification significantly improves germination rates, though it’s not absolutely required.
First-year plants benefit from consistent moisture while establishing their root systems, but once established, plants become remarkably drought tolerant. Deadheading extends the bloom time considerably, though if you enjoy the volunteer seedlings that appear the following year, you may want to leave some flower heads to mature and drop their seeds. Plants grown in rich soils or partial shade may grow tall and lanky, requiring staking to keep them upright. Pinching young plants when they’re 6 to 8 inches tall encourages bushier growth and produces more flowering stems.
Common Pests and Diseases
Anise Hyssop is remarkably pest and disease resistant. Deer and rabbits generally avoid the plant due to its strong licorice scent, though rabbits may occasionally browse young plants.
The primary disease issue occurs in poorly drained soils where root rot can develop. Prevent this by ensuring excellent drainage and avoiding overwatering. Powdery mildew may occur in humid climates or crowded plantings with poor air circulation. Improve spacing between plants and avoid overhead watering to reduce risk. Organic sulfur or neem oil can control mild infections if they develop. Leaf spots rarely cause problems but may occur in very humid conditions. Remove affected leaves and improve air circulation if this occurs.
Managing Self-Sowing and Spread
Anise Hyssop self-sows readily in optimal conditions and spreads moderately through rhizomes. While not as aggressive as true mints, it can naturalize in gardens. Deadhead spent flowers to prevent self-sowing, or allow some seedheads to remain for bird food and controlled volunteer seedlings. Unwanted seedlings are easy to pull when small and can be transplanted to new locations.
Divide established clumps every 2 to 3 years in spring or fall to control spread and rejuvenate plants.
When and How to Harvest Anise Hyssop
Both the leaves and flowers of Anise Hyssop are edible and can be harvested throughout the growing season.
Harvesting Leaves
Harvest leaves anytime during the growing season, though flavor is most intense just before flowering begins. Cut stems 4 to 5 inches from the base in the morning after dew dries but before heat of day. Strip leaves from stems for fresh use or drying.
For continuous harvest, cut outer leaves while leaving the growing center intact. Plants will produce new foliage throughout the season.
Harvesting Flowers
Harvest flowers when they are three-quarters open for peak flavor and appearance. Cut flower spikes for fresh bouquets, drying, or culinary use. Flowers are edible and make beautiful garnishes for salads and desserts.
Drying for Tea and Storage
To dry leaves and flowers for tea, cut stems and bundle loosely. Hang upside down in a warm, dry, dark location with good air circulation. Leaves and flowers should be completely dry within 1 to 2 weeks. Strip dried leaves and flowers from stems and store in airtight containers away from light. Properly dried and stored Anise Hyssop retains flavor for up to one year.
Using Anise Hyssop
Anise Hyssop offers multiple uses in the kitchen, garden, and home. Fresh or dried leaves make delicious hot or iced herbal tea with a sweet anise-mint flavor. Young leaves add unique flavor to salads and fruit dishes, while flowers make beautiful garnishes for salads, desserts, and cocktails. Seeds can be added to cookies, cakes, and muffins for subtle licorice flavor, and the leaves complement fish, poultry, and vegetables.
In the garden, Anise Hyssop serves as an exceptional pollinator plant, attracting bees, butterflies, and hummingbirds throughout its long blooming period from June through September. The vertical flower spikes add structure to perennial borders and cottage gardens, and the stems make excellent cut flowers for both fresh and dried arrangements. The plant’s deer and rabbit resistance makes it valuable in areas with browsing pressure.
Traditional medicinal uses include respiratory support, digestive aid, and calming tea. As with any medicinal herb, consult qualified healthcare providers before using for health purposes.
Growing Anise Hyssop Successfully from Seed
Growing Anise Hyssop from seed brings a beautiful, fragrant, and beneficial native perennial to your garden. This low-maintenance plant rewards minimal care with abundant flowers, exceptional pollinator support, and edible foliage perfect for tea.
Remember that cold stratification significantly improves germination, though it’s not absolutely required. Provide well-drained soil and full sun for best results. Once established, Anise Hyssop asks for little and gives abundantly, returning year after year while self-sowing to create naturalized colonies of lavender blooms that buzz with pollinators all summer long.
Whether you’re growing Anise Hyssop for its ornamental beauty, pollinator value, or culinary uses, this native prairie plant deserves a place in every garden.