Growing Everglades tomatoes (Solanum pimpinellifolium), also known as native tomatoes or wild tomatoes, offers home gardeners an opportunity to cultivate one of the most heat-tolerant and prolific tomato species available.
A wild relative of the modern cultivated tomato, Everglades tomatoes belong to the Solanaceae family and are native to coastal regions of Peru, Ecuador, and northern South America. They have naturalized in parts of southern Florida and the Caribbean, where they thrive in the hot, humid climate with little care.

Their history of cultivation in the southeastern United States, particularly Florida, has made them a regional favorite among gardeners who struggle to grow more common tomato varieties in the summer.
Everglades tomato plants are remarkably well suited to USDA zones 8 through 12, especially in regions with long, hot growing seasons. They can be grown year-round in frost-free areas but perform especially well when planted in spring or early fall in subtropical climates.
In North and Central Florida, they are often grown through summer, when other tomatoes fail due to heat or disease pressure. In colder zones, Everglades tomatoes can be grown as warm-season annuals after the danger of frost has passed, or they may be started indoors for an early start.
Why Florida Gardeners Love Growing Everglades Tomatoes
Everglades tomatoes are popular among Florida gardeners for their ability to thrive in poor soil, high humidity, and intense summer heat. The plants are resistant to many common tomato pests and diseases, making them ideal for low-maintenance gardens or organic growing conditions.
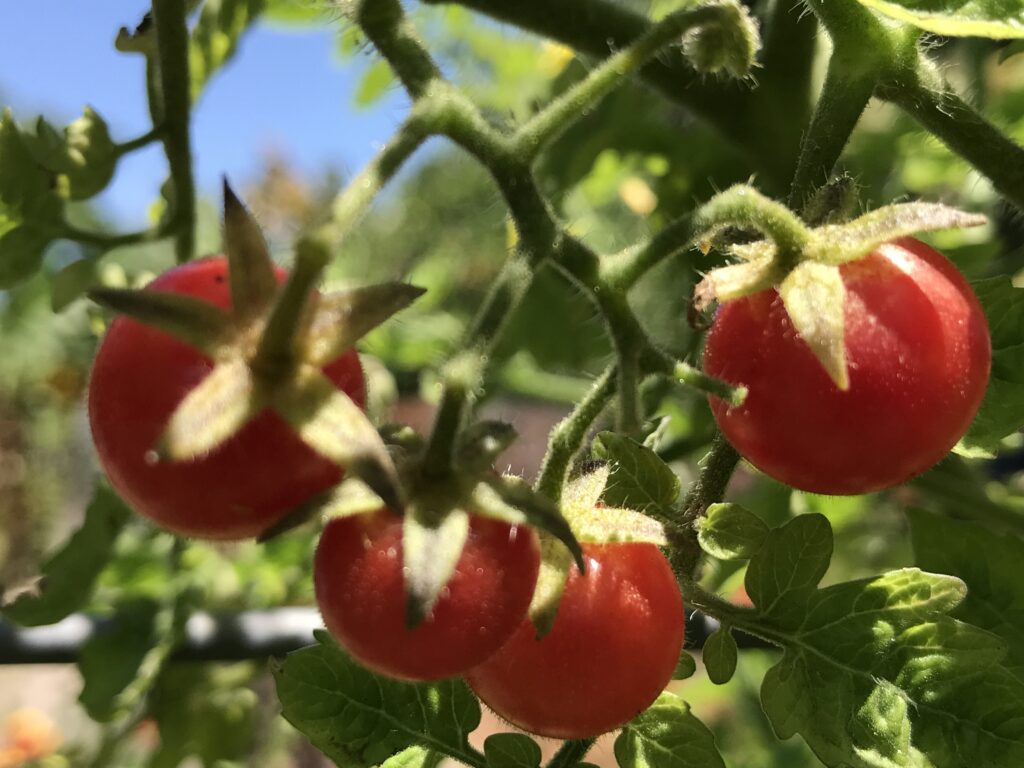
The fruit is small—about the size of a blueberry — but incredibly flavorful and ridiculously abundant. These tomatoes are perfect for snacking, tossing into salads, or using in sauces when harvested in quantity.
The sprawling, vine-like growth habit also makes them useful in edible landscapes or along fences where they can grow freely.
While typically grown as annuals in most regions, Everglades tomatoes are technically short-lived perennials in tropical and subtropical climates. In frost-free zones, they may survive for multiple seasons and reseed readily from dropped fruit.
In colder zones, plants will die back after frost but will often self-sow and return in the spring. With the right conditions, gardeners can enjoy near-continuous production from these hardy plants.
What to Expect When Growing Everglades Tomatoes
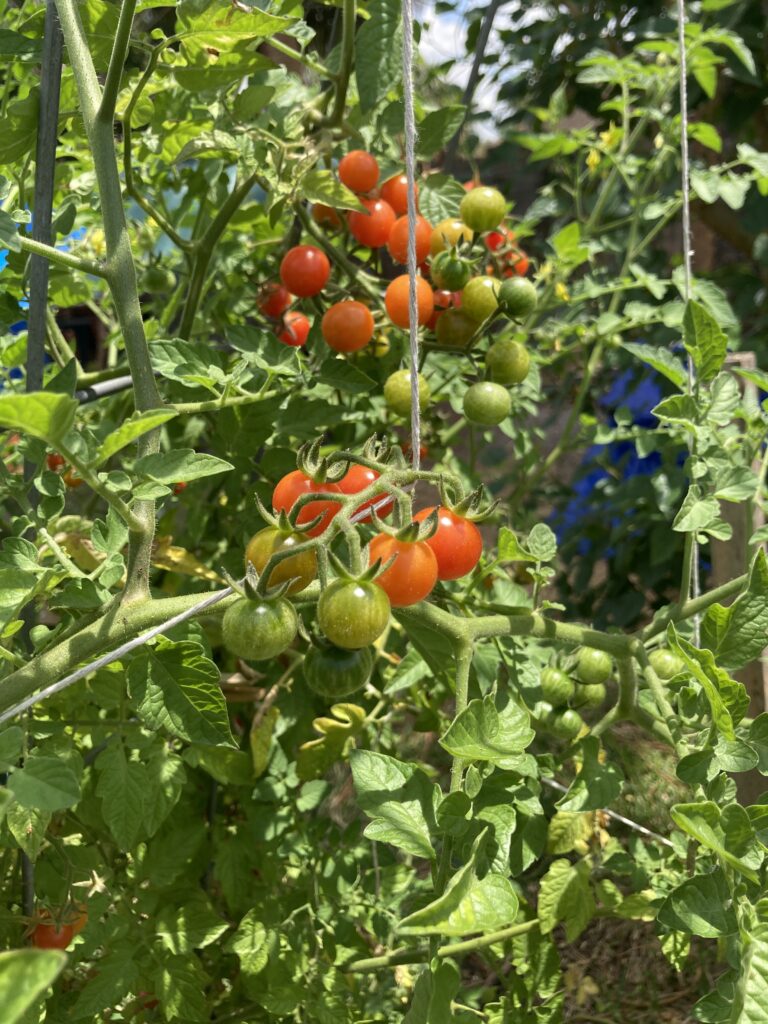
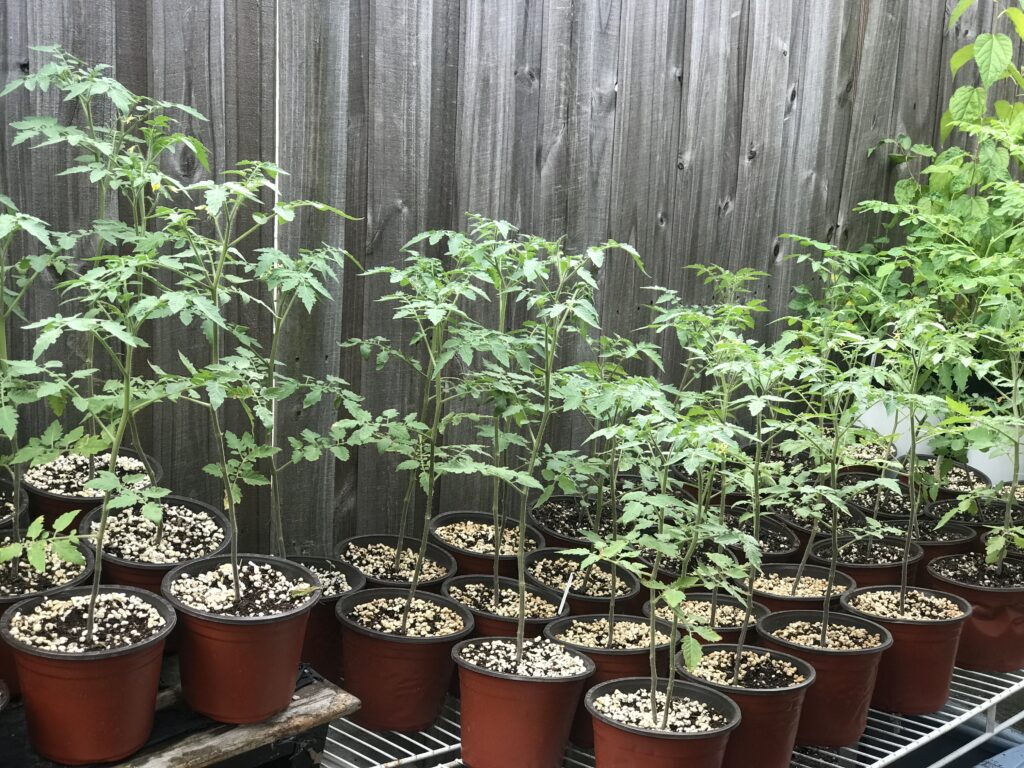
The Everglades tomato (Solanum pimpinellifolium) is a sprawling, vining plant that can quickly take over a garden bed or fence line if left unpruned. It typically grows to about 3 to 5 feet tall when supported, though its true nature is to sprawl along the ground or cascade over the edges of containers, trellises, or garden borders.
With adequate space, it can spread 4 to 6 feet or more in all directions, sending out long, wiry stems that root where they touch the soil. This wild growth habit makes it especially useful in informal edible landscapes, along fences, or at the edges of raised beds where it can trail freely.
Gardeners often let the plant sprawl or loosely support it on a fence or tomato cage rather than attempting to tame it into a neat, upright form.
Everglades tomatoes thrive in sunny, well-drained locations and are highly adaptable to containers, garden beds, raised beds, or rewilded corners of the yard. Their resilience and compact fruit make them especially popular for school gardens, beginner gardeners, and small-space growing, where their high yield makes the most of limited real estate.
Summary of Plant Characteristics:
- Lifespan: Tender perennial in Zones 10–12; grown as an annual in cooler zones
- Mature Height: 3 to 5 feet tall with support
- Mature Width: 4 to 6 feet or more when allowed to sprawl
- Growth Habit: Indeterminate, vining and sprawling
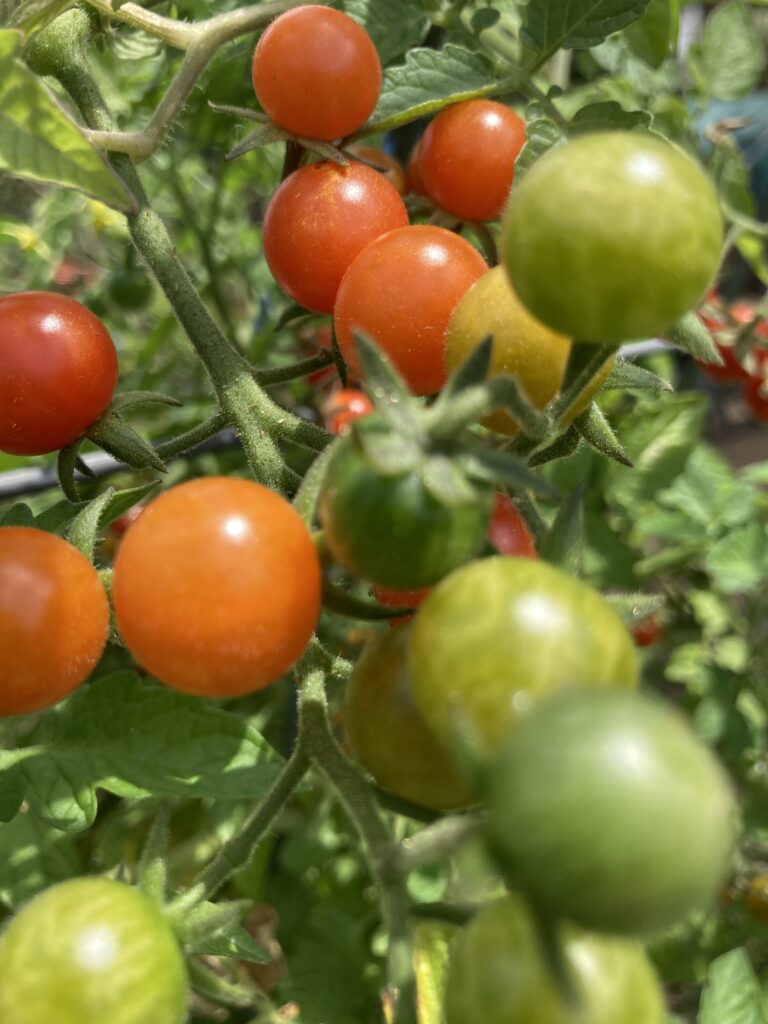
- Fruit Color: Bright red to red-orange
- Fruit Size: Small, about ¼ to ½ inch (currant-sized)
- Days to Maturity: 55 to 65 days from transplanting
When to Start Everglades Tomato Seeds

Because Everglades tomatoes (Solanum pimpinellifolium) are highly adapted to heat and humidity, they can be grown successfully in a wide range of climates with a bit of seasonal adjustment.
Like all tomatoes, they are frost-sensitive, but unlike many cultivated varieties, they tolerate summer heat in southern zones where other tomatoes struggle. When planning to start Everglades tomato seeds, your USDA hardiness zone and your region’s average frost dates will help determine the best approach—indoors or out.
Zones 3–5 (Short Growing Season, Cold Winters)
Start Everglades tomato seeds indoors 10 to 12 weeks before your region’s average last frost date. Harden off and transplant outdoors only after all danger of frost has passed and nighttime temperatures consistently remain above 50°F.
- Direct sowing is not recommended in these zones due to the short growing season and slow early growth in cool soils.
Zones 6–8 (Moderate Winters, Distinct Seasons)
Start seeds indoors 8 to 10 weeks before your average last frost date. Transplant after frost, once the soil has warmed and nights are reliably above 50°F.
- Direct sowing can be attempted after the last frost, though this may slightly delay fruiting compared to transplanting.
Zones 9–12 (Warm to Hot Climates, Mild or No Frost)
You can start seeds indoors or directly sow outdoors, depending on the season. In subtropical and tropical areas, Everglades tomatoes are often best planted in late winter or early spring for a spring harvest, or in late summer for a fall-to-winter harvest.
- In these zones, direct sowing works well once temperatures consistently reach the 70s during the day and remain above 60°F at night.
- Avoid sowing during peak summer if temperatures regularly exceed 95°F, as this can reduce fruit set and slow seedling development.
Everglades Tomato Seed Preparation
Everglades tomato seeds (Solanum pimpinellifolium) are known for their slow and sometimes staggered germination. Unlike many hybrid or heirloom cultivated tomatoes, these wild-type tomatoes often require extra time and warm, steady conditions to sprout.
Germination typically occurs within 7 to 21 days, but in some cases, it may take longer depending on temperature and moisture levels. This unpredictability means growers should plan ahead and avoid disturbing seed trays prematurely.
Soaking the seeds before planting can help soften the seed coat and give them a stronger start. Although not essential, this step may slightly improve germination time and consistency.
To soak Everglades tomato seeds, place seeds in a small container with room-temperature water. Soak for 6 to 8 hours before planting, but do not soak for longer than 12 hours to prevent deterioration. Drain and plant seeds immediately after soaking.
Although Everglades tomatoes are slow to sprout, they grow vigorously once established and thrive in conditions where most other tomatoes struggle. With a bit of extra patience at the start, these resilient plants reward growers with prolific harvests throughout the warm season.
Prepare Your Garden for Growing Everglades Tomatoes
Everglades tomatoes (Solanum pimpinellifolium) may be smaller-fruited than cultivated tomatoes, but their sprawling habit and vigorous growth make thoughtful bed preparation essential. While they can thrive in less-than-ideal conditions, giving them a well-prepared space can dramatically improve fruit set and ease of maintenance.
Choosing a Location
Choose a site that offers protection from strong winds but good air circulation. Because they can become sprawling and wide, they benefit from areas where they can spread without crowding other plants.
Everglades tomatoes require full sun for maximum production. Select a site that receives at least 6 to 8 hours of direct sunlight per day. In Zones 9–12, some afternoon shade can help prevent heat stress, though the plants are extremely heat-tolerant overall.
Everglades tomatoes tolerate some drought once established, but they perform best with consistent, moderate watering. Choose a site that has good drainage but retains some moisture.
Everglades tomatoes grow well in a variety of soils, but loose, fertile soil with good organic content encourages strong root development and fruit production. Amend garden beds with compost or well-rotted manure before planting. Loamy or sandy soils are ideal. A pH range between 6.0 and 6.8 is preferred, but these tomatoes are forgiving of slight acidity or alkalinity.
Preparing the Garden Bed
Gently loosen the soil if compacted, but avoid disturbing an otherwise well amended vegetable garden bed. You can add 2 to 4 inches of compost and rake that over the garden bed.
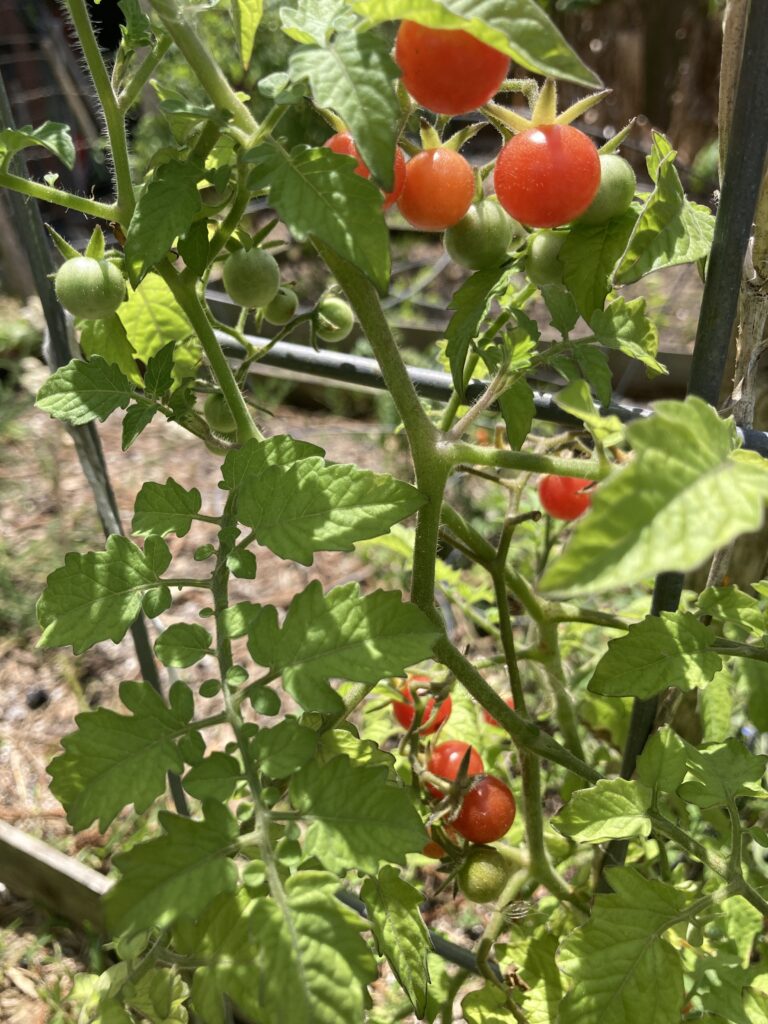
While Everglades tomatoes do not require staking to survive, I recommend using some form of support to make care less of a chore. These plants tend to sprawl vigorously and can quickly overtake pathways or neighboring crops, as well.
Trellising, cages, or even makeshift fencing can help reduce disease risk from ground contact, make harvesting easier, and improve airflow through the foliage. If left unsupported, allow ample space for them to ramble freely.
Direct Sowing Everglades Tomato Seeds
To successfully sow Everglades tomato seeds directly in the garden, follow these essential steps for optimal growth:
- Depth to plant: Sow seeds about 1/4 inch deep in the soil.
- Moisture requirement for seeds: Keep the soil consistently moist but not waterlogged during the germination process.
- Optimal temperature for germination: Ideal soil temperature for germination is between 70°F and 85°F.
- Light requirements for germination: Seeds require light to germinate, so avoid covering them too deeply and provide ample sunlight or grow lights.
- Time to germination: Germination can take between 10 to 21 days, as Everglades tomatoes are known to have slow germination.
Starting Everglades Tomato Seeds Indoors
Starting Everglades tomatoes indoors can give you a head start on the growing season, especially considering their slow germination rate. I usually recommend starting as much as 12 weeks ahead of planting out to ensure a more successful transplant.
Here’s how to successfully start Everglades tomato seeds in cell trays or soil blocks:
- Mix: Use a light, well-draining seed starting mix designed specifically for vegetable seeds. You can also create your own mix by combining equal parts of coconut coir, perlite, and compost.
- Containers: Start Everglades tomato seeds in seed trays, small pots, or soil blocks. Make sure to allow enough room for the roots to develop before transplanting. Cell trays are great for starting multiple seeds, while soil blocks are an eco-friendly, space-efficient alternative.
- Depth: Plant Everglades tomato seeds about 1/8th to 1/4 inch deep into the seed starting mix. This ensures the seeds have enough coverage to retain moisture.
- Watering: Keep the seed starting mix consistently moist, but not soggy. Mist the surface with a spray bottle to keep the soil evenly moist. You can also bottom water your trays by allowing them to sit in a dish of clean water for half an hour or so. Don’t let the mix dry out, but also to avoid overwatering, which can lead to mold or rot.
- Optimal Temperature: Everglades tomato seeds germinate best in warm conditions. Keep the seed trays or containers in a warm area where the temperature is between 70°F and 85°F. Using a seed heating mat can help maintain the optimal temperature, especially in cooler environments.
- Time to germination: Everglades tomato seeds can take anywhere from 10 to 21 days to germinate, even longer, depending on the temperature and moisture conditions. Be patient, as this variety is known for its slower germination compared to other tomato varieties. Because these are “wild” rather than “cultivated” plants, they haven’t been bred for consistent characteristics.
When to Transplant Your Growing Everglades Tomatoes
Knowing when to transplant your Everglades tomato plants into the garden is key to their success. While it might be tempting to plant them out as soon as they develop a few leaves, it’s important to wait until your starter plants are fully ready.
Plants that have been up-potted to a larger size before planting outside tend to be more successful, as they have a better-developed root system and can withstand transplant shock more effectively.
Here are the key factors to consider when determining the right time to plant out your Everglades tomato plants:
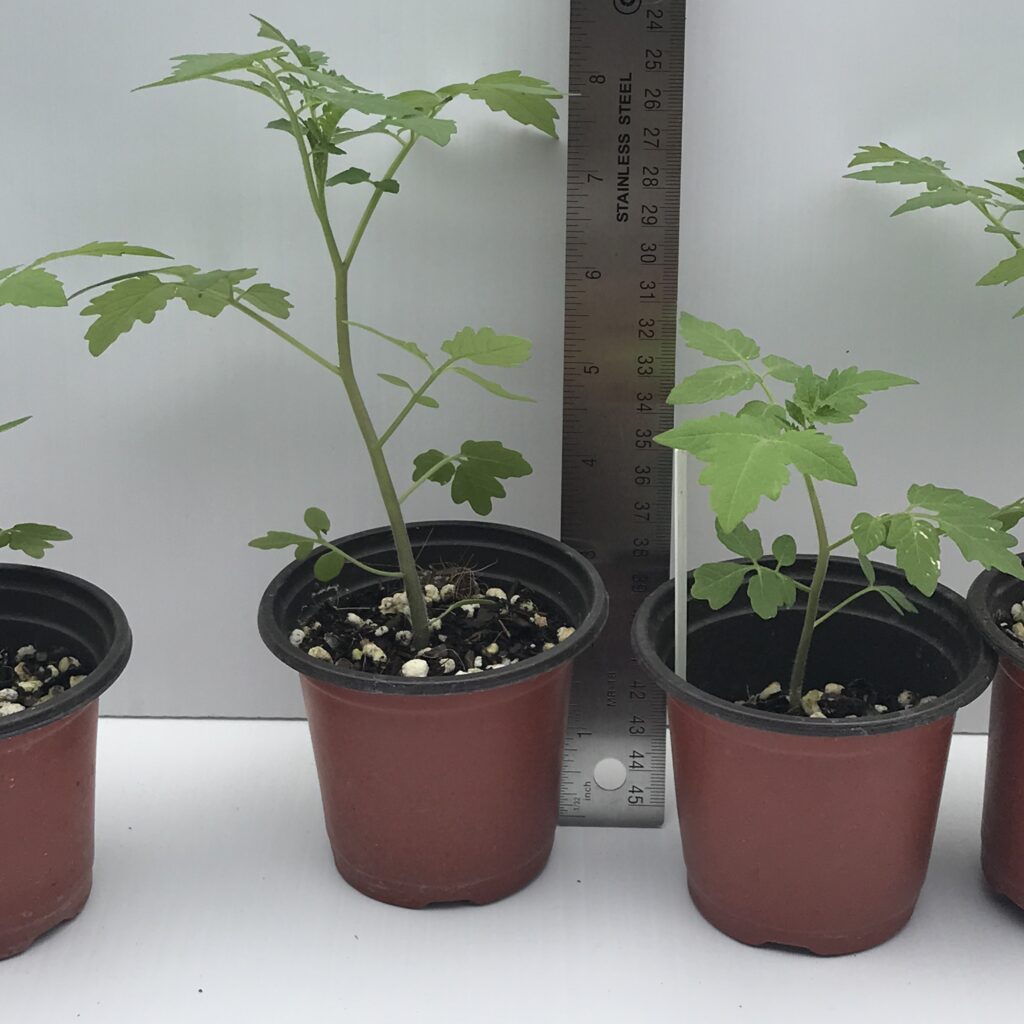
Size and Maturity
Before transplanting, ensure that your Everglades tomato plants are at least 6-8 inches tall and have a strong, healthy root system. They should have several sets of true leaves, which indicates they have moved past the seedling stage. At this point, the plants should be sturdy and capable of handling outdoor conditions.
Up-potting
If you started your Everglades tomato seeds indoors early (8-12 weeks before the last expected frost), it’s highly recommended to up-pot your plants into larger containers as they grow. This allows the roots more space to develop and prevents them from becoming root-bound, which can hinder growth. It also helps the plant develop a more robust root system that can better absorb nutrients and water once it’s planted outside.
Frost-free Date
Everglades tomatoes, like all tomato varieties, are highly sensitive to frost. Planting out should only occur once all danger of frost has passed, and nighttime temperatures consistently remain above 50°F. For most regions, this will be after the last expected frost date in your area.
Hardening Off
Before planting outside, make sure to harden off your plants. Start by gradually exposing them to outdoor conditions, placing them outside for a few hours each day and increasing the time gradually over the course of 7-10 days. This helps them acclimate to the wind, sunlight, and temperature fluctuations they’ll encounter in the garden, reducing transplant shock.
By allowing your Everglades tomato plants to mature in their containers and carefully hardening them off before transplanting, you’ll help ensure that they thrive once planted in the garden. This thoughtful approach will lead to a healthier, more productive growing season.
Transplanting Your Everglades Tomato Plants

Ensure your growing Everglades tomatoes establish well and thrive in their new environment by keeping the following in mind when planting out:
Prepare the Planting Holes
Dig a hole for each tomato plant that is deep enough to bury the root ball and some of the stem. The ideal planting depth is several inches deeper than the container the plant is in, allowing the roots to be well-covered.
I recommend adding a mycorrhizal fungi amendment directly into the planting hole when transplanting tomato plants. This helps prevent transplant shock and improves nutrient uptake in young plants. Two of my favorites are Espoma Bio-Tone Starter Plus and Smart Grower Supercharge. Both contain mycorrhizal fungi and beneficial bacteria that improve plant health.


When planting tomatoes, bury a portion of the stem up to the first set of leaves, or remove leaves to cover the stems by several inches. Tomatoes will develop adventitious roots along their stems, resulting in healthier and strong plants.
Spacing
Give your Everglades tomato plants plenty of room to spread: 36 to 48 inches is good. Even with supports, they easily spread out and vine. I normally plant only one in any garden bed with plenty of room, using the shade they produce to plant more sensitive plants where they will be protected from the harsh Florida sun.
Mulching
After planting, apply a layer of mulch around the base of the plants. Use organic mulch such as straw, grass clippings, or hay. I don’t recommend wood chips, as they can persist in the garden bed, typing up nitrogen for up to two or more years.
A 2-3 inch layer of mulch helps retain moisture, regulate soil temperature, and reduce weed competition. Be sure to keep the mulch a few inches away from the plant stem to avoid rot.
Watering
Right after planting, water the plants deeply to settle the soil around the roots. Ensure the soil is moist, but not waterlogged. Over the first week or two, water regularly and deeply to help the plants establish.
Monitor and Adjust
As the plants establish, water them consistently, especially during dry spells. If the weather is particularly hot, increase watering frequency. Keep an eye on the plants for signs of stress, such as wilting or yellowing leaves, and adjust water levels accordingly.
Everglades tomatoes need consistent moisture, but it is essential not to overwater them. Water deeply at the base of the plant, ensuring that the soil remains moist but not soggy.
Tomatoes generally prefer about 1-1.5 inches of water per week, more during hot periods. Definitely more when grown in Florida.
Drip irrigation or soaker hoses are excellent options to minimize water on the leaves, which can help reduce the risk of fungal diseases. Aim to water early in the day to allow time for the foliage to dry out.
Feeding
Feed Everglades tomatoes with a tomato fertilizer if desired a few weeks after transplanting, when the plants begin to show strong growth. You can feed them again when they start to flower. You can also amend the soil with organic compost or well-aged manure for added nutrients throughout the season.
I’ve found it unnecessary to feed my Everglades tomatoes at all when I’ve planted them into an established garden bed that I’ve regularly amended with compost.
Weeding
Regularly weed around Everglades tomato plants to minimize competition for nutrients and water. In order to prevent disturbing roots, cut any weeds off at ground level, rather than pulling them. You can leave the weeds on top of the soil to add organic matter if they haven’t gone to seed yet.
Pest Control
Everglades tomatoes are relatively pest-resistant, but they can still be susceptible to some common tomato pests, such as aphids, whiteflies, and hornworms. I sometimes find them covered with leaf-footed bug babies during the hottest summer months.
Inspect your plants regularly for signs of pests, such as discolored leaves or chewed foliage. You can use plain soapy water directly on leaf-footed bugs, but avoid using persistant pesticides. This helps preserve beneficial insects like ladybugs, which help control aphid populations.
Pruning

Growing Everglades tomatoes can easily take over your fence, trellis, but they don’t require pruning like cultivated indeterminate tomato varieties.
You can improve air circulation and encourage stronger growth by removing any dead or damaged leaves.
For more compact growth, you can also prune the plants as they mature, especially if they are sprawling too much.
Staking or Supports
Everglades tomatoes don’t require staking for health like more cultivated varieties, however, a small cage or trellis to helps to keep the plant upright. This prevents the fruit from touching the ground, reduces the risk of disease, and makes harvesting these tiny tomatoes so much easier on your back.
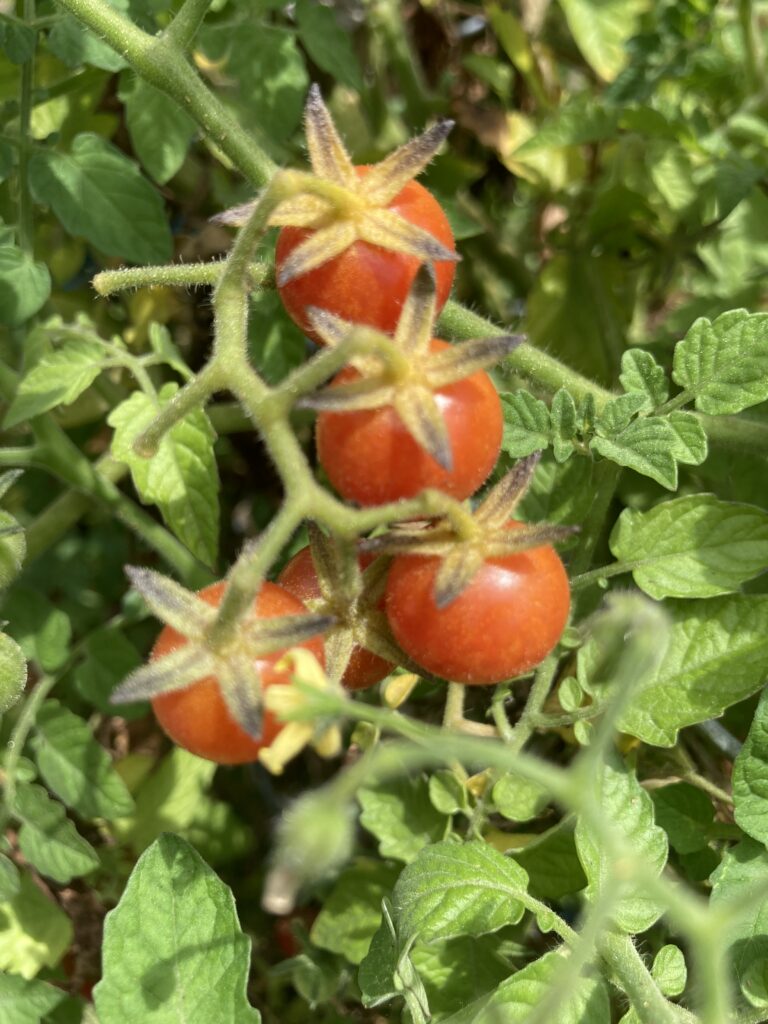
Harvesting Everglades Tomatoes

Everglades tomatoes typically take about 55 to 75 days from transplanting to reach full maturity, depending on growing conditions and climate. These small, cherry-sized tomatoes are ready to harvest when they have turned a deep red color, although some gardeners may prefer to harvest them when they are slightly underripe and allow them to finish ripening off the vine. The fruit is small but packed with flavor, and it will feel firm to the touch with a slight give when ripe.
To harvest Everglades tomatoes, gently twist or cut the fruit from the vine. Since these tomatoes tend to grow in clusters, it’s best to carefully check the entire cluster for ripe fruit before picking.
Avoid pulling too hard on the stem, as this can damage the plant and hinder future growth. It can often result in tears in the fruit’s skin.
When harvesting, try to pick the tomatoes in the morning after the dew has dried, as this helps prevent potential damage from moisture. It’s also important to handle the fruit gently to avoid bruising.
You can also pick underripe fruits and allow them to ripen indoors, away from hungry (and thirsty) wildlife. Female Bluejays seem to love to swoop in and steal the tiny fruits. They’re just the perfect size.
You may also find squirrels stealing them. Tomatoes aren’t really their preferred food, so they will normally help you harvest them only when thirsty. Keep a clean, filled birdbath or container pond available in the garden to deter wildlife from eating them for their water content.
Everglades Tomatoes Stand Up to the Hottest Summers and Heaviest Humidity
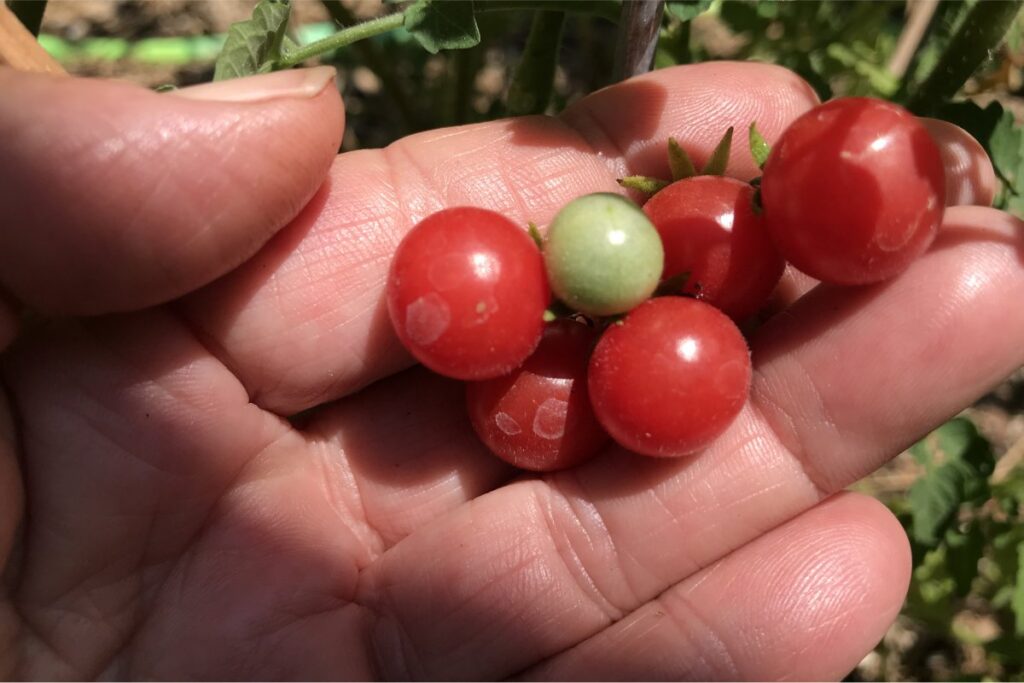
Everglades tomatoes (Solanum pimpinellifolium) are truly a unique and rewarding addition to any garden. With their small, bite-sized fruit bursting with intense flavor, these wild tomatoes offer a true taste of nature.
They’re resilient, drought-tolerant, and well-suited to Florida’s hot, humid climate. With average summer temperatures increasing across the country, they’re a sure-fire tomato for gardeners anywhere in the U.S.
Plus, their ability to reseed and thrive with minimal care makes them perfect for those looking for a low-maintenance, high-reward crop. Whether you enjoy them fresh, in salsas, or as a snacking treat right from the vine, Everglades tomatoes are a must-grow for any gardener.
These little powerhouses withstand the summer heat while continuing to produce fruit into the fall. In Florida (and zones 9-12), they even grow and fruit through winter, with only a sheet to protect them on frosty nights.
Growing Everglades tomatoes delivers a bountiful harvest of one of the most flavorful, hardy, and unique tomato varieties you can grow!
Last update on 2025-08-07 / Affiliate links / Images from Amazon Product Advertising API
This product presentation was made with AAWP plugin.