Growing luffa from seed is a practical and rewarding way to produce your own natural sponges at home. Often called loofah or sponge gourd, Luffa aegyptiaca is a fast-growing annual vine in the gourd family that thrives in warm climates and full sun.
With a long growing season and vigorous vines, learning how to grow luffa from seed may be the easiest chore in your Florida garden this summer. By starting seeds indoors, providing a strong trellis, and maintaining consistent moisture, you can successfully cultivate this climbing vegetable plant from germination through to harvest.
Once mature, the fibrous interior of the luffa gourd can be peeled, cleaned, and dried to make biodegradable bath or kitchen sponges.
What Exactly IS Luffa (or Loofah)?
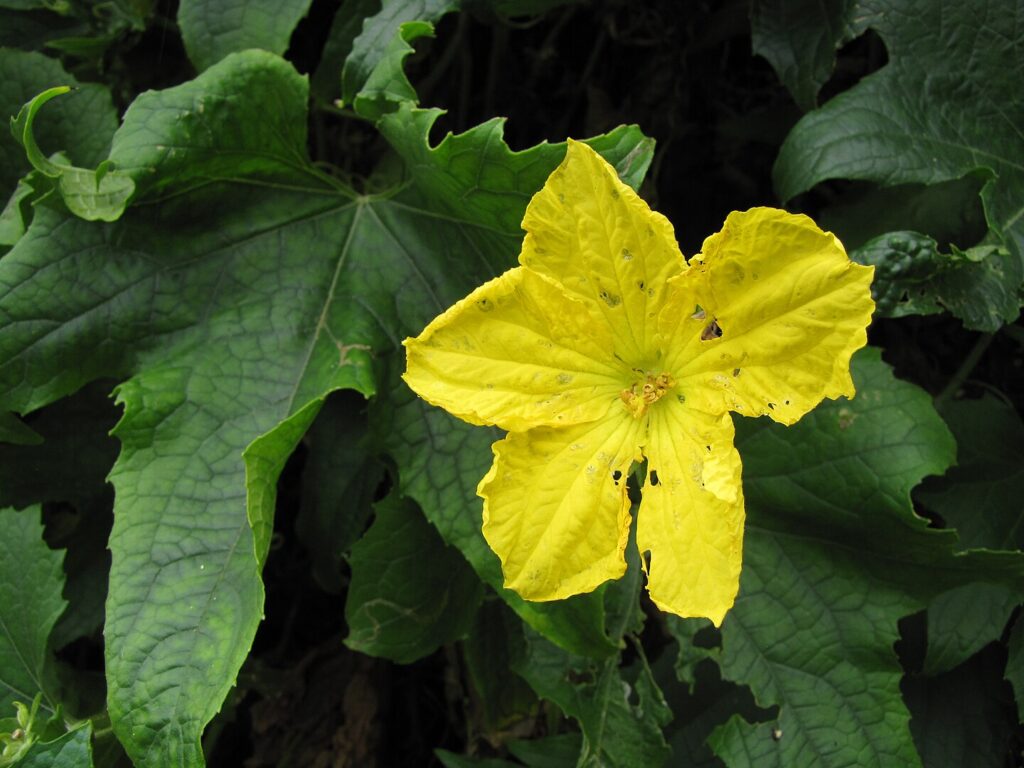
Luffa plants belong to the Cucurbitaceae family, which also includes cucumbers, squash, and melons. Botanically classified as Luffa aegyptiaca or Luffa cylindrica, they are commonly grown for the fibrous interior of their mature fruits.
This interior webbing is what people process into natural sponges. Unlike many gourds grown primarily for decoration, luffa is valued for its functional use and vigorous growth.
Is it Luffa or Loofah?
Luffa goes by several names depending on regional or functional use. “Loofah” is the most common spelling in North America when referring to the dried sponge, while “sponge gourd” or “vegetable sponge” are often used in agricultural and botanical contexts. In culinary settings, especially in Asia, immature luffa fruits may also be referred to as “Chinese okra.”
Loofah Lifespan
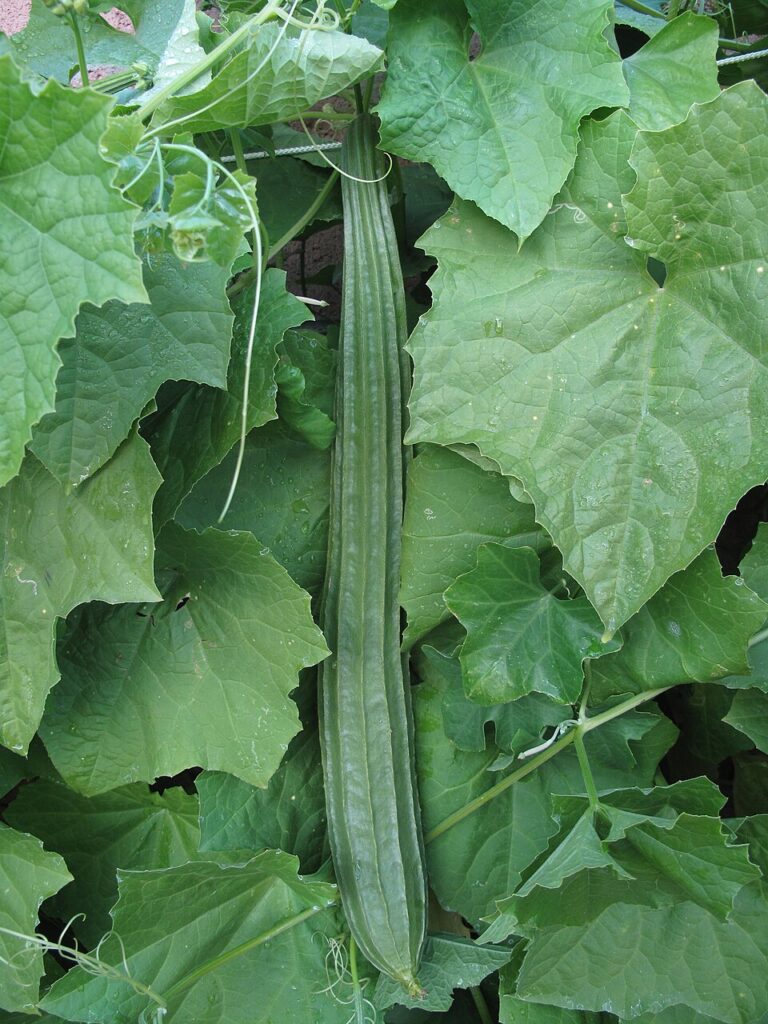
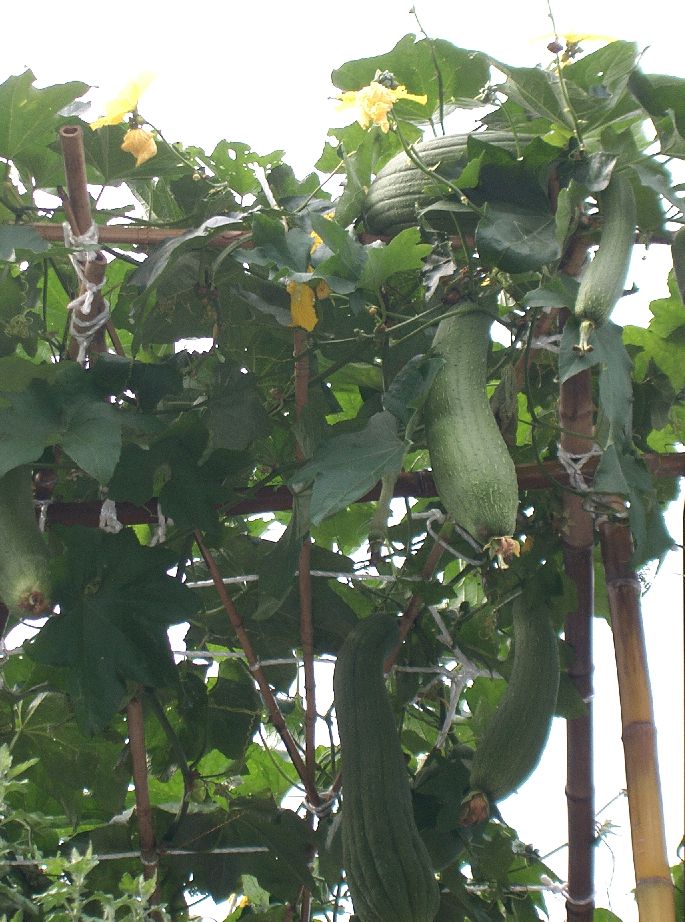
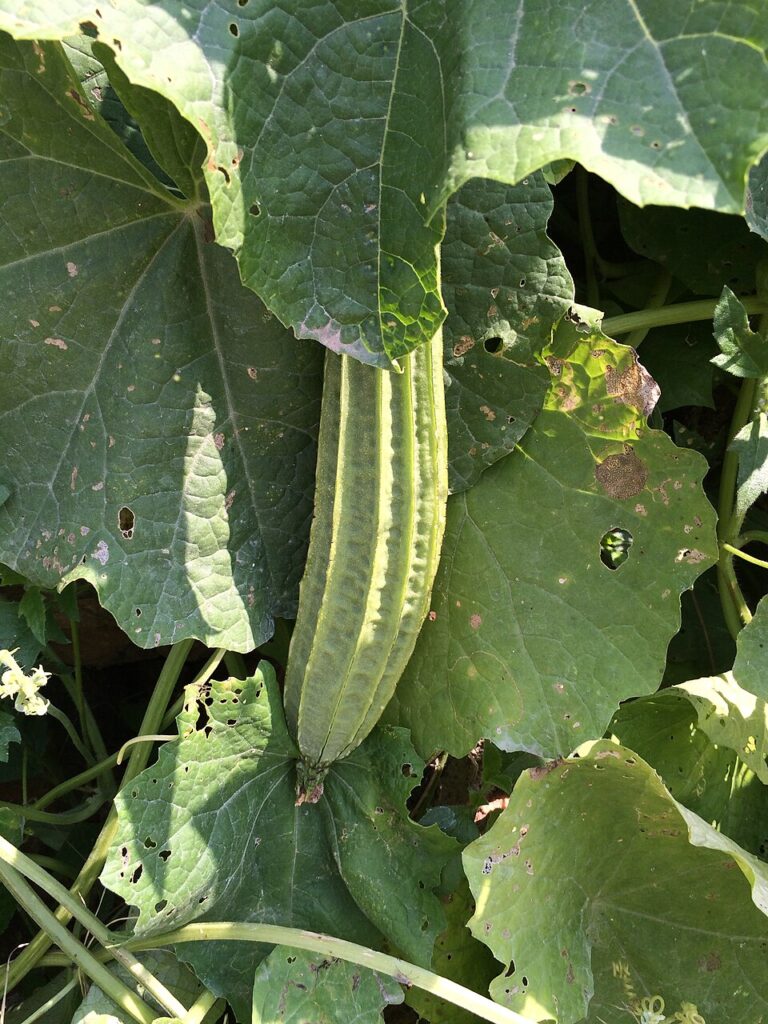
Loofah is a warm-season annual that requires a long frost-free growing period — typically between 150 to 200 days from seed to sponge harvest. The vines are fast-growing and can reach 15 to 30 feet in length under optimal conditions.
Because of their climbing habit, they need strong vertical support and plenty of space to sprawl or climb.
Luffa aegyptiaca vs. Luffa acutangula
Growers focus on two species of luffa for cultivation: Luffa aegyptiaca (also known as Luffa cylindrica) and Luffa acutangula. L. aegyptiaca produces smoother, cylindrical fruits and is the preferred species for sponge production.
L. acutangula, or ridged luffa, has deeply grooved fruits and is more often used as a cooked vegetable when young. While both are edible in their immature stage, L. aegyptiaca develops a more uniform sponge when fully mature.
Ideal Climate for Growing Loofah
Luffa grows best in USDA Hardiness Zones 7 and above, where the growing season is long enough to allow fruits to mature and dry on the vine. In Zones 6 and below, seeds must be started indoors to compensate for shorter summers.
Loofah is highly sensitive to frost at all stages of growth, and even mature vines can be killed by a light freeze. Daytime temperatures between 75°F and 90°F are ideal, and nighttime temperatures should consistently stay above 55°F for healthy growth.
When to Plant Luffa Seeds
In Florida, gardeners have plenty of flexibility when starting luffa seeds. We can start them indoors about 4 to 6 weeks before the possible last frost date. Although most of Florida gets no significant frost, I’ve found that late December to late January is a good time to take a month off.
We can also try direct sowing outdoors — If you want to know how to grow loofah from seeds in Florida, this is easiest when soil temperatures consistently reach at least 70°F.


Luffa requires a long growing season, so earlier planting—whether indoors or directly in the garden—ensures that your loofah fruits have time to fully develop and dry on the vine before autumn.
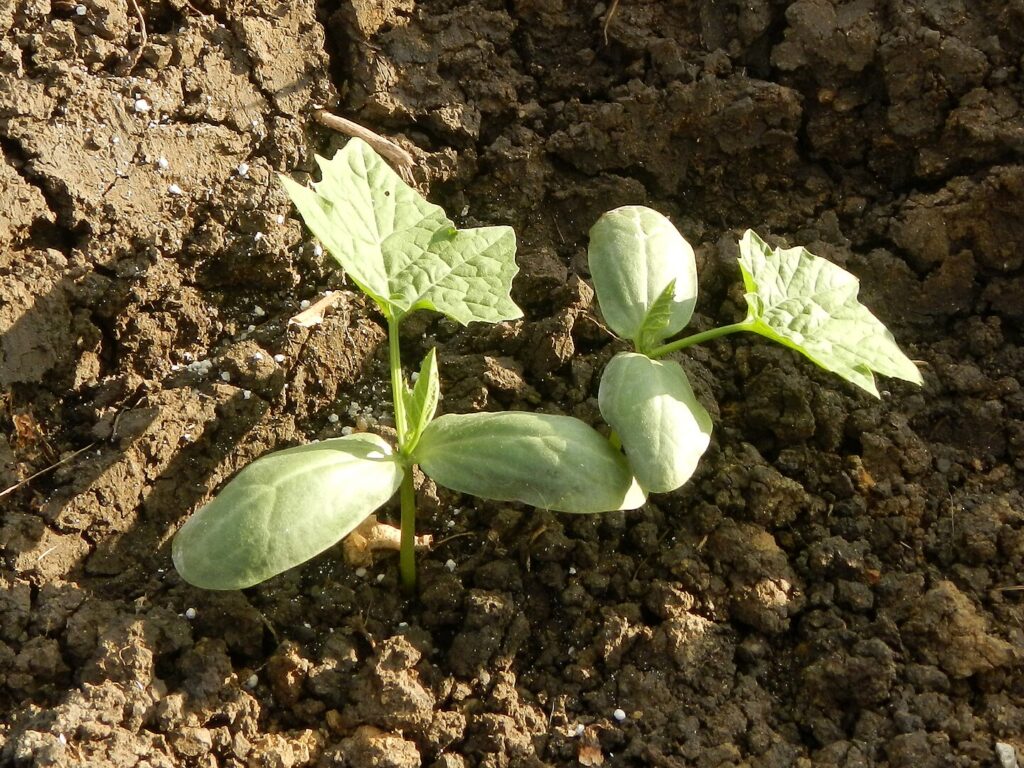
Germination Requirements for Loofah Seeds
Luffa seeds germinate best in warm soil with temperatures between 75°F and 85°F. Germination can take 7 to 14 days under ideal conditions. If soil is too cool or remains overly wet, germination rates may drop, and seeds are prone to rotting.
Whether starting indoors or outdoors, use a well-draining, sterile seed-starting mix and maintain consistent warmth and moisture without oversaturating.
How to Speed Germination of Luffa Seeds
Luffa seeds have a hard outer shell that can delay germination. To encourage faster and more uniform sprouting, gardeners can soak seeds in warm water for 24 hours prior to planting.
Some growers also choose to nick the seed coat lightly with a nail file or sandpaper before soaking—a process called scarification.
While not strictly necessary, these techniques can improve germination rates, particularly when seeds are older or conditions are less than ideal.
Use the Right Pots for Growing Luffa from Seed
If starting seeds indoors, use biodegradable pots such as peat, paper, or cow pots—or make soil blocks. These methods minimize root disturbance during transplanting, which is important because luffa seedlings dislike having their roots disturbed.
Plant one seed per container, and position the seed about ½ inch deep. Provide consistent warmth, moisture, and bright light to prevent leggy growth.
Harden Off Luffa Seedlings
Before transplanting luffa seedlings into the garden, harden them off by gradually exposing them to outdoor conditions over a period of 7 to 10 days. Start by placing seedlings outside in a sheltered location for a few hours each day, gradually increasing sun exposure and time outdoors.
This acclimation process reduces transplant shock and helps young plants adjust to direct sun, wind, and fluctuating temperatures.
Transplanting Luffa Seedlings
Avoid transplanting during extreme weather or when nighttime temperatures drop below 55°F.
Provide Full Sun and Wind Protection
Luffa plants require full sun to thrive—ideally 8 or more hours of direct sunlight per day. Choose a planting site with southern exposure and shelter from prevailing winds, which can damage young vines and interfere with vertical growth.
Planting near a fence, wall, or other windbreak can provide necessary protection while still allowing for airflow to prevent fungal issues.
Soil Prep for Growing Luffa from Seed
Luffa grows best in fertile, well-draining loam or sandy loam soil with a slightly acidic to neutral pH between 6.0 and 7.0. Prepare the planting area several weeks in advance by loosening the soil to a depth of at least 12 inches and incorporating several inches of finished compost. Avoid compacted or poorly draining soils, which can lead to root rot and stunted growth. If your soil is heavy clay, consider growing luffa in raised beds to improve drainage.
Spacing Requirements for Loofah
Luffa vines require ample space to prevent crowding, promote airflow, and reduce disease pressure. Space plants at least 24 to 36 inches apart along the row, and leave 5 to 6 feet between rows if planting multiple. Proper spacing is especially important for trellised vines to ensure each plant has adequate room to climb and produce without tangling excessively.
Trellising Luffa Vines
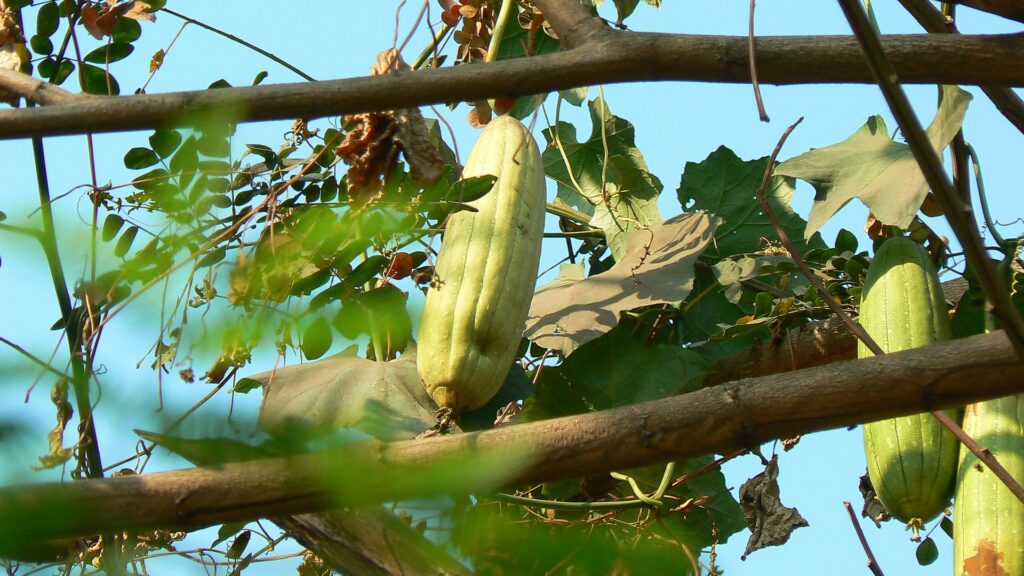
Because luffa plants produce long, heavy vines and large fruits, they must be supported from the start. Install a sturdy trellis, fence, archway, or vertical A-frame structure before transplanting to avoid disturbing the roots later. The support should be at least 6 to 8 feet tall and strong enough to hold the weight of multiple mature fruits.
Training the vines vertically not only saves space but also improves air circulation, reduces pest and disease problems, and helps the fruits grow straighter for easier processing.
Caring for Luffa Plants
Luffa plants require consistent moisture throughout the growing season, particularly during flowering and fruit development. Provide 1 to 1.5 inches of water per week, either from rainfall or irrigation, depending on local conditions.
Deep, infrequent watering is preferable to frequent shallow watering, as it encourages deep root growth and greater drought resilience. Be warned that sandy Florida soil may dry out quickly, though.
Always water at the base of the plant to avoid wetting the foliage, which can increase the risk of fungal diseases such as powdery mildew. Mulching with straw or leaf mold can help retain soil moisture and suppress weeds.
Fertilizing Loofah
Luffa is a heavy feeder and benefits from nutrient-rich soil. Incorporate compost at planting, when possible. You may want to fertilize once the vines begin to flower.
At that stage, apply a balanced, all-purpose organic fertilizer or one slightly higher in phosphorus and potassium to support flowering and fruiting.
Avoid overapplying nitrogen once the plants are established, as it can promote excessive vine growth at the expense of fruit production.
Fertilize every 3 to 4 weeks during peak growth if needed, based on visual inspection or a soil test.
Pruning Luffa Plants
While not strictly necessary, pruning can help manage overly vigorous growth and improve airflow through the plant canopy. This reduces the risk of foliar diseases. Remove any dead, damaged, or diseased leaves as needed.
In smaller gardens or on dense trellises, selective pruning of excess lateral vines (side shoots) can direct more energy into fruit development. However, take care not to over-prune, as the plant’s large foliage is critical for photosynthesis and overall productivity.
Pests and Diseases
Luffa is relatively pest-resistant, but it can be affected by common cucurbit pests such as cucumber beetles, squash bugs, aphids, and spider mites. Regular inspection of leaves, stems, and flower buds is essential. Hand-pick pests when possible or use insecticidal soap as needed.
For disease management, rotate crops each year to avoid soil-borne pathogens, and avoid overhead watering. If powdery mildew appears, remove infected leaves and consider organic fungicide treatments approved for edible crops.
Keeping vines well-spaced and off the ground with a trellis is one of the most effective preventive measures.
Support Vines
Luffa vines climb by twining tendrils that wrap around nearby structures. Direct vines onto the trellis early in the season to establish their path and prevent sprawling. As they grow, vines may need gentle training and redirection to stay on the support structure.
Use soft ties or clips only when necessary, as the tendrils are typically sufficient to secure the plant. Avoid tying tightly or constricting stems, especially as they swell later in the season. Regular monitoring ensures the plant remains well supported and evenly distributed across the trellis.
How to Harvest, Peel, and Cure Luffa Gourds
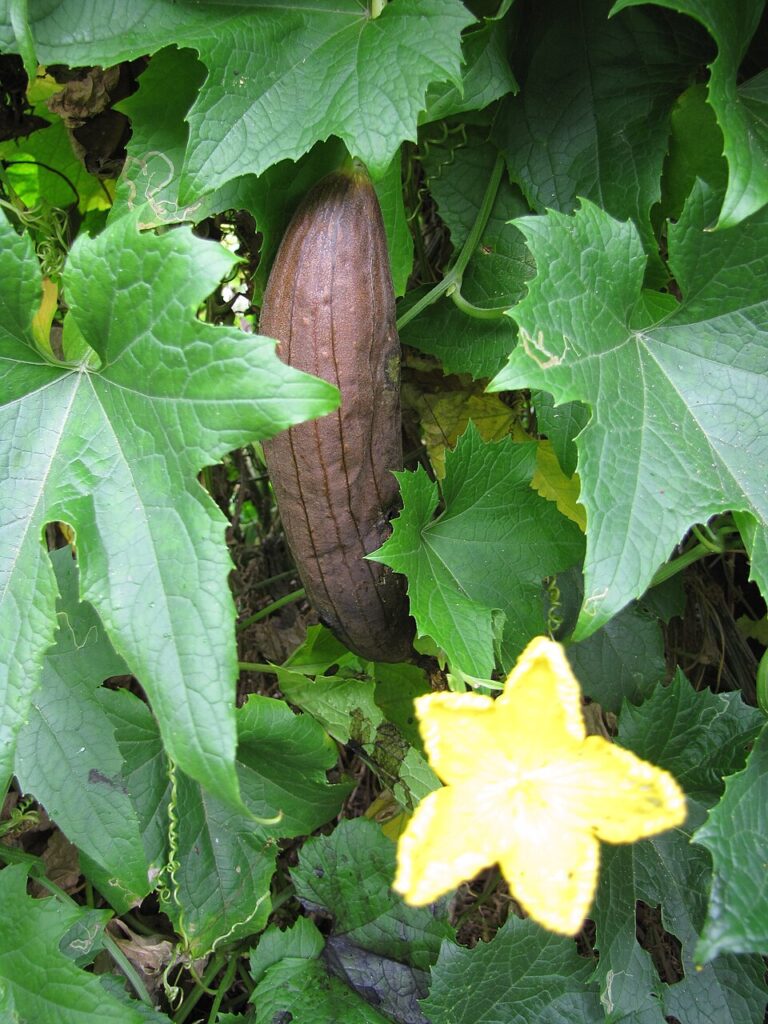
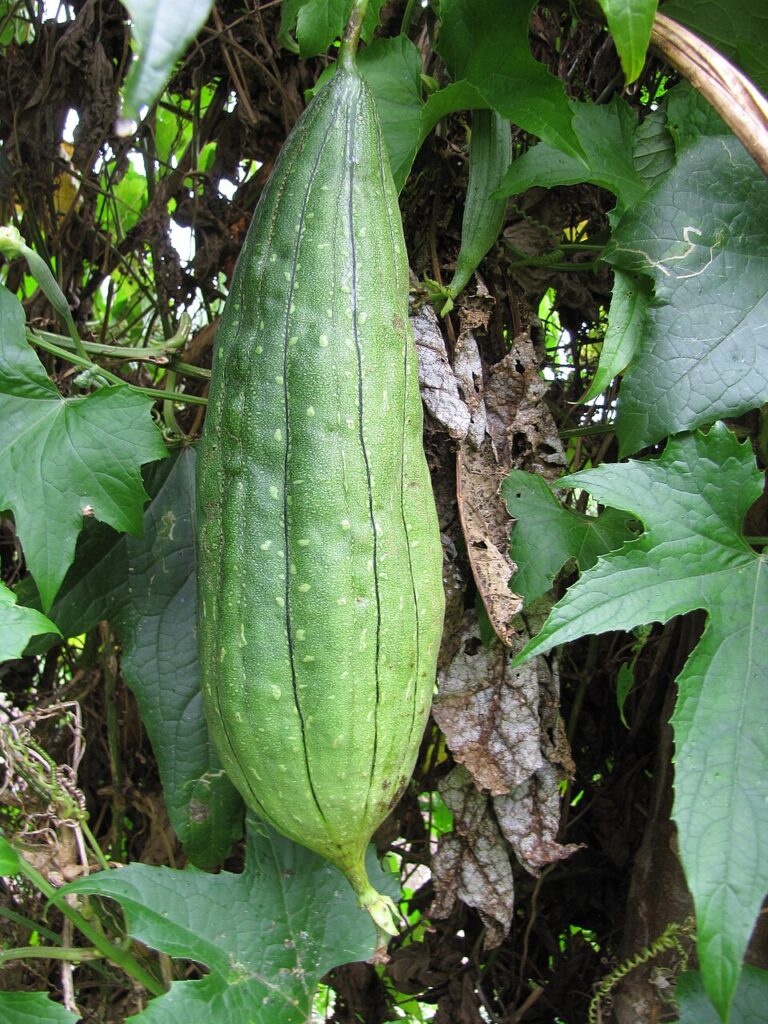
Wait until your loofah gourds become mature before harvesting them for use as sponges. Immature fruits don’t have the fully developed dense internal fiber network necessary.
Maturity is typically reached 90 to 120 days after planting, depending on the variety and growing conditions. Mature luffas are lightweight for their size, have a dry, brittle skin that often turns yellow, brown, or mottled. They also may rattle slightly when shaken due to loose seeds inside.
If the gourd is still green and firm, it is not yet ready to harvest. Allow fruits to dry fully on the vine whenever possible, but harvest before a hard frost or prolonged wet weather to avoid decay.
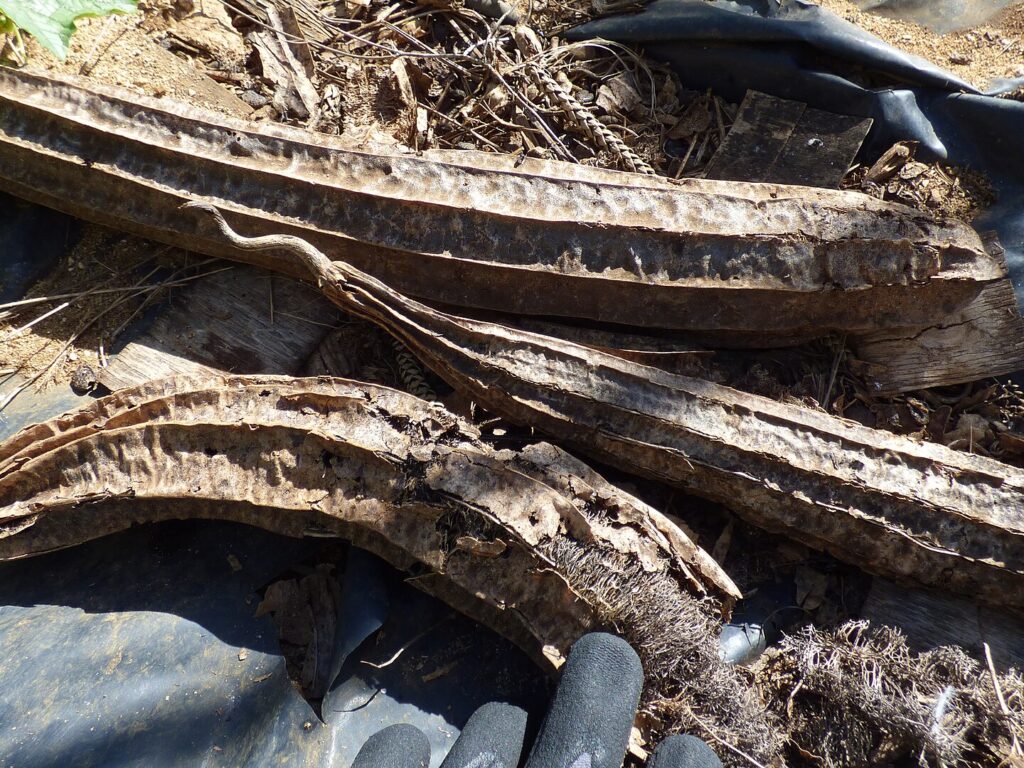
Harvesting Tips
Use clean, sharp garden pruners to cut mature luffas from the vine. Leave a short section of stem attached to avoid tearing the fruit.
Handle gourds gently to prevent bruising or cracking, especially if the skin has started to dry and harden.
If harvesting before the gourds are fully dry — such as before a seasonal cold snap or hurricane warning —allow them to cure indoors in a well-ventilated space away from direct sunlight for several days before peeling.
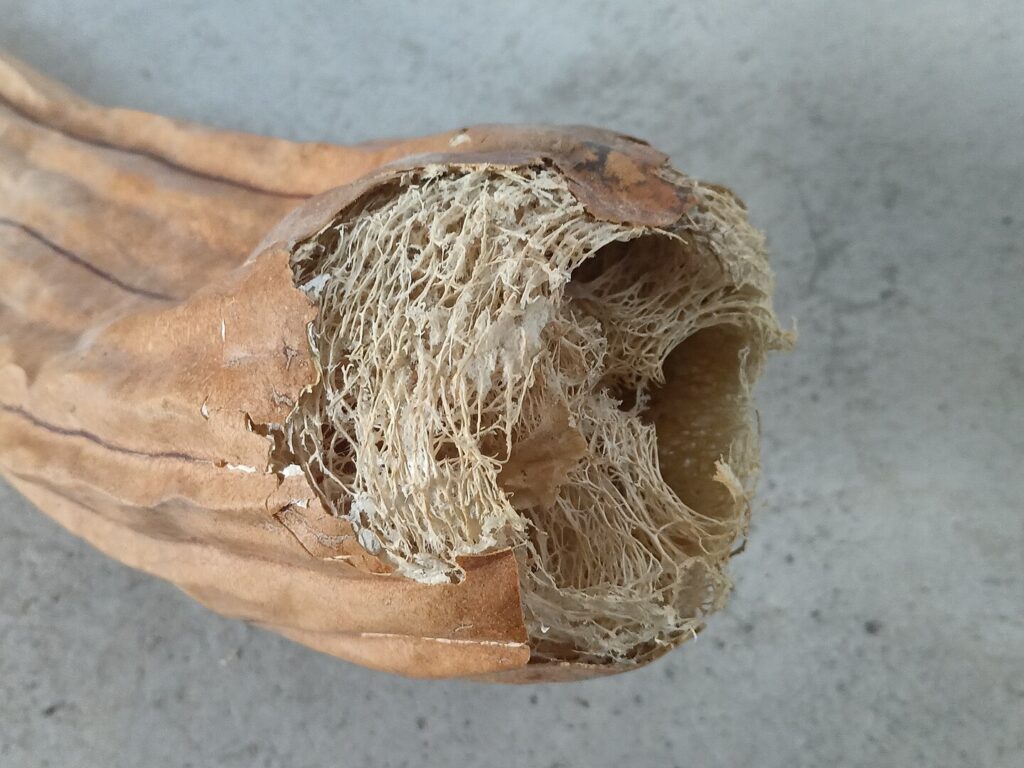
Preparing Luffa Sponges
Peel the dried luffa by cracking the skin — just tap it against a hard surface or roll it firmly. Once the skin begins to split, peel it off in sections by hand.
You can also soak the gourd in warm water for 15–30 minutes to soften the skin if needed.
After peeling, shake out or rinse away the seeds and remove any residual pulp or sap. Use a hose or bucket of water to thoroughly wash the fiber, repeating as necessary until clean.
Curing Your Loufah Sponge
After peeling and rinsing, place the luffa sponges in direct sunlight or in a warm, dry area with good airflow to dry completely. Rotate them periodically to ensure even drying and to prevent mold.
Once dry, the luffa should feel light and stiff with a tan or pale color. If it still feels damp or soft, continue drying until fully cured.
Properly dried luffas can be stored long-term in a dry place and will not rot or grow mold.
Saving Luffa Seeds
Fully mature seeds can be collected during the peeling process, dried, and stored in a cool, dry place for next season’s planting. Only save seeds from healthy, vigorous plants to maintain genetic quality.
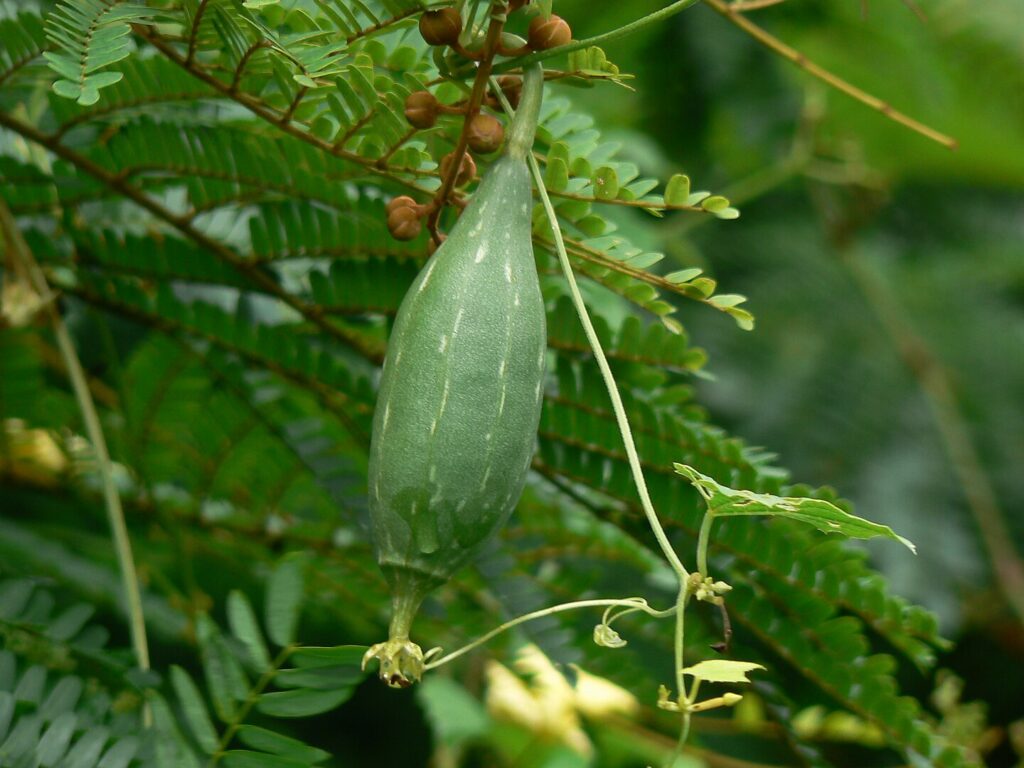
Green Luffa Gourds
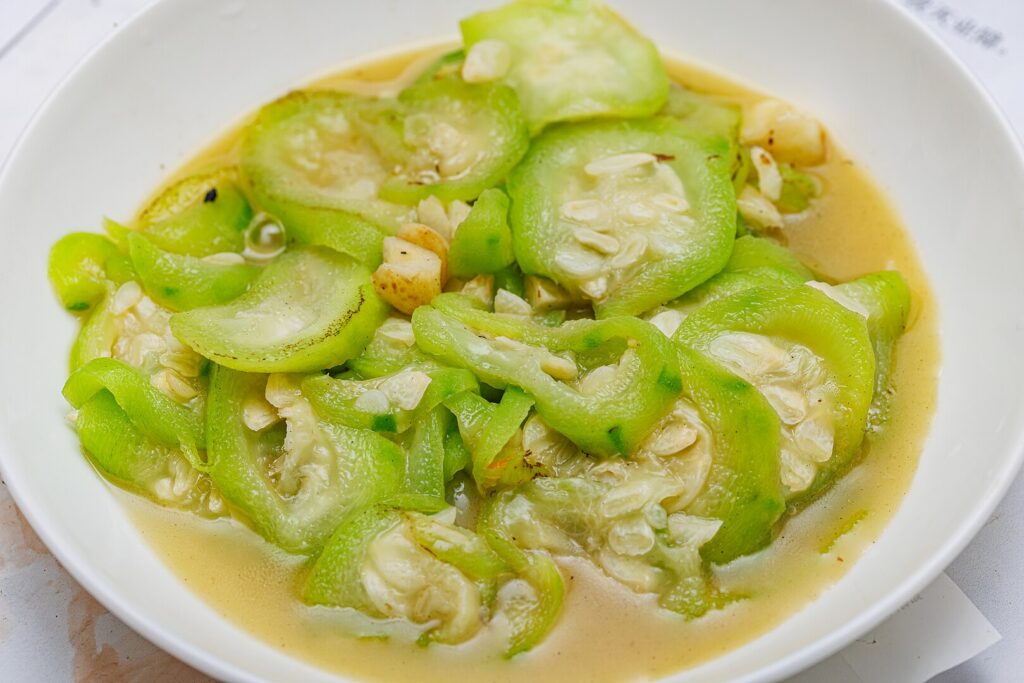
Immature gourds that are too green to peel and cure can be composted or used as a novelty vegetable when still young — similar in taste and texture to zucchini.
However, once they begin to toughen, they are no longer suitable for culinary use or sponge harvest.
Growing Luffa from Seed to Sponge Success
Growing luffa from seed is a rewarding endeavor for gardeners with the patience and space to support a long-season vine. From understanding the plant’s vigorous growth habit to staying attentive to care, each stage is essential for a productive harvest.
By the end of the growing season, a well-managed luffa crop can yield not just natural sponges but seeds for the next generation.
Whether you’re cultivating luffa for personal use, gifts, or small-scale sales, the key lies in knowing the right time to harvest and cure the gourds. With the right knowledge and preparation, even first-time growers can achieve sponge-quality results.
Ready to start your own luffa project? Plan ahead, prepare your garden, and give these heat-loving vines the support they need. Your future sponges are just a growing season away.
Last update on 2025-08-07 / Affiliate links / Images from Amazon Product Advertising API
This product presentation was made with AAWP plugin.