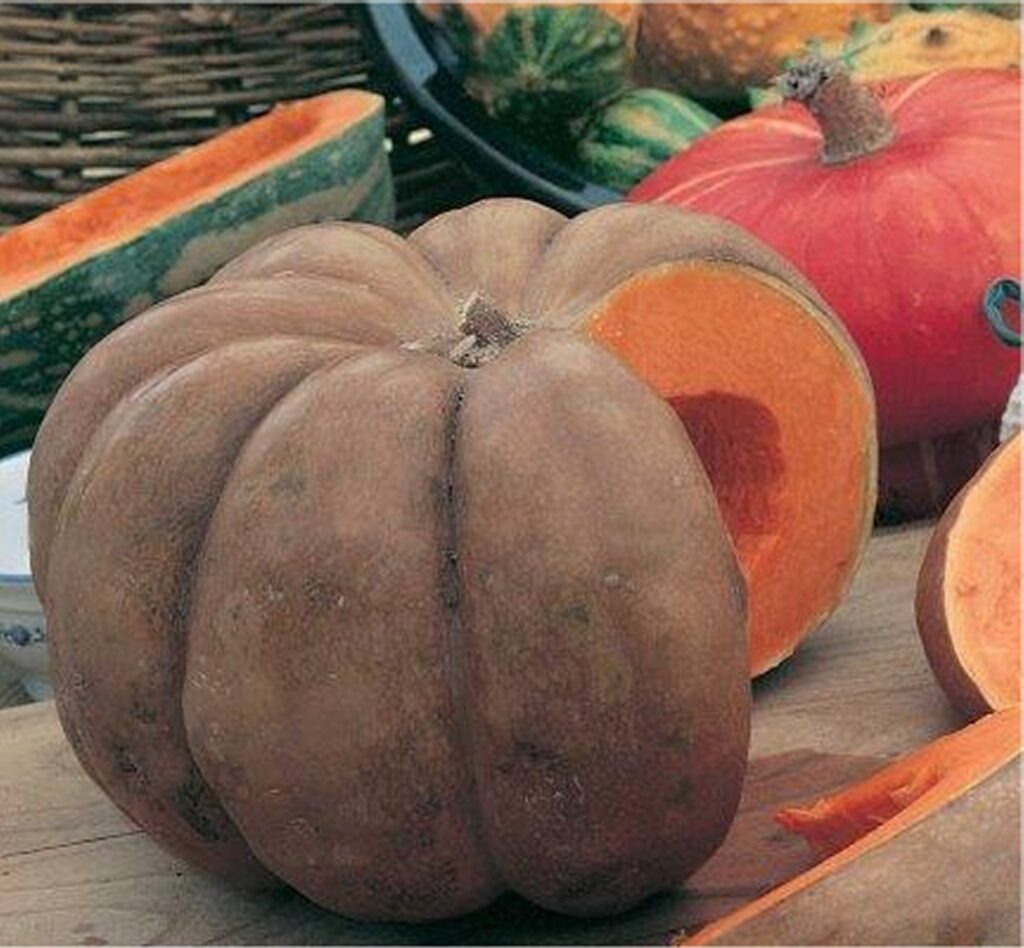
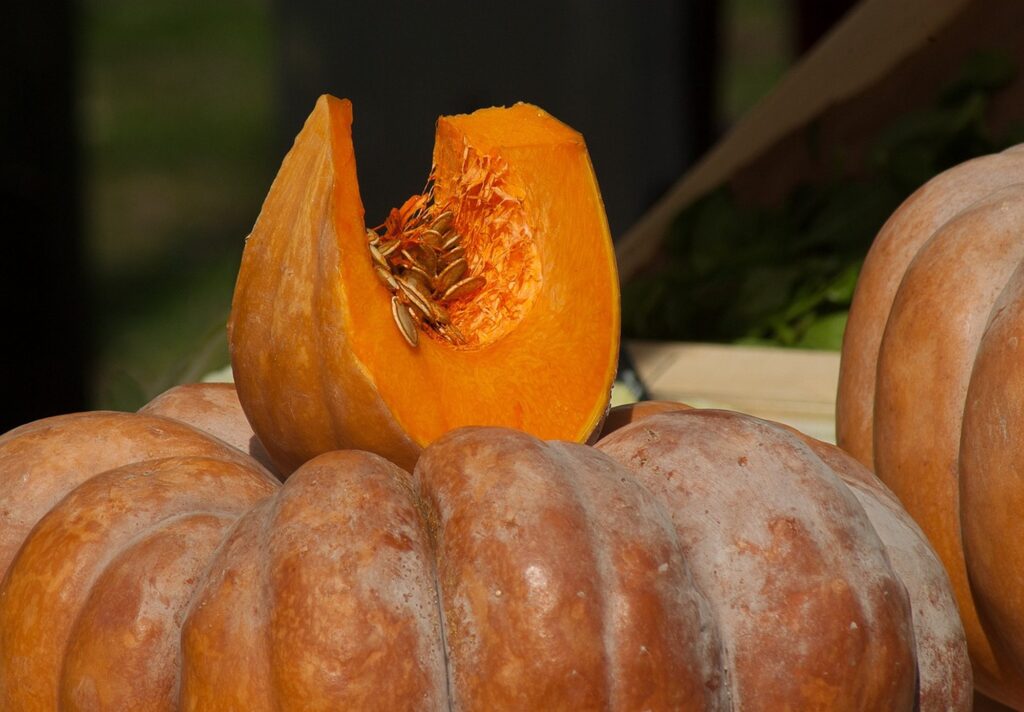
Calabaza squash, also known as West Indian pumpkin, is a delicious and nutritious addition to your garden. It’s a warm-weather crop that thrives when given the right conditions and care. Follow these step-by-step instructions for growing Calabaza squash from seed.

Growing Calabaza Squash Indoors or Undercover:
Start your Calabaza squash seeds indoors 3-4 weeks before the last expected frost date in your area. Alternatively, you can start them undercover in a greenhouse or a cold frame.
Selecting the appropriate seed starting mix is essential for healthy seedlings. It should be lightweight, sterile, and well-draining. You have two main options:
Commercial Seed Starting Mix: Easily available at garden centers, these mixes are specifically formulated for seedlings. They are sterile, ensuring a clean environment for germination.
DIY Mix: You can create your mix by combining equal parts of peat moss, perlite, or vermiculite, and a small amount of compost or well-rotted manure.
- Use small 3-4” pots or large 4” soil blocks for starting Calabaza squash.
- Fill seed trays or pots with seed starting mix.
- Plant 2-3 seeds per tray or pot at a depth of 1 inch.
- Keep the soil consistently moist but not waterlogged.
- Provide adequate light, either by placing the trays near a sunny window or using grow lights.
- While waiting for your plants to grow and develop, being preparing a space for them in the garden.
You will be able to transplant seedlings outdoors when they have at least two sets of true leaves and the risk of frost has passed.
Preparing a Garden Bed for Growing Calabaza Squash
Crop Rotation: Avoid planting Calabaza squash in the same spot as any other cucurbit family members (like zucchini or cucumbers) to reduce the risk of disease.
Supports and Trellises: While not necessary, providing supports or trellises can help save space and keep the vines off the ground, reducing the risk of disease.
Hardening Off Calabaza Squash Seedlings
Before transplanting your Calabaza squash seedlings outdoors, it’s essential to harden them off gradually. This process helps acclimate the tender young plants to the outdoor environment, preventing shock and stress.
We’ve learned the hard way that even in subtropical climates, it’s important to acclimate small indoor or greenhouse-grown seedlings to the outdoors. They need to be hardened off to the heat and bright sunlight in hot climates as well as cooler ones.
Here’s how to do it:
Timing: Begin the hardening-off process about a week before you plan to transplant your seedlings.
Location: Choose a sheltered spot outdoors, such as a porch or a shaded area, where the seedlings will be protected from harsh sun, strong winds, and heavy rain.
Gradual Exposure: Follow these steps to gradually expose your seedlings to the outdoor conditions:
- Start by placing the seedlings outdoors for just 1-2 hours on the first day, during the mildest part of the day.
- Increase the outdoor time by an hour or two each day, gradually exposing the plants to more sunlight and outdoor conditions.
- By the end of the week, your seedlings should be spending the entire day outside.
Protection: Watch the weather forecast and be prepared to move the seedlings back indoors or provide extra protection if there’s a sudden cold spell or heavy rain.
Observation: While hardening off, pay attention to how the seedlings respond. If they appear stressed, with wilting or yellowing leaves, reduce their outdoor exposure and increase it more gradually.
Once your Calabaza squash seedlings have been successfully hardened off, they will be better prepared to thrive in the garden environment when you transplant them. This gradual transition helps ensure a smoother and more successful transition for your plants.
Knowing When Calabaza Squash Starts are Ready for Planting Out
Transplant seedlings outdoors when they have 2-3 true leaves and all danger of frost has passed. The soil temperature should be consistently above 60°F (15°C).
Preparing a Garden Bed for Calabaza Squash
Before you start growing your Calabaza squash in the garden, it’s crucial to prepare the bed properly to provide the best growing conditions for your plants. Here’s a detailed guide on choosing the right location and preparing the soil:
Choosing the Right Location
Calabaza squash thrives in full sun, so select a location that receives at least 6-8 hours of direct sunlight each day.
Ensure your chosen area has ample space, as Calabaza squash vines can be quite vigorous. Plan for rows that are 5-6 feet apart to allow for proper vine spread.
Calabaza squash prefers well-draining soil. Avoid areas with poor drainage to prevent waterlogged roots, which can lead to root rot.
Soil Preparation
Soil Testing: Start by testing your soil to determine its pH and nutrient levels. Calabaza squash prefers slightly acidic to neutral soil with a pH of 6.0 to 7.0.
Amendments: Based on the soil test results, amend the soil as needed:
- To raise pH, add lime.
- To lower pH, add sulfur.
Prepare the bed by removing rocks and weeds. Improve soil fertility by incorporating well-rotted compost or aged manure.
If your soil is compacted, use a garden fork or broad fork to gently loosen the soil. We recommend against tilling or double-digging established garden beds, as it destroys the soil structure and harms critical soil life.
Organic Matter: Add a generous layer of organic matter, such as compost, to improve soil structure and provide essential nutrients. Aim for a 2-3 inch layer of compost if possible. You don’t have to dig it in, as the worms and other soil critters will do that for you.
Supports and Trellises
Supports or trellises can be beneficial for Calabaza squash. It saves space and keeps the vines off the ground, reducing the risk of disease and making harvesting easier.
Install supports or trellises according to the specific requirements of your garden space.
Spacing
If not trellising, plant Calabaza squash vines 3-5 feet apart within rows and leave 5-6 feet between rows to allow for proper air circulation and vine growth.
If trellising, you can plant them about 3 feet apart.
Planting Calabaza Squash by Direct Sowing
If you have a long growing season, you can also direct-sow Calabaza squash.
Plant seeds directly in the garden once the soil has warmed up to a minimum of 70°F and the danger of frost has passed.
- Create small mounds about 1-2 inches high and space them 4-5 feet apart in rows. If trellising, place them 3 feet apart.
- Plant 2-3 seeds per mound (or trellis) at a depth of 1 inch.
- Thin to the healthiest seedling in each mound once they have several true leaves.
Fertilization
Use a balanced, all-purpose slow-release organic fertilizer. Apply it when the plants are actively growing, typically about 3-4 weeks after transplanting or when the direct-sown plants have developed a few true leaves.
Feed regularly after the vines begin to flower, following the package instructions for application rates.

Caring for Calabaza Squash Plants
Follow-up care focuses on preventing insect and disease damage.
Pest Management
Monitor for common pests like squash bugs and cucumber beetles. We recommend plain soapy water for squash bugs and an organic pest control spray containing Spinosad for caterpillars and beetles.
Disease Prevention
- Prevent fungal diseases by spacing plants adequately, promoting good air circulation, and avoiding overhead watering.
- To prevent fungal infections and improve nutrient uptake, we recommend an organic preventative containing Bacillus amyloliquefaciens strain D747, which is an immune-enhancing natural bacteria commonly found in healthy soils.
- To correct fungal infections that are not powdery mildew, we recommend a copper-based organic spray. Follow the manufacturer’s directions for application.
- For powdery mildew, we recommend a simple mix of 8 tablespoons of household hydrogen peroxide (3%) mixed with a gallon of water. Spray in the early evening, covering the tops and bottoms of leaves thoroughly. Apply every other day for three days in a row, and then once or twice a week for prevention.
Pruning and Support
As the vines grow, consider pruning the leaves touching the ground and tying up the vines to supports to prevent diseases and make harvesting easier.
Other Tips for Growing Calabaza Squash
Mulch around the plants to retain moisture, and water consistently, keeping the soil evenly moist but not waterlogged.
Harvesting Calabaza Squash
Harvest Calabaza squash when they reach a mature size, typically around 90-120 days after planting. The skin should be hard and cannot be easily pierced with a fingernail.
Cut the squash from the vine using a sharp knife.
Avoid harvesting when the squash is overripe, as it won’t store well. If you find you’re too late, you can cook them right away and freeze them for later consumption.
For longer storage, you can cure Calabaza squash. This involves letting the freshly harvested squash sit in a warm, dry place for a week or two. Curing toughens the skin and extends shelf life.
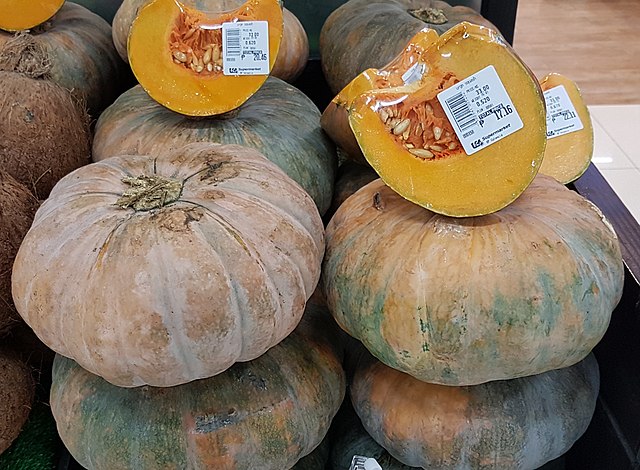
Storing Home-Grown Calabaza Squash
Store harvested squash in a cool, dry, and well-ventilated area. They can last for several months if stored properly.
Before storing, wipe the squash clean to remove any dirt or debris. Do not wash them as excess moisture can promote mold growth.
Cure them as described above. Curing increases shelf life and improves the sweetness of the fruit.
Store Calabaza squash in a cool, dry, and well-ventilated place. A root cellar, basement, or a cool corner of your garage can be ideal. The temperature should be between 50-55°F (10-13°C).
Place the squash in a single layer, avoiding direct contact with each other. Stacking them can cause bruising and lead to faster spoilage.
Check stored squash periodically for signs of decay, mold, or soft spots. Remove any damaged squash immediately to prevent the spread of spoilage.
Calabaza squash can typically be stored for several months if kept in optimal conditions. However, it’s best to use them within the first few months for the best quality.
Cooking with Calabaza Squash
Calabaza squash is a versatile ingredient that can be used in a variety of culinary creations. Here’s a quick guide on how to cook with Calabaza squash:
Roasting: Cut Calabaza squash into cubes, toss with olive oil, salt, and your favorite seasonings (we like an Italian herb blend with garlic and onion powder), then roast in the oven until tender and caramelized. Use as a side dish or add to salads.
Soups: Puree cooked Calabaza squash to make creamy soups. Its sweet, nutty flavor pairs well with spices like cinnamon and nutmeg.
Mashed: Boil or steam Calabaza squash until soft, then mash it with butter, garlic, and herbs for a delicious alternative to mashed potatoes. Or make a sweet version in place of yams for holiday meals.
Baking: Use Calabaza squash in baked goods like pies, muffins, and bread. It adds natural sweetness and moisture to your recipes.
Grilling: Slice Calabaza squash into thick rounds, brush with oil, and grill until it’s tender and has grill marks. Season with herbs and spices for added flavor.
Experiment with Calabaza squash in both savory and sweet dishes to enjoy its unique taste and versatility in your kitchen.